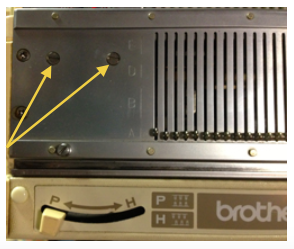
Before approaching using ribbers in relationship to cables I thought I would mention a bit on alignment. An online source reviewing the topic with downloadable PDF: http://machineknittingetc.com/brother-kr120-kr710-kr830-kr850-kr230-kr260-service-manual.html. Studio machines’ how to may be found on a youtube video by Roberta Rose Kelley. Before making any adjustments check that the clamps that hold the ribber in place are flush with the table and securely clamped; that the screws in the setting plate are not loose, and that they, in turn, are installed at the same depth. 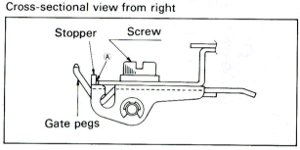
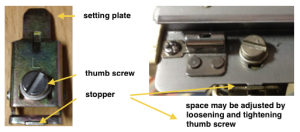
 As adjustments are being made, and the thumbscrew is tightened, the setting plate may actually slide toward the main bed, narrowing the gap. To prevent that from happening I had to use a metal spacer between the stopper and the main bed.
Make any adjustments based on needles at each end. Ribbers tend to bow in the center with wear and age. To check how needles in both beds line up in relationship to each other: with the racking lever on 5, the pitch lever on P, pull forward at least 10 needles on each end of both the main bed and the ribber, they should line up point to point. If any of the needles do not touch or line up, loosen the 2 screws to the left end of the ribber just a bit (a quarter turn is usually enough), tap the end of the ribber with your hand just enough to the right, or left to line up needle positions. Recheck the alignment on several spots across both beds, tighten screws, check again.
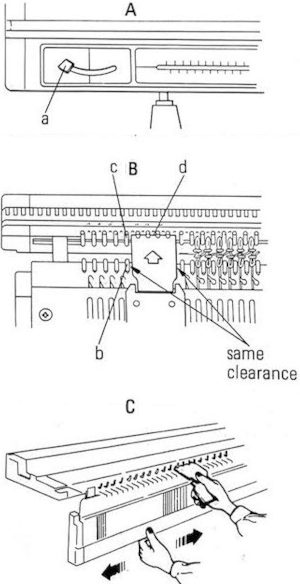
Another visual option for checking alignment is offered by Studio machines in their manual for the RT1 transfer carriage 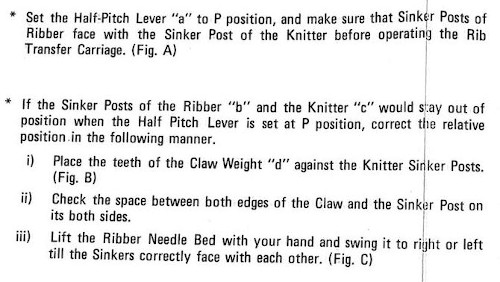
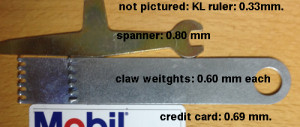
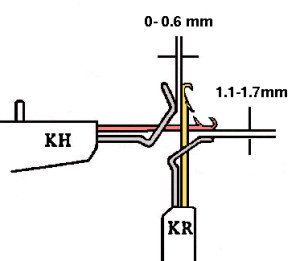
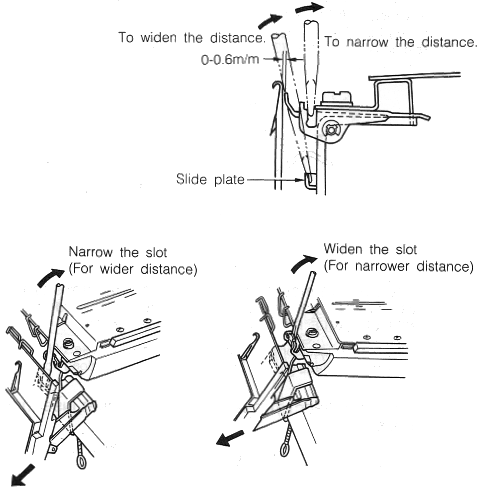
 To check the height of the ribber: pitch lever on H, bring it to the full up position (Brother has 2 up positions), and bring forward at least 10 needles at each end of the main bed. Use spacers ie. a credit card, or claw weight hangers that came with ribber as measuring aides; they should slip easily between main bed needles and ribber gate pegs, the recommended distance between the back of the KR needles and the KH gate pegs is 0-0.6 mm.
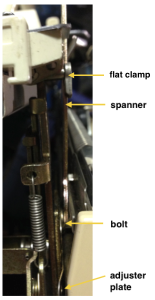
The online PDF has additional photographs of the nut that needs to be loosened in order to change the height. To loosen it, the ribber needs to be brought to its down position. Use the spacer tool, start with a quarter turn, to begin with, (lefty loosey, righty tighty). Lift the ribber into place. By moving the thin metal lever (adjuster plate) up and down the height may be adjusted, one side at a time. Bring the ribber down to tighten the bolt, up again for a final check.
Lastly, with main bed needles out of work bring groups of ribber needles out to E. A single claw weight should slip behind the ribber needles and in front of the main bed gate pegs. Repeat adjustments if needed so the space between the beds is as equal as possible. The space between the bottom of the main bed and the top of the ribber gate pegs should be between 1.1 and 1.7 mm.
To adjust the distance between the 2 beds: bring at least 10 needles out at each end of the ribber. Use the spanner to loosen the thumbscrews, and a screwdriver to loosen the flat clamps.
If the nut should become completely loose for any reason: the part in question I believe, is #24 in the service manual, the “slide plate guide stud”. In the image below b= the bolt that became completely loose on one of my brackets. I discovered after getting things back together that a, which secures the ribber bracket, is actually directional with a barely perceptible change/ difference in shape. If it is accidentally rotated 180, it will keep the ribber bracket from changing height positions and working properly. Rotating it restored expected actions for me. 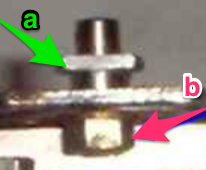
Yarn thickness and needle arrangements may also require some tweaking of height and other adjustments. Listening for changes in machine sounds as the fabric is knit, and visual checks over time are a great help in avoiding problems. Here are positions for bracket lever as indicated in the service manual 
A reminder: if the needle presser bar on the ribber (all plastic) is to be removed, it is reinserted back in with ridges facing, and flat side down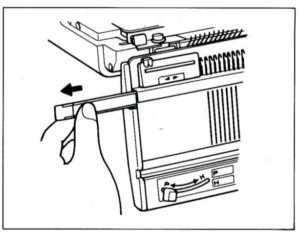 I have several sinker plates. An accessory that began to appear with ribbers at some point, seen here in this illustration:
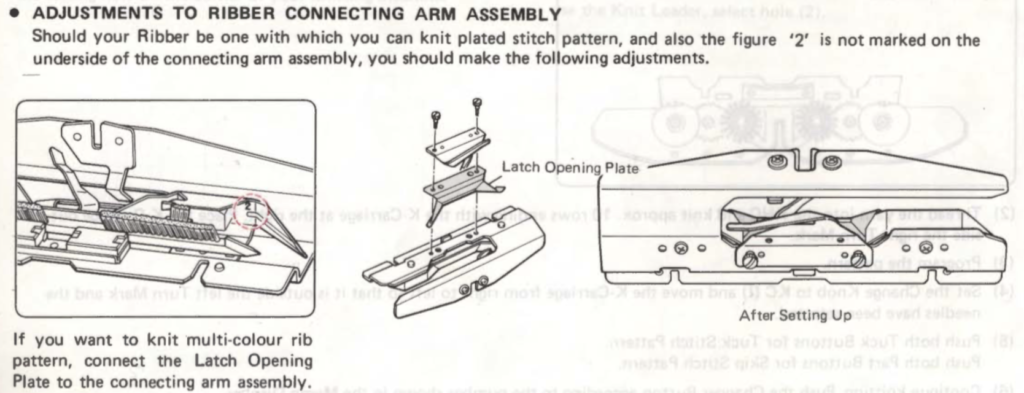
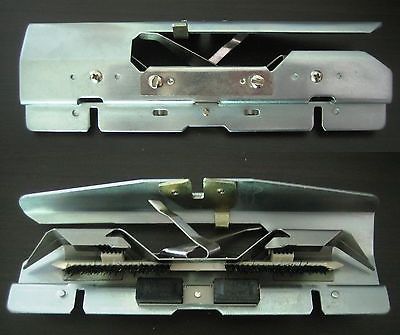 below is a close up showing markings on the right side of upturned connecting arms in 2 different model year ribbers
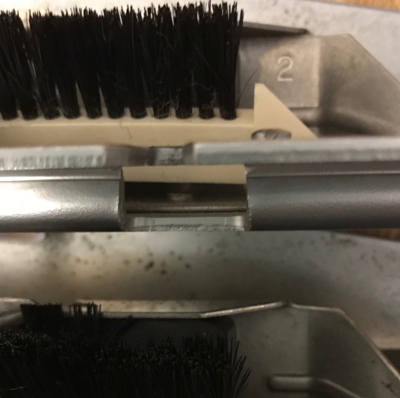 and here the latch opening plate has been secured into place in the connecting arm without the #2 marking, where it makes a noticeable change, bringing the unit closer to needles when on the machine during knitting
 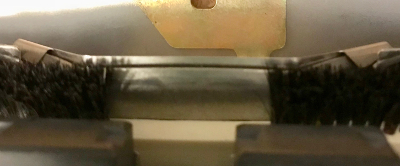 And, speaking of ribbers and clamps, not all clamps are created equal though they may appear to be doing their job until some attachments cause problems.
Studio (shorter) vs Brother in place 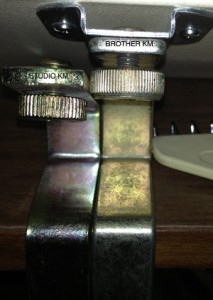 Brother bulky on top of the standard clamp, its shorter cousin
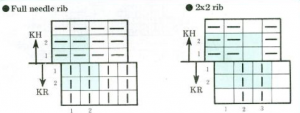
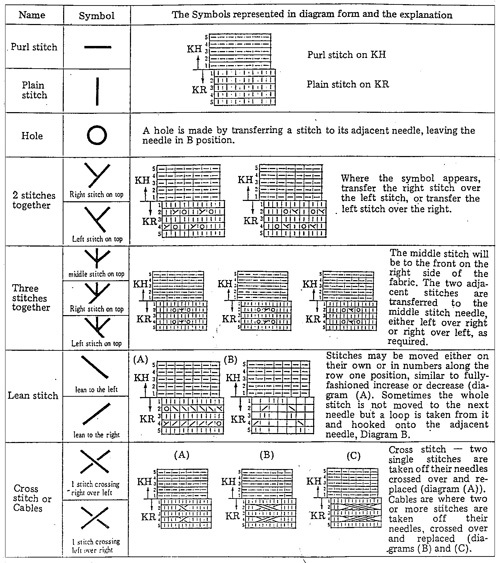
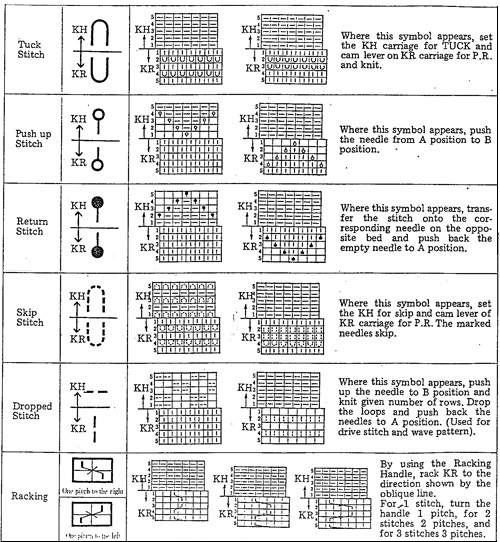
  Knitting symbols used for the ribbing attachment show what the stitches would look like on the “wrong” side of the knit. In the Brother system, KR refers to the ribber bed, KH to the knit one: typical illustration of symbols as found in Brother punchcard pattern and technique books:
A brother publication on Japanese symbols for knitting available in English, French, and German,  may be downloaded from http://machineknittingetc.com/japanese-symbols-for-knitting-machine.html ; page 15 is missing from the document. Another resource: http://tata-tatao.to/knit/japanese/e-index.html
