Sometimes I begin by analyzing the moves on large print paper to get a sense of the direction for the required transfer moves. This pattern is fairly straightforward, single moves to the right or to the left. What makes it different is what I have referred to as the knit side “chain” in the previous post. To achieve this, sets of stitches are transferred, doubled up, and moved back to the original position to create the proper eyelet placement.
Tension may have to be adjusted to accommodate the double travel of stitches. If it is just a tad off and occasional stitches sit on a closed latch, that may not be noticed, and runs in lace are no fun. Edge stitches get fussy as the knitting grows, edge weights moved up at regular intervals can help with that problem. Where 2 stitches need to move to their right or left, I have chosen to do so by hand rather than relying on the lace carriage to move them onto the single needle, and in turn back onto the center one of the group of 3. My initial notes on paper: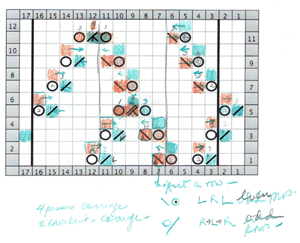 Assigning colors for transfer, charting in excel: green to left, pink to right, checking where markings need to be for full KM repeat:
Expanding the repeat, adding 2 blank rows between pairs of transfers with the intent to white out square for “wrong” transfer rows places transfers to right on wrong chart row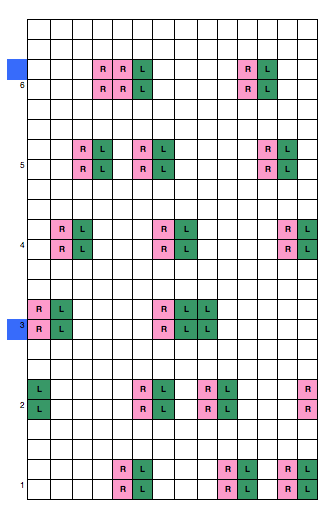
all markings, shifted to proper location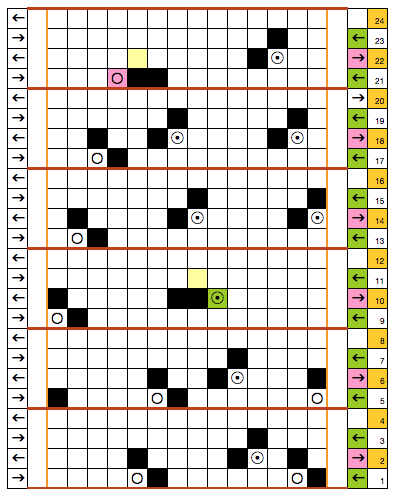
symbols used: black squares = mylar markings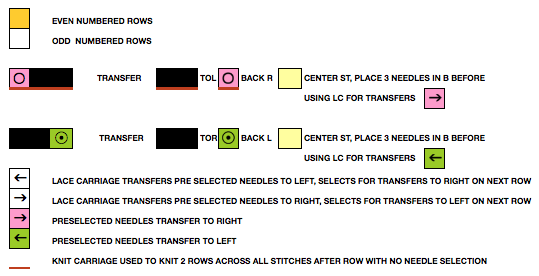
The lace carriage begins on left as usual, makes 4 passes before each 2 rows knit. The first sequence hand transfer occurs on row 2 of the 4 LC passes. The second sequence hand transfer on row 1 of 4 passes. After the 3 onto one hand transfer, be certain all 3 needles line up in B position before the lace carriage makes its transfers as well.
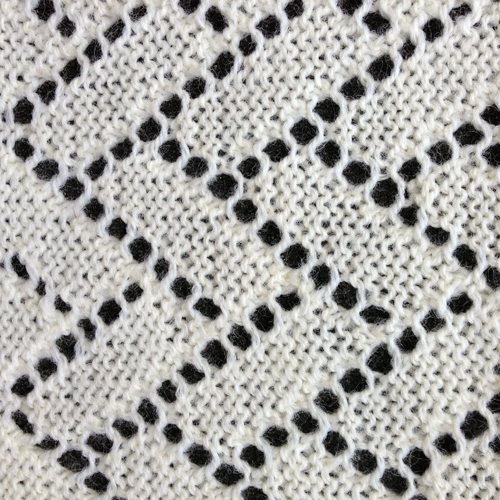
the resulting fabric’s knit side 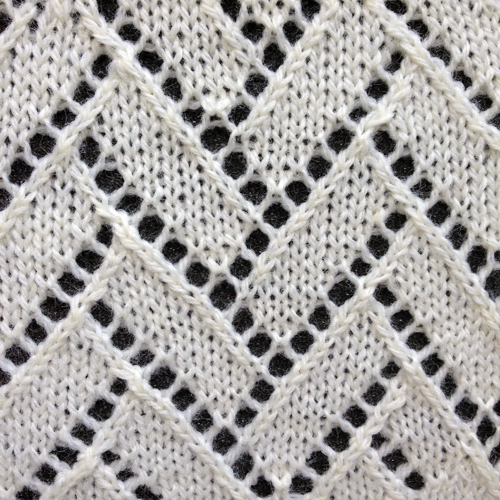
purl side