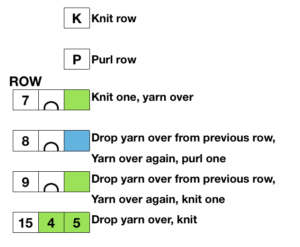
I was written an email asking about the possibility of creating bubbles in hand knitting, this is my attempt, may serve as a starting point for DIY.
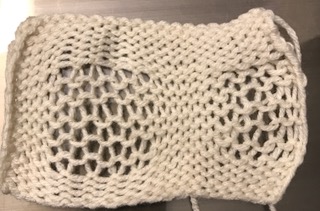
Below a small sample serves as an illustration of my first attempt. It was knit in acrylic, steamed to the point of death, but shows the type of elongation of the “bubble” stitches using this technique. To keep things simple I stuck to a “square” shape. Stitch counts and placements of shapes may be adjusted to suit. It is possible to knit or purl the yarn overs, unraveling the extra stitches before knitting the original number of stitches when the top of the bubble is reached, but the resulting look is a bit different. It is worth trying, depending on preference for the type of result, or the way one is accustomed to dealing with elongated stitches and yarn overs in hand knitting.
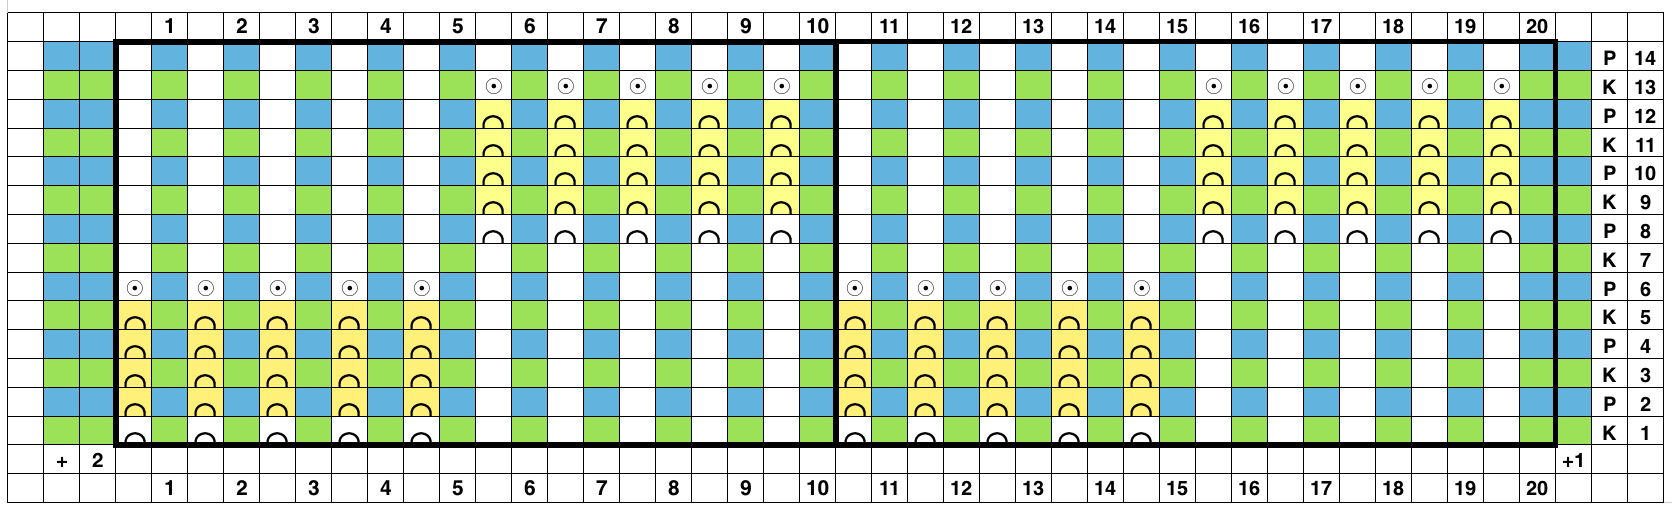
 So I now own a new Mac, no longer have Microsoft Office available, and am now working my way through charting diagrams using Mac Numbers. Below is a possible working chart with a different stitch count than above. I would suggest larger blocks of all knit stitches and rows between “bubble” repeats
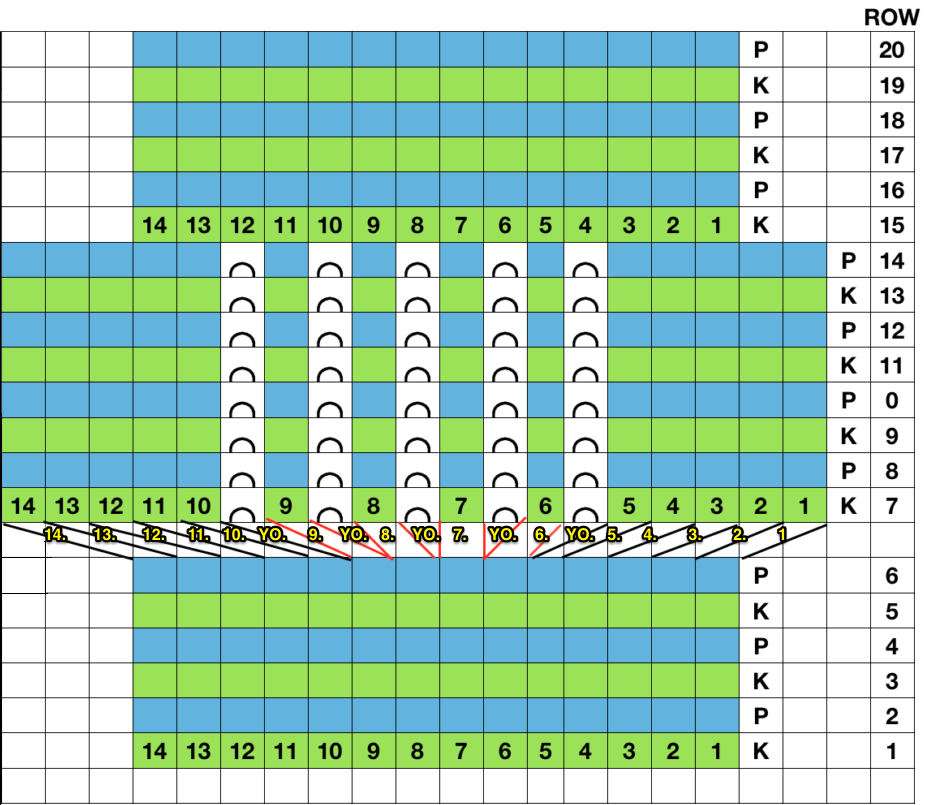
The further step of taking the technique to a brick repeat follows. I have been experimenting with a varied number of rows and stitches. Subsequently, I was happier with knitting or purling the yarn over as an extra stitch/ increase until I had worked the desired number of rows, then dropping those extra stitches, thus working once again on the original number cast on. The shape also seemed a little less square to me if a second row was worked before returning to making yarn overs. A border of more than one stitch on either side helps stabilize the shape edges.
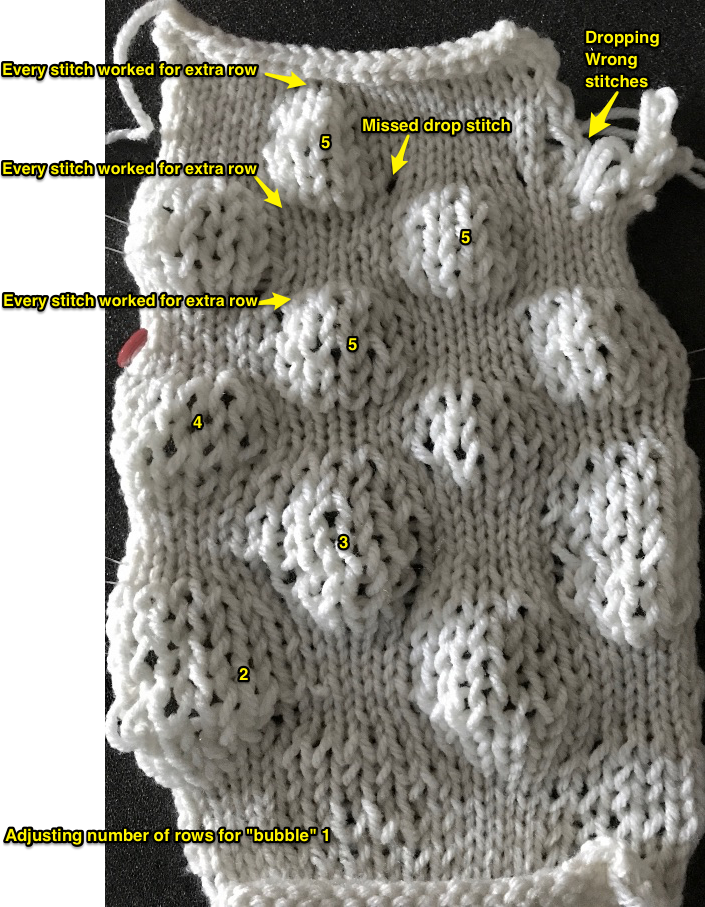
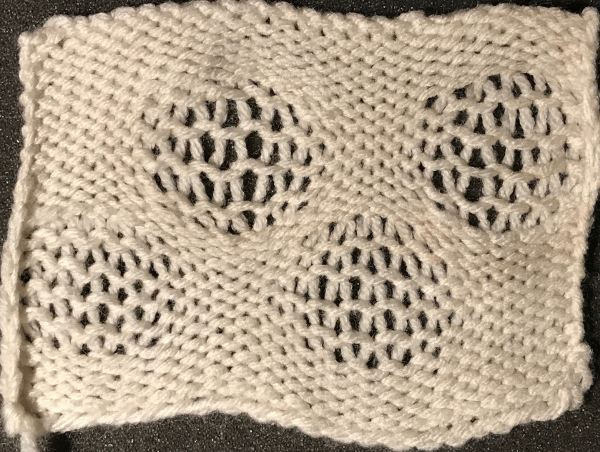
This sample was worked in my “throw away” acrylic 4 ply. To my eye, the most pleasing and effective bubble happened on the least number of rows of dropped stitches (diagram provided above). The top and bottom edge of the “bubble” looked the best when stitches were taken off the needle on one row, and not allowed to “run” to the yarn over row until after the next row was knitted or purled all the way across. That may not be the best idea, especially when working much wider pieces of knitting. Dropping back to yarn over row as you work row 6, 13, etc. of chart provides a more controlled way of checking “runs” for individual stitches, making repairs for any errors easier. Dropping yarn overs with each pass seems to me to be the easiest way to track knitting as it progresses or gets wider, and counting bubble rows is far more easily tracked. Below, variation #5 matches the above chart.
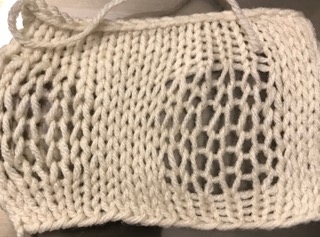
 the reverse of the fabric, lightly killed with steaming and pressing
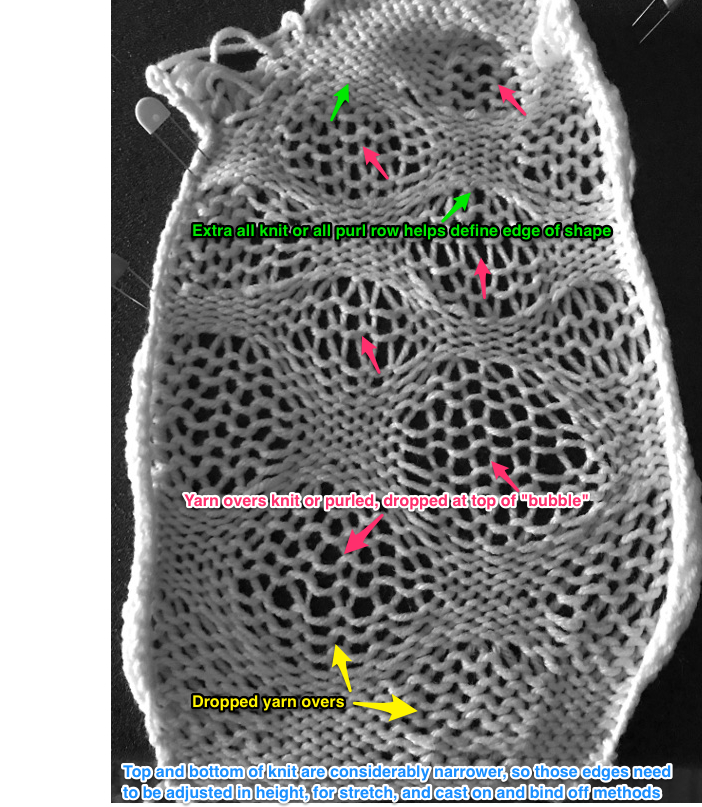
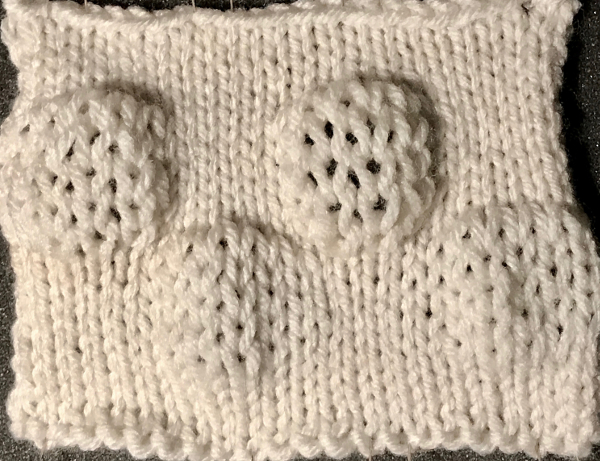
A last swatch: here a row is knit or purled as seen in the chart above after yarn overs and their treatment is completed. If the aim is bubbles which will not be flattened out, dropping the yarn overs on each row worked gives a flatter (bottom of the swatch), less of a “bubble” effect than knitting or purling the yarn over before dropping it at the appropriate point (top of the swatch). If the fabric is to be “killed” as flat as possible, dropping the yarn overs each row may be good enough.
 My machine knitting posts on this topic: https://alessandrina.com/2012/09/21/knit-bubbles-and-stitch-ditchersdumpers/
https://alessandrina.com/2013/09/06/more-knit-bubbles/
https://alessandrina.com/2013/09/07/a-bubbles-cousin/
https://alessandrina.com/2017/10/18/revisiting-knit-bubbles-brother-km/