Periodically questions come up with regards to how to manage float control other than using familiar DBJ settings, or the best way to proceed to achieve it when one prefers to work in thicker yarns. In this technique, all main bed needles are in use for patterning and in working position, the ribber needles can be arranged in nearly any configuration in groups with 1 needle in work, and one or more needles out of work. The main bed tension is close to what would normally be used for a single bed fair isle, while the ribber is set at least one or two whole tension numbers tighter, thus reducing bleed through or vertical separation lines on the “outside” of the knit. The fabric uses less yarn than every needle rib DBJ, is lighter in weight, has more stretch, but will not lie as flat. In Brother, if needles are arranged in groups of 2 (pairs of lines and spaces on the needle tape with even spacing between them (i.e. 2 X2, 4X4, 2X4, etc) then lili buttons can be used. The latter method has less chance of the backing showing as a vertical line/ separation on the pattern surface. Sometimes the ribber needle arrangement may result in a secondary, interesting pattern on the purl side. It is still a good idea to have floats that are limited in width, generally less than 5 stitches. For the purposes of illustration, I knit 2-row stripes on the main bed, while altering settings on the ribber.
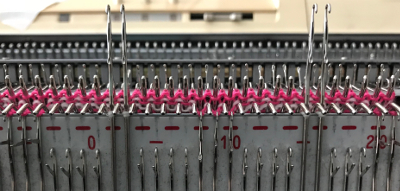
This was my initial setup. The ribber needle tape is marked in what I think of as dashes and blanks, in continuous pairs. When using single ribber needles for the ladderback, the number of out of work needles may be even or odd between the ones in work
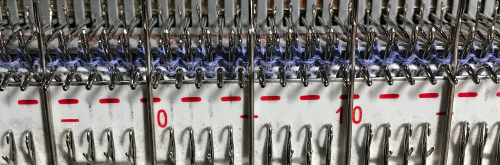
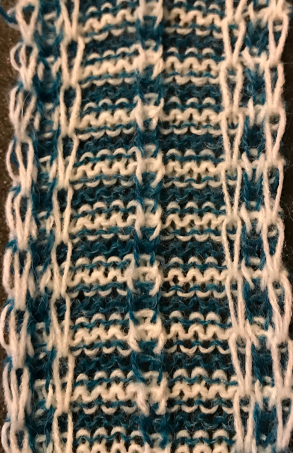
As each row is knit the ribber will pick up yarn, or not, depending on carriage settings, creating a knit stitch vertical chain on the purl side of the knit 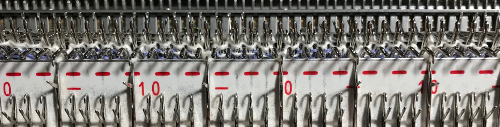
If empty needles are simply brought in to work above plain knit rows, eyelets will be created. One way to reduce their size would be to pick up loops between stitches on the main/ opposite bed and use them to œcast on your ribber needles. With ribber carriage set to knit in both directions, each color will knit with each pass of the carriages (2).
 With it set to knit in one direction, slip in the other, each color will knit on the ribber for a single pass, slipped in the opposite direction, and the slipped stitch becomes elongated (3).
  Having a needle in work on the ribber close to the edge of the knit may help reduce the roll along that edge (4).
 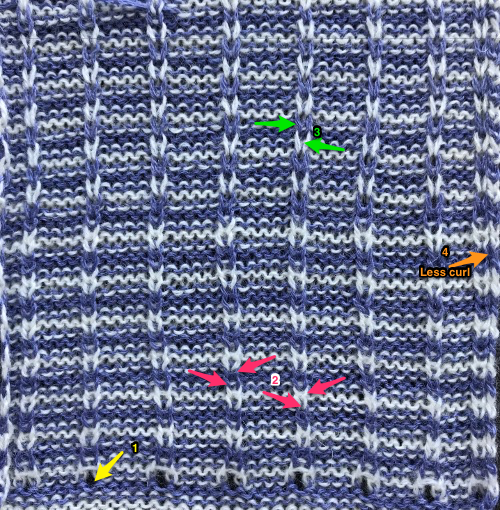 A slight separation may appear on the knit side in the location of the vertical columns created by the ribber stitches, it is less apparent when ribber knits on every other row
 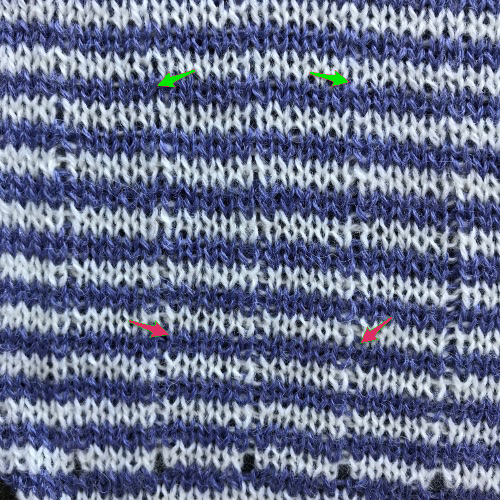 It is possible to only have one of the 2 colors knitting on the purl side. In my case, it was white knits, blue slips. Here the ribber carriage settings need to be changed with each color change, so for white I used
for the blue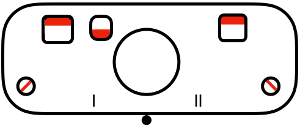
Setting up for using lili buttons: needles need to be in pairs, each with a matching “dash and a blank”, even number of out of work needles in between them. My previous set up required a bit of moving stitches around
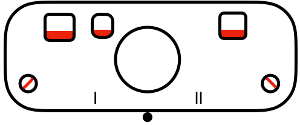
 ribber is set to slip both ways, lili buttons engaged
 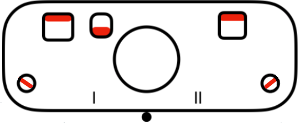 With the above settings, the needle on the right of each pair will catch the yarn on the pass to the right, the needle on the left of each pair will pick up the yarn on the way back to the color changer. Stitches are elongated because they are slipping alternately for one row, and are slightly offset from each other with a bit of a “jog” because they are not knitting on the same pass. This is noticeable in lili backed full DBJ as well. The color change from blue to pink is simply because I ran out of blue yarn.
 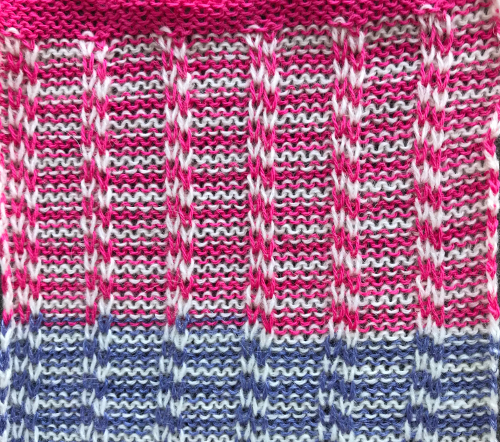 My ribber stitches should have been tighter throughout, but even in this tension situation, the knit side has the least noticeable vertical separation along vertical column edges in the series of tests
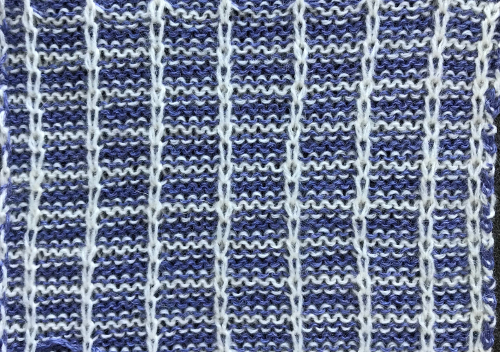
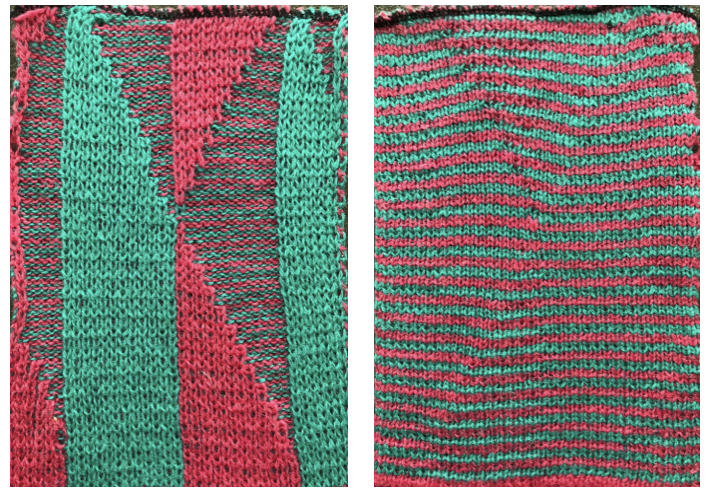
 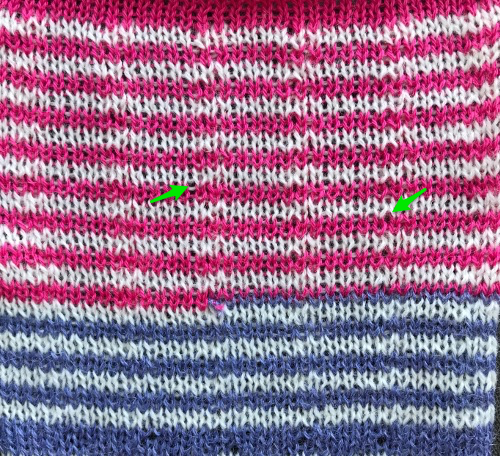 The technique may be used on any machine. This sample was knit on a Passap, using one of the patterns built into the console, pushers 2 up, 2 down for long stitch alternating color vertical lines, fixed distances between them, BX <–/LX, Tech 179.
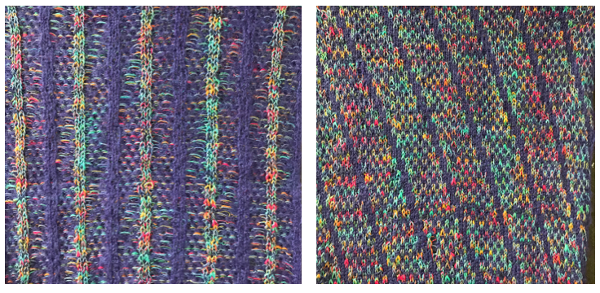 Similar backing may be produced on the Brother machine, but now a hand technique is involved. The ribber remains set to slip <– –> throughout, no lili buttons. The spacing may be chosen on the basis of the interaction with the main bed motif, or in a different configuration for each color, making the hand technique easier to track. Needles are brought to E position on the ribber for each row to be knit in that color. Here the different colors are easily identified
 the ribber settings
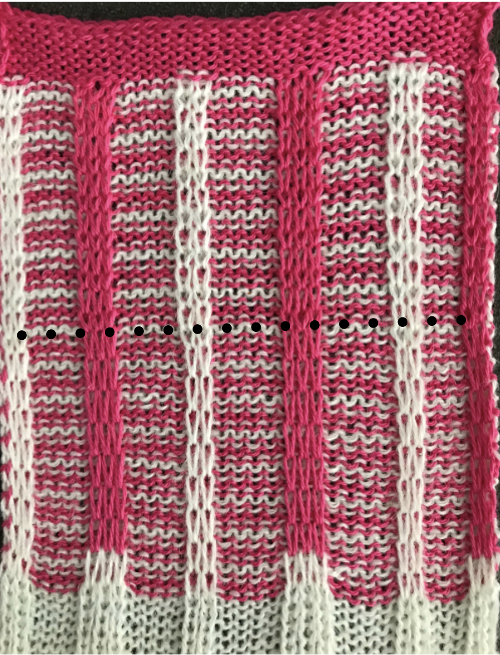
There are 2 options: one is for bringing appropriate needles to the E position for each color only once. I chose to do so immediately after each color change, with carriages on the left (below dots). The other is to bring them to E for the second pass of the carriages on their way back to the color changer as well (above dots). There is elongation in stitches in both options, less so when each color knits on the ribber for 2 consecutive rows, where one short and one longer stitch for each color may be observed. The first option also caused a bit of puckering on the knit side, which disappeared with pressing.
 the reverse side
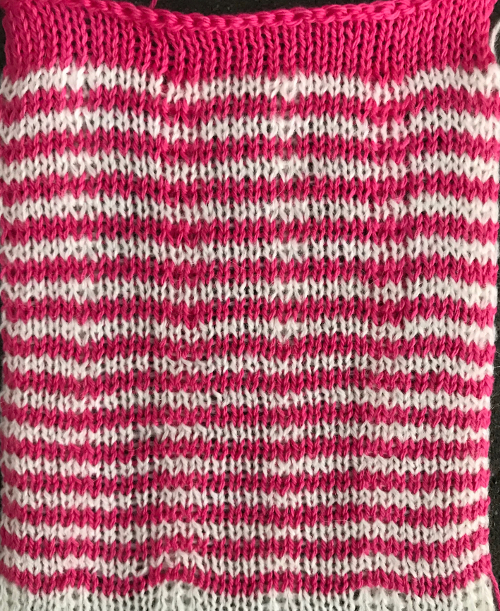
Similar ideas, playing with the configuration of color blocks on either or both beds, can result in applique, embossed jacquard including pleats, and a whole range of other double bed knit fabric variations. A quick sample with transfers between beds
Lastly, here is a tiny swatch in an arrangement beginning to explore the odd number of needles in work on the ribber in conjunction with the use of lili buttons and adding needles to “fool the machine” as described in the post