In 2013 I shared my first post on the topic, covering single bed quilting as a hand technique, with the aid of a punchcard to pre-select needles only, and with an intro to a simple ribber repeat in a single color. It was followed by a post explaining the color separation for 2 color quilted fabrics. It is also possible to use an altered knit carriage to knit rows on the main bed only while leaving the couple carriages on the left instead of changing ribber settings from slip to knit and back with color changes, see post on ribber-fabrics-produced-with-2-knit-carriages-selecting-needles/
one color experiments using monofilament 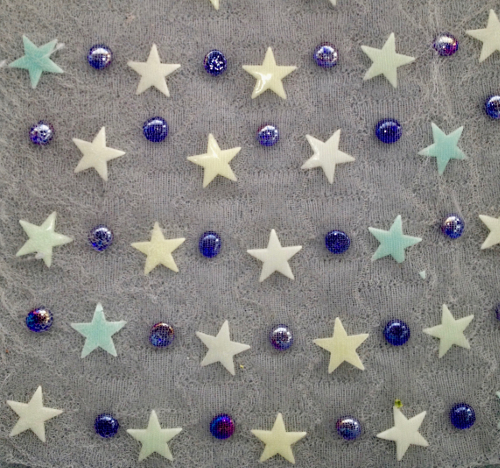

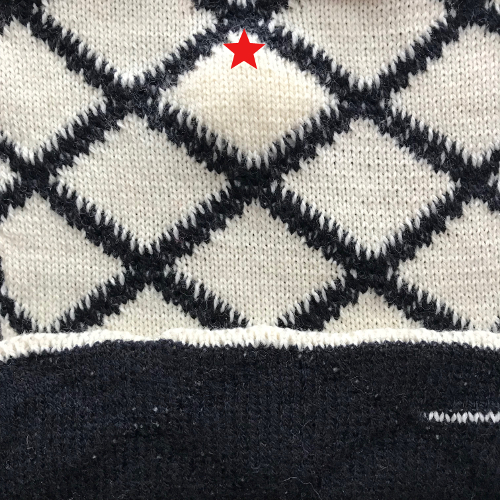
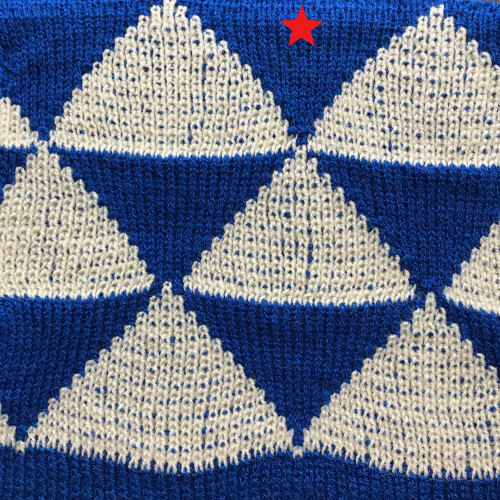
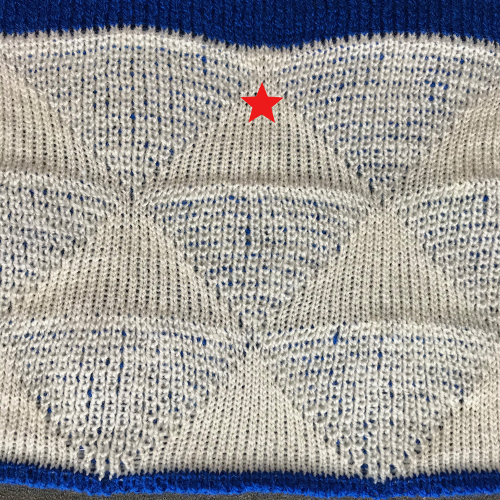
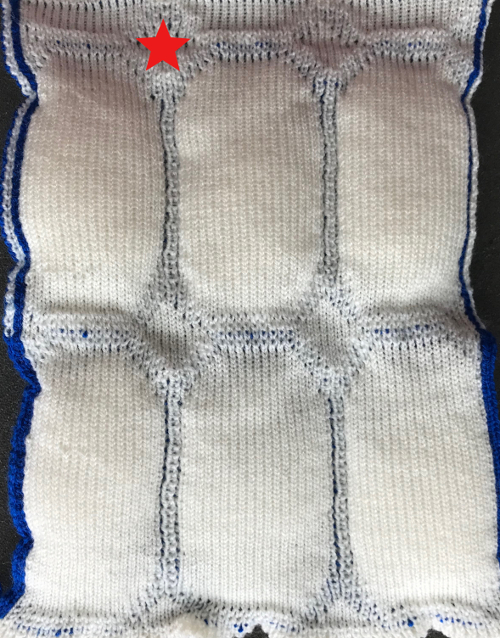
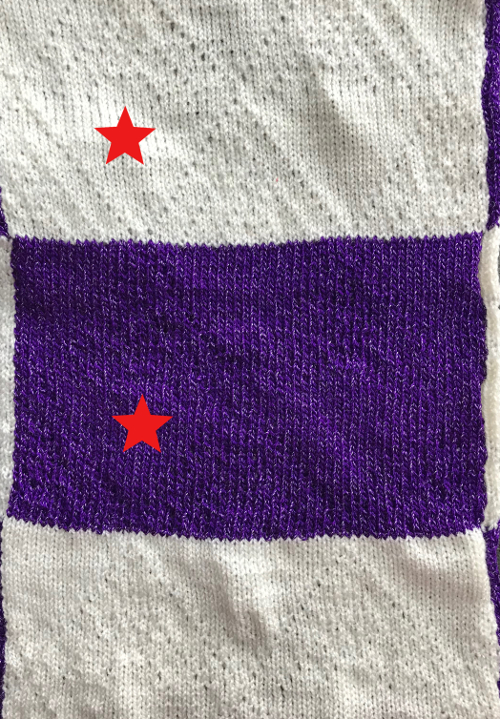
In my swatches below, the red stars mark the spots where one fabric surface separates from the other. All use 2 color patterning, with a single color only appearing on the reverse side. In Brother machines to achieve this result, the ribber settings are changed manually every 2 rows. The ribber is set to knit when carrying the backing color, which is also creates the “stitching/ joining” sections, while it is set to slip when the color creating the pockets is worked. The settings on the illustration on the left create the foreground color pockets, and the ribber slips for 2 rows. The settings on the right will knit every row on the ribber. Two rows of each color are knitted alternately, the same as in DBJ. Since there are as many “blister” rows as there are rib rows, the blister/ pocket design will lie flat against the backing. If the goal is a lined Jacquard, the yarn tension must be evenly balanced to produce a fabric that lies flat. The texturing of the quilted surface is produced with uneven tension, knitting more loosely on the main bed. The looser surface may be left as is, or wadding may be inserted between the beds as knitting progresses while dropping the ribber partway. Commercial versions of these fabrics are sometimes referred to with the terms eightlock or interlock, and double jersey. 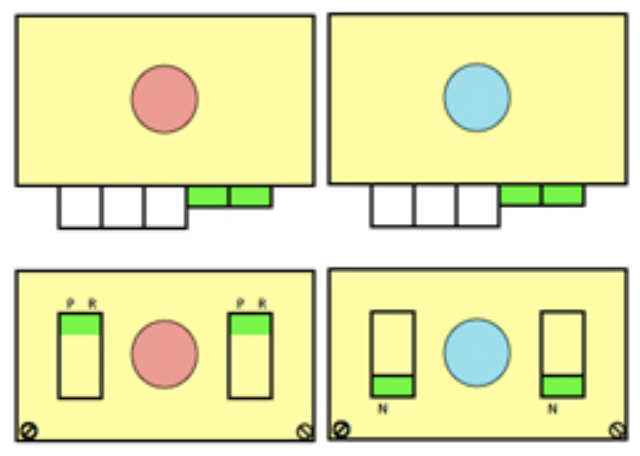 The punchcard instructions for the first swatch, from Brother Ribber Techniques Book,
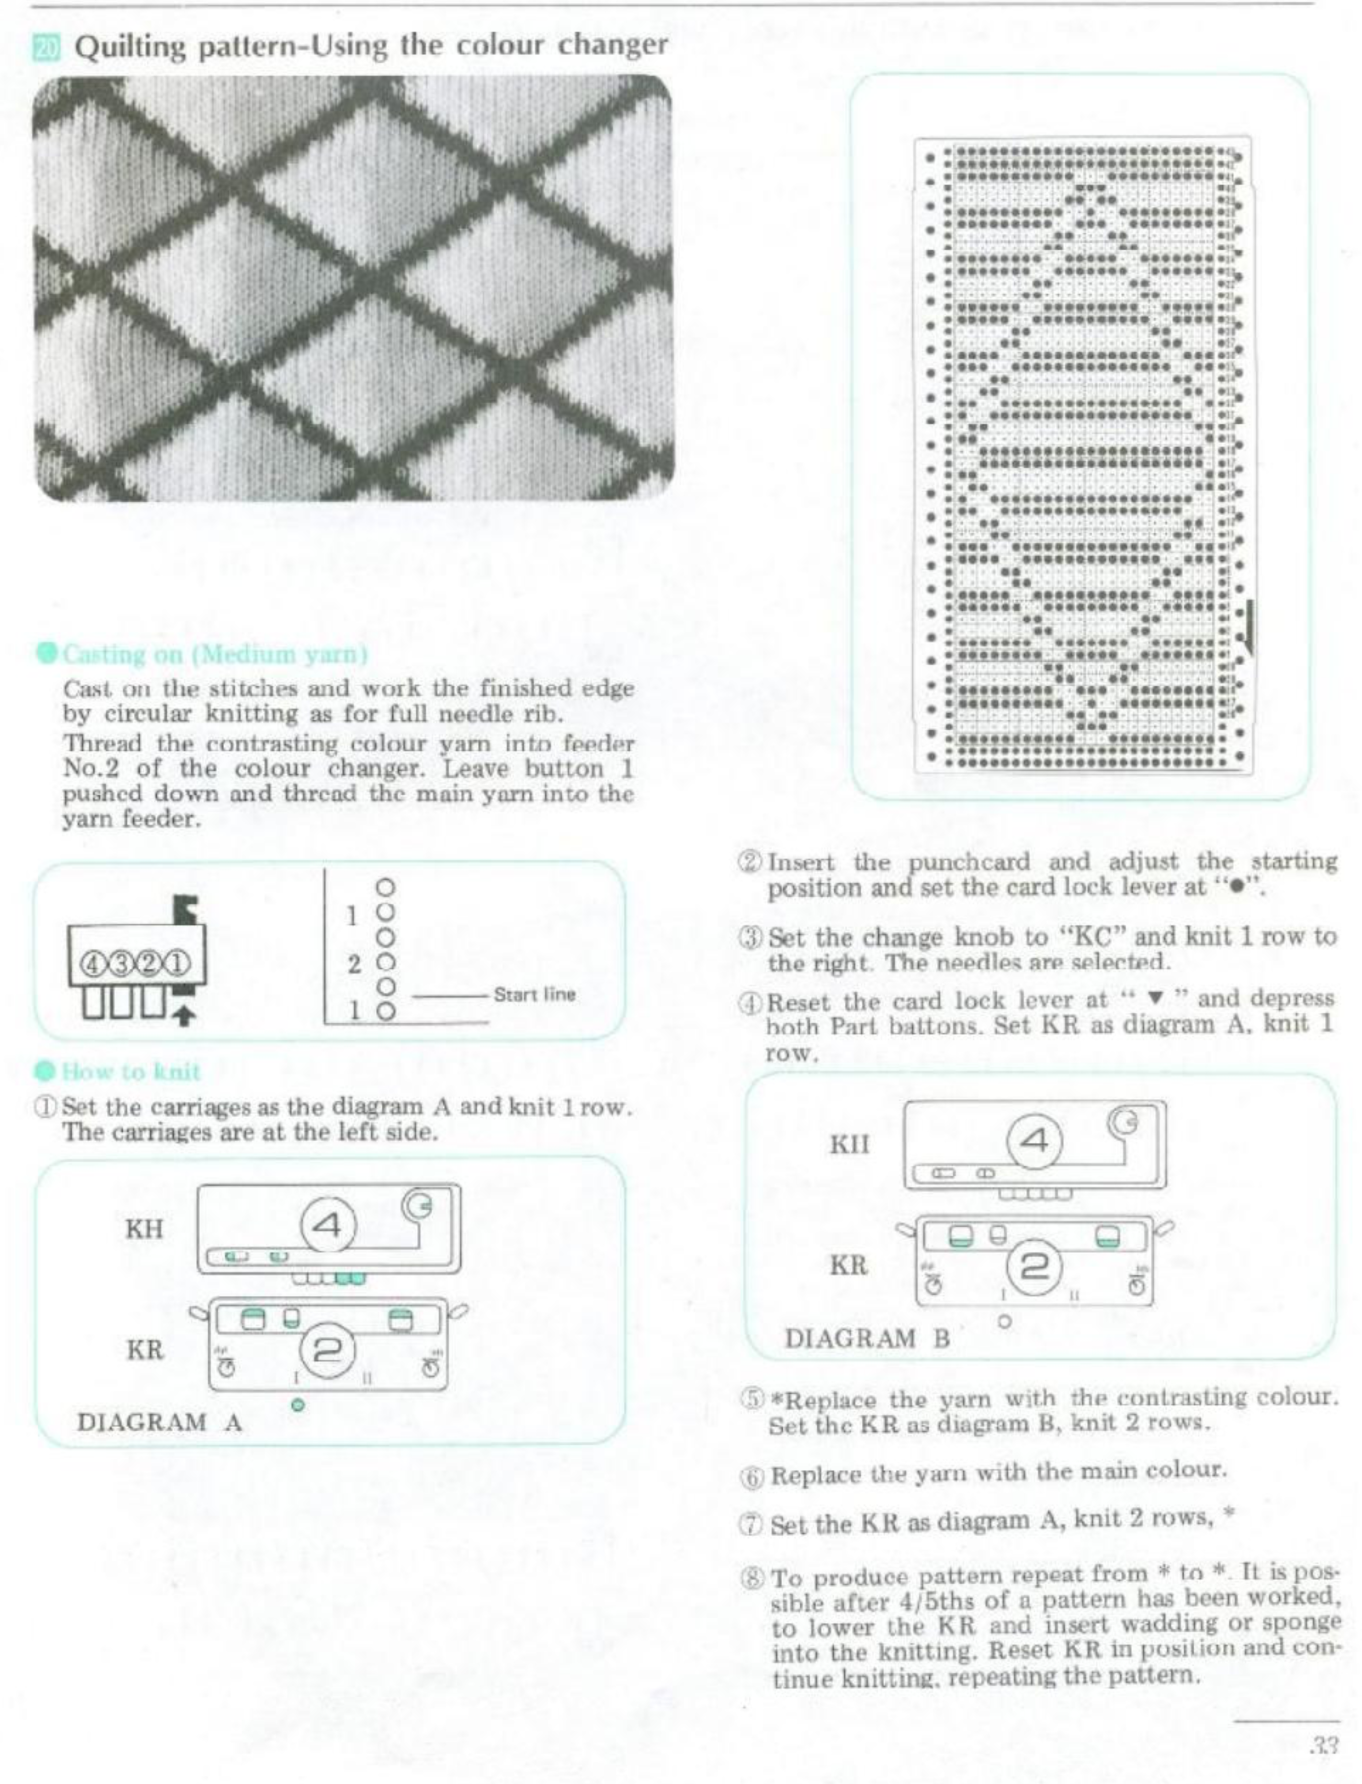
reverse of fabric (black) folded over on the bottom
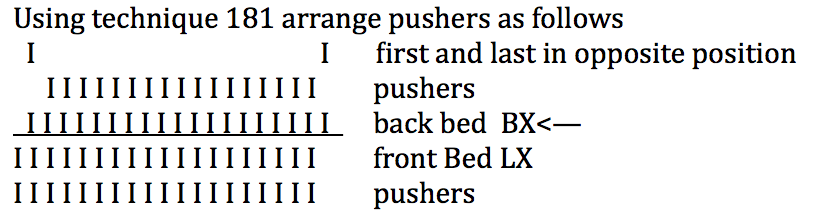
Passap Technique 181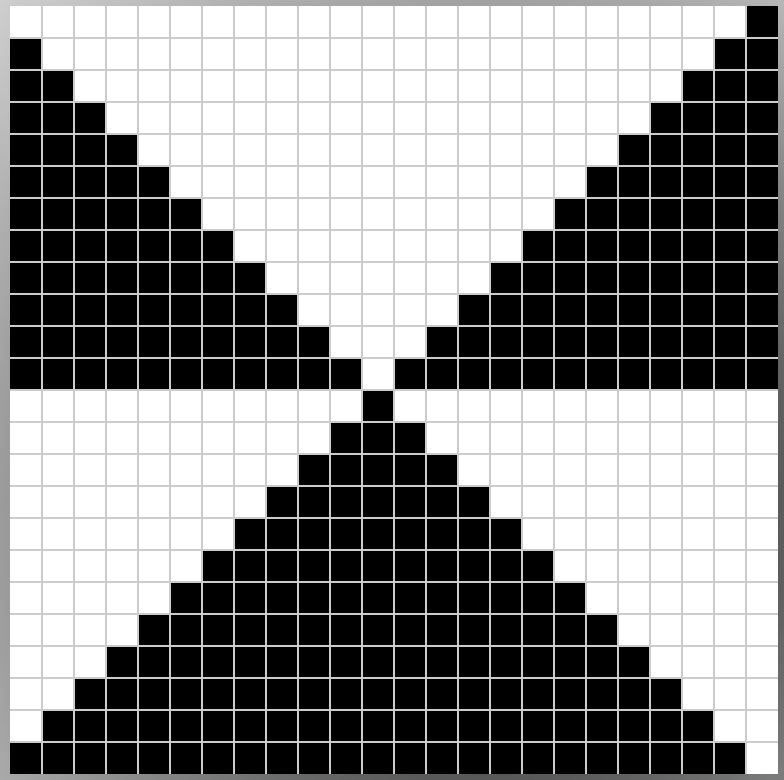
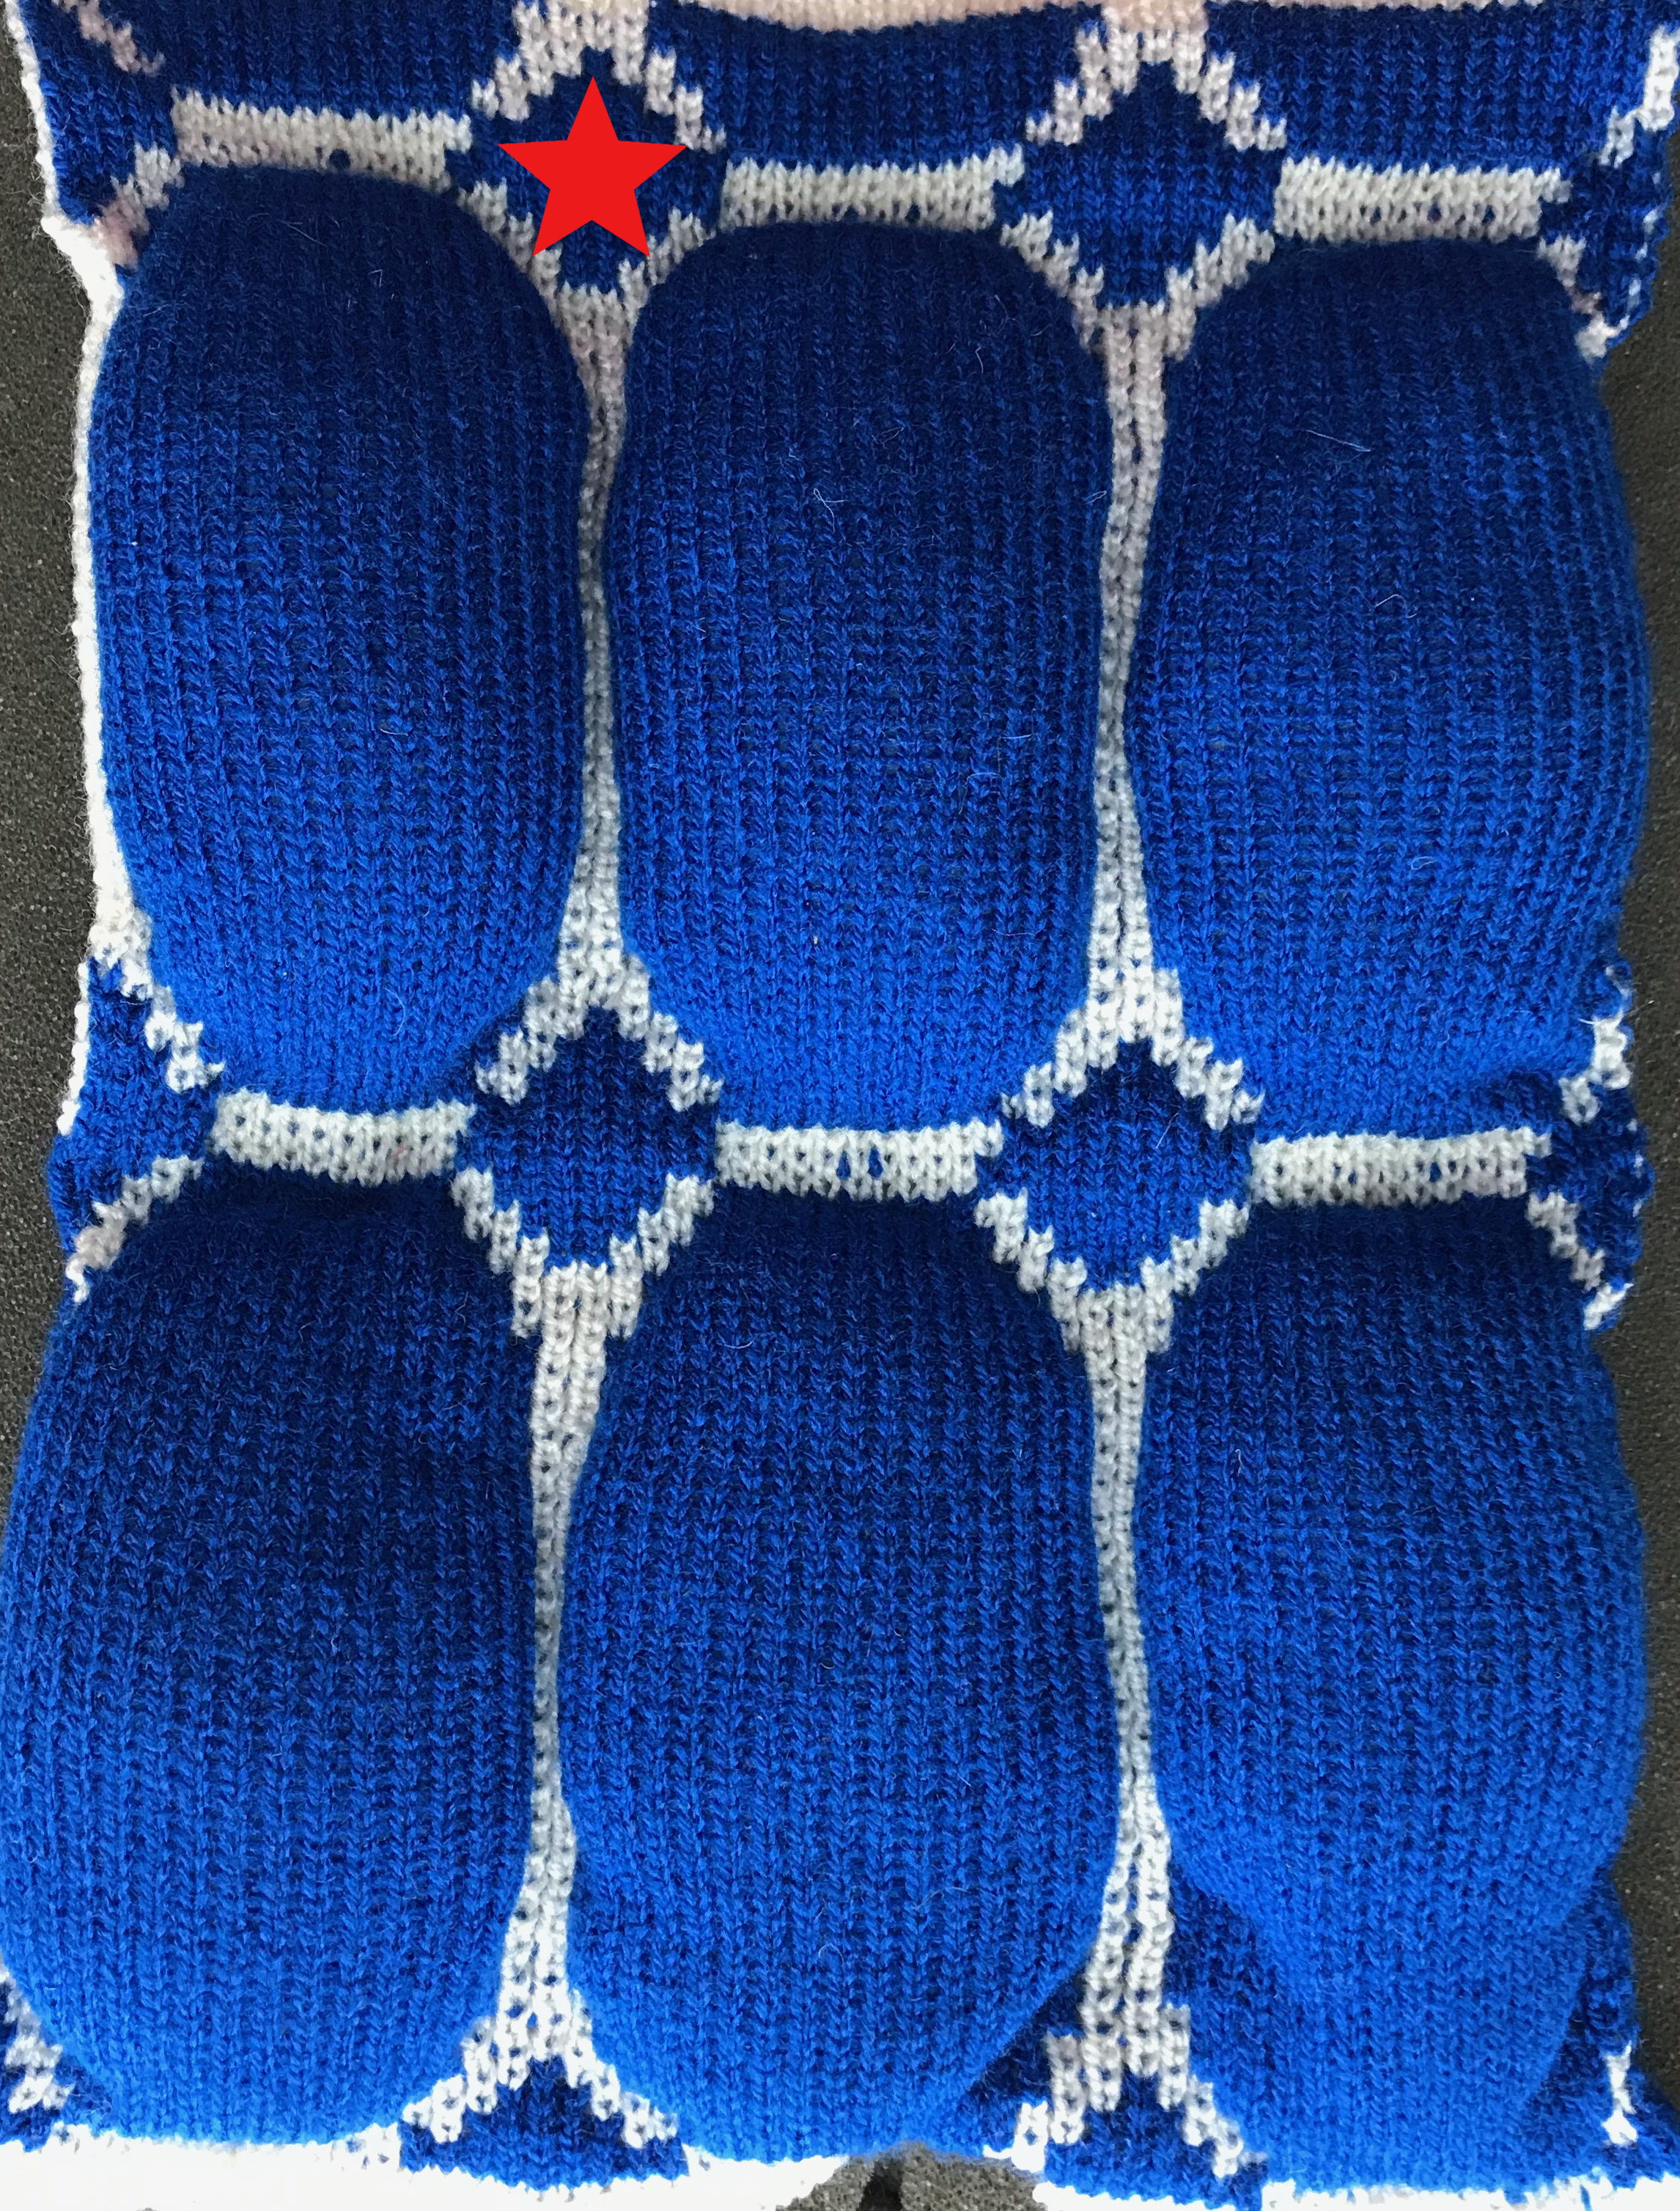
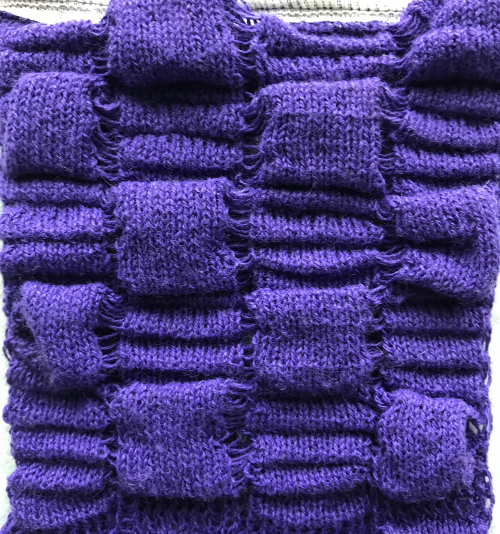
here the large areas are obviously “stuffed”
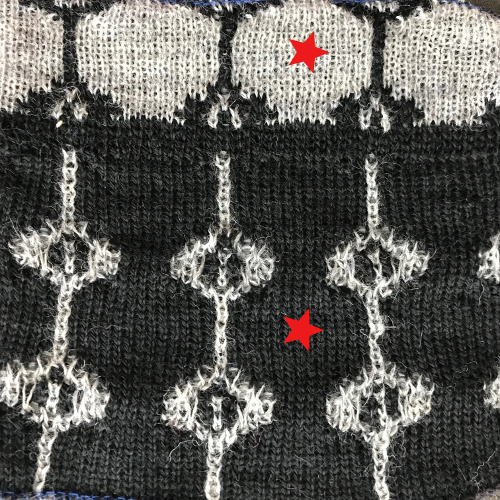
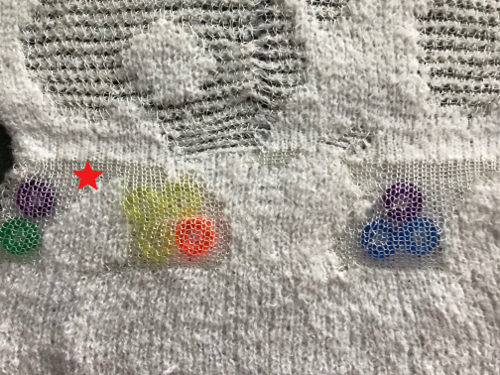
Pockets may result as a part of any larger, DBJ design, when monofilament or thinner threads may be used for the second color
Possible problem areas: stitches may be dropped along areas where fabric is joined (A), sealing side edges (C) will keep them from separating (B). The end needle on each bed must knit the opposite selection as its neighbors in order to close the selvages. The last needle at the side opposite the color changer may require pushing needles to E manually if not selected by the KM at regular intervals. 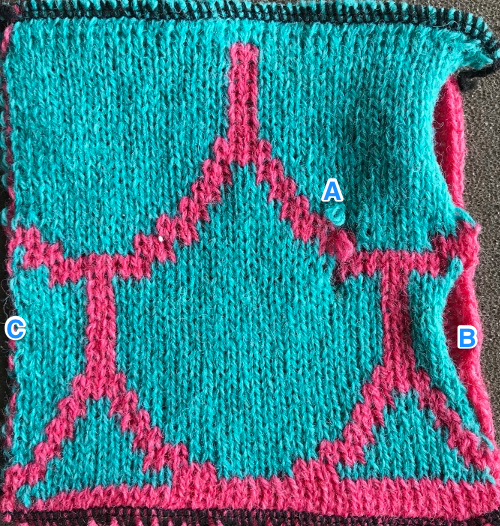
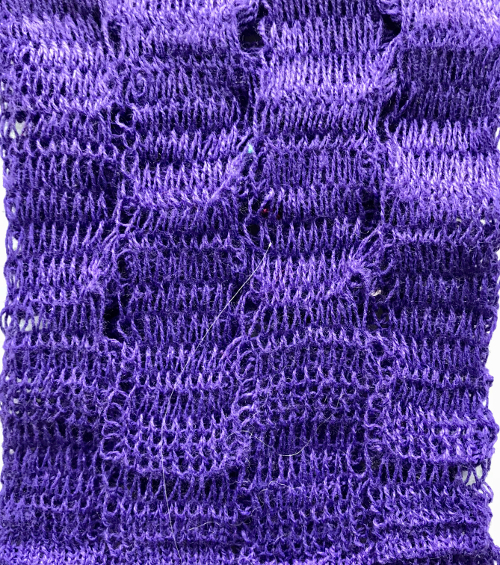
Blister fabrics and pintucks are cousins.
Quilted fabrics are sometimes referred to as “single blister”. Both rely on one group of stitches knitting more rows than another and can occur both in a single color, or multiple colors. The ribber slips while the main bed knits X number of rows in pattern, and pleats/ pockets are created, eventually sealed by knit stitches on both beds. The number of rows for which this action may be taken in Brother machines is far more limited than in Passap, where the strippers help keep the fabric in place.
Single-color pintucks/ blisters began to be addressed in my post, which reviewed Brother ribber techniques suggestions. A multiple-row blister sample executed on Passap, in turn, programmed from an ancient DUO 80 magazine, eliminating hand selection on the back bed, and programming it in terms of black and white squares on the front bed.
 its reverse side
 My E 6000 manual is annotated extensively, and my scribbles make a good argument for keeping better notes. I immersed myself in learning the machine when first purchased it.
Knitting techniques 250-255: when using even numbers the pin tucks are formed on the back bed on the needles which are opposite those with pushers selected down and according to black squares on the card. The corresponding odd number techniques select pushers down according to white squares on the card. 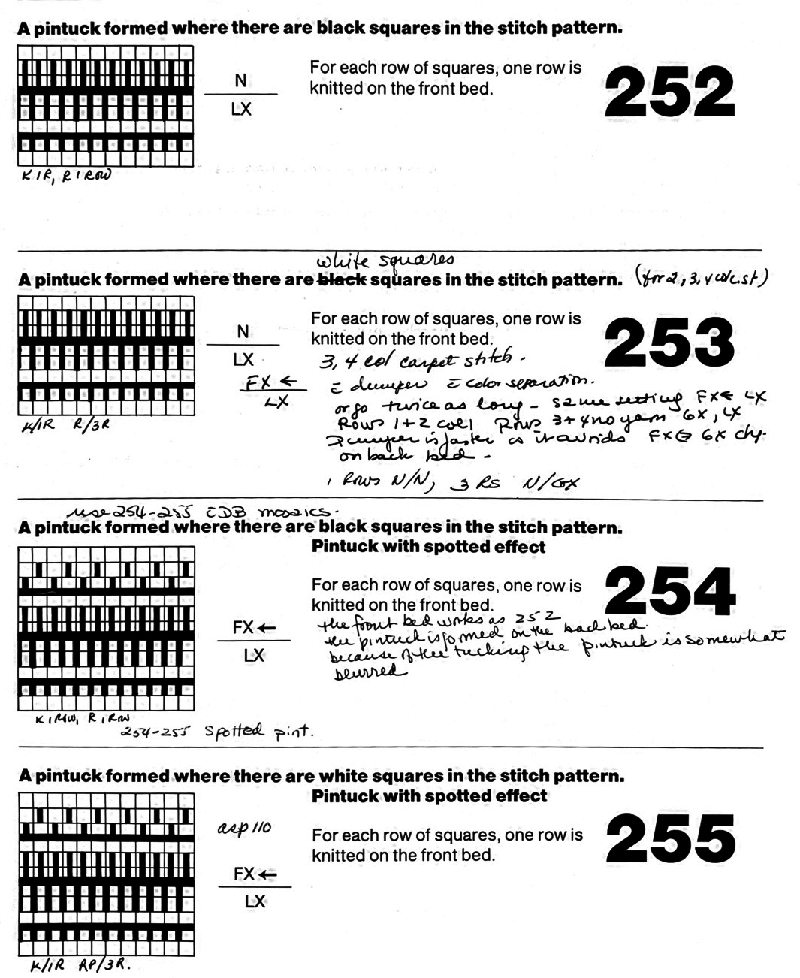
The technique for solid color backing, tubular FI illustrated in the manual, is a workaround to create “quilting” “automatically”. A bit of translation and a different setup from my working notes are offered after the scanned image. The circular setting in Ayab software performs the same automatic color separation. 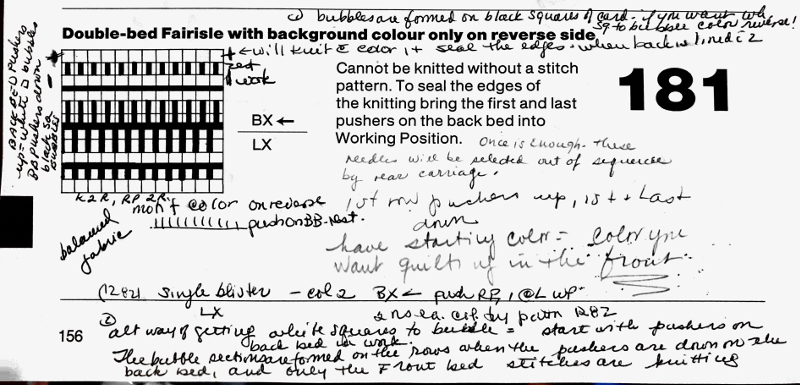
 With this arrangement, pouches will be formed on the white squares of the card. If you think in terms of the colors of the squares, then it is not important which color is determined as the background color by the console.
The setup may be different in your copy of the manual. Knitting four consecutive rows with either color reverse the position of the colors in the pattern. Every 4 passes of the locks complete one design row.
Reversing the BX <– pusher selection (manually, on the right, prior to color change), will reverse the areas quilted. The first pushers on both left and right are aligned in the opposite position to rest.
Floats are created between the layers by the color not knitting on the back bed, and the altered pusher position will keep them from jumping off. Depending on the size of the pockets you may want 2 pushers in that position rather than one. Always swatch before you commit to a large piece of knitting.
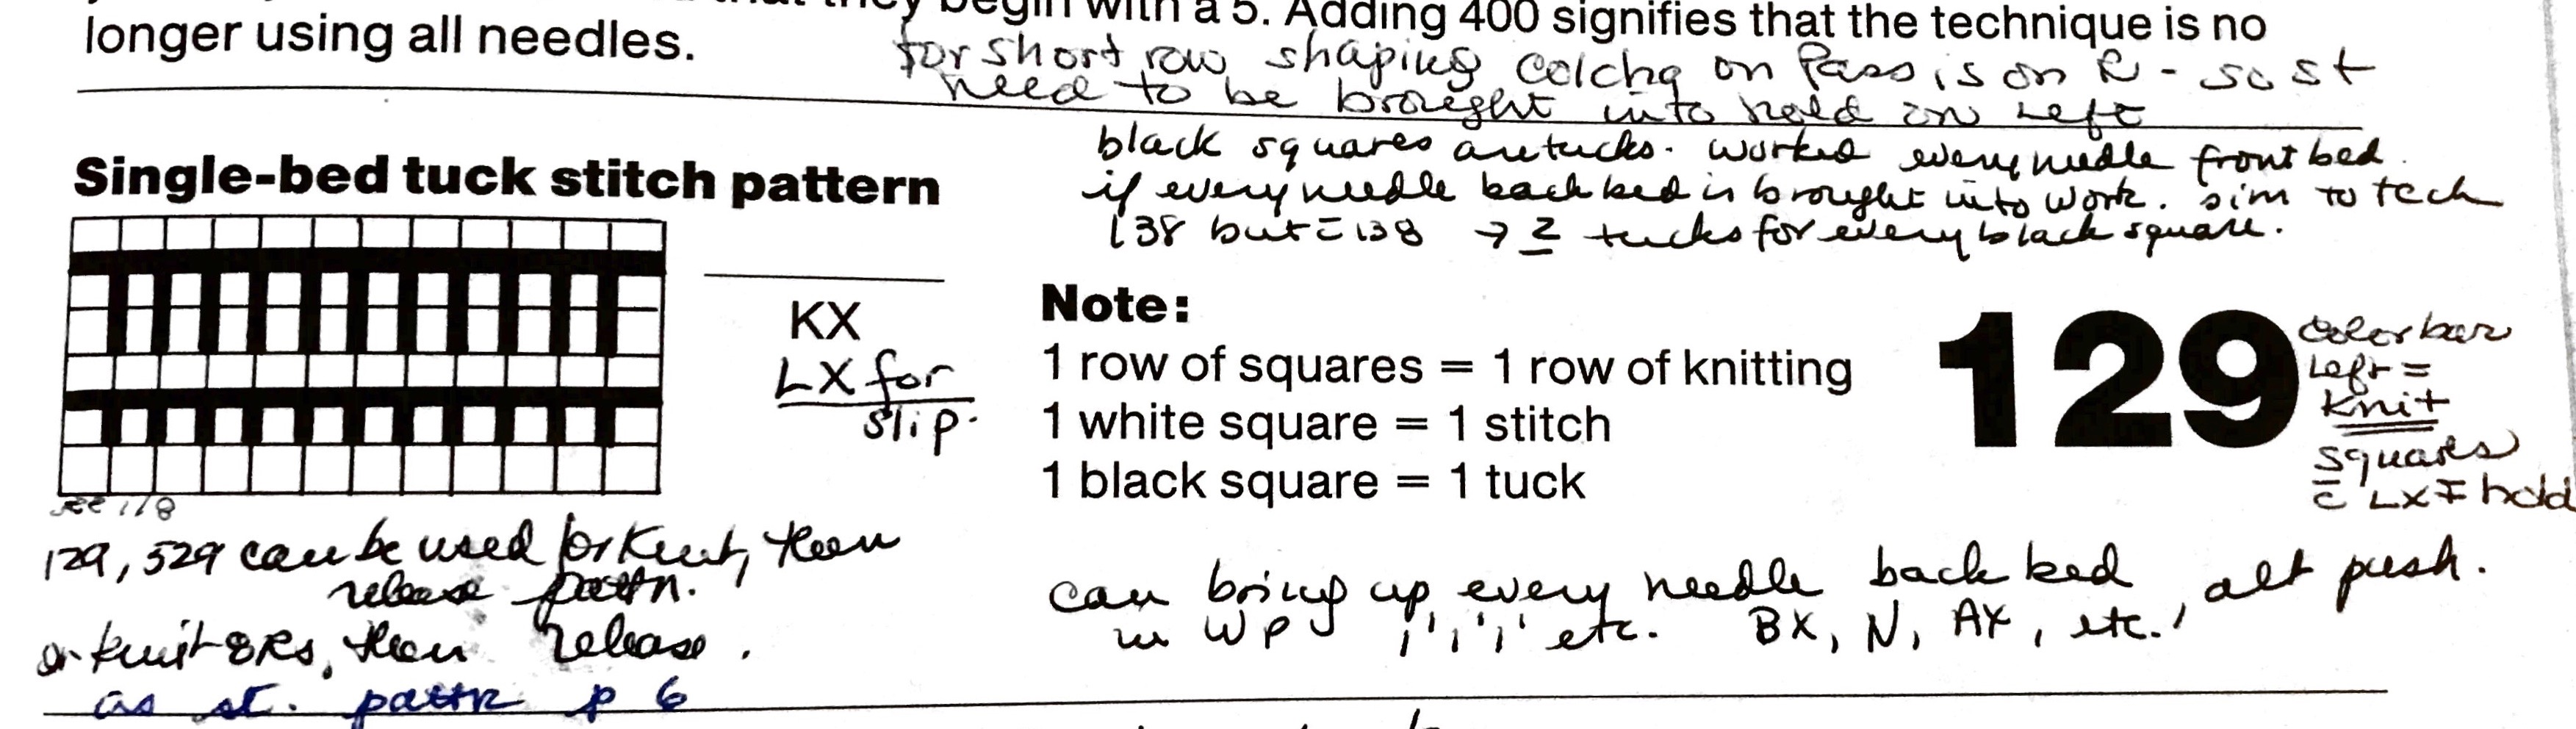
The identical design methods as those offered for Japanese machines and the associated fabrics may be reproduced by entering the separations as a pattern and then in turn entering technique 129. The PDF suggests a method for using Japanese designs as drawn on the punchcard knitting machine in an E6000.
My scribbles from my Passap manual. The console and manual recommendations are only guidelines.
Any and all technique lock settings may be altered to suit planned fabric, and if the machine offers beeps and reminders for the factory program, simply disregard them.
 It is recommended that pushers not in use for any pattern be kept in the rail.
Double bed work requires at least 80 stitches by 100 rows for gauge testing for finished garments. Any machine: for blankets or warm jackets, the pockets may be filled with padding every X # of rows, and the front bed may be dropped to make this easier. Monofilament and /or fine wire may produce structures that have objects dropped into pockets i.e. marbles, sequins, sponges that will expand into space when wet with fluid, etc.
While working on a later post on knitting this fabric using Ayab software in a hacked 910, I found using a simple single pixel height per row diamond shape outline, elongating it X 2, and working in the circular setting produced the single color quilted fabric with no other fuss ie. a color separation. Below is the working repeat for use with the first preselection row from right to left, knit with the right slip button on the main bed, and the left slip button on the ribber throughout. The same settings and approach should work in punchcard Brother machines. 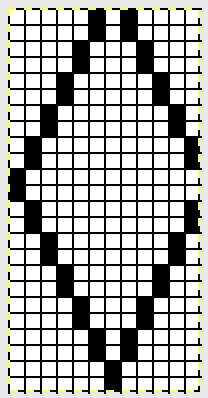
Beautiful results with the quilting technique!