These were the guidelines offered in my intro to machine knitting class for machine knitting swatches to be measured for gauge, or simply to test new yarns or yarns in different colors. Sometimes yarn from the same manufacturer can vary in gauge even if in the same color but from a different dye lot. Black is often yarn that has been over-dyed and may behave very differently. The knit studio was a Brother punchcard lab, with a few 910s available for special projects at the end of the course, or for advanced knitting when offered. The suggestions work well for single bed knitting on standard or bulky machines for fabrics that are not deeply textured. I find with DBJ and highly textured fabrics it is wise to measure much larger swatches if the goal is a predictable size garment or a finished piece. I also got in the habit of checking the marker measurements against a finished piece, such as the back, which is likely to have the simplest shaping.
If using a knit leader, the tape used to track your stitches should line up on the width of your swatch in terms of counts. Using truly contrasting colors for the separating rows with tension marks, in equal weight yarn if possible, make the visual measurement for row counts easier. Until one has a good understanding of how stitches are formed, it is good to avoid very dark colors.
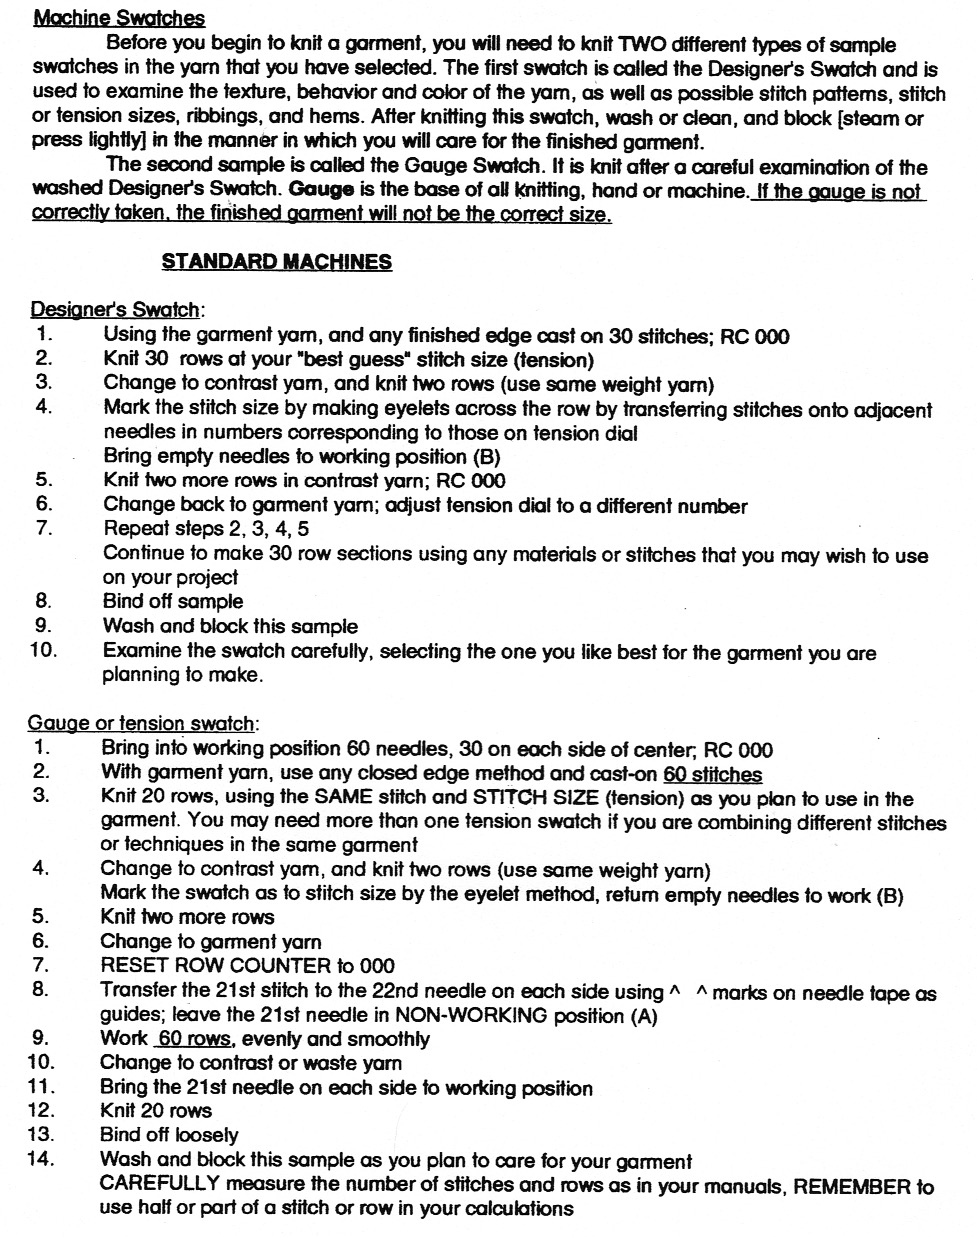
The measurement in single spots inside as shown in most manuals and quoted below is often not enough for accurate gauge calculations, it is best to measure in several spots, and calculate to the second decimal point before any rounding off of numbers.
Over time I found treating the swatches as usual as one would the finished fabric and calculating the width gauge based on measuring the full swatch along a few spots and recalculating to 40 stitches if necessary, worked more predictably for me. In terms of height, stripes in truly contrasting colors make it easier to see the start and end of the garment pattern, sometimes easier to identify on the purl side than on the knit.
Textured fabrics will require swatches that are measured across at least 100 stitches by 100 pattern rows. The 100 number facilitates calculations in cm.
If weights are used, shaped pieces ie sleeves will need to have weights reduced accordingly based on the number of needles in work.
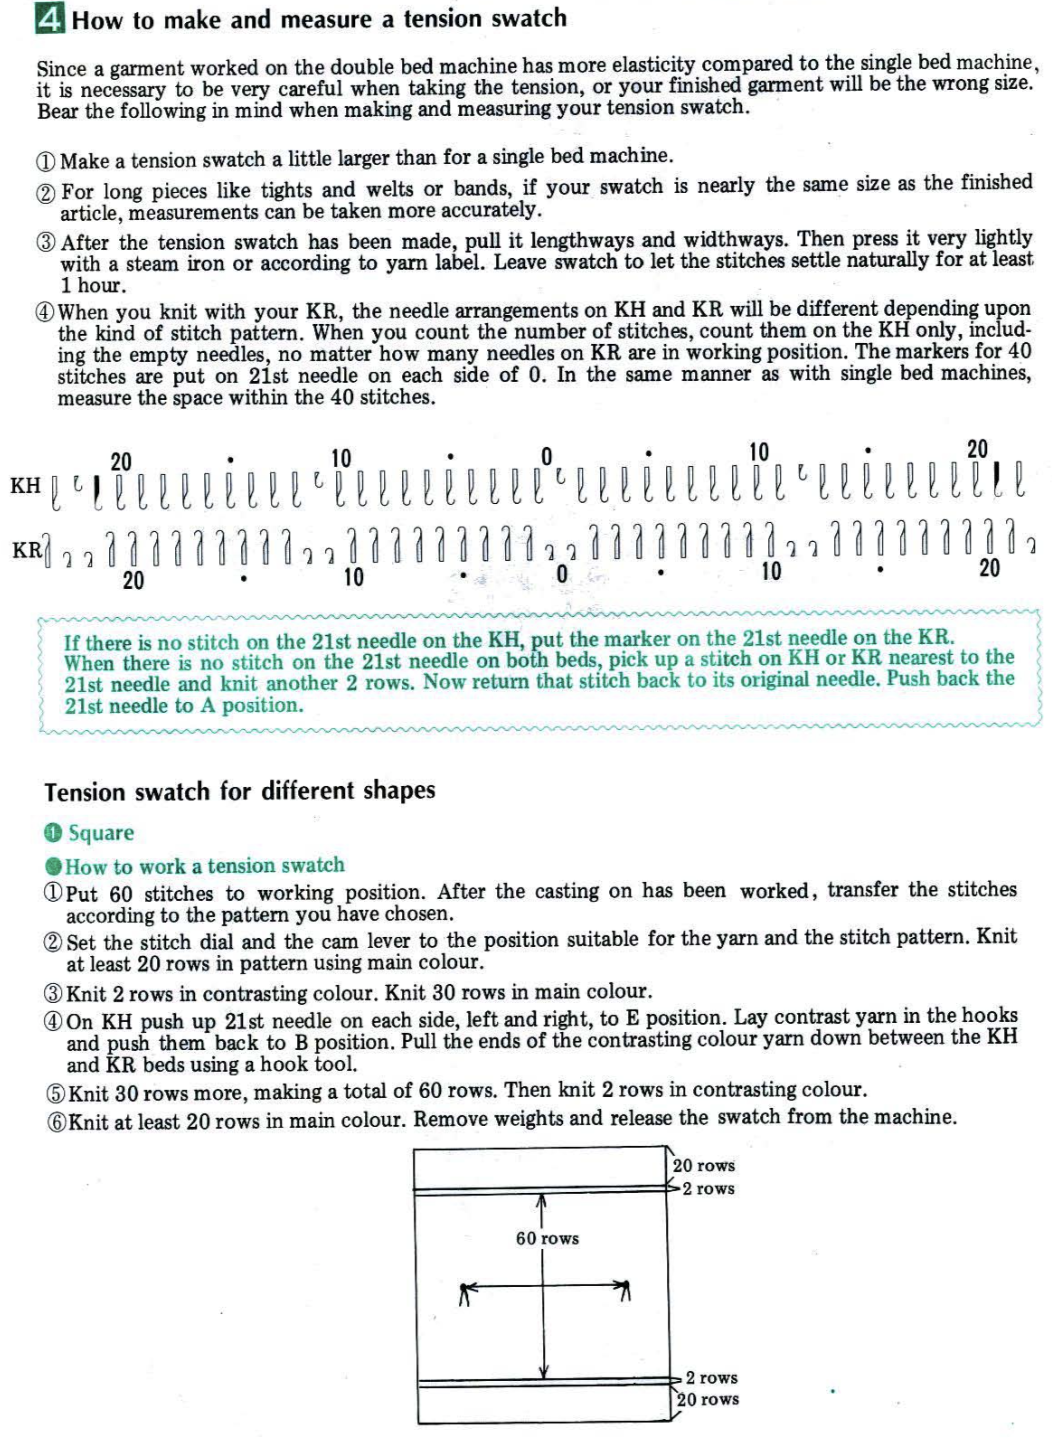
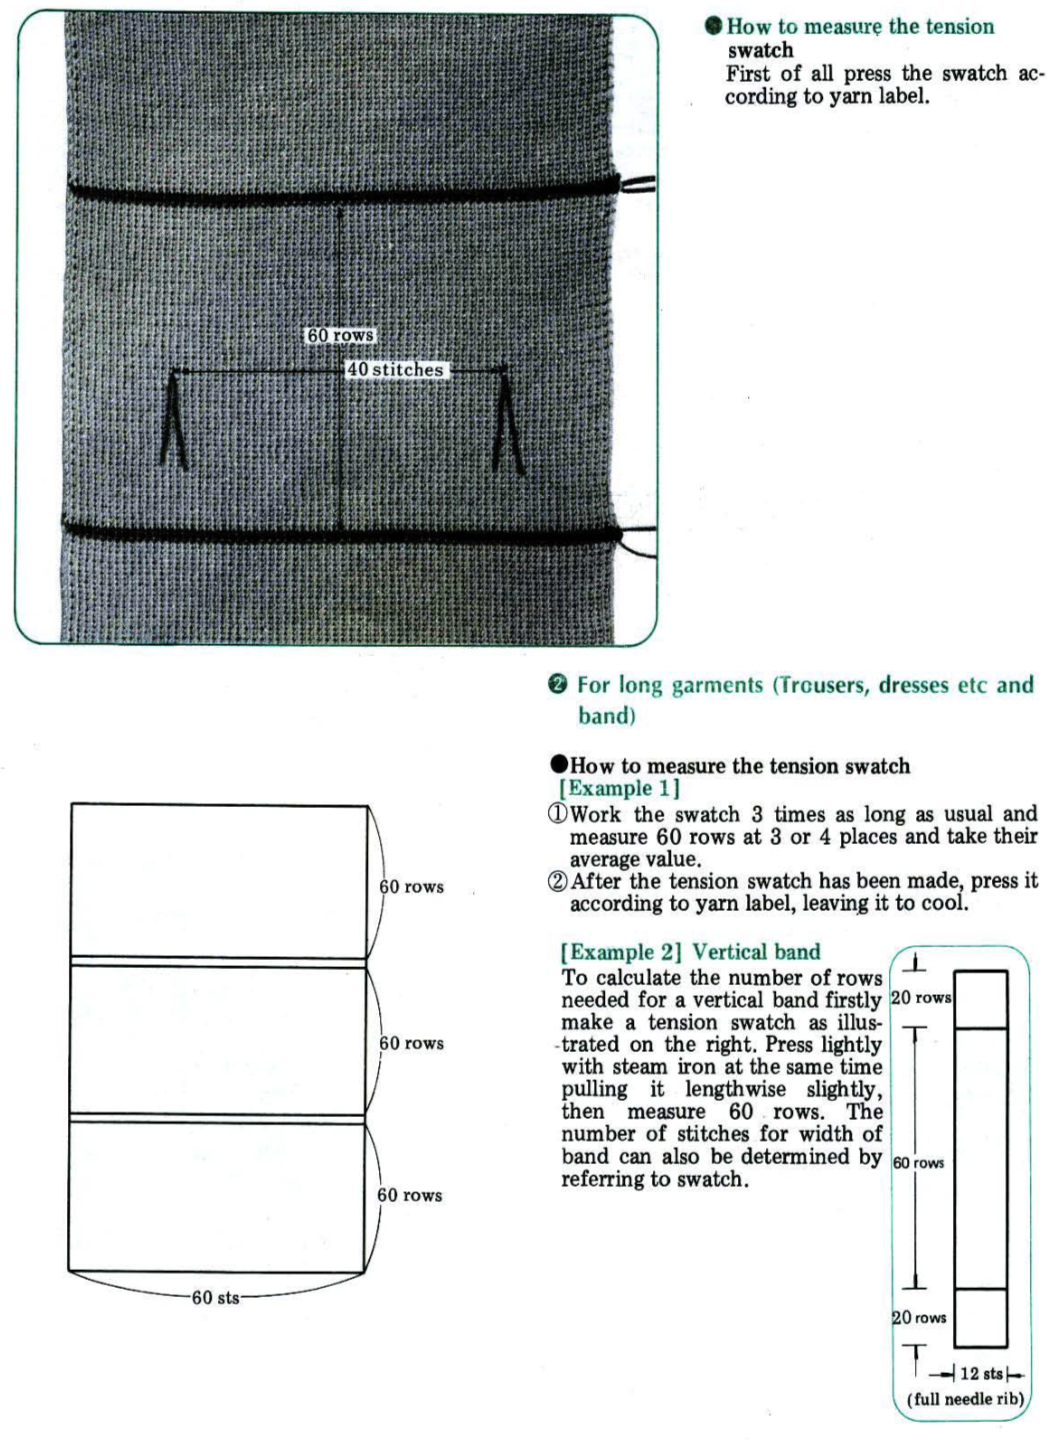
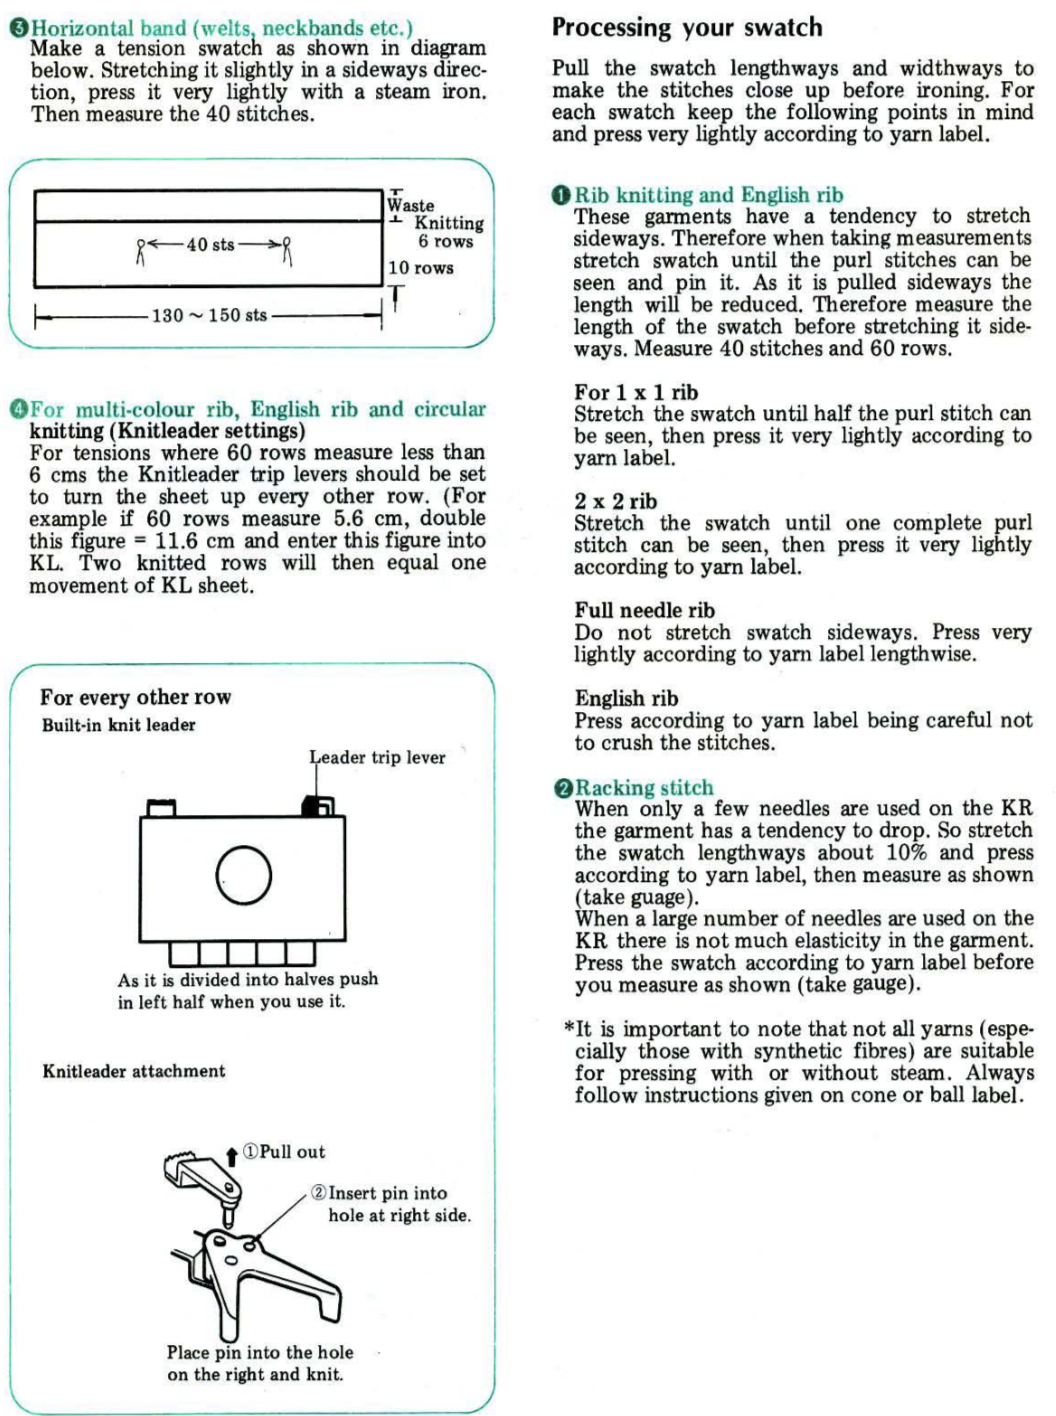
 These illustrations are from the Brother Knitting Techniques Book, now available for free download online
 adding yarn markers in the body of the knit
 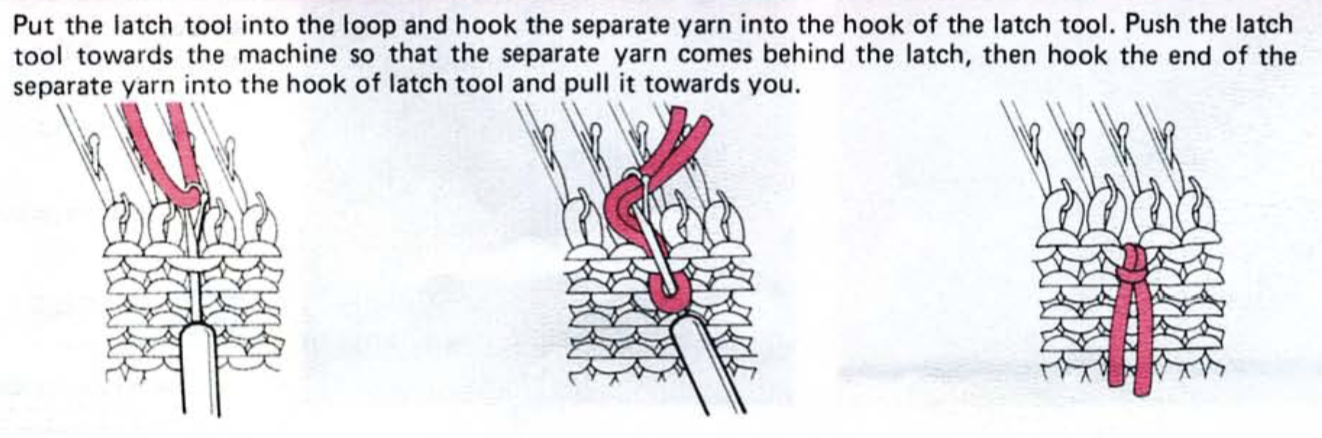 I prefer to measure on the purl side, find the top and bottom of stitches easier to identify
 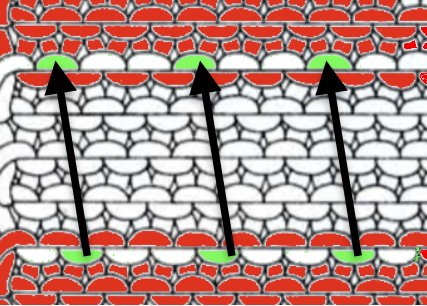 Using the ribber? from the Brother Ribber Techniques Book:
 There are some additional ways to handle measuring swatches. For very textured fabrics or DBJ, the standard becomes a 100X100 swatch. As always, treat the test as you would the finished piece ie by steaming, pressing, washing, etc., and allow it to rest. It is easier to work in mm than inches to start with. There is a ruler supplied by Brother for that purpose, but any good quality ruler with such markings will do. Measure the full width of the swatch in several places. The stitch measurement suggested by the machine manuals is necessary to find the proper ruler to insert into the knitleader. Obtain that number through proportional math. Using the suggested ruler, position it from 0 to 60, or your chosen full-width stitch count on your swatch, on more than one place from side to side, turning it over, or choosing another tape as needed to match the stitch indicators.
For height: draw a line on your knitleader mylar that equals your mm row measurement. Set the leader for the corresponding value, air knit 60 rows to check that that setting is the appropriate one as well. If it is off, check that the mm calculations, corresponding settings, and proper trippers were chosen. If the results are satisfactory, the mylar is set back to row 0 and knitting continues.