The previous post elicited a Facebook query as to whether it might be possible to create solid shapes within the field of brioche vertical stripes. The inspiration for the query was a hand-knit pattern published in Ravelry 
https://www.ravelry.com/patterns/library/pariss-brioche-scarf
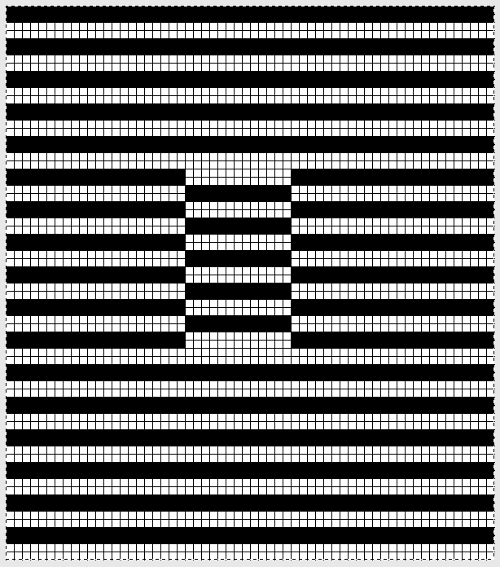
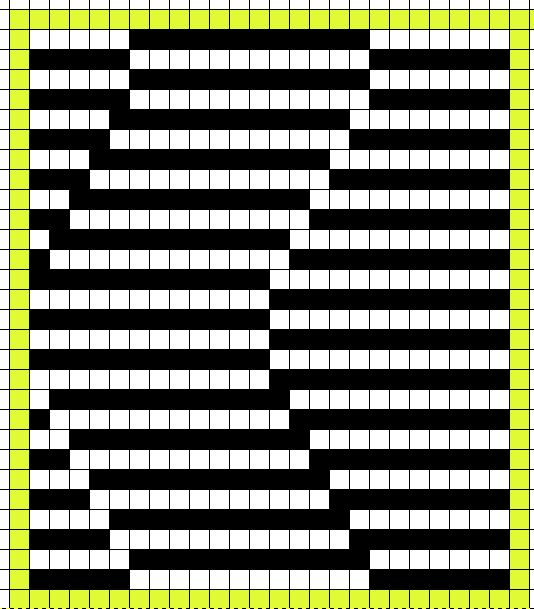
Many terms are used in instruction manuals and published directions. In my notes I will refer to fabric with tucking on both beds as full fisherman rib, tucking on one bed only as half fisherman. These were my first attempts at exploring the inspiration idea, the fabric has inherent differences as it requires both slip and tuck stitch settings, so technically it is neither fisherman. Knitting happened on a random drop stitch day, which explains the patterning interruption errors.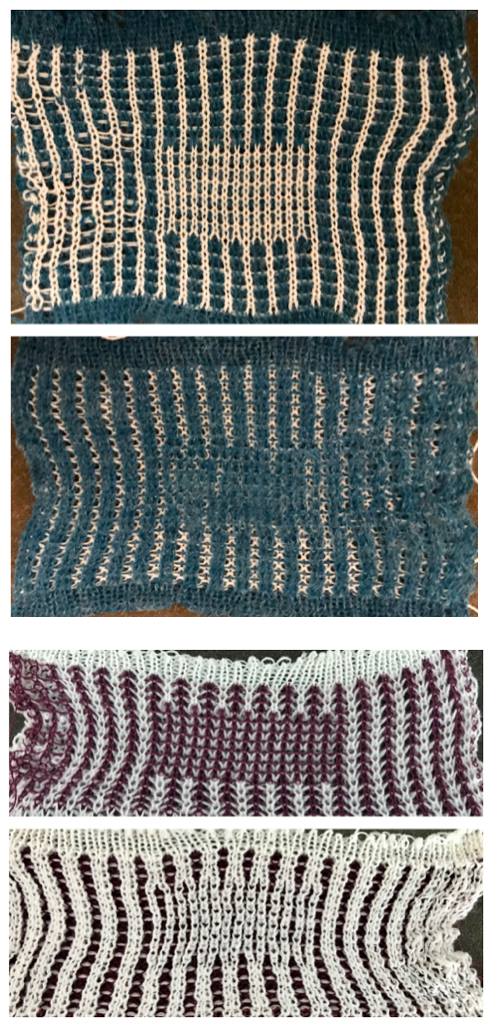 When attempting to knit isolated geometric areas on a field of frequently tucking stitches, automating the task when possible makes the process easier and faster. This was my first “diamond” pattern repeat, suitable for a punchcard machine as well. The design is illustrated on the left, converted to punched holes/black squares/pixels on the right
  The knit carriage is set to tuck throughout. The programmed repeat will alternate the knit/ tuck functions across the bed based on black squares, punched holes, or pixels.
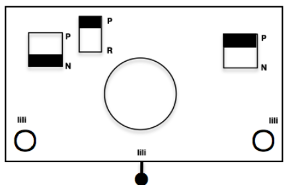
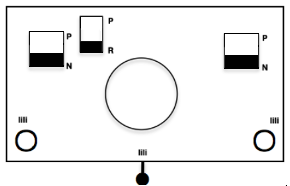
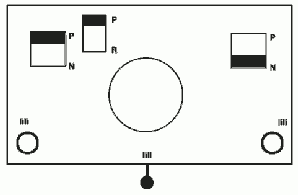
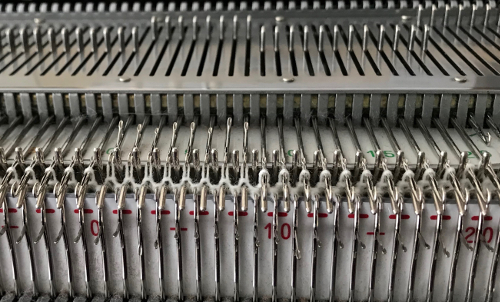
 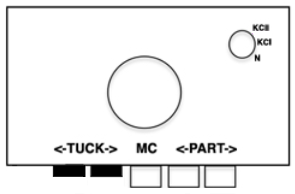 For full fisherman rib (top swatch) the ribber needs to tuck in one direction only, opposite to the action taking place on the main bed. A choice needs to be made on either of these 2 setting directions based on needle selection on the main bed and stays fixed throughout knitting. The ribber is set to knit on even-numbered design rows on the card, to tuck on odd. Row count numbers may be different than design row ones depending on row counter settings by the operator or built KM ones. Below are tuck settings for to the right on top, to the left on the bottom.
 For half fisherman rib (middle swatch), the ribber is set to knit with every pass.
 Note the half fisherman fabric is narrower than the full. Also, I am not used to my 930, overlooked that the machine was set for isolation, so its bottom diamond-shaped repeats are incomplete.
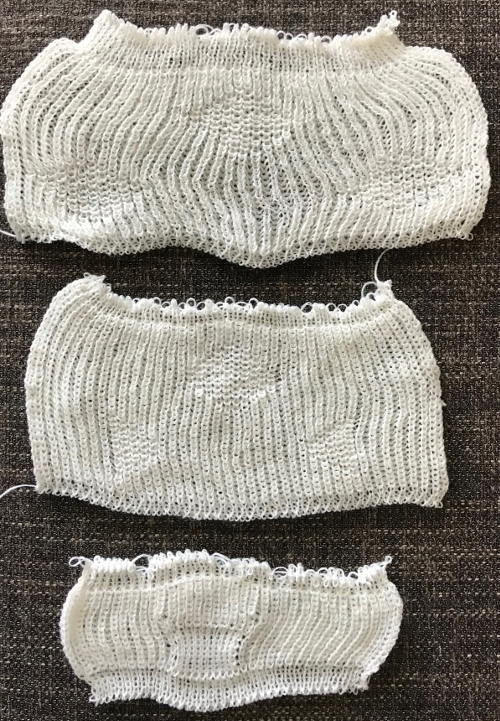
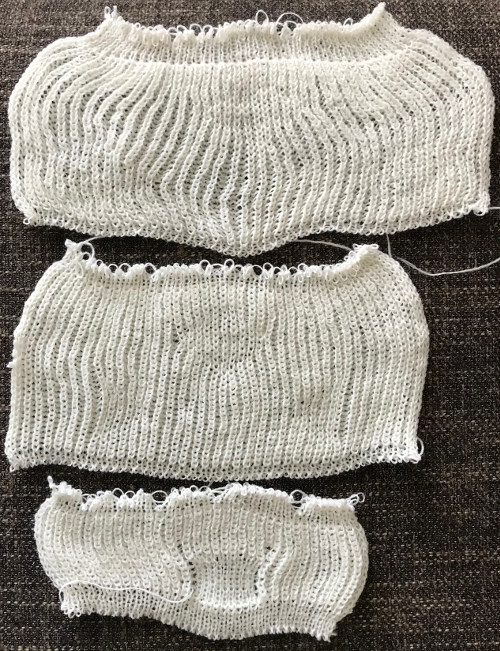
In the bottom swatch, I tried to produce a more distinct shape on tubular tuck created with only knit stitches on both sides of the fabric. Hand selection on the alternate beds on all tuck rows produced knit stitches in the desired area. A needle out of work made it easy for me to find a proper location on the needle bed.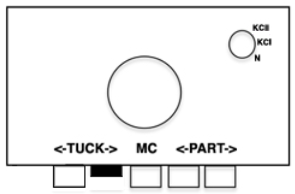
 Getting back to automating at least part of the process for such shapes: the repeat needs to be altered
 main bed will be knitting the black squares in the chart on the right on every row, tucking the white ones. When the ribber carriage is on the side appropriate for it to tuck the following row and no needles are selected in design segments on the top bed (odd-numbered design rows, ones with the majority of black squares, tuck may not be used in those locations because then the resulting stitches would be tucking on both beds with nothing holding the tuck loops down.
 bring all needles between selected main bed needles up to hold on the ribber so that they will knit while the remaining needles tuck on the next pass of the carriages.
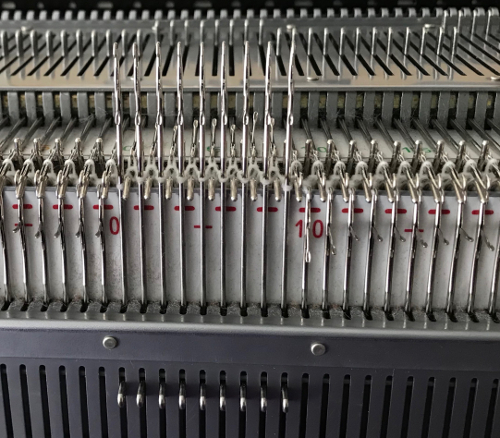
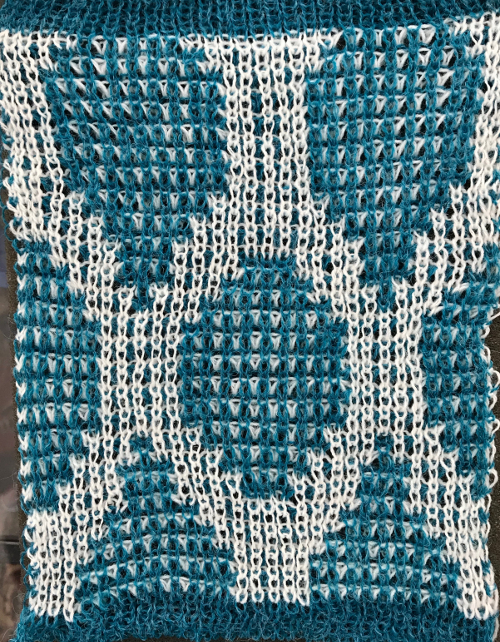
 In my sampling, the ribber was set to tuck when moving from right to left. Below is the resulting swatch, shown on both sides. Part of one diamond shape is missing due to the fact I was concentrating on moving needles around and missed the change in selection on one side of the machine.
 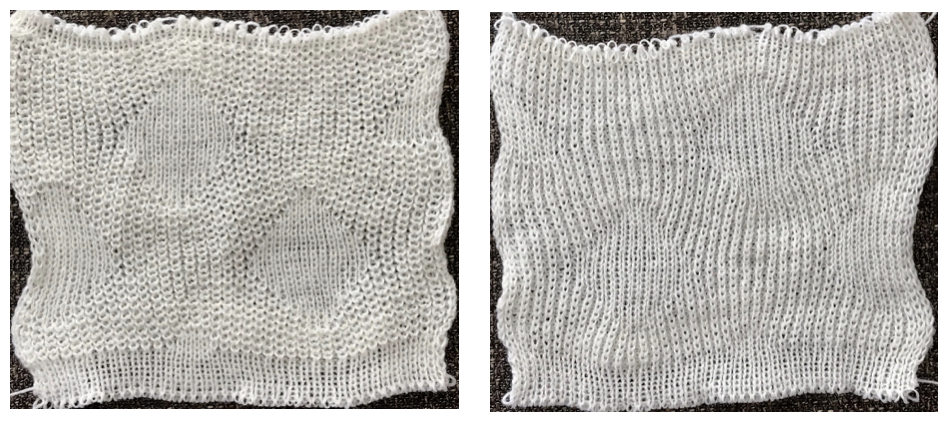 Back to the original method used in the previous post where ribber settings are changed from knit to tuck <– –> every 2 rows along with color changes. I chose a design that would make it easy to identify the location of non-selected needles on the main bed in rows where the ribber will be set to tuck in both directions. The result is interesting, but the solid areas, narrower than the remaining knit, are in the opposite color to the dominant one on each side, the reverse of the inspiration fabric.
 When needles are not selected on the main bed, interrupting the every needle selection.
 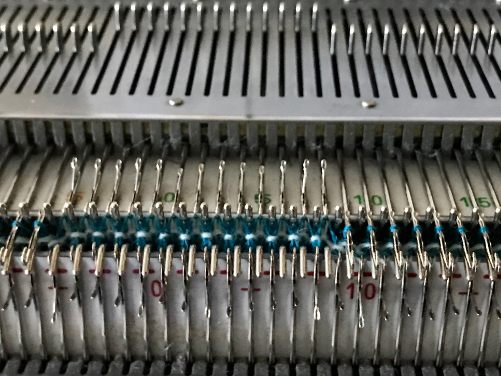 Bring all needles on the ribber between selected needles up to hold on each of the 2 passes from left to right, and right to left. Stitches on those needles will knit rather than tuck
 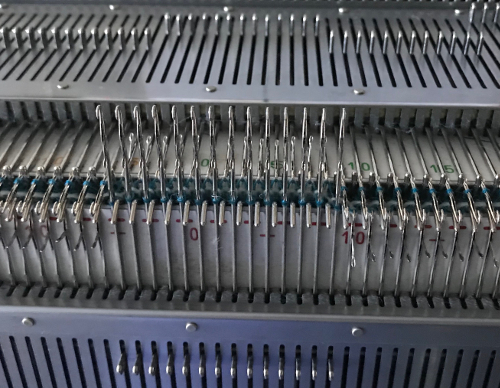 resulting in this fabric
 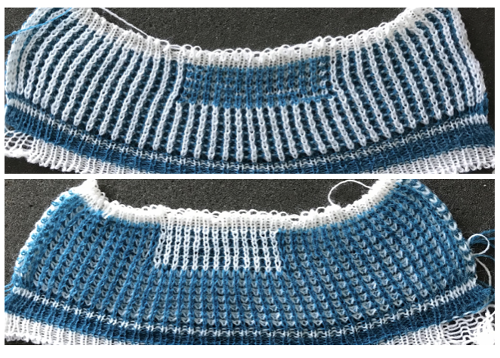 The first swatch at the top of this post was achieved going a very different route. Two knit carriages were used to select and knit from opposite sides of the machine. Each carried one of the two colors. When working with the first color and coupled carriages the main bed is set to tuck <– –>, the ribber to knit <– –>. The second color is knit using the main bed knit carriage only, set to slip <– –>. A knit sinker plate may be altered and used so as to knit on the main bed only rows, adjustments to it are shown in the post: 2018/04/15/ribber-fabrics-produced-with-2-knit-carriages-selecting-needles/. The chart for my working repeat with a multiple of 4 rows in each pattern segment, color changes every 2 rows indicated on right
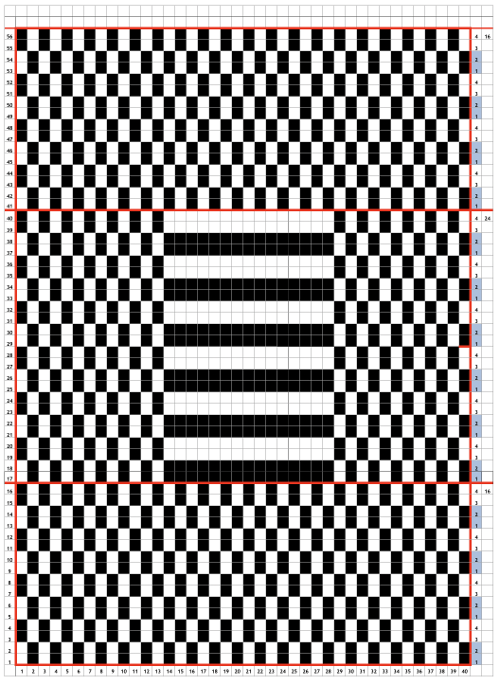 trying to produce a diamond shape using this technique, my first repeat had arbitrarily placed pixels:
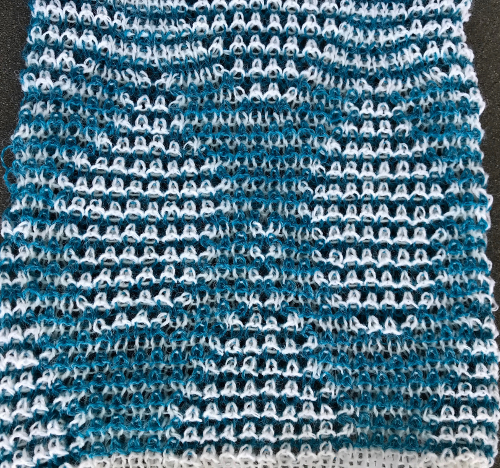
  the cam settings on the right of the swatch images correspond to those used in each swatch segment. Colors were changed every 2 rows throughout. The first 2 rows in the pattern were knit in a tuck setting, followed by 2 rows knit in slip. In segment B when no needles were selected on the top bed, all those needles were brought out to hold before knitting to the opposite side. Because every row is now knitting in the corresponding color changes the result is a striped pattern. Segment C is knit with both carriages set for 2 rows as in C1 alternating with knit carriage only set as in C2. At that point the color being carried knits only on the ribber, skipping non selected needles on the top bed, avoiding the striped result. A float is created between the beds in areas where no needles are selected that will be “hidden” as one returns to knitting in rib with 2 carriages.
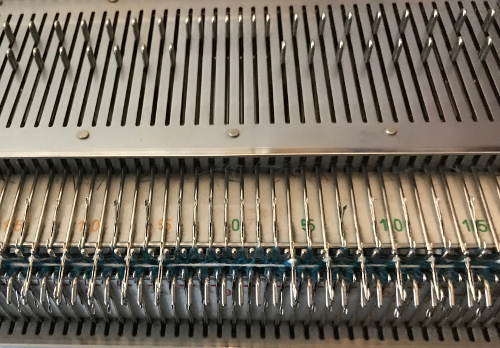 The arrow in the chart points to an area where two colors were picked up with the color swap rather than one. The resulting swatch samples
Analyzing the result in section C: the diamond is the same color on both sides, whereas the initial rectangular shape experiment reverses the colors. Reworking the diamond repeat in segments that are each a multiple of 4 rows: 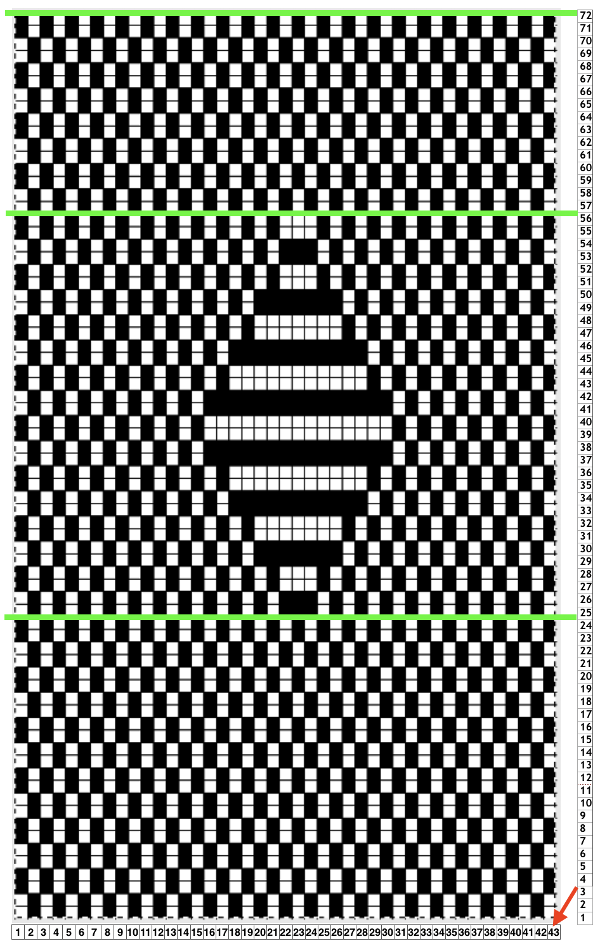 Other considerations in DIY designs. The background repeat for this pattern is actually composed of units 2 wide by 4 rows high. If the pattern is intended to be repeated across a larger number of stitches on the machine bed than that in the chart, it is always worth tiling the image to pick up any errors (sometimes happy design features). Tiling in width readily shows an error
 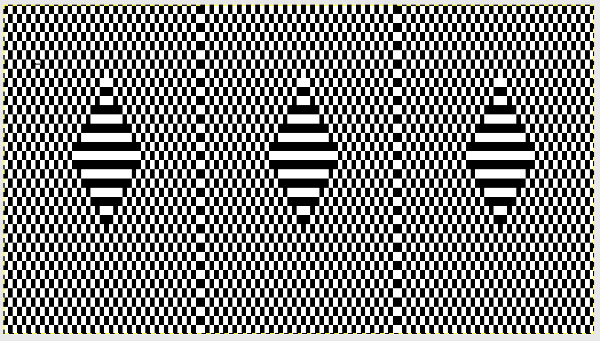 tiling in height as well proofs row intersections as well
 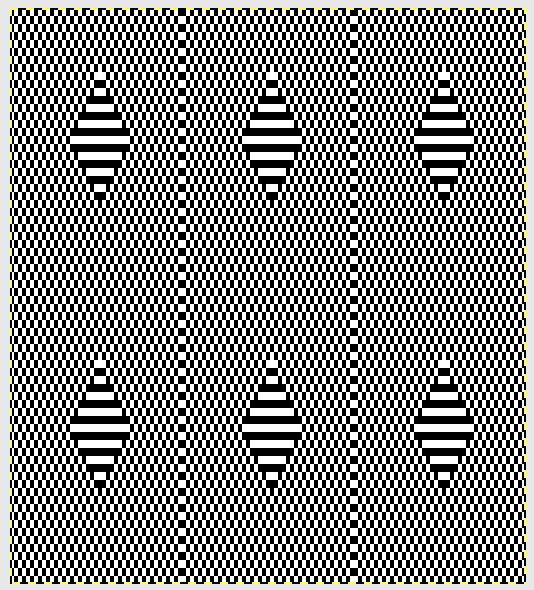 tiling the corrected width repeat, now 42 stitches wide by 72 rows high
 sometimes tend not to keep immediate notes when I test ideas, which often comes with a price. I knit my first swatch using this repeat beginning the pattern with 2 rows of tuck, resulting in this fabric (and some randomly dropped stitches once more) with the same color diamond on both sides:
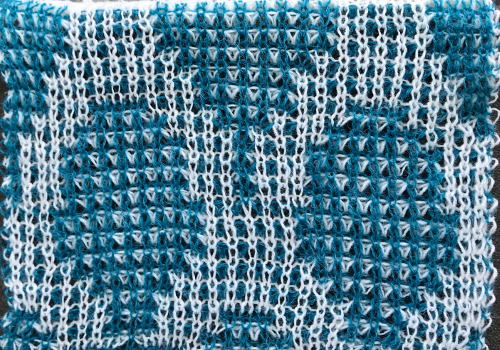
 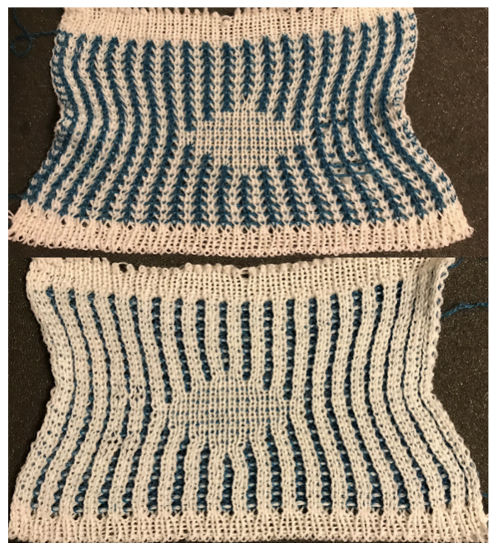 Beginning the pattern with 2 rows of slip stitch on the main bed only mirrors the swatch at the start of this post. Where no needles are selected on the main bed, with passes of the combined carriages, two rows of tuck will now be produced, resulting in the wider geometric shapes and the increased bleed through
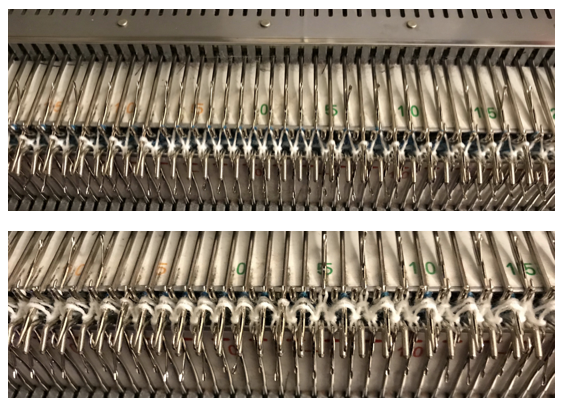
 The tuck loops created by the white in this instance have the elongated slip stitches in the alternate color (blue) partially covering them, creating the darker geometric shape in the top detail photo. The blue is thinner than the white, the effect will vary depending on yarn weight and tension used for the main bed yarn. One can begin to observe the change in width in areas with more stitches tucking.
If the aim is to have a tighter, more clearly defined diamond, after the swatches rested, the swatch that began in slip stitch setting appeared to “work” better to my eye, even with the single color geometric shape on both sides taken into account. Ultimately the choice is a personal one. The wider vertical stripes created in the white yarn in the slip combination fabric happen because of the 2- stitch wide repeat on the top bed as opposed to a single needle one in a true fisherman knit. Because of the slip setting the results will be narrower in width from it as well.
Ayab knitters will need to program any repeat across the width of the intended number of stitches, and use the single setting. Electronic knitters can enlarge the background pattern field easily, or create brickwork, extended repeats.
Arah-paint offers a free program that allows drawing repeats in different orientations with a few mouse clicks. Shifting this pattern must also be in pairs of pixels/black squares in this instance because of the 2X4 stitch background unit. The 21 (half) pixel shift shows an error in its continuity 22 stitch shift results in a “correct” all over repeat
Quite some time ago I experimented with shadow knits including in posts

It occurred to me the same design might work in a tuck rib version. The original repeat was 24 stitches wide, 28 rows high 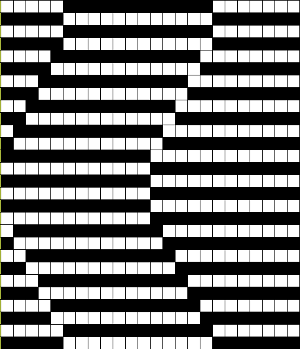 scaled to double length, 24 stitches wide by 56 rows high
  a tile test of the new pattern
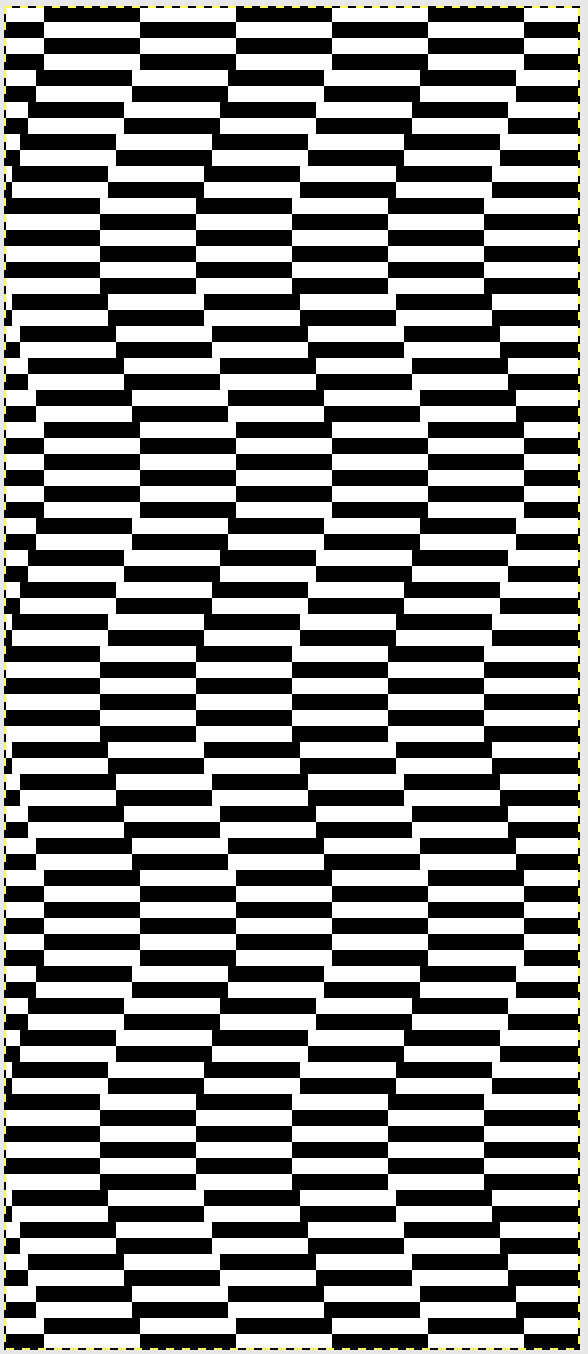
The ribber remains set for knitting in both directions throughout, with the main bed set to tuck in both directions.
Knit tests: the red yarn was very strong cotton, hard to knit smoothly, the blue encountered some stitches not being picked up on the main bed as well, but the concept may be worth exploring further. The main bed is set to tuck in both directions, the ribber to knit throughout. The red and white fabric is considerably wider because of the tension required to get the red cotton to knit.  Better stitch formation results with the different yarn used for the second color
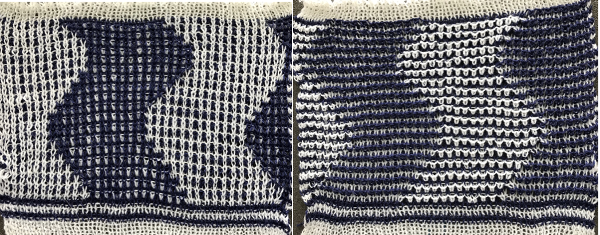
And lastly, a first quick adaptation of a design previously used for drop stitch lace, which requires some further clean up the yellow squares indicate loops tucking on both beds at the same time, the repeat on the far right is the one tested after eliminating those areas. It is 14 stitches wide by 80 rows high 
 an “improved” version, the choice remaining as to whether to make all the blue shapes pointed at top and bottom or “flat”
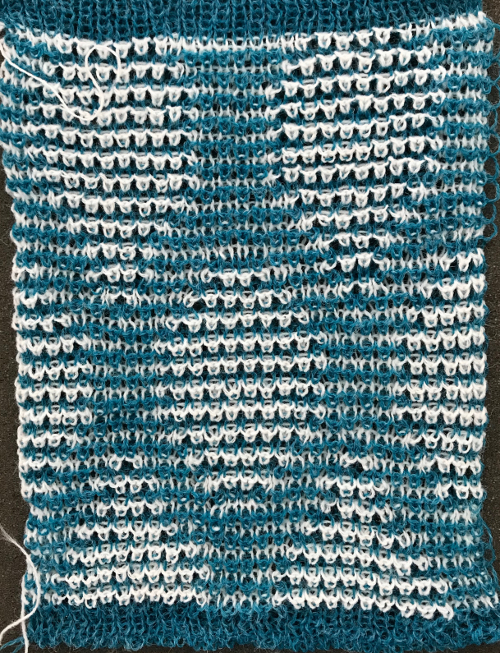
 this is my repeat, tiled. It is 14 stitches by 84 rows
 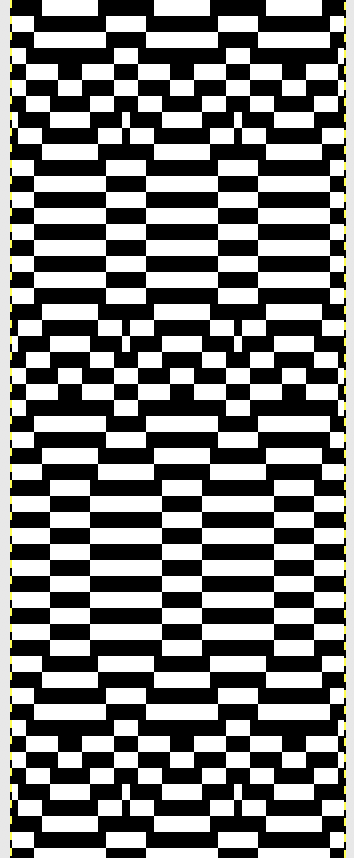 The single 14X84 png
 ![]()
I tend to do all my knitting unless by accident at that setting. The other settings are supposed to allow for tighter and looser rib. I have seen ribs on students’ final pieces too loose or tight because of changes in settings that were not noticed until the garment was finished. There are so many variables in rib as is that I have the preference of simply leaving the slider in the same position. By doing that I also have one less piece of information to keep track of in notes (mine can be awful or inconsistent at times, particularly when something is “obvious” in that instant in time)
Hi,
Intellectual curiosity of a self study learner: why is the ribber carriage slider set to lili? i thought that was just for dbj.
looking forward to any of your experiments… you are quite welcome
Yay!!i will be following your instructions carefully during my easter break.thank you.
Thank you. My hope is that my sharing will help spark curiosity and explorations on the part of those who follow my posts.
I love the way you experiment and how one thing leads to another. Our machines are fantastic and endless in the variety of fabrics we can achieve. Thanks for sharing.