An example of a common ruffle/ frill is produced with variations using both beds: cast on for every needle rib, knit X rows at full fisherman rib, followed by X rows at half-fisherman, and then possibly by plain rib for X rows, EON rib or even following with transfer to the single bed for X rows, bind off. The yarn used in this swatch is a wool-rayon blend  Needle transition arrangements to produce a ruffled edge:
bring every needle into work, and cast on every needle rib.
Knit a minimum of 6 rows.
Transfer every other stitch from the ribber up to the main bed
adjust tensions on both beds, and continue in rib to the desired length. The yarn used in the swatch is a 2/8 wool on a Brother standard, which pushes the machine in every needle rib. The appearance of the ruffle will vary, as usual, depending on the yarn’s thickness, fiber content, and knitting tension adjustments on either or both beds. 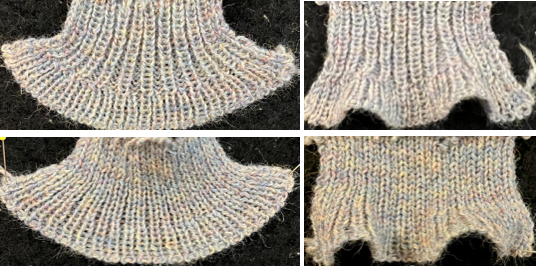 Exaggerated frilled starts: no cast-on needed, working on every other needle patterning on both beds. A few rows will produce a curly edge, and more rows a ruffle proportionate in depth to the number of rows.
 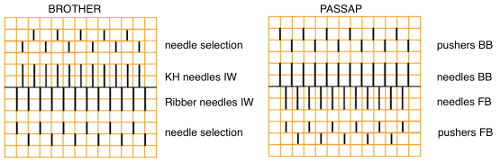 Passap KM: AX/AX or AX/KX 4-10 rows, continue in plain rib N/N
AX/KX 4-10 rows, knit 1-row N/N, transfer to 1X1rib, continue to knit in plain rib
racking cast on
BX/KX 6-10 rows, continue in plain rib
Pushers in the upper work position (UWP) will make the needle knit while those in the lower nonworking position (NWP) will respond to lock patterning settings. E6000 either program the front bed for the pattern (1000) or bring every other pusher completely out of work to avoid having them return to work position after the first pass. The motif repeat for 8 stitches/rows usable on any machine
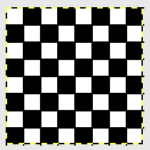 Working it on Brother becomes a bit fiddly. Whether working on a punchcard or electronic KM, it is possible to introduce patterning on either or both beds as seen below. I preferred the look obtained with the racked cast on at the start. Setting up the Brother machine: program the repeat, half pitch for every needle rib, air knit to place the pattern on the bed so that the first needle on the left (or right if you prefer) is preselected forward and will produce a knit stitch on the first row knit. The yarn used is a 2/24 acrylic
 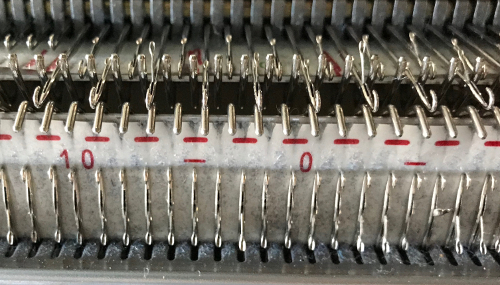 Both beds are set to knit, and lili buttons will be in use. On the ribber bed, the second needle from each side will knit, so starting on the left side of the ribber the first needle to the right of the first needle in work on the main bed is brought into work. It will need to be the second needle in work when the carriage moves from left to right in pattern knitting
 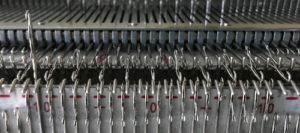 now another needle on the ribber is brought in to work on the far left, it will tuck with lili selection when moving from left to right
 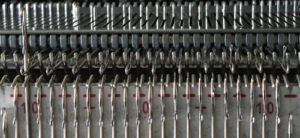 remember the ribber rule with lili buttons: an even number of needles must be in work, this shows the start and end of selection on the ribber on alternate needle tape markings, as required
  It is sufficient to continue with no circular rows after the first zigzag one. The start will be “loopy”, but will improve when the bottom row is stretched vigorously. In this Brother version, the first row of the pattern needs to be selected toward the carriage and yarn after the first pass by the paired carriages. Beginning COR, a row is knit to the left side. The knit carriage is removed from the bed and brought back to the right. COR: a “free pass” can be made with the machine set to tuck in both directions as well as to slip. Using tuck avoids errors in recalling to switch cam button functions. Using KCI (or II) the carriage with no yarn makes the free pass preselection row to the left, where the carriages are coupled again. I used KCI for my swatch. Before continuing to knit make certain lili buttons are engaged, that both carriages are set to tuck in both directions, and continue in pattern for X rows. Switch both carriages to N/N and continue in every needle rib (or knit 1-row N/N, transfer, and continue in EON rib or single bed). If stitches are transferred for EON rib or stocking stitch knit on a single bed, the yarn tension will need to be adjusted.
To review: lili buttons on ribber, checking needle selections on both beds. Cast on with no circular rows, zigzag only, option 1: tuck <– –>, tuck <– –> loops will build upon every other needle for single rows, so the frill can be continued for any desired height
option 2: tuck <– –>, tuck <– –> to desired # of rows, knit 1 row N/N, transfer for 1X1 rib
option 3: combination slip/tuck
With no circular rows after the zigzag note the edge, and the amount of stretch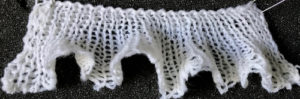
 Using a racking cast on followed by the same carriage settings as above
COR zigzag row right to left
COL rack 1 to left (increase 1 number on racking lever), KCI (pattern pre-select), program row 1 of pattern, knit one row to the right
COR rack to right (decreasing number) set both beds to tuck, and knit X rows (I chose 10). After completing the desired number of rows continue in every needle rib or knit one row with carriages set to N/N, transfer for every other needle rib, and continue on the EON rib. 
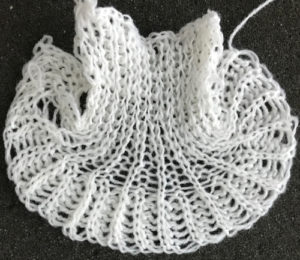 Both pieces compared for width and rippling
I was plagued with random dropped stitches after my transfer to EON rib, one seen above left.
I finally sorted out that I had been using a ribber arm from an older model punchcard machine. When I replaced it with the later model arm shown at the top in the photo below, etched by the factory with #2 (outlined in magenta), I no longer had any problem.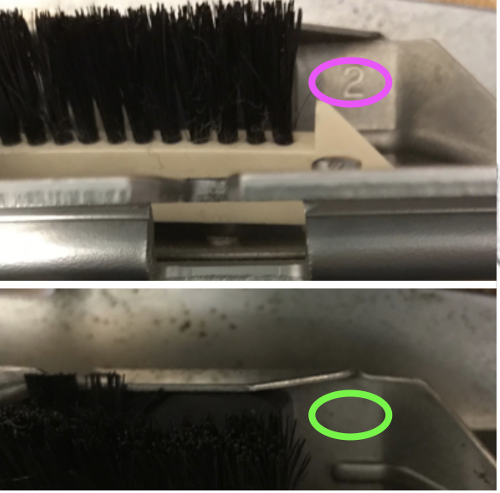
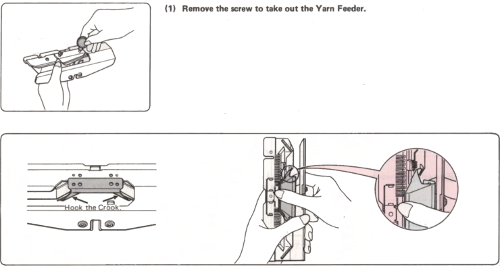
The latch opening plate use and installation
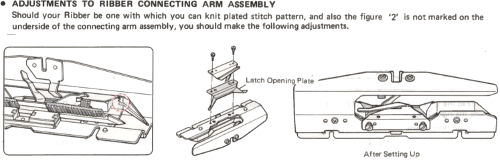
Here the latch opening plate has been secured into place in the connecting arm without the #2 mark. The change in height is noticeable, and brings the unit closer to the needles when on the machine during knitting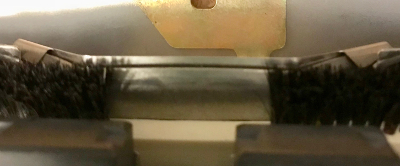
A reminder: if the needle presser bar on the ribber (all plastic) is to be removed, it is reinserted back in with ridges facing, and flat side down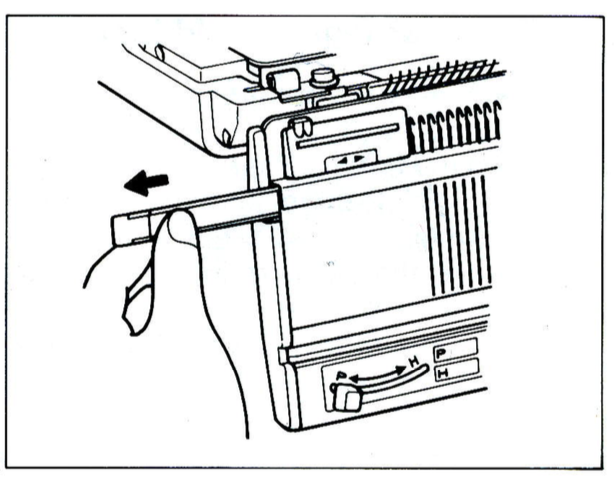
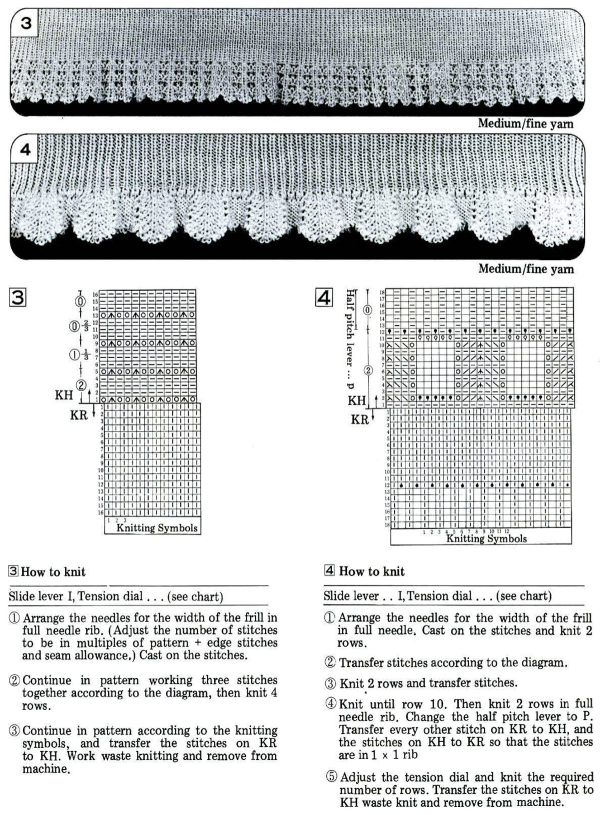
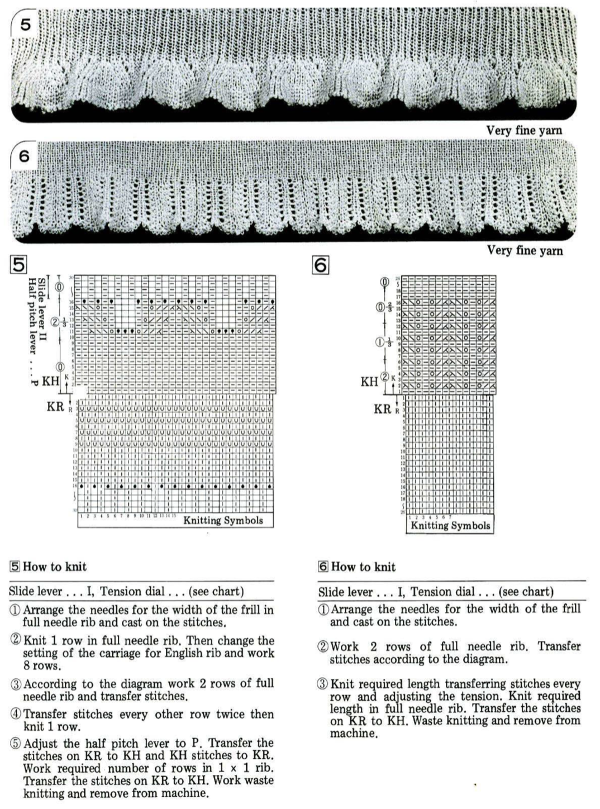
From the Brother Ribber Techniques book: frills and more:pp113-115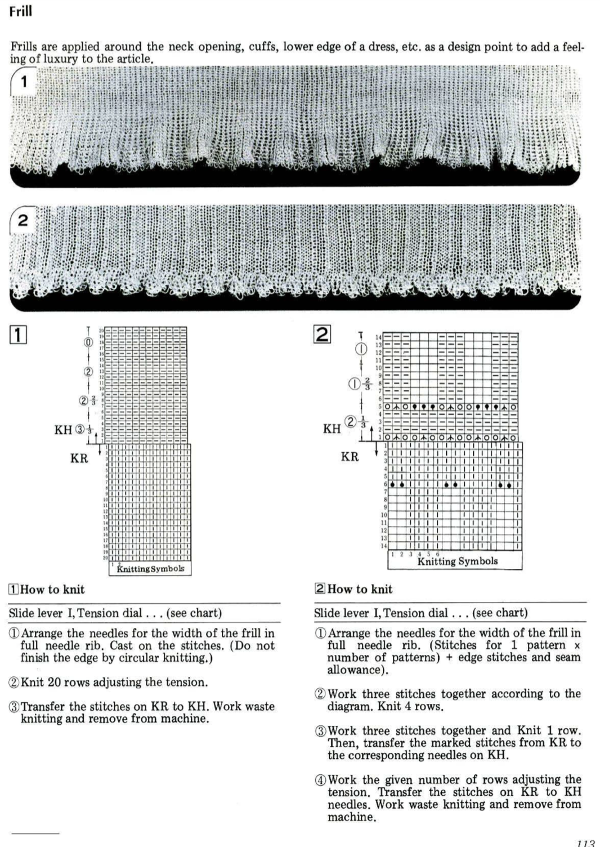
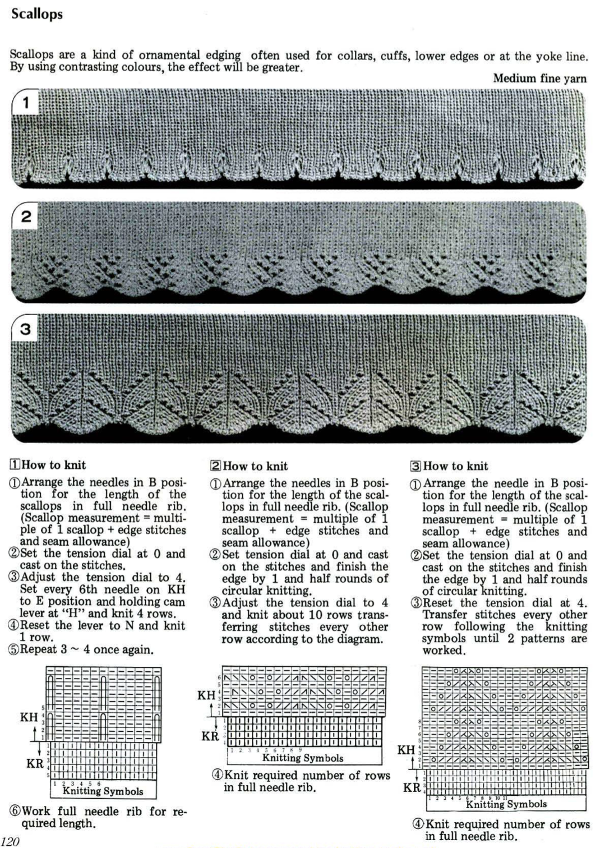
 An intro to scallops: p.120
A previous post on checking ribber alignment