Fair isle is the name given to a pattern knitted with 2 colors in each row. The motifs are easily identified by looking at the holes in the punchcard, or squares on mylar, pixels in programs. While I will be referring to punch card knitting, the same principles apply. Your knit swatch will look like the card, but the design will be squashed, and these designs are generally knit at least one whole tension number looser than when using the same yarns for stocking stitch. The length of floats created in knitting these fabrics is sometimes an issue, and following are some of the methods that help with “float control”.
Altering the pattern: random holes may be punched in addition to those in the motif and shorten the very long floats, providing this does not distort the pattern too much. Iris Bishop is a designer with an extensive library of such designs.
Hooking up floats: this method works best when the 2 colors used are similar. If they are strongly contrasting there is a possibility of show through where the float is knitted on the same needle as a contrasting stitch. Use the single transfer tool to hook up the float into a needle hook above while leaving the needle in the position to which it has been selected. If it is a very long float, it may require “hooking up” several times. Show through can be reduced on machines that preselect the needles, if you can place the float on a needle about to knit in the same color as the float (the needle will be selected to upper working position).

Binding with fine yarn: using a fine yarn, even sewing thread, matching the main color of the design, break off a length for every place that will bind the float down, trying to keep unanchored floats to no more than 5 stitches if possible. Make a slip knot at one end, take it under the first float, and place it onto the needle above, leaving the needle in the position to which it has been selected . Knit the next row, and lay the fine yarn into the needle hook, fastening down the next float by carrying each length horizontally up your fabric and hooking it over your needles as required. Add more pieces of yarn or change colors as needed.

While this method illustrates managing edges of single motif, it also illustrates managing additional threads.
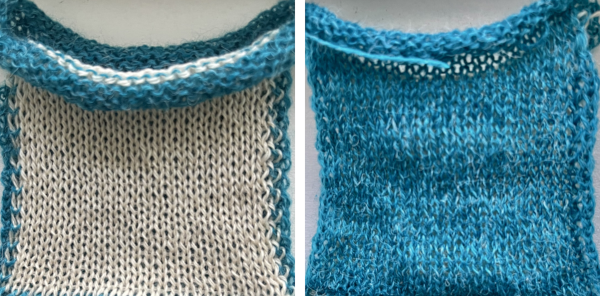
 When knitting only a small area in fair isle (single motif), the contrast yarn will pull away from the edge of the patterning. This may result in holes or ladders to either side of the design. The illustration above and the one below from the Brother 940 manual illustrate securing the edges with spare lengths of the main color yarn. The lines of the yarn are in black and pink respectively for the purposes of illustration. Program the machine for single motif, attach each length of spare yarn to a needle adjacent to those pre selected for single motif, in upper working position. Knit one row in pattern to opposite side. Take the extra yarn length between the knitting and the carriage and place it on the adjacent needle in B position (in background color), knit one row to opposite side, repeat wrapping on carriage side throughout the shape.
Latching: Using the latch tool, pick up a short float below the first long float. Slip it behind the latch, catch the next long float in the hook, and pull it through the first. Continue in this way, latching up all the long floats, and then place the last float pulled through into the hook of the closest needle above that is knit in the same color latched up. As the next row is knit, the float will be caught. The disadvantage to this method is that the hooked floats will pull across the fabric, making it pucker. This technique may be done off the machine as well, with the last float sewn in by hand.


Sewing: sew floats in by hand after completion of knitting by catch stitching the longer floats in on the reverse of the knit. As an alternative a sewing machine and “stitch in the ditch” with matching thread while placing the knitting on the machine and carefully stitching down the valleys between the rows of stitches at desired vertical spacing.

Knit linings: these may be in the form of hems or pieces of knit fabric that you attach as you knit, which could be in finer yarn, large stitches, and not necessarily on every needle. Color matching once again matters.

Bonding with fusibles: suitable for yarns that can take hot, damp ironing. It also stiffens the fabric. Some bonding materials are knit, with stretch in one way and not the other, woven ones have no stretch.
Fringing: long floats may be cut and made into fringes. In this instance, the punchcard may be intentionally masked to cover holes and create intended long floats, which may be later cut. The purl side will now become the “public one”.
Mock weaving: use the reverse side of the fabric for a knit woven effect, one example. The pattern on the knit side may become distorted in a way that could be considered an added design feature.

Decorative floats: use the long floats and twist them, or bind, pick up, tuck behind stitches to make decorative fabrics highlighting the purl side.
Ruching in pattern: hooking up stitches as in hems to enclose part or all of the long floats. For this technique, if a lot of ruching is to occur, it may be best to elongate the original pattern to at least X2.
“Stitching in the ditch”: after the piece is finished floats may be anchored by using a straight, medium-sized stitch on the sewing machine. Use thread that matches the main color as much as possible. Place knitting on the machine knit side up. Stitch carefully and slowly in the valleys between rows of knitting in areas with longer spaces between ground and contrast. The same method is sometimes used at standard intervals to secure FI floats when using yarn such as chenille to help avoid “worming” (yarn slipping out in loops) along motif edges as time passes.
Fringing: deliberately planning long floats with the intent of cutting them to create fringed effects. The purl side of the fabric would be used as the “right” side. Specific areas of punchcards could be masked with tape to create wide float areas amid smaller designs, and electronic machine users can control the placement of pixels. Both can vary the designs by exchanging yarn positions in the sinker plate feeder and/or adding additional color striping.
Please note: try any of these techniques on swatches first. There may be changes in the surface of the knit on the knit side such as puckering or bleed through that may require changes. If combining techniques in a garment, each should be tested. If combining FI and “plain knit” one possible solution is to knit the latter in a simple FI pattern using the same color in both feeders, keeping similar texture and weight in both areas. If using several color changes, the card may be marked to help track them. If self-drawn, repeats lining up in width and height should be knit tested as well.
Combining patterned stripes in stocking stitch: the latter will be single density and different weight than FI. In FI two yarns knit simultaneously, producing a double-thickness fabric. Test on swatches whether doubling the yarn for single color rows works for you. Another option is to knit “plain” bands in a 1X1 fair isle pattern, using the same color yarn in both feeders.


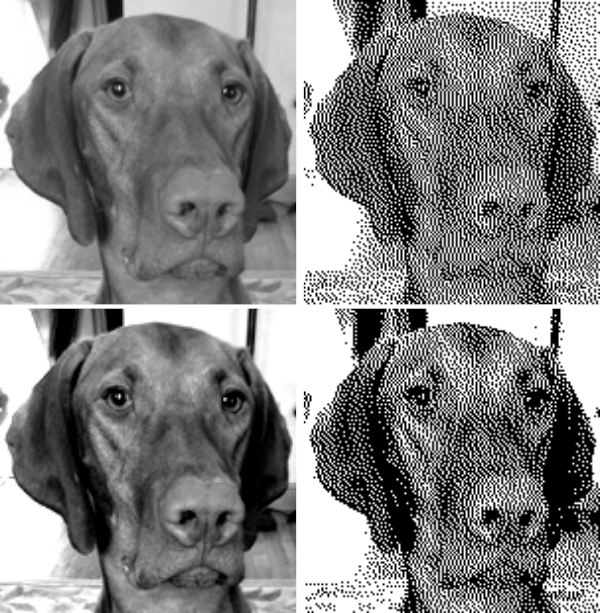
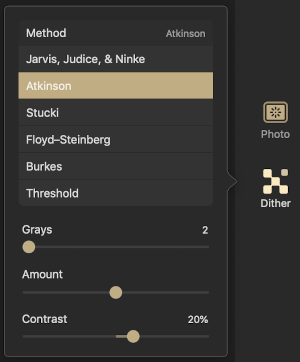
 May 24, 2019 a greyscale mode scaled image processed in
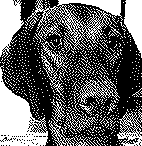

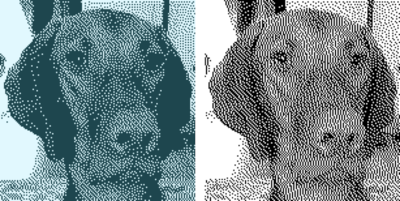
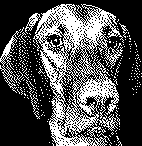
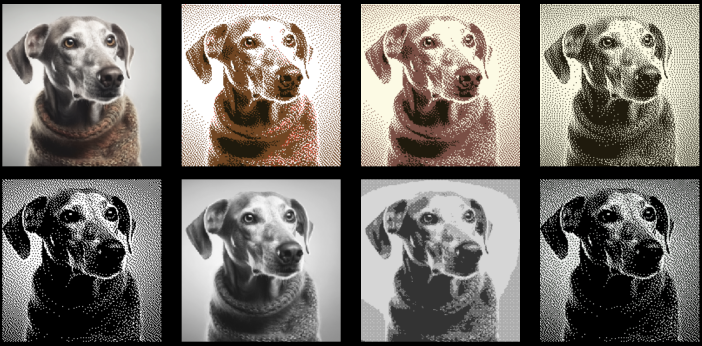
 The image is used with the kind permission of Rocco’s owner. I have used this image before, when I posted previously on some ways to reduce colored images to B/W for possible knitting using a Mac computer, please see post on 013/03/14/ color-reduction- conversions-mac-os/. Gimp offers some alternatives to the familiar dithers and is available, free, for both PC and Mac platforms. Tutorial links on Gimp edge detection available online as of May 2019 are listed at bottom of the post.


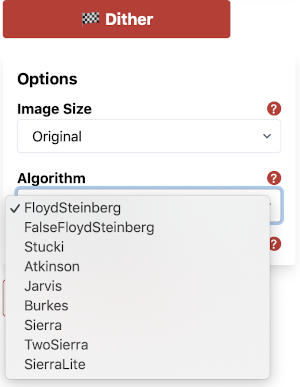
 Difference of Gaussians


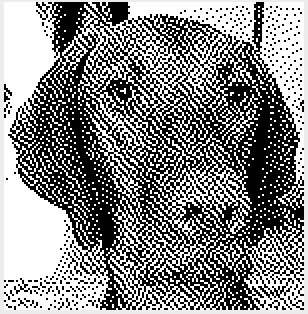
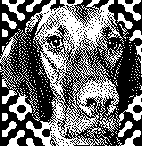
 adjusting B/W with Threshold
 after a bit of “tweaking”
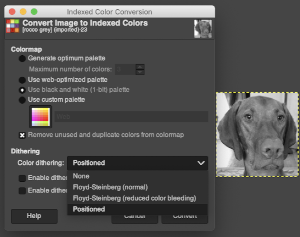
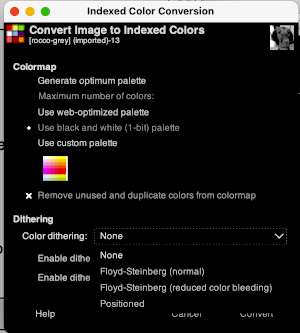
  Image_Mode_Indexed, rendering it “knittable in 2 colors”


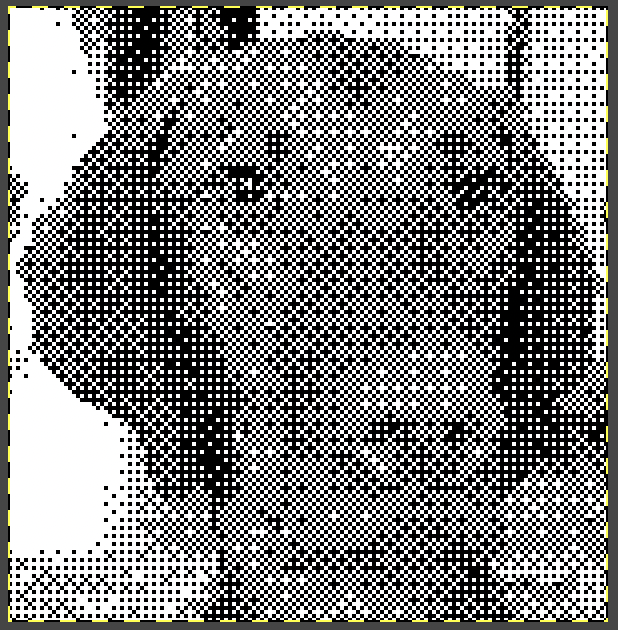
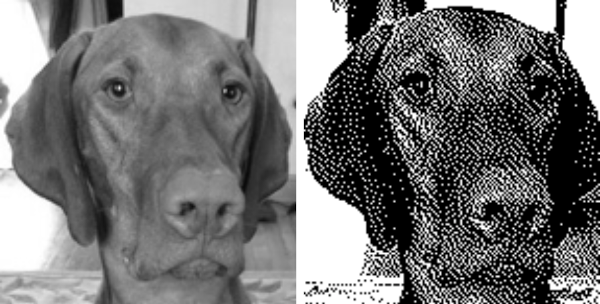
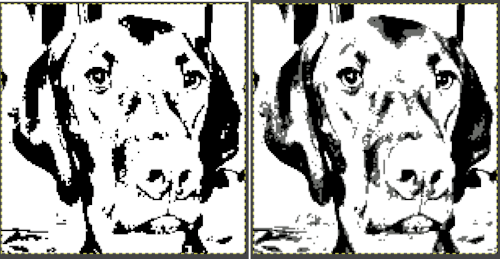
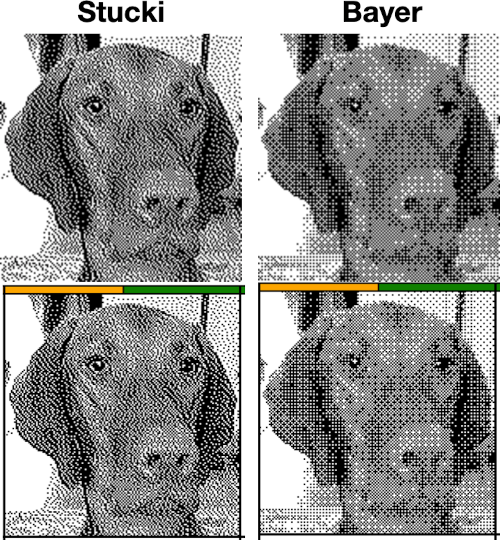
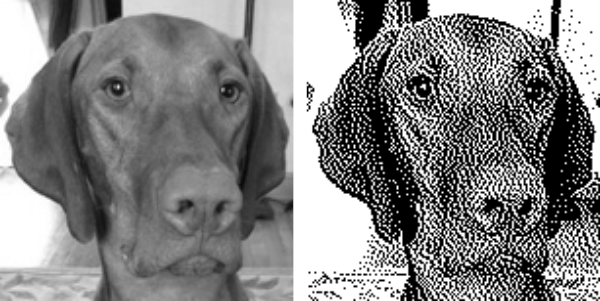 default Stucki
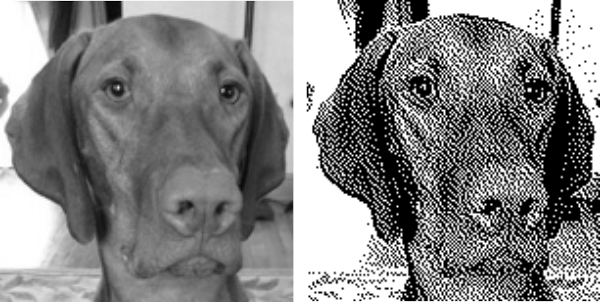
 Check dithered results, downloaded images may be in RGB Mode. Prior to any knitting, they will need to be converted to B/W indexed.
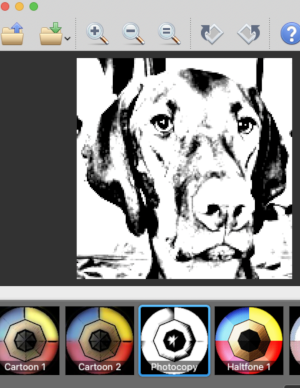 imported the result into Gimp and saved it in indexed 2 color BW and in turn, 3 color indexed mode, no color adjustments, finding the result pleasantly simple
 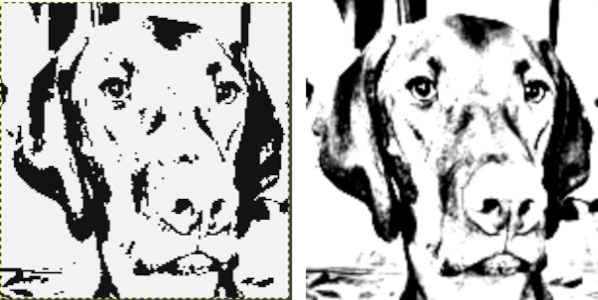 beginning with the greyscale generated image followed by Mode changes in Gimp, indexed 2 color BW, then indexed 3 color, there appear to be very subtle differences with a bit more detail:
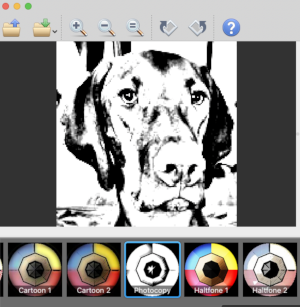
 It is possible to reduce images to 4 or 3 colors using the program as well: a slider for color count is used to choose the final number of colors in the reduction. Again, these instances have no added manipulation
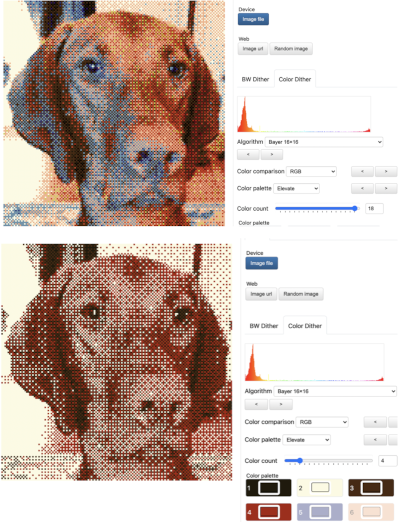
 To retain the quality and size of the dithered image, download it, rather than using a screen grab. The software used to separate the chosen dither may alter the result somewhat. I am writing my posts using an iMac M1 with OS 12.0.1. At this point Ayab is not operable, img2track does open images, but in this case, with interesting distortions, and it does not download any files at all.
  Yet another dithering
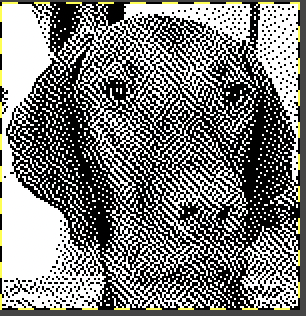


 change the second value


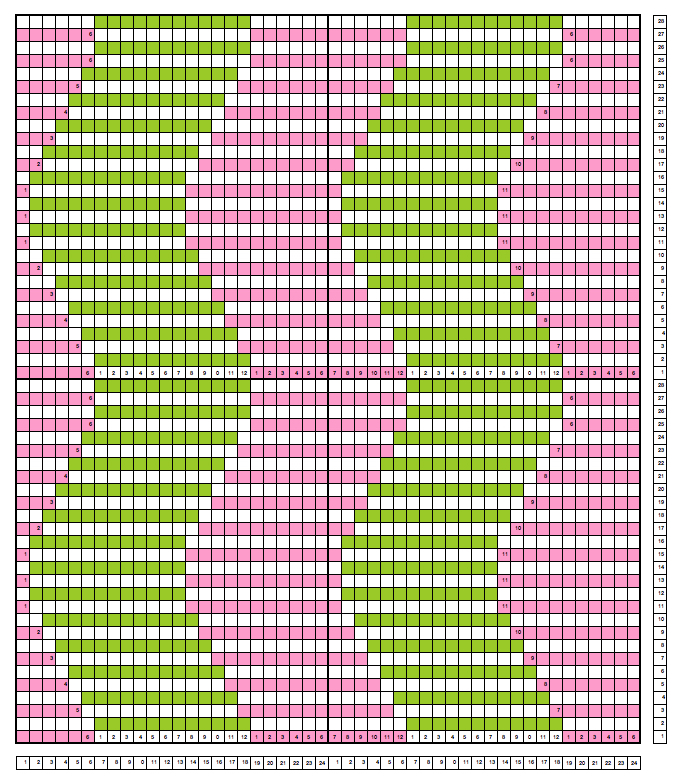
 On odd-numbered rows beginning with row 1, mark all empty squares in the even-numbered light-colored row immediately above it with purl symbols.
  All unmarked stitches throughout the design are knit, whether, on the “wrong/right” sides, all dashes are purled, patterning occurs on the second row of each color. To visualize the full pattern one may use the add row below feature to expand the graph (the chart below is missing the very first row).
  Now add the second row of each color and grounding stripe (s) at bottom of the repeat. Most patterns will start the illusion immediately after casting on with dark color, row 1 above. I was interested in my sample having a border of sorts on its top and bottom.
  The resulting knit swatch

 the actual repeat
  color inversion begins on row 1 and follows every other row (if numbered these would be odd rows)
  testing the repeat through filter/ map/ tile
  a working chart that can be printed to suit with dark/light row markings and blank squares for tracking knitting rows in the execution of the pattern
  A larger version with stitch and row counts marked. The chart represents half the rows in the actual knit. The cast on row counts as knit row 1, color 1, and following the chart beginning with row 2 knit the black squares and purl the white squares. *Change color, knit one row (odd#), on the next row follow the chart, knitting the black squares and purling the white (even#).** Repeat from * to **.
 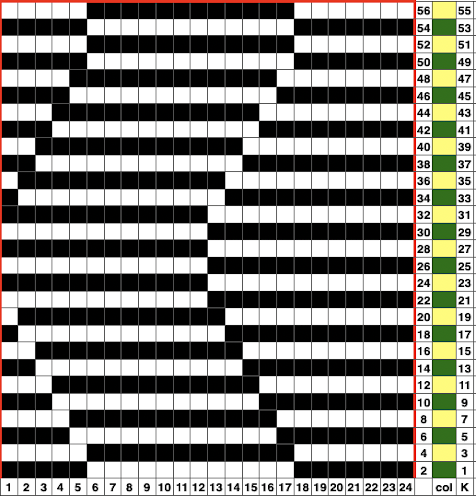 the knit swatch: “shadow side”

 Follow up:
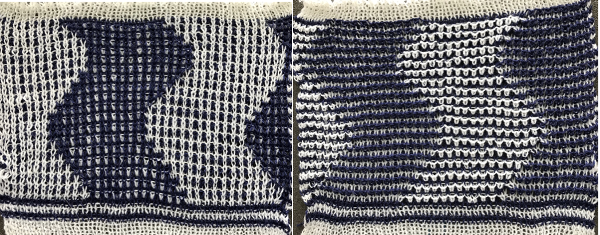


 rear view


 When all main bed needles are preselected, the ribber is set to slip for 2 rows, only the main bed will knit. When there is no preselection on the main bed, the ribber is set to knit, no stitches will be formed on the main bed, so each surface remains separate. The knit carriage is set to KC1 to ensure the sides of the tube will be sealed. If two knit carriages are used to select needles, then it is possible to easily adjust tension for the alternate color if that is deemed needed.