A return to loopy knits

WORK IN PROGRESS 

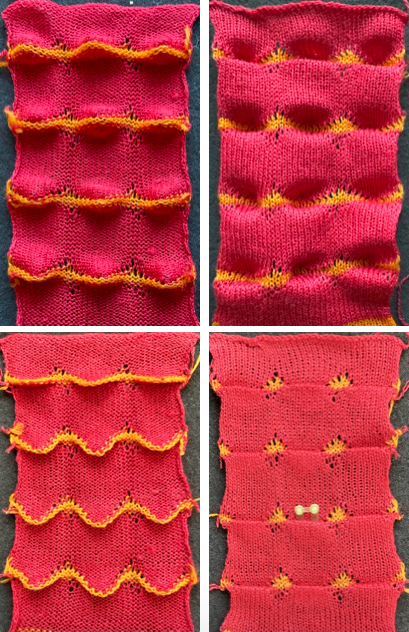
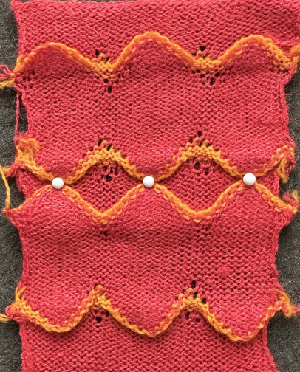
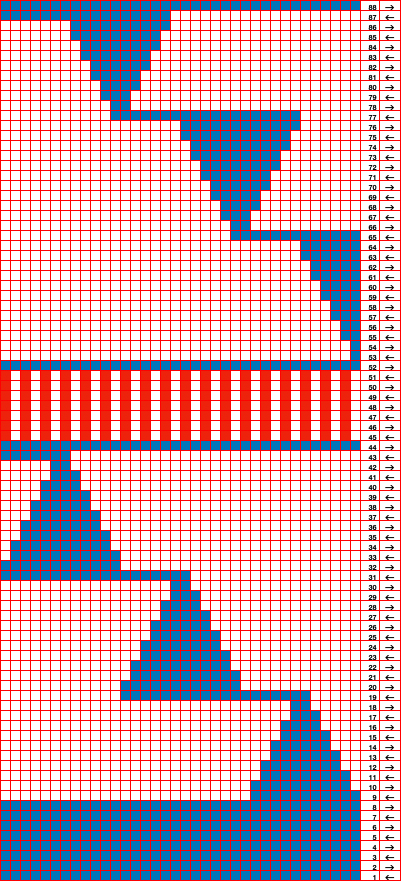
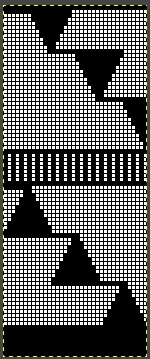
Fringes, loops, and pile/carpet knits are populating Fall knitwear runways.
Pile knitting is best executed on Studio knitting machines. Love the knit structure? find a Studio KM to borrow for the project.
Fringes are essentially long loops, and share principles with knitweaving.
Previous posts
Pile knitting on Passap and Brother KMs 4
Pile_carpet stitch knitting on Passap and Brother KMs 3
 
Pile knitting on Passap and Brother KMs 2
 
Pile knitting on Passap, Brother, and Studio KMs 1
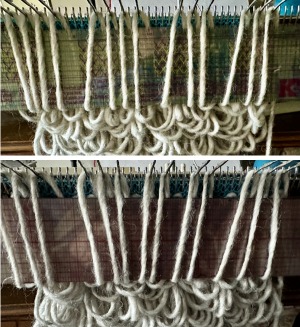
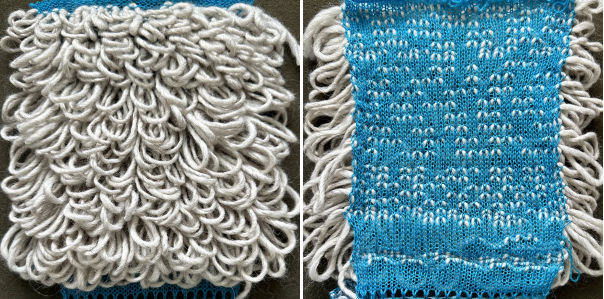
With Studio KMs outside the range of possible use, there are loop techniques that can be executed manually on any gauge machine
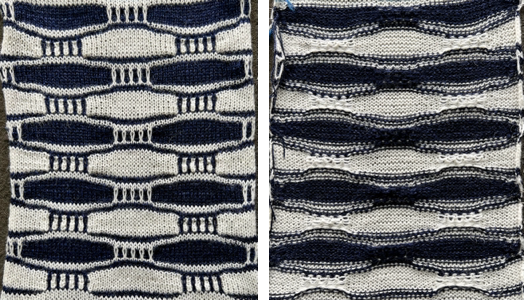
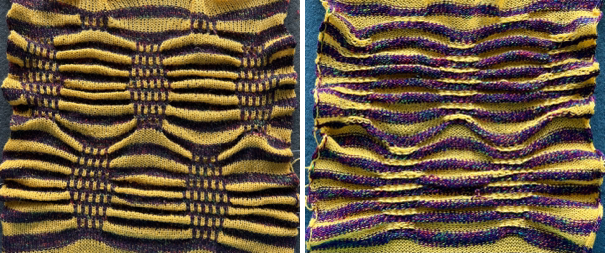
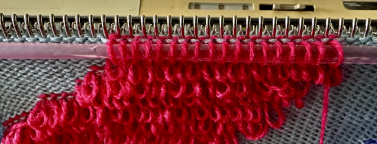
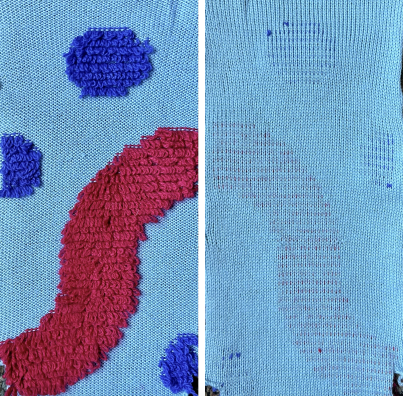
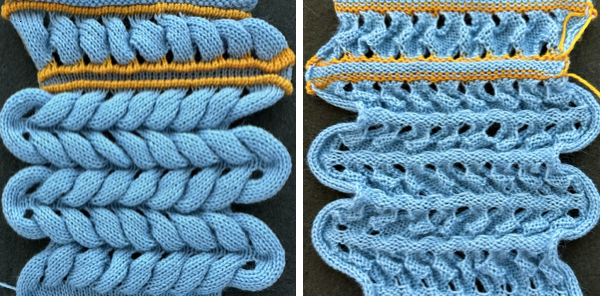
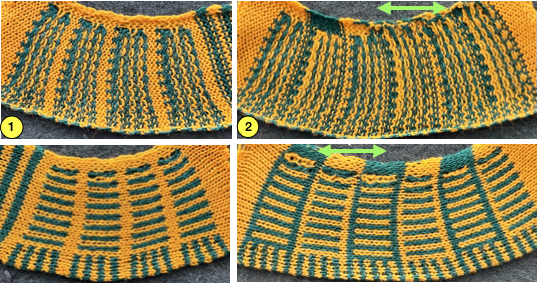
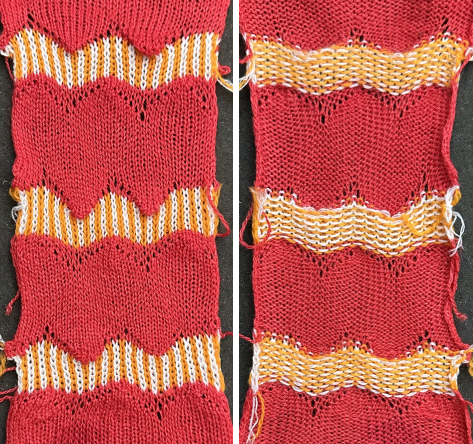
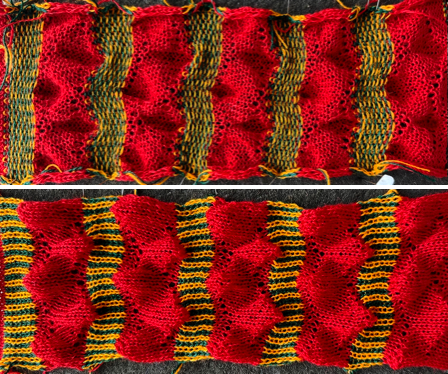
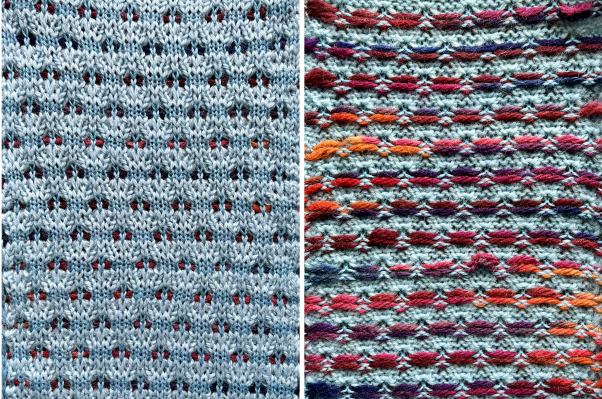
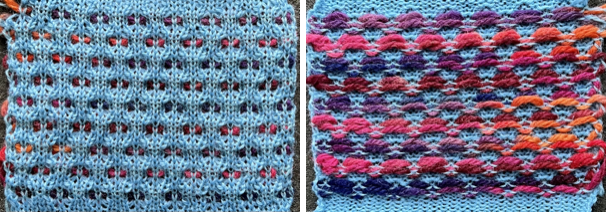
The first sample is knit on a 4.5 mm 930.
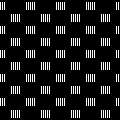
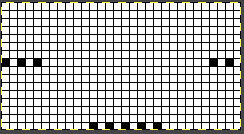
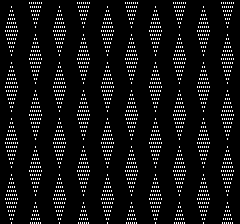
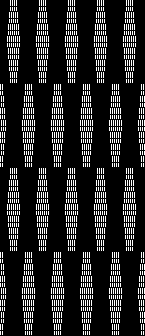
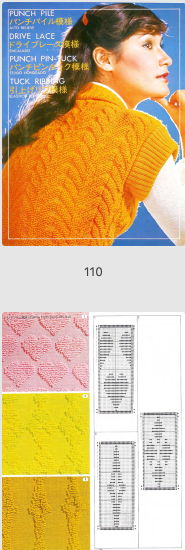
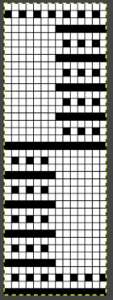
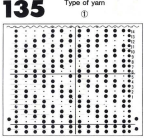
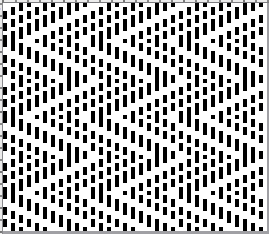
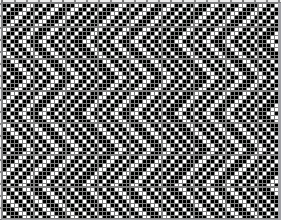
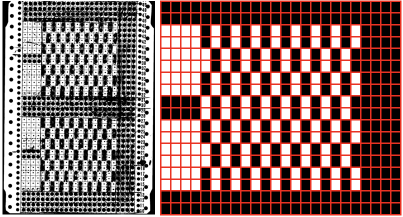
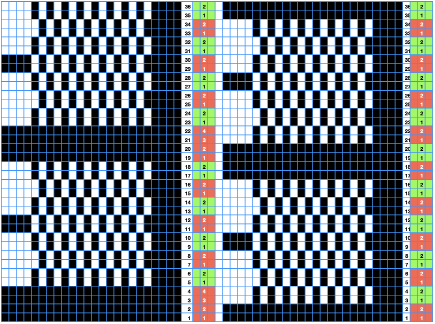
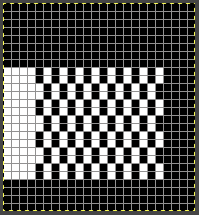
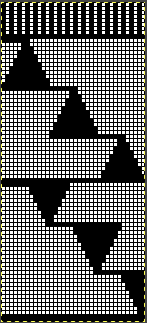
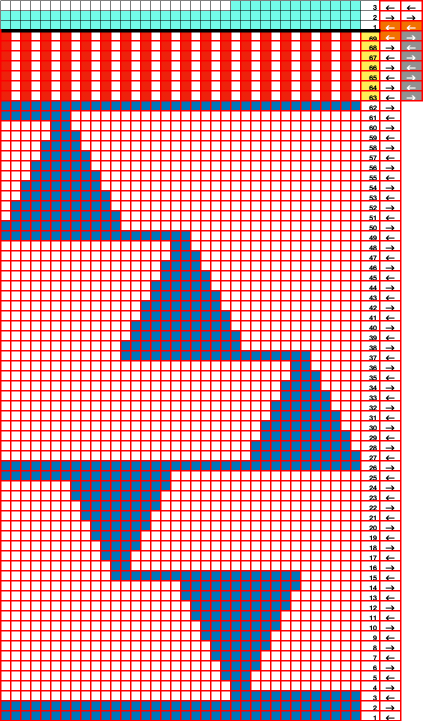
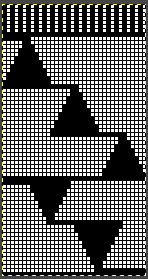
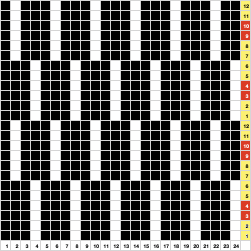
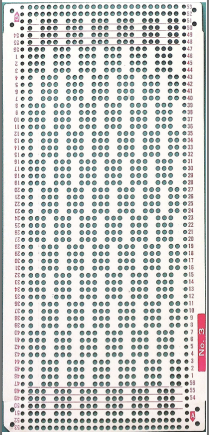
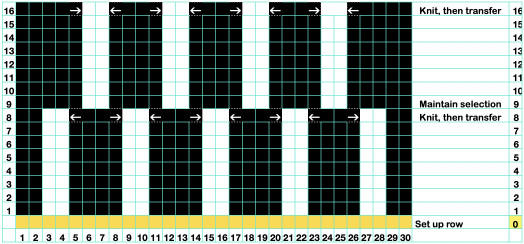
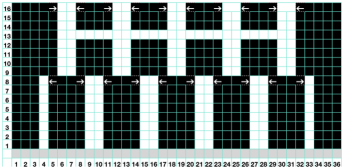
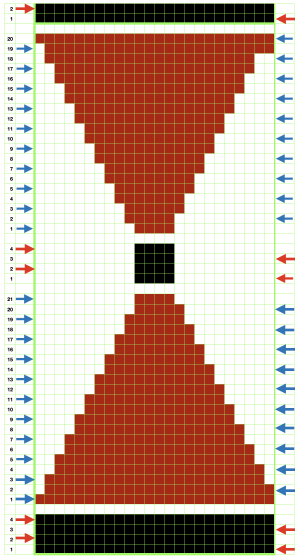
A downloadable punchcard volume for Studio aka Silver Reed machines offers punchcards for the double bed technique referred to as punch pile In analyzing the repeats, the black cell rows represent loops picked up on the main bed, the blank rows the carriage passes knitting every stitch on the ribber alone holding the loops down.
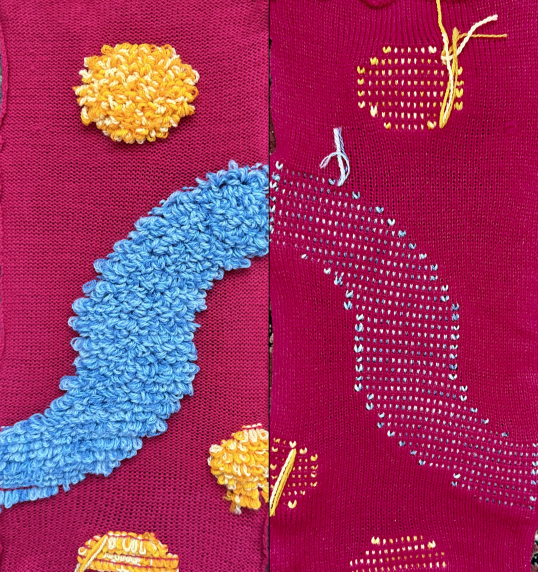
Applying permanent loops to the surface of a knit using Brother knitting machines falls into the knit weaving family.
The knitter can choose color placement and changes, as one might in intarsia.
Previous related posts:
Machine knit fringes 4, long loop patterning , my first use of straws, bulky loop yarn, the main bed programmed repeat:  Long loops: a bit on method includes instructions on the use of single bed cast on comb, rulers, ribber gate pegs.
As usual, my swatches begin with random yarn choices from my stash, using colors that will help identify proper stitch formation, and just as a random return to designs intended for other fabrics in previous shares.
Developing a repeat: since the loops are created by hand, the goal is to work with larger loops than those in automated punch pile designs.
In the past, I was drawn to and explored truchet tilings
Truchet tiling design inspiration 1
Truchet/Smith inspired designs 2 meet ArahPaint
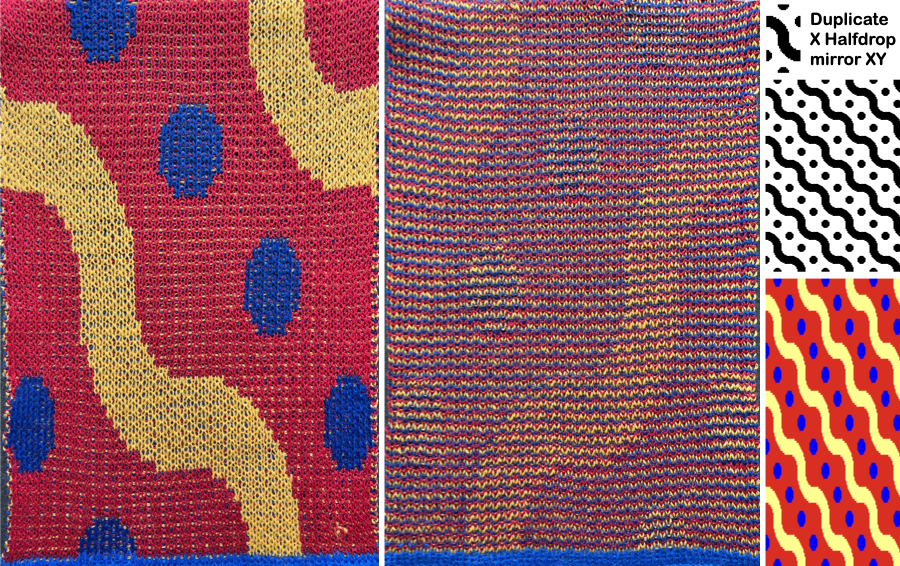
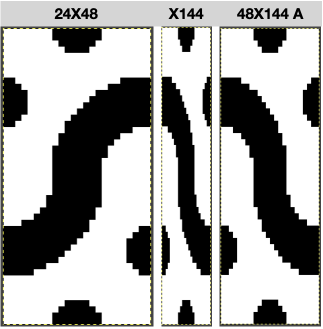
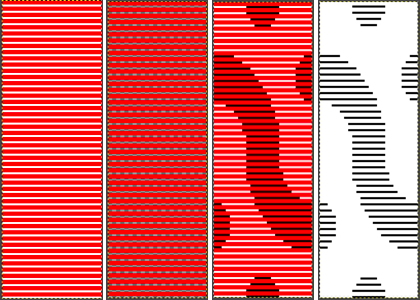
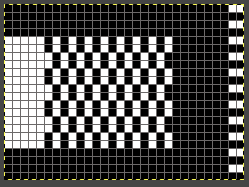
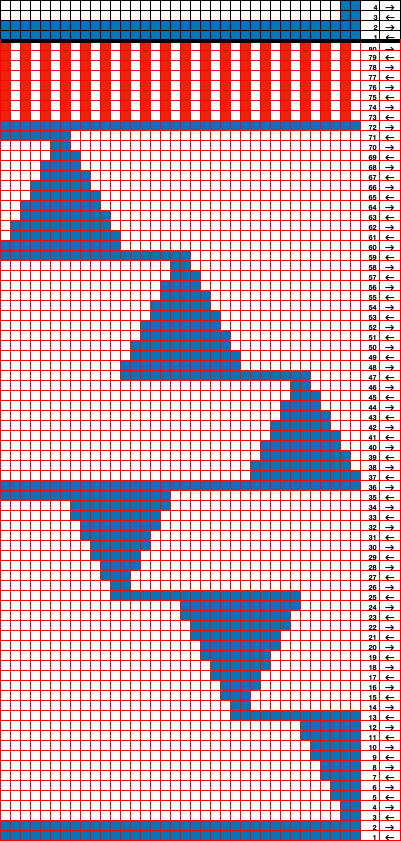
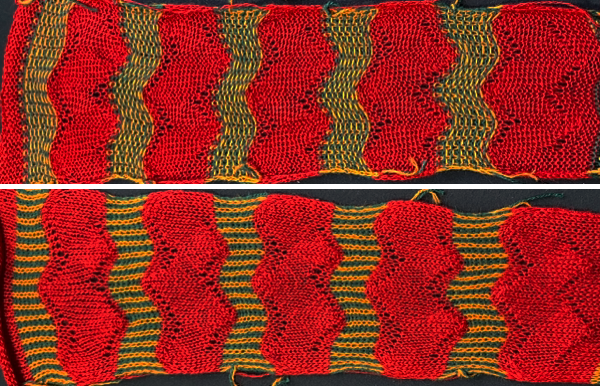
More Truchet inspired tiles, a brief look at gradient filter use included this 3-color knit sample resulting from an img2track color-separated DBJ repeat Aiming to form large loops and a larger scale motif with more than one knit row between rows of them, the original 24X48 repeat,  evolved into a very different 48X48 repeat.   The full design in gridded view: The process used to attain it: the original repeat was scaled x3 in height, and then again in width X2 for visual balance  Working in RGB mode the 48X144 image was opened in Gimp, and a new image file in the same size was added with a white ground, and then a third 48X3 image with rows 2 and 3 colored in red. The latter saved to the clipboard, may be used to bucket-fill the all-white second image.
The white is rendered clear using layer, transparency, and color to alpha.
The result is copied and pasted on the original.
The red is selected by color, filled with white, and fixed by clicking on the rectangle tool.
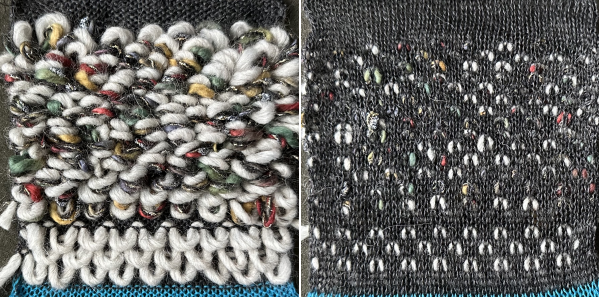
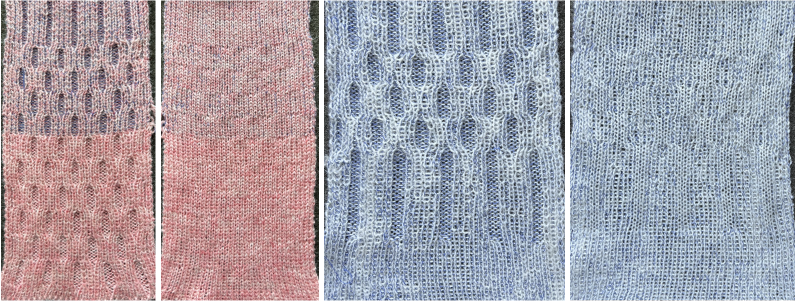
The mode is changed to BW indexed, and the image is saved for knitting. I grabbed yarns for color visibility and thickness, not fiber content, and in the resulting knit the loops flattened permanently in the red acrylic and the blue acrylic blend. The technique might be better served using a 3/8 wool for the loops.
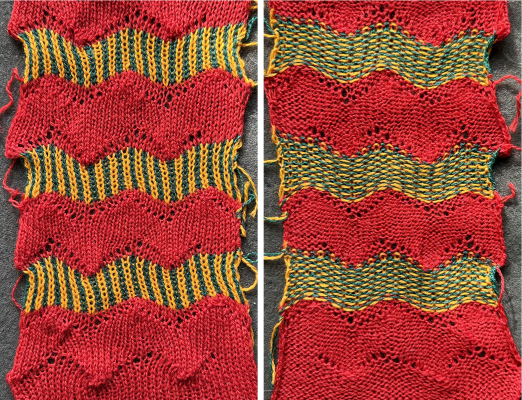
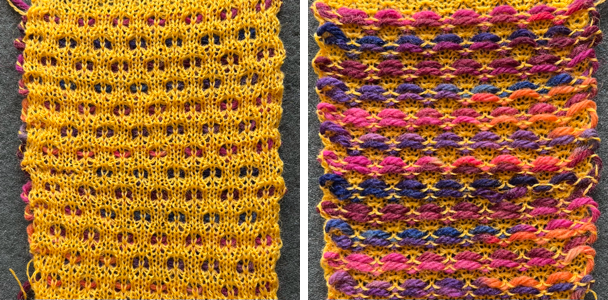
The work in progress:  The full repeat in the final swatch measures 6X11.5 inches The same repeat was used again, and the red acrylic yarn was switched to the background for a result that would steam flatter permanently, while the loops were formed with triple yarn strands.
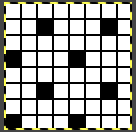
It took testing adjustments in tension and loop length, noticeable at the bottom of the swatch images, to achieve consistent coverage and a new tool to form them.   When searching through published sources and adapting them, results can be random or outright failures. Pondering patterning on every other needle, with end needle selection off, this design from:   for 12 stitch punchcard models came to mind, including this chunky machine design The what if repeat, expanding it to a 22 stitch version with every other column blank and checking for proper tiling was not useful as a knit woven pattern, but when used to form loops on preselected needles and graduating the height of the loops the result proved interesting.
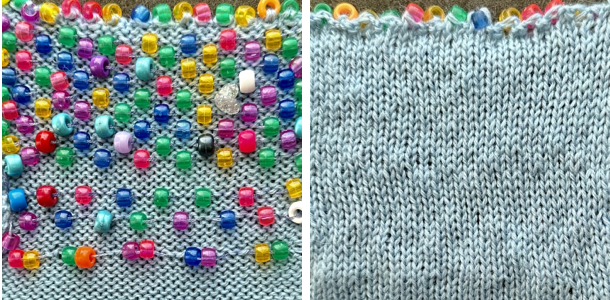
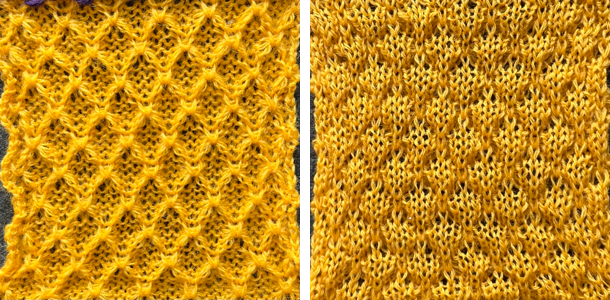
Rulers of different widths and thicknesses were used as tools used to form the loops including but not shown, the metric ruler supplied with Brother knit leaders. Diagonal designs, in particular, can be hard to force into 12 or 24-stitch conventions. With further editing, the published repeat is adjusted to larger 23X18 pixel dimensions, appears to align correctly, and will be returned to in a post containing more knitwoven samples.   This test begins with caution, then produces a dense pile testing the limits on yarn thickness using the repeat:   Pony beads were threaded on a double strand of cotton from an unmarked cone, and loops were formed with beads advanced and placed between and below preselected needles.
Spacing was tested before committing to the final choice, the same repeat as in the above swatch.
The bead-carrying yarn was pulled to tighten it across the previous woven row just before laying it in place for the next patterned row.
Bead addition was also tested between chains in bind-off.

Inspiration for varied stitches from a single chart

Nearly 9 years ago, I began exploring scale designs. At the time, my charts were generated using Excel and a program called Intwined Pattern Studio, which soon became inoperative  armani hkThe above repeat, visualized tiled.    At present, using custom-printed needle tapes has proven useful in tracking actions required in hand-manipulated stitches.
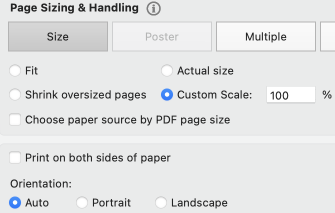
The attached PDFs have been printed in the proper aspect ratio with the following changes from default settings using Mac Preview,  and Acrobat Reader 7 needles
single 4.5
Whether the knit tests are worth pursuing in large pieces with or without modifications is subject to end-use and personal preferences.
To begin with, stitches were transferred, the empty needles were pushed back to the A position, Out Of Work, and returned to the work, B position, for reversing or shifting the shapes.
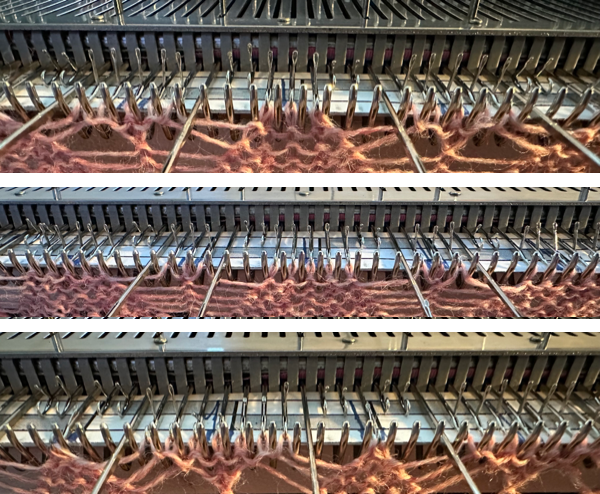
Forming ladders: the chevron shapes are created by single stitch transfers, and bringing needles in and out of work.
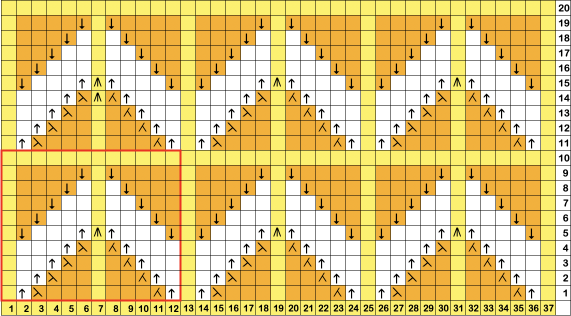
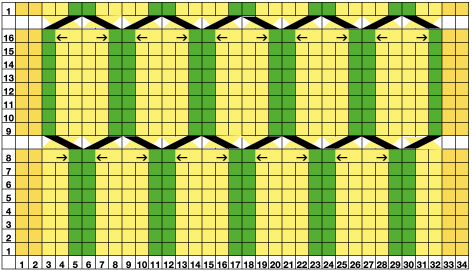
A starting chart:  Keeping the same palette as in previous charts, yellow cells represent needle positions where stitches are not disturbed, and the white cells where needles are taken OOW. The up-arrow needles mobed to A/OOW, and the down-arrow needles returned to B.
The work in progress:
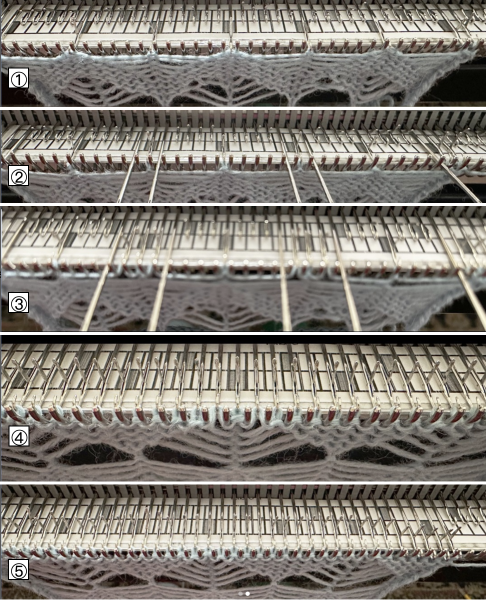
1: to reduce the line length formed by the single stitches, the point at which needles are returned to work can be varied
2: in this instance, as 5 empty needles side by side are reached, bring needles into work for the next shape on each side of the single stitch decreasing the number of empty needles to four. As the knit carriage returns to the opposite side, loops are formed on each of the needles returned to work
3: continue to bring an empty needle into work aside each pre-existing loop
4: after the last 2 empty needles are returned to work and are followed by a knit row the last two loops are formed
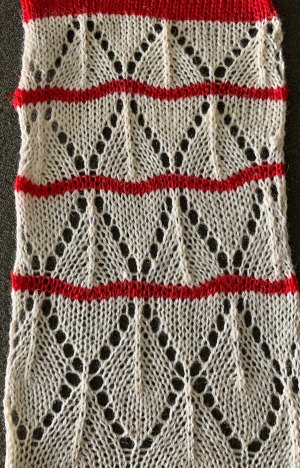
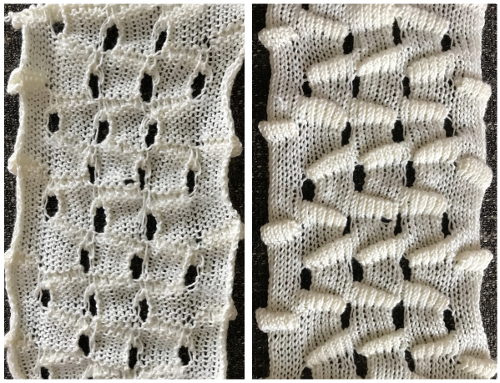
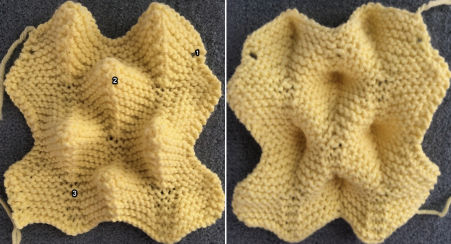
5: knit one last row across all the needles, and begin transfers for the alternate shape.  This yarn is a 2/8 wool, which worked nicely for holding ladder edge stitches in the leaf swatches but yielded a stiff knit in this case, and the elongated single stitches fold over at the top, creating extra nubs on the surface of the knit.  Continuing designs with similarly shaped outlines but leaving the emptied needles in work, B position, produces different shapes. All needles remain in B throughout.
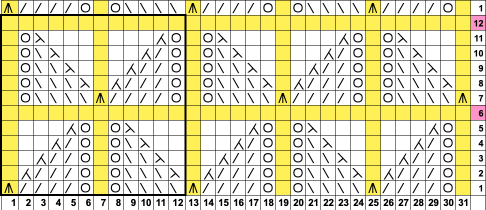
The yellow columns in the chart indicate the locations on the needle bed where stitches are never moved.
Visualizing the tiled repeat and the direction of the transfers: the initial experiment is also a 12-row repeat. The magenta cells indicate spots where extra all-knit rows may be added in DIY.
The work in progress:
A 7-prong tool is handy in making the 5 and 4-stitch transfers.
After each transfer, loops will form on the empty needles with the next carriage pass
3: the loop becomes part of the subsequent transfer, and the newly emptied needle remains in work
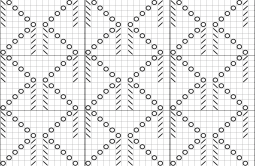
The first swatch began with a 12-row repeat and an all-knit row before transfers began for the alternate shape.  Visualized in larger BW tiling The transfers are made away from the circles in the chart using multiple transfer tools.
After each transfer, the empty needles are left in B or pushed out to E.
As the knit carriage moves to the opposite side, loops are formed on the empty needles.
Each loop becomes part of the next transfer.
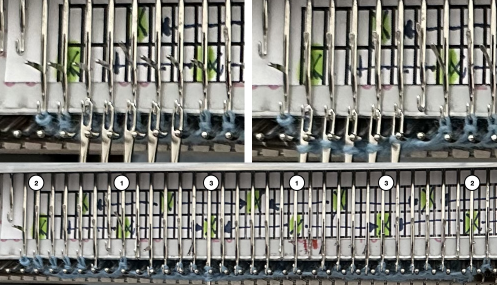
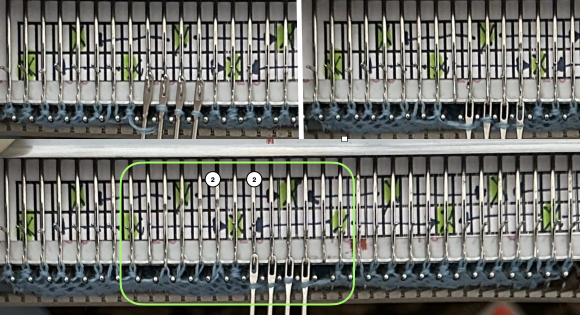
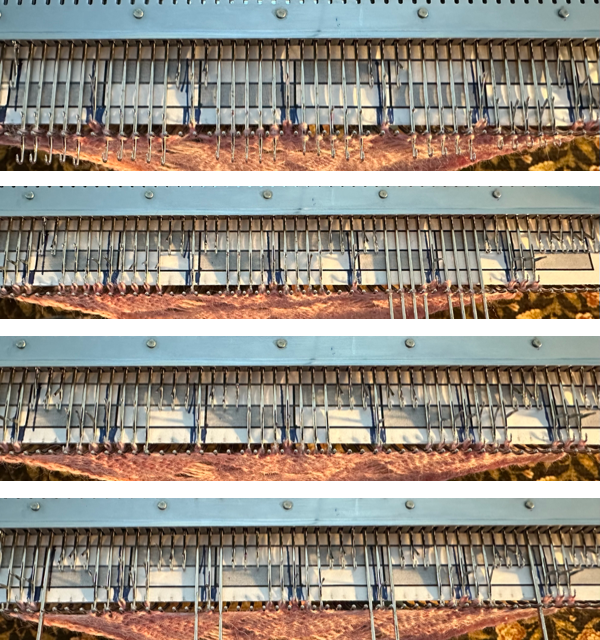
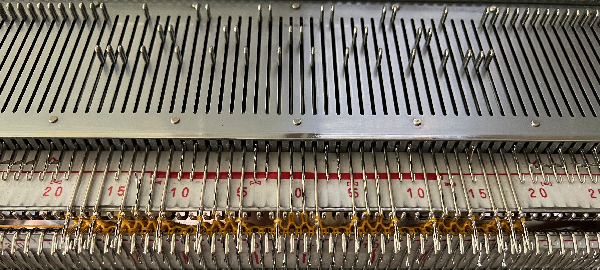
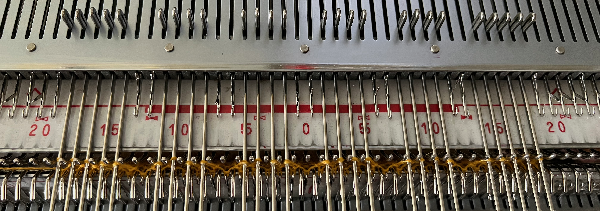
Setting up the first design row using a 7-prong tool with 5 prongs selected:  the numbers in the lower image indicate the number of stitches on each of those needles as the setup row is completed.  The second group moves 4 stitches at a time. Loops are treated as stitches.
After the transfers, there will be groups of 2 stitches adjacent to those holding 3 in the previous row.
The outline in the lower image points to one pair of transfers in the process of being completed.
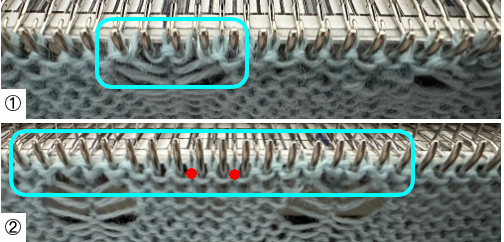
1: When this configuration is reached, knit one more row to the opposite side,
2: begin transfers away from the midpoint between the shapes to form the brick repeat. The result forms a bump once more due to the length of the single knit stitch columns. The above yarn is a 2/8 wool, the swatch was quite stiff. A second swatch was knit using a softer, thinner, alpaca-silk blend.
The relaxed knit after removal from the machine was very textured and narrow,   this result followed some light pressing and steaming.
Traditional wet blocking would be required to maintain the shapes in a final piece. Eliminating the all-knit row to reduce the extra lengths of those single-stitch columns did not produce what to my eye was an improved knit.
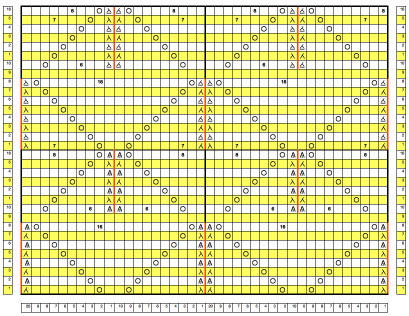
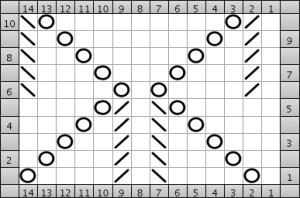
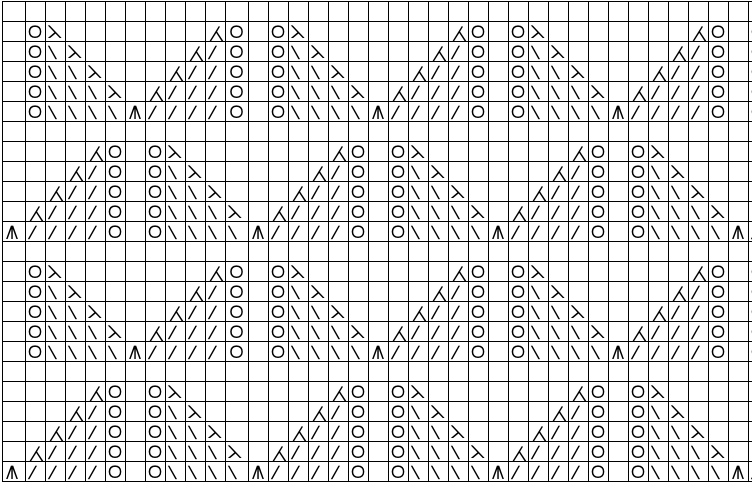
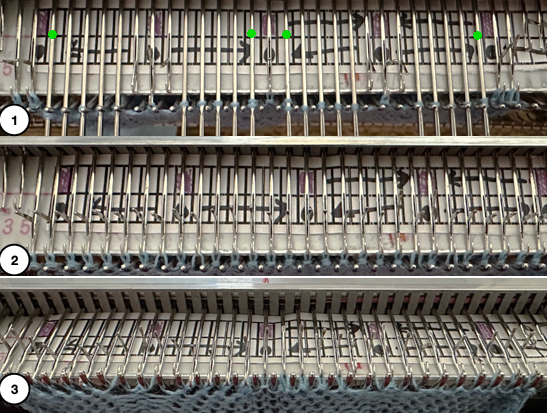
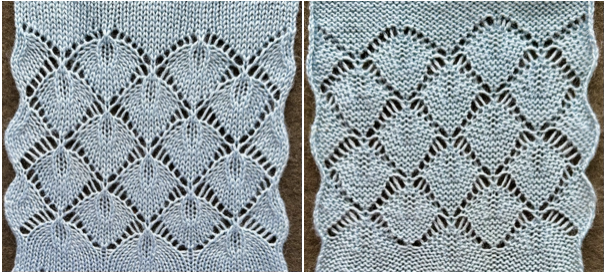
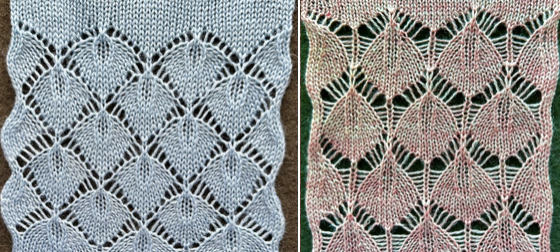
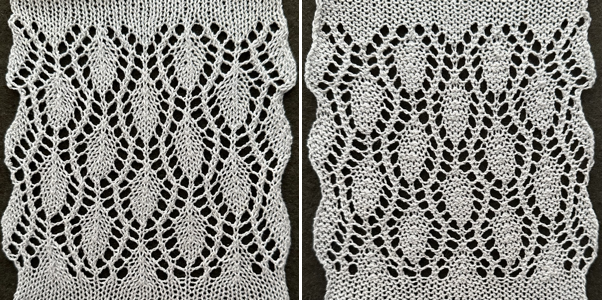
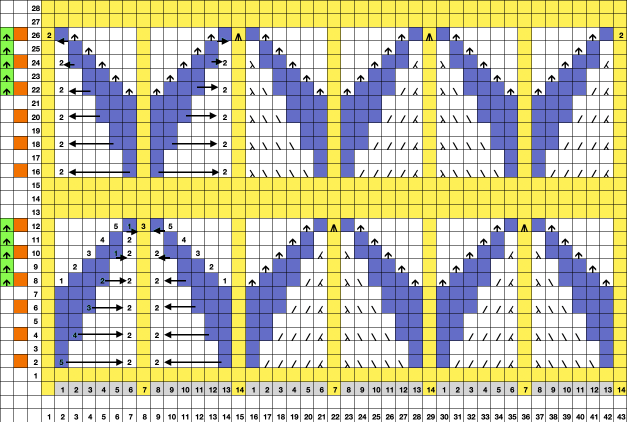
In a last what-if test, the chart was turned 180 degrees, with transfers beginning with a single stitch, and ending with moving five.  The results, knit in 2/15 wool and lightly steamed and pressed, appeared more successful to my eye.  relaxed overnight, the surface is a bit more 3D Using a similar technique for multiple transfer lace designs:  a 14-row repeat, magenta cells mark all knit rows, and all transfers are made toward stitches aside every 7 stitches except for on rows 6 and 13, circles in the chart now indicate eyelets, transfers are made every row.  1: the setup row.
Empty needles are left in work, B.  Cyan dots mark needles holding 2 stitches after the beginning transfers
2: the next knit carriage pass forms loops on the empty needles
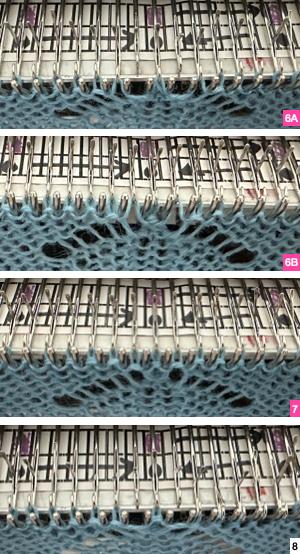
3: with the next transfer, an empty needle results adjacent to each loop, the start of the next eyelet On Row 6 the last transfer results in 3 stitches on the normally undisturbed vertical stitch columns, 6A as the next carriage pass is made, 6B, loops are formed on the empty needles. A second row is knit on every needle, 7, and transfers begin to be reversed for the top half of the shape, 8.  The result shares some similarities with another hand technique .

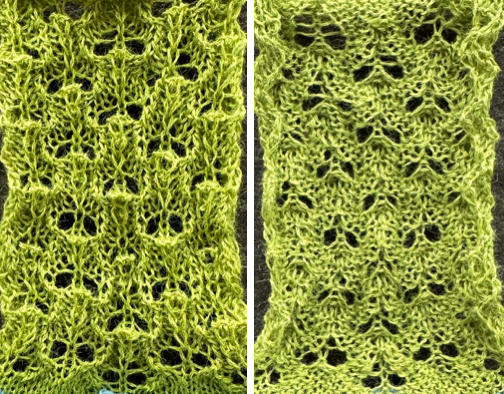
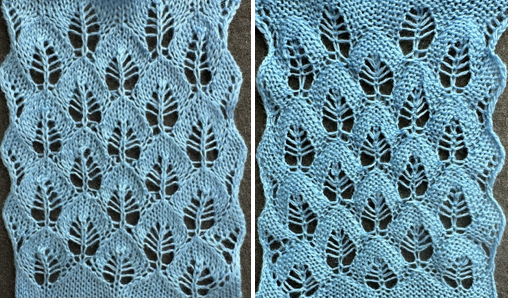
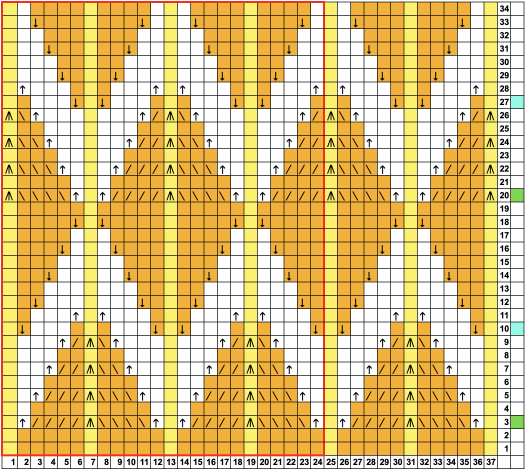
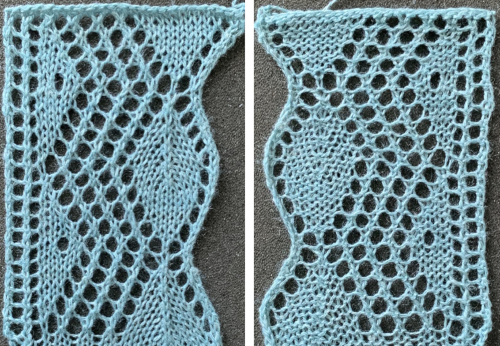
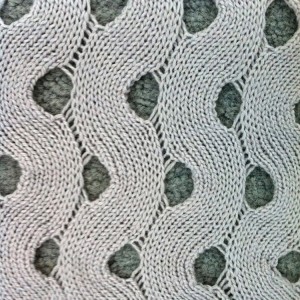
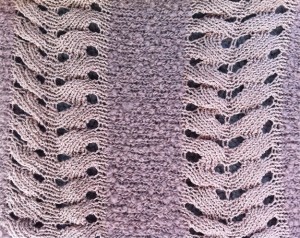
Revisiting lace leaf design repeats 2

I am constantly drawn into multiple knitting rabbit holes.  Along with my revisiting 3D surfaces, more leaves are still in my line of sight for further exploration.
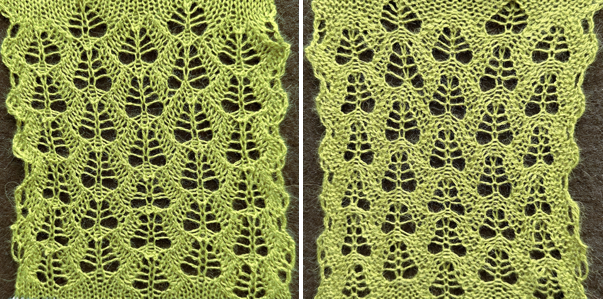
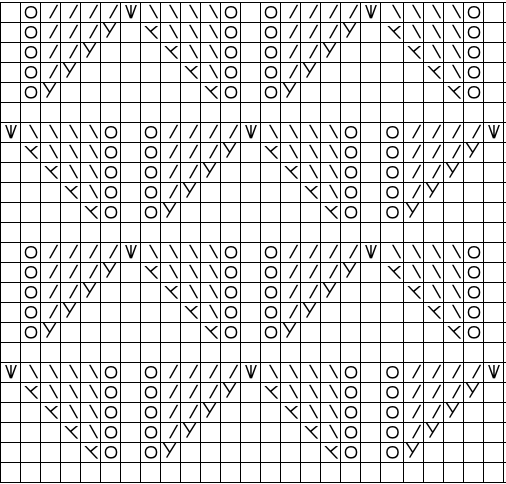
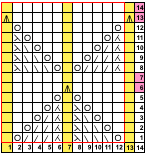
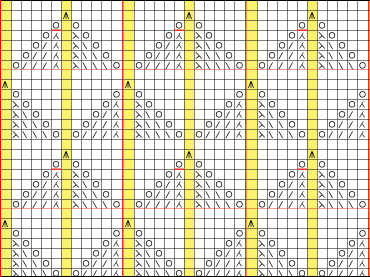
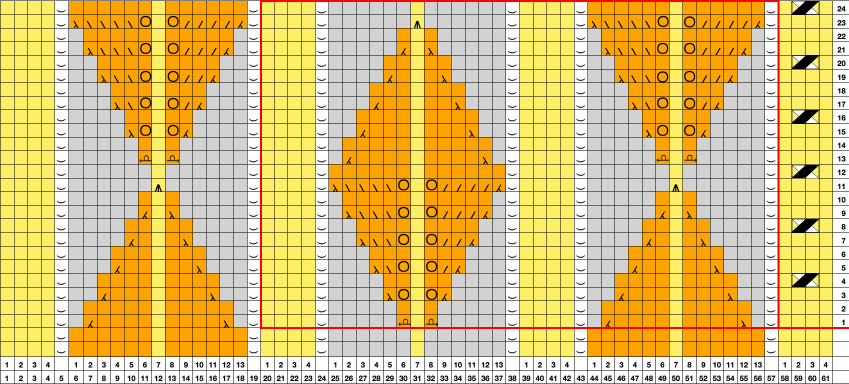
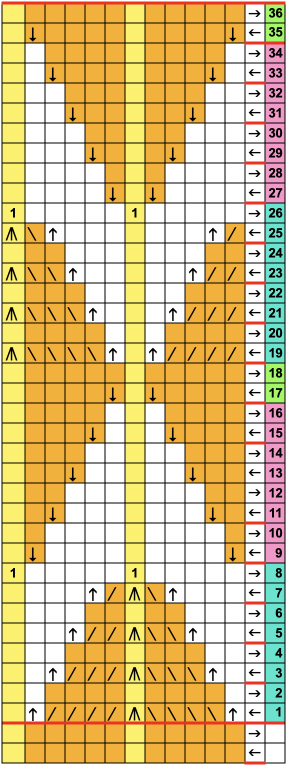
Here they are surrounded by a traveling mesh ground: a 12X52 repeat, marked for punchcard use:

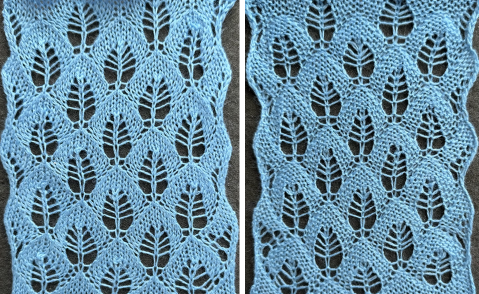
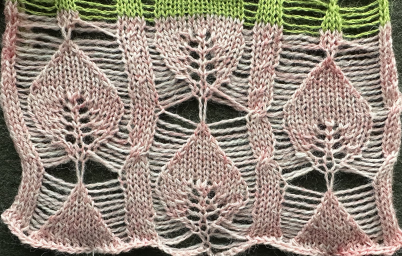
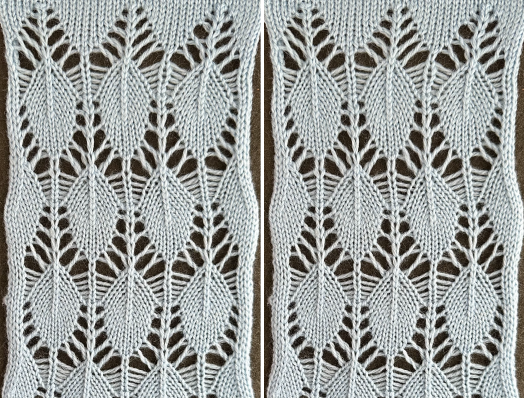
the associated PNG The test swatch knit on 38 stitches:  This design was shared as an stp file for use with DAK by Claudia Scarpa.
Her blog post includes downloadable files with clear markings for knit row locations, a punchcard version, a schematic for working it as a possible hand technique, and more.
DAK does not allow for exports in other file formats ie PNG.
Charts for the designs can be screengrabbed and processed with other programs ie Gimp and ArahPaint to make them usable in other ways including download options.
This electronic repeat is 20X136 pixels.
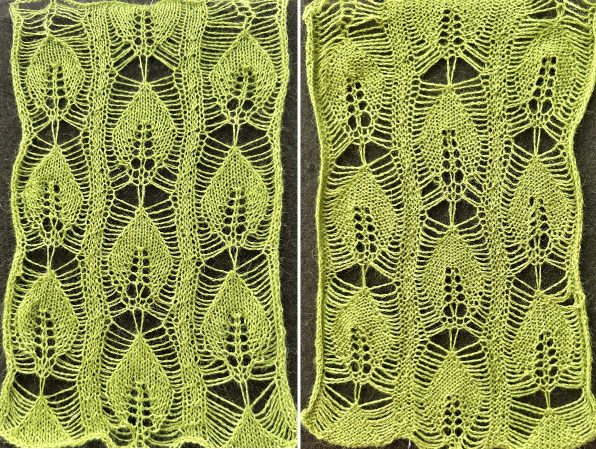
Horizontal mirroring was not required when using it in my 930.   Knit on 40 stitches, using the same wool-rayon yarn as in the first sample, there is a considerable change in the size of the resulting leaf shapes  This is my chart for Claudia’s punchcard version, marked in 6X6 squares blocks as found in Brother factory punchcards,   the result is a longer repeat resulting in larger leaf shapes, 24X228 pixels And then there is the world of leaves formed with hand techniques and surrounded by ladder spaces.
This was published in an early Silver Reed/ Studio pub eons ago and got filed in my “someday” image folder.  Visualizing repeats and necessary actions in spreadsheets before any actual knitting is useful.
With practice, we develop a personal library of choices regarding symbols and any additional information.
This was my initial draft taking into consideration:
the direction of the transfers
the location of single-stitch columns that are left undisturbed throughout
the needles on which stitches are doubled after transfers
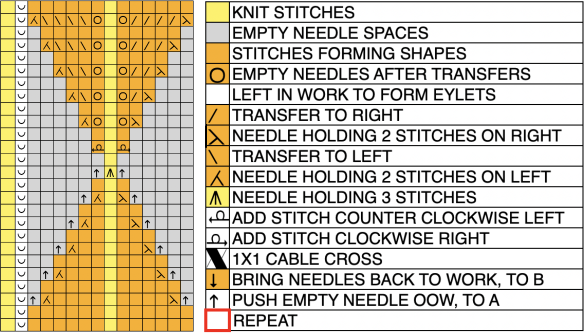
where stitches are decreased, every 2 rows, marked with orange cells in the second column from the left
where stitches are brought back into work on every row, marked with green cells and arrows that point up in the first column on the left
Printing custom needle tapes is an alternative to marking the needle beds or needle tapes to offer guides that help avoid errors or lots of needle counting in many hand techniques.
Mac Numbers version at present: 13.2. Its rulers can be set to centimeters for easy calculation of needle space cells with Japanese machine needles set 4.5 mm apart.
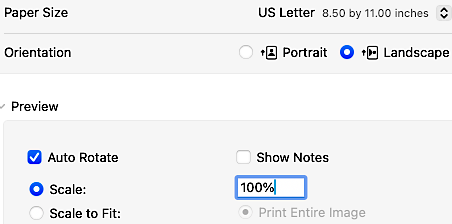
This PDF printed to the correct size for me when set to 100% landscape: 7 needles
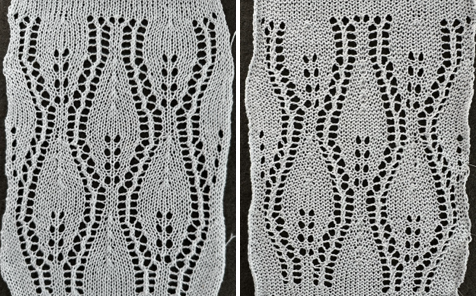
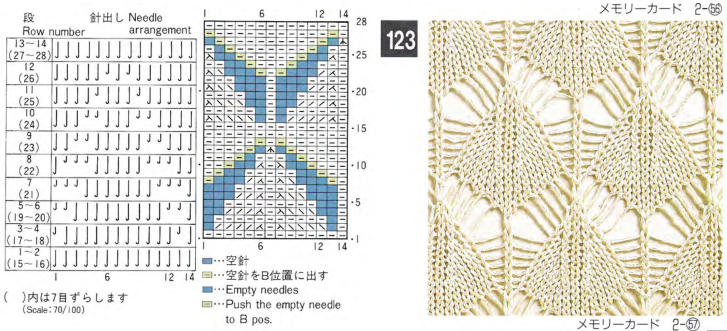
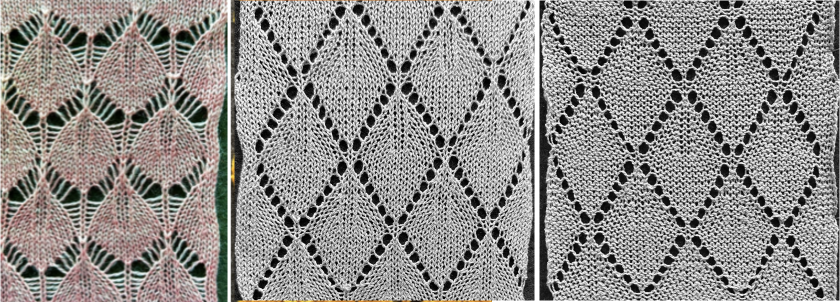
4.5X7=31.5 mm: to convert the mm to cm in DIY move the decimal point one number to the left. Row height can vary with the limit being about 2 cm. The specs from the shared file:  The work in progress on the machine as transfers are being made and the empty needles are taken out of work back to the A position.  The end of transfers approach and needles are returned to work before each carriage pass, forming loops on them.  The test swatch, knit in 2/8 wool at tension 9, the color chosen randomly for weight and easy visibility The pattern is evocative of another Studio transfer lace #112, 12X104 a smaller design without the missing stitches and empty spaces.  Following some research, the chart for Studio punch card 123: The electronic equivalent, 14X92 cells The file adjusted for knitting on Brother is now reduced to 14X88 cells, and the cyan is marking areas where the knit carriage makes 4 passes rather than the usual 2 The result is a 14-stitch leaf in traditional transfer lace.  And then, the general shape begins to “appear” in other, older post swatches such as in this, part of the development of very different 12-24 stitch designs.  More leaves combined with open spaces, returning to hand techniques:
in DIY charts symbols can be developed to suit and included or eliminated in final directions. Convention matters if directions are to be published with patterns for general use, and matters less when for personal use.
Examples:
 the starting diagram:
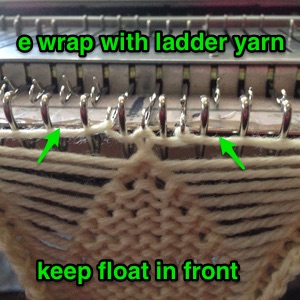
The test swatch was begun on 2/8 wool, then switched to a 4/10 alpaca and silk because it was green, and the guess that the resulting looser stitches using it might make cable crossings and transfers easier, As can be seen in the work that follows, the size and definition of knit stitches at the edge of the vertical columns and the leaves are sharper and better retained in the thicker yarn.  A chain cast-on was performed on the number of needles as shown above, and chains were dropped to achieve the proper setup   To make a visually balanced increase from one to three stitches, the tool is inserted from back to front of the ladder on each side of the stitch, twisted clockwise on the right, counter-clockwise on the left, with the twisted loops lifted and placed on the empty needles each side of that center stitch.  An illustration from one of my earlier posts on leaf shapes surrounded by ladders e_wrap0-2It is helpful to have a couple of 7-prong transfer tools to speed transfers along, with one set to move 4 stitches, the other 5, or simply use a combination of the standard ones. Another variation: The slightly revised repeat  A few images of the work in progress: in this design, actions take place every 2 rows.
The dark segments on the custom-printed needle tape mark the needle positions for stitches that are never transferred, ie rows # 1, 7, 13, 19, etc. in the chart.
At this point in the work, there are 3 stitches on the needles holding the last transfers, marked with circles, and single stitches on the alternate needle locations, marked with squares.  After a row is knit to the opposite side, the groups of 3 stitches are reduced to a single stitch.  and it is time to begin to reduce the width of the floats.
Empty needles are brought to B position/work on each side of the single stitches.  Loops will form on each of those needles as the knit carriage moves to the opposite side.  Moving forward, empty needles are brought into work adjacent to each loop every 2 rows.
A closer look at the twist in the floats as the action continues and the number of needles out of work is reduced: The locations in which stitches are taken out of work form straight floats, where needles are returned to work, the floats form the familiar twists seen in transfer lace patterns.

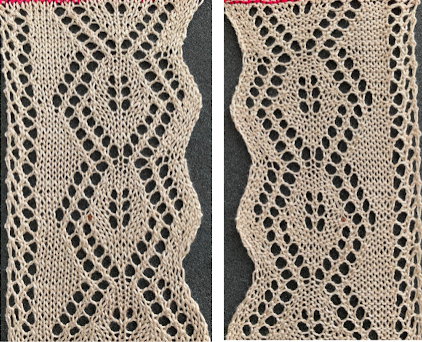
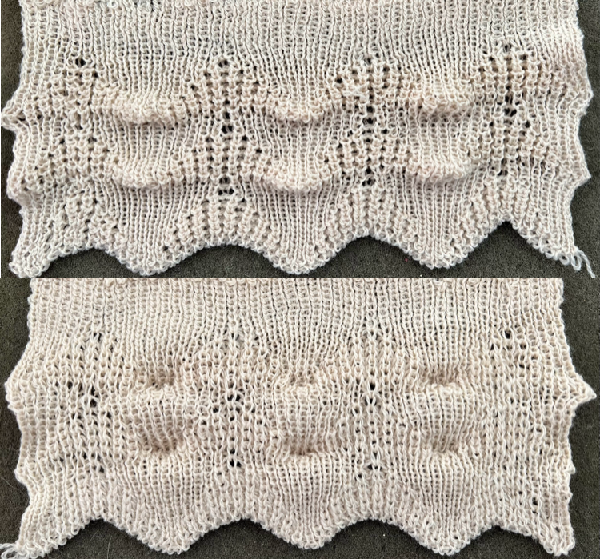
Not to be forgotten, fully automated lace edgings such as here
and this, with both patterns shared in the same blog post  

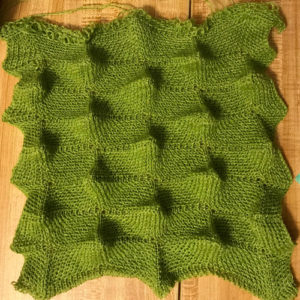
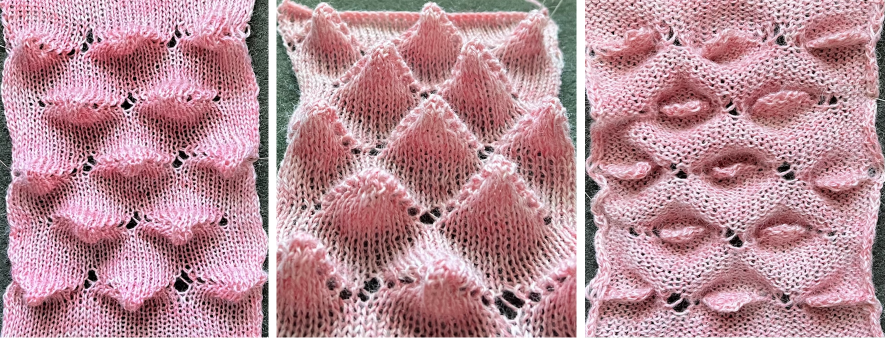
Revisiting “wisteria” 3D shapes and their possible automation

Present software makes automating textured designs in these families easier to plan and execute.
This method is limited to single colors being used at any one time and does not allow for additional patterning through fair isle or end needle selection.
Slip stitch in both directions results in black cells being knit sequentially, and the limit in width for the total design is limited to the width of the knitting machine and how the program is read and implemented.
End needle selection is canceled.
All needles in work need to be cleared with each carriage pass.
My electronic km samples are now knit on a 930, which automatically mirrors any downloaded repeats, an advantage for lettering, but not for many other situations. These designs require mirroring when using any machine or software that does so if the holding is to begin with the knit carriage on the right.  The direction of movement for the knit carriage is illustrated by arrows in the charts, which serve as guides in planning sequences.
The original charts were executed using Mac Numbers, the table was converted and scaled to size using Gimp as described in other posts, downloaded using img2track, and mirrored horizontally before test knitting on the 930.
Both swatches are 40 stitches wide, planned in blocks 8 stitches in width and height, the first repeat 40X178 pixels  

The first test: the knit carriage is set to slip in both directions. A wool yarn was used, retaining spring-back for more of a 3D texture. The design can be interrupted with all knit rows breaking up the shapes at varied intervals, with added colors if preferred. The second repeat, 40X 226 pixels.  A PDF for larger views of both files pdf
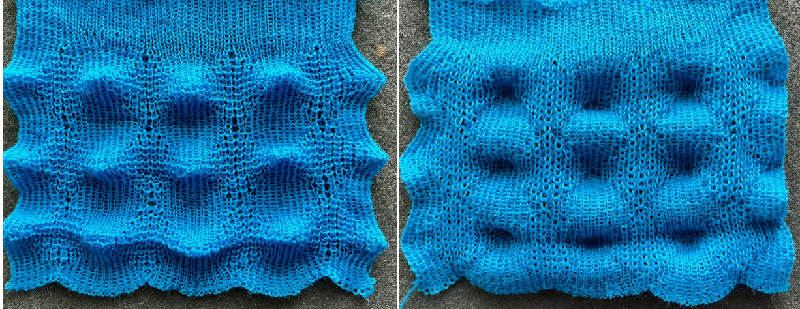
A quick test in a 2/18 wool produced a soft, loose, drapey knit.  The same swatch was photographed 48 hours later, in a relaxed state.  A 2/10 wool knit on the same number of stitches produced a firmer and more clearly 3D effect which remains unaltered with time.
Hems and a knit stripe were tested as a way of breaking up the shapes Possibilities with hand selection of needles: some samples from  Adding fair isle patterning to short row patterns creating eyelets.  
“Wisteria” meets hems “Wisteria” cousin 2, also called fern leaf, hand technique “Wisteria” cousin revisited (“holding” using slip stitch), the first programmed repeat, drawn on mylar. The 910 knit the image as drawn on the purl side, with no mirroring necessary  
“Wisteria” 2  Horizontal “cable”  

A slip stitch patterned ruffle and more

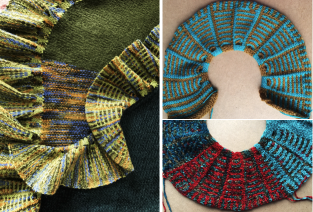
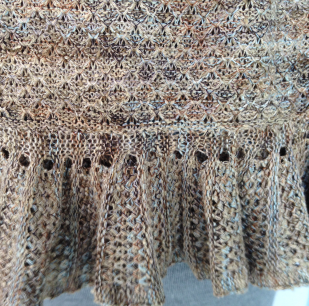
A recent Instagram share led to my being asked how the ruffle attached to the piece as partially shown on the left was created. The images on the right illustrate 2 of the color-way explorations prior to committing to a final one, all knit in rayon chenille yarns.   At that time a punchcard was used. The repeat technically is 24 stitches wide and 18 in height, repeated twice to meet minimum punchcard height requirements, while for electronic patterning the 18 row segment is used. That said, repeating and shifting the minimum pattern repeat in a paint program or spreadsheet allows for visualization of possible color change sequences,  A 24X36 electronic repeat beginning with 4 all knit rows:    Knitting does not always need to be programmed to start on the first design row.
When miles of trim ie when it is planned as an edging for items such as shawls are planned, there are other considerations.
I prefer to use the seam as you knit method. Since rows will be joined to rows, use a 1 to 1 ratio. Doubling up on stitches happens every 2 rows along the knit border’s vertical edges.
After estimating the number of rows in the final piece, any trims can be knit separately, taken off the machine on waste yarn, and joined as the piece progresses. If needed, after removing the waste yarn, more rows can be added to the trim or unraveled to shorten it before binding it off.
The other option is to finish the body of the knit item, and then join the trim as it is being knit.
The process is rendered easier if the ribber is off the machine.
Switching between punchcard and electronic models, it can get confusing as to whether the design needs to be mirrored horizontally or knot.
In this case, the png was used on my 930 in the same orientation as the punchcard design.
To reduce the roll to the purl side, it may be best to use yarns that will block flat ie rayon, or acrylic.
The knit is centered on the needle bed. My 930 has a punchcard needle tape in place, I prefer programming based on 24-stitch needle selections to avail myself of the position option available on the electronic.
The first preselection row is made toward the color changer.
End needle selection is canceled, or unwanted floats will be formed, pulling in the edge of the knit.
When the color changer is reached and the proper color is in the yarn feeder, set the machine to slip in both directions.
Continue color changes in the preplanned sequences.
In proper pattern selection, the slip stitch column/non-selected needles occur on the right (1).
The all-knit stitch column/ selected needles occur on the left (2). Rows, where every needle is preselected, will knit a solid color with the next carriage pass. As colors are changed small floats will be created between the stripes, a light edge weight may be needed, depending on the yarn used and its fiber content, to keep the edge stitches from being reduced in size or even gathered.
1. the same color is used for 4 consecutive rows when all needles are selected and are followed by color changes every 2 rows until all needles are preselected once more
2. color changes are made every 2 rows
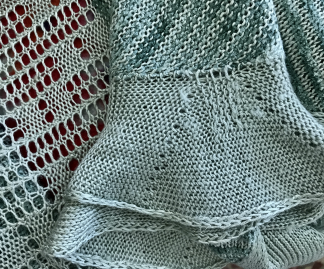
The cyan arrows illustrate the floats on the purl side the differences in the stitch shapes on the knit when the end needle selection is on, and the lack of proper formation of color blocks, especially if the goal is a reversible knit. Added knit rows will result in less of a flounce, offer the opportunity to play with striping, and more colors may be added, accompanied inevitably by cut yarn ends  For a reduced roll on narrow edgings, add a 2-3 stitch every other row border,   the result illustrated in this close up of a different slip stitch ruffle, also joined to the shawl using the seam as you knit technique.  Ruffles may be created with other stitch types ie tuck, which shortens and gathers the knit stitches aside them in areas where they are used.  For those not familiar with slip and tuck stitch formation, it is reviewed in the post: Single bed tuck and slip stitch fabrics 1. Here hand-selected short-row techniques form the wedges, with ladders added for more surface interest on the far right.


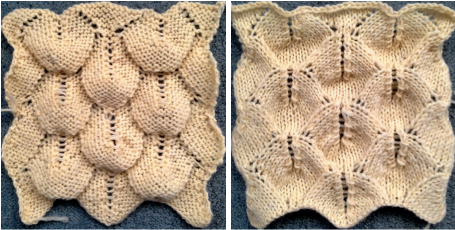
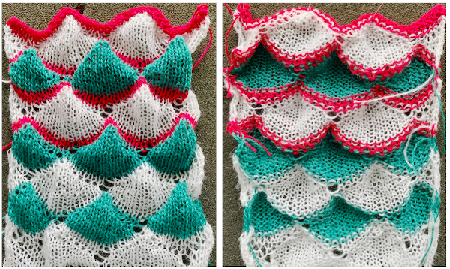
Revisiting 3D scales and shells, automated and not

Other posts exploring the scale topic began in 2015 with a swatch experiment based on an Armani sweater, followed by this group of shares, listed by creation date and beginning with the most recent
More mesh dragon scales, some striped and some not
Single bed scales made with stitch transfers
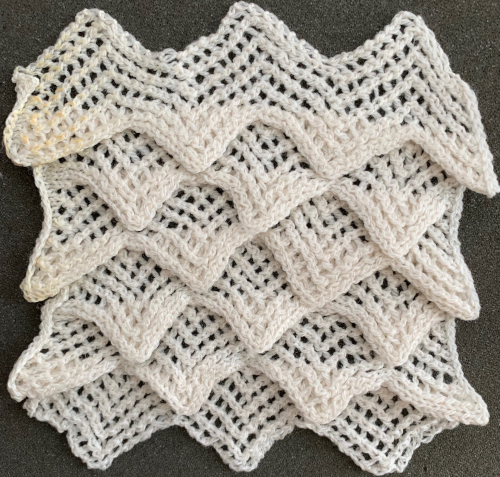
More dragon scales and chevrons in ribbed, racked (4) fabrics
Hand-knit “dragon scales”

Incidental discoveries  Ribber trims 4 

Automating 3D textures across full rows of knitting:
Machine knit leaves using slip stitch with holding Revisiting automated shell shapes  Automated shapes across rows of knitting using slip stitch only  various designs
“Automated” shell shapes  When the construction of the scale and shell shapes was proposed, I did not always share the repeats for the automated version.
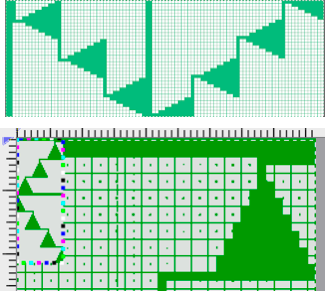
After the fact, a screen grab from the shell charts was cropped to its outline, opened in ArahPaint, and using the program’s tool “guess weave from grid“, the 36X98 png is obtained with a few mouse clicks,

and saved the file for further exploration.
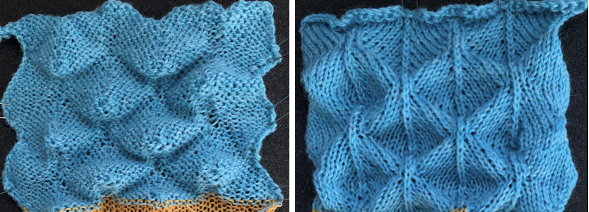
Note that for the “shells”, the shapes are formed by all the triangles pointing in the same direction, while in the “scale” version they mirror vertically.
Tips and reminders:
I find it useful to test techniques in geometric shapes that are familiar and easy to imagine in 3D, hence the return to triangles.
The goal here is to automate needle selection to eliminate stitch counting and hand selection.
The 200 needle max on 4.5 mm machines, as well the amount of memory in the model of electronic being used, ie 2K in a 930 imposes more limitations.
Performing the selection of needles manually and using the setting for short rows may make varying shapes, their scale, row counts, and color changes possible in a way that traveling to and from the same side of the machine in 2 row sequences does not.
When using the slip stitch setting if every needle on the top bed is not in use, the end needle selection must be canceled.
The knit carriage must clear all needles in work with each carriage pass even though small stitch counts may be worked on at any one time.
Just as when working short rows, depending on the fiber content of the yarn, there may be some visible wear on the purl side from the many carriage passes required to complete full design rows.
Test on small swatches for accuracy and aesthetic personal appeal before committing to larger pieces.
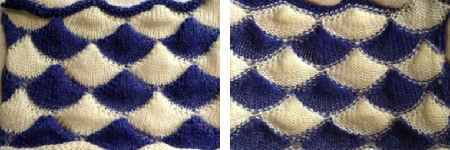
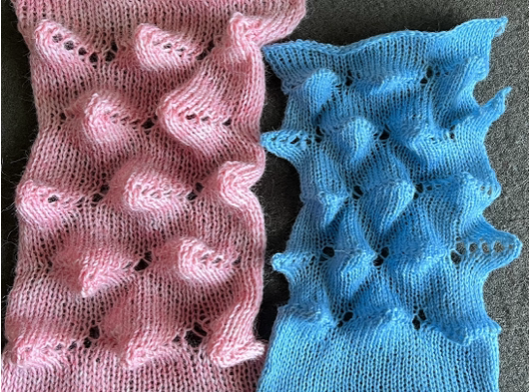
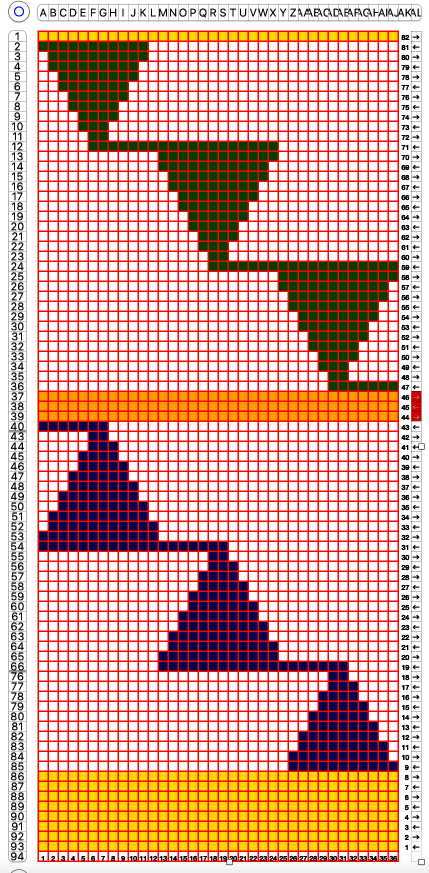
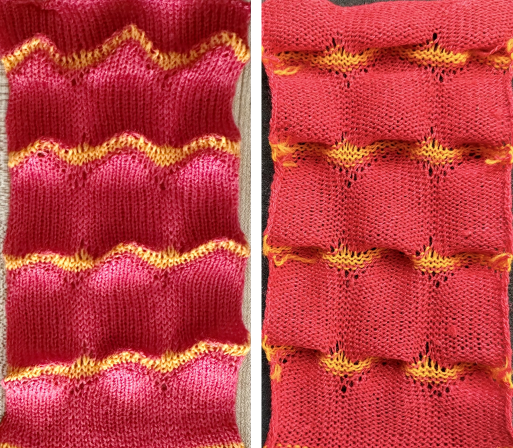
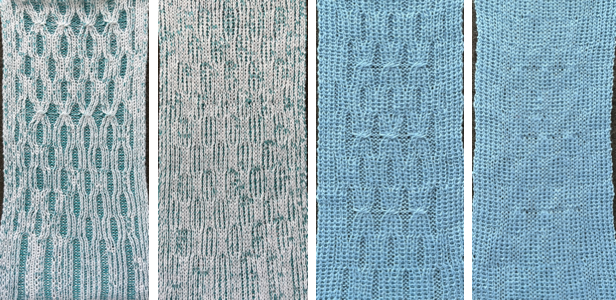
A 36X166 pixel repeat:   The edge half repeats are eliminated in an attempt to yield straight vertical side edges, with the repeat reduced in height to 36X124.  The resulting scales, knit in a 2/8 wool, were resistant to getting completely poked through to the purl side.  Comparing the difference in the results when knitting the same number of stitches and rows in the pattern; the blue yarn is of a slightly different thickness than the pink.  Seeking striping at the center of the triangular shapes, I found what appears to be a one-off error in the spreadsheet numbering of cell rows vs actual design rows, which initially resulted in issues with a correct conversion to PNG.   Transitions are made after odd numbers of rows to allow starts from the right for each pattern segment ie. Yellow/ 8+1 rows at the top of the repeat for plain knit segments, orange for the 3-row contrasting color stripe at the peak of the shapes. There will be cut yarn ends at each transition.
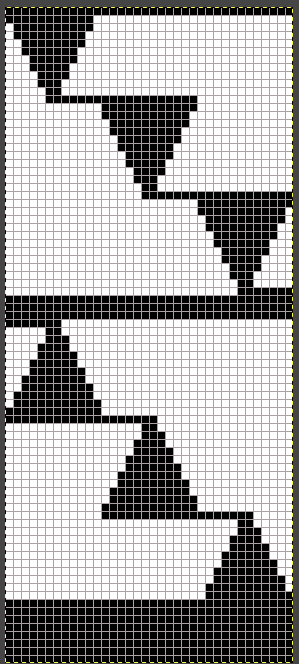
The design, charted in black and white,  the 36X82 png One may choose on which side to display the resulting shapes, here to the knit side,   and to the purl, shown also after some pressing. A punchcard snap is inserted in one of the pockets in the last image on the lower right to hint at pocket size.  Steamed, flattened shapes may also be coaxed in different directions, stitched in place or even together with a contrasting stripe behind them, or added beads at the join  A first draft at adding a FI or slip stitch stripe at the center of the repeat still relies on some segments occurring for an odd number of rows, was rearranged in the later designs, measures 36X88 pixels.  

Analyzing the swatch:
the edges where the triangular shapes meet the striped bands jut out more when pointing down than when pointing up
the eyelet typical when knitting short rows for 2 rows is OK as part of the overall design
the 8 rows of plain knitting between the shapes are too many Altering the design 1:
the plan is to retain starting each segment of  scales from the right,
the fair isle band is now planned for an even number of rows, making it possible to operate more easily from the same side, but loosening the tension,
the 36X80 repeat: the side edges in the swatch differ from each other,   Altering the design 2: whether executed with cam button changes with the knit carriage always operating from the right, or operating a second carriage selecting needles from the left, the fair isle band in this experiment needs to occur for an odd number of rows, the repeat is 36X68. The cells highlighted in yellow on the right of the chart follow the carriage movement from the right when switched from slip to FI, and the gray cells the movements for a second carriage selecting needles from the left.
The recurring shapes are planned to produce straight side edges.
The 36X68 repeat Very often 3D knit structures can change dramatically with steaming and pressing.  They can literally be “killed” permanently if fibers such as acrylics are used, while wool has some spring back, but surface retention depends on the specific pattern. The temptation to press is in proportion to what degree the knit rolls, sometimes dramatically, to the purl side. In this instance, the depth of the shapes was lost, and the swatch grew significantly in length.

Tuck stitch meets knit-weaving

This video was recently shared on Facebook. The sample in the video was knit on a Studio/Silver Reed brand knitting machine and prompted the question about the possibility of knitting the same pattern on a Brother machine.
Some techniques require infinite patience.
A summary of observations made looking at the video:
1: the machine tucks for two rows
2: the card is set to elongation for weaving rows, where the pattern selection continues, but the carriage is set to knit the background for woven rows
3: the carriage is set to tuck once more to complete what are 8 or more rows of pattern
4: start the process again by knitting four rows of tuck followed by 2 rows of knit weaving until the top of the piece is reached, ending with two rows of tuck before binding off.
Studio machines select as they knit each row, while Brother machines preselect each row as knitting continues after the initial preselection row.
There cam buttons switch from tuck to knit, and the card rotation settings are changed frequently from single to double length on the repeat segment as given.
To mimic the video, this is a chart for the adjusted repeat planning to knit a swatch on an electronic model using 2 knit carriages selecting needles with the pattern advancing one design row for each pass of the carriage.
The cam button variations: the yellow cells mark tuck stitch rows. The red cells mark the knit-woven rows, where the carriage is set to knit with continued pattern selection, and a weaving yarn is brought into play for 2 rows.
The knit carriage is then set to tuck once more, and the process repeats.   Punchcard users working with a single knit carriage can punch all black cells in the width given in the chart, and twice its height for 48 rows, eliminating the need for elongation shown in the video.
Using 2 knit carriages can eliminate cam button changes from tuck to knit and back.
When using any pair of carriages to select needles, each carriage must be disengaged from the belt while the other carriage is being used to avoid breaking it, so extension rails are required.
I began with the sample knit on 30 stitches on my 930.
The carriage set to tuck operates from the left, the knit-weaving one from the right, with the first preselection row made from right to left.
The 30-stitch test includes a one-stitch knit border vertically on either side. The main background yarn used for tuck rows color is a 3/9 wool, and the knit weaving carriage is threaded with a slightly thinner, darker yarn of unknown thickness. The weaving yarn is a worsted-weight wool.  Changing the ground yarn to the same yellow 2/20 in both carriages, the pattern was first knit in tuck stitch alone, possible for 6 rows because of the yarn thickness,  and then using the 2 carriages knit weaving at the same intervals resumed.   A pair of some of the previous posts on using 2 knit carriages to select needles on Brother machines
Knitting in pattern with 2 carriages vs color changer, Brother punchcard KMs 2 
Knitting in pattern with 2 carriages, Brother punchcard KMs 1 
The Punchcard used in the video Brother punchcard machines repeat the preselection of needles on the first pass with the carriage from the opposite side to advantage in reproducing the swatch. The two 892E carriages  If a second punchcard carriage is not available but an electronic one is, the model year may affect the fit, but an electronic carriage can be used on a punchcard machine to advance the card and select needles.
The first row on the Studio card is locked on row 3 to preselect the first tuck row on the Brother from right to left
Rows 1-2: COL, set the carriage to tuck in both directions, make 2 carriage passes, ending COL with the carriage positioned on the extension rail, clearing the belt
Rows 3-4: COR, begin with the second carriage set to KC and outside the set line, and do not push in any cam buttons. Prepare your weaving yarn. Knit to the left, the card does not advance.
COL: weave the second row, move the carriage back ending COR on the extension rail, clearing the belt
Rows 5-8: COL, the card does not advance on the first pass to the right, knit 4 rows of tuck stitches, ending COL on the extension rail, clearing the belt
Rows 9-10: COR, repeat 2 rows of knit weaving
reminder: any hesitation with movement back and forth of either carriage once it is on the knit bed and selecting, will advance the card one design row
Repeat Rows # 5-10 twice to complete each full repeat segment
Choose an ending pattern segment and bind-off.
The proof of concept uses two slightly different yarn background shades again   Other tuck-stitch combination fabrics
Tuck stitch combination fabrics 
Combining tuck stitches with lace 2 (automating them)
Combining tuck stitches with lace 1
Tuck and garter stitch: from hand knit to machine knit

“Crochet” meets machine knitting techniques: working with short rows
More on using multiple carriages
Revisiting knitting with 2 carriages single bed, 910 vs Ayab so far
Geometric shapes on ribber fabrics with tuck stitches 2; knitting with 4 carriages 
Ribber fabrics produced with 2 knit carriages selecting needles 

More slip stitch experiments inspired by commercial designs

PRADA knitwear often becomes a source for inspiration and discussion both in hand and machine-knitting forums. A recent sample:  Developing proofs of concept can begin to be achieved by reducing repeats in size, making sampling quicker to achieve and evaluate.
Larger automated repeats by default require electronic machine programming.
Spreadsheets offer an opportunity to plan color-changing sequences ahead of time and to check their horizontal and vertical alignments.
If a color changer is in use, in the Japanese machine models it sits on the left.
Color changes are made away from and back to the changer as frequently as every 2 rows, or as needed in the specific design.
Other brand machine models have color changers on each side, allowing for single rows knit in any one color and for dividing repeat segments differently.
The assumption here, to begin with, is that each color is carried for an even number of rows.
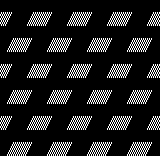
This chart was developed using Numbers for Mac.  The repeat is 40 cells in width, and 52 cells in height, and is outlined with a red border. It is planned so as to return to the initial color selection when completed, maintaining a continuous design,  tested on 80 stitches.     Its alignment is not on a true diagonal, and shapes are offset To duplicate the swatch, cast on and knit for a preplanned number of rows with the dark color.
Needle selection serves as a visual guide to the need for color changing in addition to or instead of row counts.
End needle selection is in use, there are no empty needles in this design.
COR: make the first preselection row from right to left, toward the color changer.
COL: remember to set the knit carriage to slip in both directions, pick up the light color
change color every 2 rows until every needle is preselected when moving from the right and back to the color changer (14 rows)
COL: every needle has been pre-selected. During every needle selection, only the dark color is used until preselection changes once more as the knit carriage returns to the left (12 rows)
COL:
pick up the light color, resume with color changes every 2 rows (14 rows)
COL: a 12-row sequence with every needle preselection completes the 52-row design.
Repeat the process ending with a preplanned number of rows knit in the dark yarn, and bind off. Expanding the design repeat would change the curvature in the solid color stripes.
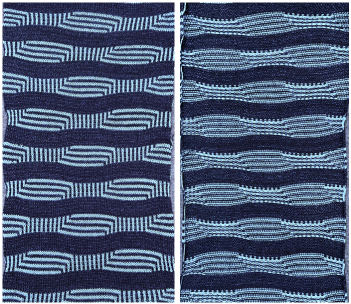
This knit is by LAFAYETTE 148, NY.  It is offered with coordinated pieces, which appear to use both a knit and a purl version as the exterior of the knit.  Beginning with an electronic slip stitch test emulating the larger shapes in alternating colors, adhering to the limitation of using an even number of rows in each color change, patterning shifts are explored in this 30X24 stitch repeat.  A tiling test The extra horizontal lines formed in the swatch are because the goals are
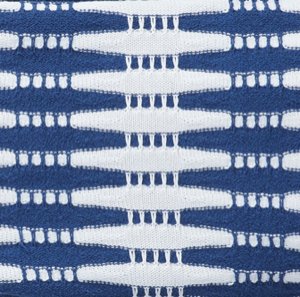
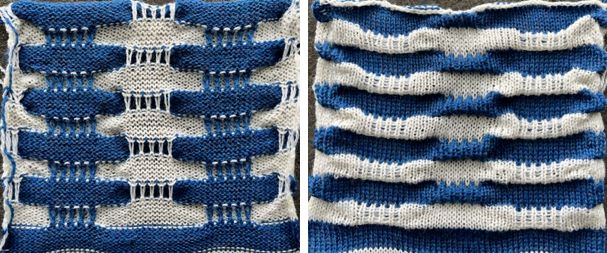
1. to make larger shapes in alternating colors with long stitches in the contrasting color in front of them on the knit side,
2. automate the process,
3. and use the color changer.
In each case, the new color needs to be knit first to and from the color changer in order for its stitches to form those elongated stitches in it on the knit side, and knit again after the contrasting color rows to complete each segment of the full repeat.
The visualization chart for the first experiment:
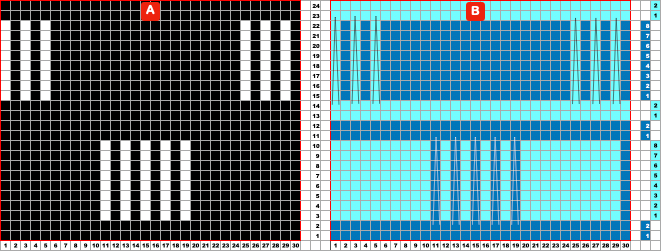
A 30X24 repeat: black cells form knit stitches including below and above white cells. White cells slip until a black cell occurs directly above them.
B a knit side visualization of color changes: the elongated stitches, marked by conical lines, are drawn where they would appear, with floats formed behind them by skipped stitches.  Eliminating extra striping by bringing elongated stitches to the purl side may be achieved by transferring stitches between beds, and using programmed needle preselection to track when to do that.
Taking the same repeat into consideration, the orange cells serve as markers for stitch transfers  A programmable repeat:  Cast on for every other needle rib, then transfer all stitches to the top bed. This allows for even weight distribution on all stitches.
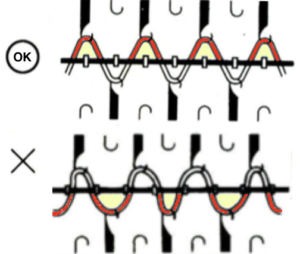
When a closed cast-on does not matter, the “broken toe” cast-on is an alternative to having all stitches on either bed  Using the ribber comb to cast on the single bed is documented in the post  Both the knit and ribber carriages are in use.  The knit carriage remains set to knit throughout, end needle selection is engaged.
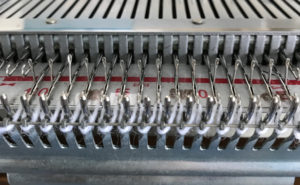
The ribber carriage is set to slip throughout, with needles point to point, its stitches are never knit, they are held until a transfer is made once again.
They stay in the B position after transfers so as not to be knit, are held, and will form the elongated stitches on the purl side, knitting off when the same color is returned to the opposite bed every 8 rows.
After transfers, empty needles are taken completely out of work.
In this visualization, the conical shapes mark areas where the elongated stitches will form on the purl side, R marks stitches transferred down to the ribber, and M, the stitches transferred to the top bed:  To duplicate my swatch, cast on and knit at least one base row with the dark color, ending COR
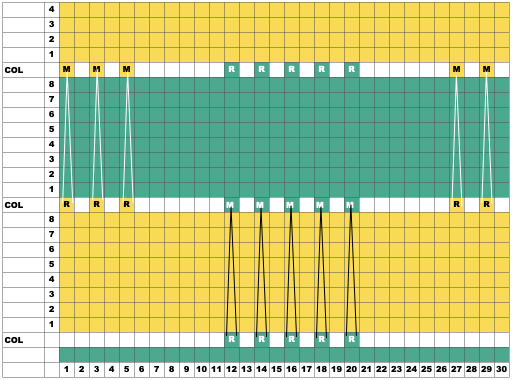
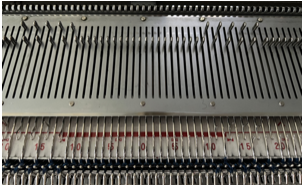
COR: program the first row, knit 1 row to the left
COL: transfer stitches on preselected needles down to the ribber, and push empty top bed needles out of work, OOW.
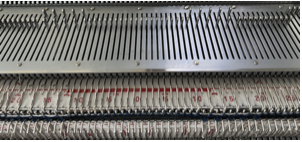
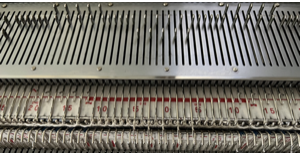
Change to a light color. As the knit carriage moves to and from the color changer, floats will form in the location of the out-of-work needles on the top bed.  COR: knit 8 rows, there will be a new preselection as the knit carriage moves to the left COL: transfer needles previously on the ribber onto the empty needles on the top bed, placing them in work position so they will knit on the next pass, and transfer new needle preselections down to the ribber.  Knit 8 more rows, change to the dark color, repeat transfers of ribber stitches up, preselected stitches down, and continue knitting, following needle prompts. Printing custom needle tapes is an option that relies on printing the generated images to scale.
Marking the needle tape or metal bed with water-soluble pens or pencils is the old low-tech go-to.
However, custom markings can be made on strips of paper slipped under needles on either bed and marked for any chosen spacing as well as in multiple colors.
An illustration for a test on a repeat different from the programmed one began with marking a strip of paper on the top bed for alternating transfers to and from each bed using two colors:   The resulting tape may be used on either bed, seen here placed on the ribber. The markings on the metal bed are left over from a previous project.   The reversed carriage settings The repeat is not programmed, setting the knit bed to slip allows the knit carriage to make free passes from one side to the other, and the stitches moved to it never knit.
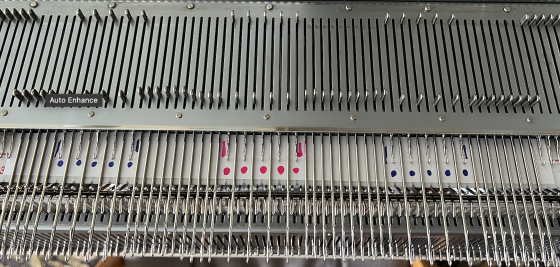
All knitting happens on the ribber.
In Japanese machines, the ribber often produces tighter stitches. Since most needles will be knitting, the tension normally used for the chosen yarn on the top bed for stocking stitch may have to be loosened by one or two numbers for smooth knitting. In Brother machines, the higher the number, the looser the stitch.
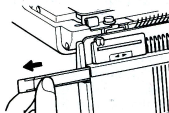
The ribber needle presser bar for Brother machines is made of plastic alone and does not exert as much pressure on the needles as the ones used on the single bed, requiring care in watching for needles that slide into other than the proper position during knitting.
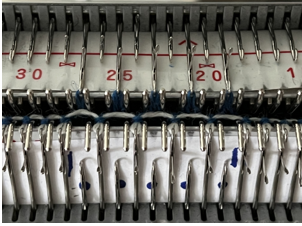
Emptied needles need to be placed completely out of work.
Floats will form on the ribber as the carriages move across the beds in the location of the empty needles, and the skipped stitches on the opposite bed will grow in length.  Though the knit side of the fabric is facing the knitter, the long loops appear behind it on the purl side, with the results in the same family as the automated single bed result but with more fiddly execution.  Seeking a closer match for the inspiration companion pieces:
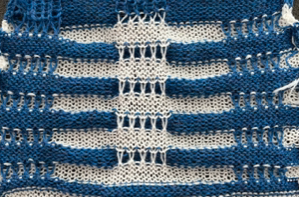
in multicolor slip-stitch patterning, the initial preselection row is generally made toward the color changer, with changes happening from the left and spaced at predetermined even numbers of rows.
Shifting that convention allows for elongated stitches on alternating color shapes without extra horizontal stripes in each color.
The repeat was first visualized and planned in a spreadsheet, repeated twice the necessary width, and outlined with a red border.
A few rows were added at the top of the table, checking for proper alignment of both the design and the color changes.  The single repeat measures 14 pixels in width by 16 in height and was tested on 44 stitches, with a planned knit stitch vertical border on each side.  To duplicate the swatch, cast on using a dark color.
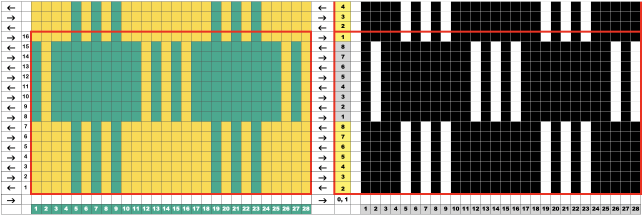
COL: the first design row in the adjusted repeat is programmed from left to right, away from the color changer with no yarn in the feeder. Setting the machine to slip in both directions allows the free pass when all needles are in the B position.
COR: thread the light color through the changer’s sinker plate, A position, and knit to the left
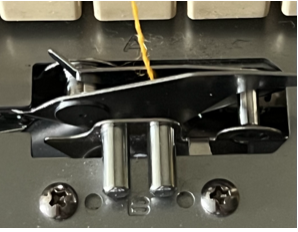
COL: make certain the light color yarn is properly threaded in its place in the color changer. Continue knitting until new needle preselections are made as the carriage returns to the left
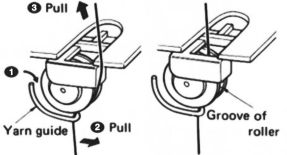
COL: change to the dark color, subsequent color changes happen every 8 rows.  
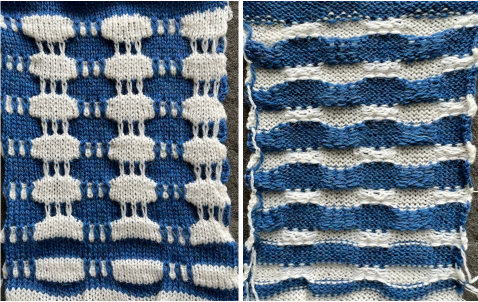
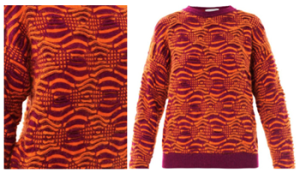
Reviewing a post from 2015 on a slip stitch experiment, the second source image now found attributed to Max Mara, inspired me to try a version using software presently available.  lyst comboThe speed in developing DIY designs and knitting them has grown exponentially with the use of new software and the capacity to move away from mylar sheets or punchcards.
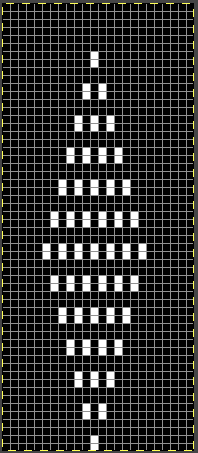
The first 24X56 diamond shape
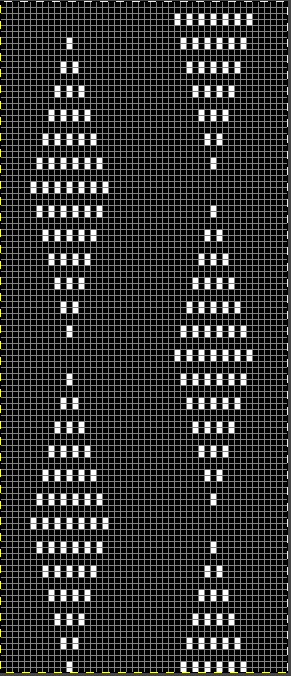
rendered in half drop, to a 48X112 repeat, with a test in the alignment of multiples  The proof of concept was knit at first with color changes every 2 rows, then converted to double length using the machine built-in function, followed by color changes every 4 rows.
The light color yarn is a wool rayon, the dark is a shetland wool.  The all-knit rows on the side edges create ruffles.
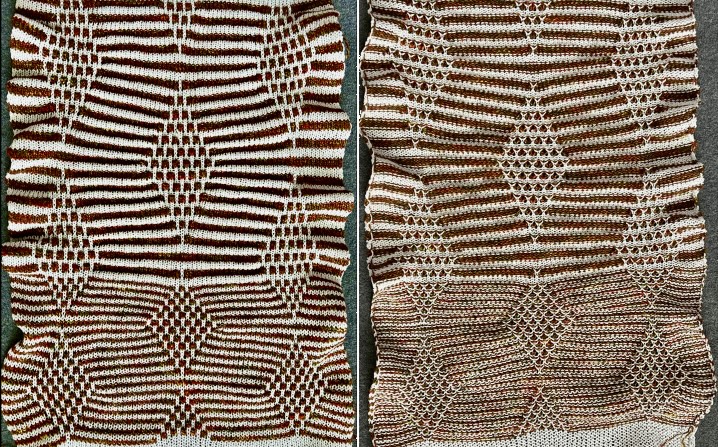
An attempt to show the changes in texture on both surfaces:   The limit on Japanese model machines for tuck stitch unless using very thin yarns is often 4 rows.
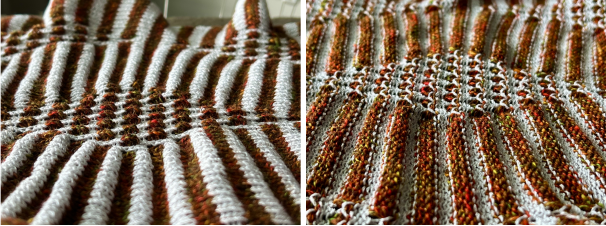
The inspiration image appears to have far taller color stripes, slip stitch is far more tolerant than tuck, what about trying color changes every 8 rows?
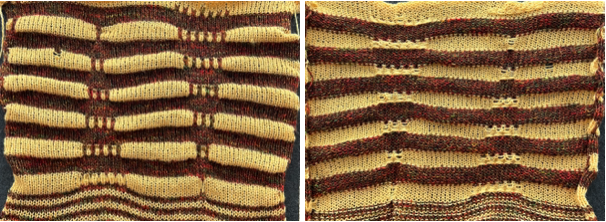
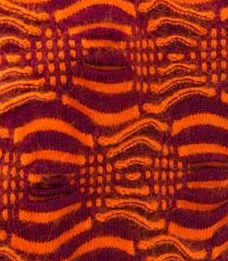
Keeping in mind that the light color consistently forms the elongated stitches on the purl side with no immediately visible long stitches on the dark color, the repeat first doubled to 48X224, if doubled in length again would require 448 rows of knitting!   A quick partial test revealed the diamond shape is far too elongated and that dark stripe needs to be gathered as well, Back to the drawing board: after taking a break, the inspiration image is magnified and reexamined, revealing the fact that there are knit and purl stitch combinations across the same rows, not practical to execute on home knitting machines (excluding G carriages from the conversation).   A compromise, still seeking to elongate only the stitches in the dark color on the knit side of a richly textured knit, planned for color changes every 6 rows,  with color reversal necessary for slip stitch knitting, adjusted in width, the tested 40X162 repeat produces a gathered dark color as well. The knit stitches on either side of the shape form ruffles. There were tension adjustments at the bottom of the swatch, increasing the length of the held stitches, the shape is still too elongated for my eye An adjusted repeat, the last in the series, 29X168tiled to check alignments  and knit on 80 sitch width using this 86 X168 programmed repeat  
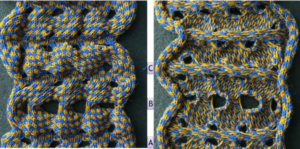
A return to plaiting and double bed hand transfers

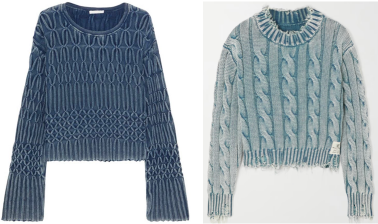
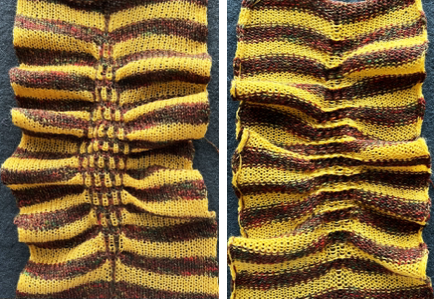
These two sweaters, by Denimist on the left, and Chloé on the right,  led me to reconsider plaiting, and as usual, whether any repeat may be programmed to make tracking of any hand techniques easier.
A review of plaiting on Brother machines.
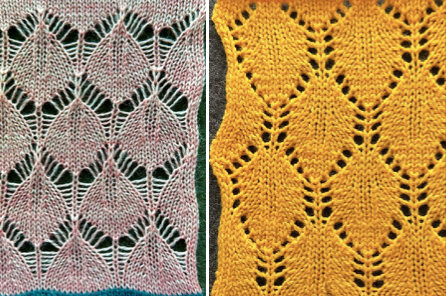
The black cells represent needles in work and knitting on the top bed. Cast on for every needle rib, change the configuration so that stitches on needles represented by white cells are transferred down to the ribber.
Needles left empty after transfers are pushed back to position A, out of work/ OOW.
The first repeat was planned for 30 stitches, but some of my tests were knit on slightly different stitch counts.   The main bed is set to KCII. Any time empty needles are part of the design repeat, the end needle selection is canceled. The stitch count remains constant throughout.
The main bed does not need to be set to slip stitch, it can be left set for plain knitting.
The needle selection is used only as a guide to the transfers, which are made using a 2-prong tool in the direction of the arrows on the knit bed every 8 rows.
The swatch on the left was knit using 2/8 wool and no-stretch serger thread for the plaiting yarn, on the right the thicker yarn is 2/15, with fiber content for the thin yarn no longer readable.  An equal-thickness dark is added on the left, with visible color distribution issues. On the right, the light is a 2/28 Italian import, the red a 20/2 rayon, and I began to test the introduction of possible cable crossings along with considering the width of all knit vertical side borders.   Varying the overall spacing and the number of rows knit before cable crossings, 4 on the left, 6 on the right. The yarn in the latter swatch is a thin, coarse, inexpensive wool. The cabled stitches were hard to knit on the next pass, the low color contrast in the finished surface makes the texture effect subtle. The instructions here in principle are as given above. The single stitch in the 1X2 cable crossings is always brought forward on the purl side prior to any transfers of the corresponding stitch pair.
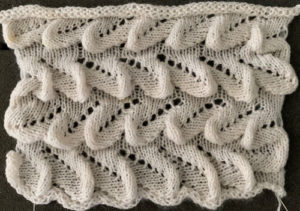
A single repeat segment imagining actions to be taken,  and a full chart for the proof of concept, 34 stitches in width  Stitches are moved after every 8 rows knit in the direction of the arrows using a 2-prong transfer tool, filling in a single empty needle to the right or left as indicated by arrows.
The empty needles are pushed back to the out-of-work position after the transfers.
The initial needle selection may be used for more than 8 rows at the bottom of the piece and the top if preferred.
A 36-stitch programmable repeat shifts the 8-row repeats shown in the colored chart   The blank cells on row 13 will serve as the area on which the 2X2 cable crossings are made.
The initial setup
after the first set of transfers groups of needles with no needle preselection serve as markers for the 2X2 cable crossings Bring needles with crossed stitches forward for easier knitting on the next carriage pass and continue knitting until needle preselection changes once more.
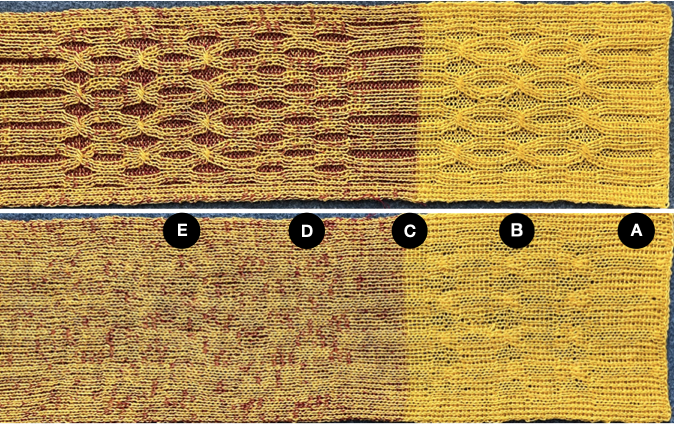
A:  fixed needle selection
B:  stitches moved with 2X2 cable crossings
C:  fixed needle selection once more. Switch yarn feeder to plaiting accessory, add plaiting yarn, with 2 yarns of equal thickness in use tension is adjusted
D:  stitches moved with 1X2 cable crossings
E:  stitches moved with 2X2 cable crossings
Return to A selection. End the swatch matching the number of rows on the fixed needle selection at its start.


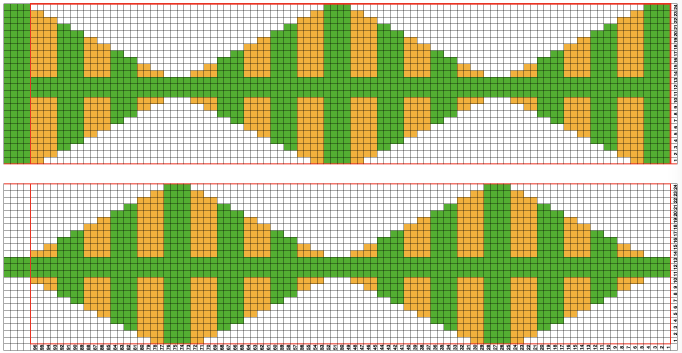
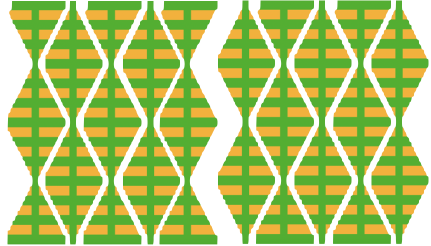
Midjourney inspired knits 1: single bed diamond shaped strips

My son recently introduced me to Midjourney and generated many images capable of inspiring a range of machine knits. The interpretation and execution may not be as simple as would initially appear, particularly to non-knitters.
Commercial knitting machines are left out of this conversation. The fact that they have multiple beds,   and compound needles that facilitate whole garment shaping makes complex structures possible that may only be partially reproduced on home models.
Japanese machines such as mine use two beds, with the ribber/ second bed added for knit and purl combinations, which may be lowered as seen below when not in use, or removed altogether.  One accessory that would make things easier to reproduce more textured knit and purl variations would be a Brother G carriage, which operates on the top bed and slowly and loudly produces programmed patterns on both punchcard and electronic Brother models.
The initial Midjourney inspiration,  and a “simpler” variation.

In hand-knitting concurrent shaping of both sides can be considered.
When working on 2 needles, because the work is turned over, knit and purl execution will change when ridges visible on both faces are planned.
Knit stitches are rectangular as opposed to square, often in a 4/3 ratio.
This chart begins to illustrate the actions involved.  Machine knitters constantly look at the purl side when working on the top bed unless ladders are manually reworked into knit stitches or the work is turned over.
Turning the work over is executable using a garter bar accessory, available for use on multiple gauge machines.  The standard and bulky garter bars offer sections that may be joined together for use on the whole needle bed, while the tool for holding, transferring, or turning over small stitches offers only 30 eyelets, the red lines on it were made with red nail polish, a handy way to mark KM tools or even linkers at fixed intervals to save constant counting.
The work is pushed off onto the garter bar with the curved ridges up and returned to the machine to create the purl ridges after turning the bar over.
At that time, the needle hooks will grab the stitches from back to front and the bar can be removed.  If the yarn supply is to be kept continuous, the knit carriage and yarn need to be brought to the opposite side before resuming knitting.
Spreadsheets offer a way of visualizing steps ahead of any swatching. Not aiming for a direct copy of any of the Midjourney results, this is a start with 4-row sequences
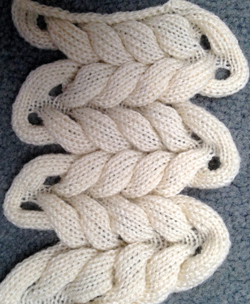
and an illustration of how strips might be joined to produce slightly different side edges. The diamonds are formed by increasing and decreasing on both side edges.
The sample is knit in a 2/8 wool, which even when knitting at tension 9 yielded stitches far too tight to remove onto the standard gauge garter bar, the 30 stitch tool was used.
Stocking stitch tends to roll to the purl side. For a cleaner edge, fully fashioned shaping is used.
From the Brother knitting techniques book, to decrease a stitch:  To increase one If both sides are shaped at the same time, the length may get affected by slight differences in stitch height formations on the carriage side as opposed to opposite the carriage.
In the test swatch increases and decreases were made consistently opposite the carriage, resulting in shaping on alternate sides every 2 rows.
Charting out the concept: the arrows represent the direction the carriage will be moving.
The blank row occurs where the knit is turned over.
A single row is knit across all stitches to the opposite side after the knit is turned before returning to shaping.
The last 2 rows in the chart would be the first 2 in the following shape.
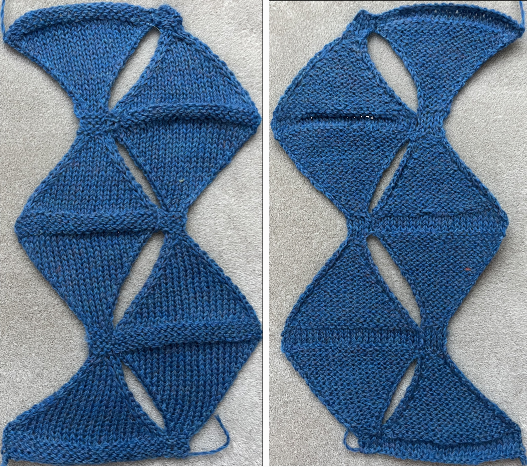
The black cells represent what will become purl rows on the knit ground. The proof of concept:  The machine-knit sample aside from a quick hand-knit on #8 needles, attempting garter ridges, offering a lesson in gauge and texture.
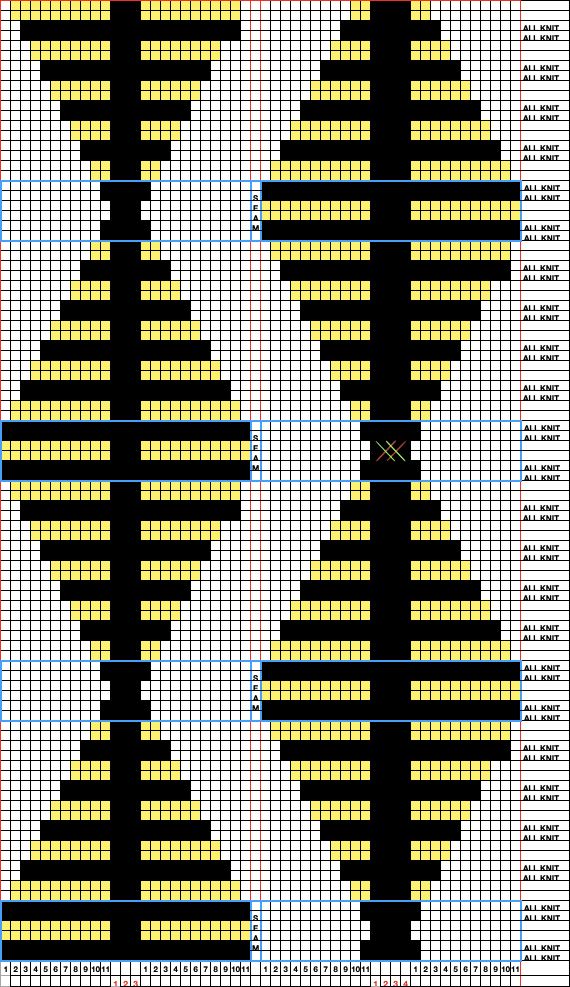
In a final piece, the shaping in the hand-knit would be carefully considered. A first draft plotting out arrangements for alternating knit/ purl ridges: the center column can be adjusted to any width, and cables or other manipulations could occur at the narrow pivot points.
Seaming or joining would occur in areas where rows are outlined in blue. Those areas could be lengthened as well.
The chart can be further marked for beginning with either a half or a full diamond. For hand knitters, the yellow cells would be purled with knit side facing, and knit with purl side facing.  A Youtube video showing building the fabric using the short row technique: https://www.youtube.com/watch?v=H7WrYOV2A6w&t=1297s
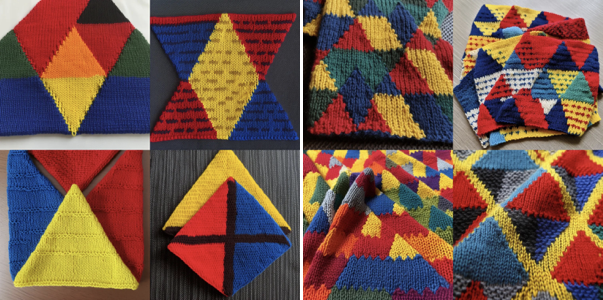
For anyone with intarsia or multicolor fondness, some AI color renditions based on triangles as well  

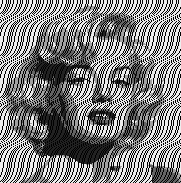
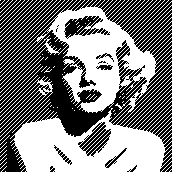
On a very different note, large, nonrepetitive AI-generated portrait images may be superimposed with brushes in any chosen design repeat to render designs such as these: