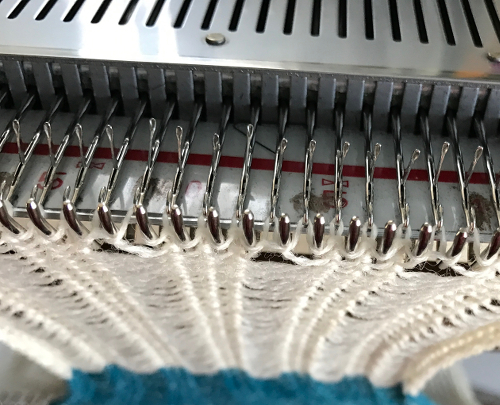
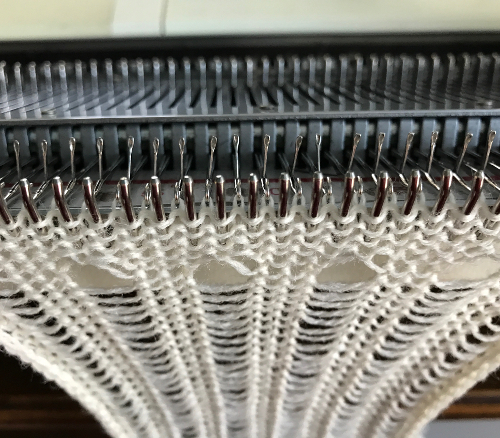
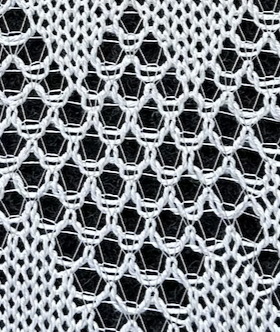
In machine knitting, stitches are usually brought out to hold opposite the carriage. If multiple stitches are brought out to hold on the carriage side, floats are created. Triangles stacked vertically as seen in the previous post will create a spiral curve along the line where stitches are held. The carriage needs to get to the opposite side and back after each ‘decrease’ or ‘increase’, so pairs of rows are used to execute and reverse angles in short row shaping. When multiple rows are knit independently from the rest of the knit, slits are created. In two-row sequences, these are generally similar to holes created in lace, in longer sequences much larger slits are produced. The latter are often used as planned design elements. The small holes being visible may not pose a problem for the knitter. If they do, wrapping the adjacent needles can help eliminate them, but the doubled yarn in the wrapped needle may create small, sometimes visible bumps on the knit side of the finished piece, creating a secondary pattern.
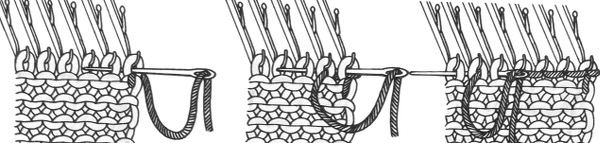
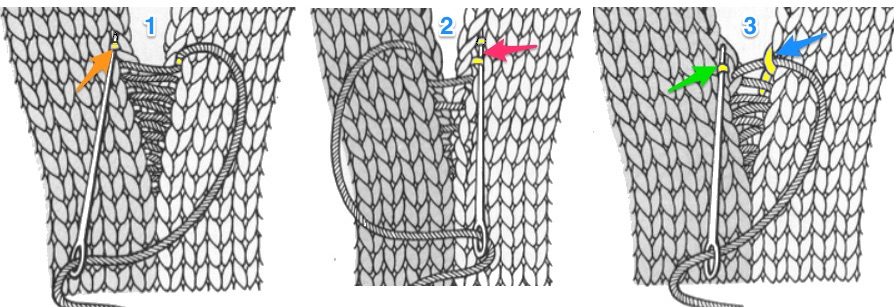
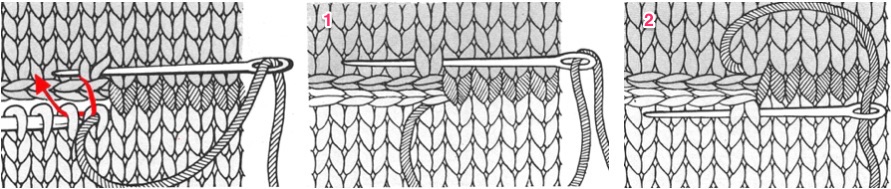
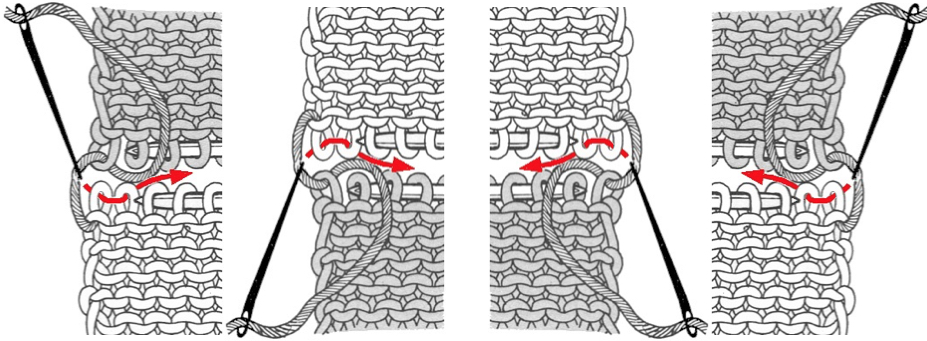
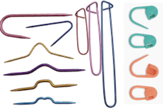
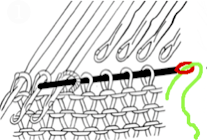
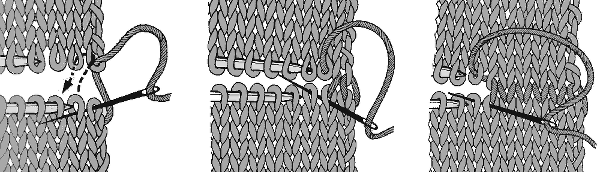
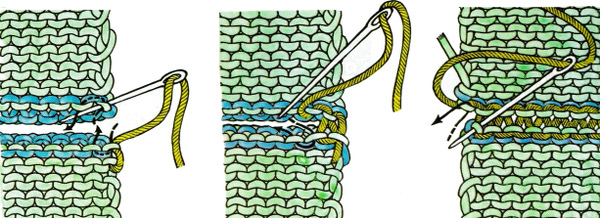
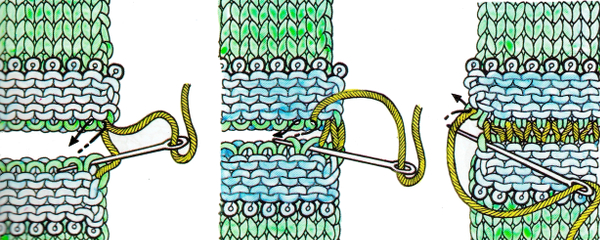
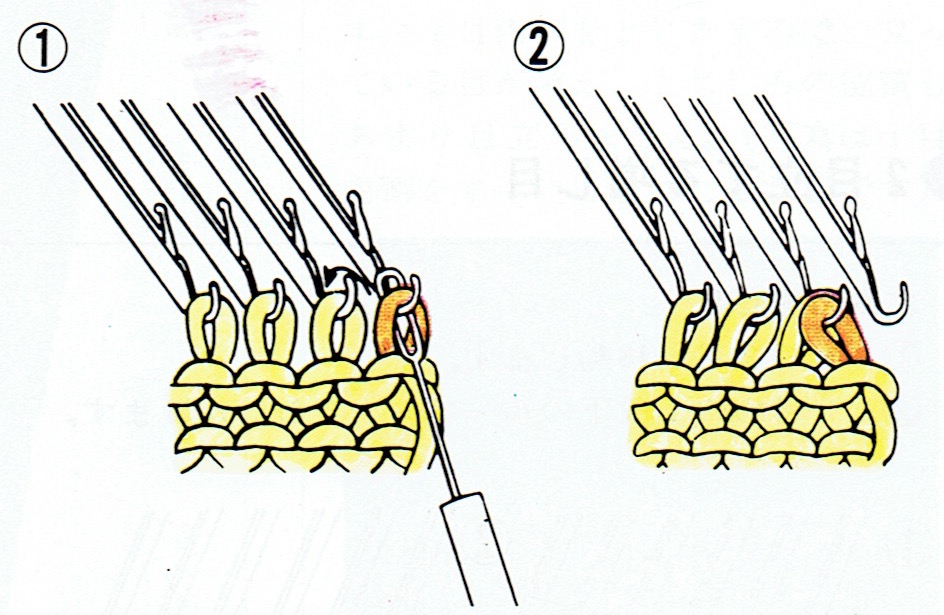
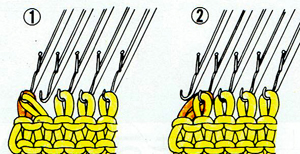
Reducing eyelet size: in traditional wrapping required needle(s) are brought out to hold, and the yarn is wrapped under and around the last needle in the hold position on the carriage side before knitting the next carriage pass
COR COL 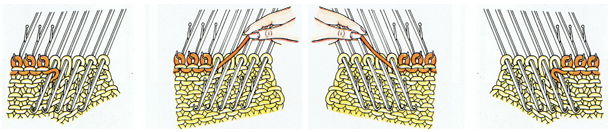
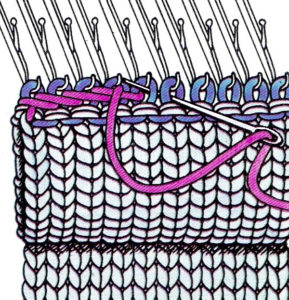
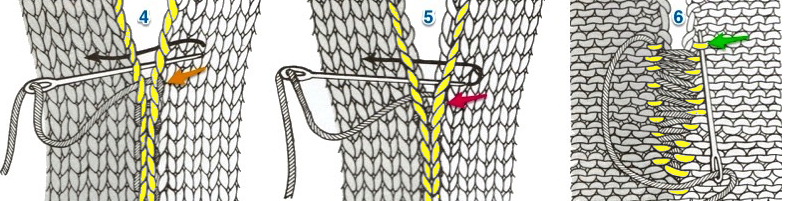
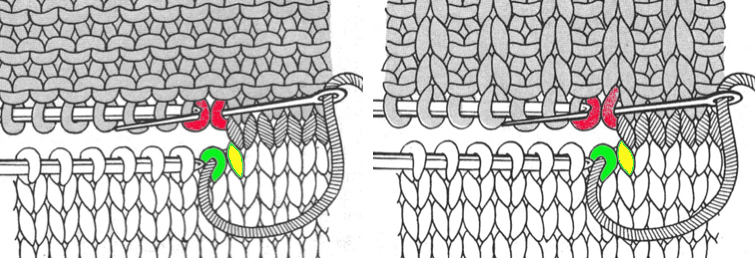
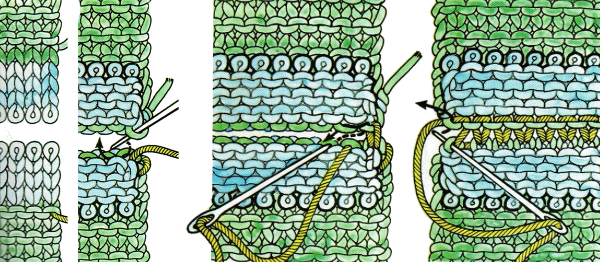
The “automatic method” for wrapping
Decreasing: if COR (COL), 1 stitch to the hold position at a time, set the machine for holding. Bring one needle on the same side as the carriage into the hold position. Pass the carriage to the opposite side. COL (COR) repeat if shaping is 2-sided, or if shaping is only on the starting side, knit back to it, and with COR (COL) repeat process. Increasing single stitch: bring 1 needle always opposite the carriage into the work position.
Decreasing: more than 1 needle or stitch at a time: if COR (COL), place 1 fewer needle than required into hold on the opposite side as the carriage, knit 1 row to left (right), toward the needle in hold. When COL (COR), bring into hold the last, additional needle. COL (COR) repeat the directions if shaping is 2-sided, or if shaping is only on the starting side, knit back to it, and with COR (COL) continue decreases on the single, opposite side.
Increasing: to remove stitches from holding, COR (COL) place the desired number of needles into the working position on the side opposite the carriage, knit one row, repeat with COL (COR) if shaping is on both sides, or knit back to starting position COR (COL) and continue increases on the single, opposite side.
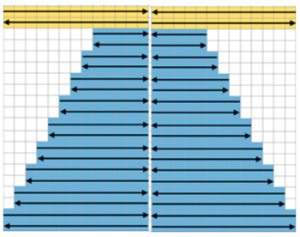
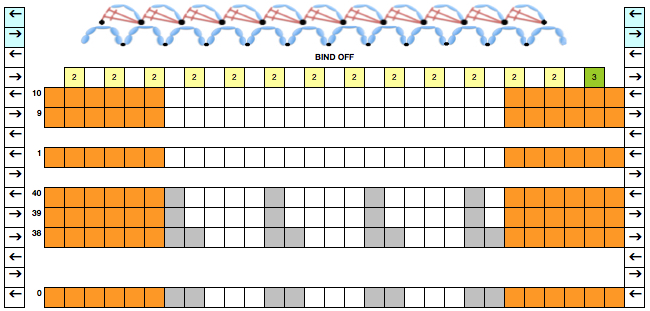
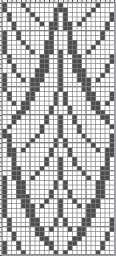
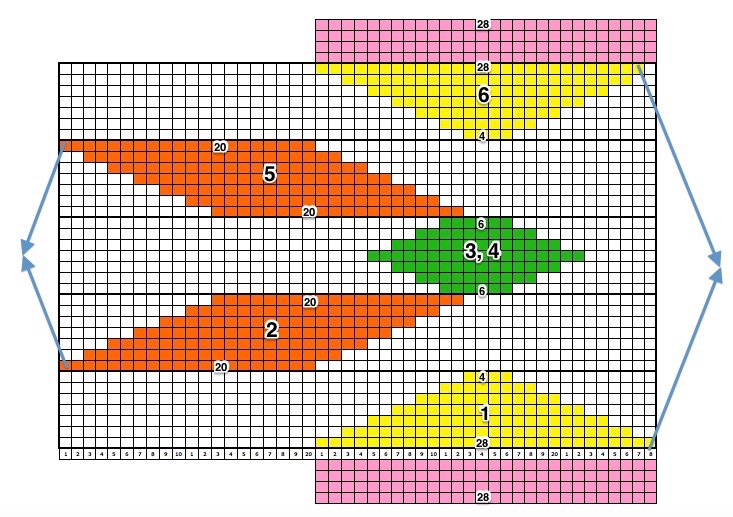
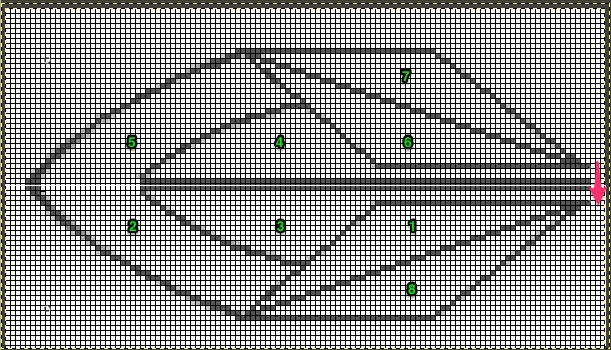
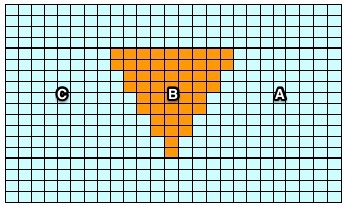
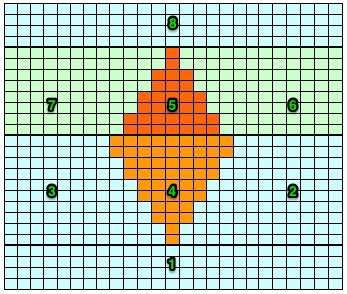
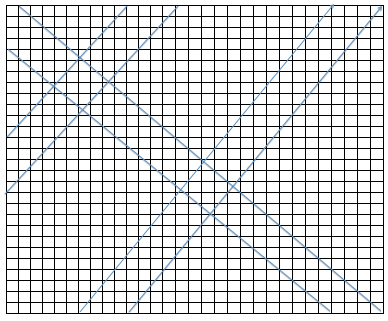
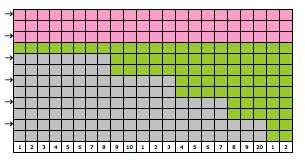
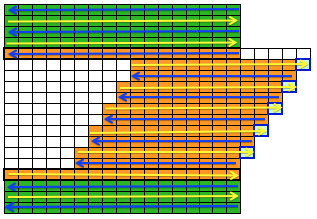
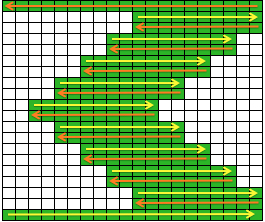
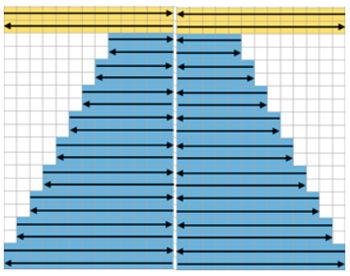
Charting out shapes knitting or programming stacked equal triangles/spirals: the wedge illustrated in the previous post  “Air knitting” is often used to think out fabric issues before swatching using yarn. Drawing lines to follow the carriage movement direction required to keep the knitting continuous, whether on graph paper or within software programs can help sort out shapes that will work in short rowing. Holding needs to happen in 2-row sequences. Below, black lines and arrows indicate the direction of knitting for each row, in this instance beginning with COR. Blue = knit stitches, yellow = all knit rows at the completion of each wedge (2 or multiple of 2, depending on planned design). This repeat is suitable for knitting a continuous strip with ruffling/spiraling at various degrees, not for ‘pie’ shapes.
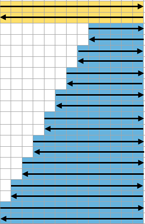
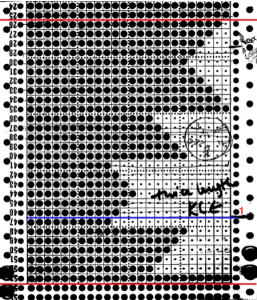
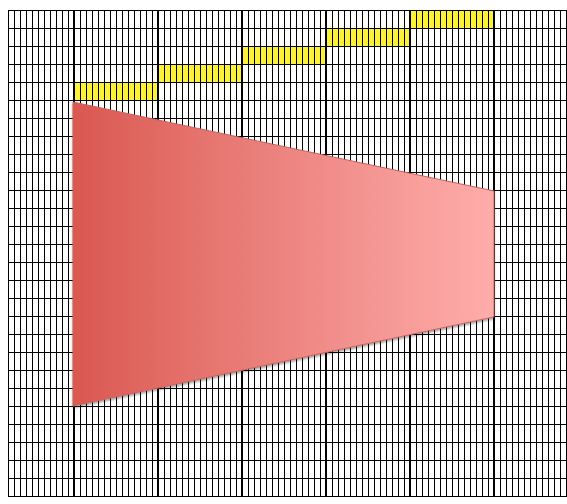
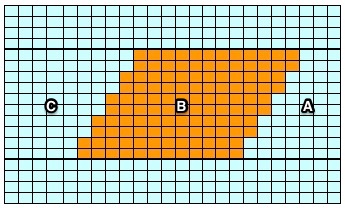
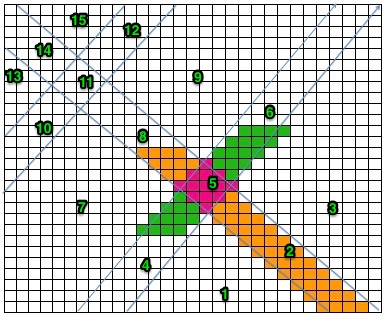
Working out the repeat: the red line represents the starting, selection (KC), knit row, the numbers at the bottom the width of the repeat, the numbers to the side its height. The first repeat A results in the fewest punched holes, drawn squares, or programmed pixels, requiring being knit double length. The remaining repeats (B, C) are drawn double length, standard card rotation is used. Eyelets form at the held edge. C takes automatic wrapping to decrease eyelet size at the held edge into account. When any sequences are programmed for knitting using slip stitch, the end needle selection is always canceled by using KCII or turning non-needle selection cams in punchcard models.
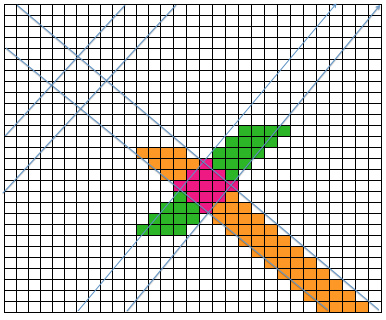
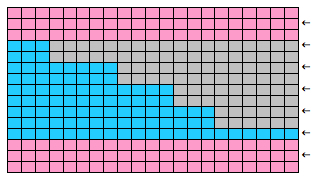
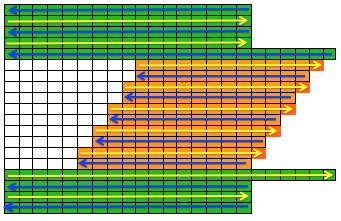
A B C 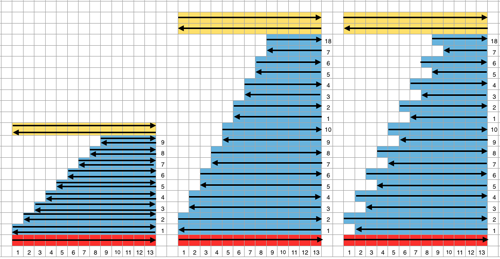 the start of a miter shape: blue repeat, extra knit rows in yellow, auto hold on the bottom right
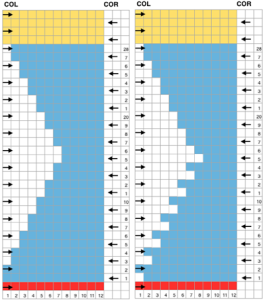
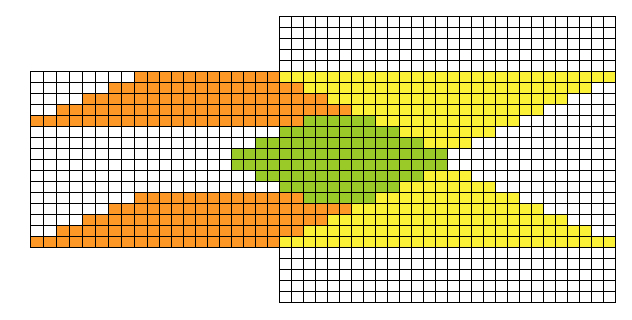
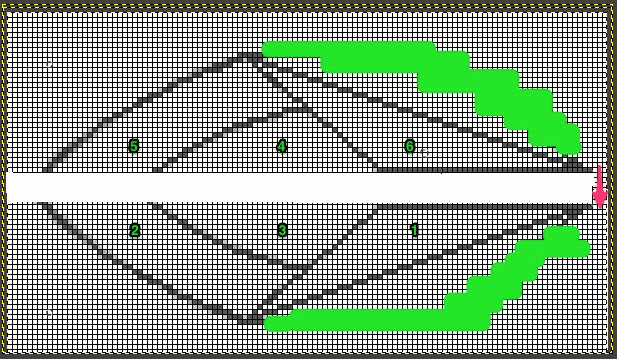
Going 3D: in many designs, the original repeat may simply be mirrored to be executed. If this is done here, one can see there is no longer a continuous knitting line, directional arrows are moving in opposite directions or toward each other from the center point
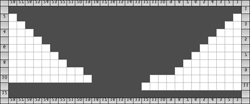
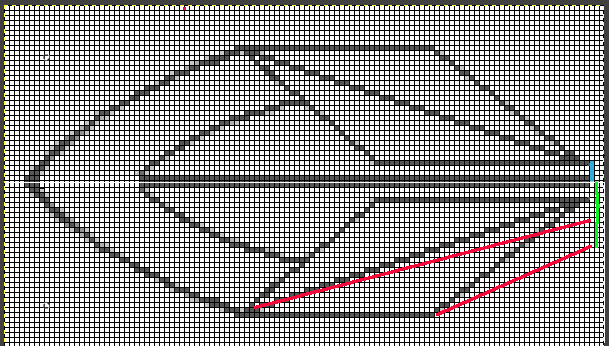
 restoring continuity
 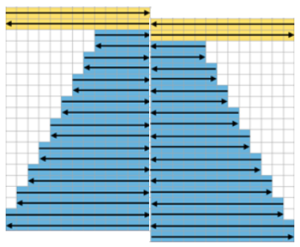 and shifting rows around to create a workable repeat
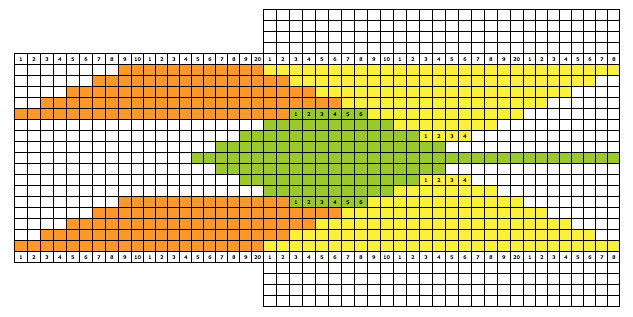
 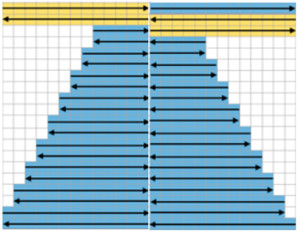 one shape knit 3 different ways: red row = KC II, all knit
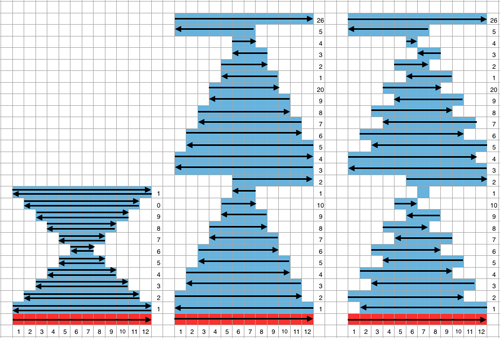
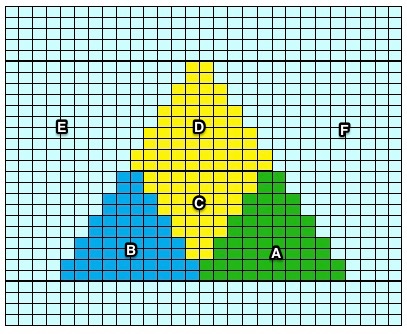
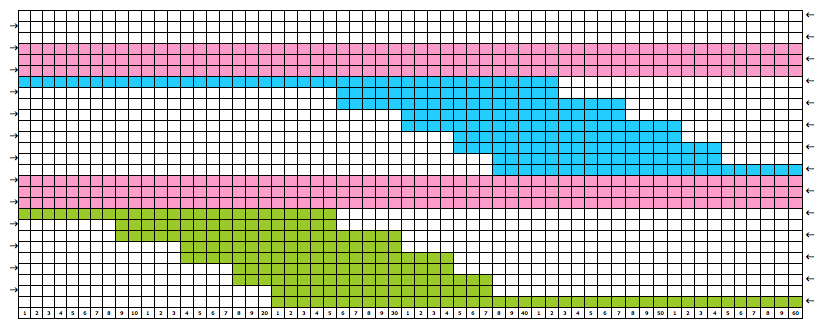
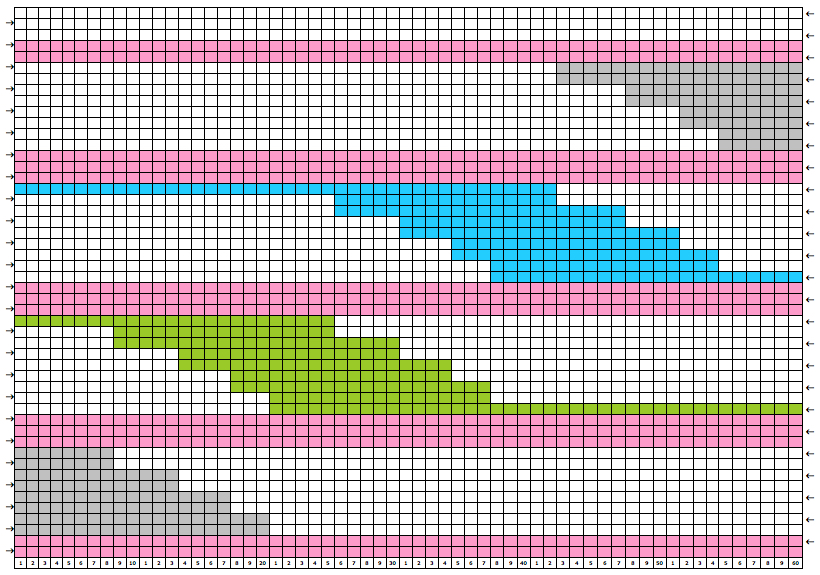
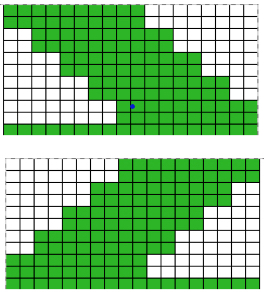
An executable 24 stitch, 26 rows repeat: black arrows alone indicate movement of carriage on the first row of the repeat, black arrows on red line indicate starting point and direction of movement of carriage for KCII rows. A begins to knit repeat with COR, B with COL. 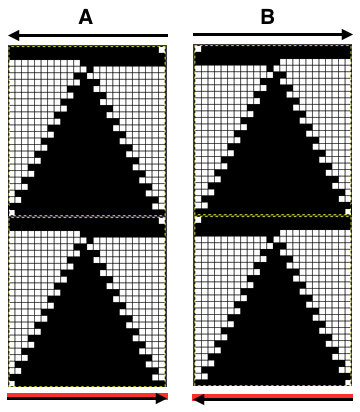 The triangle’s vertex can be squared off, the height of the repeat shortened, to make 3D shapes much rounder
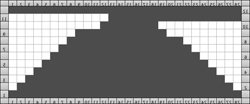
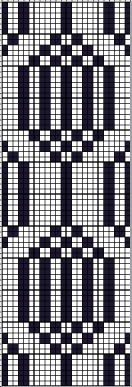
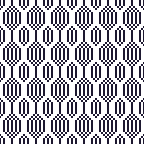
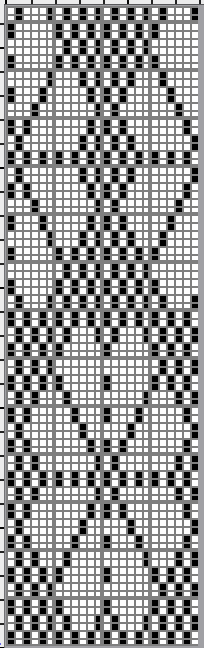
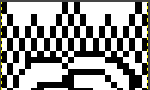
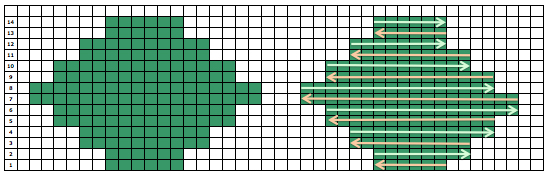
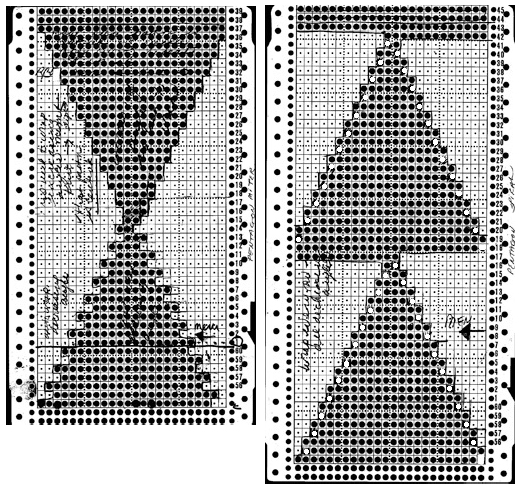
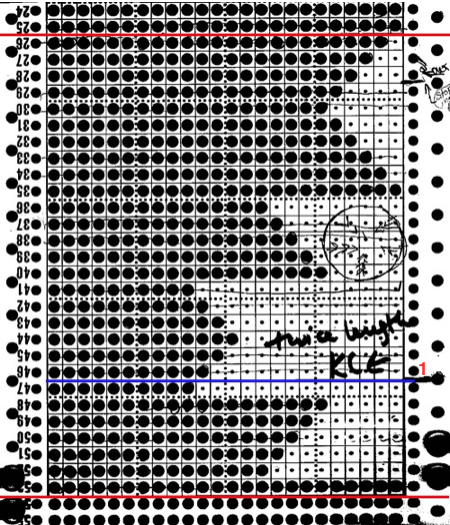
Not just for electronics: some punch card repeats to try (also suitable for any machine). End needle selection is canceled. Selection rows are always toward the first pair of rows knit in a holding pattern, so for the first 2 cards, they would be from right to left. Single rows are punched but 2-row sequences are needed, so cards must be elongated X 2; miter shaping repeat is shown on the left, spiral on the right. Narrower shapes may be created and knit on the appropriate segment of the 24-stitch repeat needle positions. Use needle tape markings as guides for placement. The preselection row is from right to left, the pattern repeat begins with COL. All punched, extra series of pairs of rows of knitting may be added at the top. Note: just a few rows may not be added with a small segment of an additional card with clips, the whole repeat may have to be split into sections to allow for the extra rows and their smooth passage through the card reader. As an alternative, more rows of all holes could be added to the original card when first punched, tested, and then trimmed if not needed. It is useful to try out the repeat as a hand technique first in any of these instances, to determine personal preference.

Going 3D: punch only actual holes (black pencil marks were originally used to mark squares that needed to be unpunched for the auto wrap on right, not the best choice for B/W scans). Two-row sequences are punched, so no elongation is needed for either repeat. Miter shaping is shown on the left, spiral on right; mem <– indicates the direction for KC row; decreasing angles are auto-wrapped, increasing angles need not be as seen in the top of miter on left, where needles are returned back to work to create the reverse shape.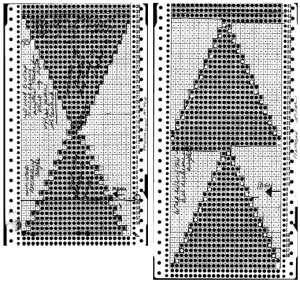
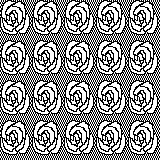
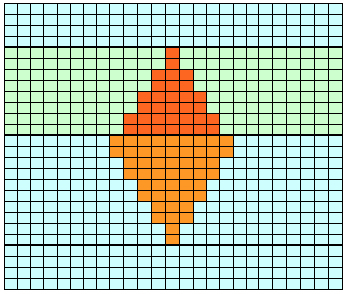
Some ruffle possibilities: all knit rows were added to the card on left with snaps, and are composed of all punched holes. The number of all knit rows between held segments determines the spacing between wedges and the degree of spiraling of the final fabric. KC row needs to be R to L for A, left to right B. Holding sequences are now staggered, changing the angle of the resulting curves. A short float is created where 2 stitches are brought to hold on the carriage side.
A: elongate X 2 B: use as is 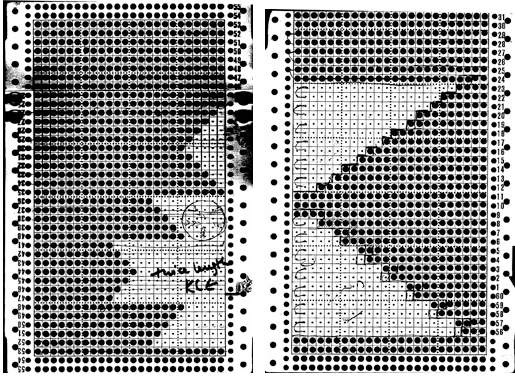
The recommended minimum for punchcard length is generally stipulated to be 36 rows. Card A without the added rows is 28 rows high (the last 2 rows are for card overlap when adding snaps), so the repeat below, with the extra segment removed, would need to be punched twice
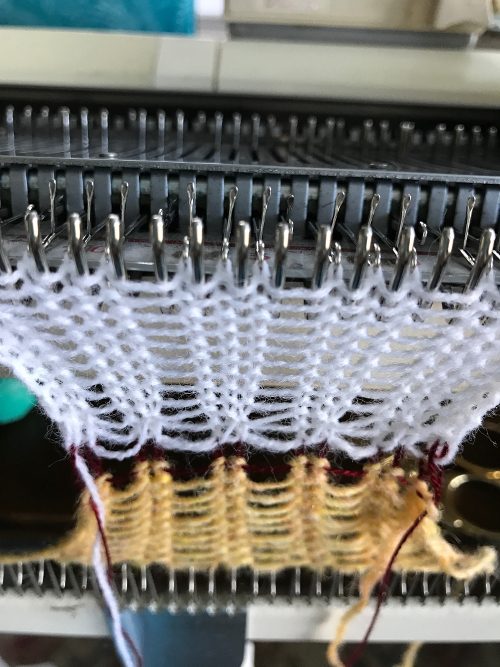
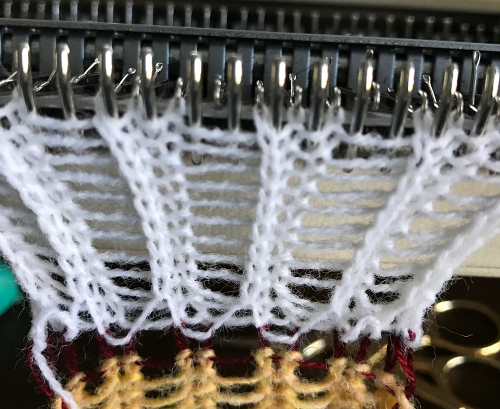
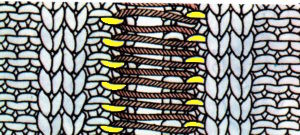
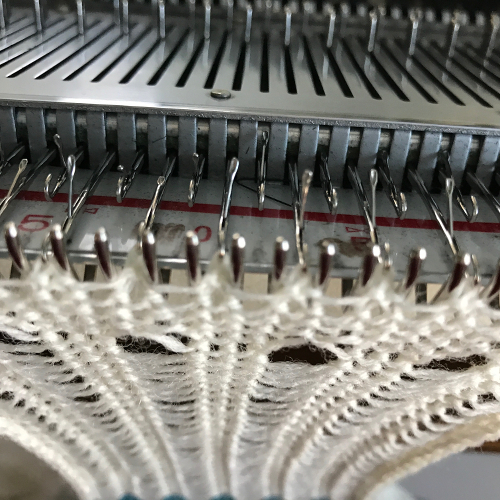
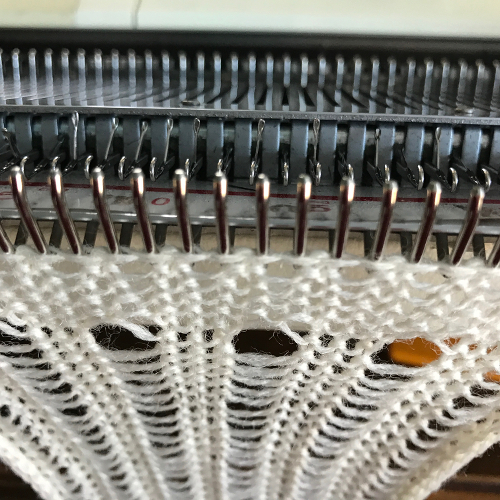
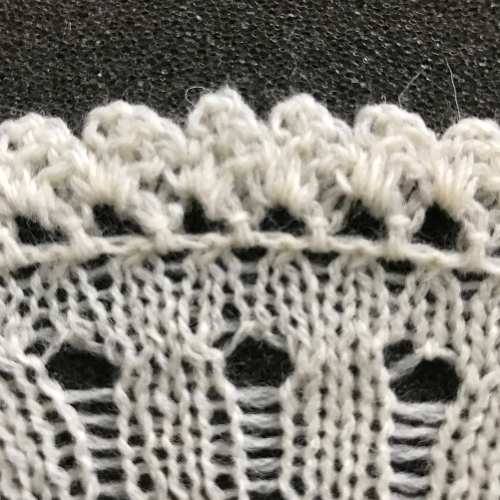
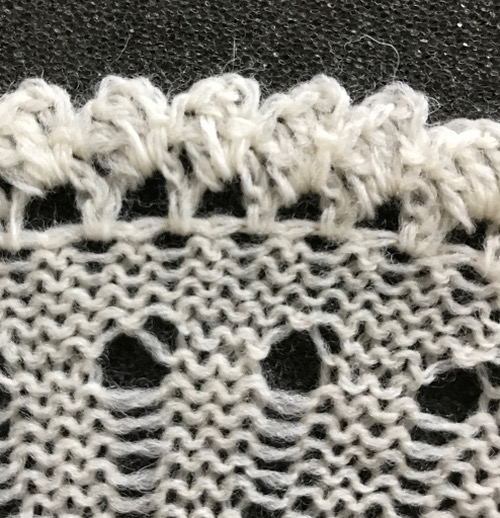
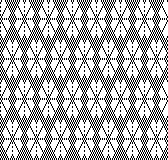
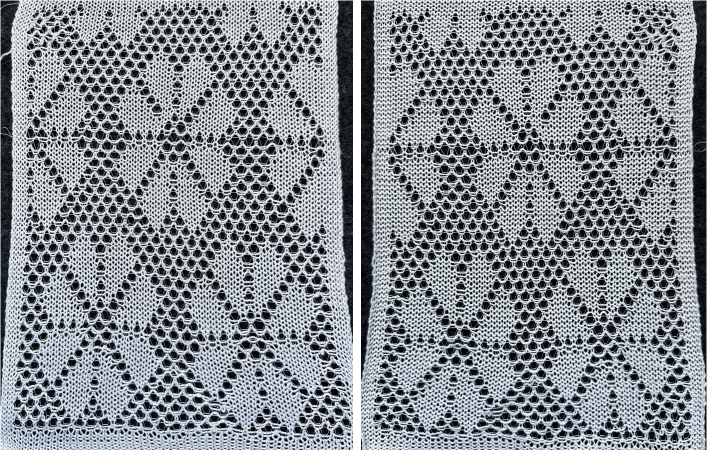
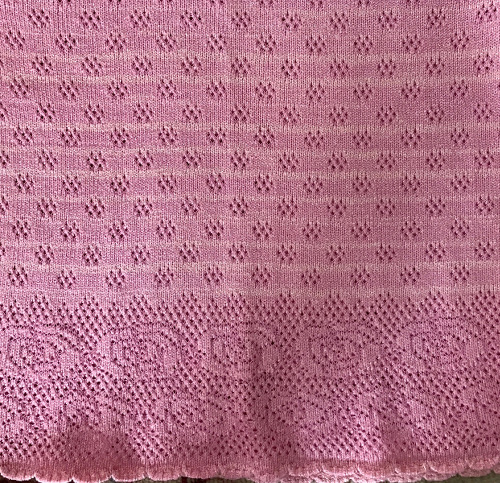
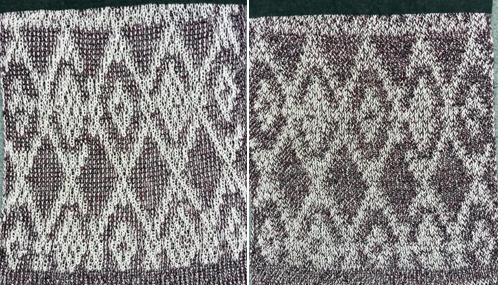
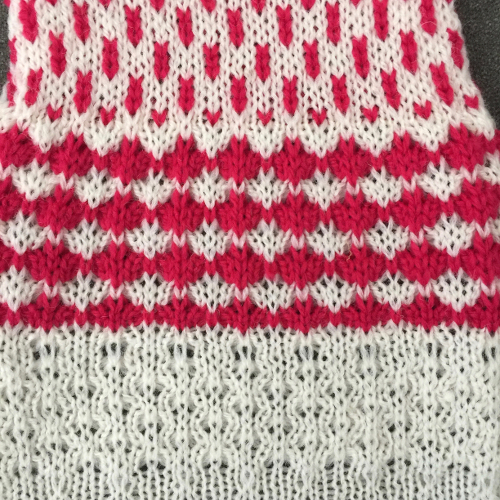
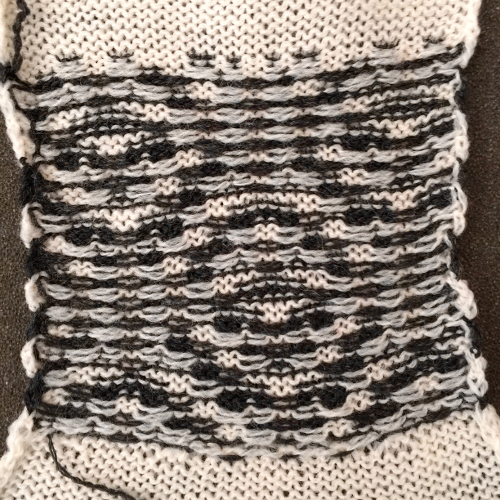
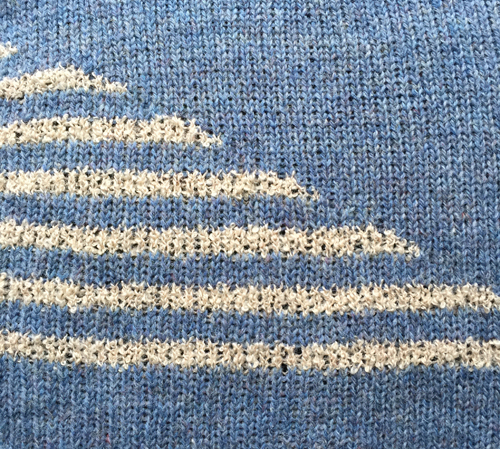
 eyelet pattern reflects shaping
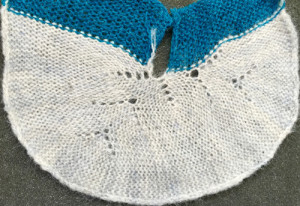

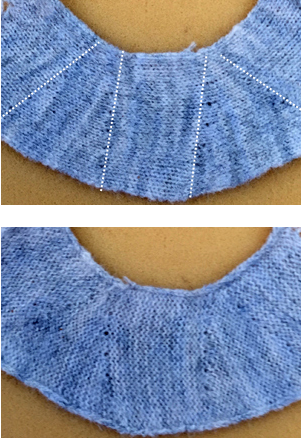
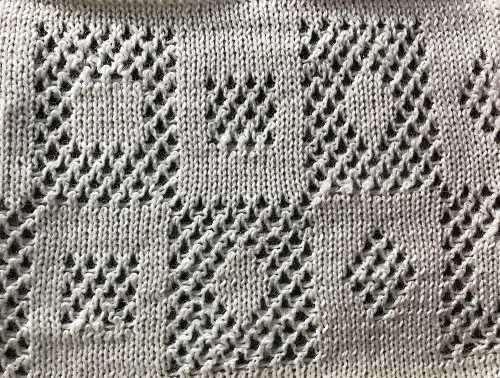
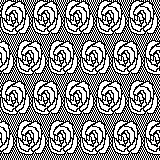
B: dotted lines outline segment: yellow dots on the purl side, the 1 needle floats 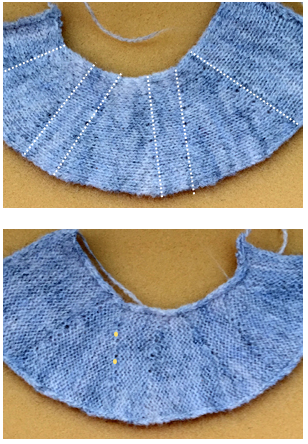 one possible card revision: red dots indicate punched holes, stitches in hold as the carriage moves from the left to the right
 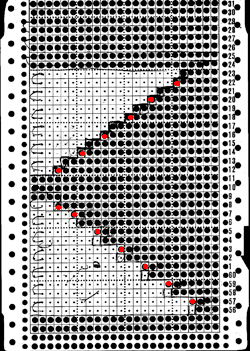 any difference in the swatch, in this yarn, was almost imperceptible; results would vary depending on yarn thickness and fiber content.
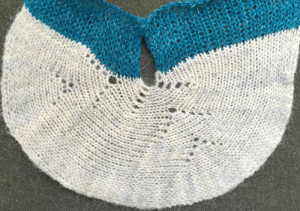
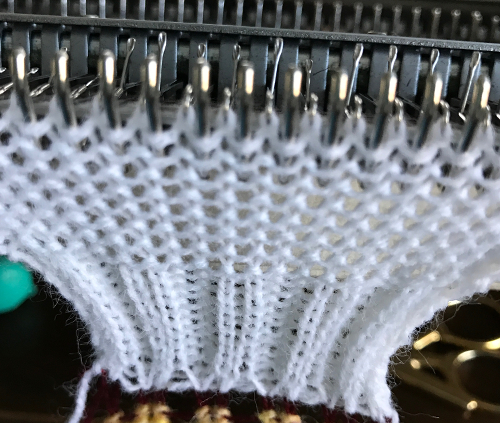
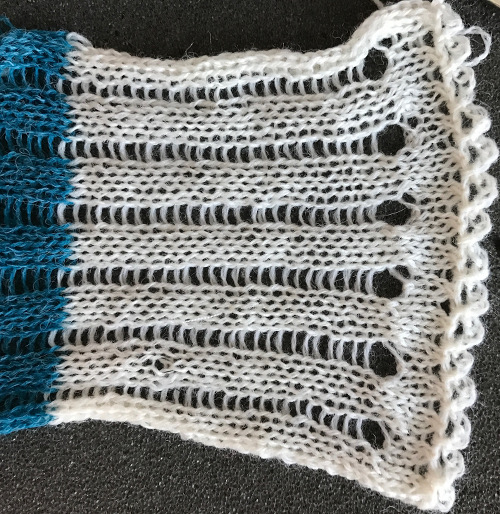
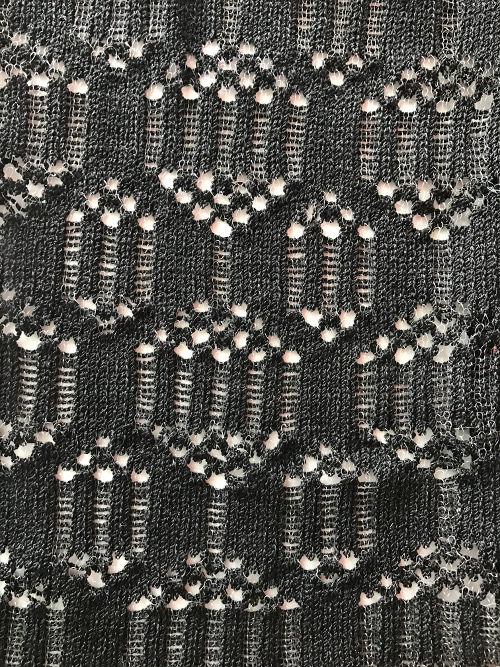
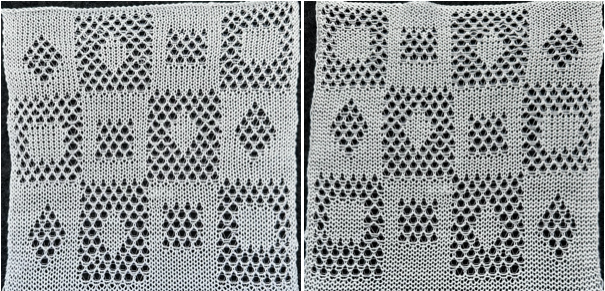
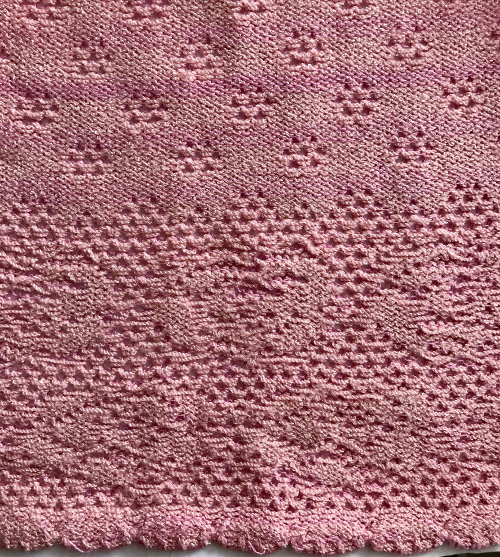
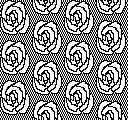
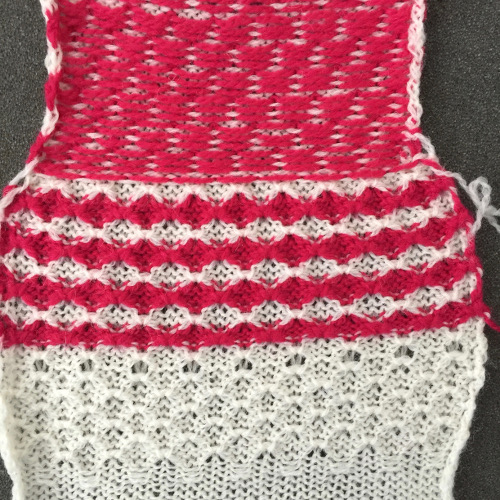
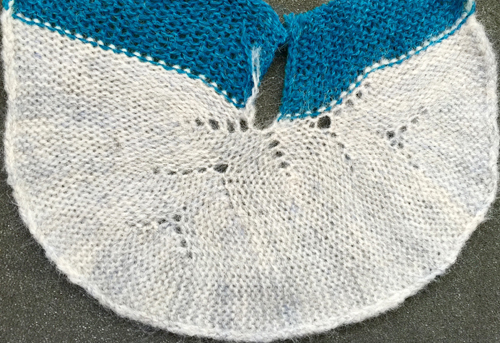
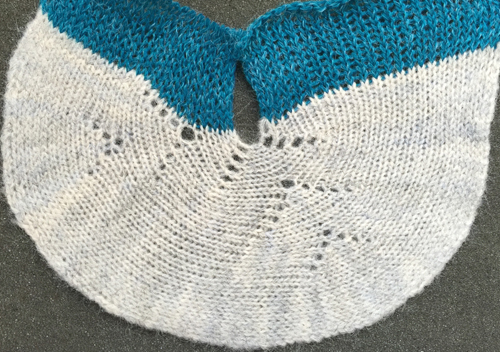
 the swatch as a “ruffle”
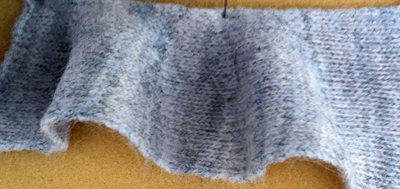
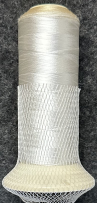
 an alternate: cast on with waste yarn and and ravel cord, knit 3 rows


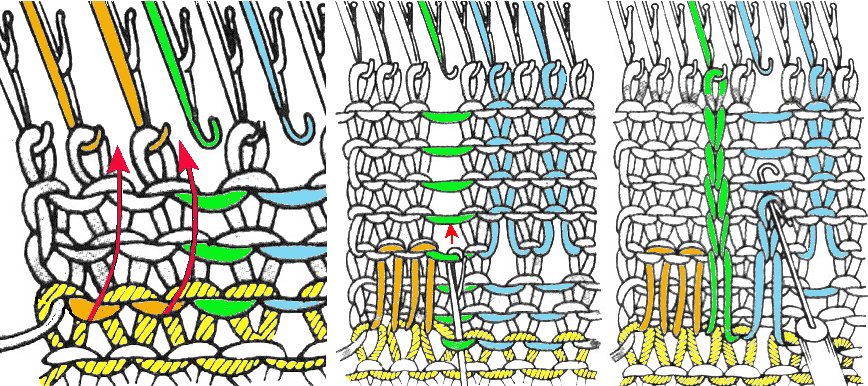
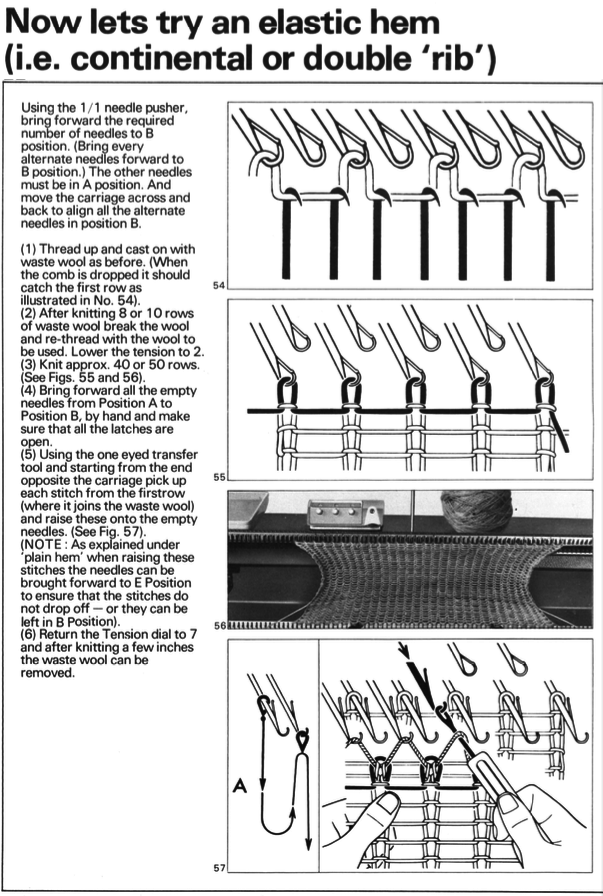
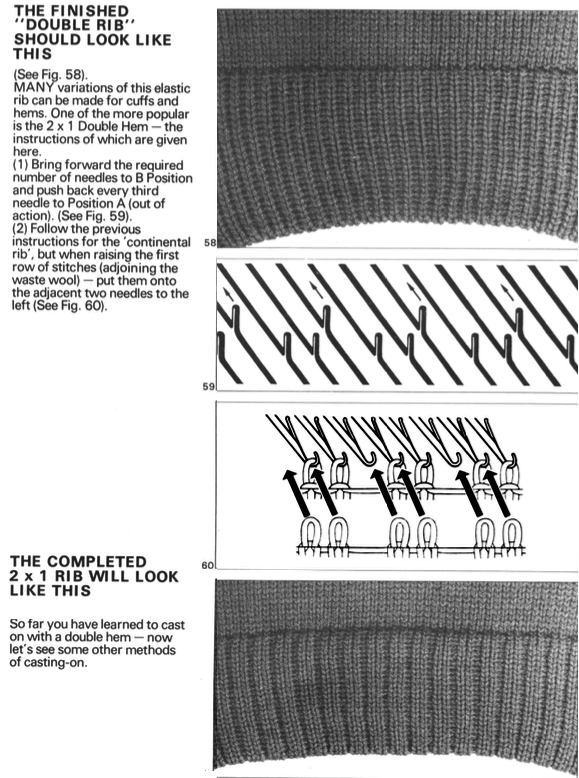
 2X1 rib using slip setting
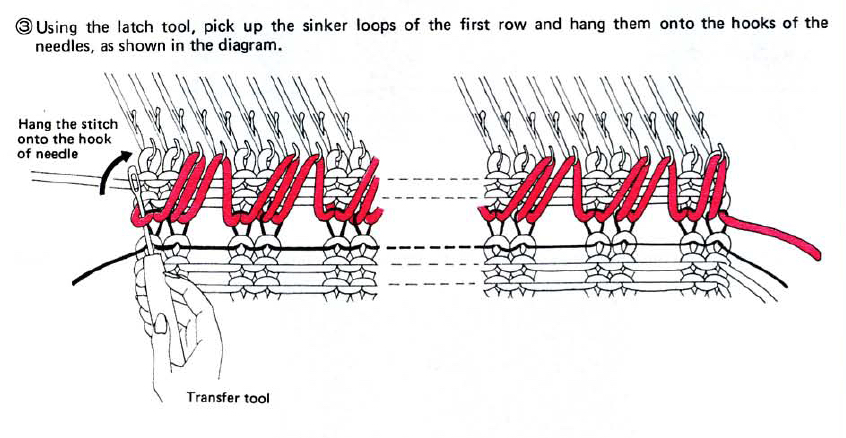
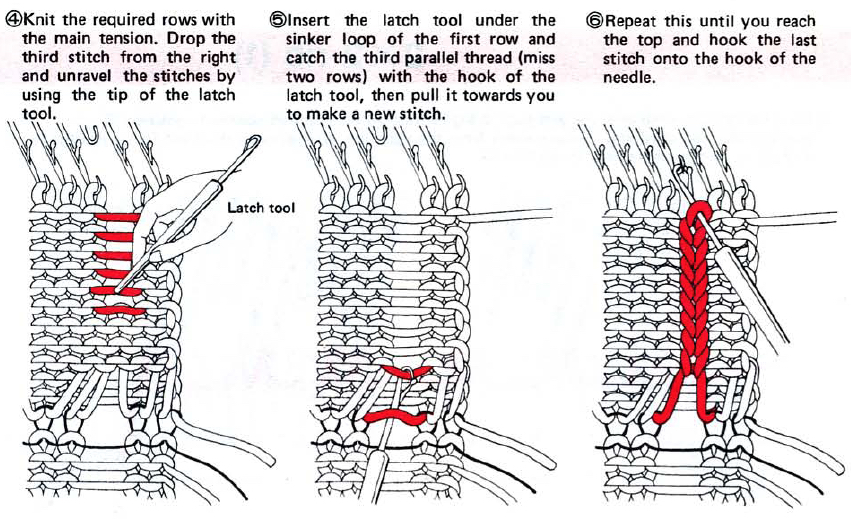
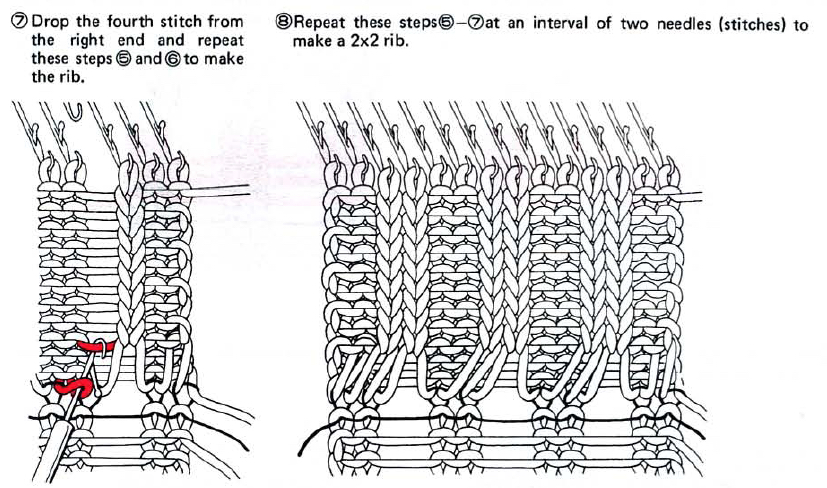
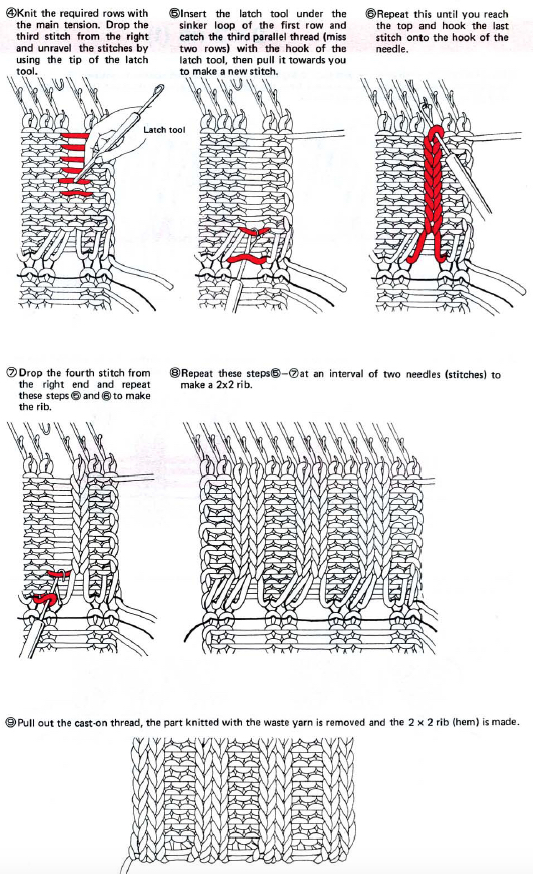
 2 X 2 rib: working with Brother cast-on comb, full text
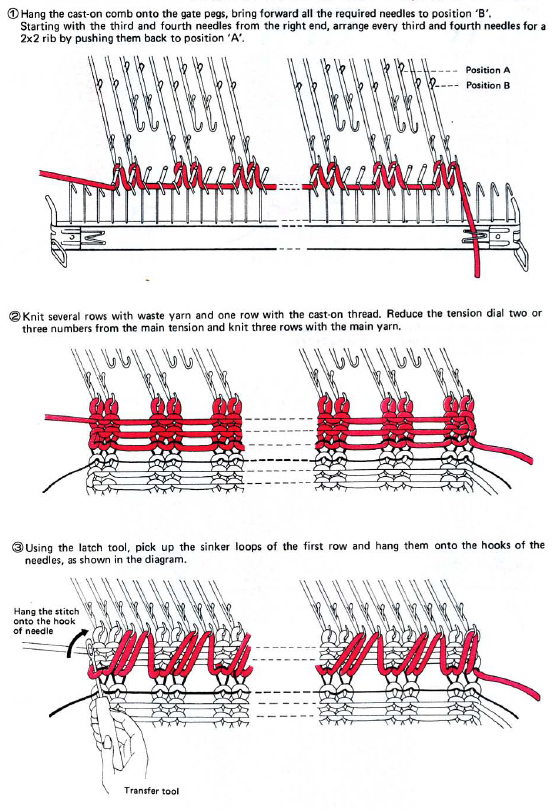
 using waste yarn

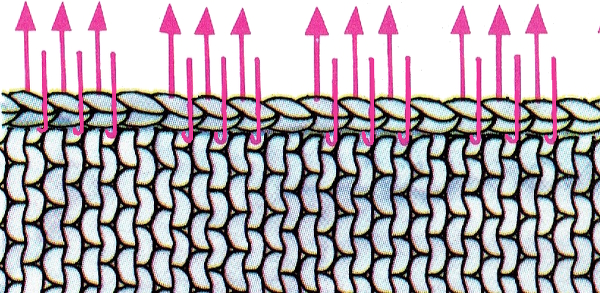
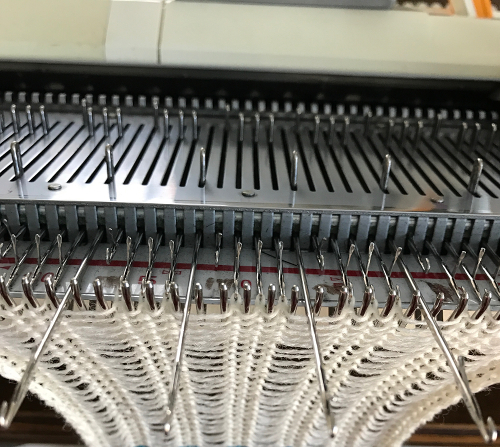
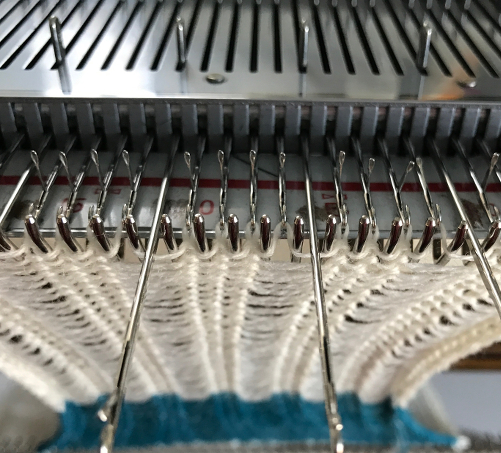
 open stitches to finished hem
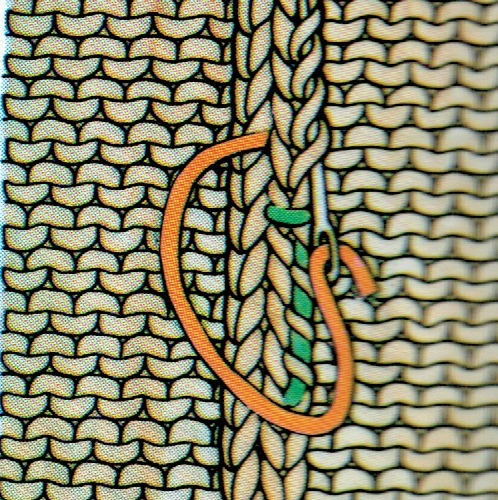
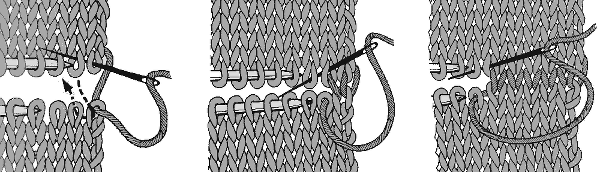
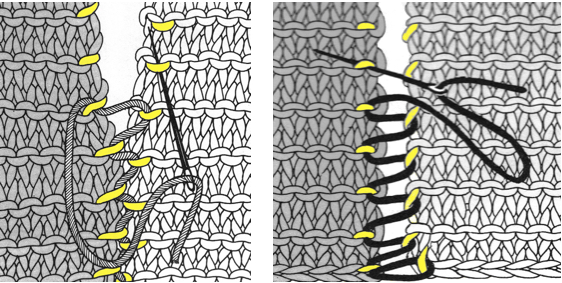 1. mattress stitch, knit side out, one full stitch away from the edge, adding a second strand of yarn to finish the join
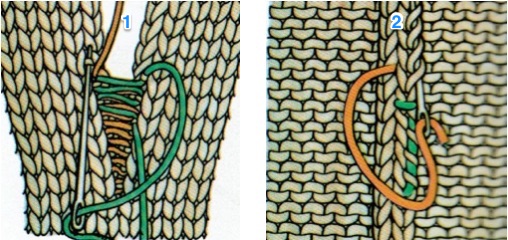

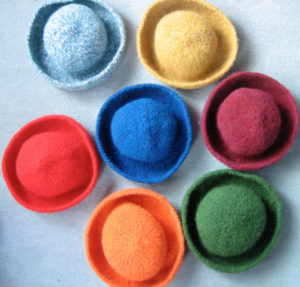
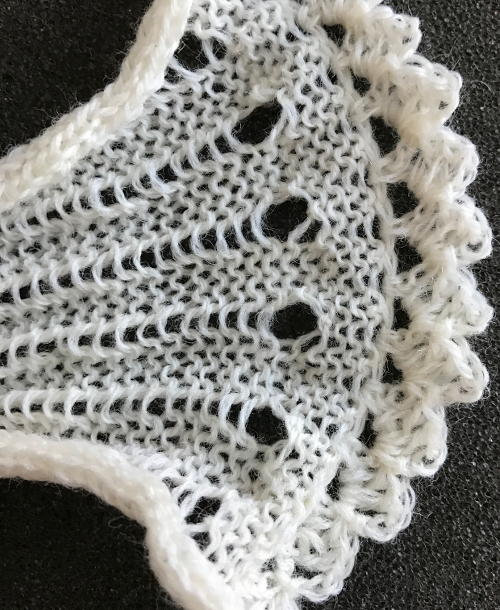
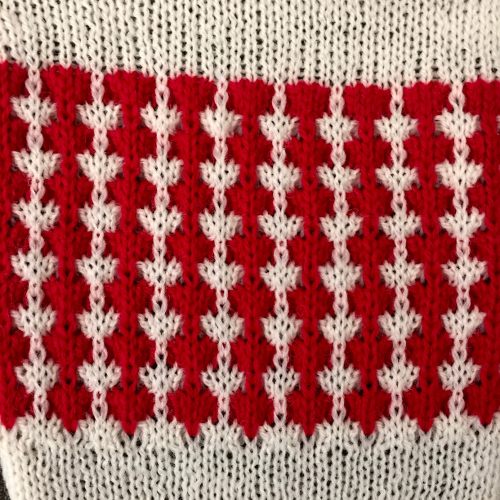
 for a sense of scale before felting
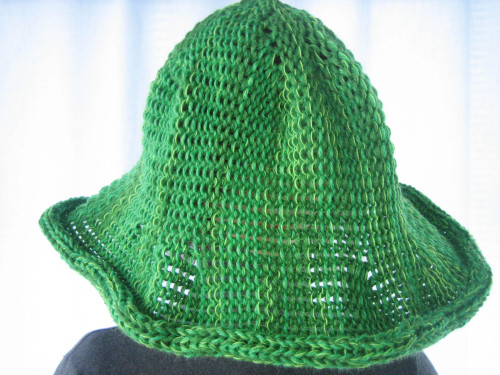
 My customer handout:
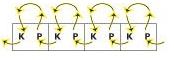
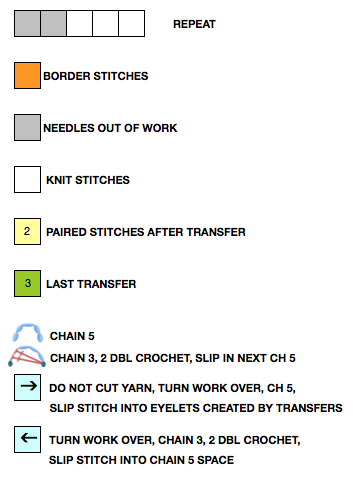


 turn work over (purl side facing once again), chain 3, 2 double crochet, slip stitch into the center of chain 5 space, repeat across the knit, end with a slip stitch into last chain 5 space
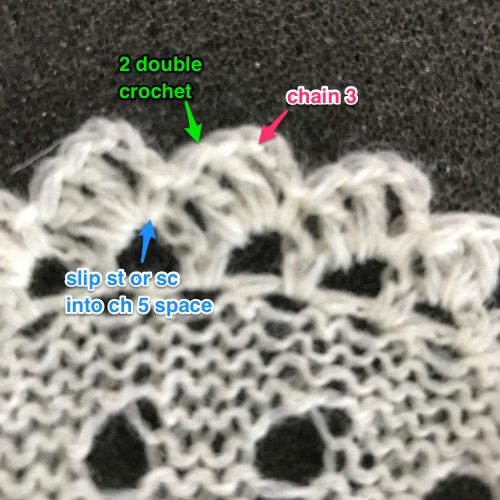


 A later blog post on the topic with additional information on yarn placement, settings, and more:
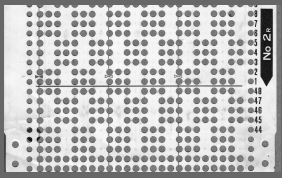


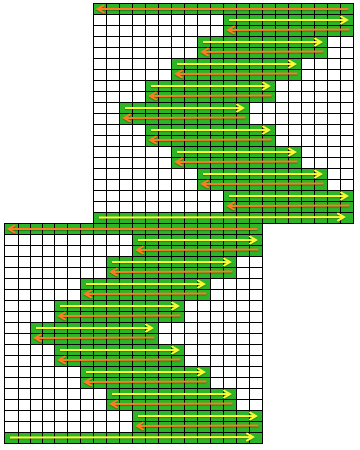
 if beginning with COL, simply flip the image horizontally
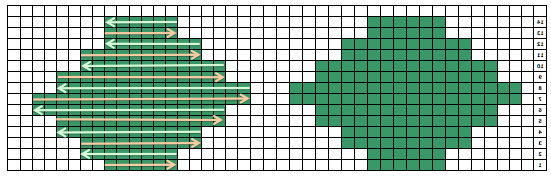
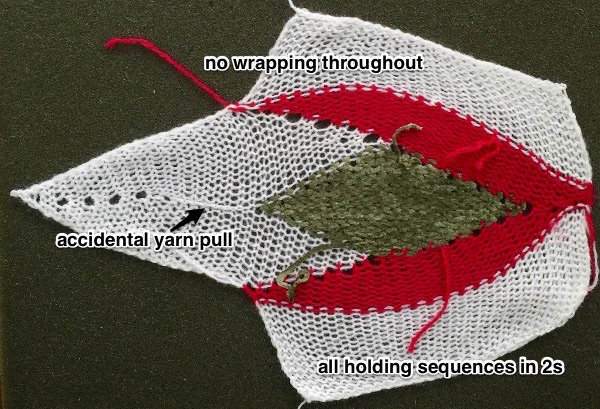
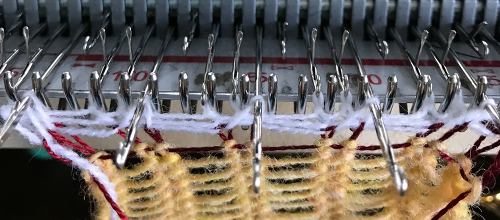
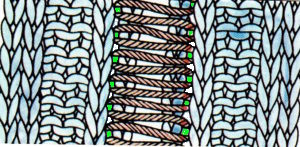
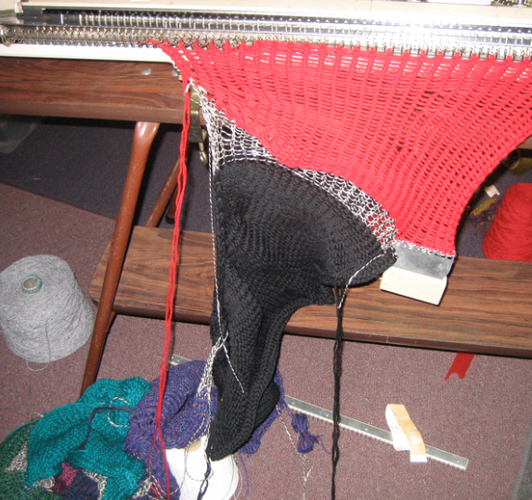
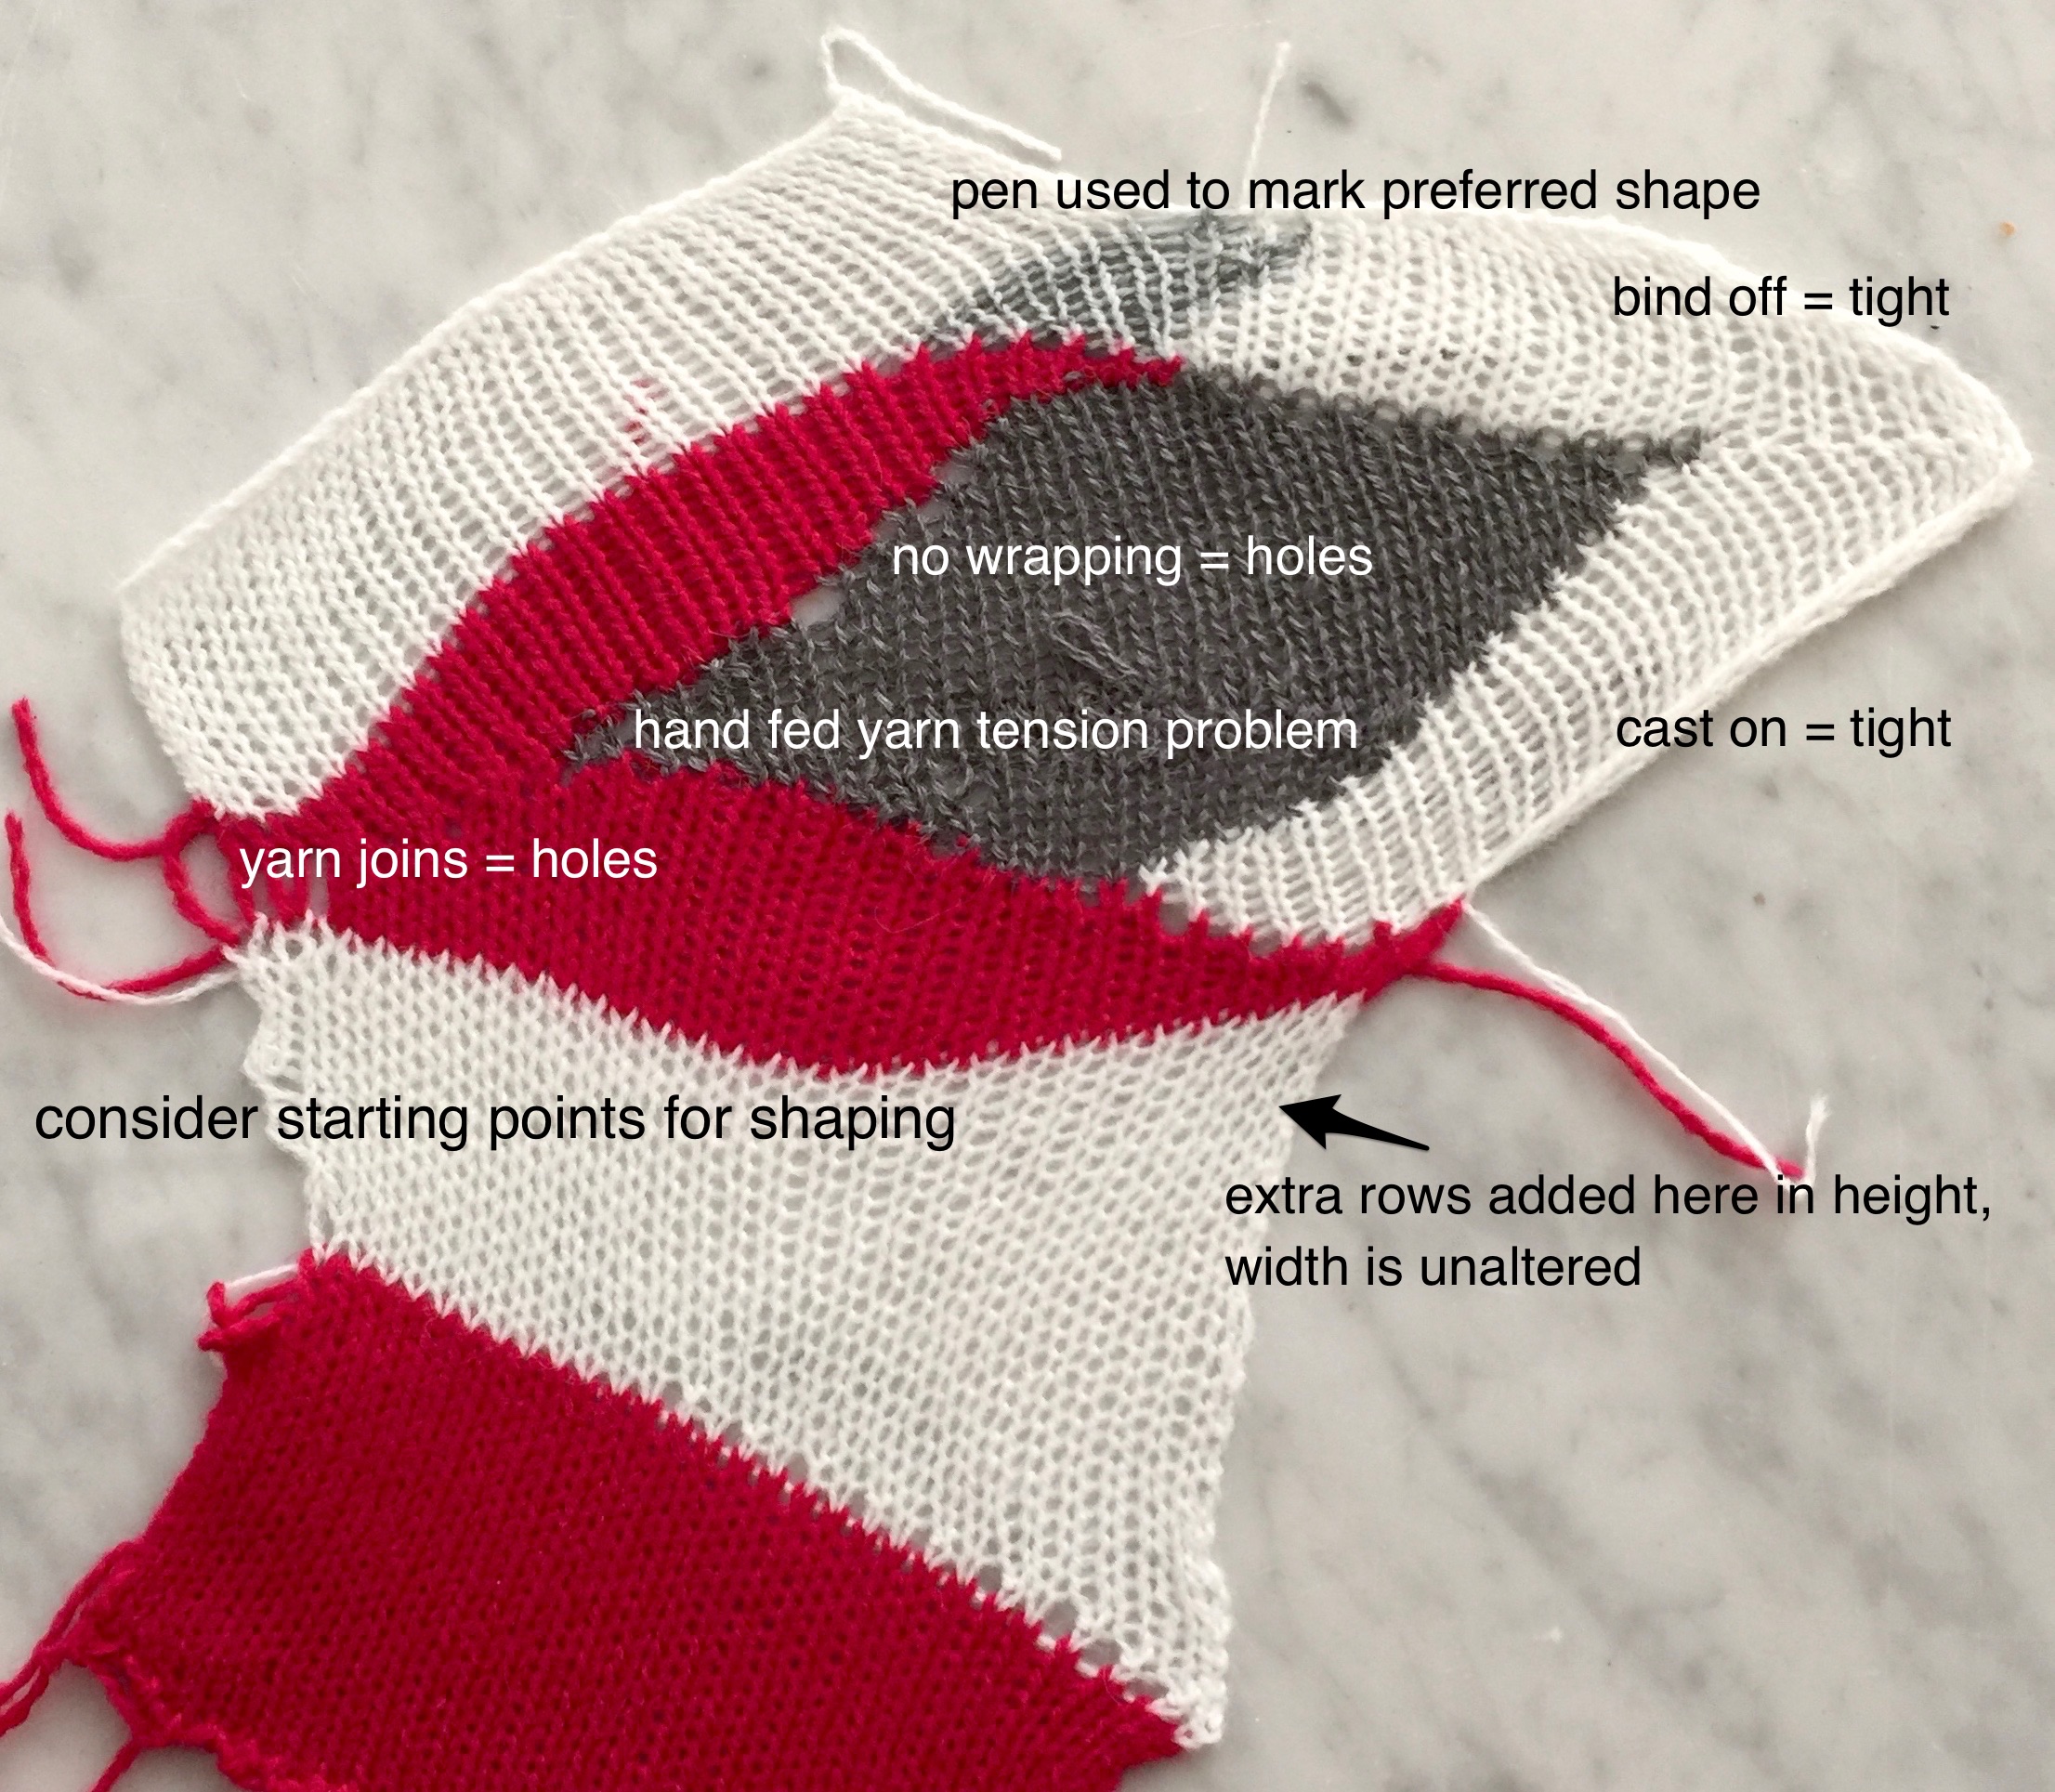
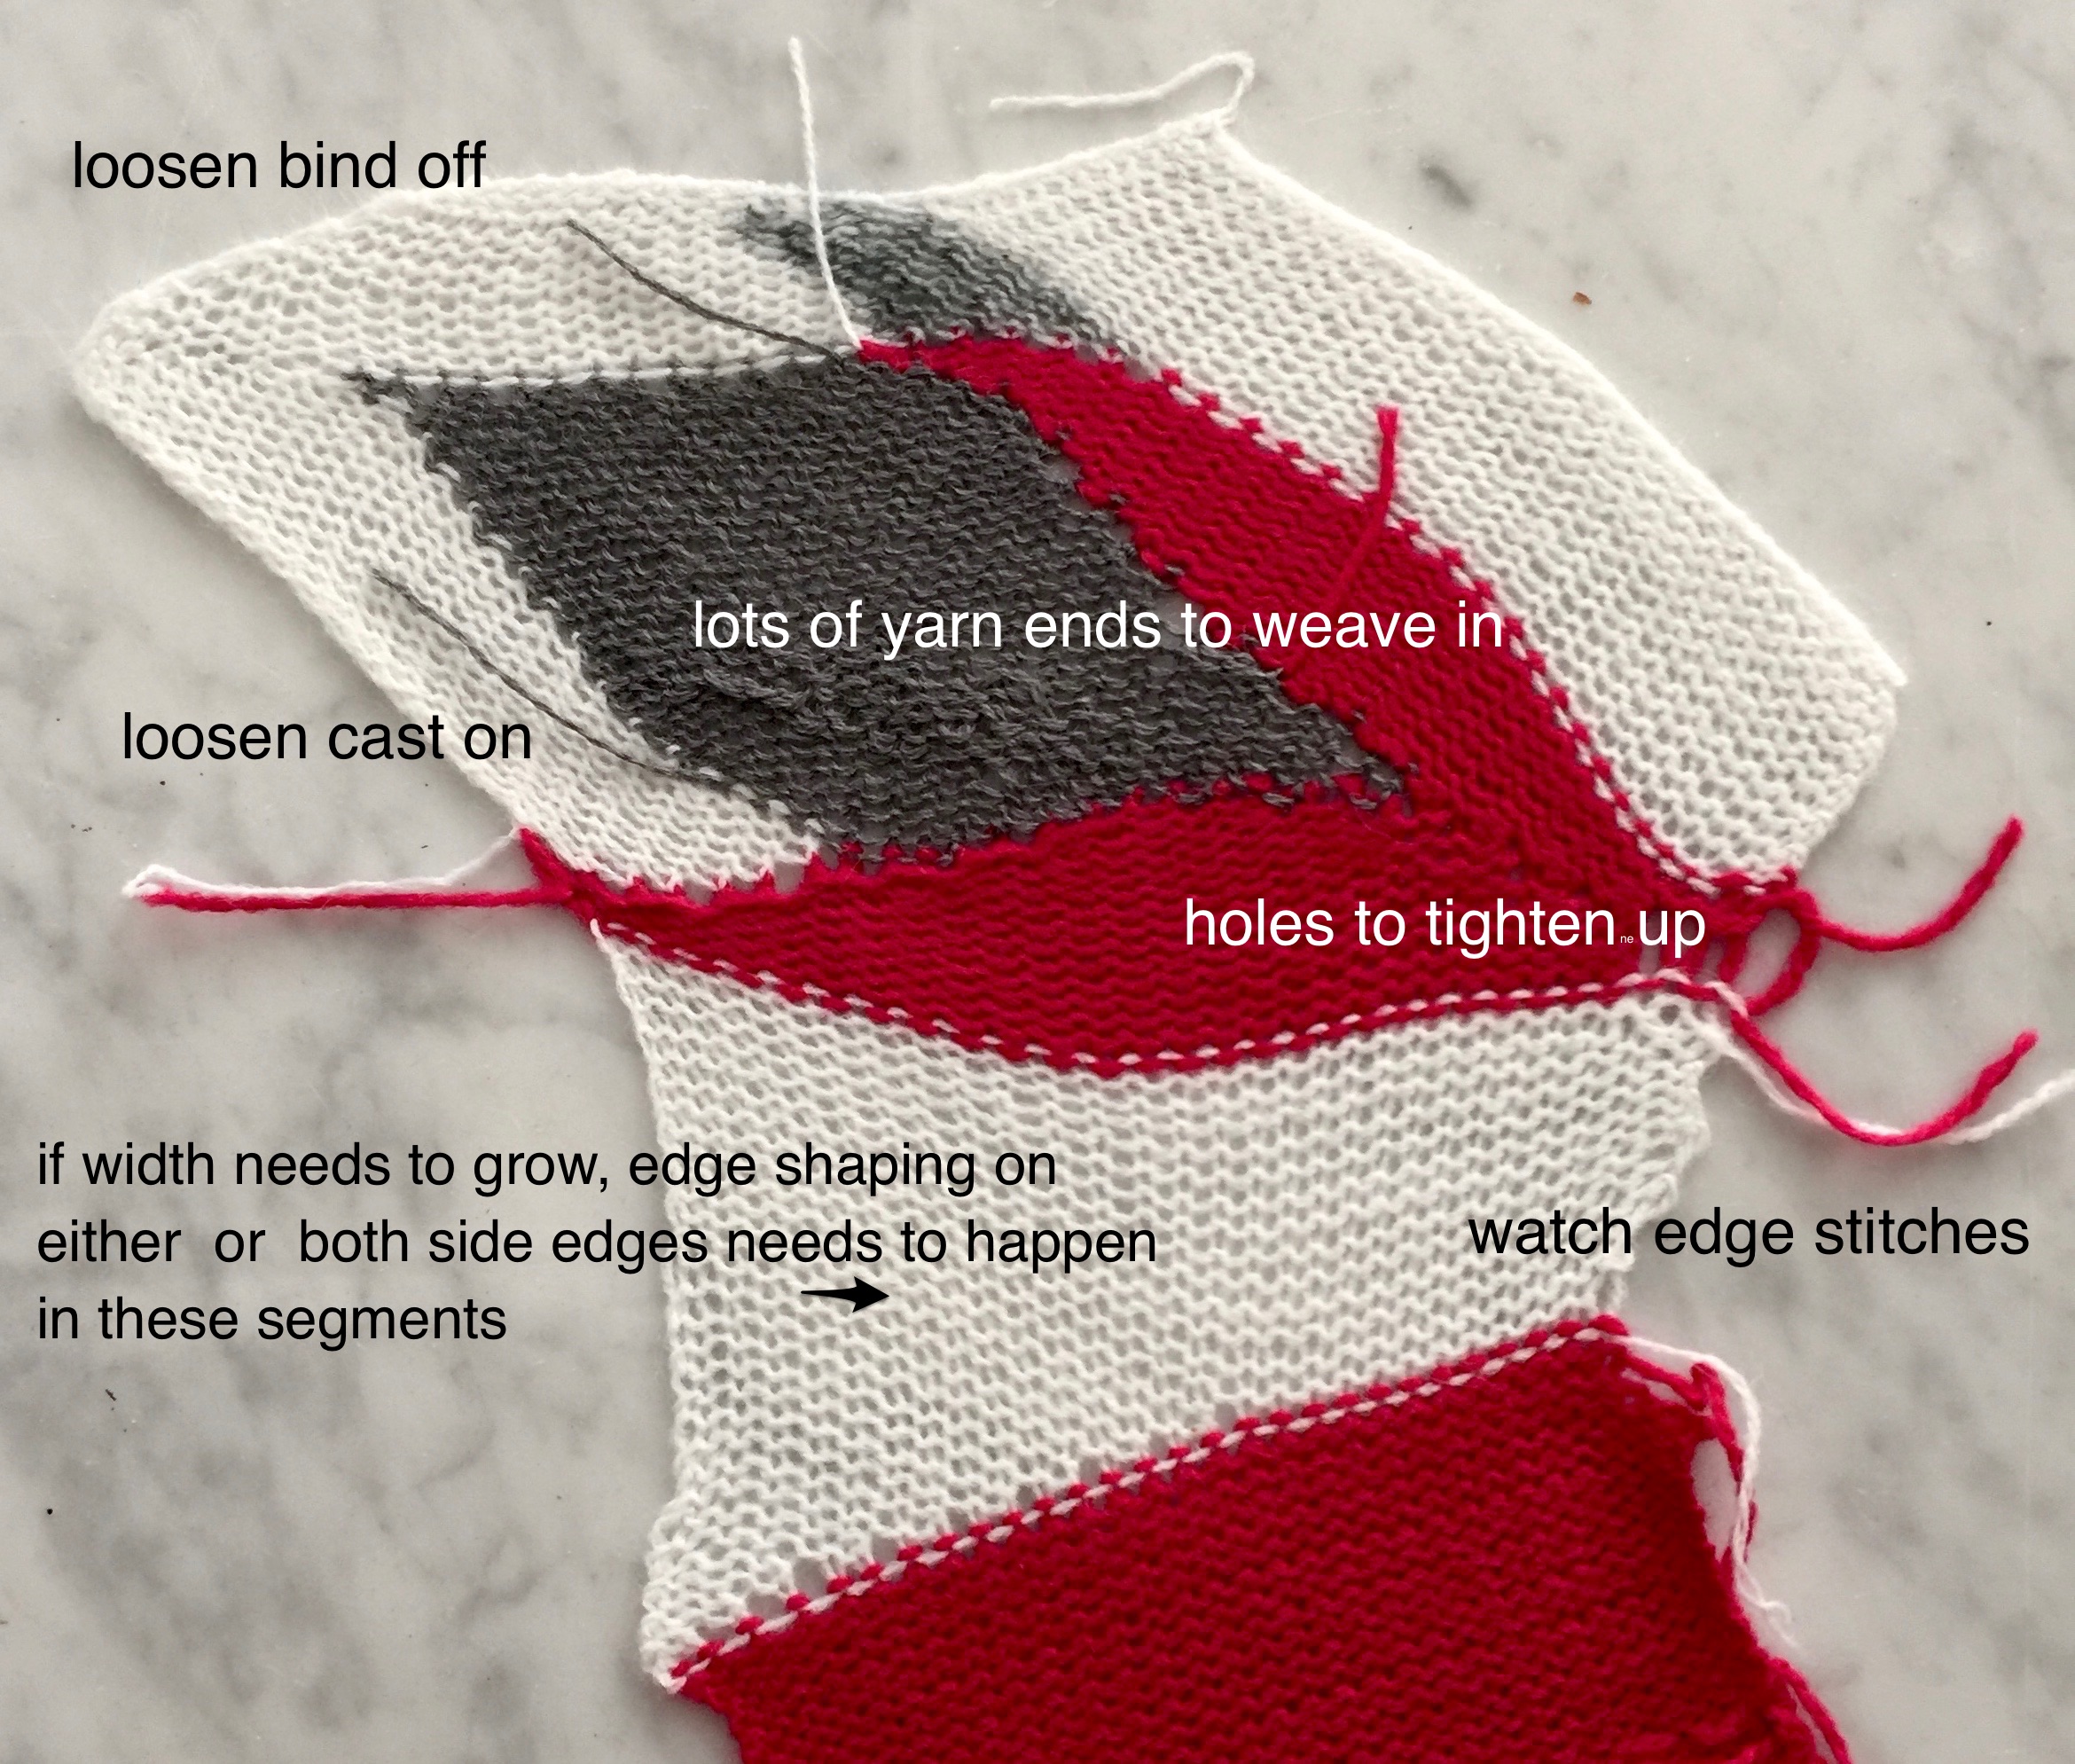
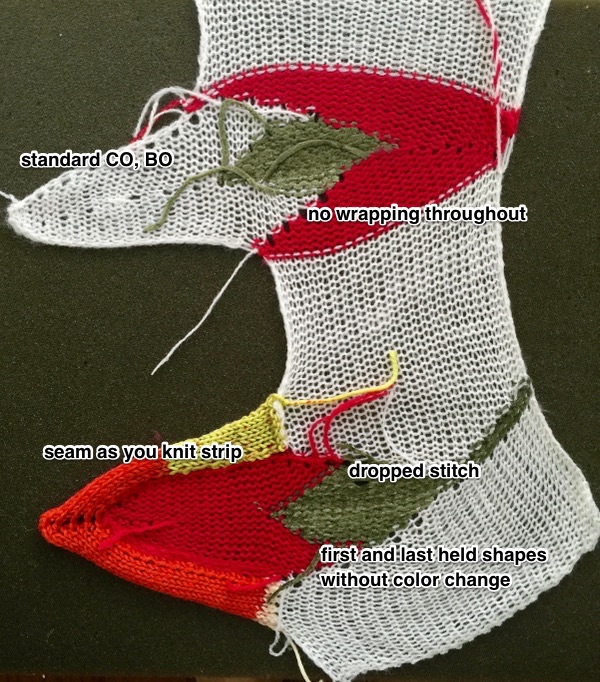
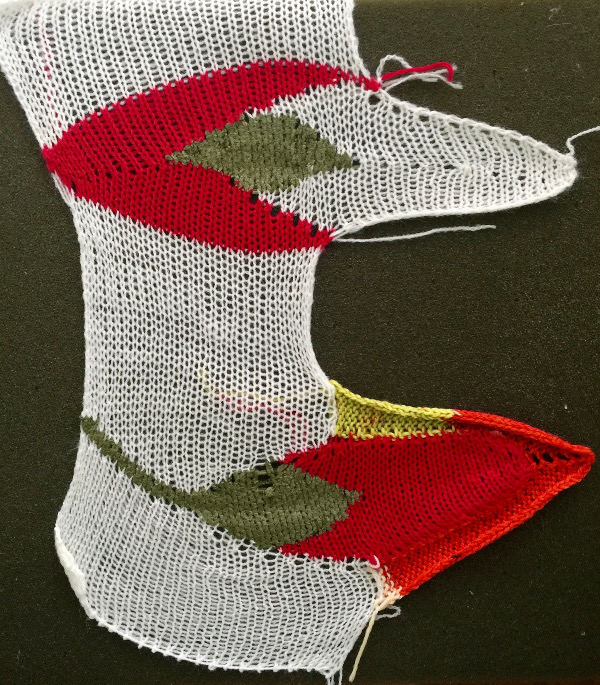
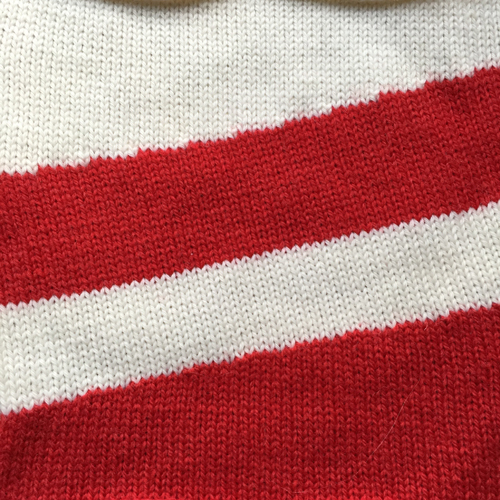
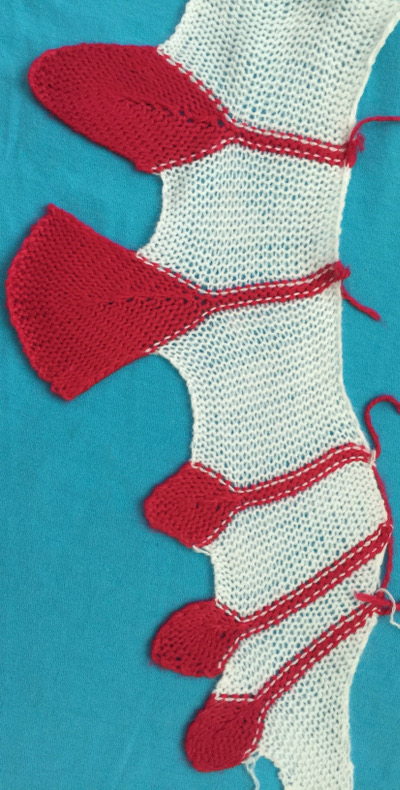
 The yarns used were “throw away acrylics” in white and red. The green is a rayon chenille, which required a looser tension, resulting in the other colors looser than I would want in a piece of the final fabric.
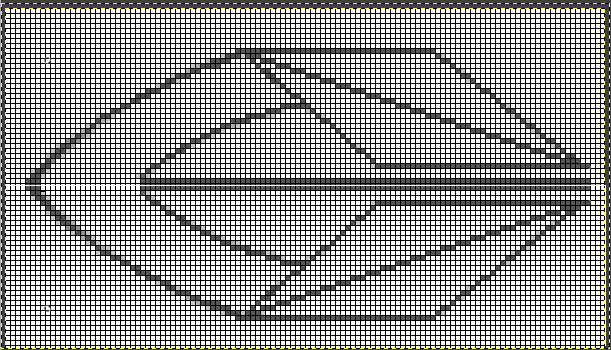


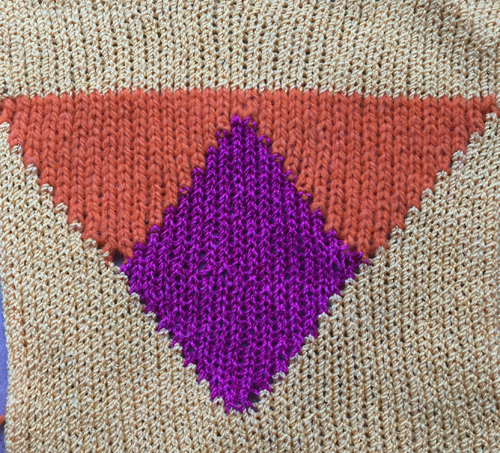
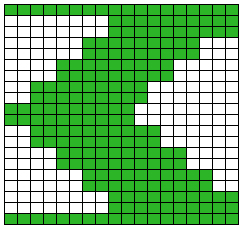
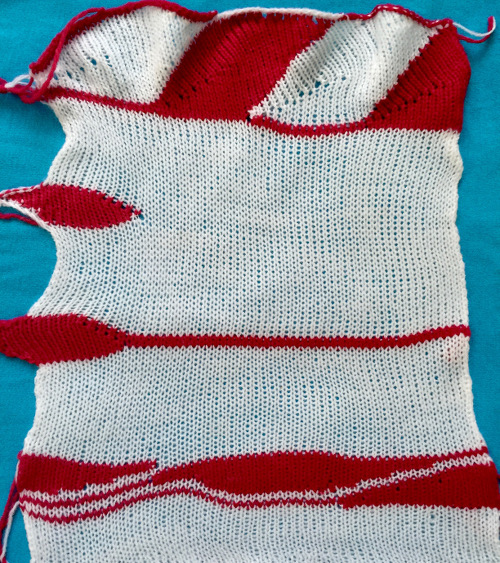
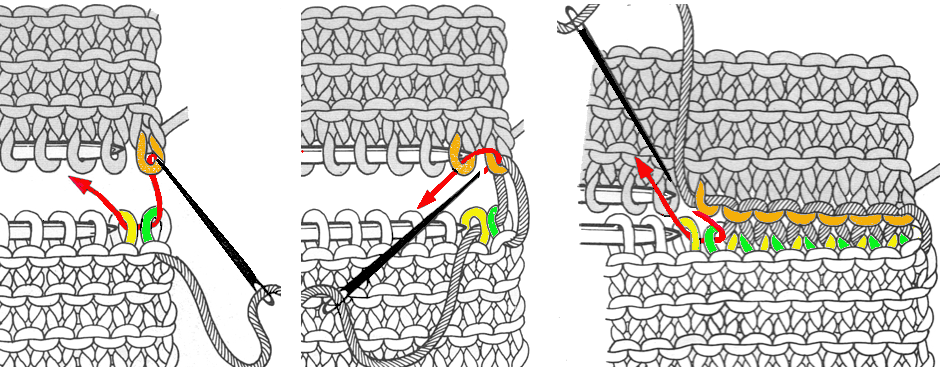
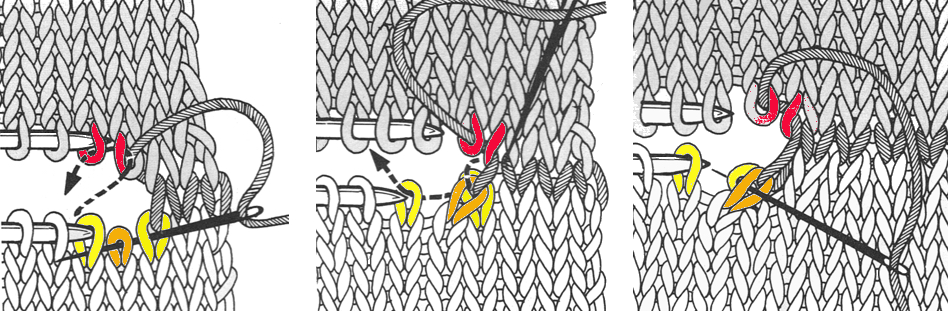
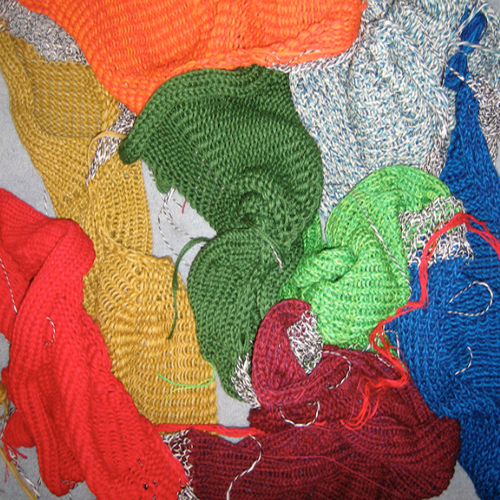
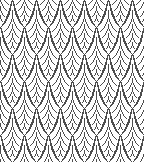
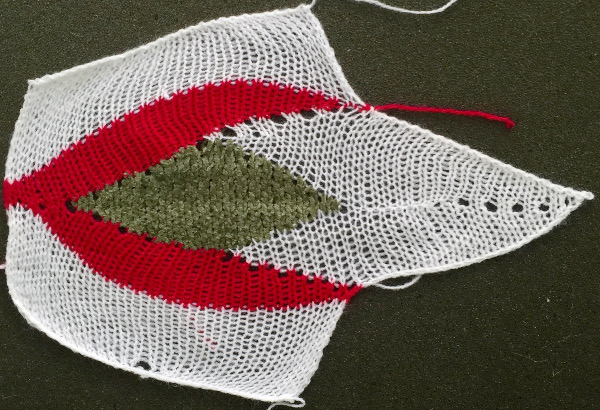
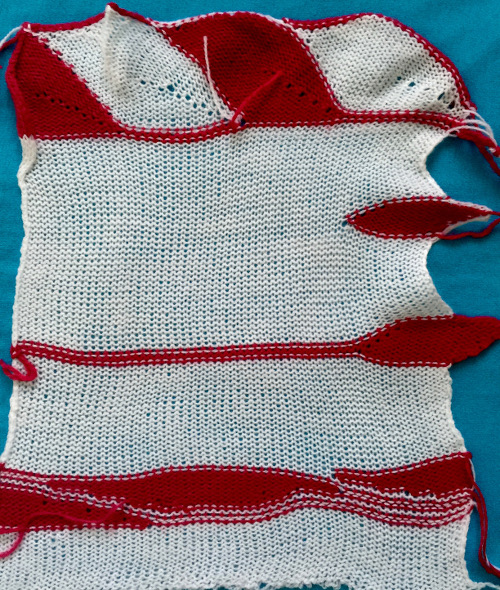 The start of a smooth shaping sequence for those “leaf shapes” on the machine
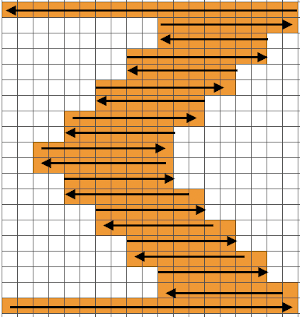


