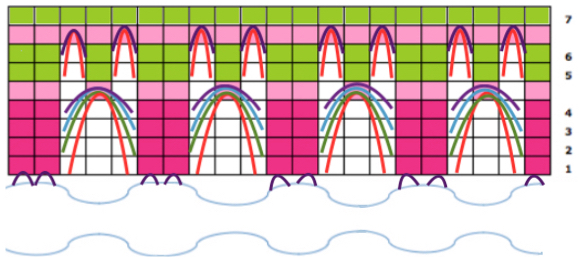
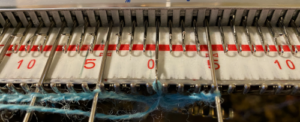
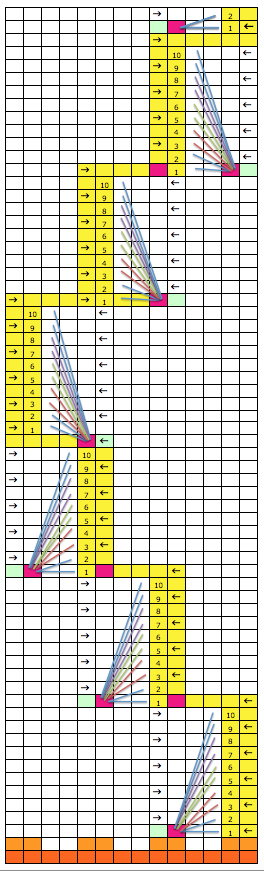
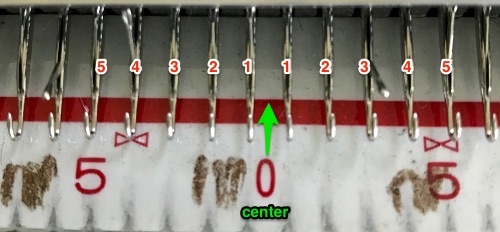
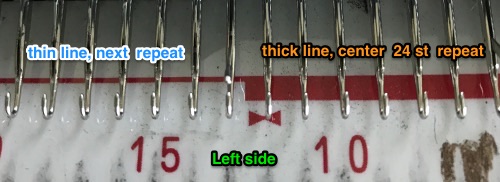
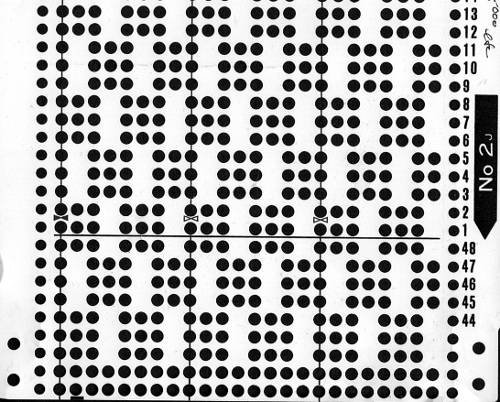
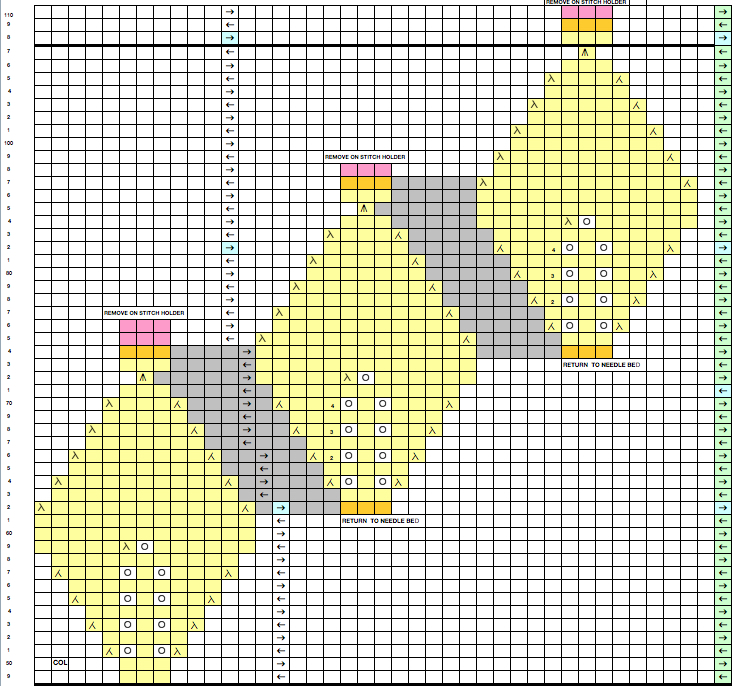
Working between electronic and punchcard machines needs to take into account that repeats on a punchcard KM must be a factor of 24 (2, 3, 4, 6, 8, 12). An electronic tuck stitch repeat may be any width. 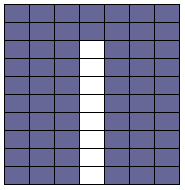 Since the above is seven stitches wide, if punched accordingly it would occupy 21 out of 24 stitch units on a punchcard. As is unless those extra needles on the far right or left are left out of work for ladders or transferred down to the ribber, it would not be suitable for an all-over fabric. It can, however, be used for a trim. If the latter is the intent, only one series of vertical repeats as seen in the chart needs to be punched. The numbers below the image indicate Brother needle tape markings. The Brother needled tape has a center O position marking, with numbers beginning count with one and radiating out marked in groups of 5 in both directions.
  This is a 6-row tuck fabric, thinner yarns should be used if the pattern is automated, as tuck loops build up in needle hooks. If you wish to experiment with slightly thicker yarns, decrease the unpunched areas to 4 rows, or execute the repeat using holding. Held stitches sit on top of the needle shank, tolerance is determined by how many rows it either takes for knit stitches on sides of the loops jump off needles or accumulated loops in hooks or any stitches become unable to knit off consistently on the next all knit pass.
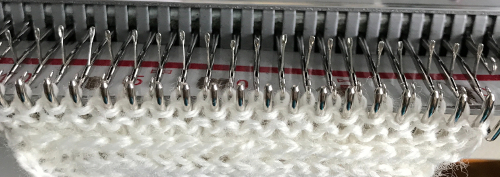
To test the yarn and repeat out, try the technique by using holding, then punch your card. Automating makes the process less prone to error and faster if great lengths of trim are needed. It is also possible to punch or program only the part of the card that is planned for the repeat. 
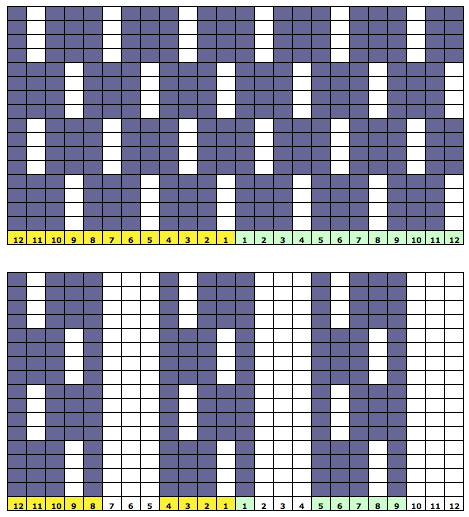
 The single-width repeat may be programmed as pixels, on left, or punched holes on right. In electronics a single 8-row repeat is adequate, punchcard knitters repeat 5 times to 40 pattern rows punched.
 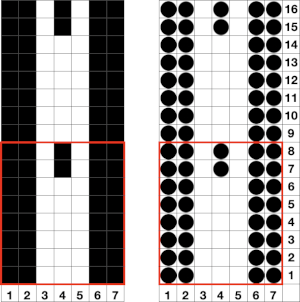 I prefer starting such designs on a knit row. To do that, the design repeat start may be shifted
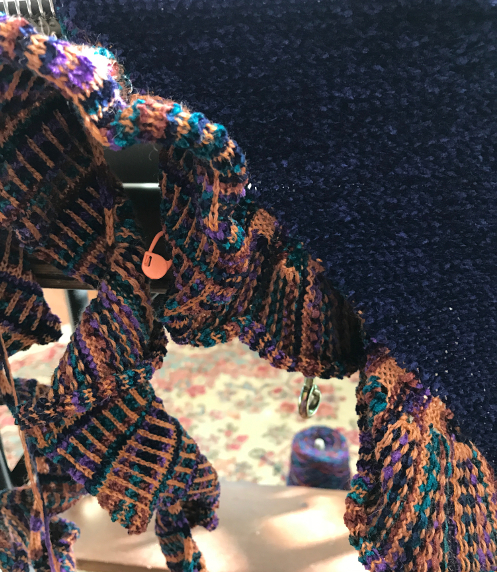
 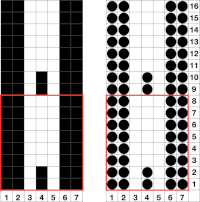 Using the trim as the cast on edge for a garment: determine the length required after a technique test. Knit a bit extra and remove on waste yarn, so more may be added or some be unraveled if needed or you wish to change the configuration using it as your cast on. Rehang and cast on later when it is completed. The flared-out portions of the trim will be used to “cast on” the edge of the piece, continuing with some needles out of work. An attempt at a line drawing of the “trim” sideways
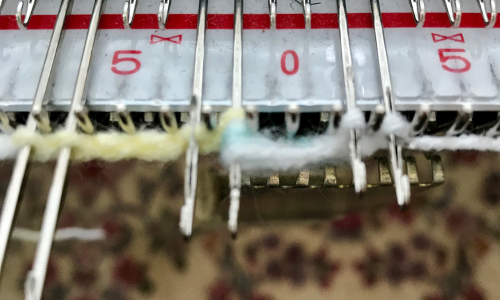
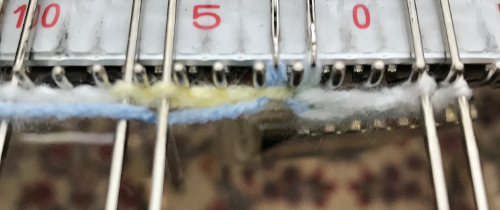
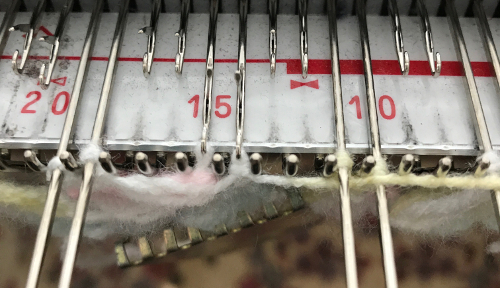
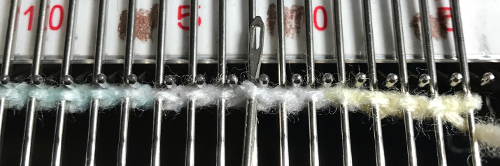
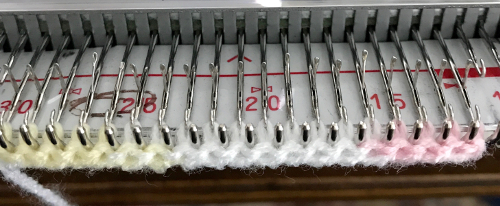
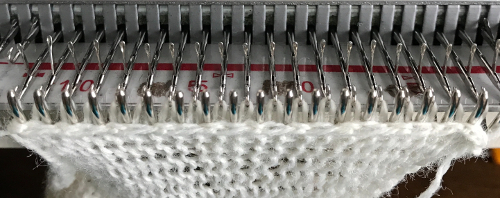
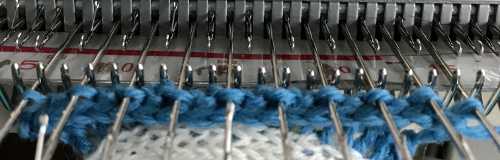
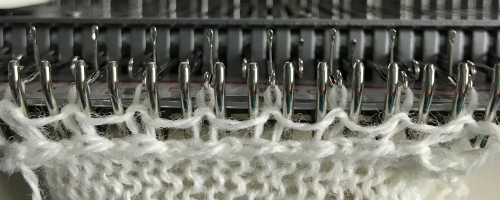
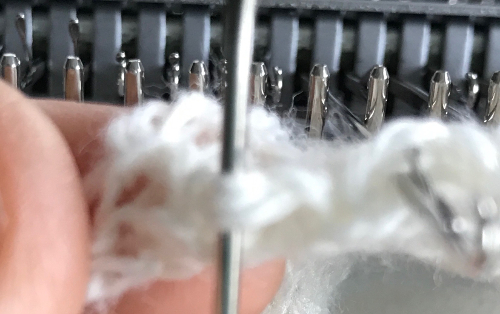
  Using the curved out edge of the trim, hang half stitches if possible, or one full stitch away from its edge as illustrated below. Knit 4 rows. With a tool pick up all ladder loops created by NOOW (RC 1-4) and hang them on the center empty needle. Knit rows (RC 5, 6), hang ladder loops on still empty needles, knit across all needles, continue with garment
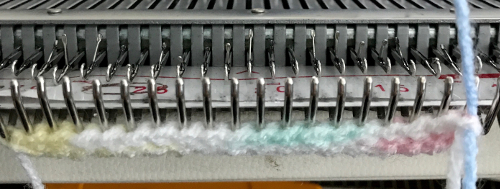
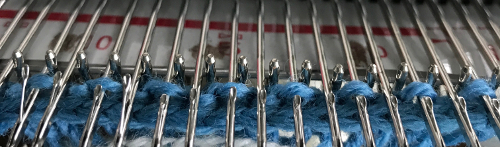
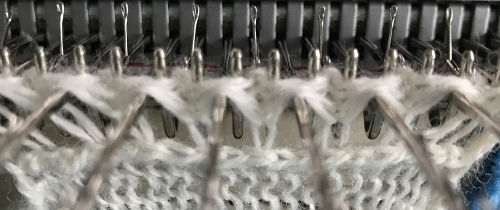
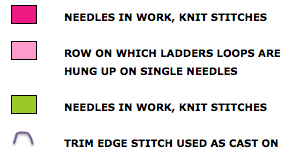
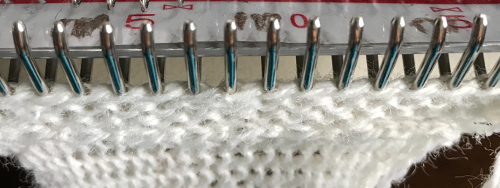
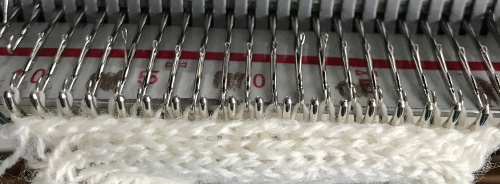
needle arrangement  picking up loops
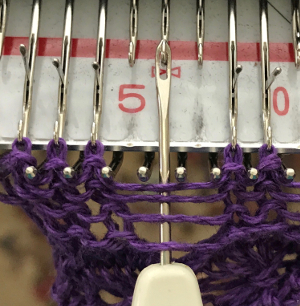
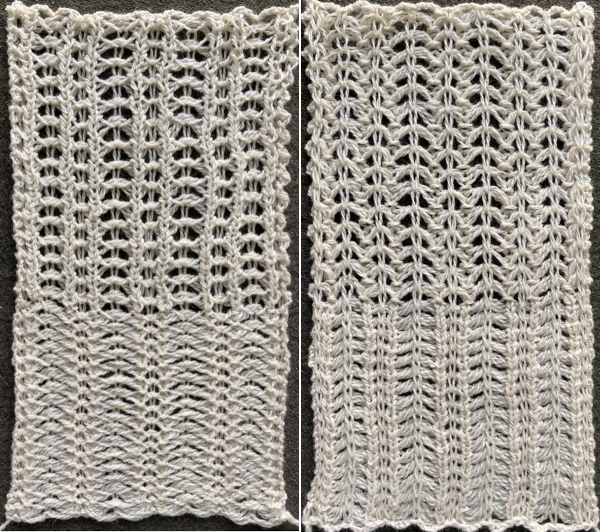
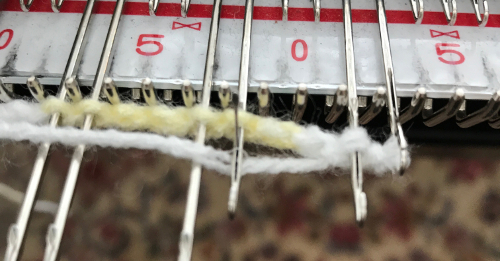
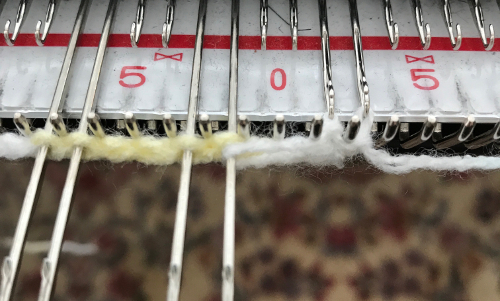
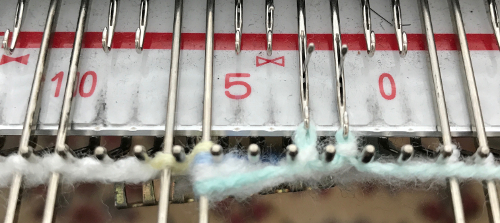
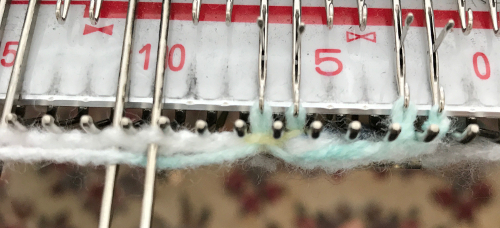
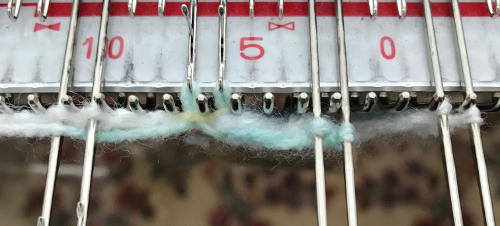
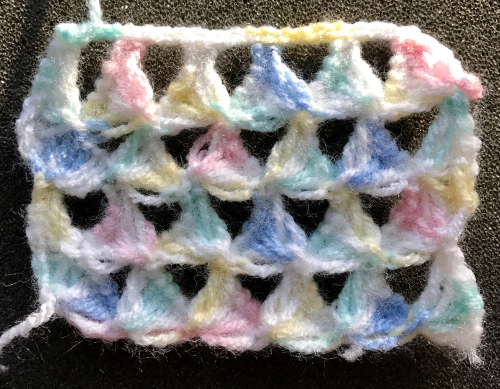
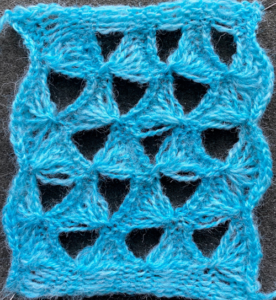
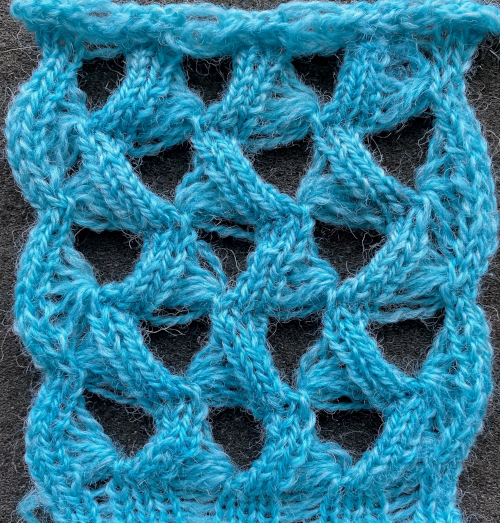
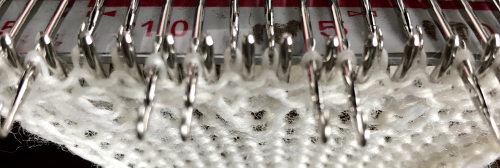
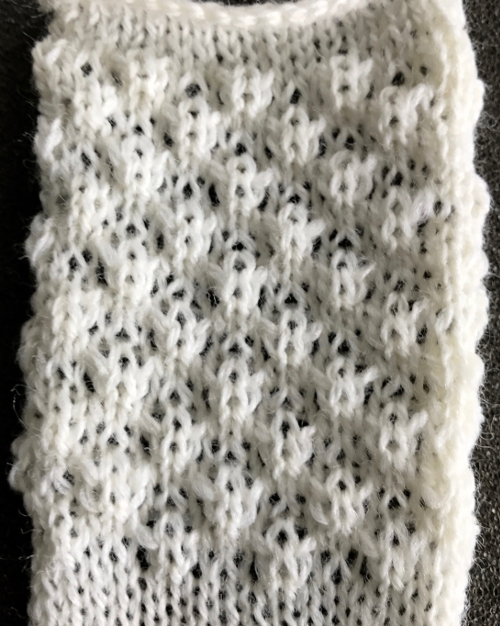
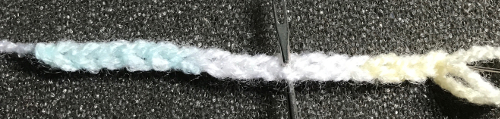
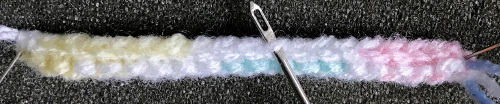
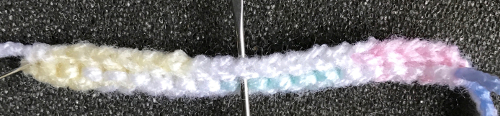
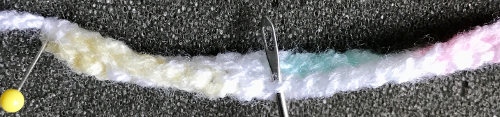
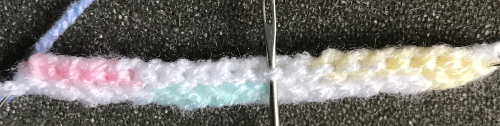
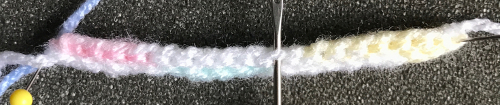
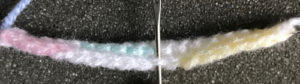
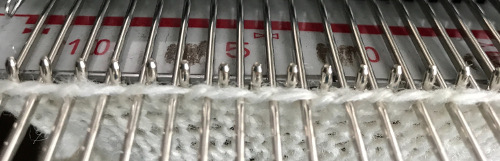
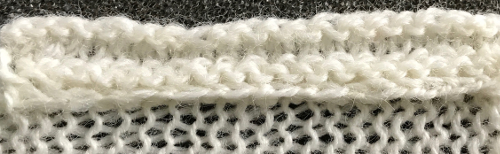
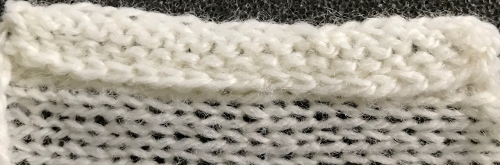
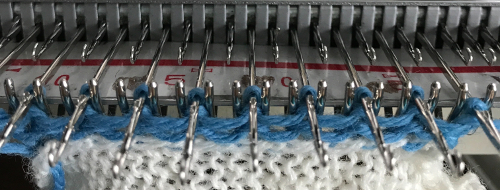
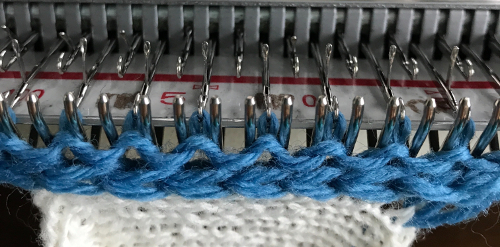
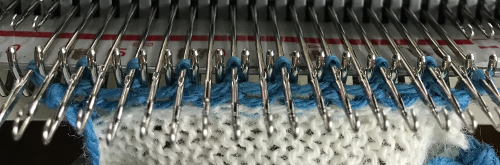
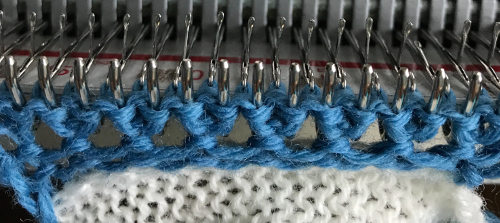
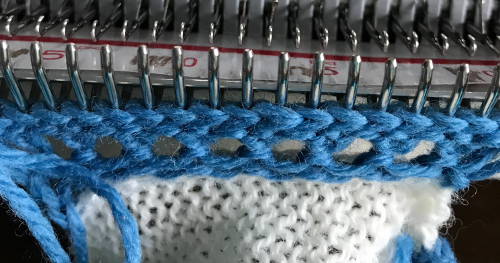
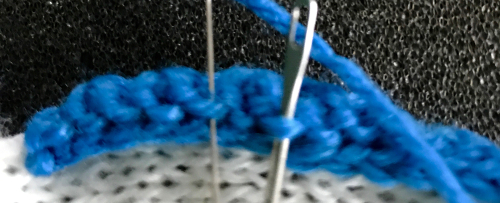
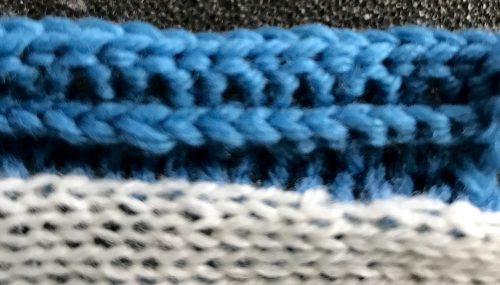
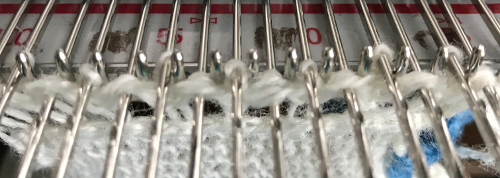
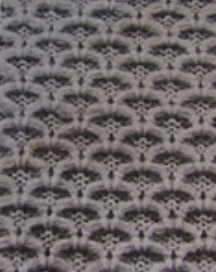
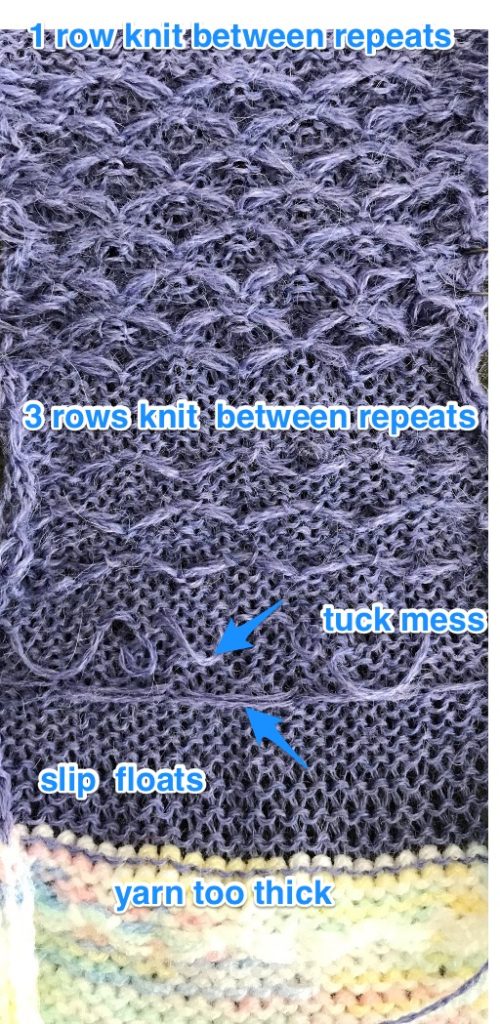
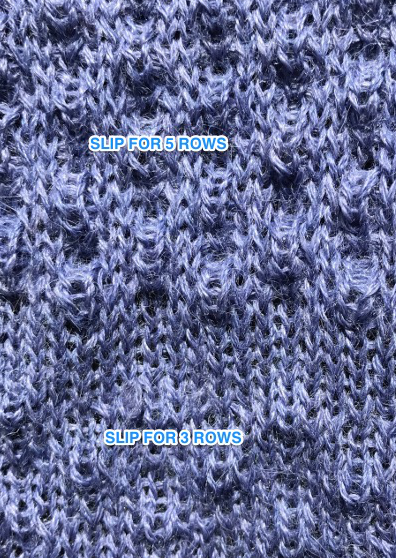
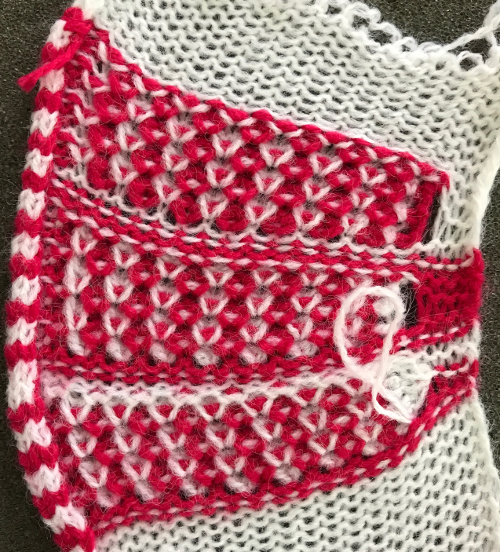
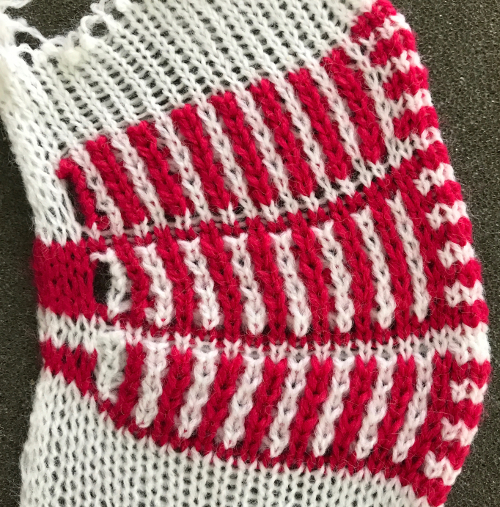
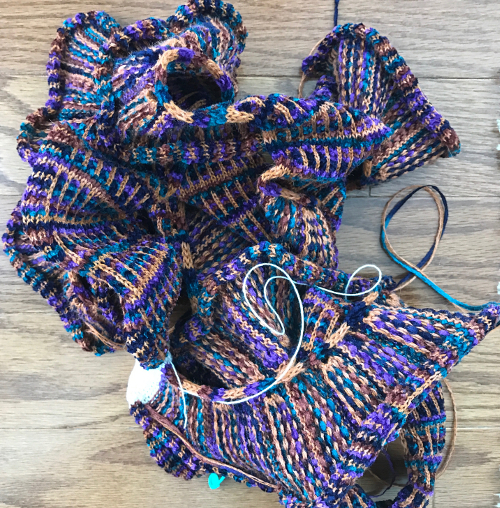
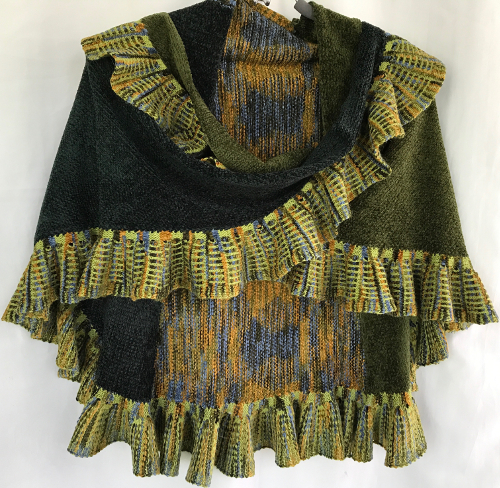
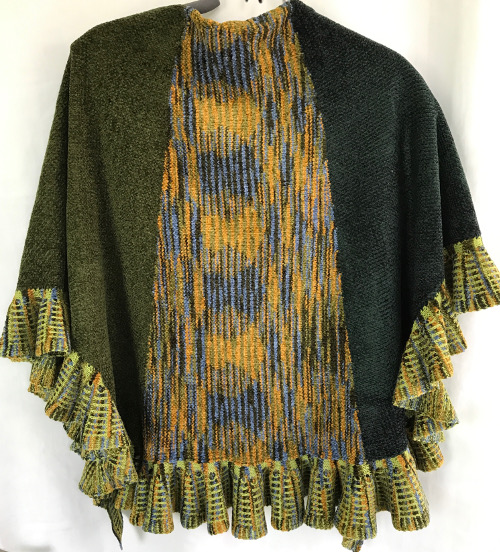
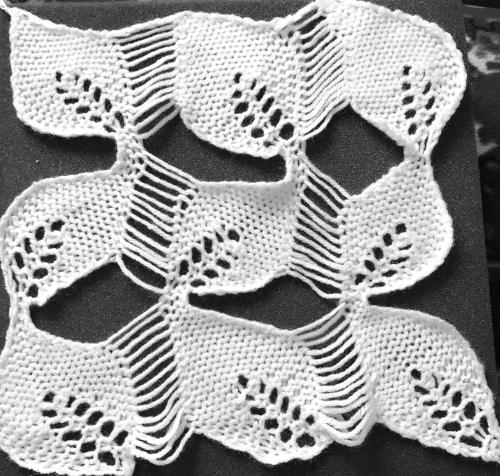
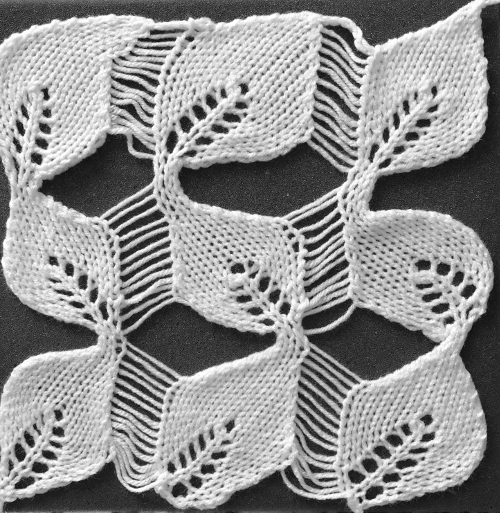
 The yarn used is cotton and appears to have a tendency toward biasing on knit rows as seen in the tendency to lean in one direction in the above photos. It has no stretch, so stitches that knit off several tuck loops remain elongated. A look at the structure on the purl side:
 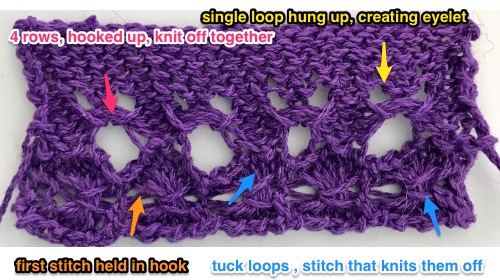 For more trims in this family, please see later post Tuck trims 4 and other edgings
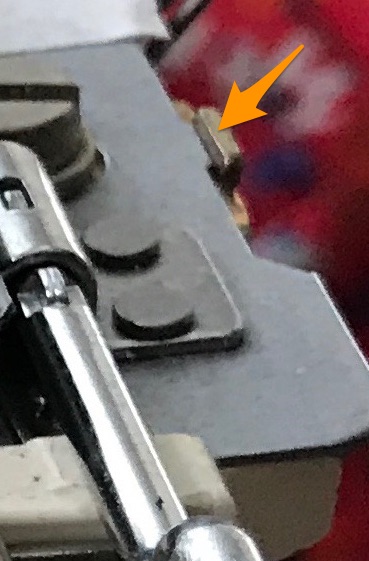
In Brother knitting when needles are out of work, the automatic end needle selection may interfere with the pattern, and this is a consideration in many stitch types.
All over fabrics, analyzing a published Brother tuck lace punchcard repeat:
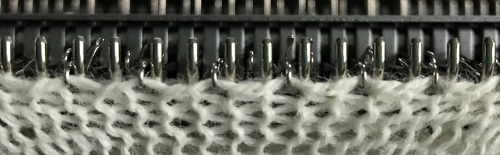
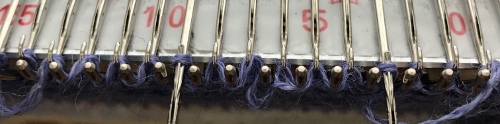
Single bed: to test the pattern, arrange the needles as shown below the full pattern repeat.
Cast on and knit a few rows, set the change knob to KCII, knit one row. Push in both tuck buttons, and knit the desired number of rows. 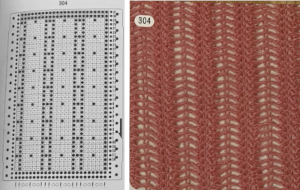 If using the pattern on electronic machines, the needle selection needs to match on the top bed. Depending on the model electronic, the pattern may have to be reversed for accurate needle selection.
I prefer to start on a row where all needles in work are selected, providing an added visual check that indeed the proper needles are in use.
Begin with waste yarn and ravel cord, followed by a permanent cast on.
I like to use a crochet cast on and bind off, with extra chains where needles are out of work. The fabric will stretch sideways depending on the number of rows tucked as well as needle set up, so casting on and binding off needs to accommodate that stretch in finished pieces.
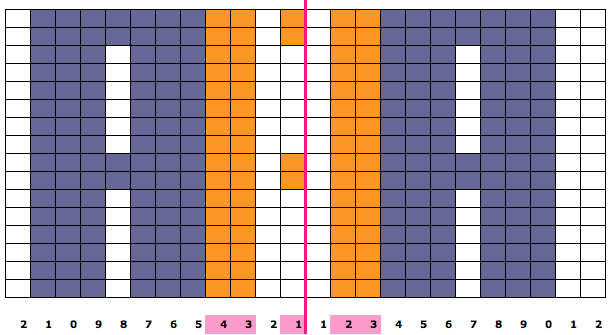
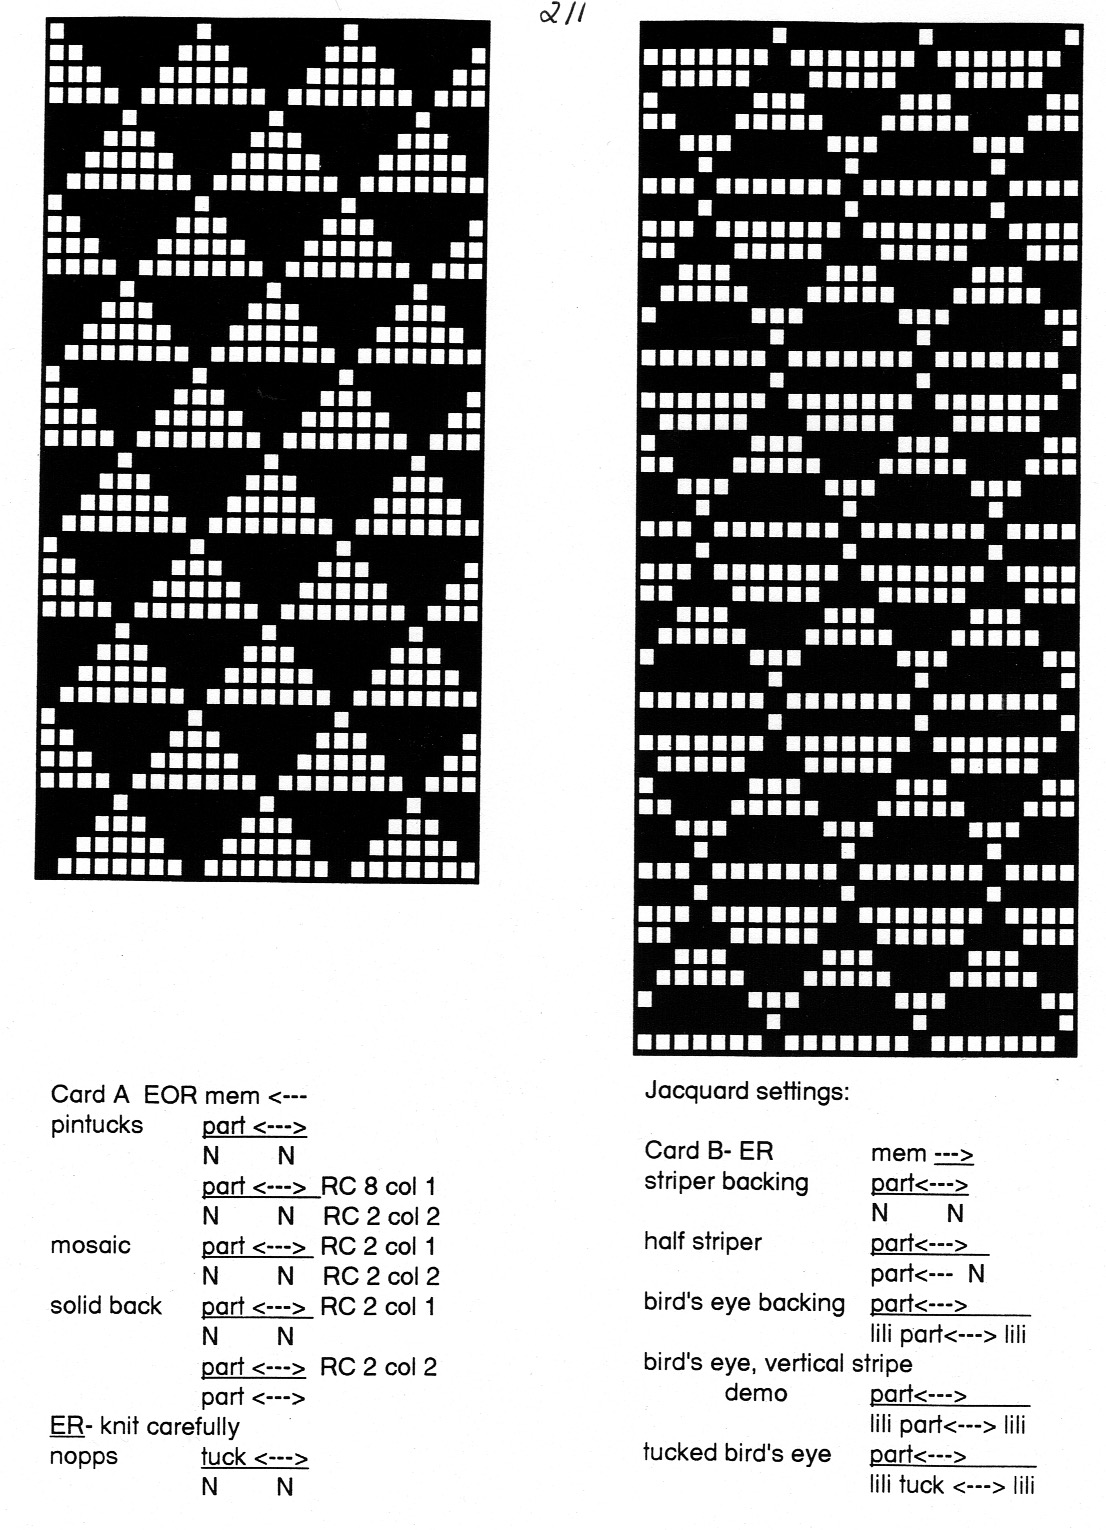
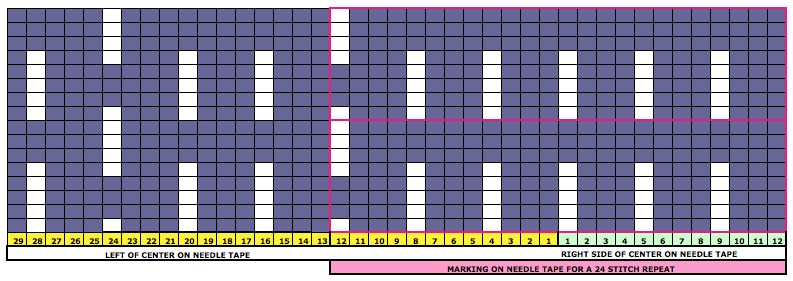
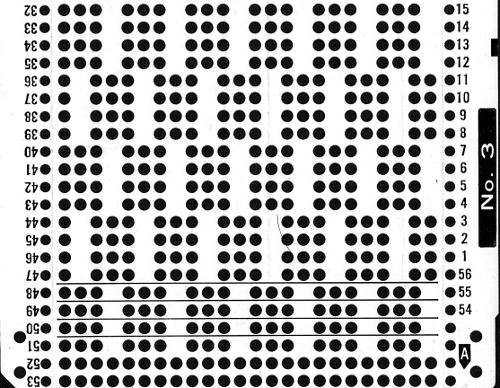
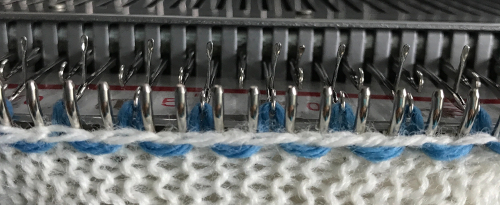
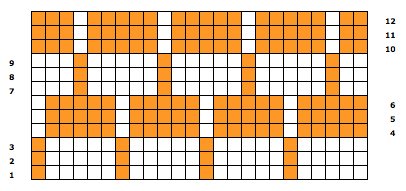
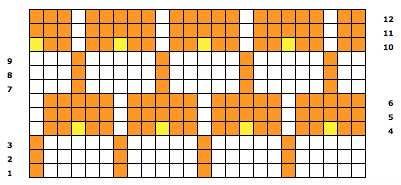
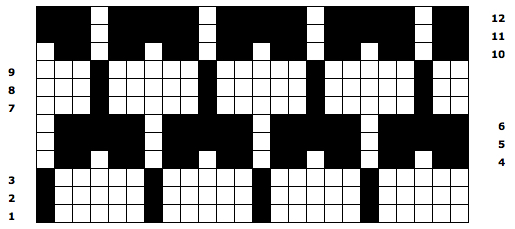
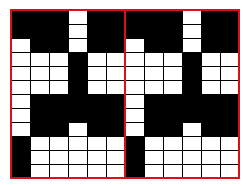
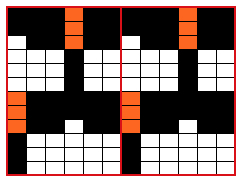
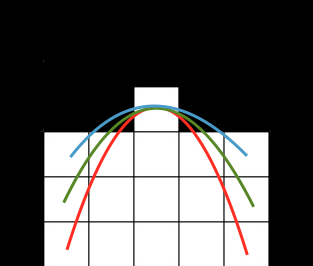
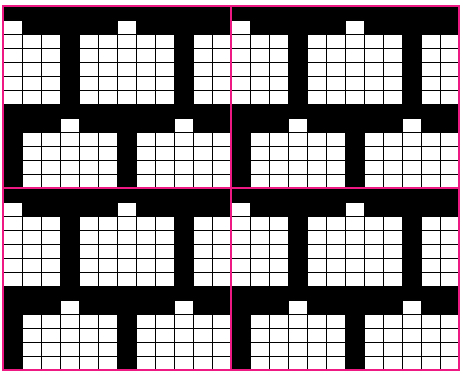
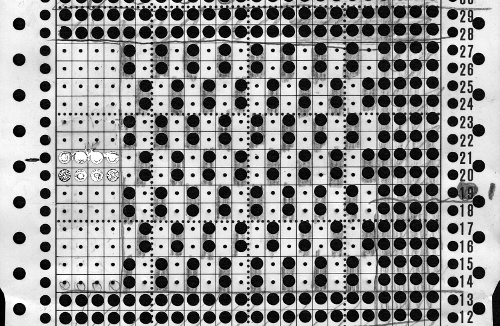
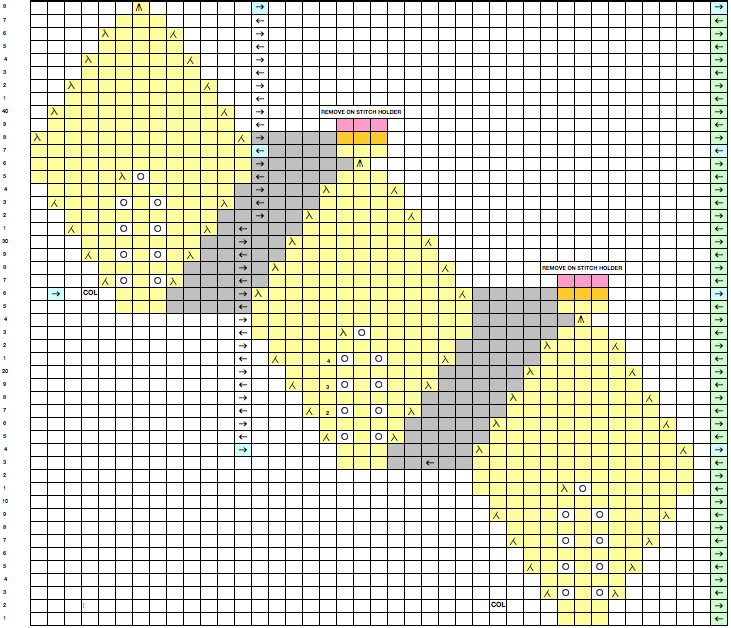
Punched holes or black pixels represent knit stitches, as always unpunched areas of the card, or white squares represent tucked rows. The knit stitch (blue) above which tuck loops (red) are formed becomes elongated for as many rows as unpunched cells or white pixels in the pattern until that same stitch is selected forward to be knit  When using card 304, tucking happens for 3 rows forming loops that span across needles out of work, then all stitches on needles on rows with numbered markings on blue cells knit for one row. Orange gradient-filled cells represent rows on which tuck loops are being formed on the held single stitches, which in turn grow in length.
  The full 24 stitch repeat, shifted for my preference, with the smallest electronic 8 stitch repeats outlined with red border
![]()
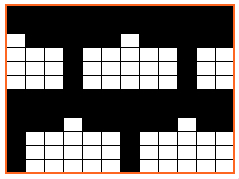
 In electronic knitting, repeats may be planned across the number of needles in work based on personal preference. Here the repeat is adjusted to produce knit stitches on both sides of the swatch, 35 stitches X 16 rows.
  On the 930: the odd number of needles are automatically placed on the left, with the pattern used in the isolated design setting.
Air knitting the selection for the first row will bring proper needles to forward position, odd number on left, even number on right.
Unselected needles on the right and left must be taken out of work, knitting will continue on the remaining selections.  Double bed: there are a couple of options for varying the fabrics. In one, to retain the laciness of the knit transfer only stitches creating those long vertical columns on the top bed down to the ribber. In the other, any or all out-of-work needles on the main bed will be transferred down to the ribber. Hybrid combinations of both modes of transfer could explore the knit further in yet more ways.
If casting on in rib, set half pitch lever on H, racking indicator on 5. Cast on the desired number of stitches and knit base rows.
Set half pitch lever on P, transfer stitches between beds arranging them as shown with NOOW on both beds. Set change knob to KCII, knit one row. Push in both tuck buttons on the main bed, knit in pattern for the desired number of rows.
Lately, I have been experimenting with chain or crochet cast ons and bind offs with extra chains between needles in work, and actually began my single bed swatch in pattern immediately after the cast-on row on the needles preselected in air knitting for row 1. Some weight, distributed evenly across all stitches is necessary. The main bed remains set to tuck in both directions throughout, the ribber when used is set to knit in both.
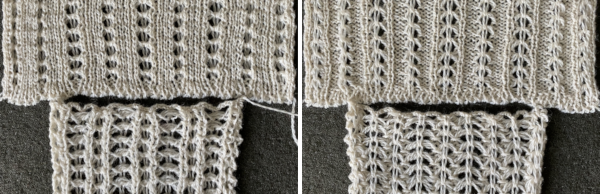
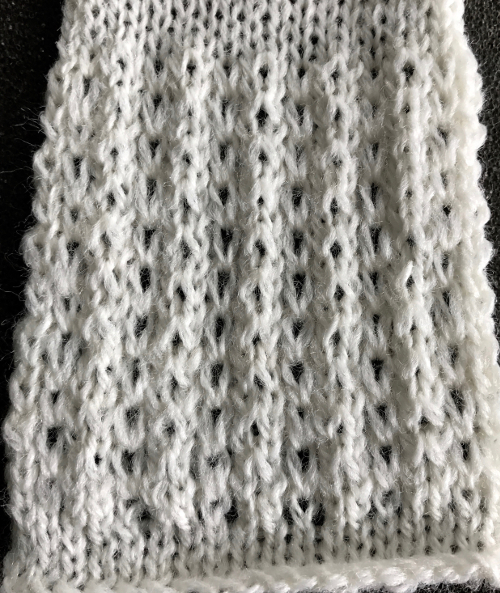
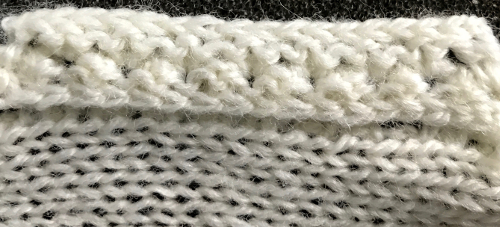
The bottom of the swatch shows the single bed fabric, the top a double bed version.
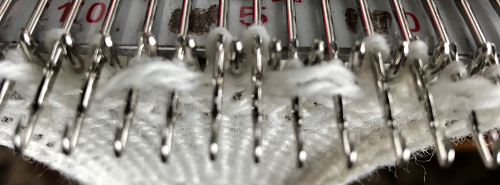
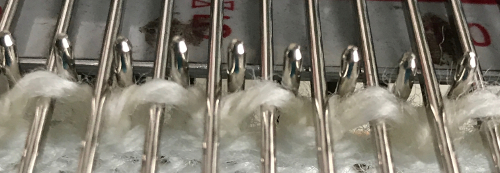
When knitting on the double bed, in this instance, the stitches where those all knit vertical columns occur on the main bed, marked with red dots, were transferred down to the ribber. Here the main bed needles, continuing in pattern, are selected forward for knitting on the next carriage pass,
 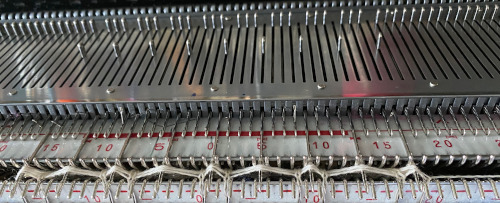 here the elongated stitches and tuck loops are shown after they have been knit together on the main bed.
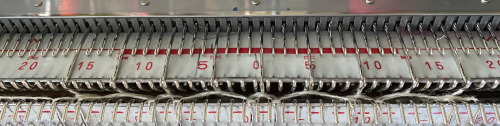
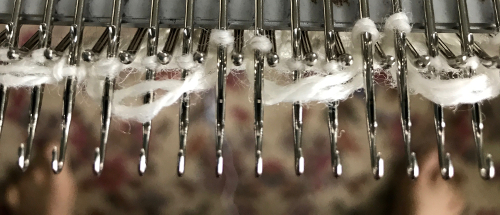
 Transferring all non-selected needles down to the ribber:
 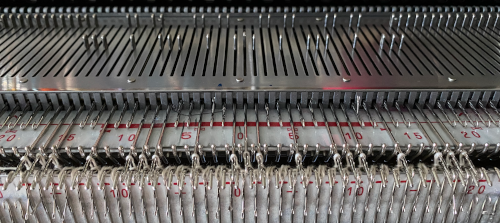 the tuck loops still form on the main bed, the ribber is set to knit every needle in both directions.
 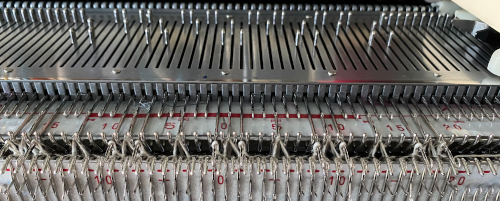 The resulting knit, very different in appearance and in width than the previous sample, using the same tensions
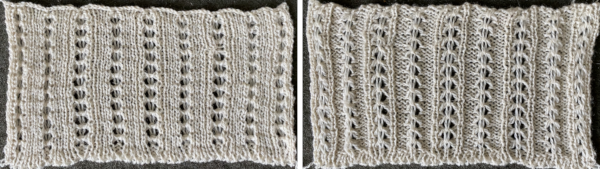
For how-tos, illustrations, and swatches showing fabrics knit with all needles in work on both beds, please see post: Ribber fabrics with main bed tuck patterning 1/ pick rib

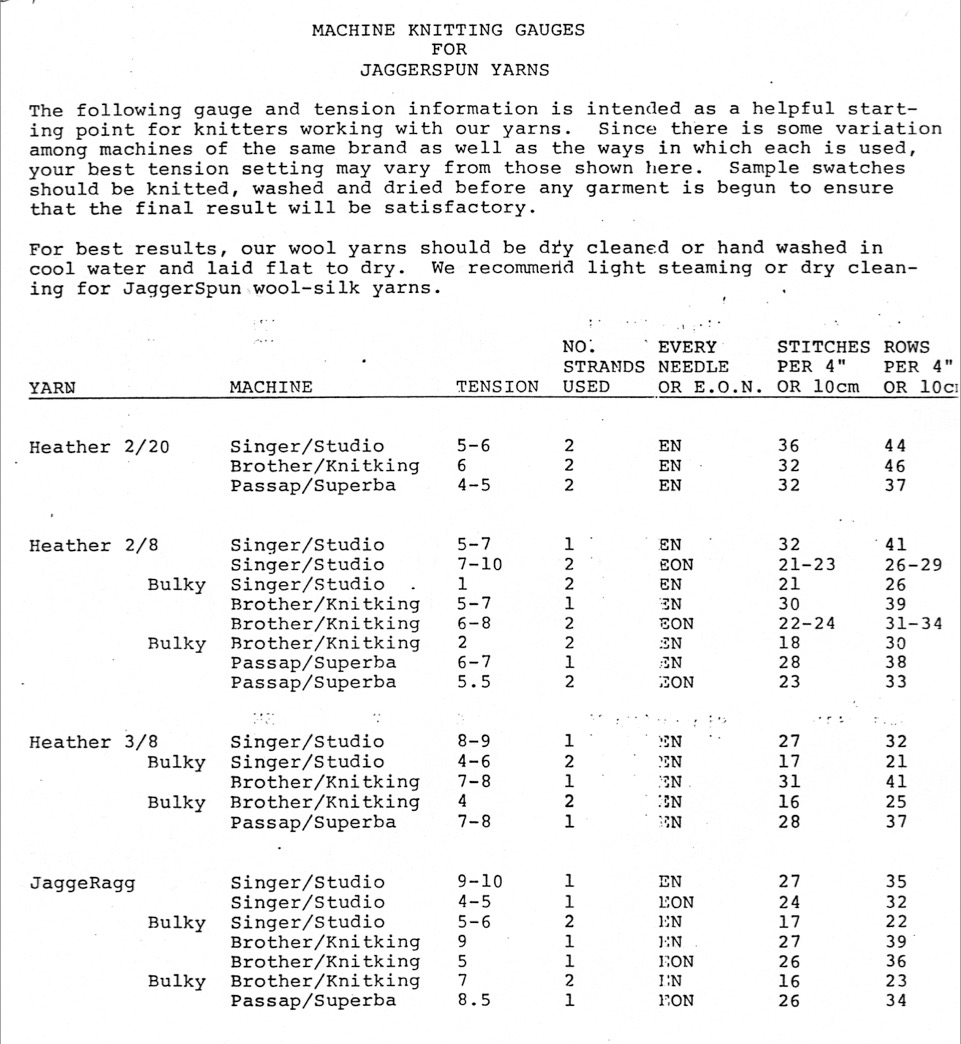


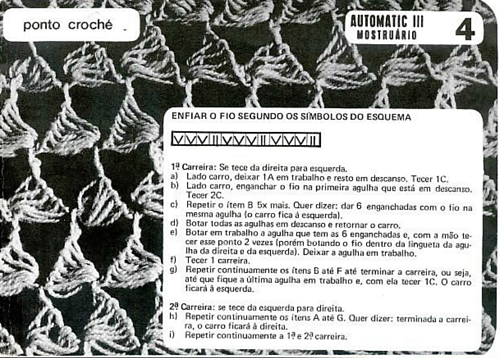
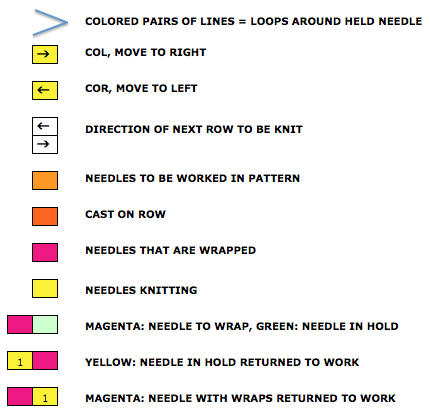
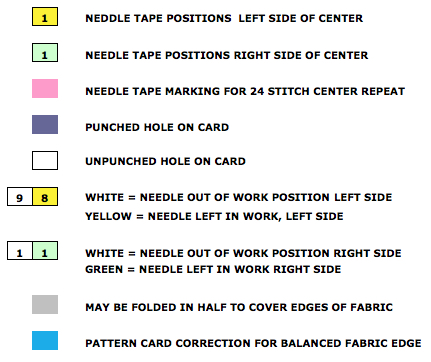
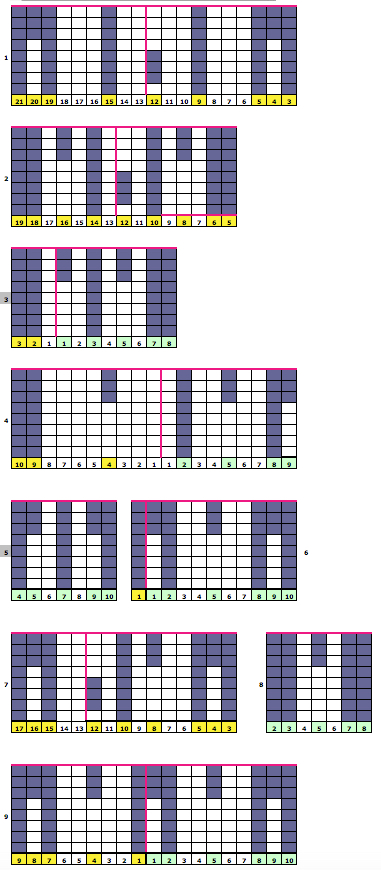
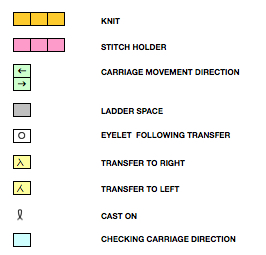
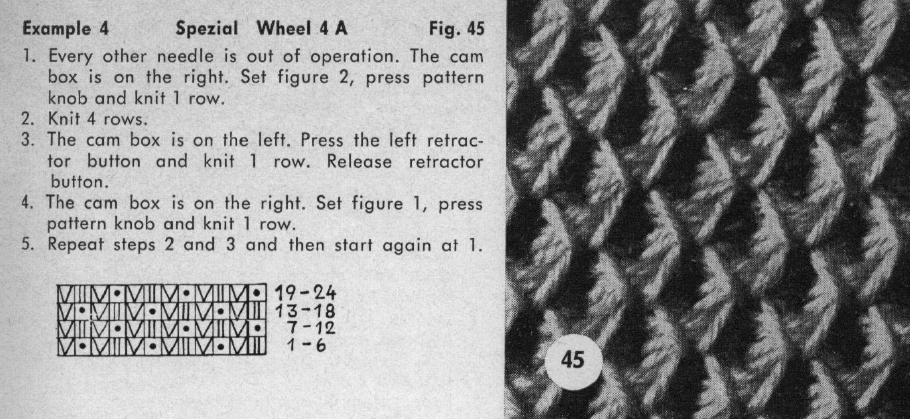 Translation of symbols used in Knittax patterns
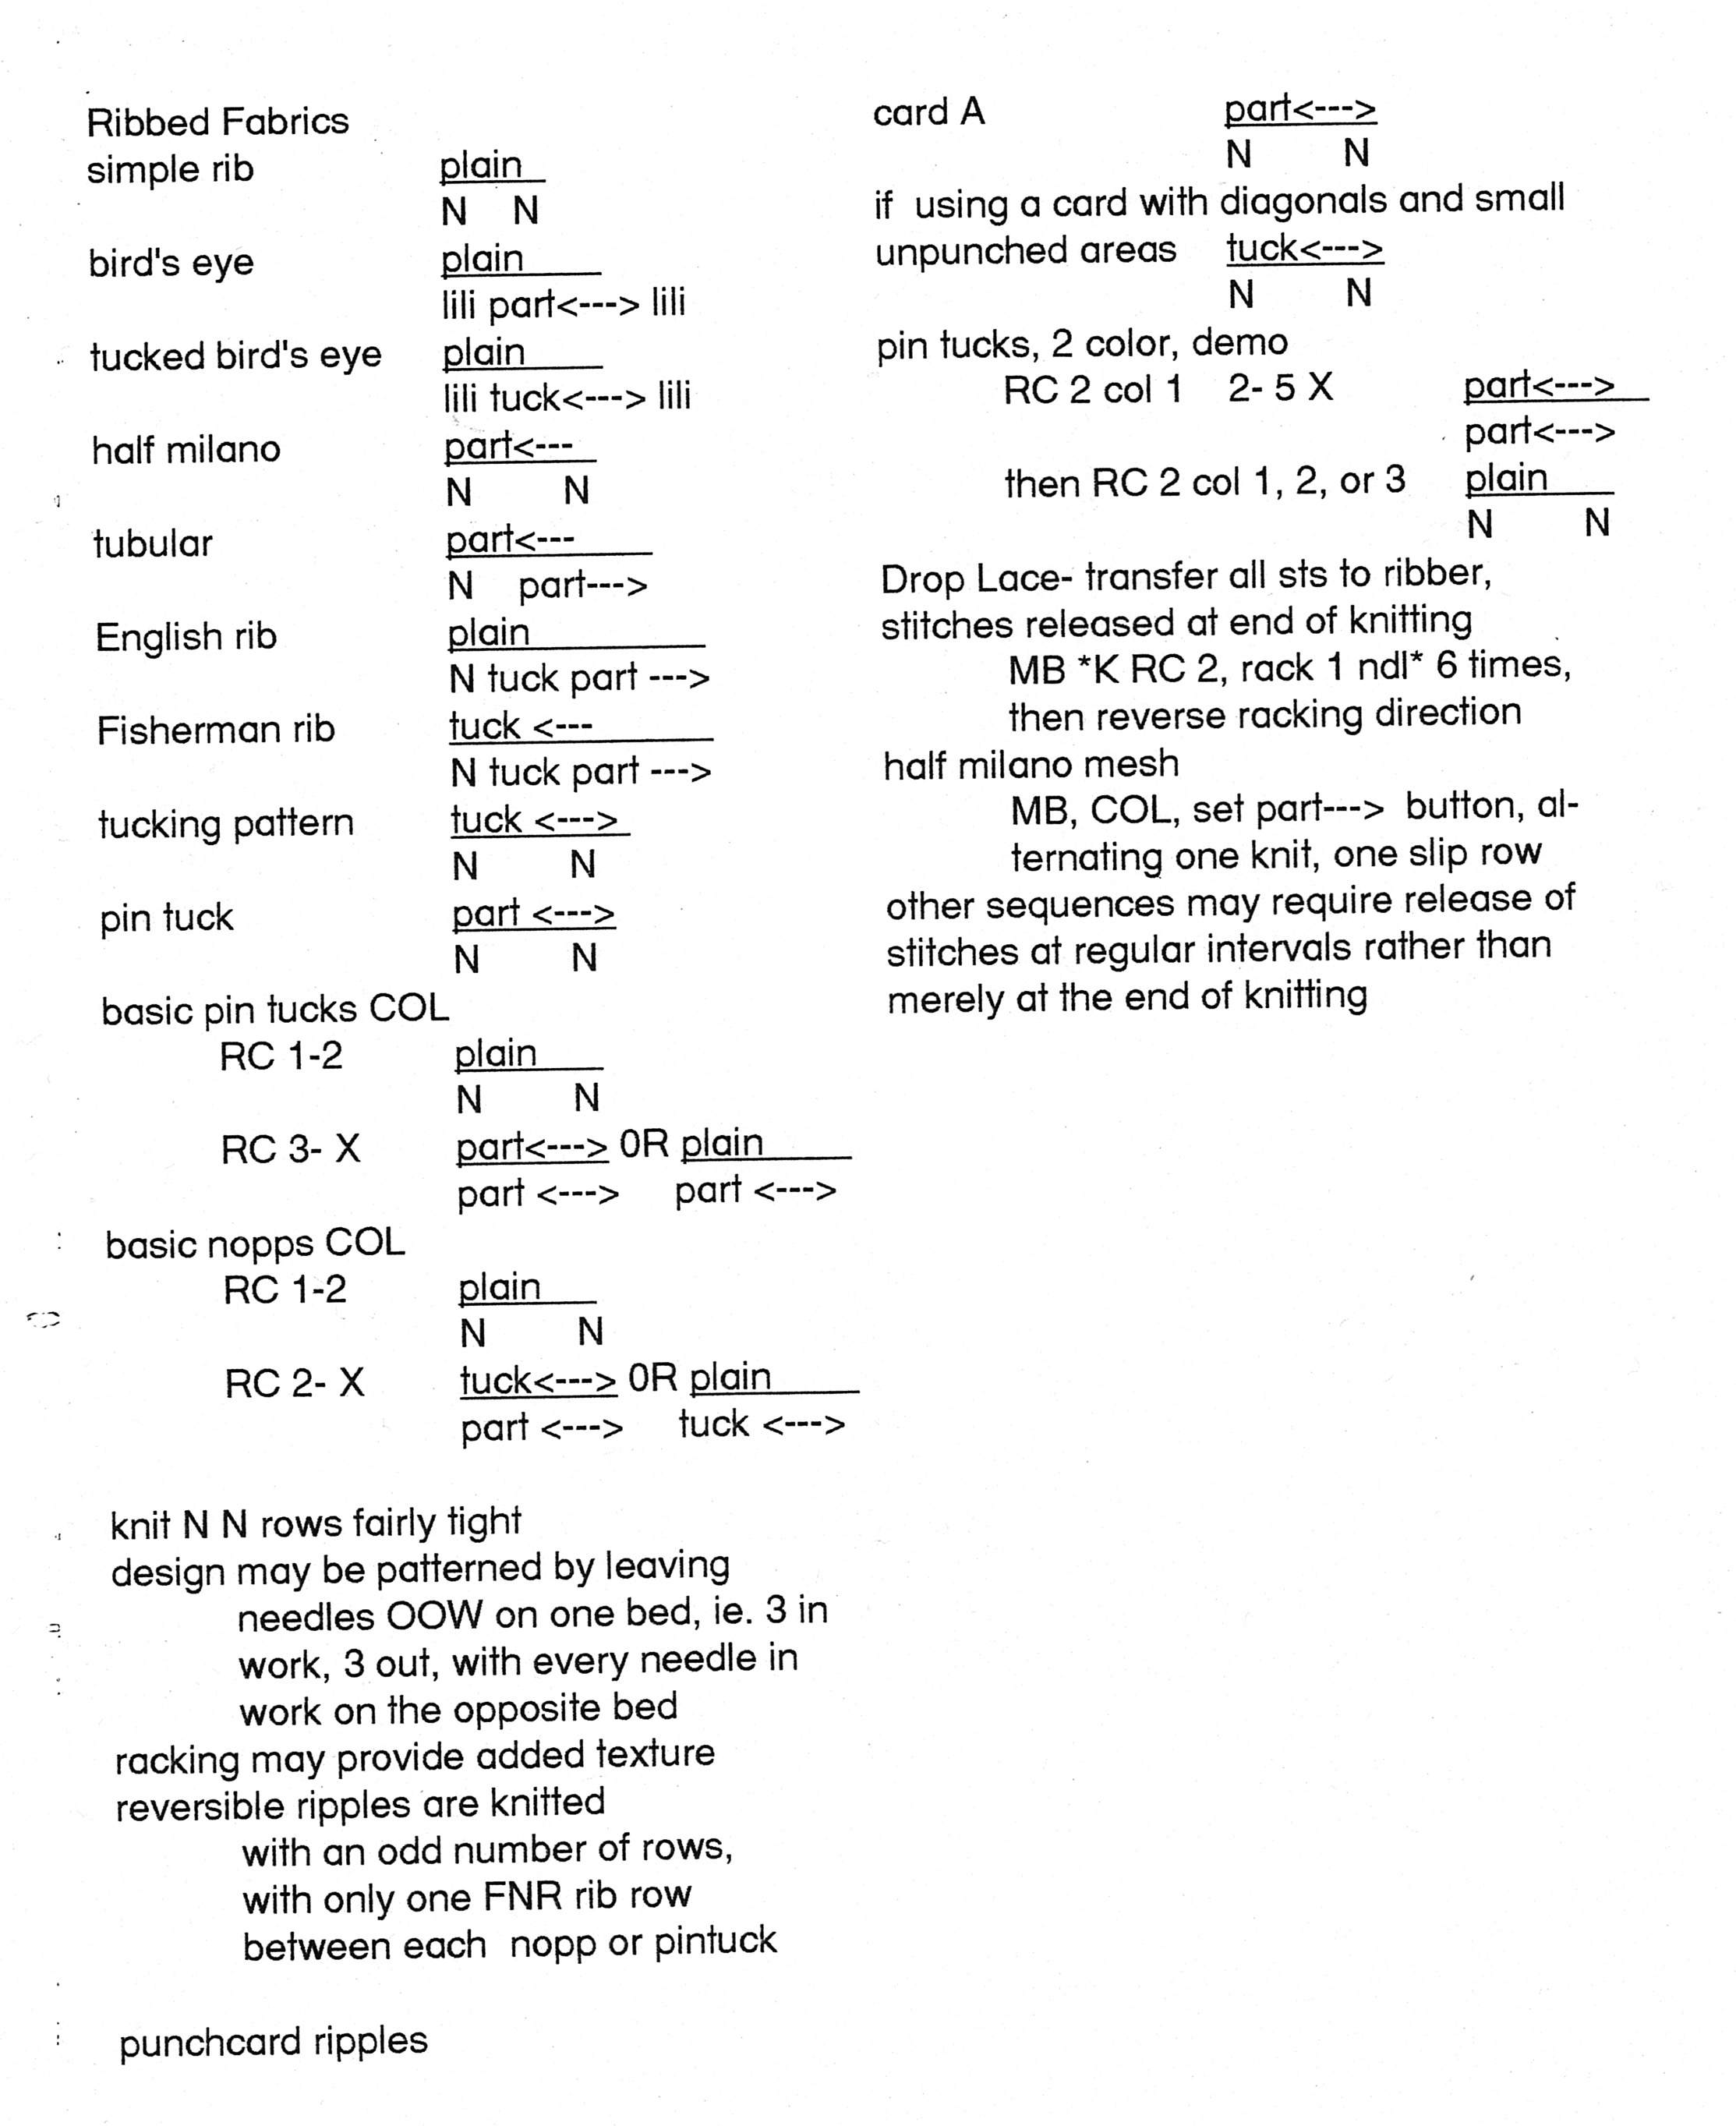
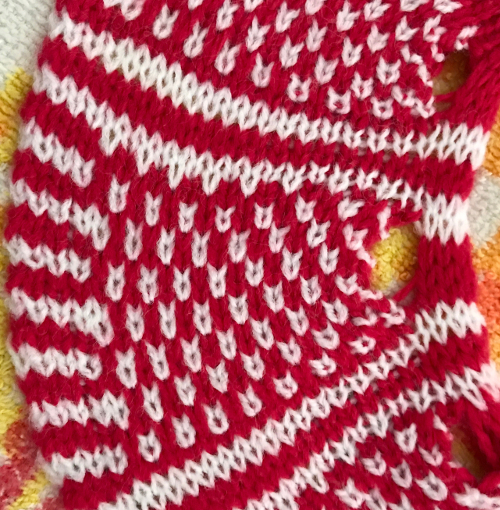
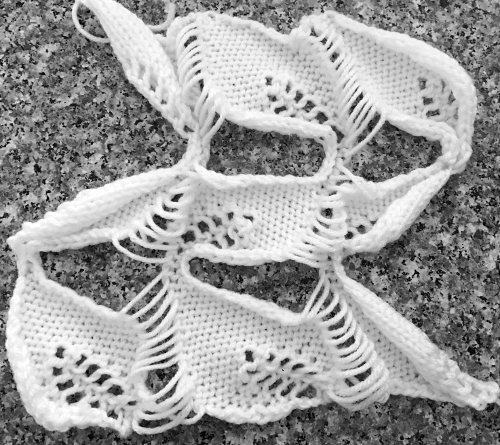
 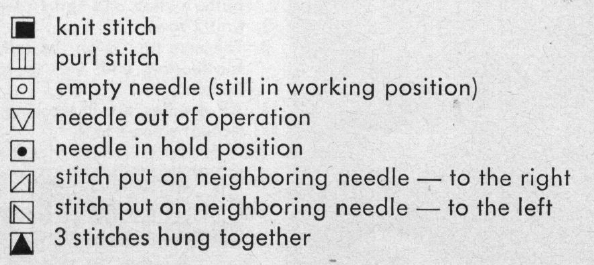 On the purl side, this creates structures that emulate crocheted shells. My first attempts at trying to knit anything like this were in thin yarn, and I had enough issues to give up for the moment. Things worked out much better when I switched to a sport weight yarn that seemed to like knitting at T 10 for stocking stitch. With NOOW set up, my sample was knit at T 9. Waste yarn and ravel cord are often a good way to start, but not always necessary, the same is true of weight. I began with a crochet cast on, every needle, multiple of 4 st + 2, then dropped the alternate pairs of needles between the first and last 2 pairs of needles in work, pulling the needles back to A position, determining the width of my “shells”
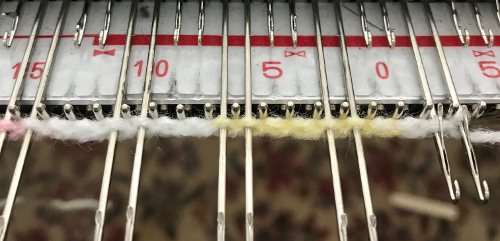
 Variations can include the number of needles in and out of work, yarn choices, etc.
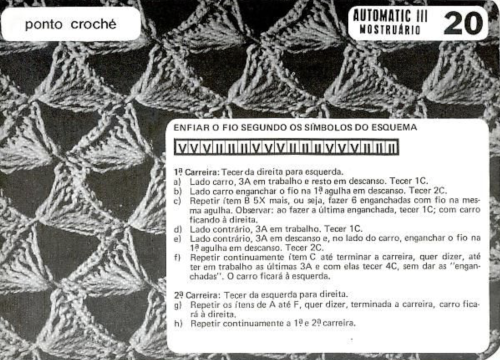
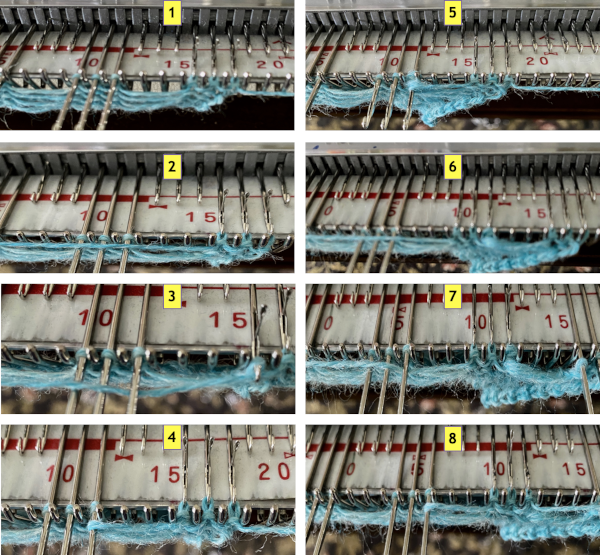
 The illustrated needle arrangement for #4
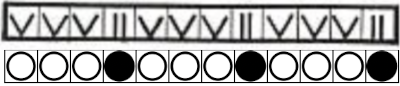 I like to begin using a chain cast on, and then dropping chains off needles out of work

 The fabric shares knitting sequences with the first 2 samples
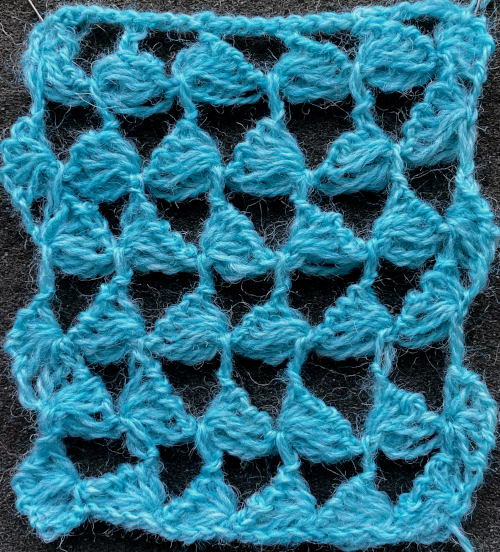
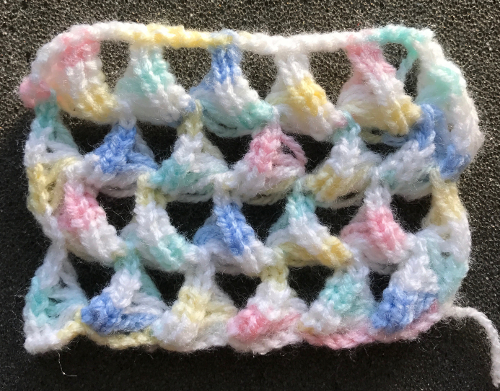
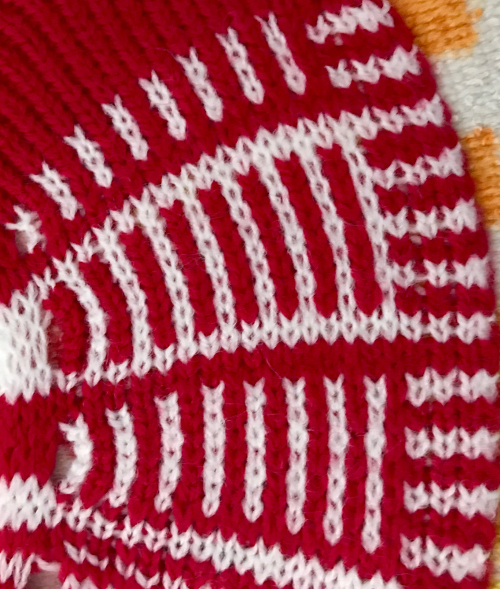
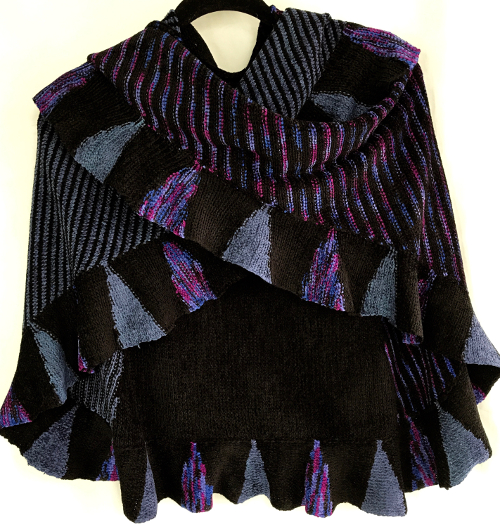
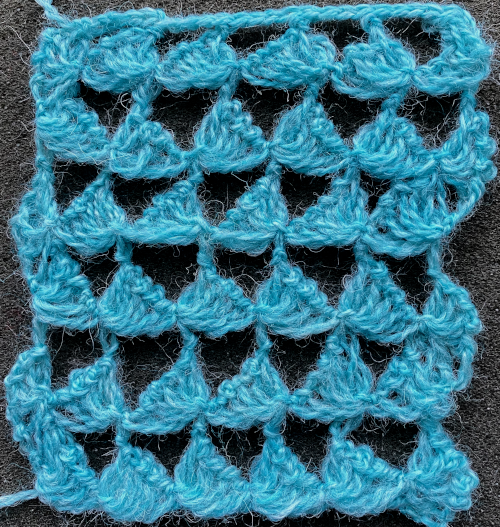 Here a similar technique is used for a trim, both sides are shown


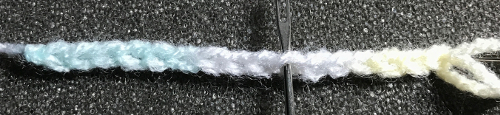


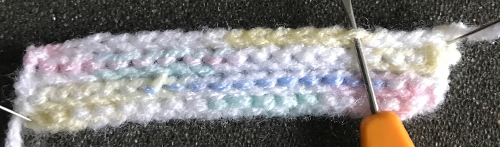
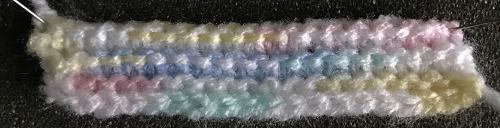


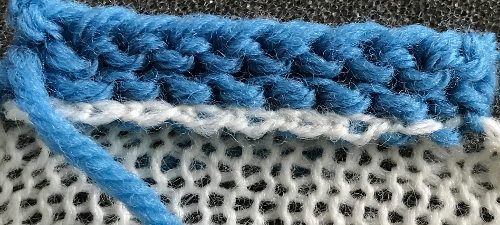
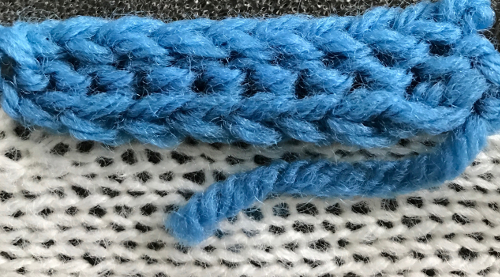
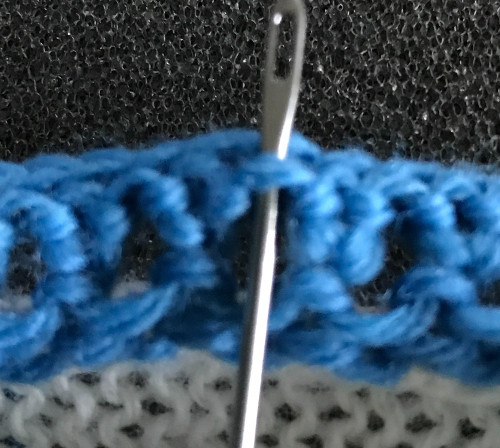
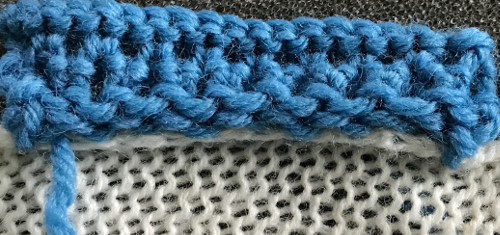


 a bit closer,
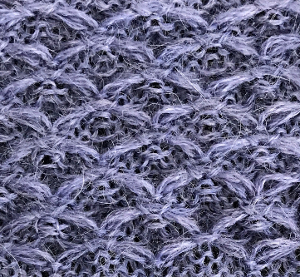


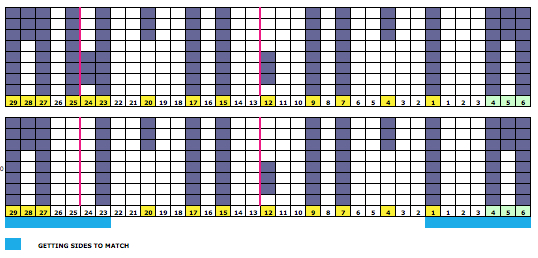