This is a work in progress post. I have now edited and included its previous version so the most recent observations appear first, the oldest last.
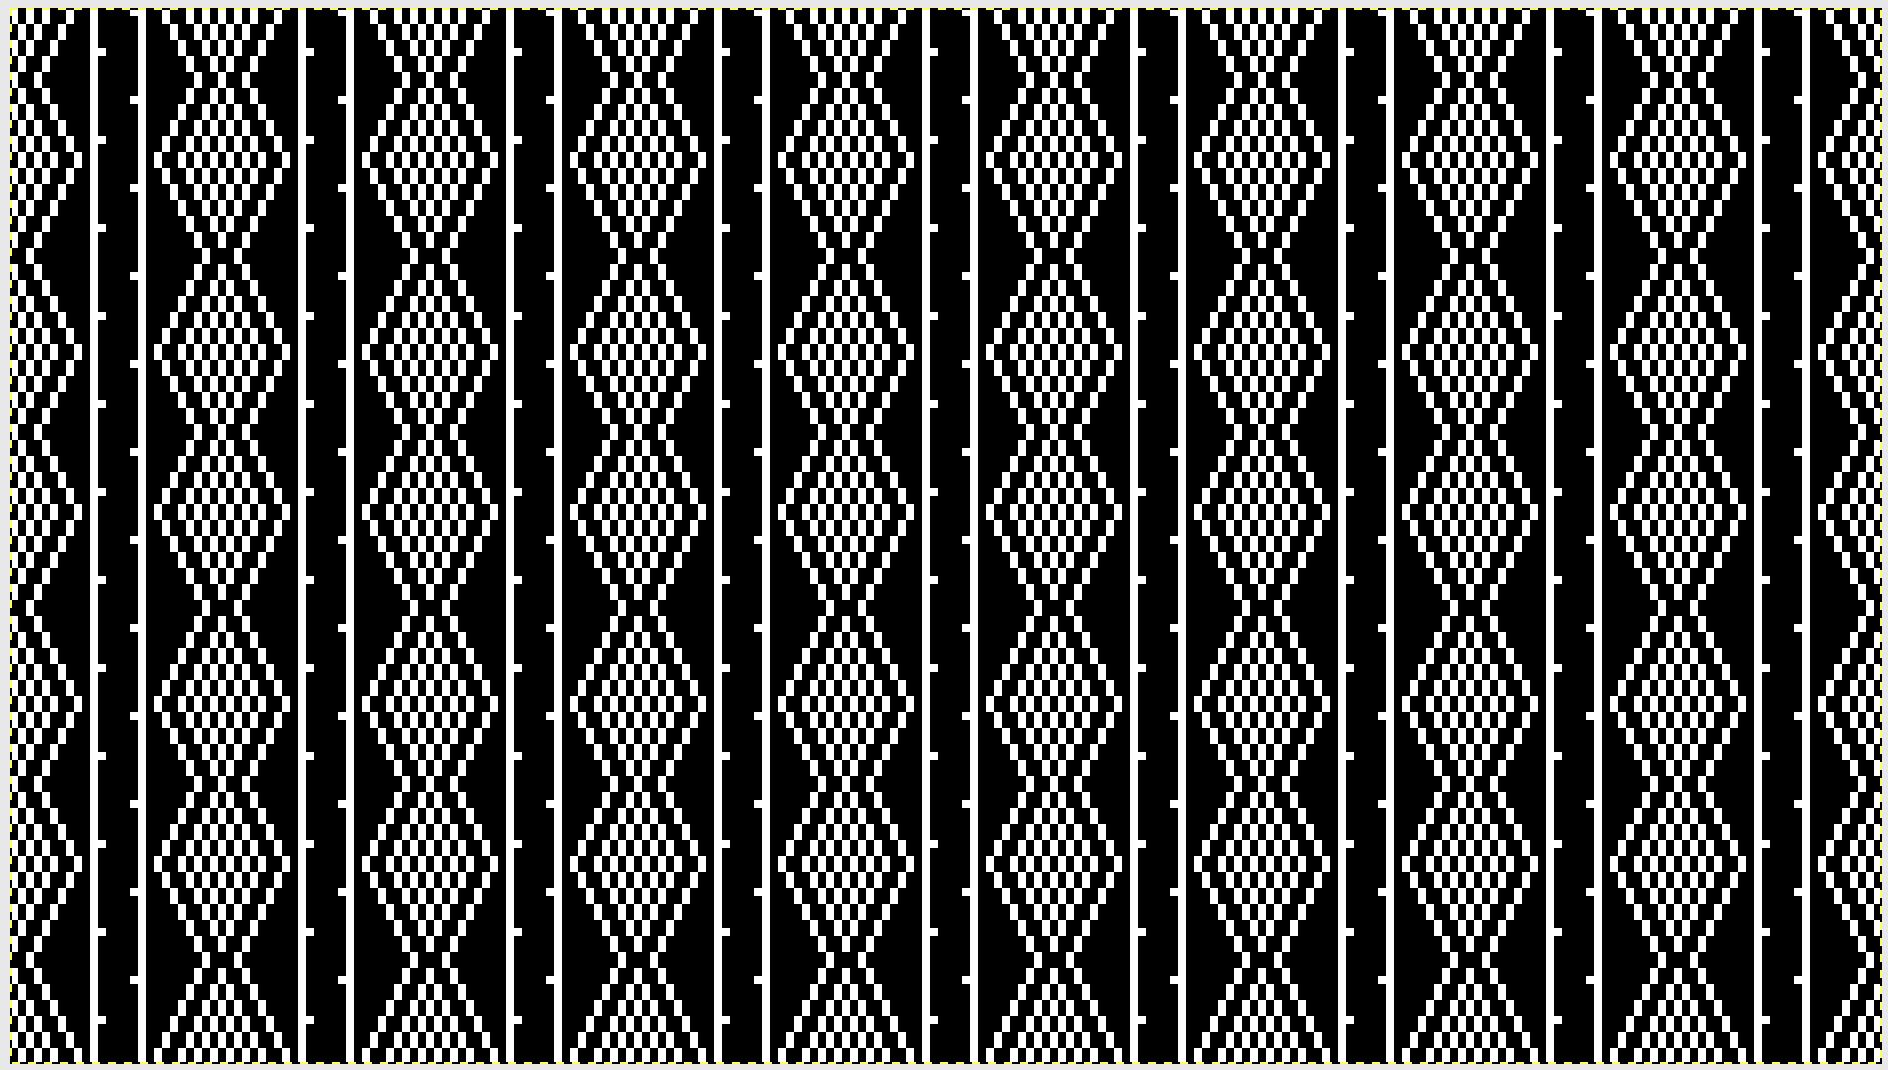
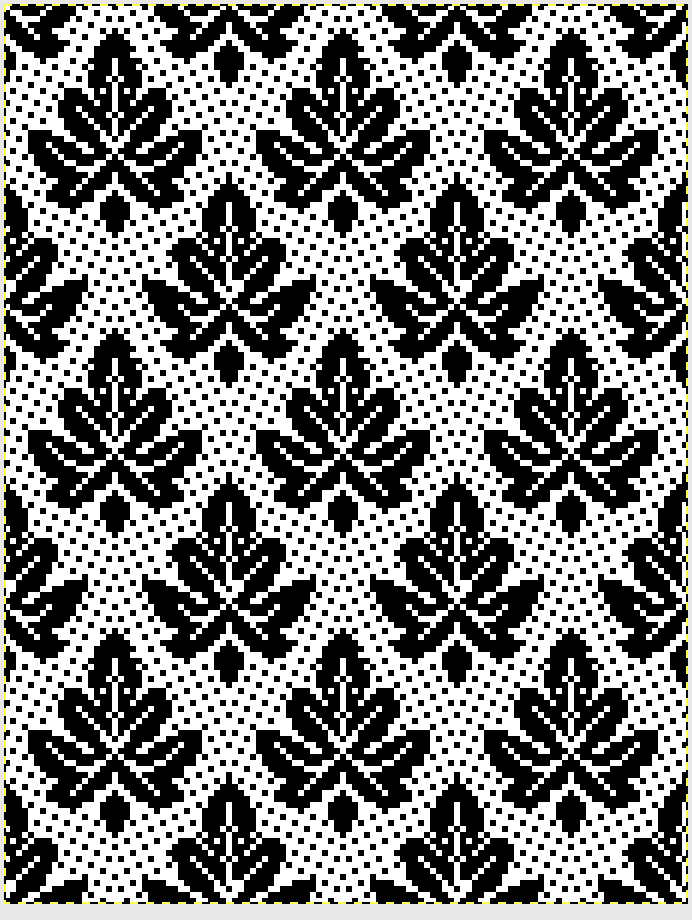
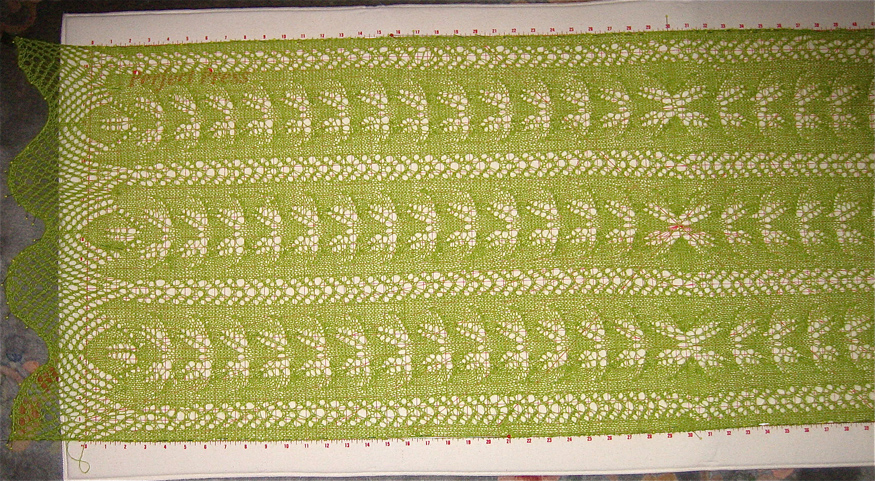
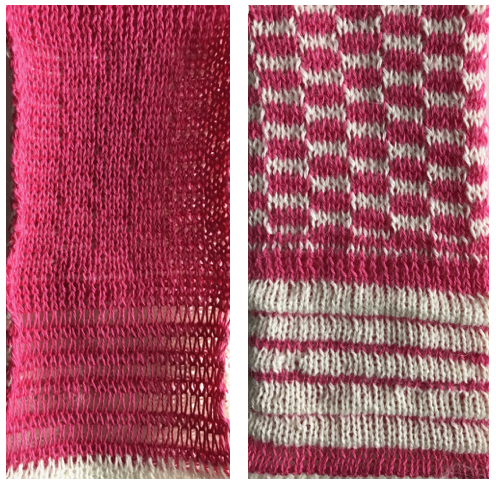
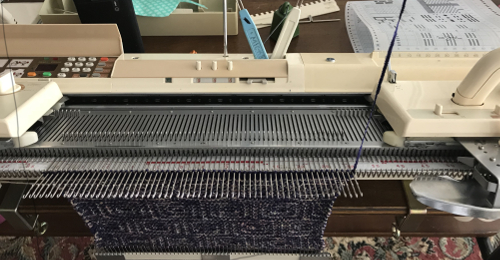
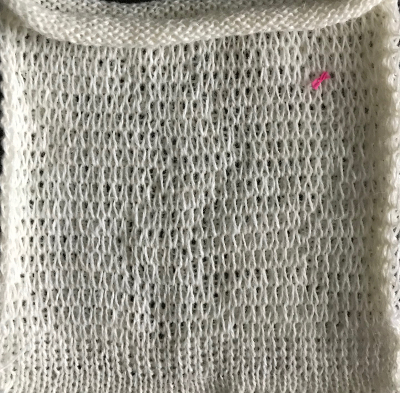
9/8/18 I have received a replacement unit from EMS. I got this far testing a large scale pattern, no fault of the program at my stopping point. I did not notice until I got across the last pattern row that I had actually knit with both strands of yarn. Rather than try to fix the issue, I decided to scrap off. This gave me a chance to test new yarns. I had never used chenille in DBJ on Passap, it sheds too much, resulting in error messages. I like to have my scarves at least 60 inches in length, and this combo looks as though it would reach that length when completed. I also did a bit more editing of the repeat as shown here. We shall see if the equipment and I both last to a whole 1200 rows or so in one sitting anytime soon 😉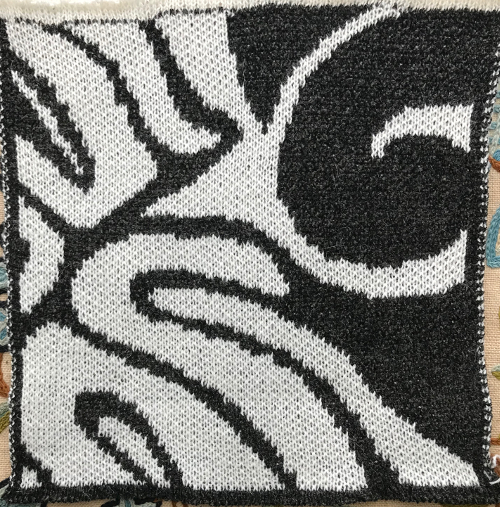
6/25/18 the kit apparently has now gone from out of stock to officially no longer in production
5/28/18 replacement kit never received, it’s back to mylars for me to actually try to get any significant knitting done 
4/27/18 I have been able to develop some fabrics using two knit carriages selecting needles from opposite sides, though the lace carriage will not select from the right if the knit carriage is also selecting from the left. The posts include altering a knit carriage to use as the second one to select needles as an alternative to changing ribber settings between normal and pattern knitting, and addition to posting on combining KC patterning with racking
I had been told my kit would be replaced due to persistent patterning error issues. Sales are presently on hold while the hardware is reviewed, and work is being done on a new version of the software, so any changes in status are to be determined.
3/ 31/ 18 At present there is no English text manual for using the software or a quick start guide. I am sharing some of the differences and similarities in actions I have noted between the unaltered 910 and those of the hack, beginning with settings, and including a few tidbits gleaned from support as I encountered patterning problems. They may be of interest to those making the transition after previous knitting experience and familiarity with the machine, or to anyone curious about the program and some of its features and differences.
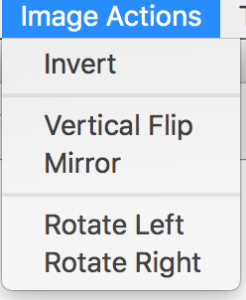
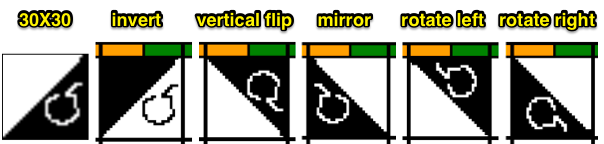
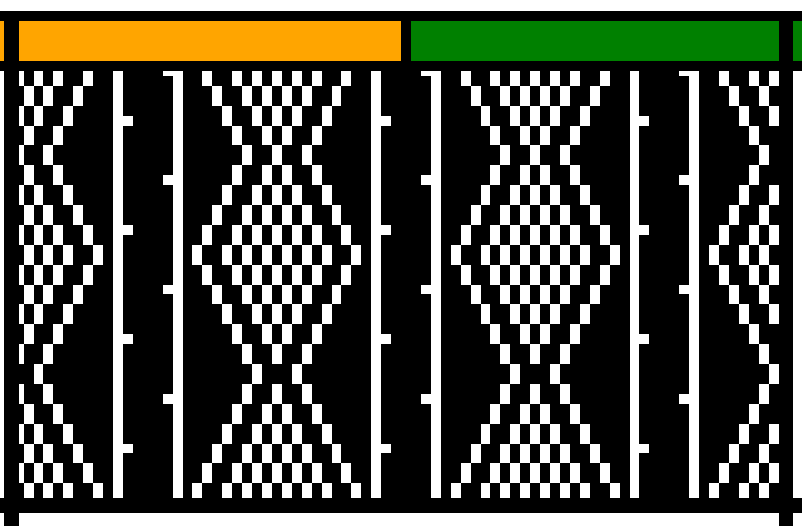
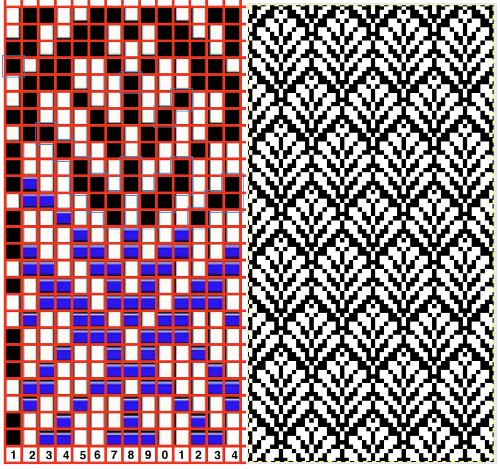
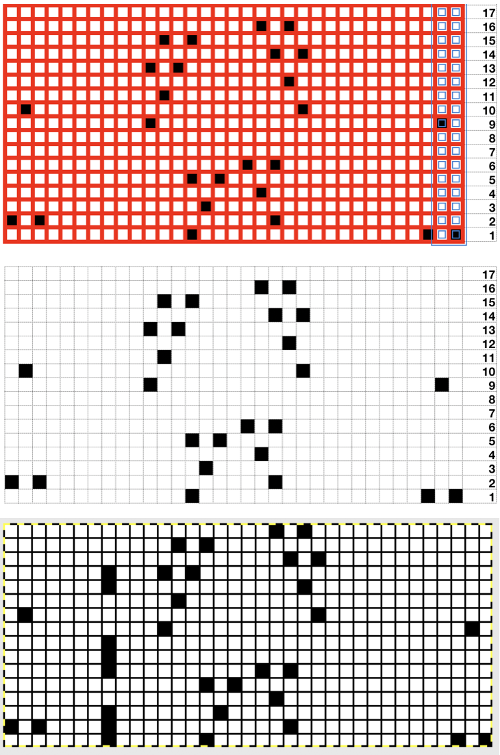
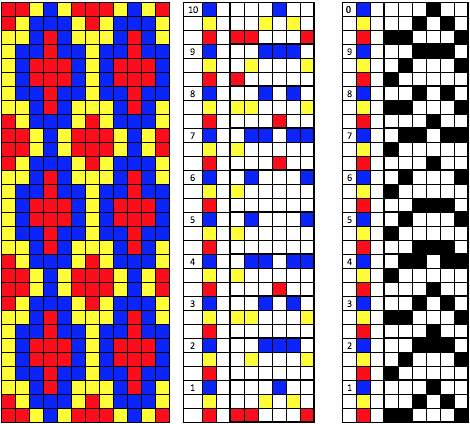
Yellow text in this first image from a publication on the 910 indicates matching functions I have identified so far in ayab software.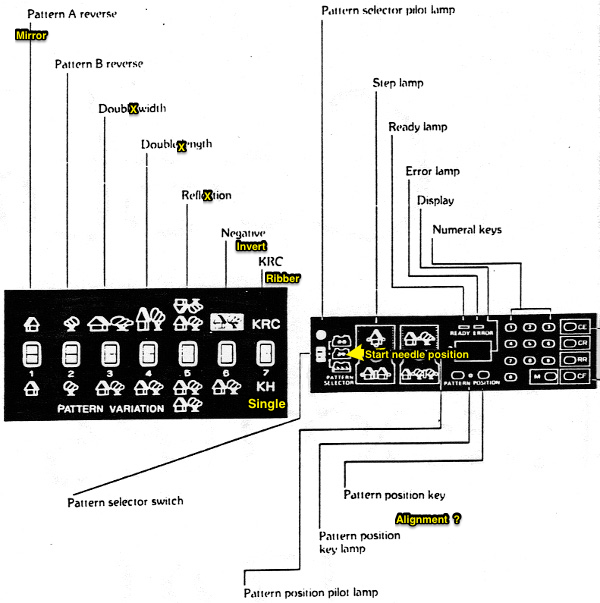
the full illustration from the 910 manual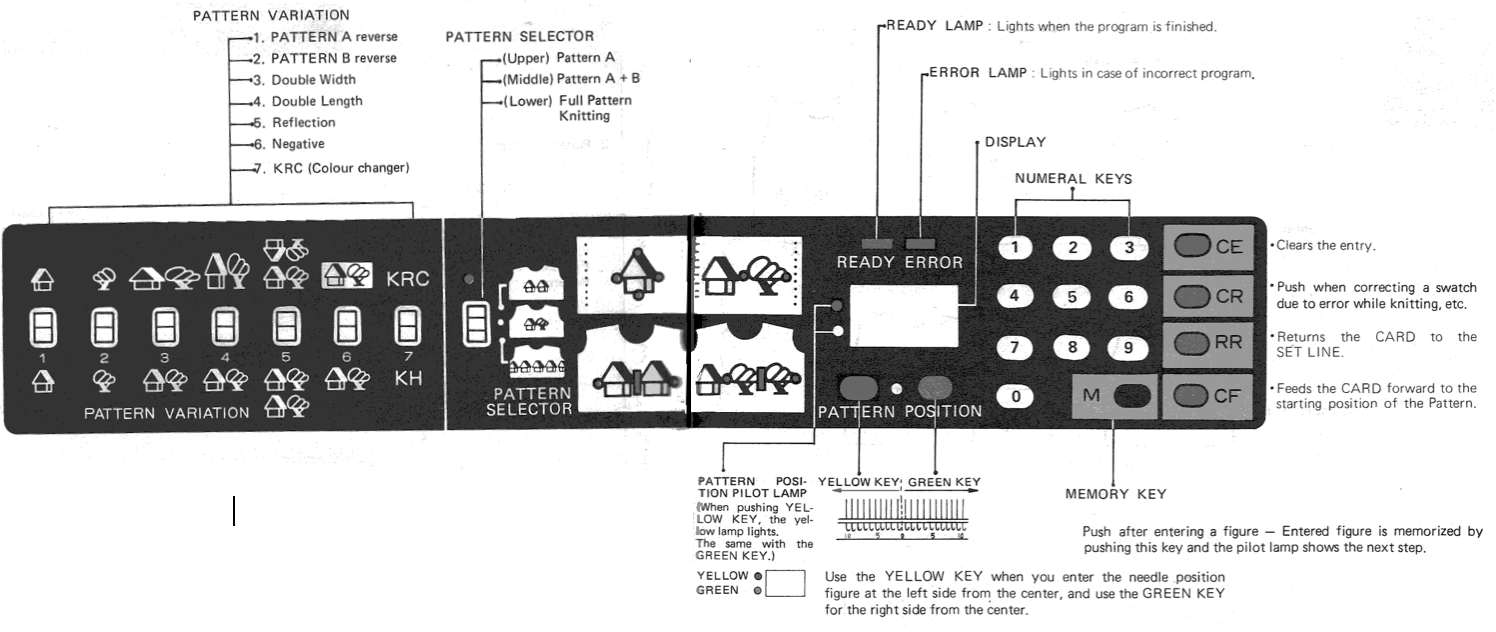 actions on the unaltered 910
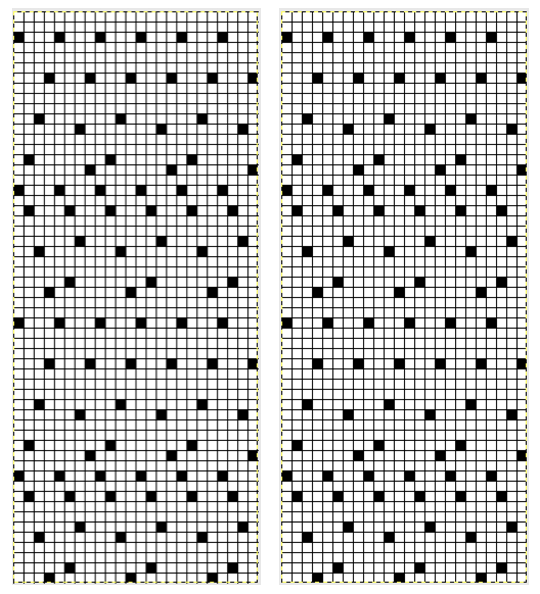
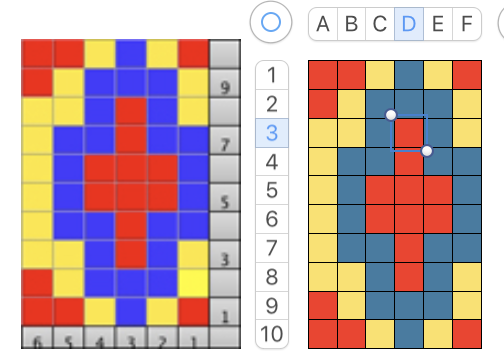
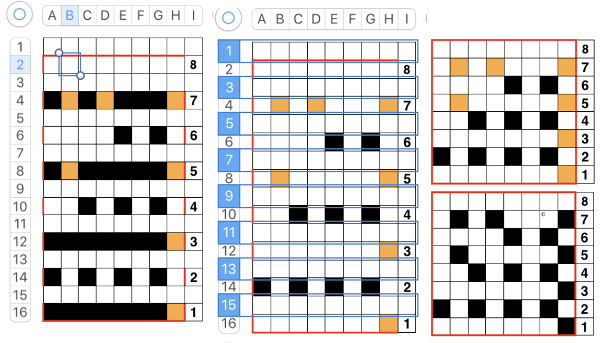
 When the pattern selector is down, the pattern is centered on green #1 (right of 0). This means if the pattern is an even number, say 24 stitches, then the pattern limits are green 12 and yellow 12. If the pattern is an odd number of stitches the pattern limits are yellow 12 and green 13, the center being green #1. With an odd number of needles, Ayab places the larger number of needles on the left, its orange (yellow) side.
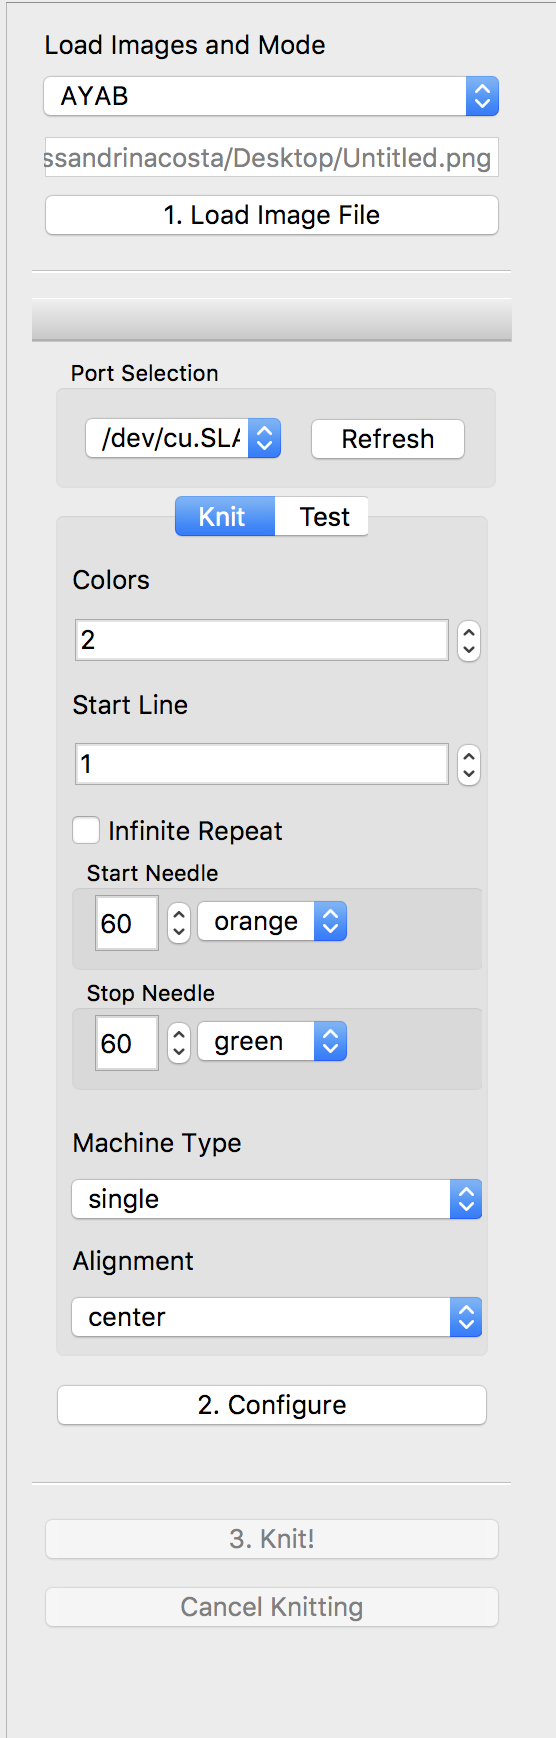
AYAB
I purchased my hardware kit (now off the market) from the developer : to purchase , wiki , interface , install. Online discussion groups: Ravelry , Facebook, and GitHub.
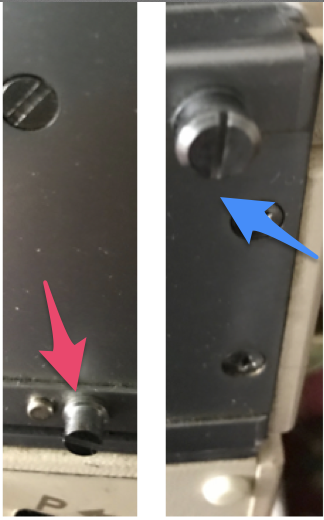
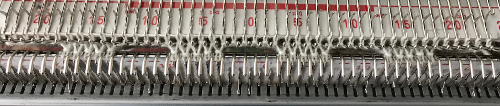
At present, there is no cover readily available for the machine once the unit is installed, so the left side of the main bed remains exposed.
Though beeps heard upon preparing to preselect the first row from left to right are described as a triple beep, I hear them as a triple set of multiple beeps with pauses between. Not taking the time to “hear” them all will result in patterning errors from the get-go. Be sure to hear the beep and see the flashing of the unit before reversing carriage direction. Clear the left turn mark at least periodically while knitting. If you have experience with any production knitting on the unaltered machine you may feel the knitting speed is slowed when using the software and cable for downloading each row as opposed to that with which the mylar scanner accomplished the same task.
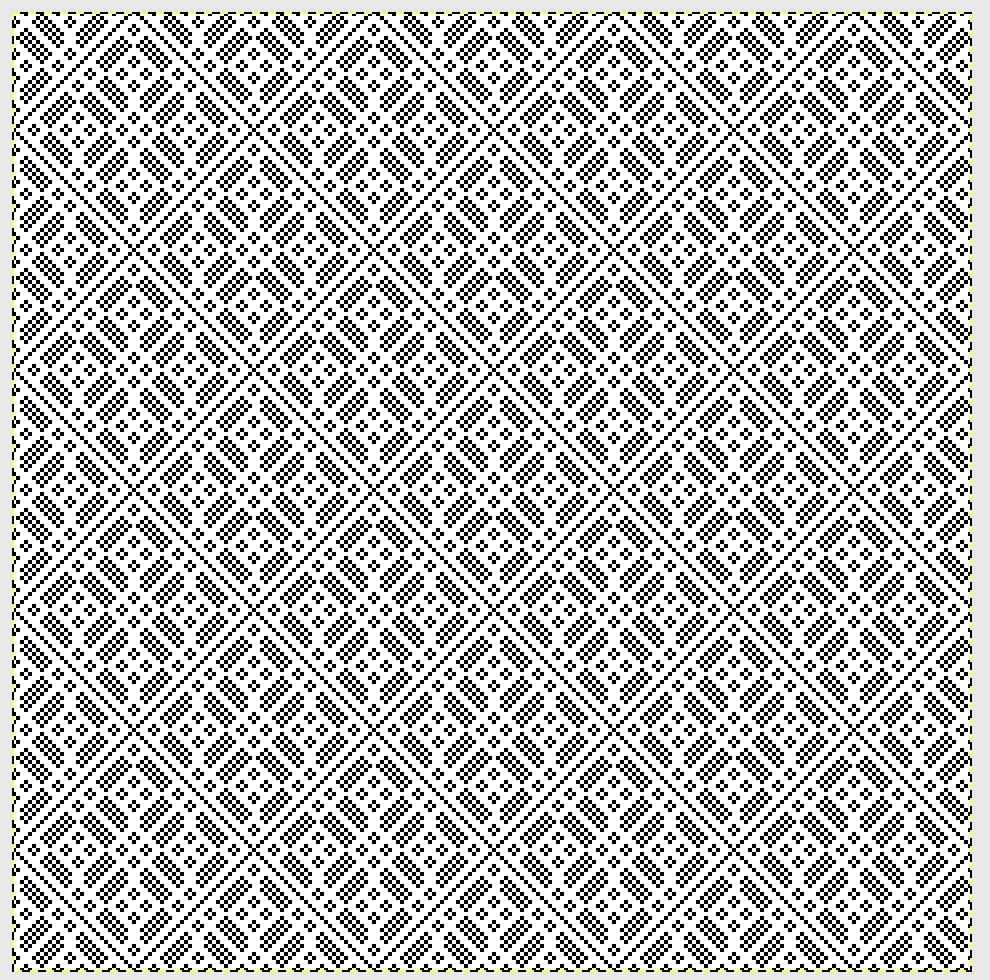
Ayab can be set for an infinite repeat in length, the function was automatic on the mylar unless one made the choice to stop at any point. A single repeat on the mylar was enough to program across the width of the needle bed, with ayab the full width of the pattern must be programmed, so designs need to be tiled accordingly.
Installation of software can be achingly slow on Mac desktop (I am using High Sierra OS). SiLabsUSBDriver is also required. Security settings need to be checked/changed even if no warning is given by the computer leading one to assume there have been no issues with the download or the install. The driver will reside in the library/ extensions.
The hardware install is fairly straightforward.
The USB connection needs to be made prior to launching the software for the port to be recognized. If port questions come up, click the “Refresh” button on the AYAB screen. When things are working correctly, you should be able to see a port name from the pop-up menu. The plug-in power supply supplies power only to the needle selection.
The popping noise or clunk is heard usually but not always when you cancel AYAB and restart and is produced by the solenoids. I have been reassured it “does no harm” by support.
The launcher box remains open throughout knitting.
To start knitting:
1. Load your pattern in the width of the planned repeat
2. Set all the AYAB settings at default (2-color, start at row 1, single, center). Check infinite repeat if you want to knit more than one vertical repeat
3. Knit carriage is on the left, outside the turn mark
4. In the AYAB software, Configure/Knit
5. Wait until the software says Please Init carriage at bottom of the screen
6. Bring the carriage across the left turn mark and stop before crossing any needles, wait for the triple set of beeps.
8. Continue across the first row and stop, wait for flash and beep, then proceed with movements to and from each side, again waiting for flash and beep that indicate each row download is complete.
If knitting a repeat in single height, when you are one row ahead of the last selection the row numbers disappear as “Image Transmission is finished. Please knit until you hear the double-beep sound”. The marker on the image jumps down to the beginning. You knit across and it does the selection for the last row and gives the long beep sound. Knit one more row to actually knit that selection. When all needles are selected to B, you cancel your settings and you’re done.
In some instances clearing both turns marks seems to help avoid errors and ensure consistent patterning. Beware of moving the carriage back and forth for any reason, ie to fix a yarn loop, dropped stitch, etc. The movements in my experience have been counted as rows, resulting in patterning errors as would happen when using a punchcard machine. If working on a desktop as opposed to a nearby laptop you may be missing any visual cues for row advancement provided by the ayab screen.
The image displayed on the screen may be magnified and reduced to fixed amounts, but at present, there are no programmable cues as might have been used on mylar ie. for color changes, lace vs knit carriage actions, etc.
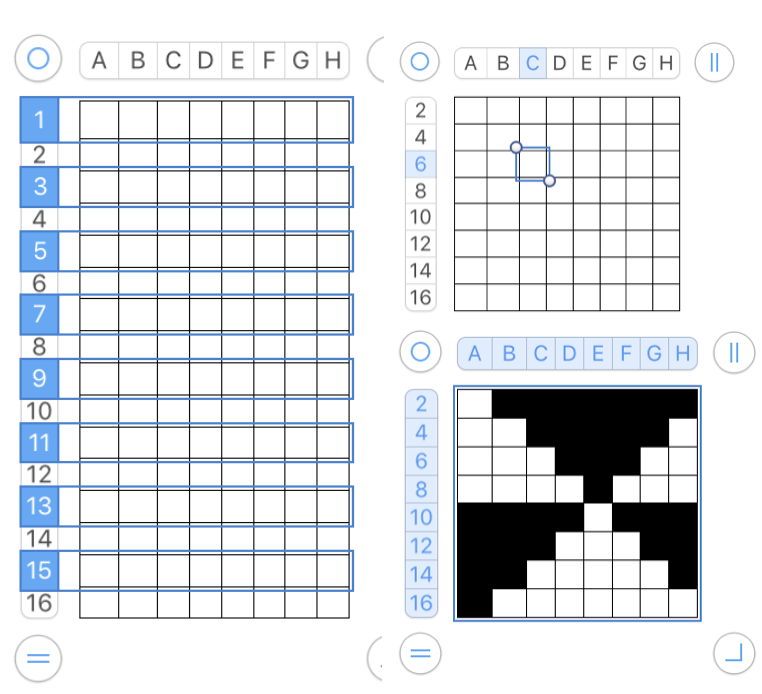
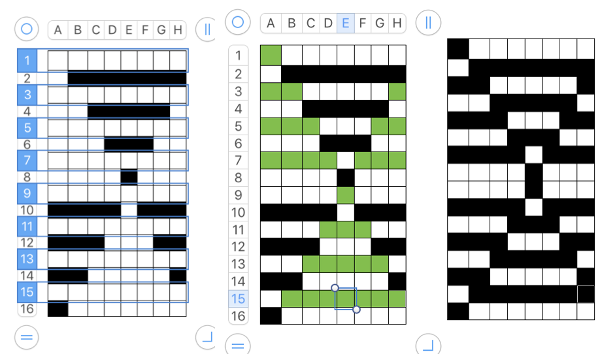
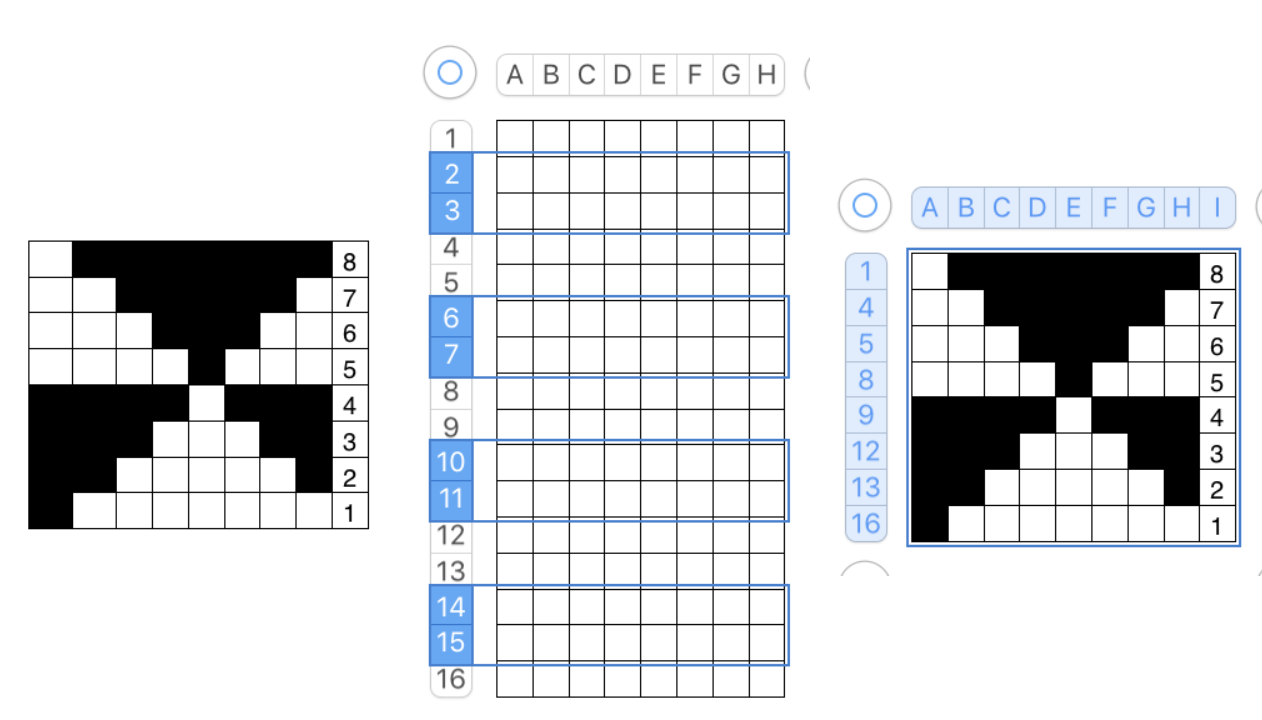
When exploring the menus, creating an easy to view repeat helps to sort out available actions
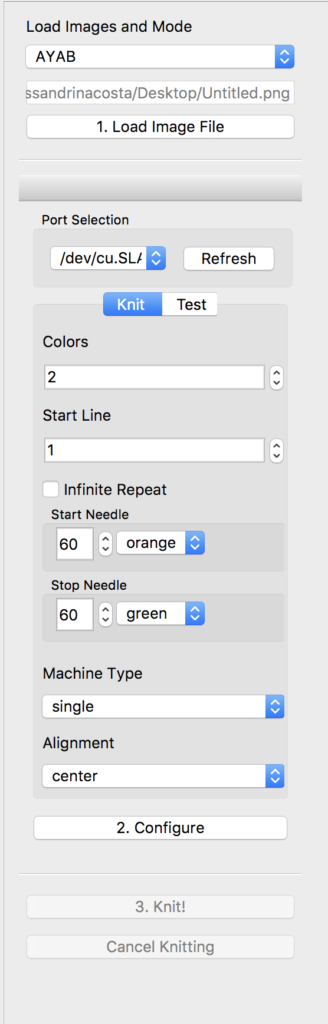
The single setting is used for all single bed fabrics. The row numbering starts from 1, not 0, and focuses consistently on the row whose pattern is being selected, not the row being knitted; design row start line placement
 start needle design stitch position on needle bed
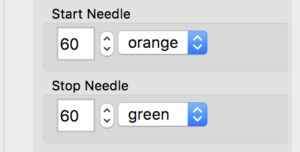
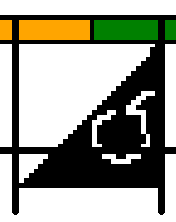
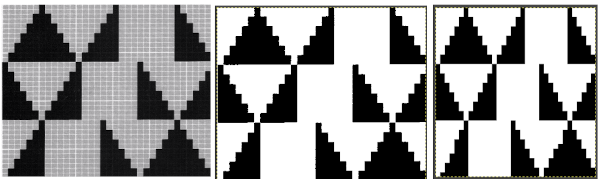
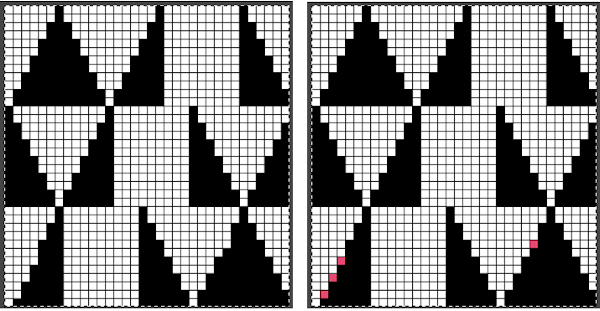
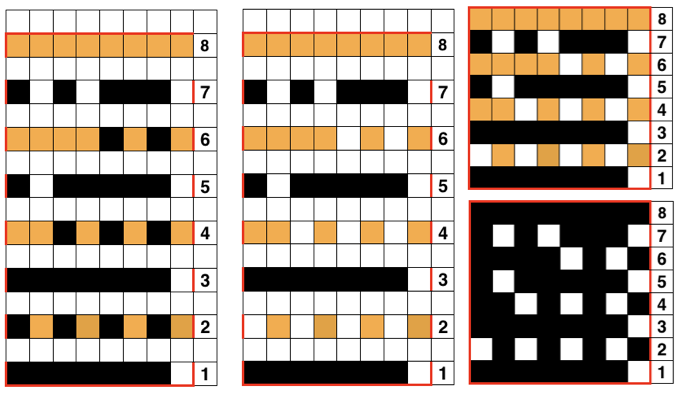
single design alignment test: left, center, right of the same repeat on an alternate start stop needle configuration 
As mentioned, with an odd number of needles, Ayab places the larger number of needles on the left, its orange (yellow) side. It also automatically mirrors all patterns, so lettering and images appear on the knit side as drawn. The mirroring, however, is a problem with lace. If working from an established pattern, the lace repeat must be mirrored again either before loading the pattern or prior to knitting it or lace transfers will be made in the wrong direction. It is possible to operate the LC from the right side using Ayab, but if knit carriage is also set to selecting needles ie. if set to slip stitch, and is used in combination with the lace carriage, the LC will not select when operated from the right, and the pattern will not advance properly (documented by others as well).
I used to constantly use 2 knit carriages in a lot of my accessories. At this point, that function is not possible due to patterning errors or loss of patterning when the second carriage operates from the right.
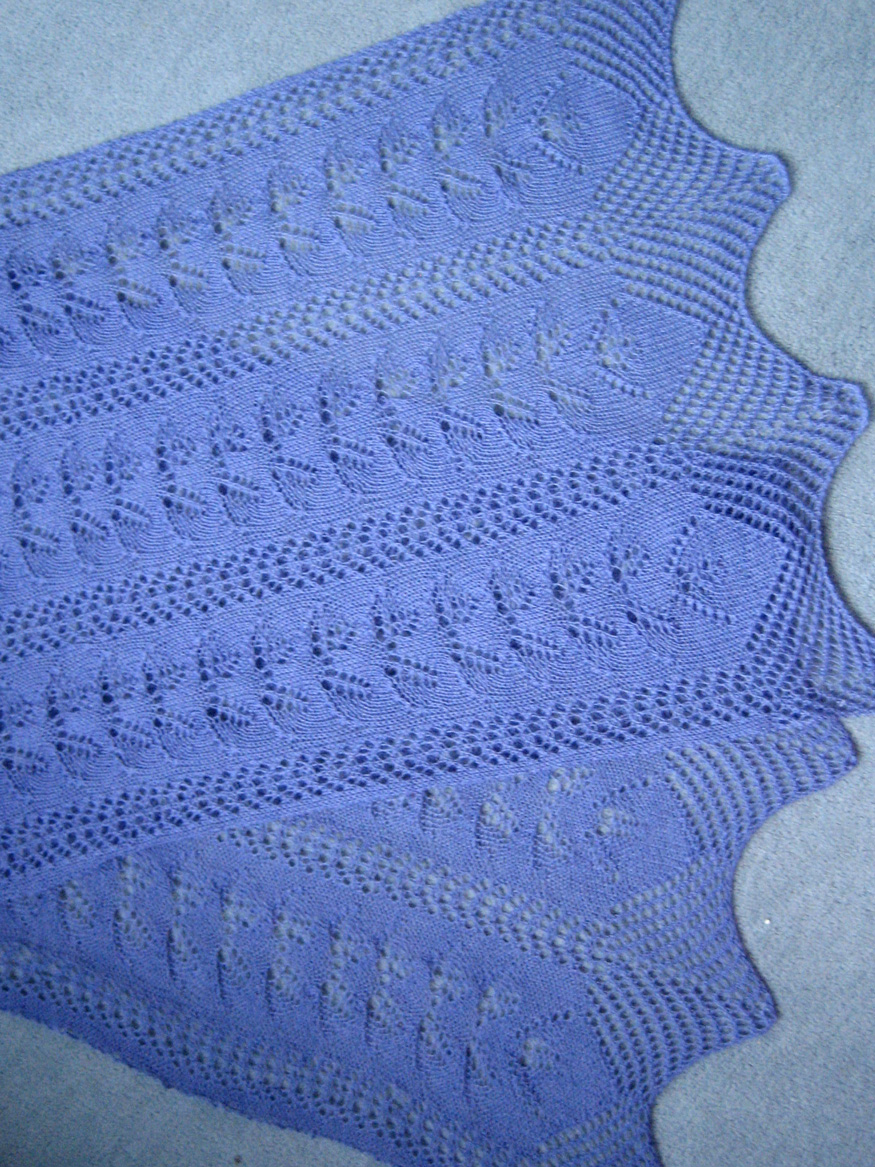
The first preselection row in Ayab is made from left to right. For any pattern that requires a start from right to left, ie one with color changes every 2 rows, there are 2 options. One is to place the design row start line at the very top row of the repeat. That row will be selected left to right, the first design row will then be preselected right to left, and the 2 color rotations using the color changer on the left can proceed accurately. The other option is to shift the last row in the programmed repeat down to row 1 position prior to downloading the pattern and saving that as the working repeat. I prefer the latter since it eliminates having to recall the change in the start line. An example of the shift is seen as applied to the automatically shaped lace trim
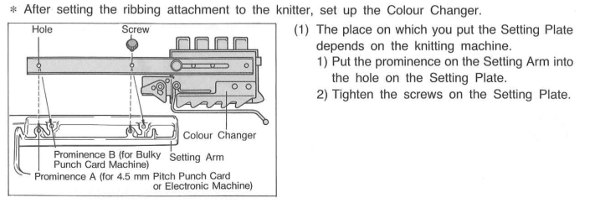
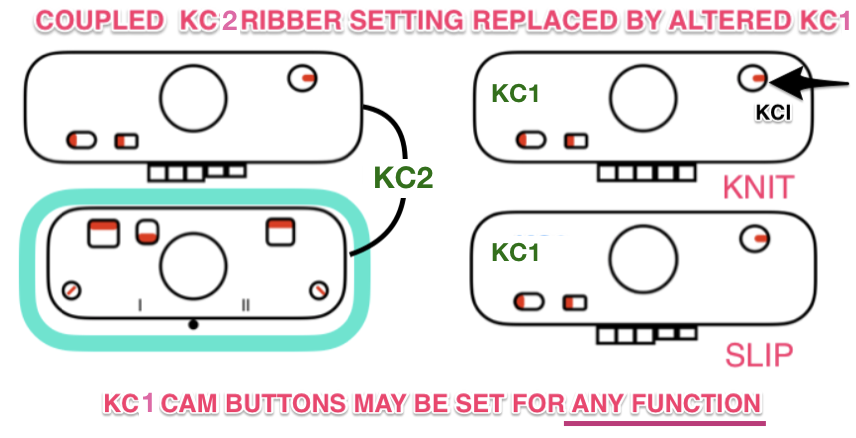
The ribber setting: a reminder, later color changers were also capable of being used on the bulky machine
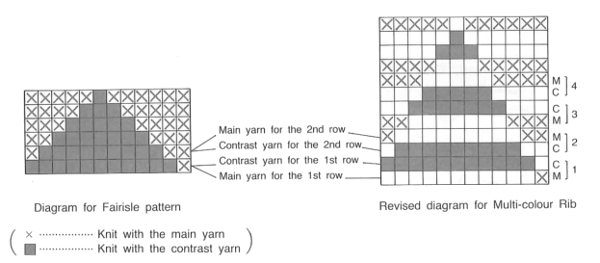
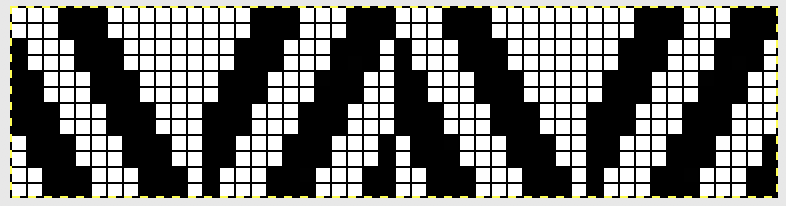
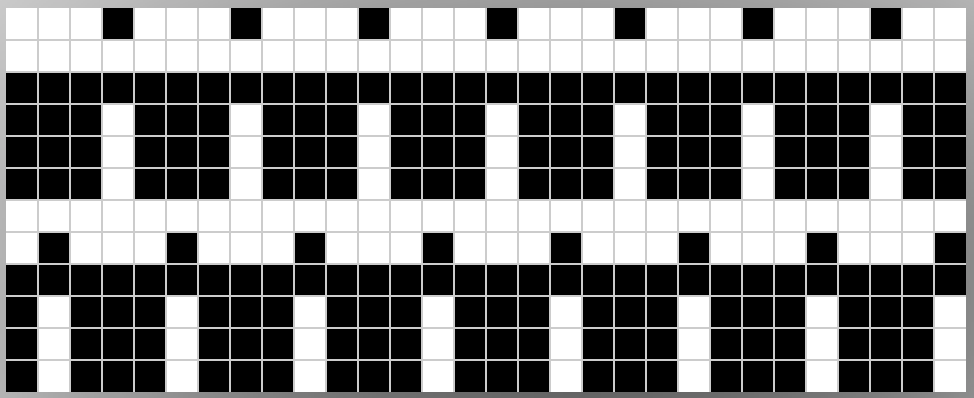
Brother DBJ KRC setting including on the 910: white is the background (color 1), punched holes, black squares or pixels are considered contrast (color 2)
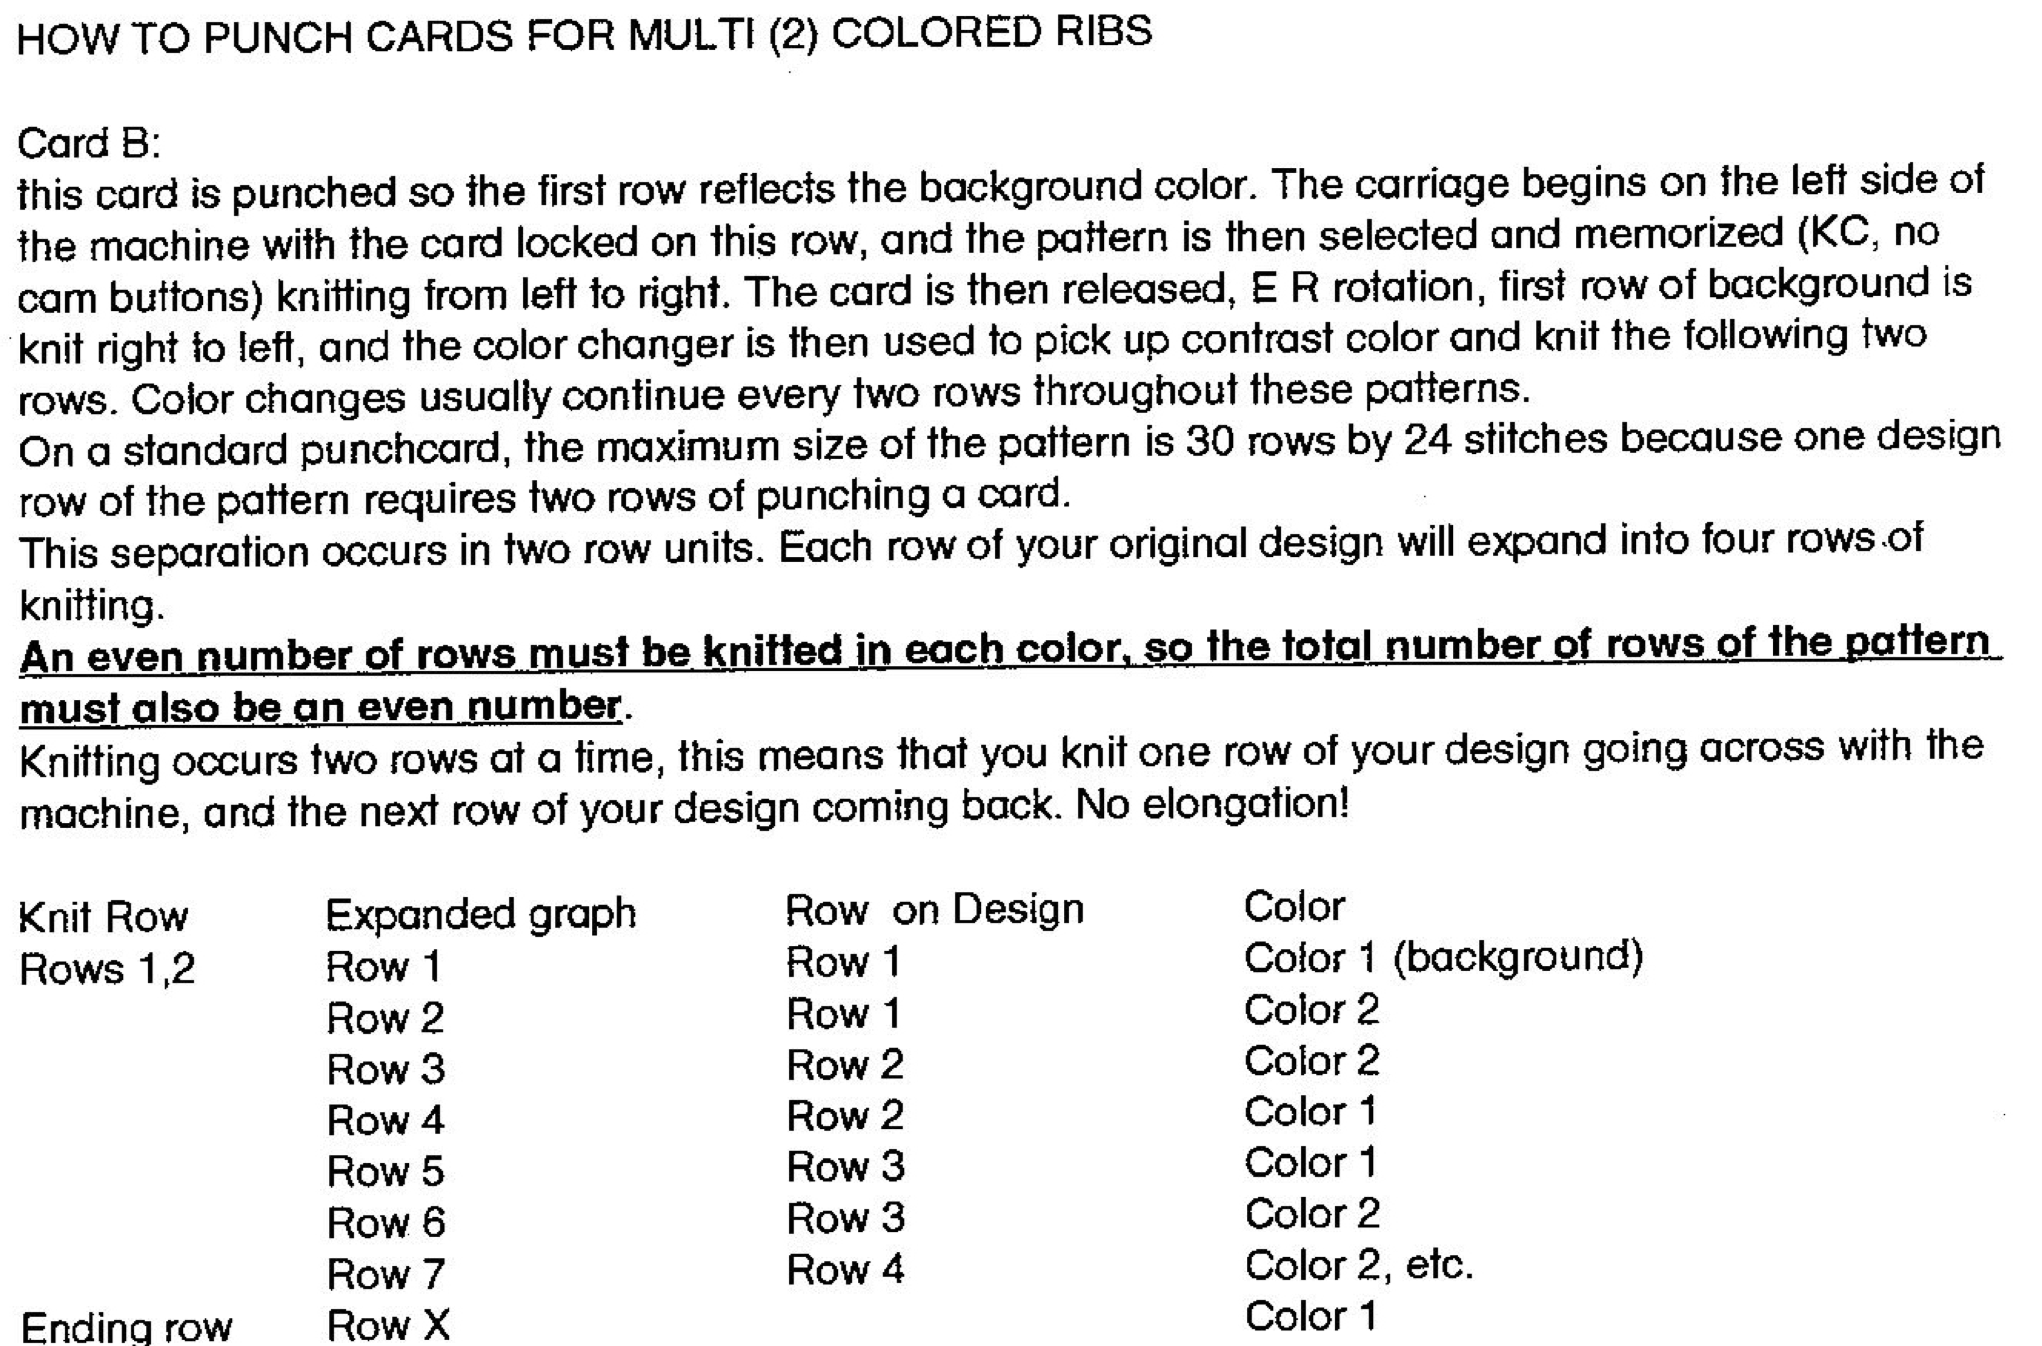
This is the KRC color separation described for DIY use on a punchcard machine:
some of the possible backings (vertical striper requires extra steps)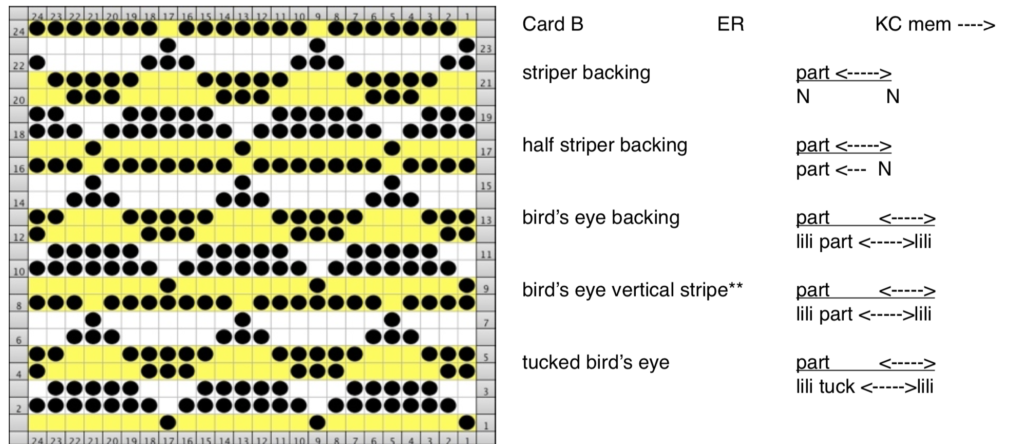
Previous related posts: https://alessandrina.com/2015/04/18/a-simple-shape-an-exercise-in-dbj-brother-km/ and https://alessandrina.com/2017/10/26/dbj-and-color-separations-some-previous-posts-links/
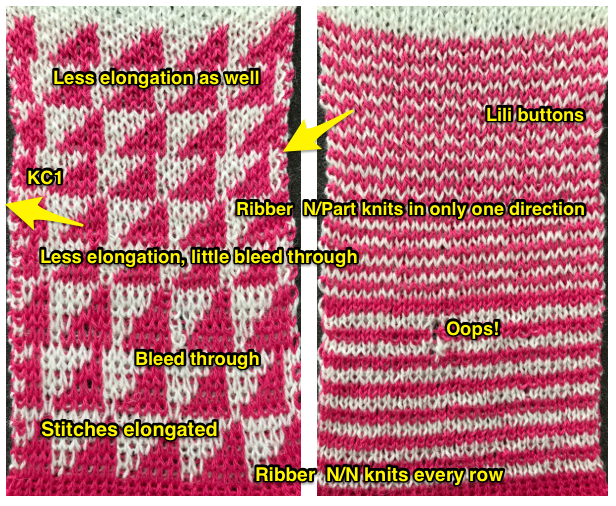
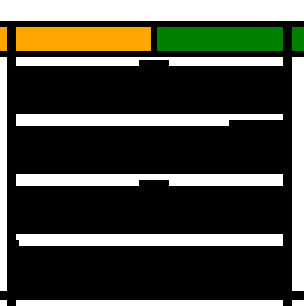
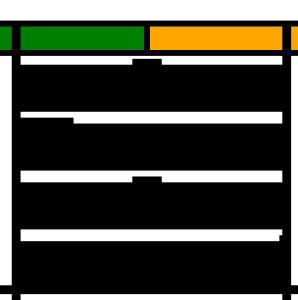
AYAB color sequence is reversed from the Brother convention of white pixels being color #1, and black pixels being color #2. It chooses black as color #1, white as color #2. The first pass to the right is set up with the “black” yarn. The actual position in the color changer can vary depending on how the yarn is threaded in the mast. The first pass to the right preselects for the first row of black squares, which will be knit on the first pass from right to left. In one option, the ribber needs to knit the yarn in order to get the carriages threaded with yarn to the other side, the KC makes a free pass, with nothing knit. This is achieved by having the main bed set to slip <– –>, and the ribber to selection to be used in the remaining DBJ fabric. After knitting across and waiting for beep, knit back to color changer, the beep happens again as you reach the opposite side. Press the button to change yarn to “white” and continue in pattern, changing colors every 2 rows. Depending on your choice of start to the piece, another option may be to have the ribber set to slip as well on the first preselection row from left to right, thread the “black” with the carriages on the right, using it to knit that first design row, moving toward its empty slot in the yarn changer, where you will then pick up the “white”. Check cam settings on both carriages before moving back toward the right. Thinking of the pattern in terms of black and white and matching the sequence as described frees one from the factory KRC convention.
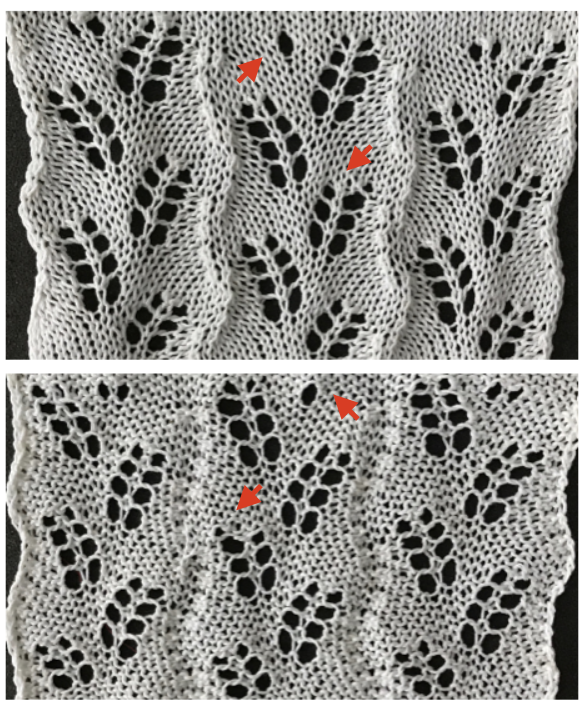
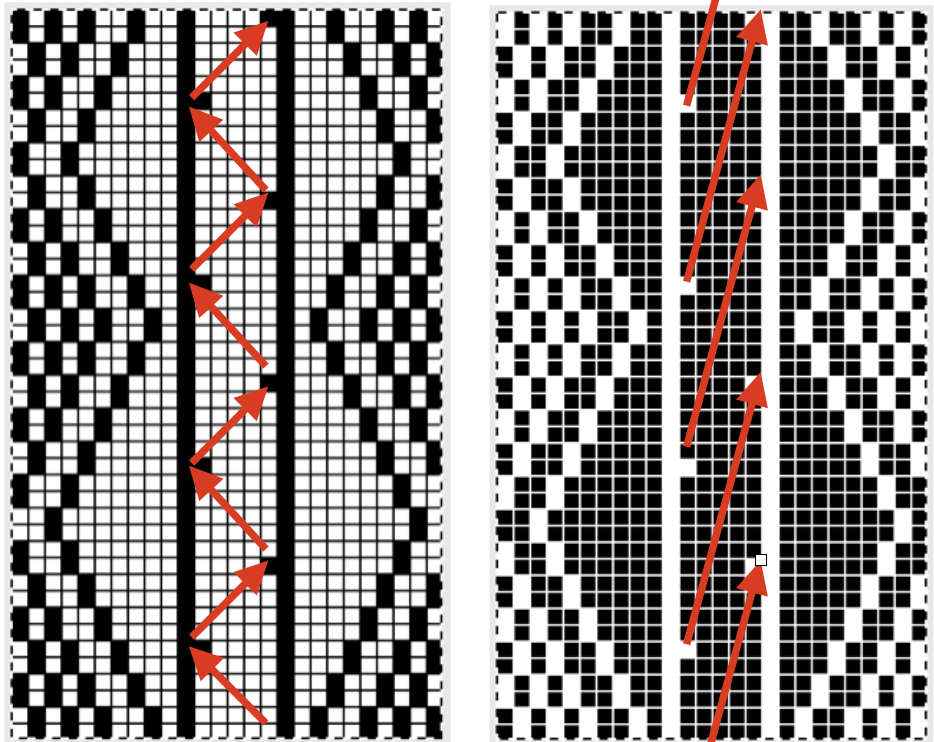
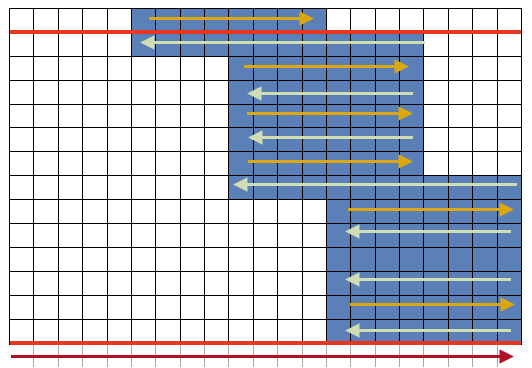
KC I or II may be used, needle arrangements can vary depending on the look one prefers on the edges. It is helpful to have some previous experience with ribber use and understanding of how stitches are formed. Patterning resulting from choices on end needle selection on either bed may be considered a boon or a distraction, at times even create a smaller, secondary pattern (arrows)
The circular setting: was intended for tubular fair isle, some of my experiments to produce other fabrics may be found in earlier posts. The ravelry group discussion on the topic including using the setting in knitting socks, with an extensive tutorial by Adrienne Hunter: https://www.ravelry.com/discuss/ayab/3346844/26-50#38
3/15/18 After more testing I have come to the conclusion that end needle selection cancellation on my 910 LC is working properly, but is not operative when I am working with my Ayab interface.
3/5/18 While working on a post on shaped lace edgings on Brother machines I encountered 2 new issues. One appeared to be I was unable to restore end needle selection on my LC while sorting out the repeats. The other was that if 2 carriages are in use, the lace carriage will not select needles if operated from the right, while if is the only carriage selecting needles, it will work from either side. This is a property that is not isolated only to my set up.
2/28/18 I have continued to intermittently knit swatches on my hacked 910. The software continues to be a boon in terms of avoiding the mylar and producing test fabrics quickly. At one point it was suggested I flash the Arduino “go to the Tools menu, Load AYAB firmware. Choose 910, Uno, 0.9. It takes a few seconds to reload the firmware (the part of the program that’s in the actual Arduino. The changes from 0.8 to 0.9 were minimal, but it’s best to make sure you are using the latest. EMSL preflashes them in testing so it’s not normally necessary for the user to do it.” Mine had not been. Doing so has not changed any of the behaviors that make me reluctant to even attempt to knit anything other than short fabric tests. The trick now has become to keep enough patience and distance to be able to not assume that any patterning issues or fabric inconsistency are due to the software and not my own inattention or faulty notes. A recent observation: if an odd number of needles are being used the rule is that the larger number will be on the left.
1/21/17 I have been reworking some of my previous posts to accommodate for the fact that Ayab preselects the first knit row only moving from left to right. After being contacted by a design school student in Europe with respect to creating specific designs in 2 color drop stitch using ayab, there is now a dedicated post on the topic. Nothing has changed in terms of my having reliable and consistent patterning for any significant knit lengths using Ayab. In addition, the knit carriage movements in the 910 when using the software now behave like the Brother punchcard knit carriages. Any change in movement in the opposite direction or jiggling of the KC for any reason can make the design advance pattern rows. This was never true for the unaltered 910 machines, which were wonderfully reliable if the knitting was interrupted, if carriage were moved outside the knit edges for any reason, did not need to clear end marks for any reason other than on the first row of knit, were able to preselect first row from either side, making patterns that required use of the color changer usable without design first row adjustments, and the list goes on. The Facebook group is an active one, and worth joining for anyone seeking more observations, advice, and inspiration.
1/7/18 Over the weekend it appears my software has now begun pre selecting first with errors, and now correctly on that first pass from left to right, so I will now be reviewing any instructions I have posted this past month in case settings need to be changed for anyone trying to execute the same fabrics, beginning with lace.
1/4/18 My Ayab software set up rows work this way: the first pass from left to right only gets the carriage to the right, selecting only first and last needle if change knob is set to KC I. The second pass from right to left preselects the first row of pattern. The third pass (from left to right), knits the first row of pattern, selects the second, and so on; the subsequent selection is correct, no rows of the design are skipped. It has been pointed out to me that this may be a unique feature to mine or one unreported by others. “First preselection row should occur on that first pass from left to right”. My posts on using the software are based on the first pattern row knitting from left to right, not right to left as would happen if the very first pass from left to right preselected for the first row of knitting. At this point in time, it is also not possible for the first preselection row to occur moving from right to left. This, in turn, needs adjustments if patterning needs to occur in 2-row sequences from the left ie. in knitting mosaics and mazes unless preselection happens from right to left, a result of my version’s “quirk”. Since I also knit on an E6000 the first 2 rows feature to complete preselection for the first row of pattern is a familiar one, and from the beginning, I assumed it was an intentional feature in the Ayab software as well. It actually solves the problem if the first selection row needs to happen toward the color changer. Fixed starting sides can be problematic depending on the type of fabric being knit. Lots of options to explore.
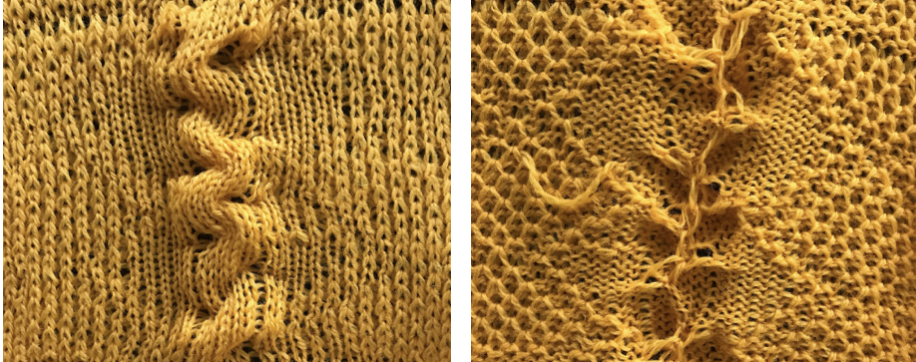
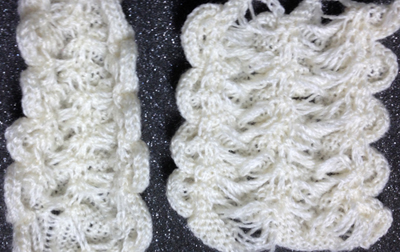
12/28/17: tuck lace meets hand technique 
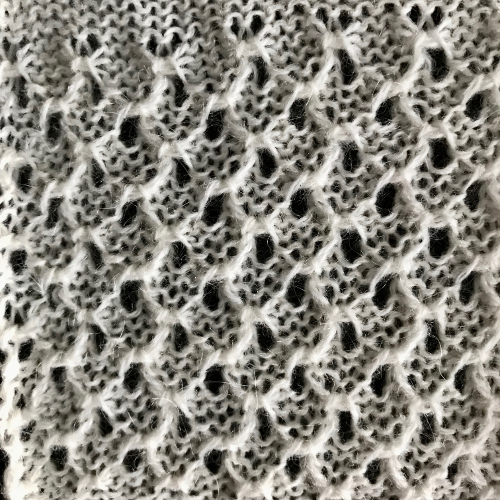
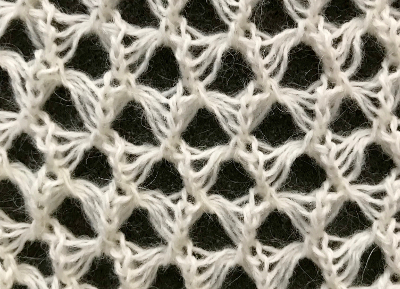
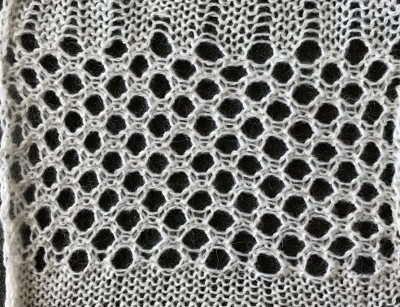
12/25/17 my first try at lace: the LC is the one to select for transfers, the KC knits to complete the formation of stitches. Brother punchcards for lace usually begin with selection rows, end with 2 blank rows at their top. Using Ayab the repeats need to repeat across the width of the piece. One nice added feature is that when doing so, blank rows may be planned and left at both sides, creating a knit stitch border and eliminating the problem of paying attention as to whether end needles are selected or not, or what other measures to take. This fabric creates large eyelets, there will be 2 empty needles side by side for the duration. Some of the old pattern books referred to it as one of the “mock crochet” ones.
the resulting fabric, knit and purl sides
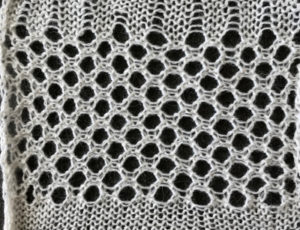
one more to try: a large diagonal eyelet lace combining lace and tuck
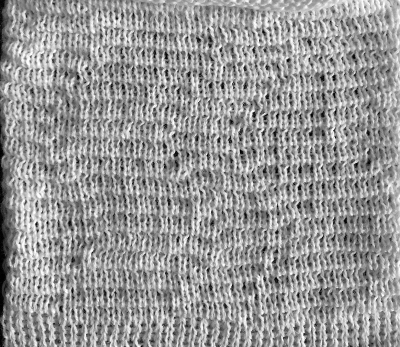
1/22/18 swatches with preselection from left, similar results for shapes that are shaped with single row increments in height. Double height, the fabric creates tiny pintucks, not blisters as can begin to be seen at top of swatch; KC slip <—, ribber slip —>;
shapes as seen in test swatch
 verifying presence of pockets
For a full post on quilting in one or 2 colors please see later post
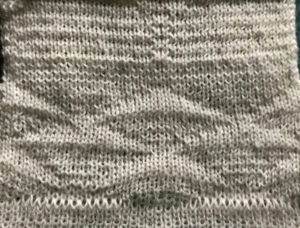
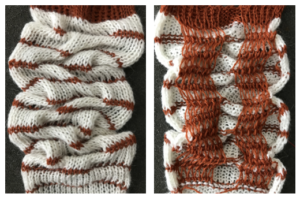
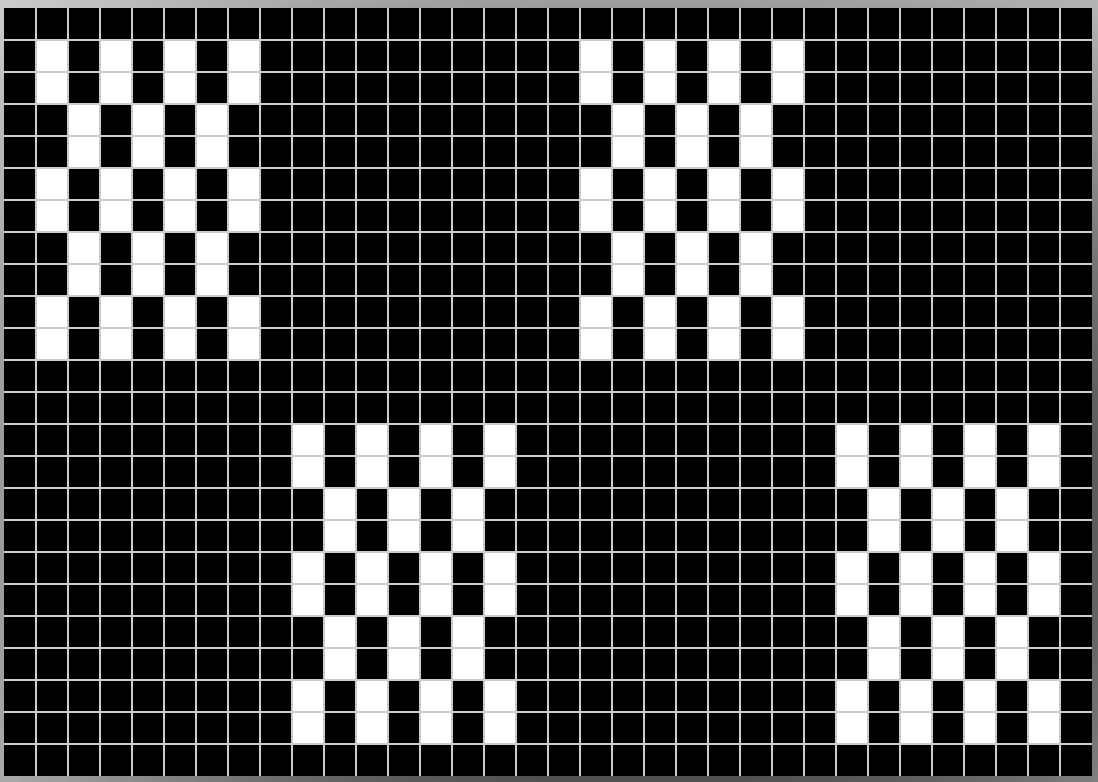
12/23/17 The “quilted” fabric produced below is different than the one achieved by specifically designed color separations, the fabric has an interesting blister like effect, the knit areas have more horizontal texture. Because of limitations due to the eventual needle selection errors, I am experiencing with the software, my swatches are limited in length or have interrupted patterns. My new repeat 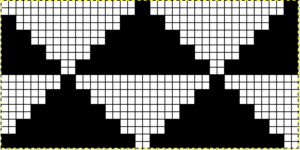 two of the “pockets” have beads dropped into them to highlight their location
12/22/17: settings given below are for first preselection row from right to left, not for left to right, testing out the waters with the circular settings, using the repeat. Please check later posts for reviewed content 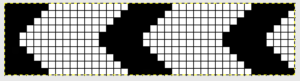
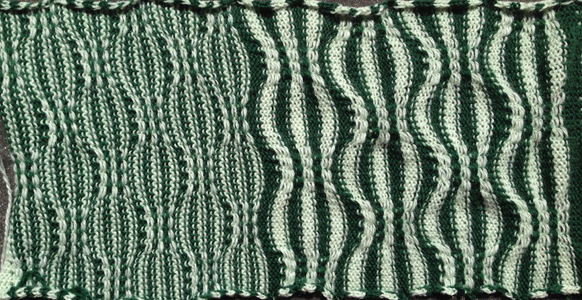
I tried to go for “quilting, but think that may require switching levers on the ribber, so to start with, this was knit in an every needle rib, with the ribber set to knit <—->, main bed set to slip —>, producing a fabric with very subtle pintucks, which may be more interesting in 2 colors

 Quilting: KC slip <—, ribber slip —>
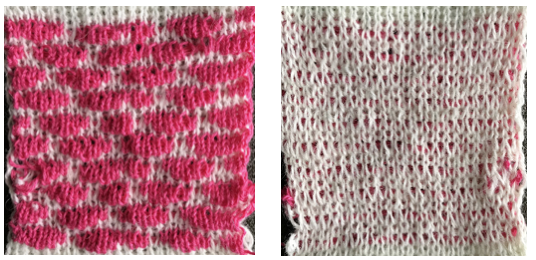
The pink and white swatch is in “drop stitch lace”, was also knit using the circular setting. Instructions for color separations for fabric, how-tos, tools, tips, and samples may be found in my posts on the topic, with the same repeat used in https://alessandrina.com/2015/06/16/geometric-shapes-in-drop-stitch-lace-2-brother-km/
 the image resulting from my own past color separation
 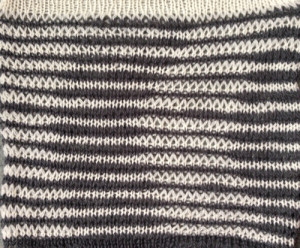 its purl side, turned sideways
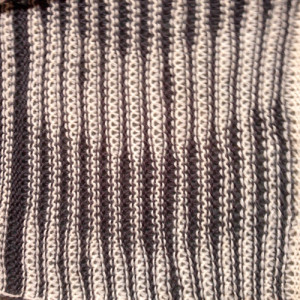
Previous posts have covered manual color separations for fair isle, quilting 1, quilting2, and a summary of series on drop stitch lace. A later post on drop stitch lace using ayab .
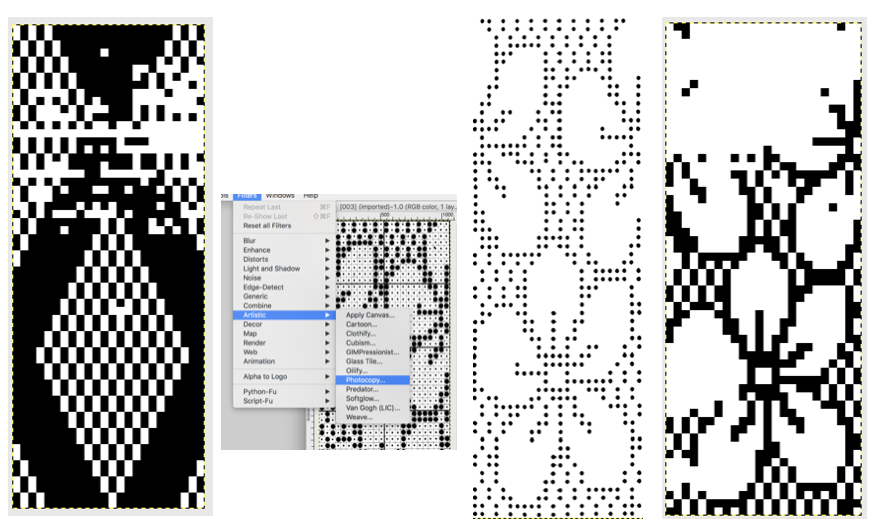
One of the differences in using Ayab, is that knitting set up begins on the left, with first preselection row happening on the second carriage pass from right to left. This makes sense if the goal is to set up patterning for moving toward the color changer. Passap E6000 uses the SX/GX (2 Rows) for set up, with its color changer on the right. The knitter may set the carriages or locks for any chosen setting (knit for knit rows, slip if the extra 2 rows knit are not desired as part of the pattern or those suggested by console or other instructions). In the original state 910, the starting side is of no consequence as long as one is outside the set line, and preselection happens on a first, single pass. The same is true of preselection in the punchcard, one may start on either side. In some fabrics such as slip stitch worked holding techniques, or if the color changer is in use and making moves in even numbers of rows toward and away from it are required, starting side matters. The Ayab circular setting does the color separation for the fabrics above, but other cam and lever settings may need adjustment, based on sorting out what selected needles are doing when knitting starts. For the “quilted” swatch above the left part button on the KC, and the right one on the ribber were used. Sometimes the guide to color selection or cam settings is whether the first square in the imported image for download is black or white. With the loss of the built-in color reverse on a hacked machine, it is easy to work when swatching and testing to color reverse the repeat by using invert, available in the color menu, providing the alternative repeat. In Gimp the grid color may be adjusted as well if you choose to work in black and white as your starting palette. For the individual image, Image/ configure grid changes the preference for single use. 
12/19/17 I am continuing to really appreciate the speed and ease for sampling pattern ideas. That said, I have also again experienced selection issues varying from lost selection to repetition of the same pattern row indefinitely, frequently after more than 50 rows are knit, and in spite of increasing attention being paid to beeps and flashes. Short pauses also seem to put the software into time out mode. I have not done enough knitting to evaluate whether moving the carriage past both turn marks with any frequency prevents those selection issues. Support is responsive, with new tools come new learning curves for everyone involved.
There is a popping noise /clunk that I have now learned is routine and “likely from the solenoids being engaged or disengaged, when they’re first powered up, or released at the end.” It is a noise I have never heard in standard 910 use. I usually power down equipment when not in use, and have been told: “For the sake of longevity on the knitting machine, it’s probably better to err on the side of disconnecting the USB cable when you power down the machines.”
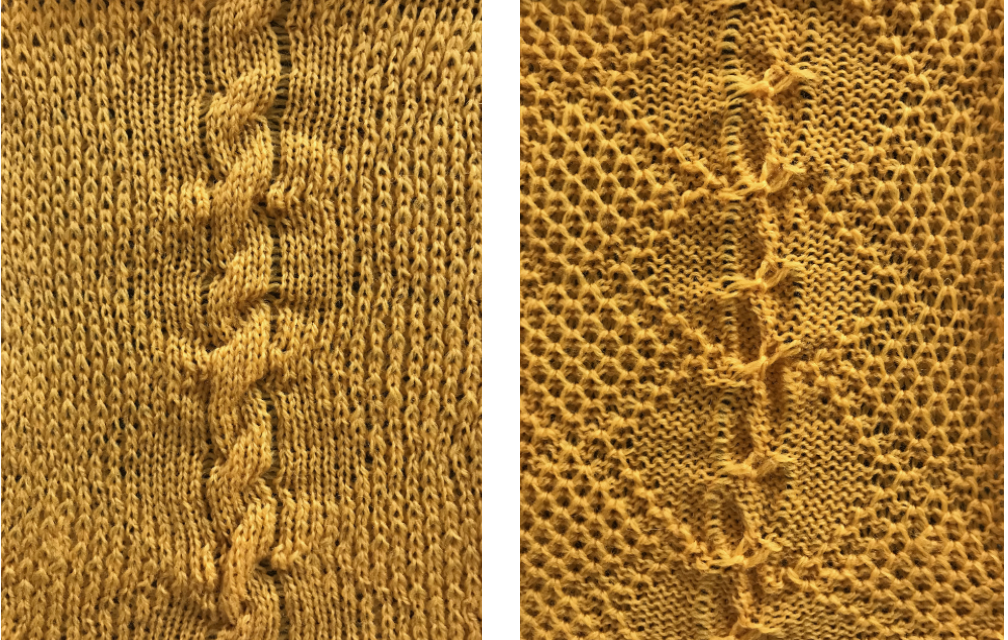
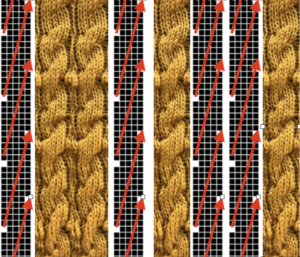
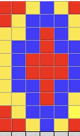
My present knitting efforts are to come up with some sort of variation of this fabric, published in an early Empisal Ribber Pattern Book, shared in a Facebook forum post. I have used racking in a variety of experiments but never traveling over a MB pattern as in this instance. There is now a dedicated post on the topic 
12/17/17 I am brand new at using the system, my comments here are logging my personal experience and observation as I am learning a new tool, not intended as a guide. Please follow forums for advice from folks with more experience and knowledge.
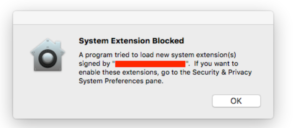
The ayab interface from EMS is now up and running on my 910. The process was easy and straightforward in terms of hardware. Software install on the Mac is very slow initially, but the launcher operates quickly after that. I am using the system connected to an iMac presently running OS 10.13.2. There initially were issues with port failure when attempting to use the program to download. No security warning was received when the driver download was completed, but rather, the image below, which I took at face value, so I did not immediately access the preferences security panel to make any changes there It took some sorting out with EMS support and finally accessing preferences security settings and “allowing” the install to solve the problem. Apparently, there may be some change in the message received within a half hour of the install. So, easy fix, check system preferences security settings regardless of pop up window even if lacking familiar and obvious warnings such as
At present, there is no cover available to fit over the kit and its wires, so the left-hand side of the machine remains exposed. There is a row counter built into the software, but I tend to rely on the built-in on the 910. Any DIY cover should take clearing the row counter and the knit leader trippers into consideration. There is some conversation about 3D printed ones or even metal. Tiny detail: the kit comes with electrical zip ties to help secure the plastic shields on both sides of the board. Clip the ends, and twist them so join sits either on top or under the interface, thus keeping them clear of KM parts, and, particularly, the belt drive on the left.
There are a series of beeps and flashes that indicate that the pattern row has indeed been downloaded and is ready to be knit. 910 mylar users are familiar with the sound coming from the reader as each row is scanned. Prior to using the Ayab system, I was initially concerned about beeps for each row adding to machine operating noise, since I am familiar with the Passap screech and at one point was also with the Studio electronic version. The Ayab beeps are actually on the soft side, and background noise or inattention may actually lead one to miss the cues. LED flashes occur in pairs indicating the row is ready to knit as well. Again, any cover may hide the light or soften the beeps, even more, making the cues available via the screen more essential.
The kit comes with a 3 ft. cable. I have rearranged placement of my machines to make using both the Croucher cable, switch box, and wincrea on the Passap, and the Ayab system on my 910. My initial wish was for a longer cable, which is possible to use. That said, there are several knit from screen clues that if you are operating the machine any distance from the computer get lost and become hard to see, including indicators for row numbers and the pattern advancement lines on your motif.
So far I have small FI samples and DBJ samples. Ran into a problem after 60+ rows of each with mis patterning occurring, but that may well have been operator error. I have used my 910 for production accessories and was very familiar with a personal optimum speed. I believe I almost unconsciously with the initial samples, may have picked up speed and interfered with the accurate download of pattern rows. When I slowed down and was much more deliberate, waited for each flash and sound, a test got me to RC 110 with no issues before I quit for the day.
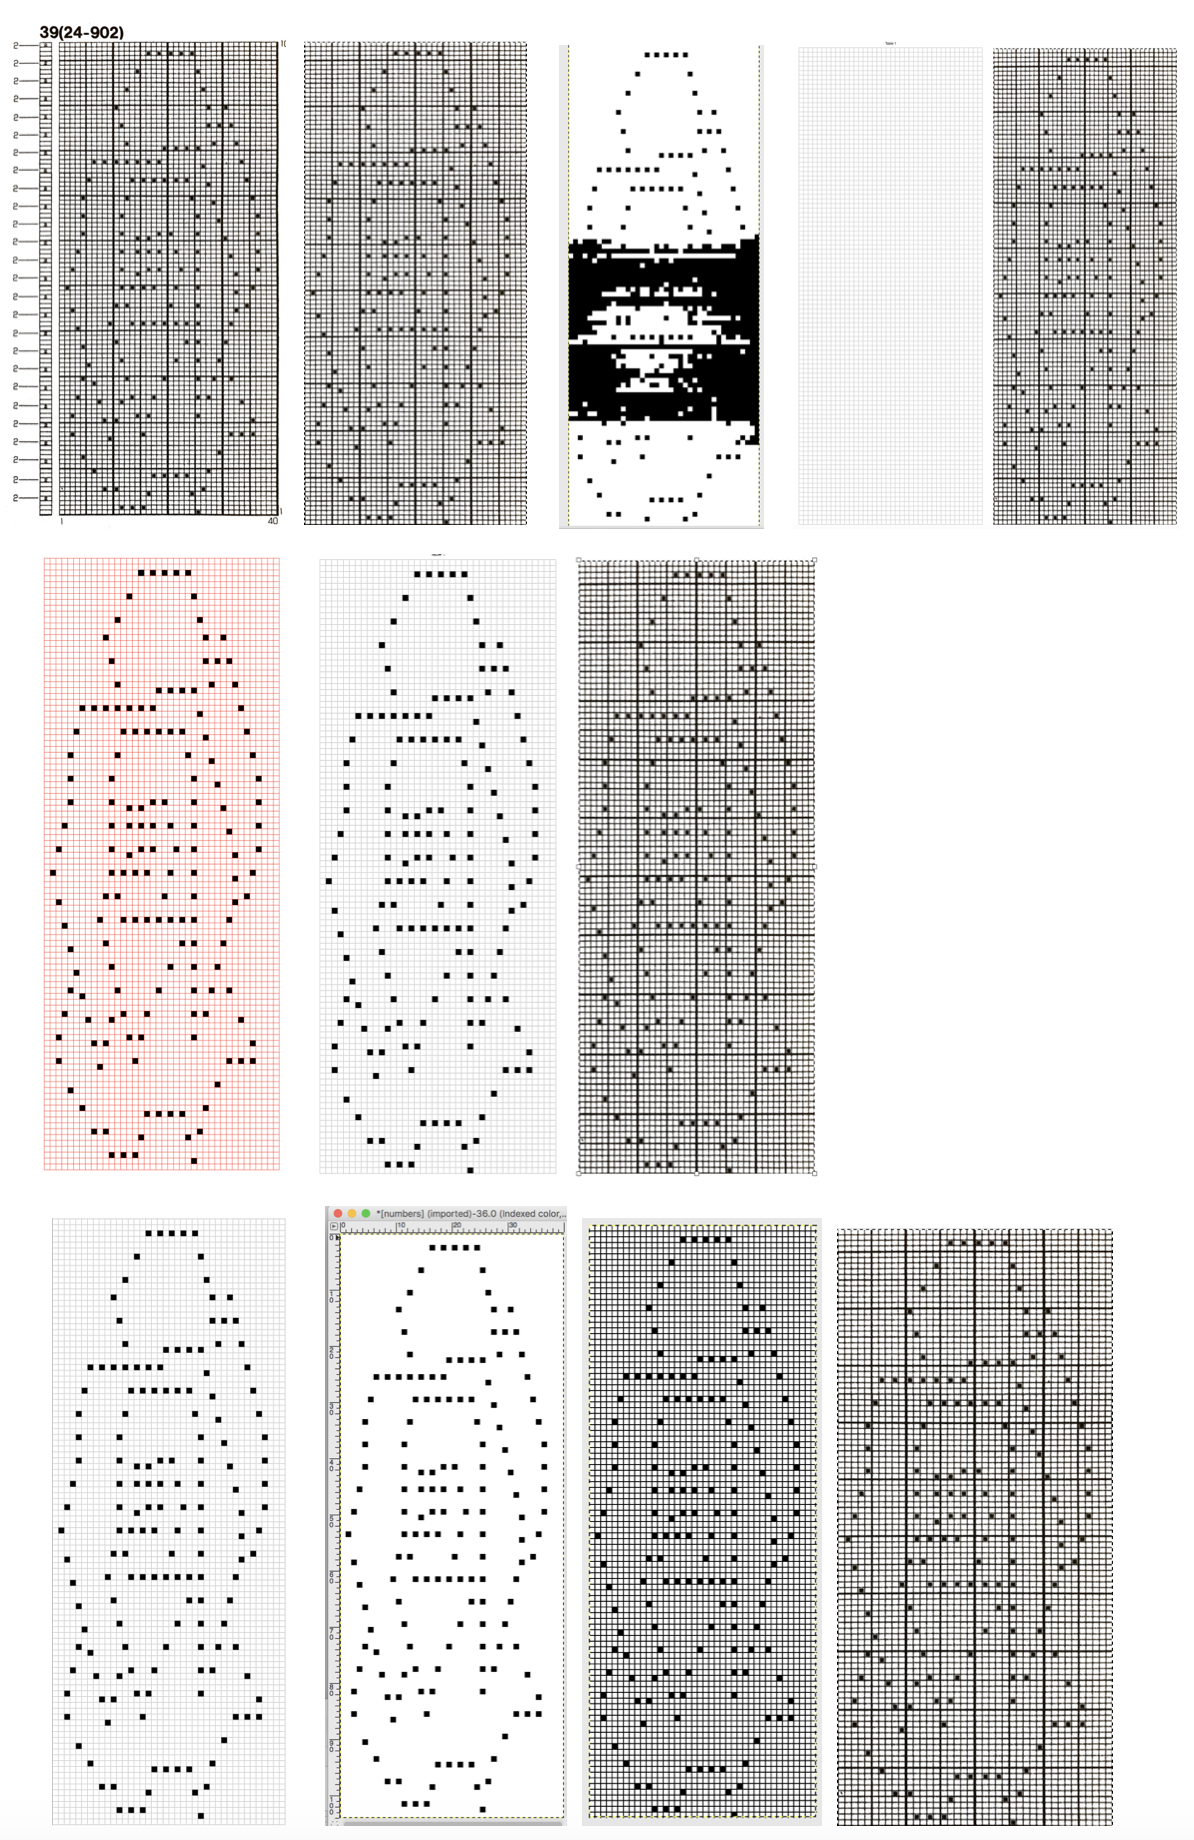
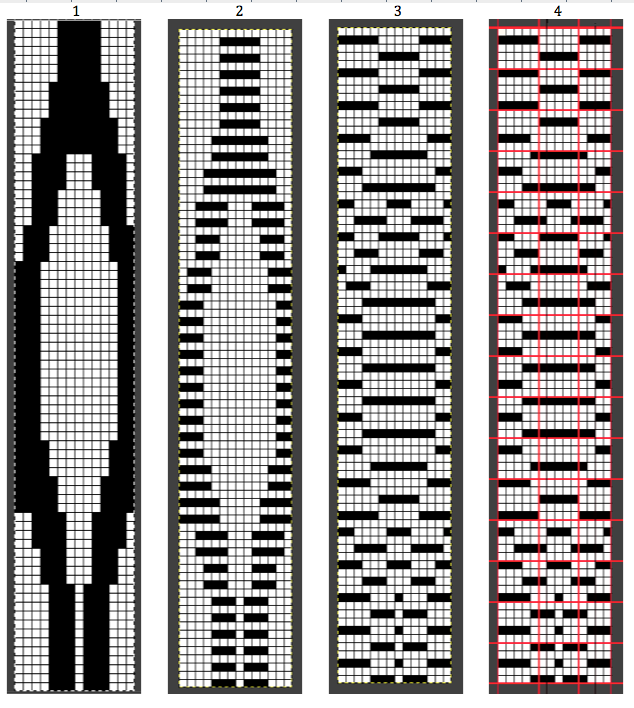
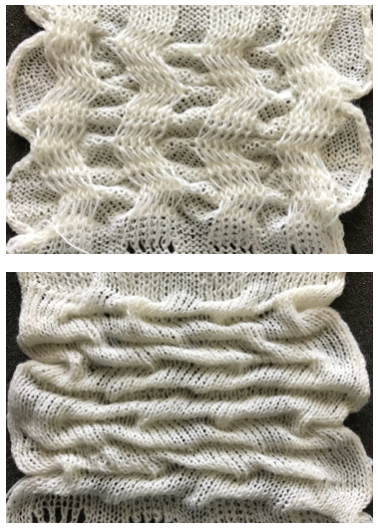
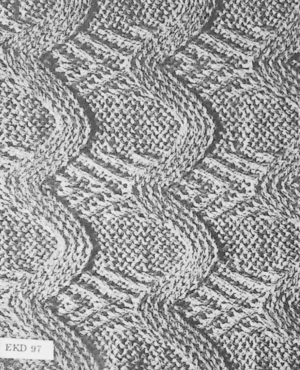
11/27/17 This punchcard was shared by someone trying to reproduce the implied fabric on their 910. It is intended to be used as a combination lace and weaving card, so on the punchcard machine, 2 carriages would be locked on the belt. If even number of passes are made with each carriage, there is the issue of the card not advancing each time when the opposite carriage makes its first pass. So far I have not been able to get this repeat to work for me as drawn, to produce results anything even resembling the “finished swatch” published photo. It did work for me using the LC carriage for 3 passes, releasing it, and following it by 2 rows knit with the KC set to tuck in both directions, a very different fabric. If the LC is released after an odd number of rows, then technically when the KC is first in use, the right to left and back to right selection is not interrupted, it is moving in the direction the LC carriage would have moved, and the punchcard row is not repeated. The first row with LC selects, second row transfers, selects next row. Third row transfers, selects every other needle for the first tuck row on the next pass of KC, and LC is released. The fabric then tucks for 2 rows as punched, on every other needle. The second tucked row is completed with KC on right. The first LC row has now been preselected, as the *LC heads back to the right (1) it transfers the selected needles, selects them again, but since they are now already empty, nothing happens to any yarn, and the next row of transfers is selected (2). The second set of transfers is made to the right (3) as the first tuck row is preselected. LC is removed. KC tucks for 2 rows (4, 5), selecting first LC transfer row with the second pass.* Repeat. The marks on the left should indicate carriage movements for each carriage, but they are off as well in my version of the fabric. My final repeats were for use on the 910 with a mylar.
 the pattern book swatch image
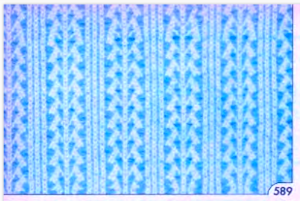 tuck swatch

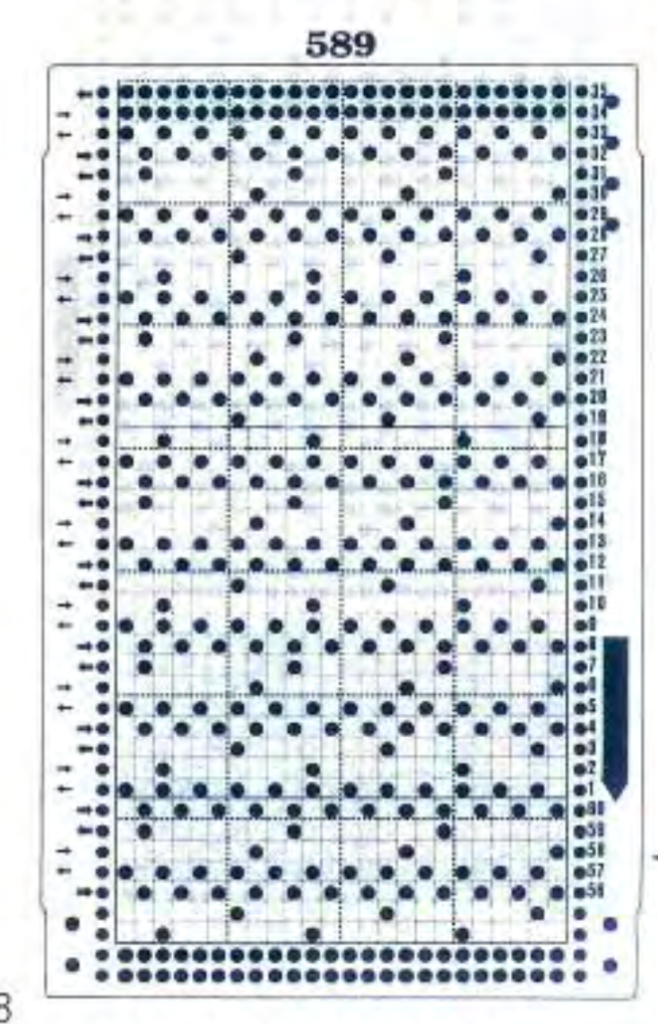
Lace is a challenging enough fabric without adding weaving yarn floats, and definitely combining them requires a clear understanding of what the yarn is doing on the needle hooks as one progresses through the repeat. I will be starting a separate post reviewing card markings in punchcard pattern books, and translating them for electronic use. For further information please see post on 589
I have always been interested in machine knitting hacks and began sharing information from the internet on the topic as early as 2013. I own the 910 Brother model, and when the ayab hack first became available, assembling electronic components was beyond my skill and interest. I have a good supply of mylars, but have always knit more complex fabrics on my E6000, which has the Croucher cable and switch box for download to and from a Windows laptop, using Wincrea . I had known a preassembled kit for the 910 hack was in development from a trip to CA, which included a visit to the Bay Area Machine Knitting Guild back in April 2016. A recent post on Ravelry alerted me to the fact that Ayab was “alive and well”, and that an assembled kit is now available and on the market. The hardware kit developer , to purchase , wiki , interface , install . My understanding is that the software is still being developed in Germany.
Online discussion groups: Ravelry , Facebook. My compiled list of online pattern generators, hacks, free KM manuals, and more: 5435
I have purchased a kit and will share my experiences with it as time passes. In addition to bypassing the mylar use, the idea of having software that will render color separations that would normally have to be hand drawn for larger repeats than would be practical, or for complex fabrics, is an exciting one.
An artist whose work I admire, using the interface early on is Claire Williams , her tutorial updated 2016 with DIY assembly of the original “kit”.
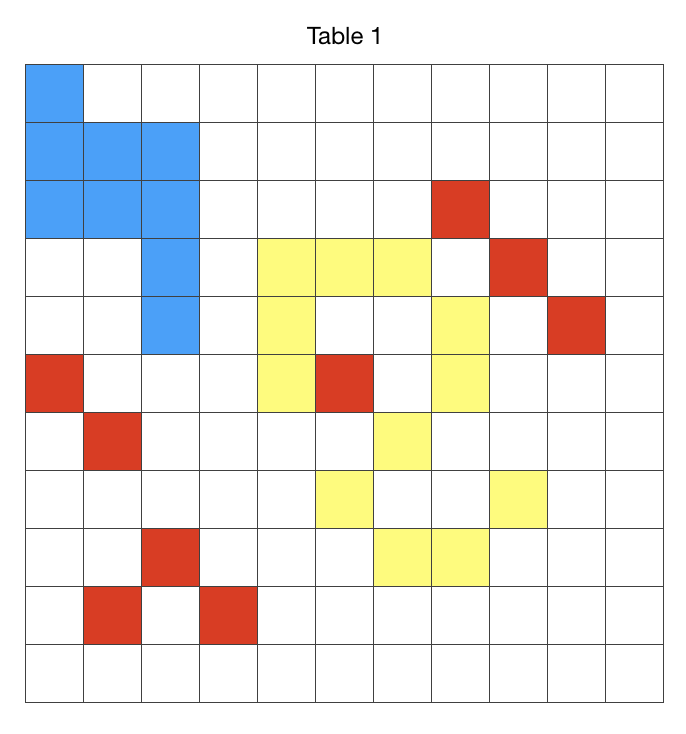
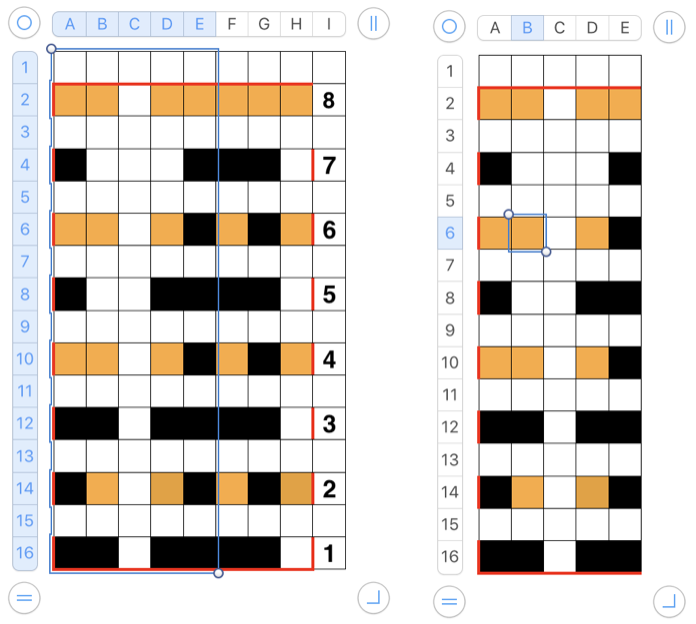
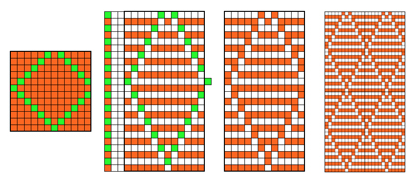
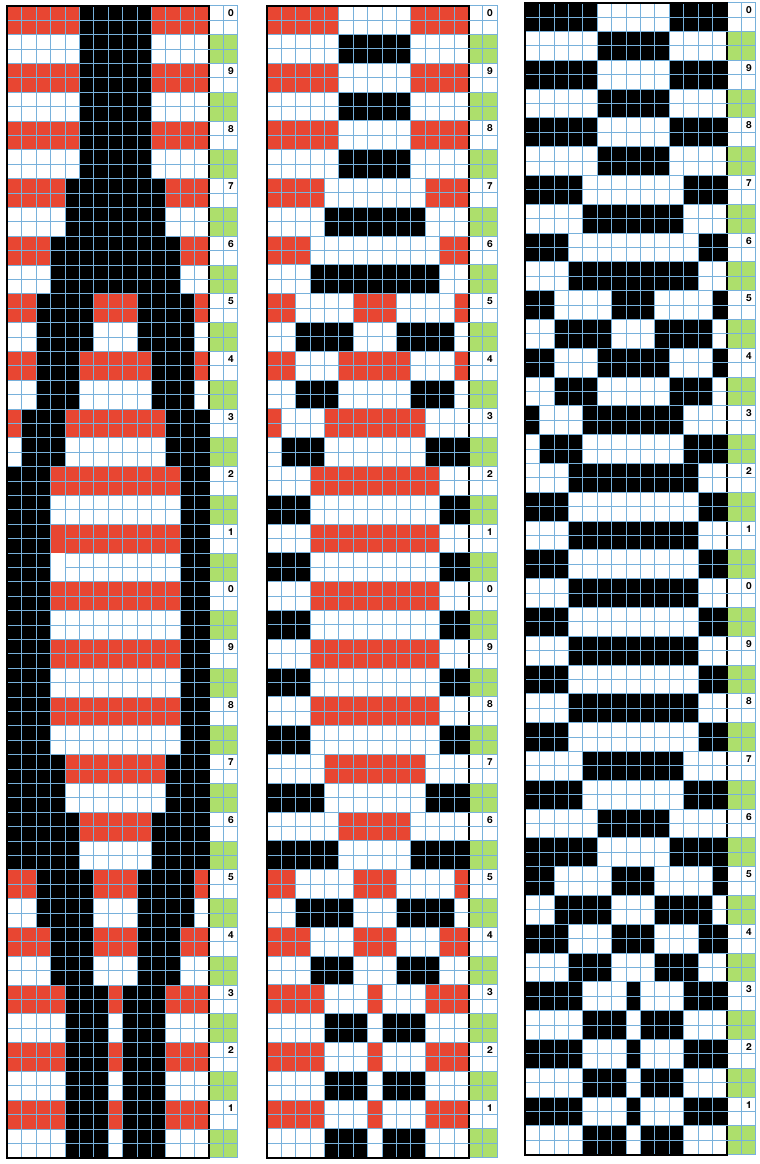
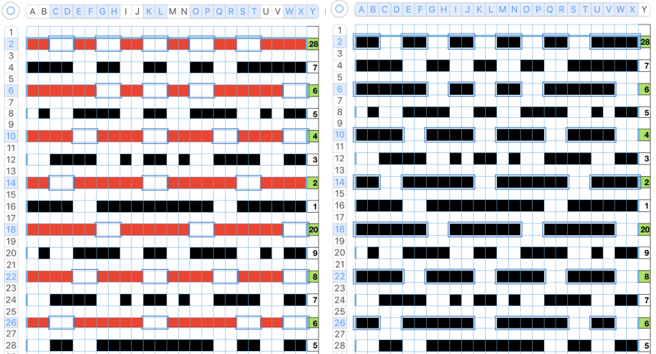
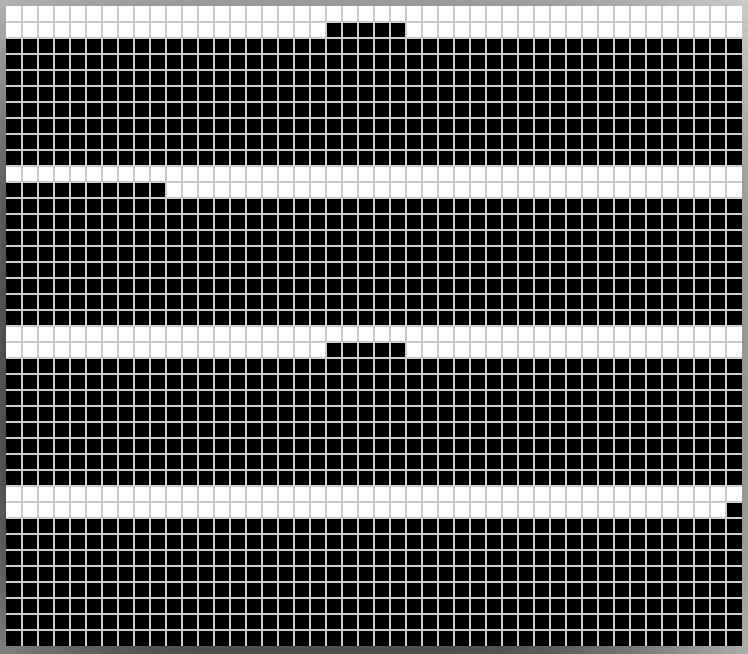
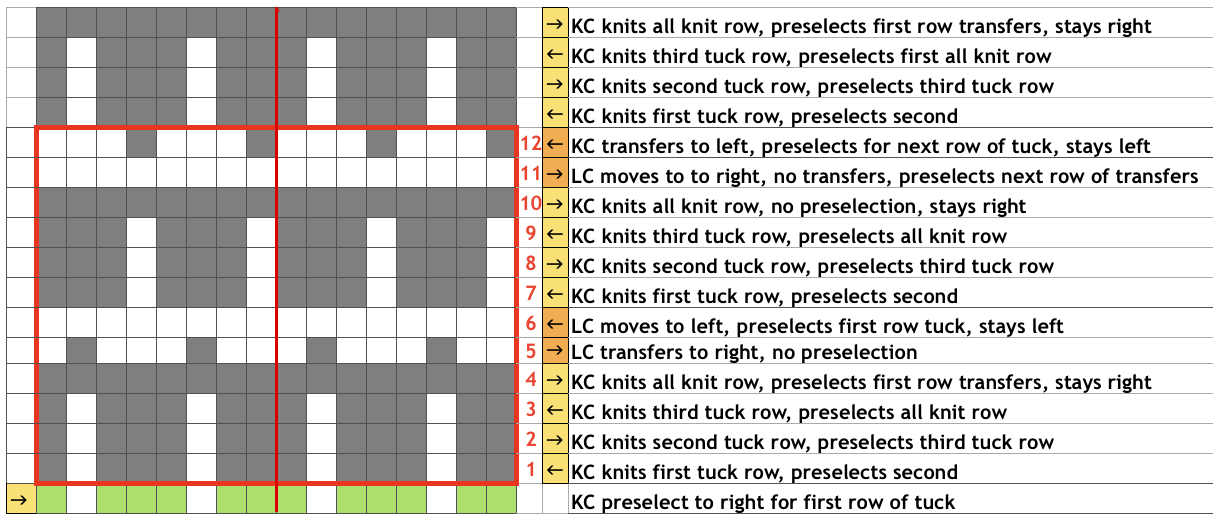
 Lace repeats that have even numbers of rows for both and LC transfer and knit ones are easy to follow. Punchcards are also easily annotated and if knitting is interrupted needle selection is easy to return to or restore if necessary. In electronics, there may not be any memo to indicate row # location for each carriage pass in the pattern, or when to switch carriages. Because in this instance there are so many transfers (some of the multiple stitches) between knit rows and dropped stitches are best corrected as noticed during knitting if possible, I created a “cheat sheet” of sorts to help keep track of actions. Each block outlined in red here represents one full repeat, read from the bottom-up, with blue borders at the center and red at the end of each half sequence. A visual check at the end of each segment’s # of rows in the series is well worth it to prevent unnoticed runaway dropped stitches and large holes. A check-in box next to # could indicate the completion of transfers. and a number added manually in that same row for that sequence, record the row on which knitting was interrupted ie. stopping on row 8 out of 16 to fix dropped stitches would be a reminder that 8 more LC passes are required before the next visual check.
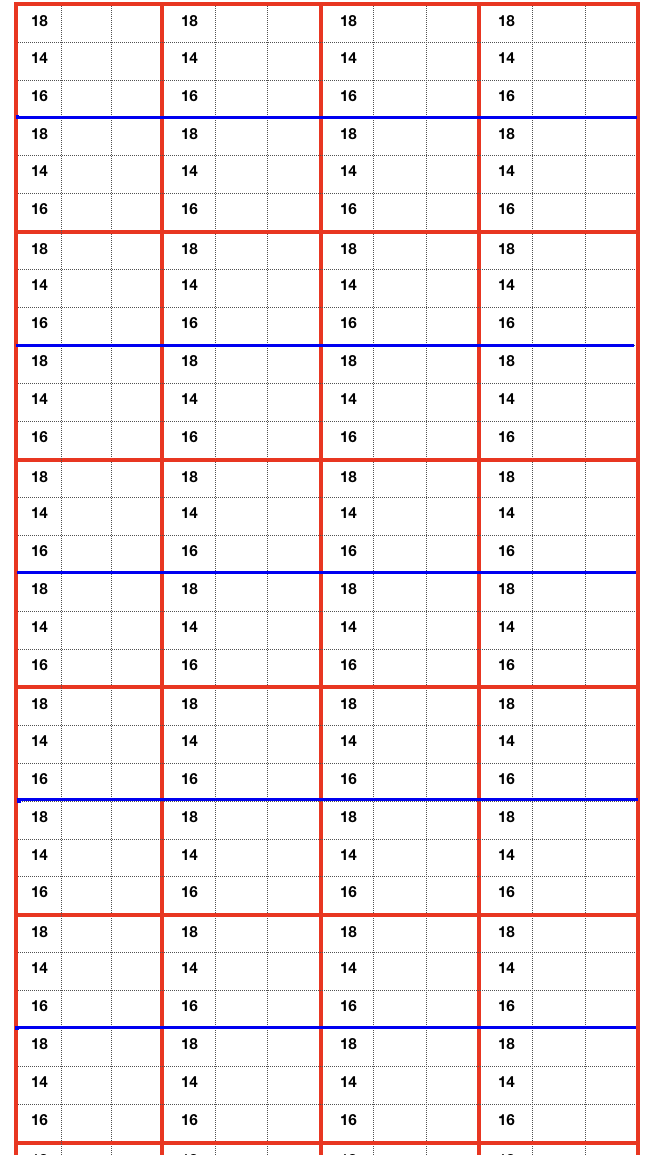
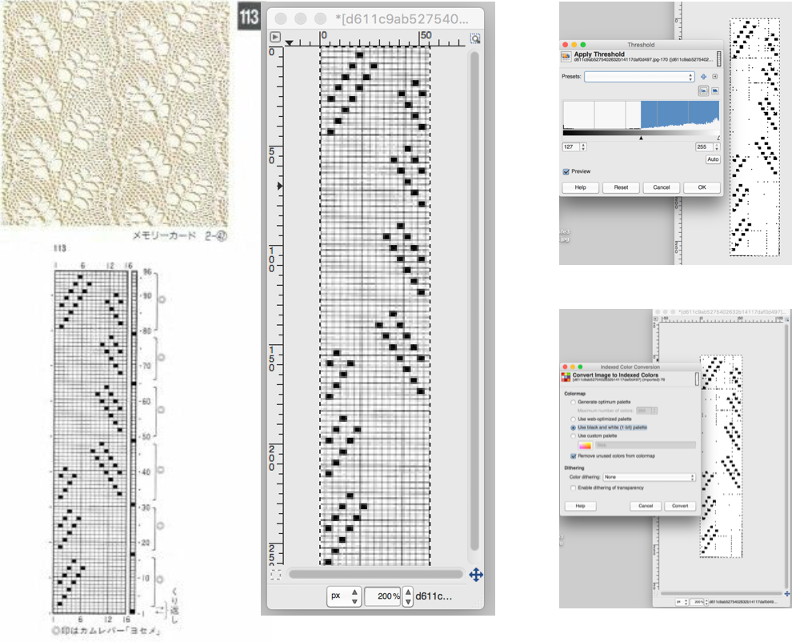
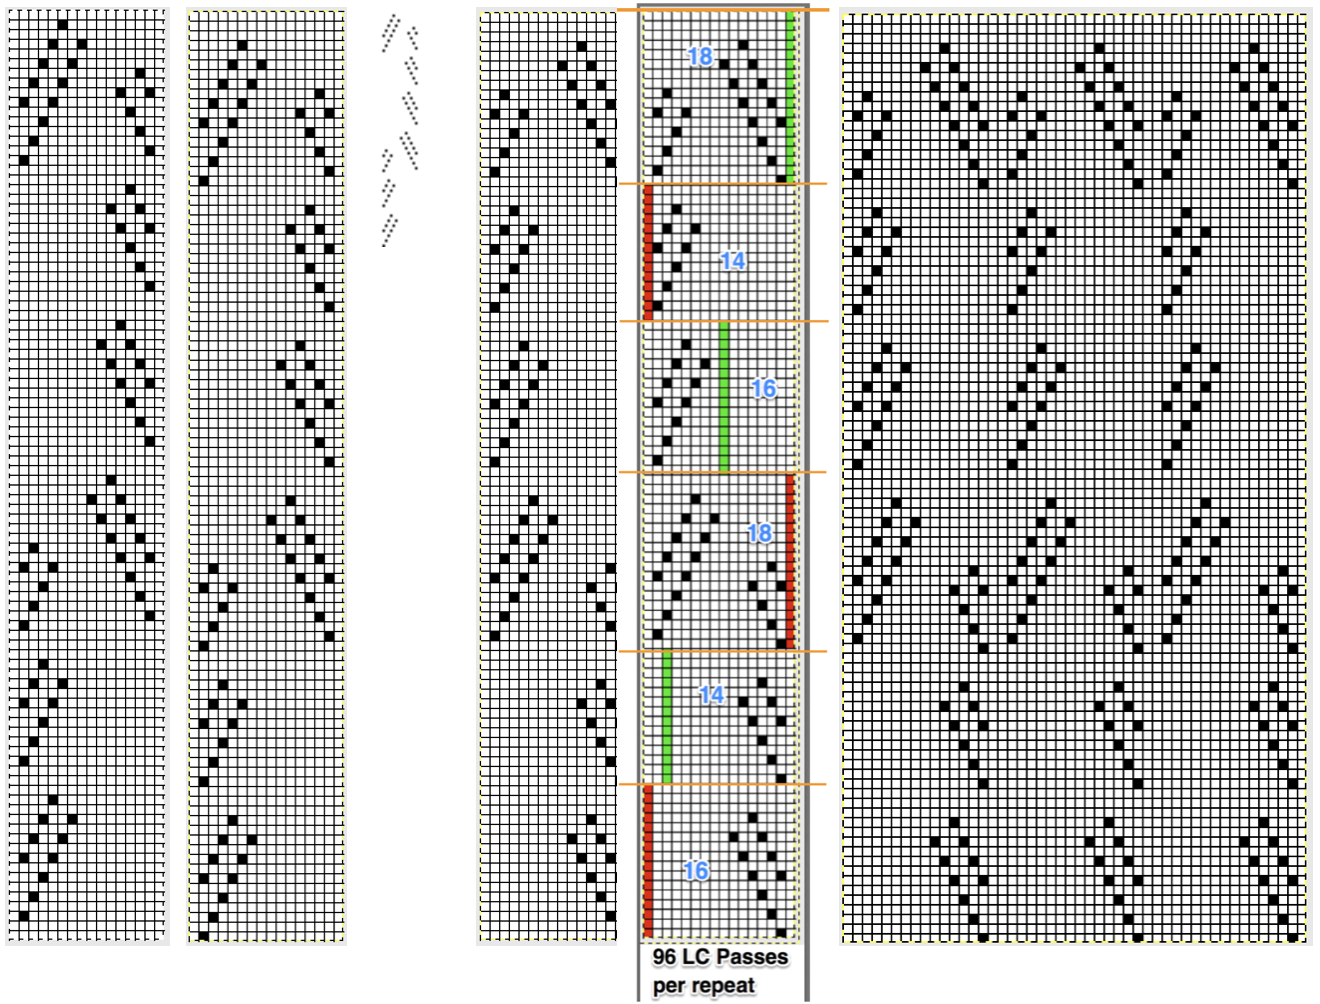
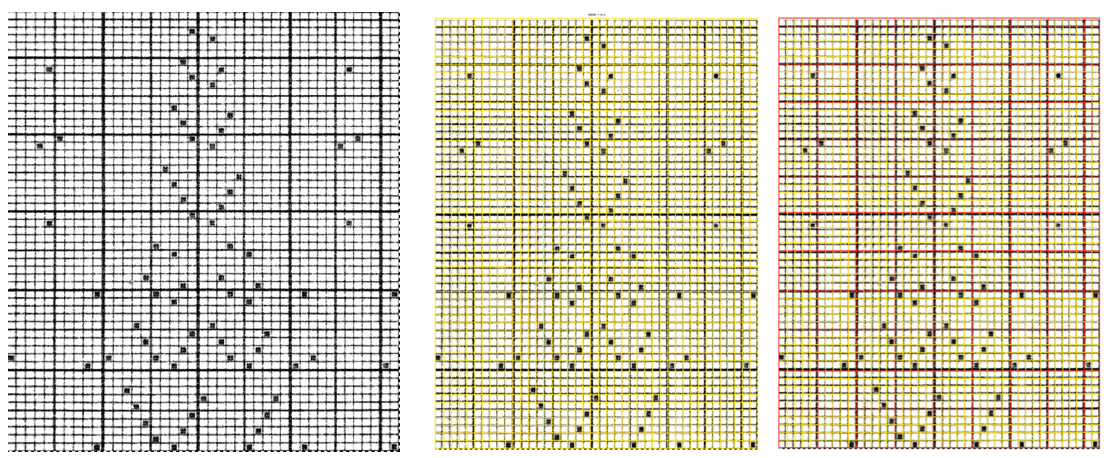
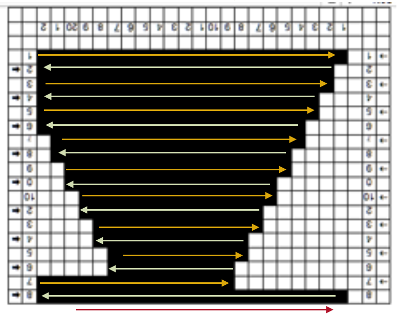
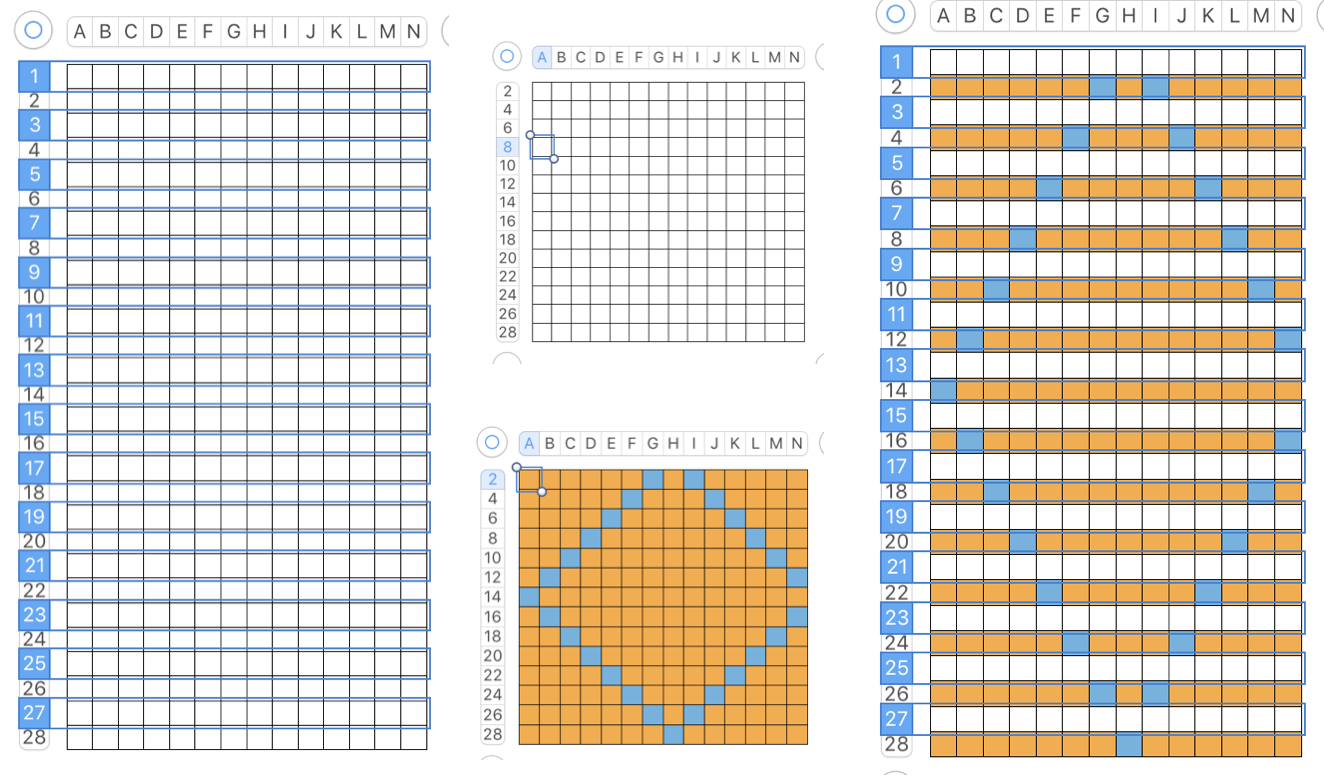
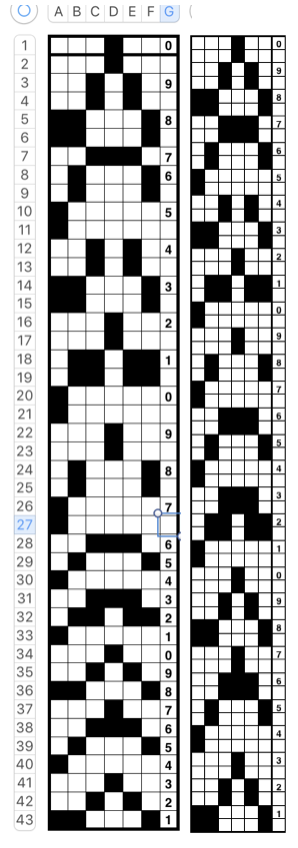
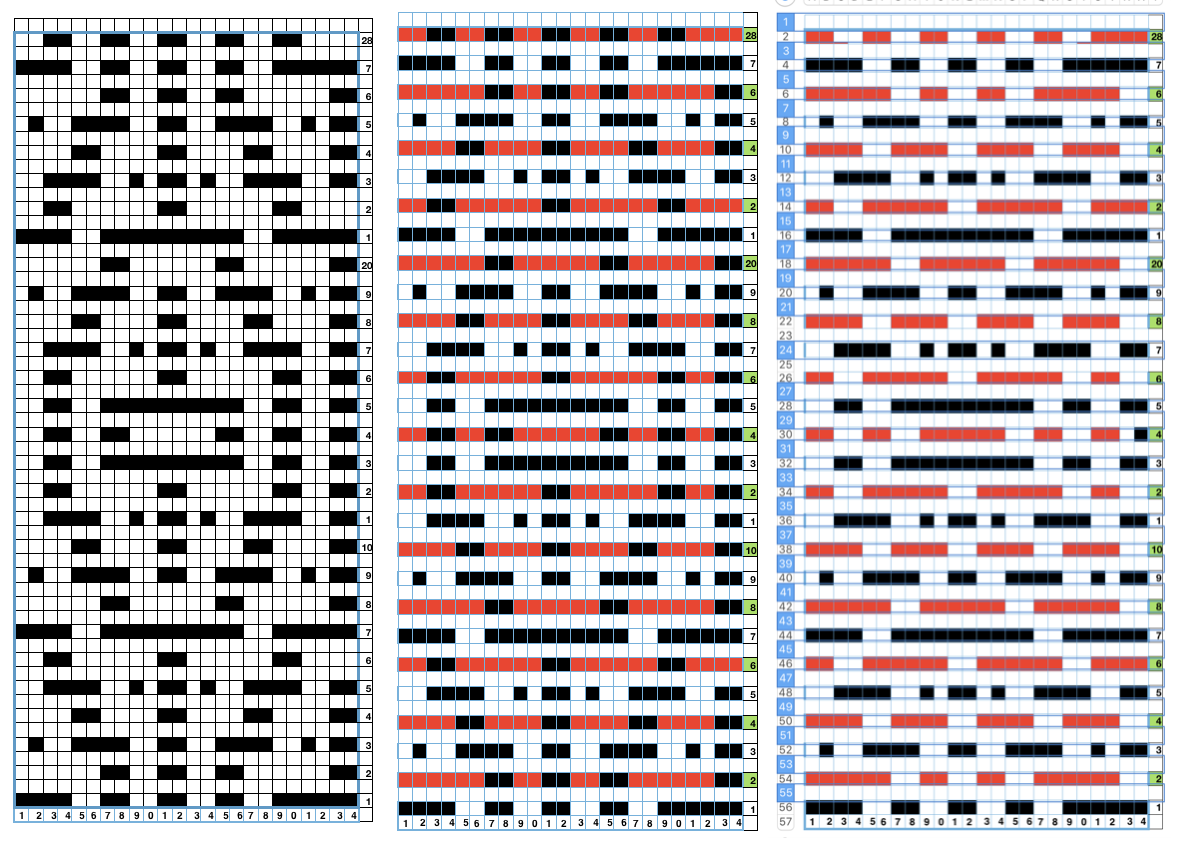
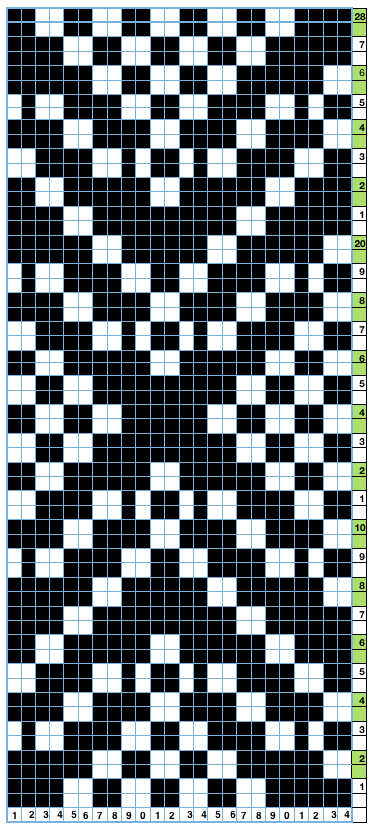
 In testing the pattern with img2track I found the LC passes are still counted, but the memo window is absent upon download. I generated a chart in Mac Numbers, reads from the top-down, expanding on the one above. It illustrates the number of LC passes (left column) required to produce any significant length of fabric. Patterns such as these are not for the faint of heart and require a friendly yarn. 2168 passes of the LC (33 full repeats, outlined in green; red line separates half repeats) are accompanied by 396 rows of “actual” knitting.
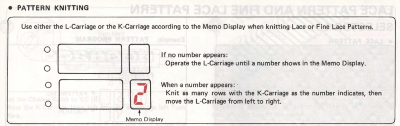
  In actual knitting, the pattern advances from row 1 to 96, and back to 1 again. A check-off list can be much simpler if one is desired. The numbers on left appear in the LC window in a 930, when reached 2 rows are knit with the KC. The numbers at the top reflect completed repeats. Boxes can be checked moving to the right as those rows are completed
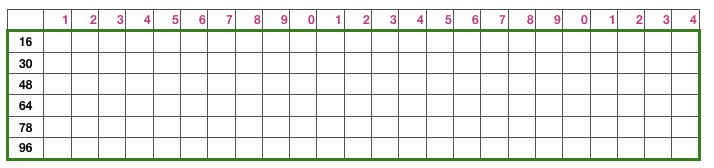 Another option is to download the pattern in img2track, and then enter memo information prior to knitting it. Two youtube videos that show how to enter memos in machine models that allow it, 930 included https://www.youtube.com/watch?v=S0tXNT76v10 and https://www.youtube.com/watch?v=nR8MheT5Bao. The number 2 may be entered after numbers on the left appear in the LC passes count window, and provide an easy guideline to follow. And this is what testing lace patterns can look like. In this instance, a tighter stitch tension, a bit of change in weight, and visually checking after each row of transfers brought me some success. This is not a stitch pattern that lends itself to easy “repairs”.
 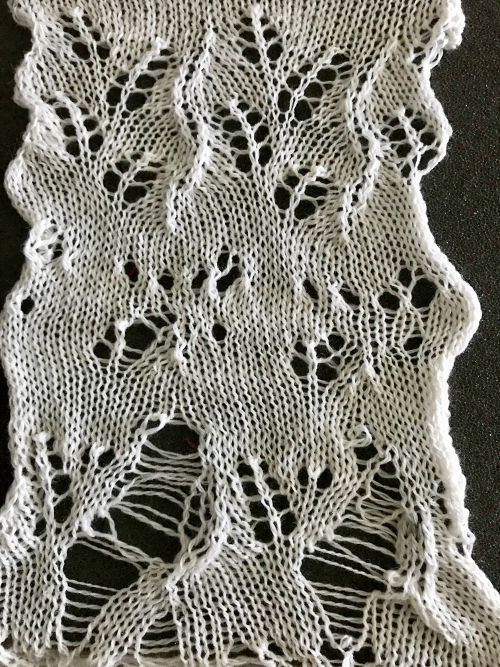 A more successful sample knit also on the 930 using the shared repeat as given, knit in wool-silk 2/18

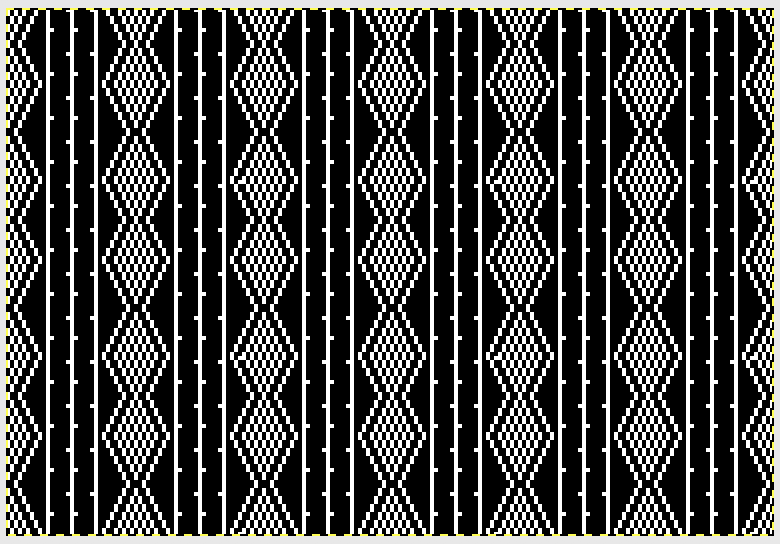
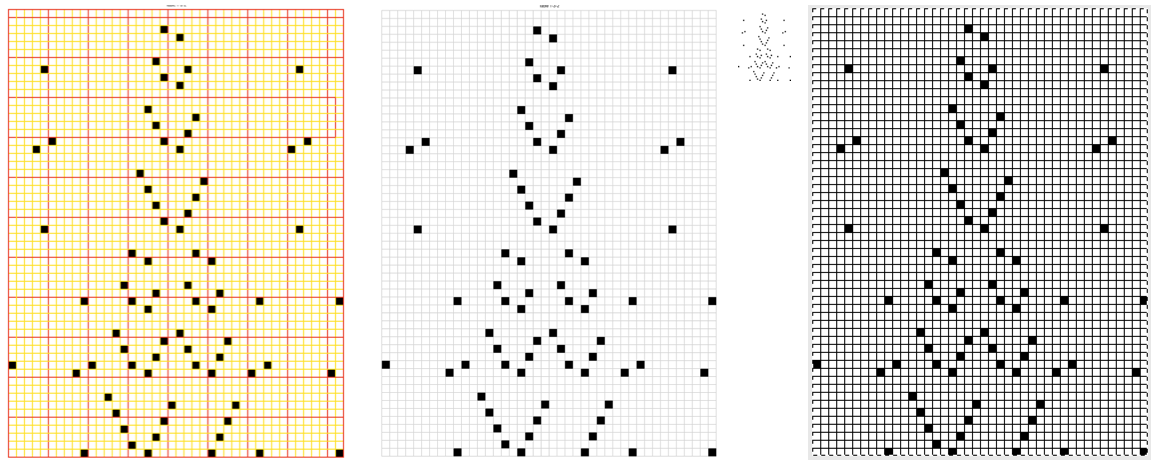
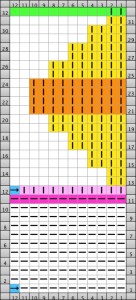
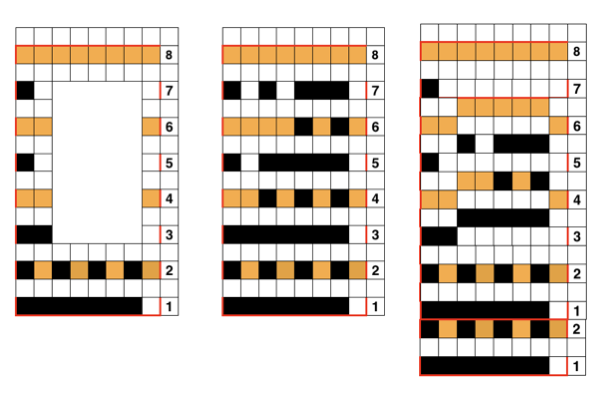
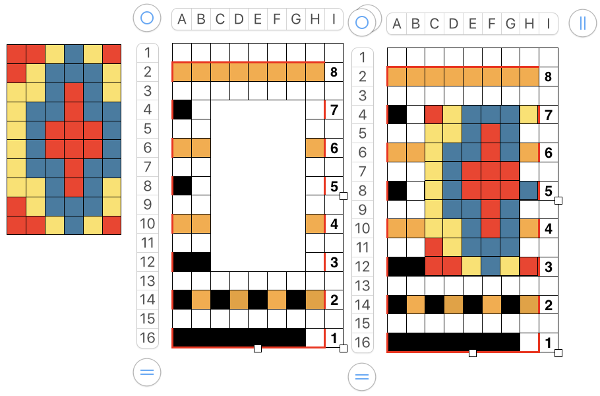
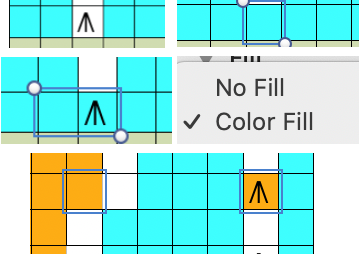
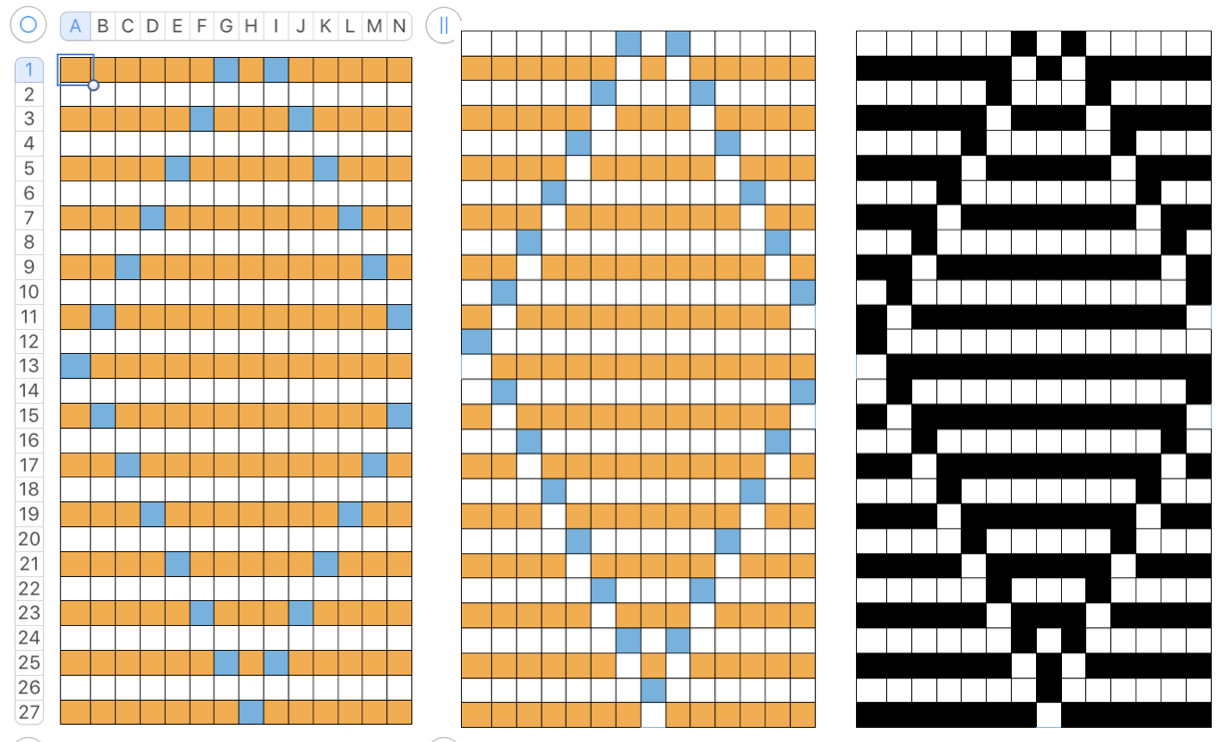
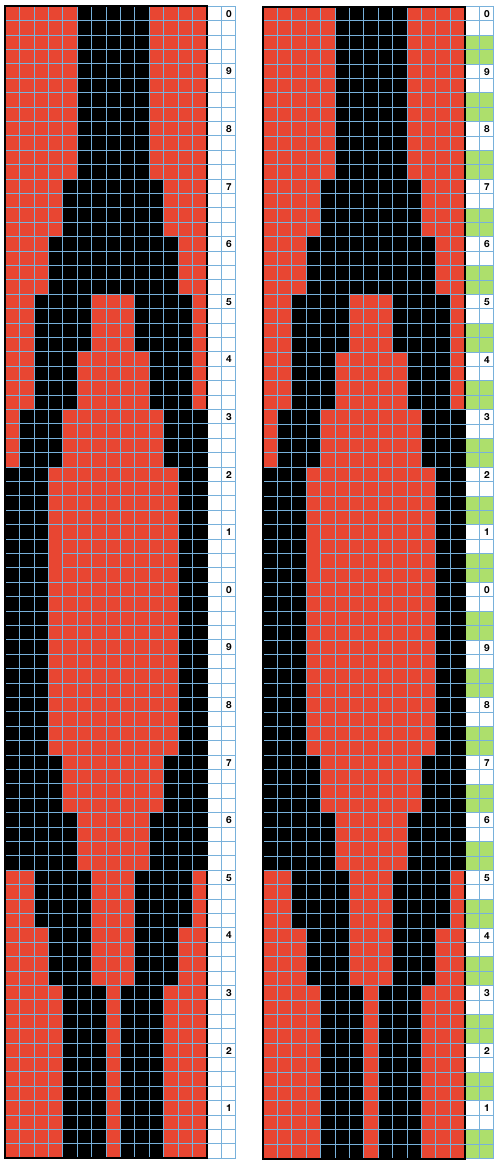
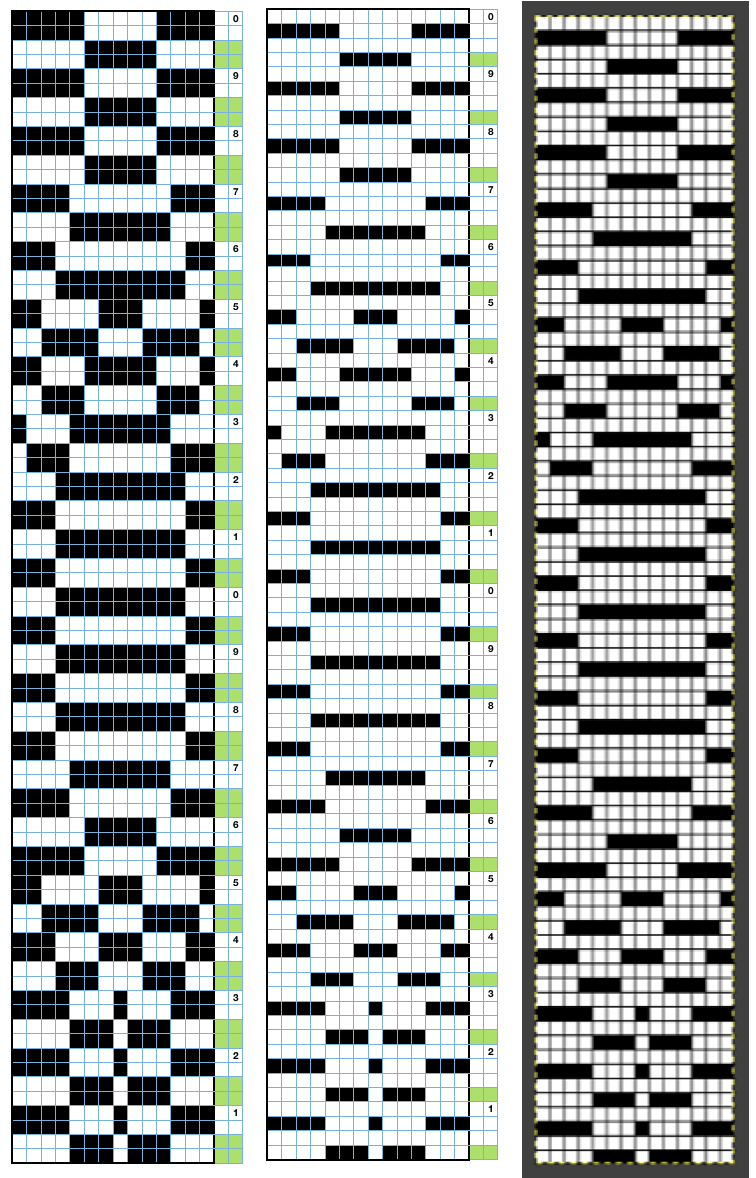
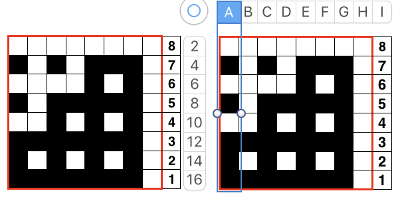
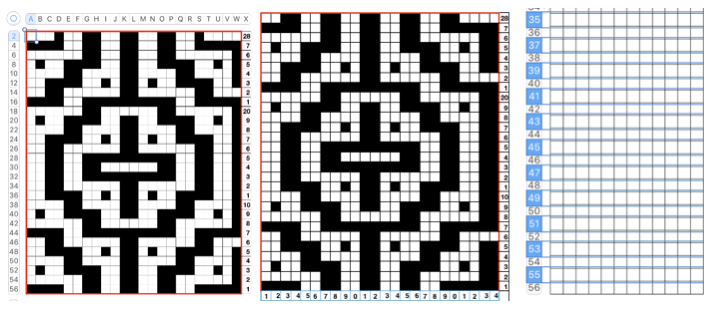
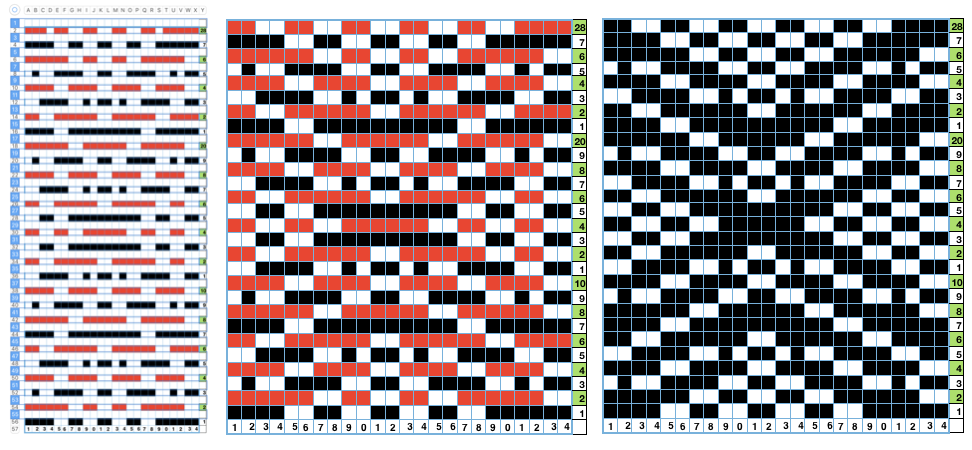
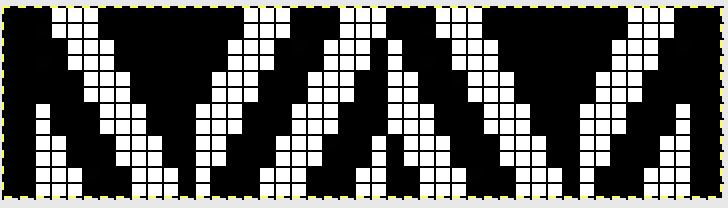
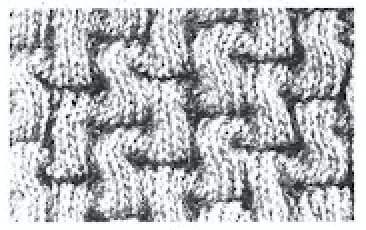
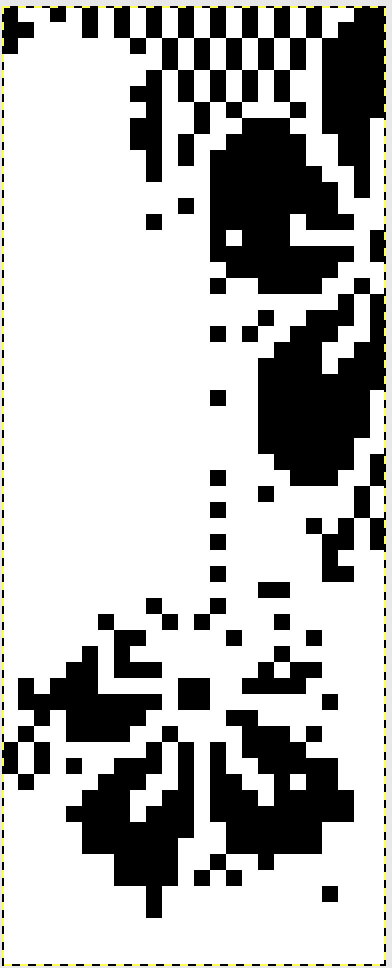
 The card is cropped to the 24 X 44 stitch in width and height for the repeat to be worked in electronics. The area colored blue on the far right indicates possible all knit rows for hooking up “cables” during knitting, mustard color indicates ladders created by an out of work needle on each side of the central, all knit column. The ladders make it easier to identify each all knit column. The tape over holes idea does not work for masking a punchcard since that blue area would need to be all punched holes. The tape over would result in “unpunched” ones.
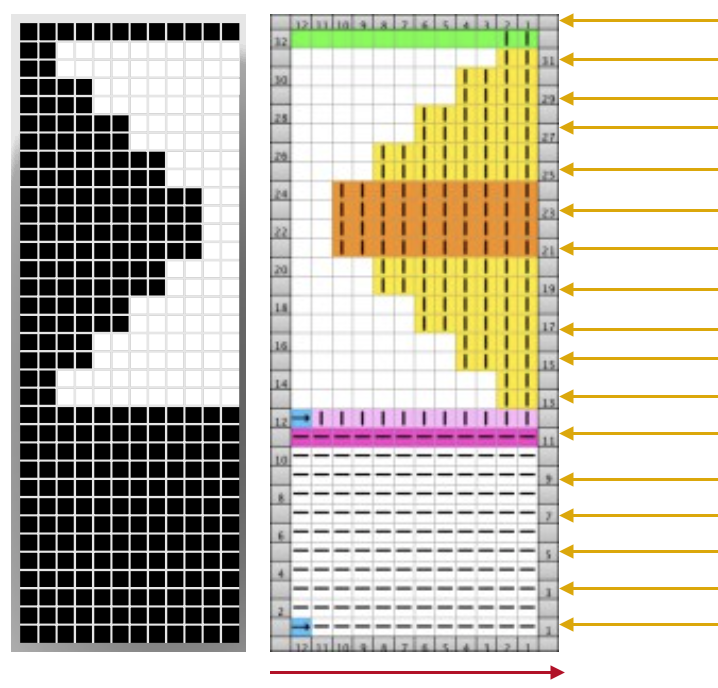
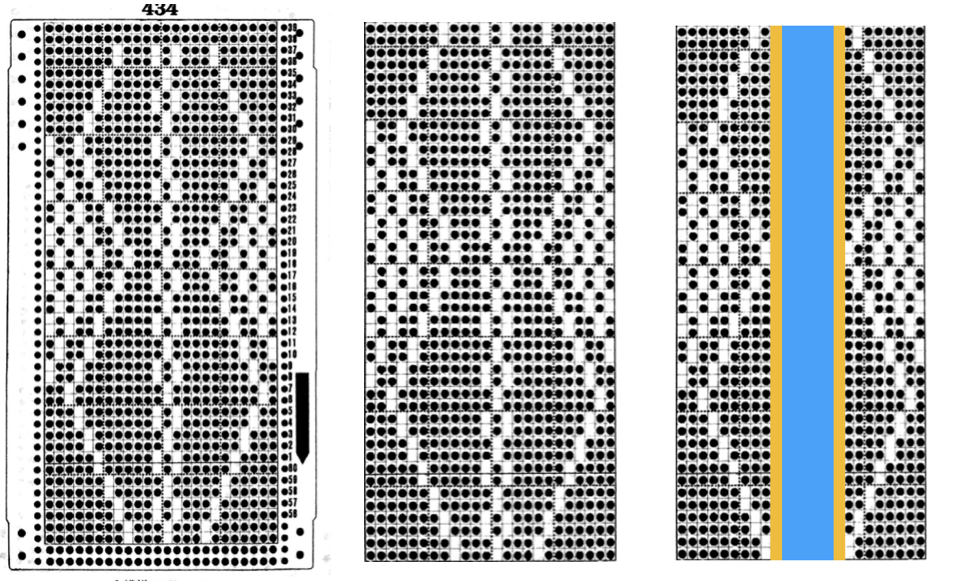 This takes the revised card single repeat and indicates some quick possibilities for altering it
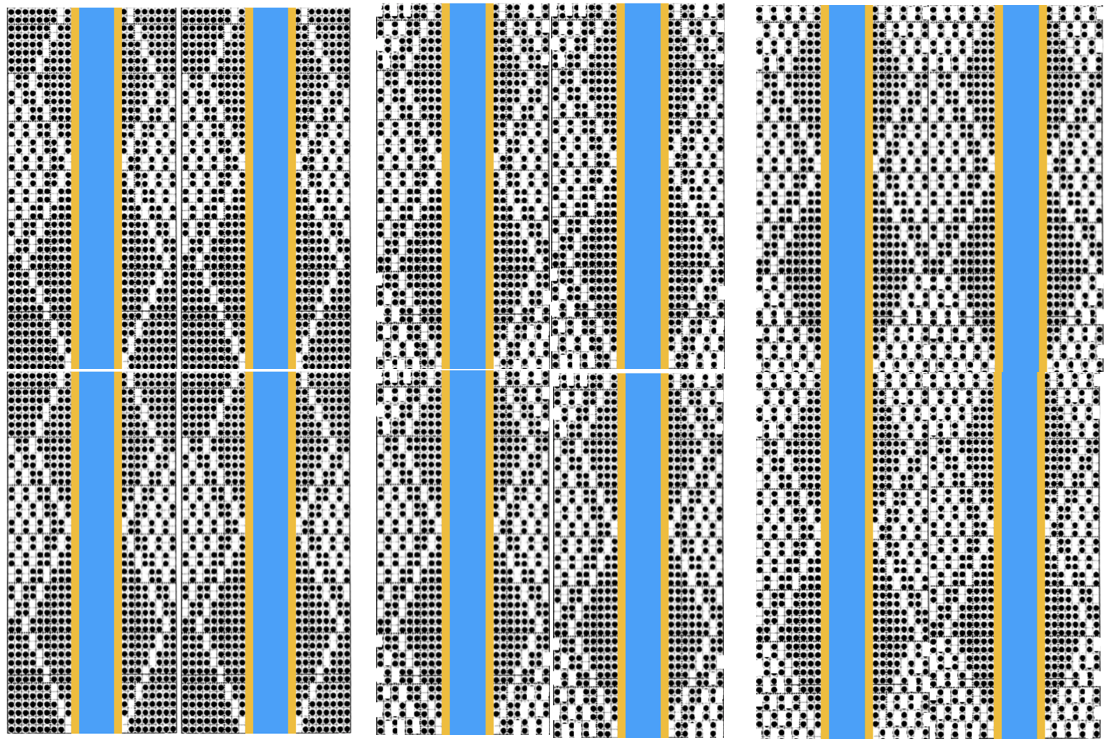
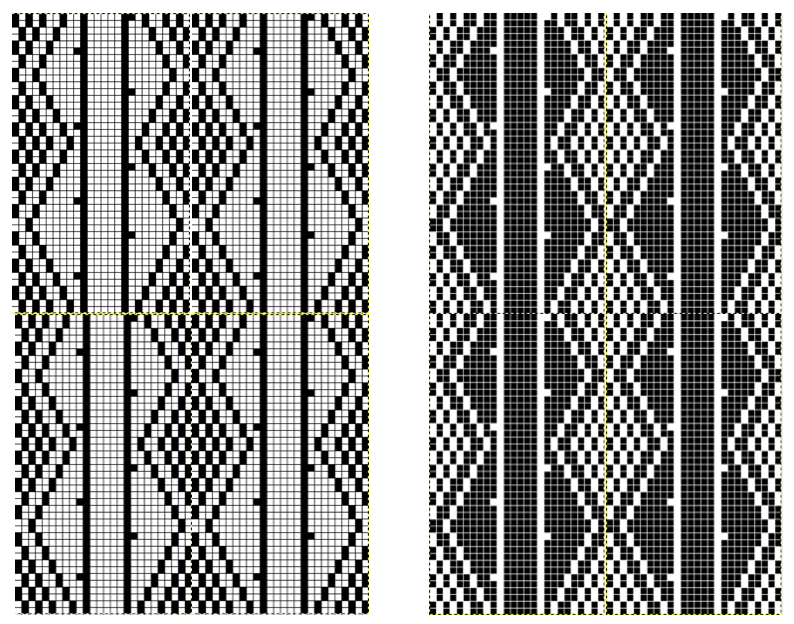


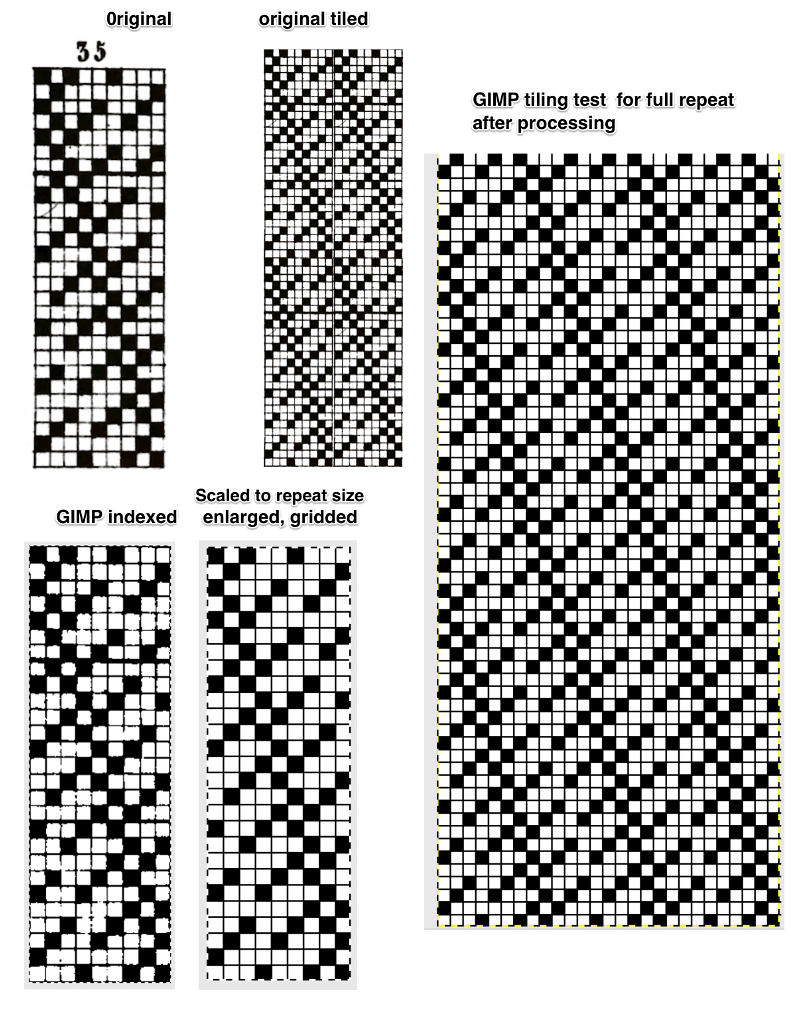
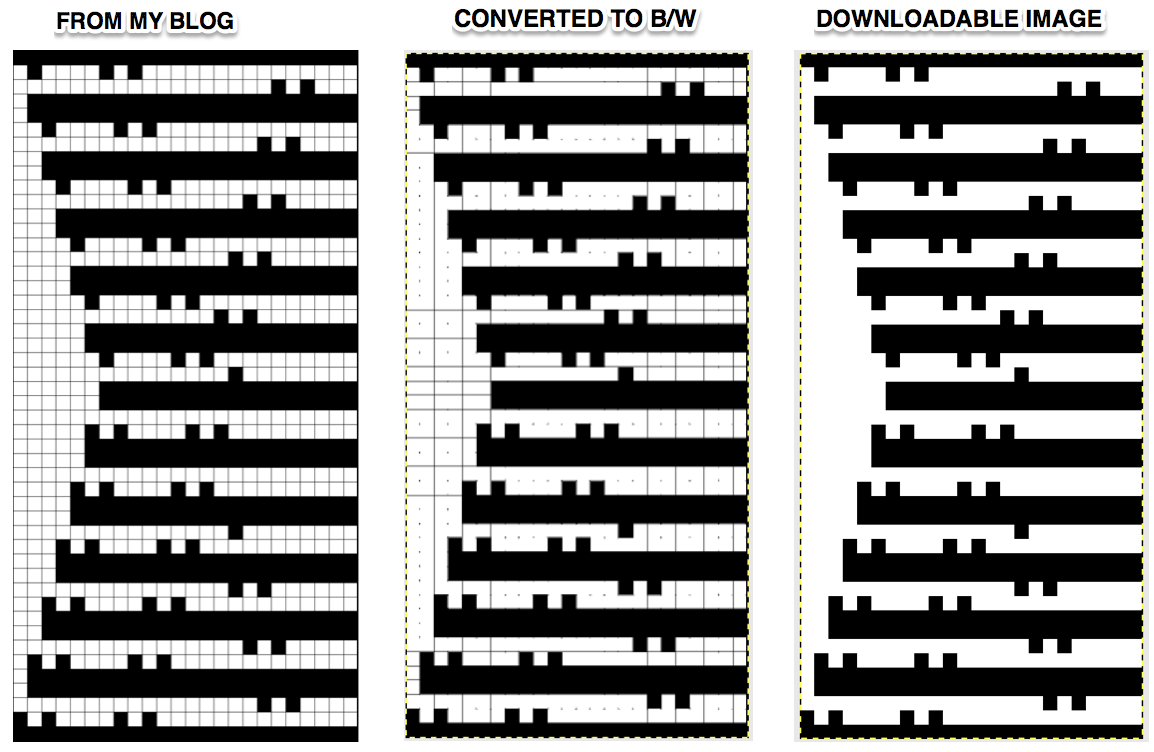
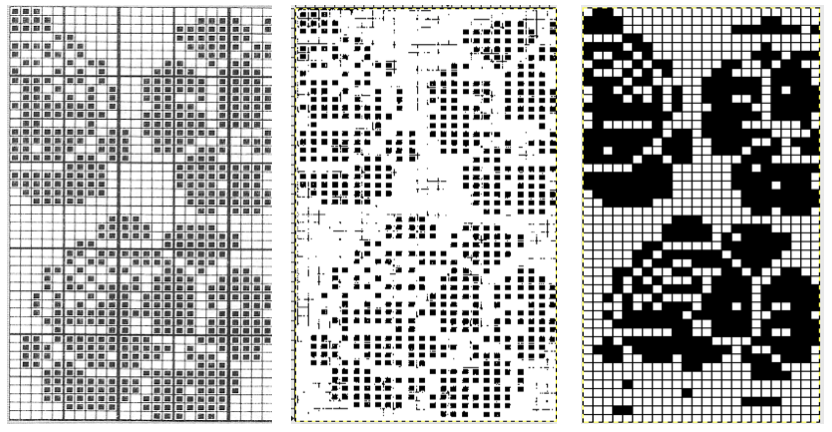
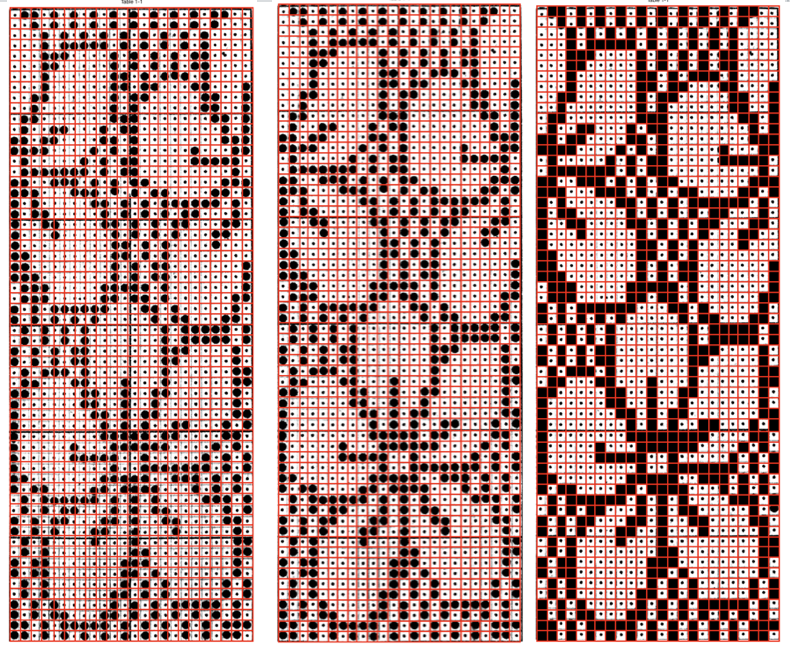
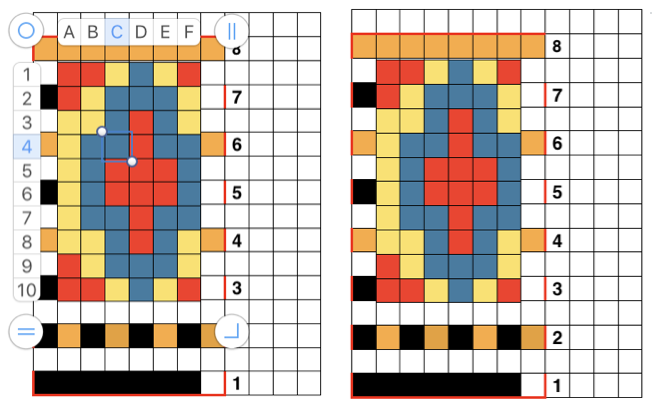
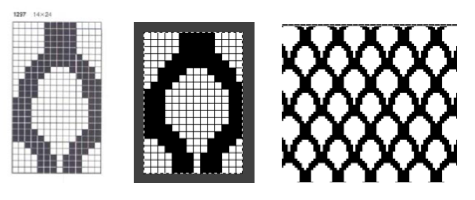
 From colored repeats in Brother electronic collections: with some color adjustment after a first attempt that required some clean up of pixels, the conversion and scaling are easily achieved. The originals were designed on a rectangular grid, within blocks defined 6 wide by 10 tall
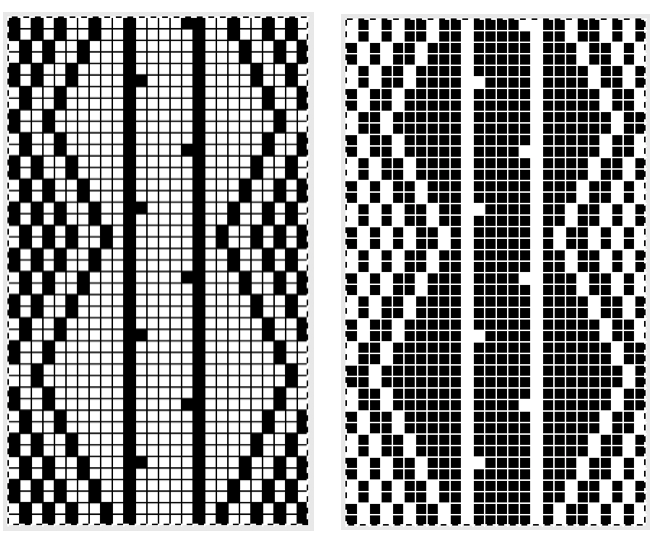
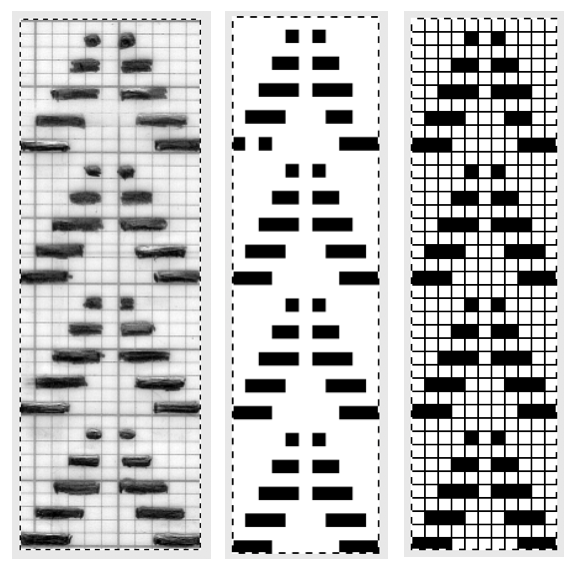
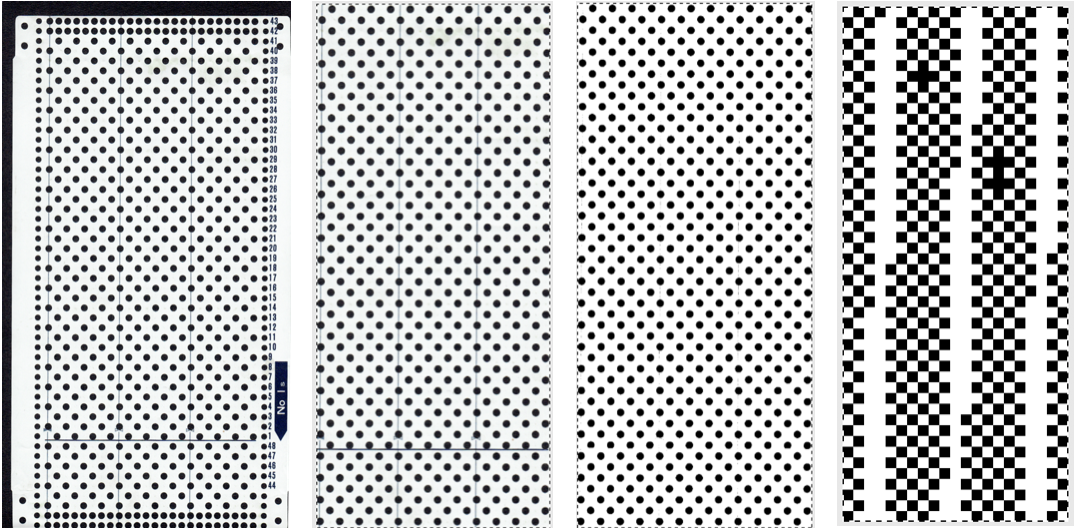 and one from a BW punchcard reference pub
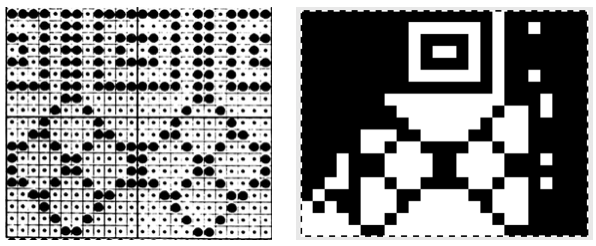


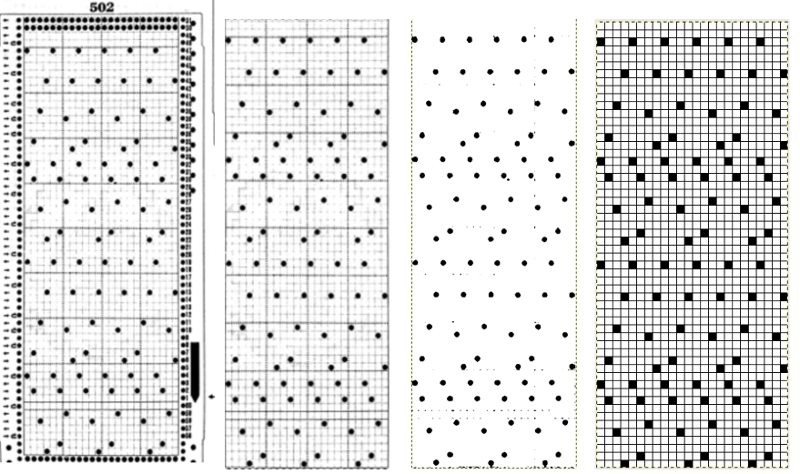
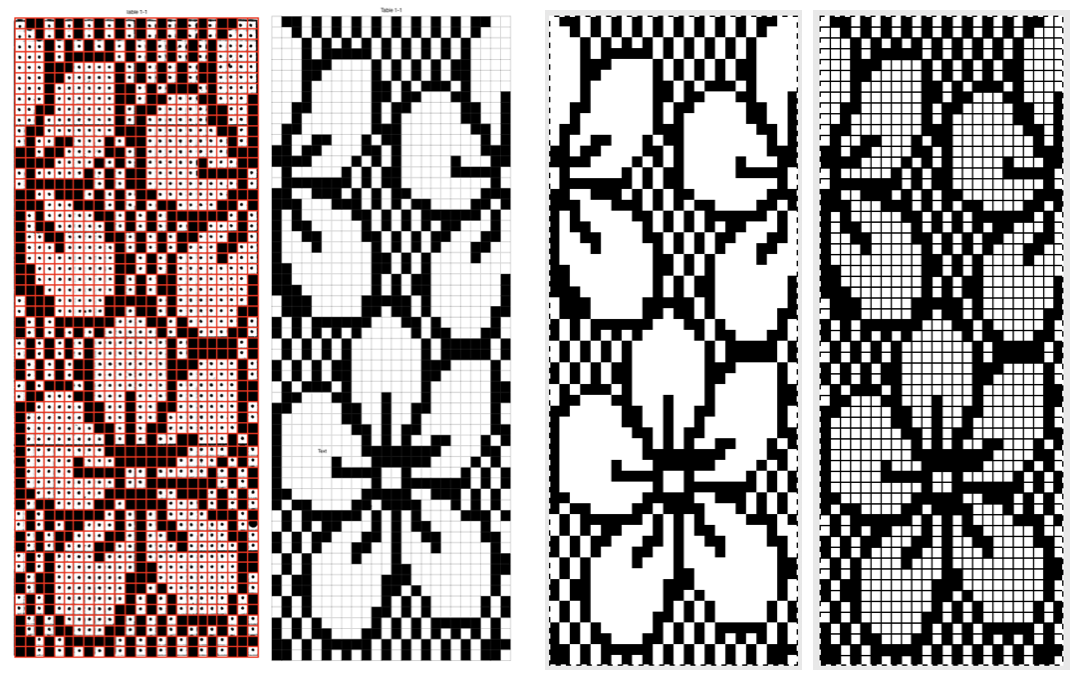

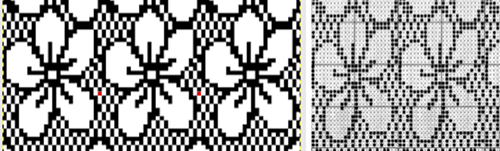


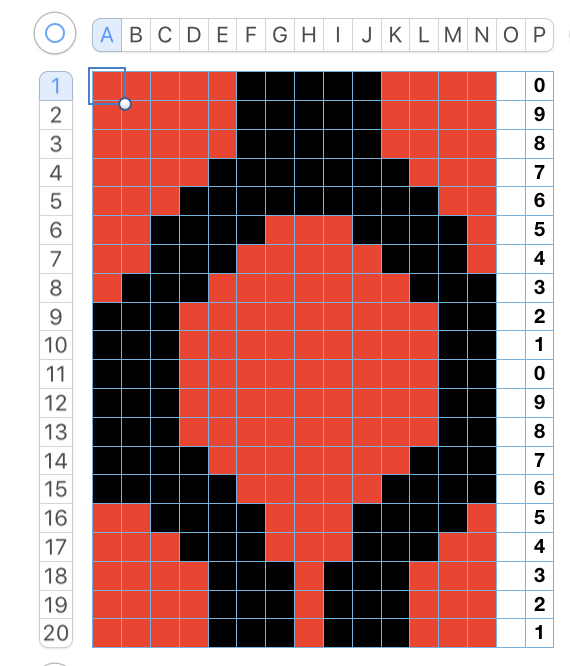
 Ayab will mirror it if drawn as is, which will place carriages in position for first preselection row to start from left, decreasing stitches in work
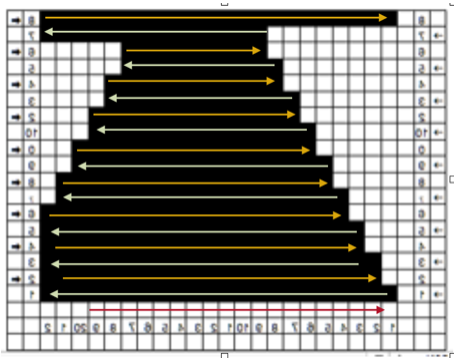


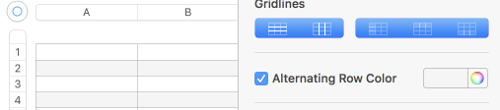
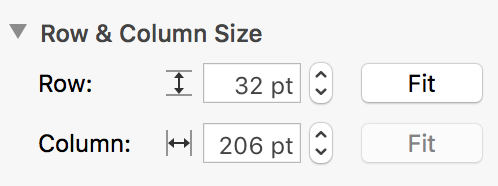


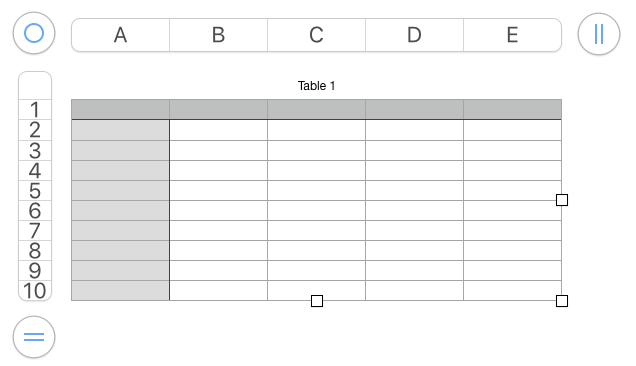
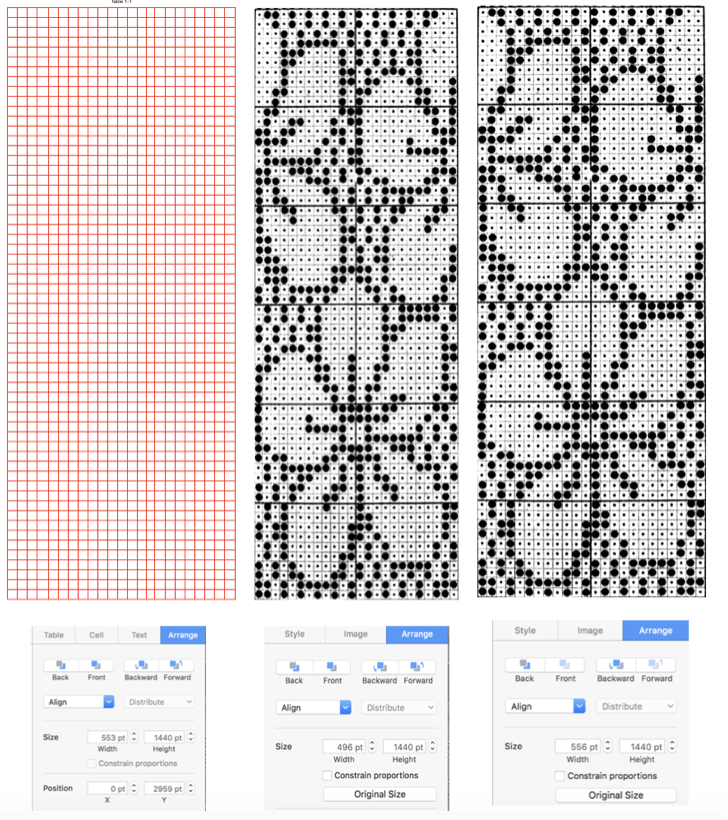
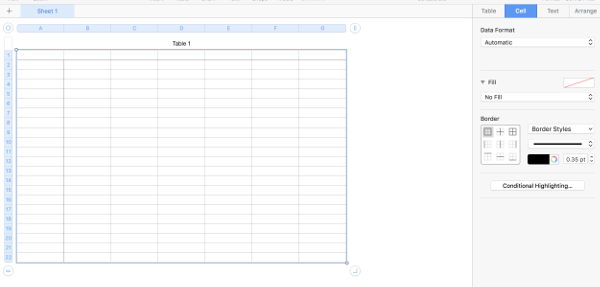
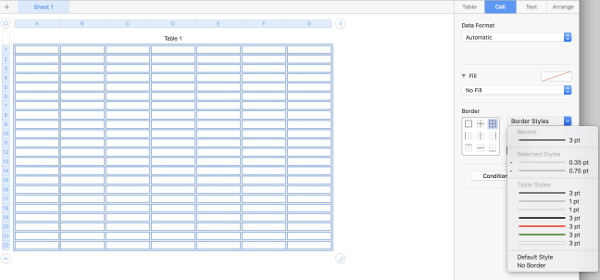
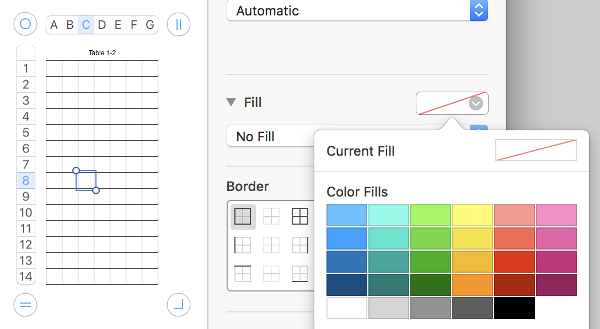
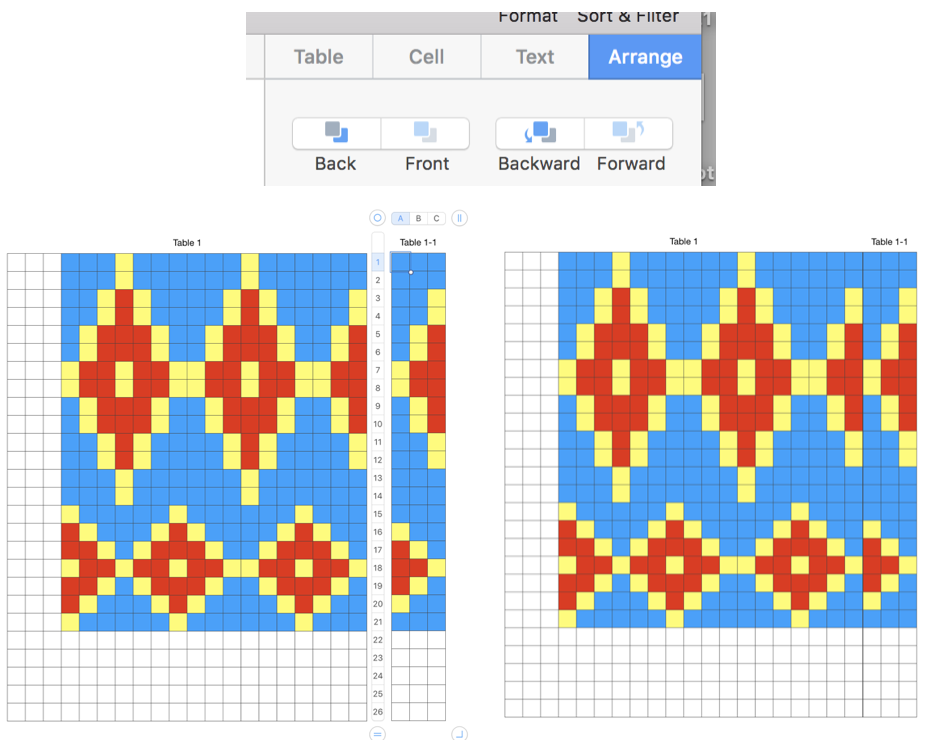
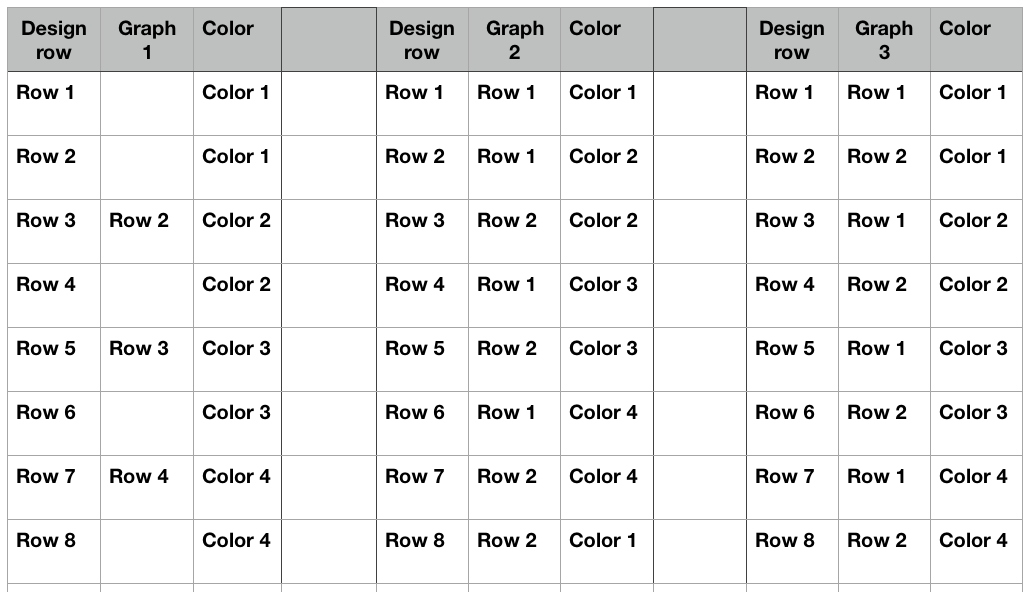
 sidebar to the right of the document to change features such as table name, headers, footers, as well as colors, and row and column size,
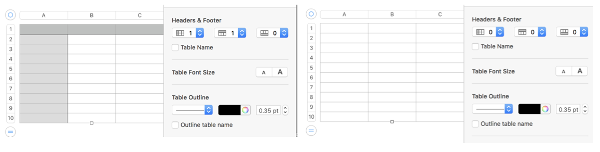


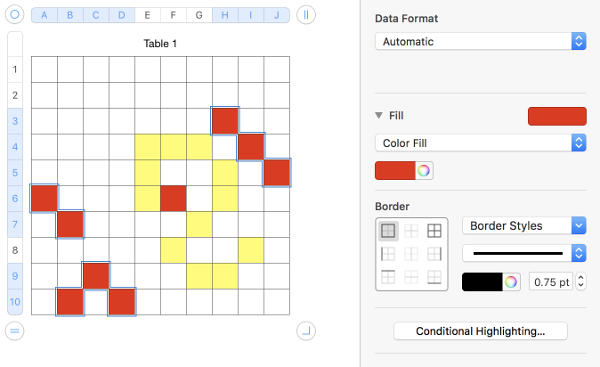
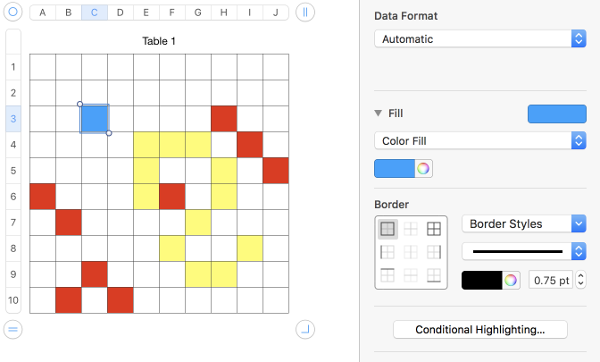
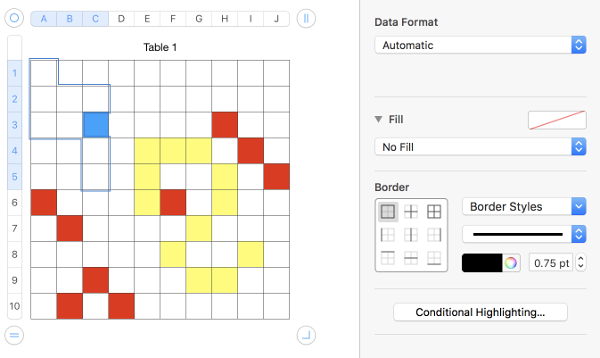
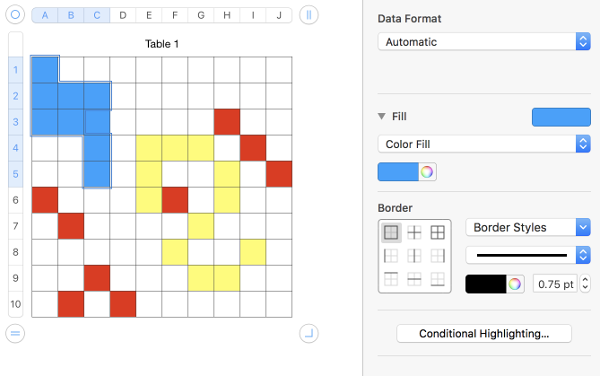
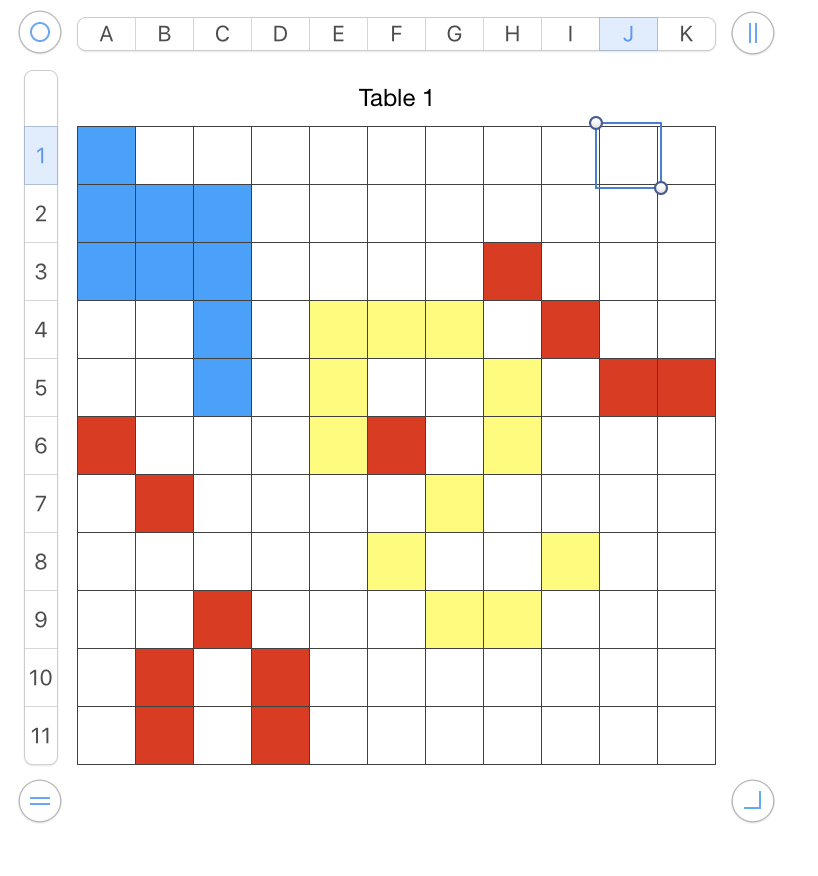
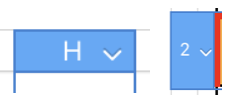
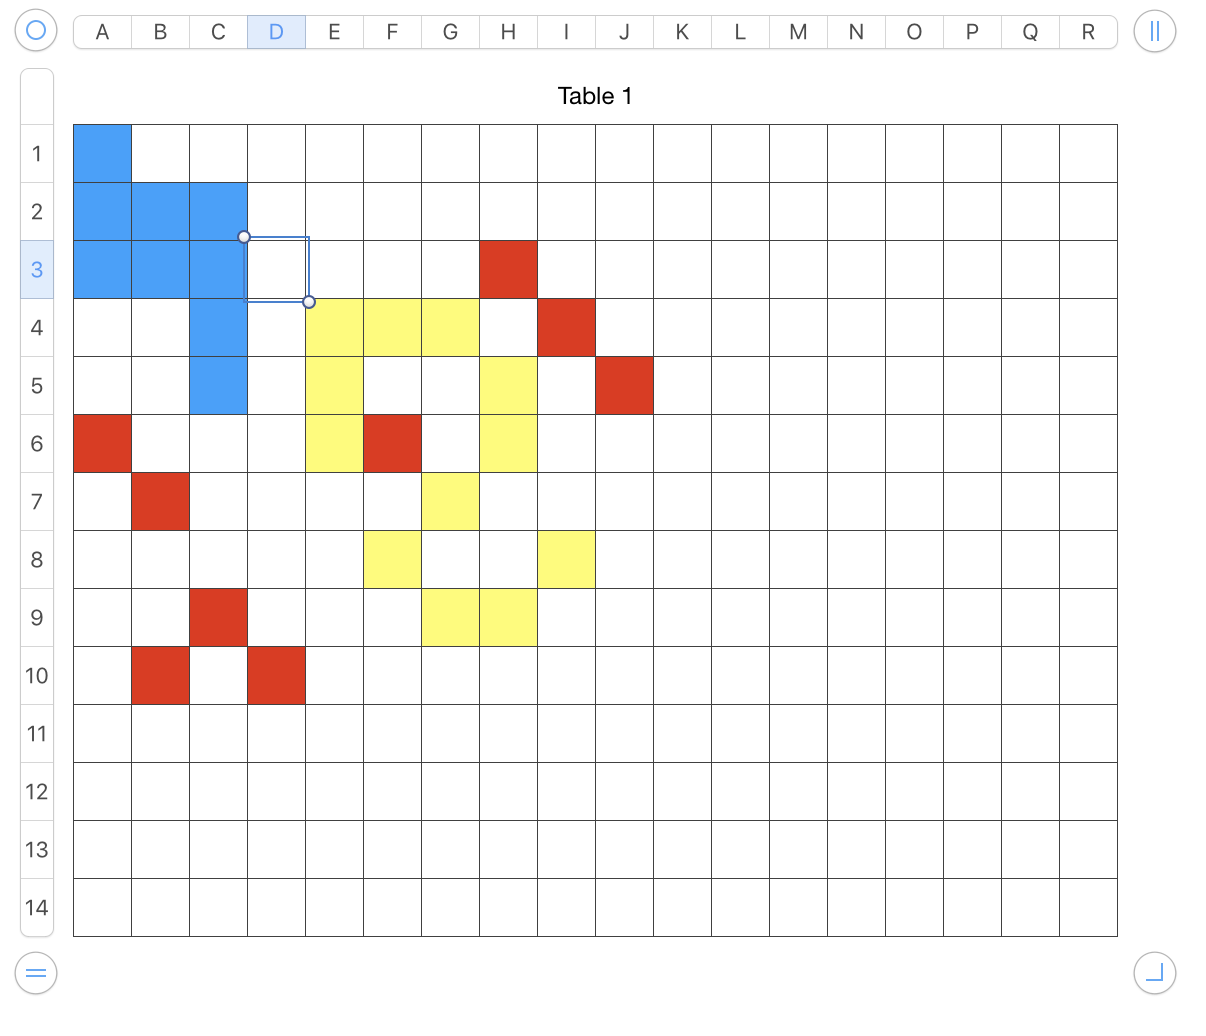
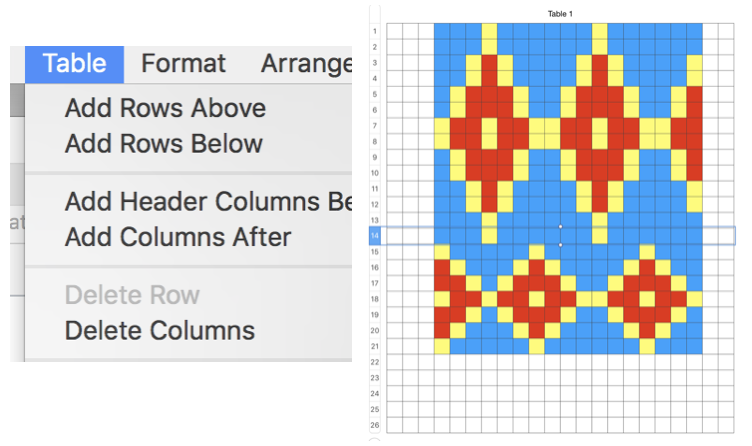


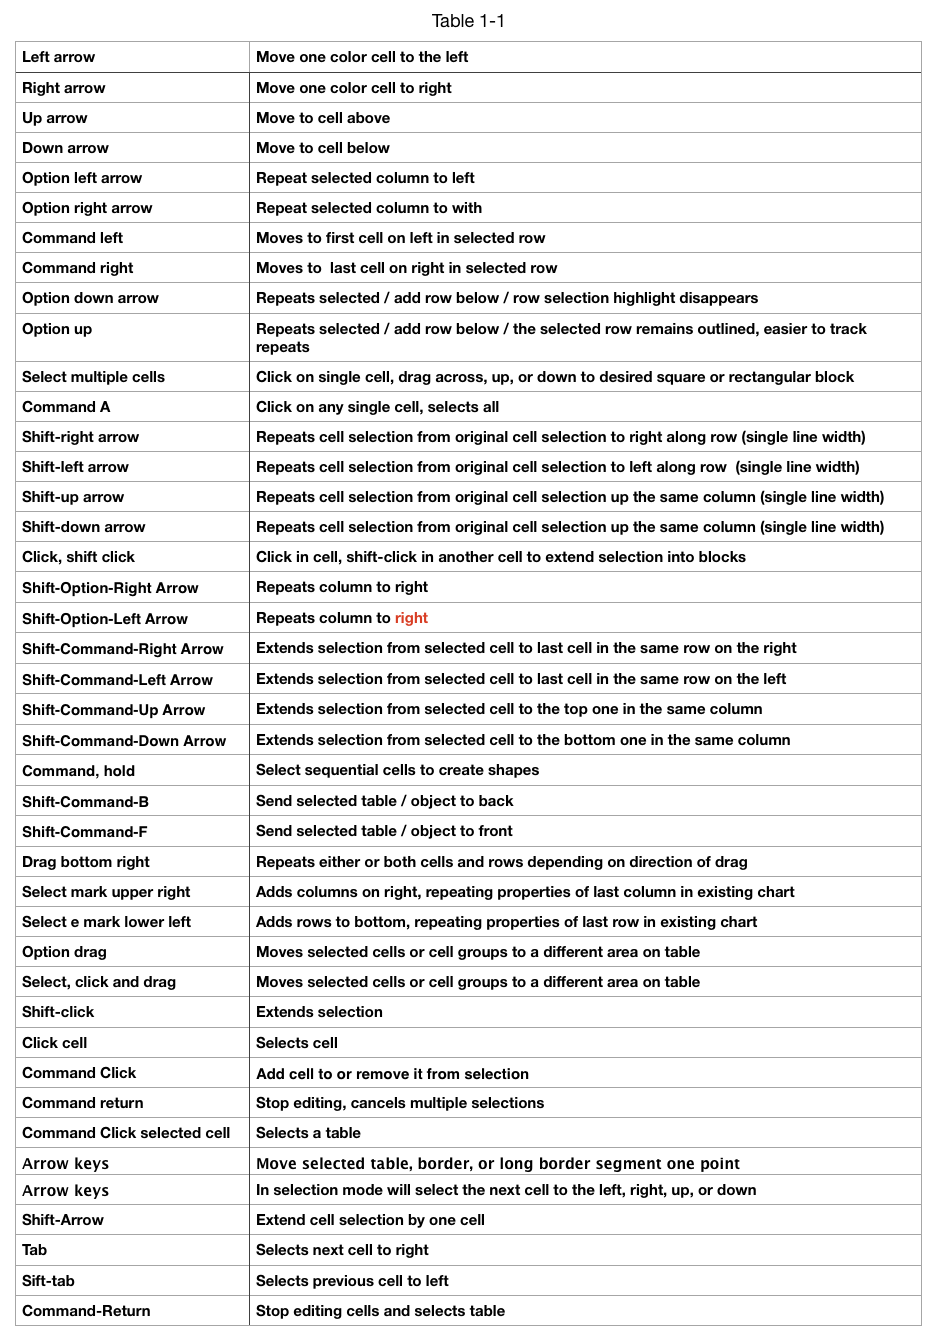
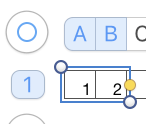 click on it and drag across the row of cells you wish to number and done
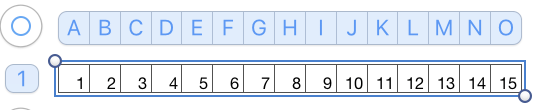
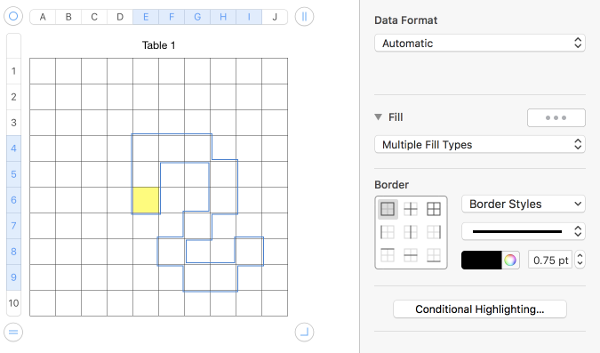
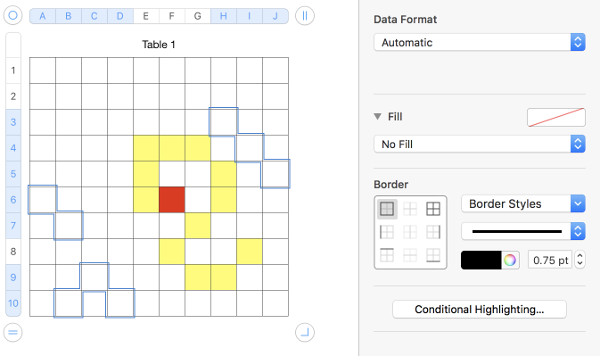
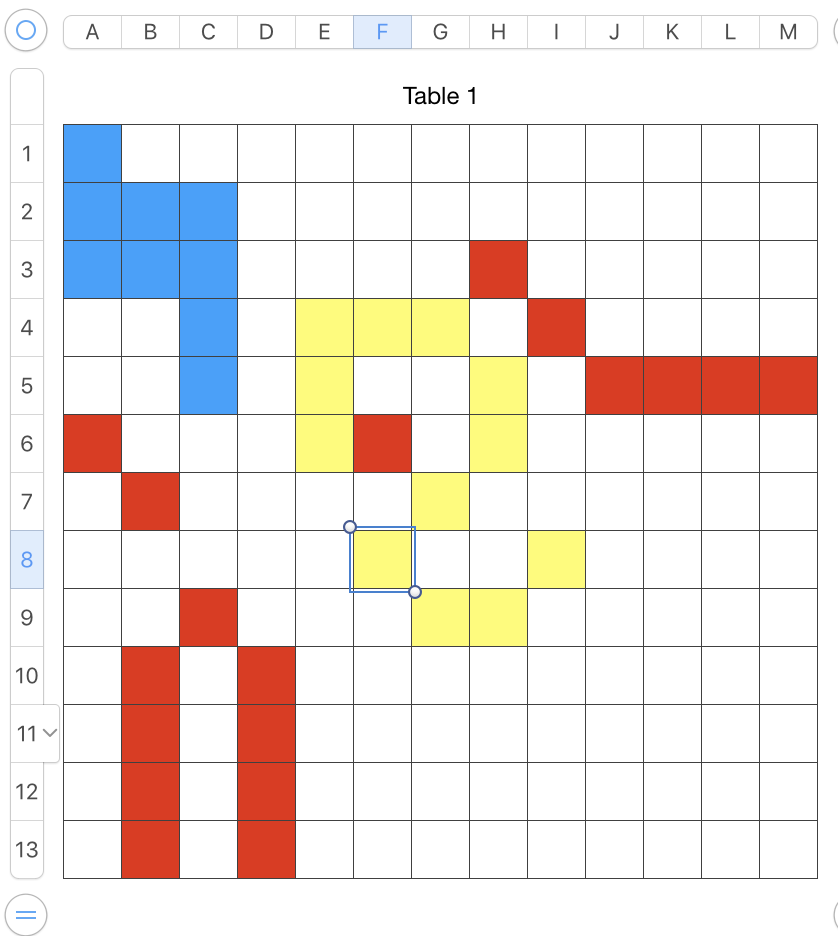
 Any table may be adjusted to accommodate adding text, shapes, or to expand on instructions. Working with shapes merits its own, separate discussion.


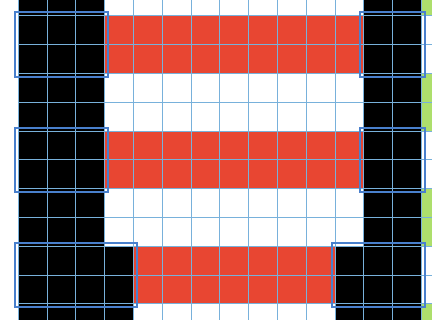


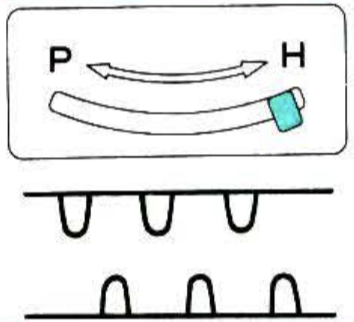
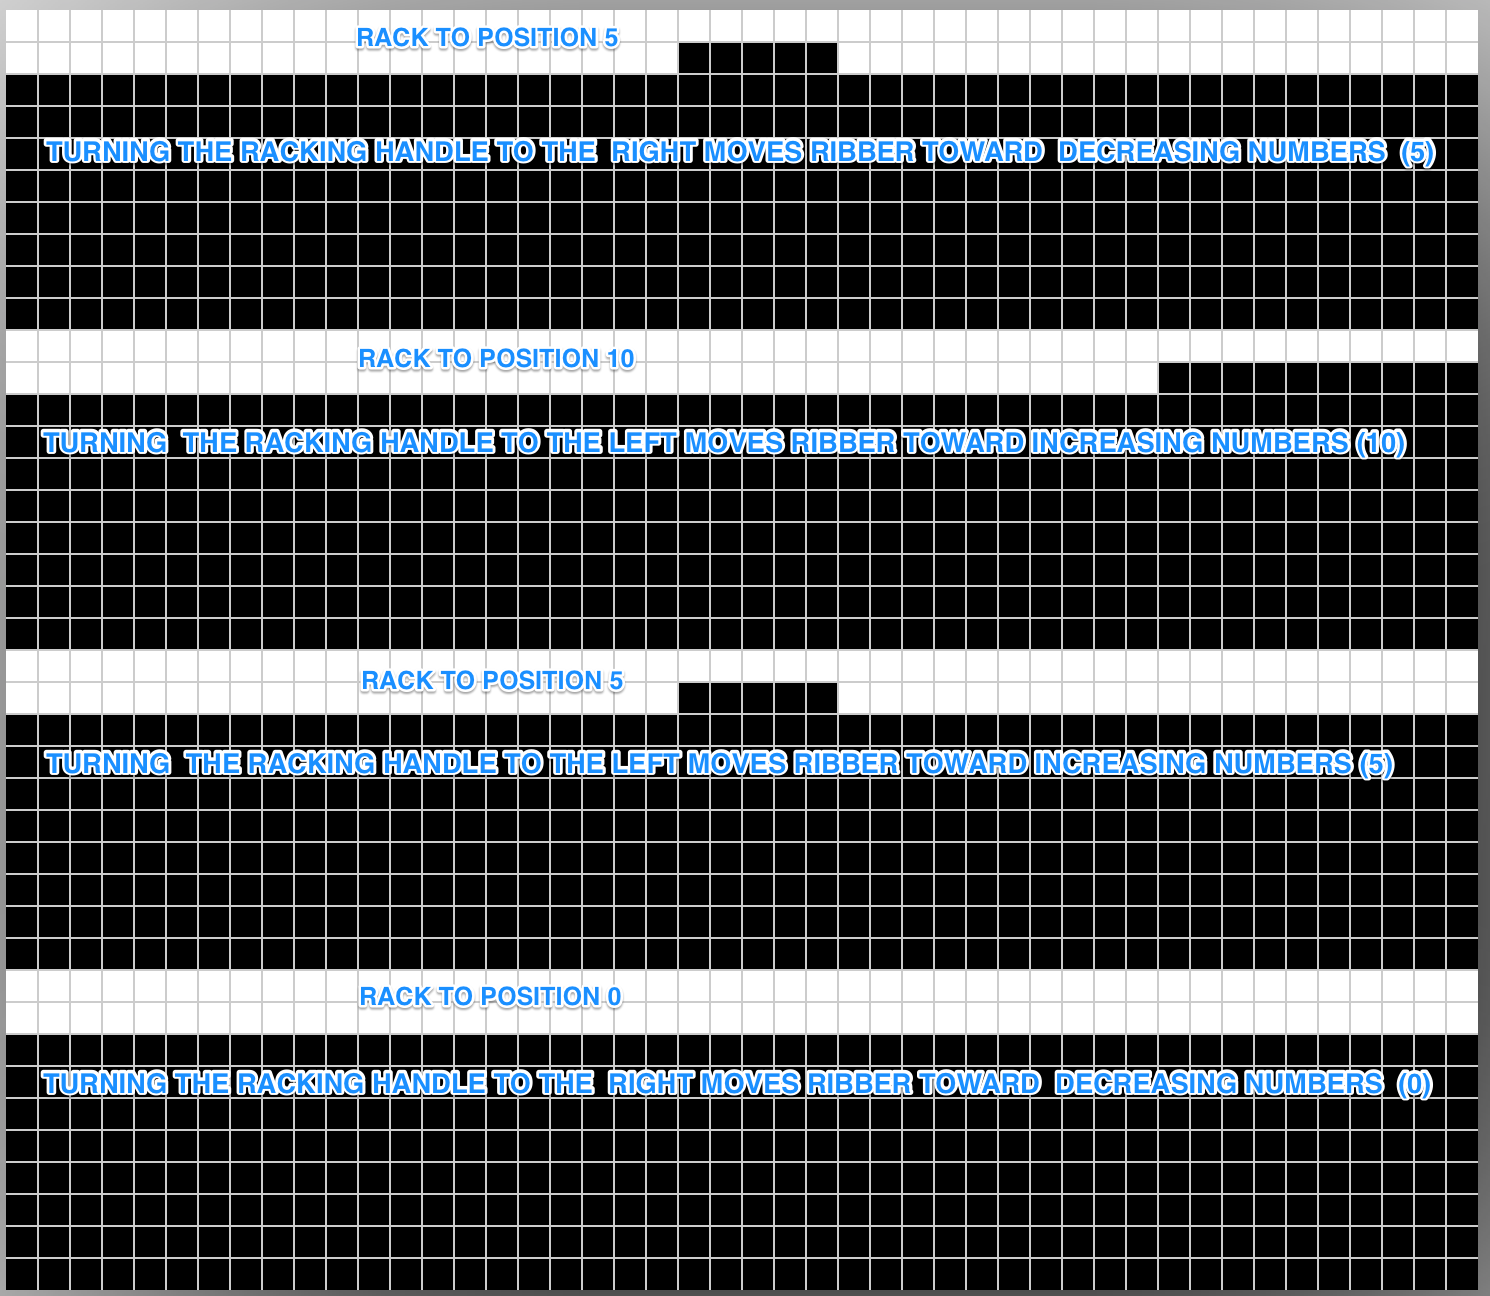
 The plan is to automate the texture, knit it in one color, and find a way to track correct racking positions: cast on may be in any preferred method. With the pitch set to P, it is easier to transfer stitches between beds to the desired configuration. Every needle is in work on the top bed, for a multiple of 10+6
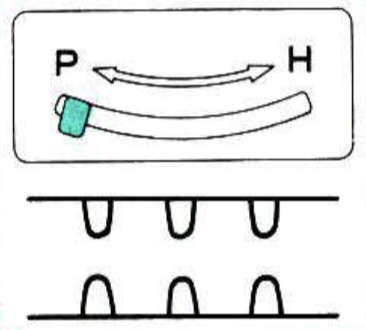


