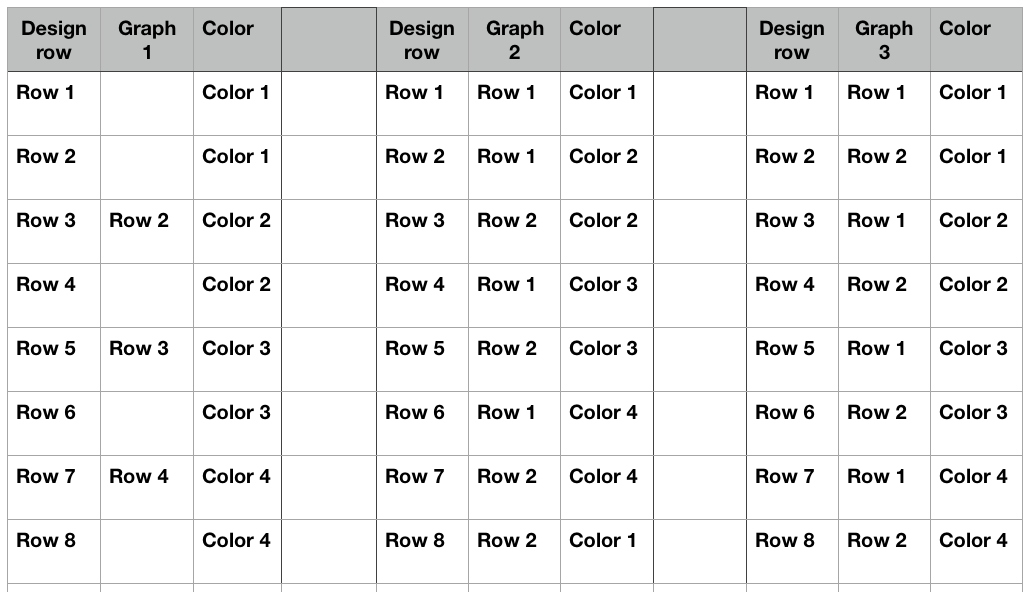
From 2012, Numbers 3.2.2: printing graph paper to desired cell dimensions: I chose to change preference for rulers to point units (options are for centimeters, inches, and points). Online conversion between units of measurement and PostScript points may be calculated (if needed) using calculators ie.
http://www.unitconversion.org/unit_converter/typography.html

default cell size in cm and points

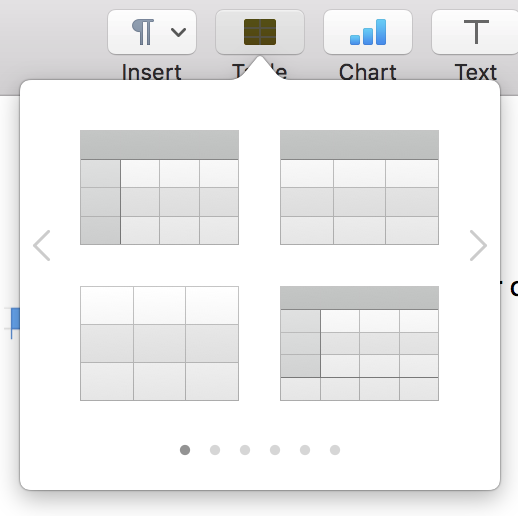
Click on the table icon at top of your document screen, to right of function icon; select first choice on left, second row

a place to start

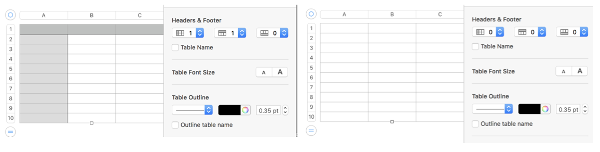
Uncheck alternating rows on the sidebar at right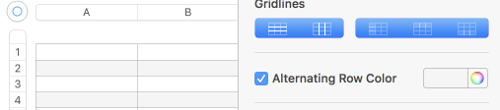
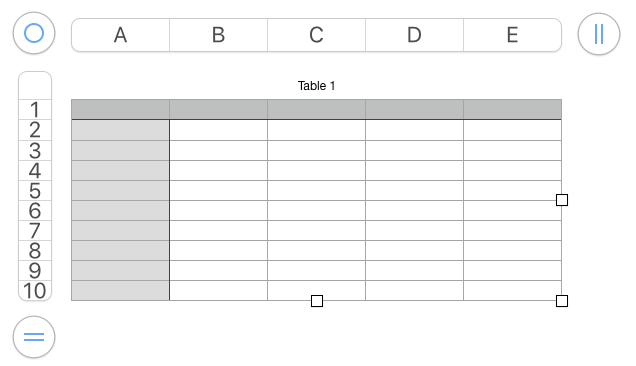
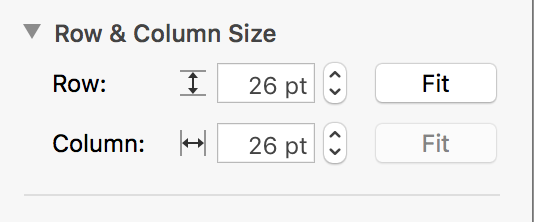
Click anywhere on the screen, use command all to select all table cells. Choose row and column size, typing in your desired values or using arrows provided, hit return.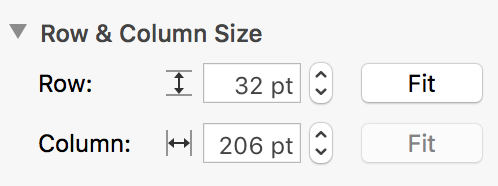
Click anywhere on the table to get additional markings to appear again. With your mouse, grab and drag  symbol on the bottom right and all units on the sheet will be resized to displayed measurements
as you do so you will also have the benefit of viewing the number of rows and columns in your document.

For thicker, darker, or even differed colored and types of lines changes are easily made working with borders menus

Clicking on any cell leaves only your graph; selecting print from your file menu prints exactly what appears as the sheet number chosen, and /or have saved; additional adjustment options are offered on right

Click on the white part of your sheet, only your chart will be viewable and ready for printing. If a PDF is desired, choose Export to -> PDF from the file menu.
The last online manual for numbers 09 is available here. The program has changed significantly in appearance and in some of its functions since then.
I have been exploring numbers out of necessity since upgrading my Mac to the latest OS, thus losing availability to Office, and therefore to Excel. I recently published a post using Numbers for color separations in knits and decided to attempt to explore the program further. Here I am reviewing and sharing some of the process and information I now use in creating my blog’s knit charts. There is no recent, full manual for the program.
The format bar that may be familiar to users of older versions 
the Graphic inspector

Tips immediately below are extracted from Online apple support Numbers 5.0.

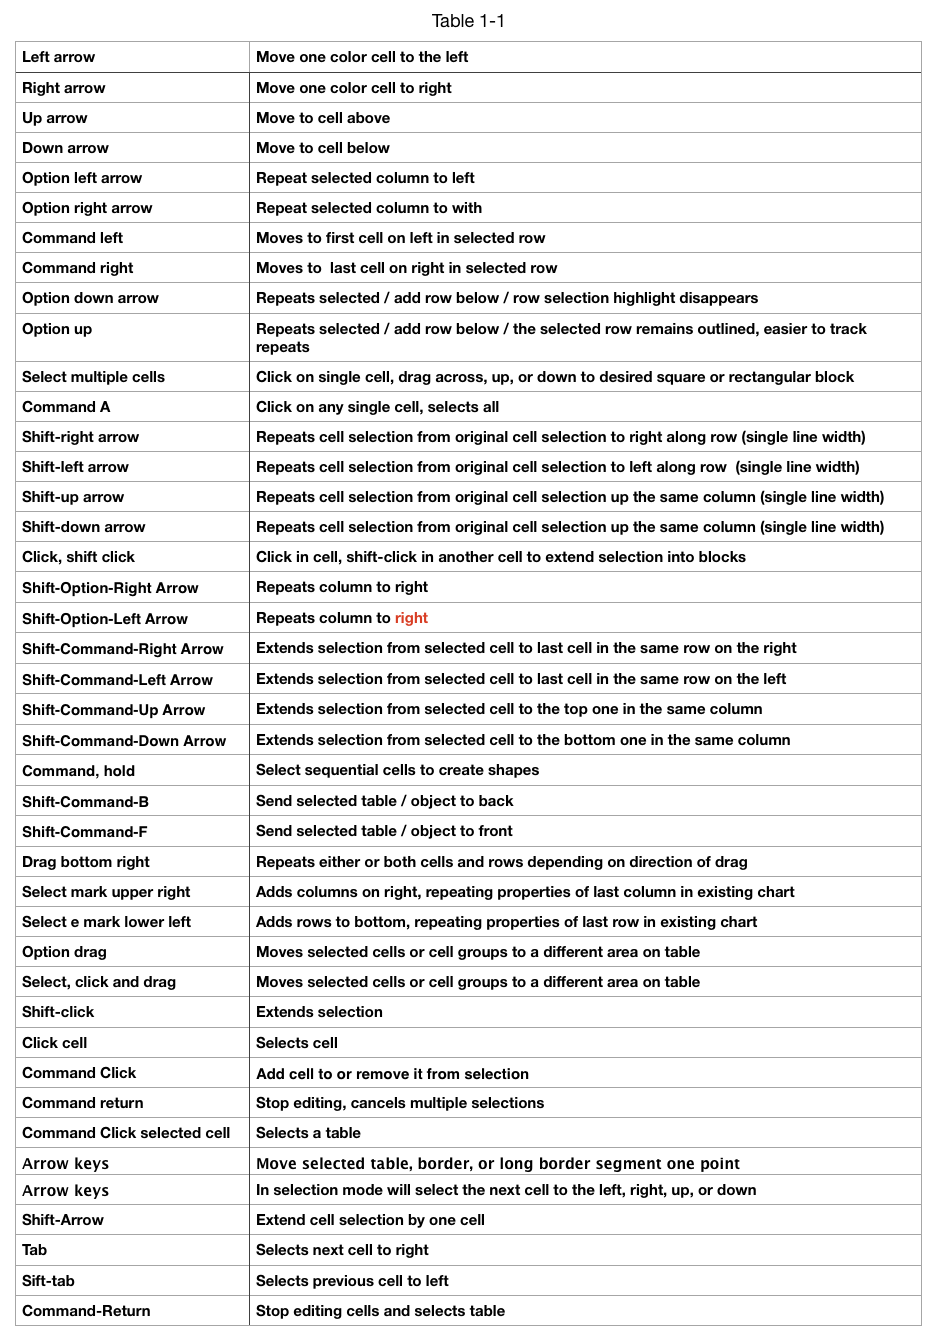
A list of keyboard shortcuts edited by me for use with colored cells
“Undo” restores the previous state, may be used multiple times to reverse several steps. Redo will cancel it. The program autosaves. The option “revert changes” when closing the program erases all changes since its previous launch session. “Revert to” under file menu offers an opportunity to browse previous saves and restore them, similar to using the time machine in older versions of the program and Mac OS.
Frequently there are more options for achieving any desired result.
Building a knit chart: choose a default table from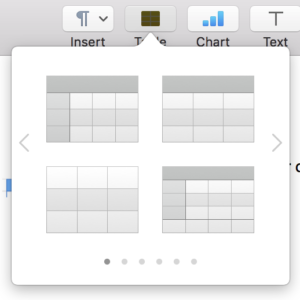
 Use format table in
- In the Format
 sidebar to the right of the document to change features such as table name, headers, footers, as well as colors, and row and column size,
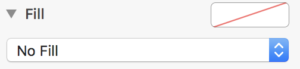
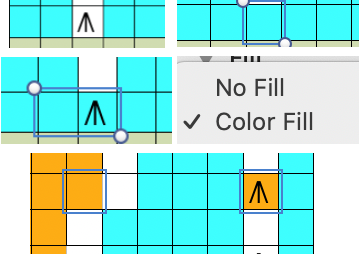
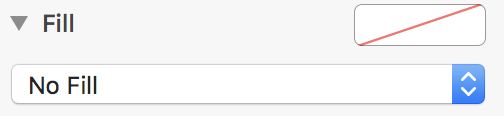
 or click anywhere in table and select all (Command A), choose no fill option on right to remove any default colors
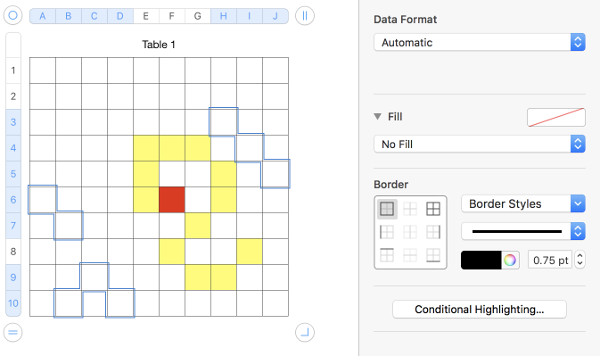
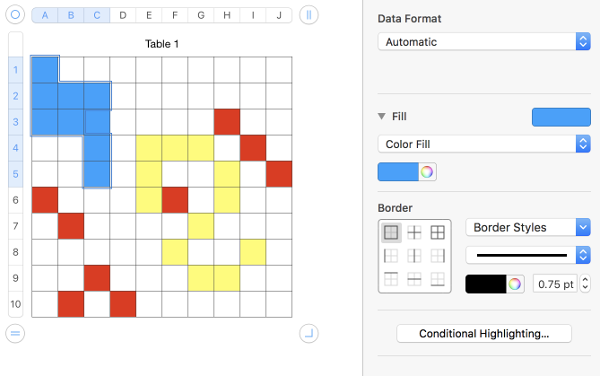
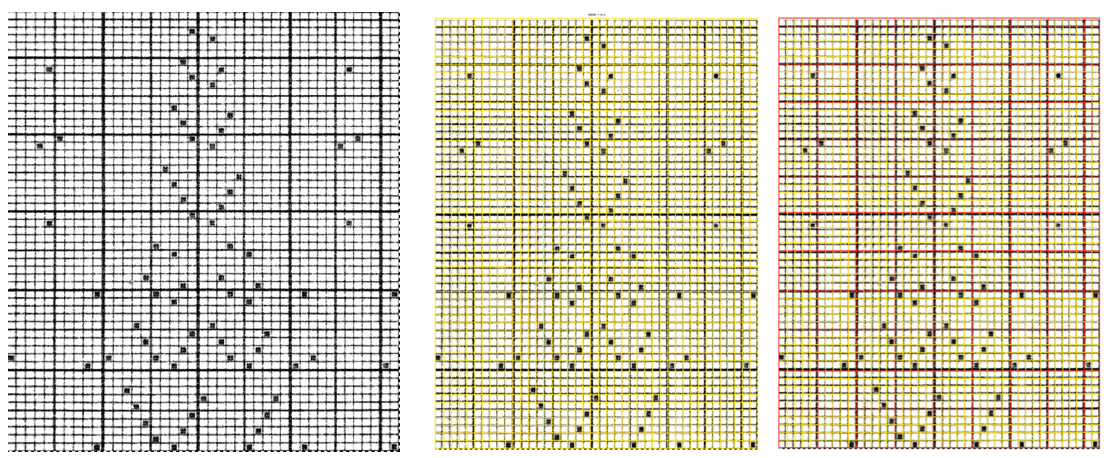
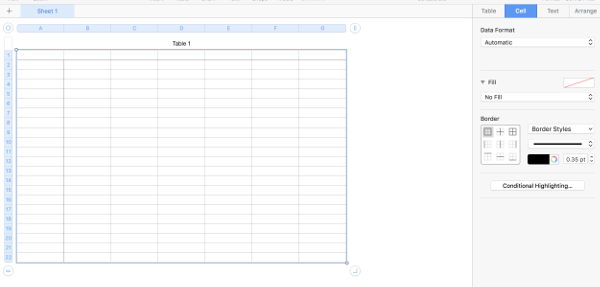 Choose a border color and line weight. If accustomed to working with black as a color in your chart building, starting off with a colored border will make the black cells easier to count. The change may be made at any stage of the design
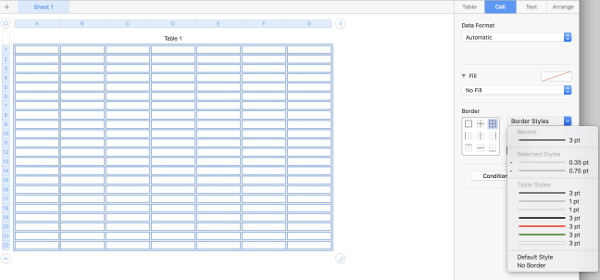
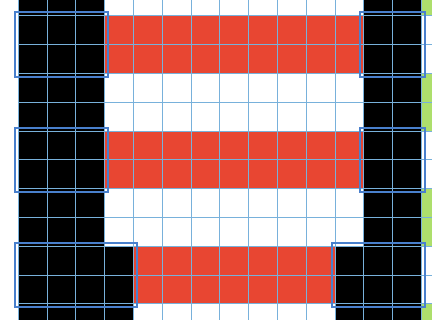
Determine column and row size using format cell menu on the sidebar at right. I tend to work in cell size 24-29 pt square shapes. These values may be easily adapted if one chooses to draw in knit proportioned cells for more closely approaching gauge or estimating elongation in fabrics such as DBJ. Border colors may be also be adjusted or changed at any point, globally, for single lines, or to outline blocks of cells. Clicking on a column tab “letter” and dragging its border on one side or the other will change its width, and the new point value is visible on a shape with a black ground while doing so. Top or bottom drag a “number” in the tab for rows at left for column height changes and viewing the changing value display. Undo will revert the change.

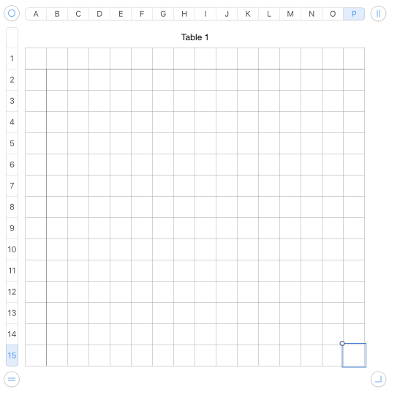
Review for basics for enlarging the table with cells with no fills: reference tab numbers on left may be used to refer to rows. Reference tab letters at the top may be used to refer to columns. Drag the table handle  to move the table. Click the column handle
  to add one column, drag it to add multiple columns. Click the row handle
  to add one row, drag it to add multiple rows. It is not necessary to press shift while dragging either symbol for multiple adds. Drag the column and row handle to the right to add columns, down for rows, and diagonally to add columns and rows at the same time. Reference tabs are active while the chart is being worked on. They disappear if any area outside the table is clicked on. Creating a chart initially larger than the planned design offers a larger field to “draw on” to start with.
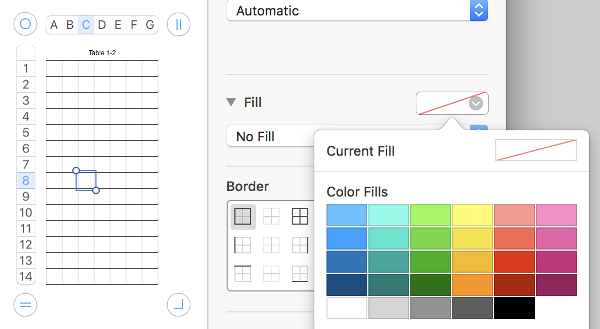
To draw shapes in color: click on a cell, choose your color 1 from the menu on right by clicking on the rectangle to the right of “fill”

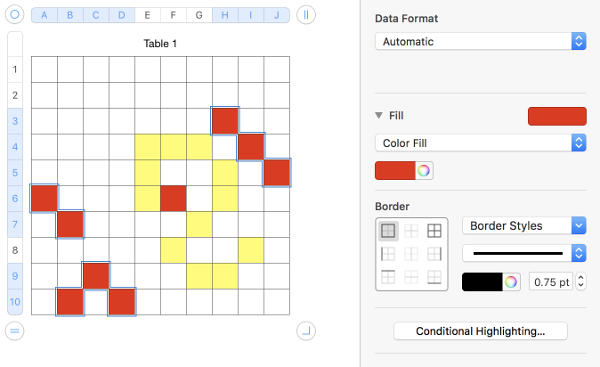
To copy cells within a table, or to another table, drag the selected cells while holding down the option key. You can also copy cells by selecting them, choosing Edit > Copy (Command C), selecting destination cells, and then choosing Edit > Paste (Command V). You can also paste a cell€™s content into multiple cells, which don€™t have to be adjacent to the copied cell or to each other. After copying a cell, select the destination cells and choose Edit > Paste. The cell€™s contents are copied to all the destination cells, in the same or another table, replacing any existing content. An alternative way to draw motifs in different colors: holding down command key select cells that will compose the desired shape
choose the current fill color again to fill the outlined areas

adding a second color: click on a cell, choose the second fill color

hold down command, select cells for a new shape
 color fill
repeat with color 3, and continue on 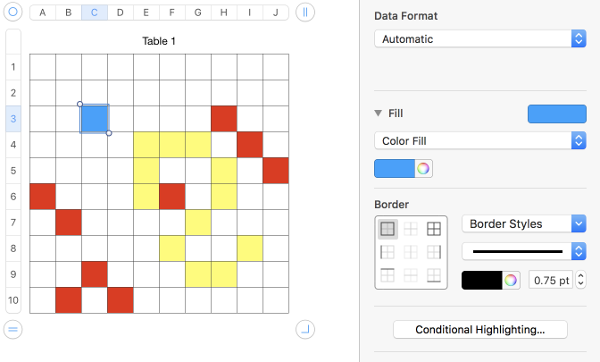
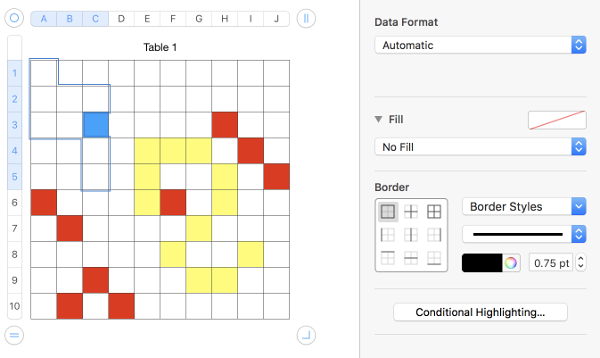
Not enough columns or rows for your motif? Click on top right or on the bottom left will copy and add the previous column or row including content 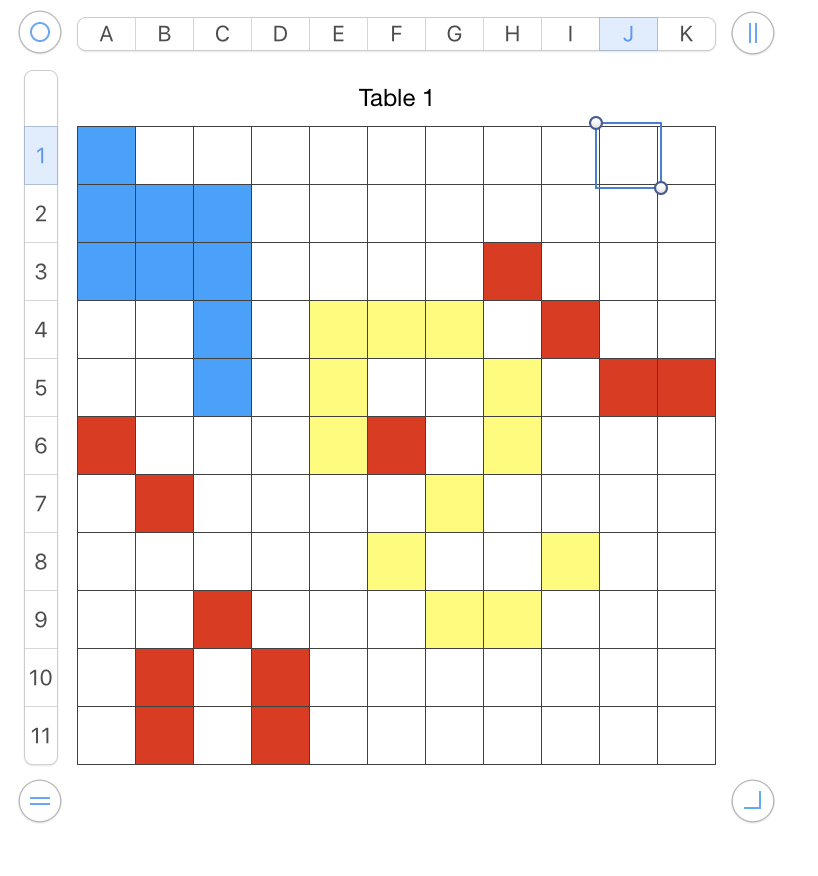 to clear unwanted filled cells in the added field, select column or row from tab reference letters (columns) or numbers (rows), choose “fill” as no fill
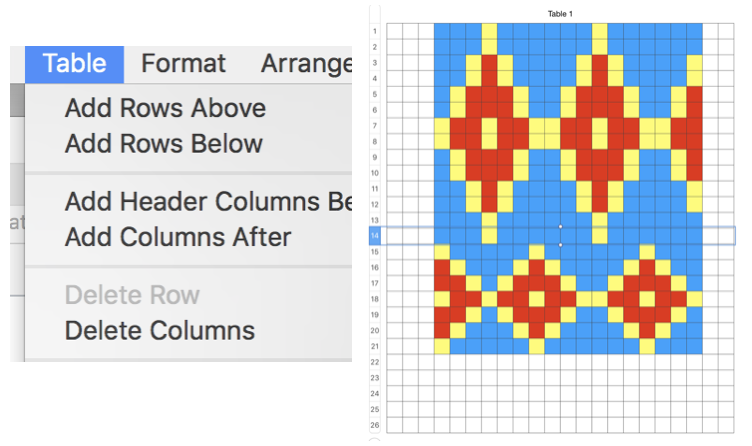
 To insert multiple rows or columns at once: Anywhere in the table, select a number of rows or columns equal to the number of rows or columns you want to insert, “click the arrow” next to one of the selected row numbers or column letters, then choose Add Rows Above or Add Rows Below (or Add Columns Before or Add Columns After). The arrows are visible as you hover or click in either tab, seen more easily when working in larger magnification, and often clicked on while unaware of doing so in lower magnifications
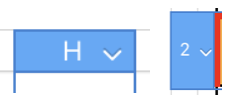
Alternately, click on table and in turn click and drag at the bottom right up, down, left or right for further adjustments to the total number of available cells,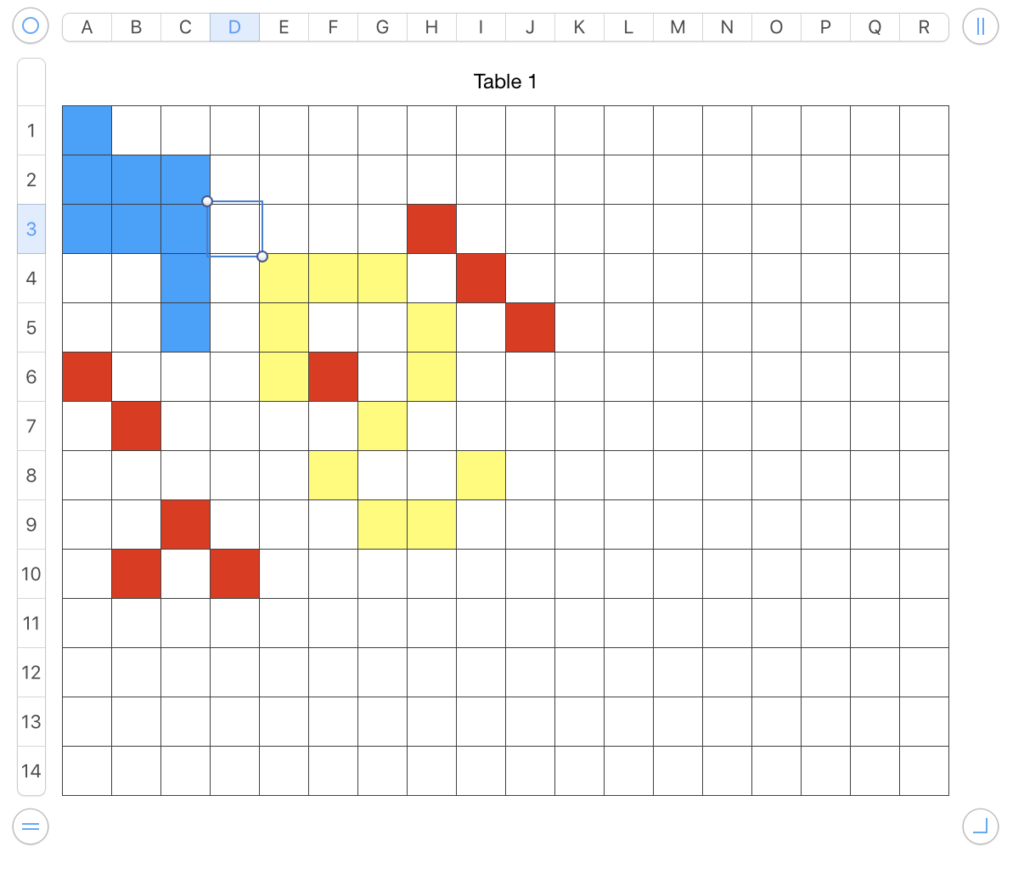 or simply repeat the fill in the selected column or row along with creating the added cells, and select areas to remove any unwanted color. In some instances, the added colored cells could serve as a deliberate design feature
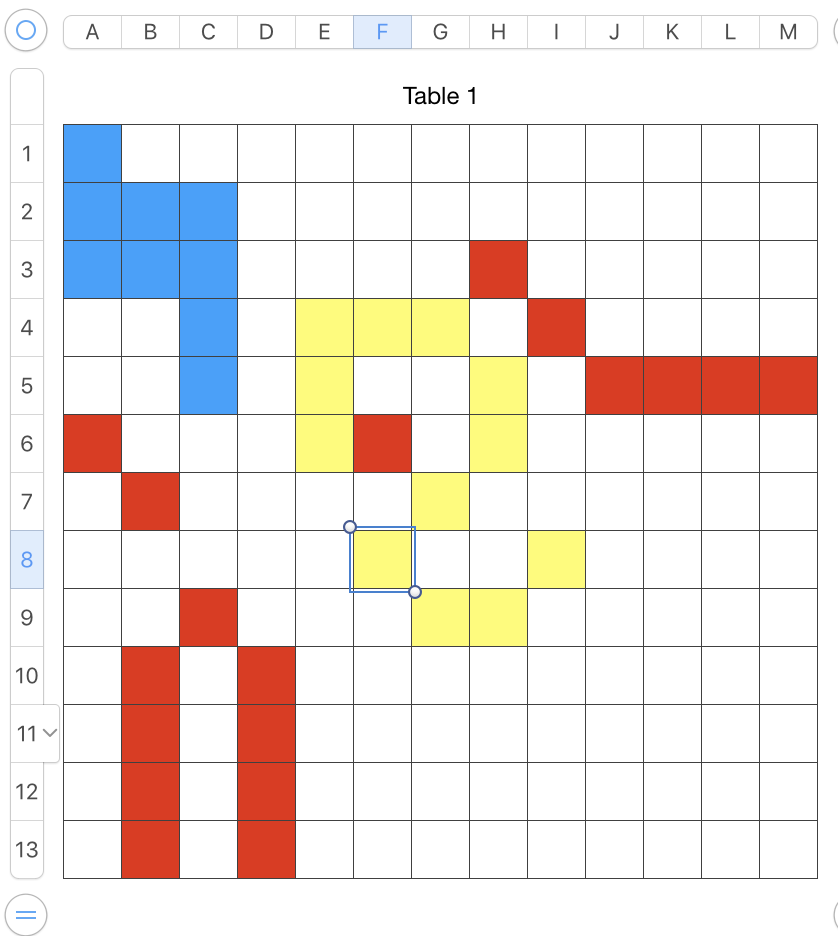
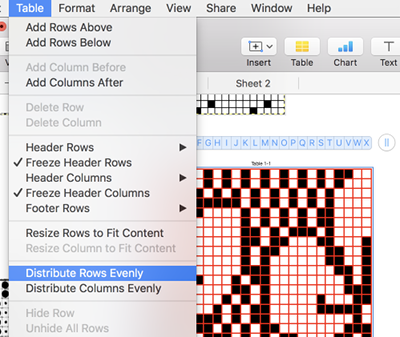
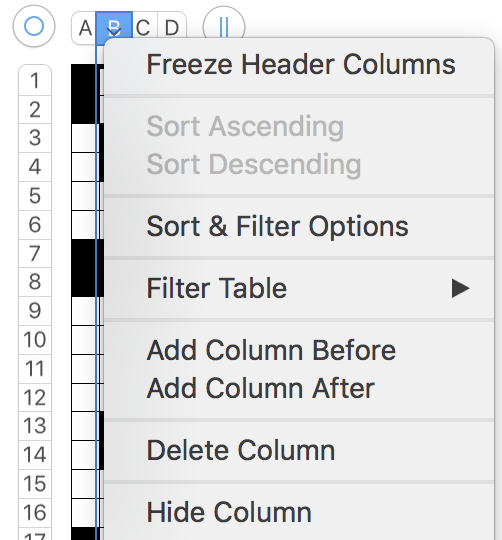
Adding columns and rows above or below and columns before or after using the table menu. Options are greyed out until a row or column is selected. 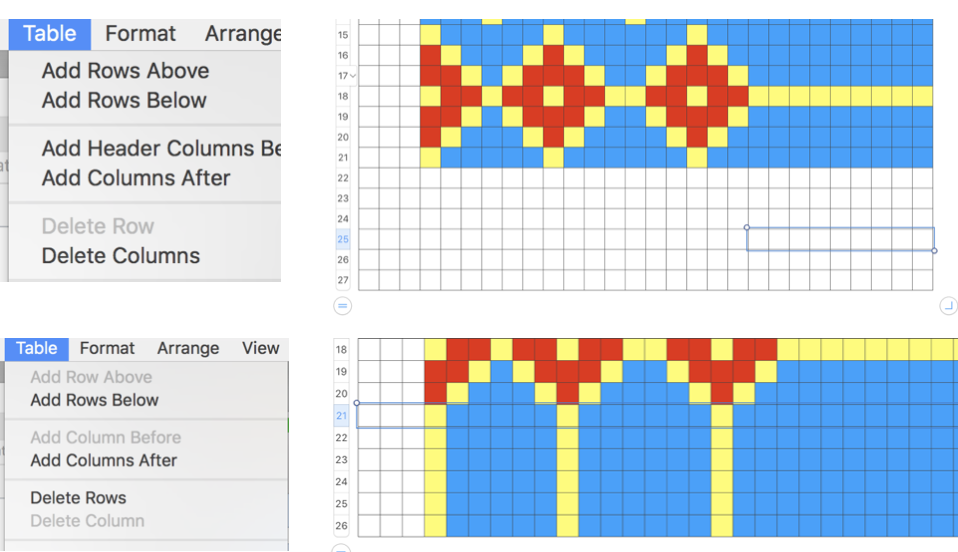
options also appear when you click on the arrow in the row or column reference tabs

Adding specific rows above or below can help scale coordinated designs. To add rows after a particular row, make sure the bottom row selected is the one after which you want the new rows added; to add rows before a particular row, make sure the top row selected is the one before which you want the new rows added. Then choose Table > Add Rows Above or Table > Add Rows Below,
or use keyboard shortcuts to add a row above a selected cell, press Option-Up Arrow. To add a row below a selected cell, press Option-Down Arrow. To add a row at the end of the table, press Return while the last cell is selected. To add a column after a selected cell, press Option-Right Arrow. To add a column before a selected cell, press Option-Left Arrow. To add columns after a particular column, make sure the rightmost column selected is the one after which you want the new columns added; to add columns before a particular column, make sure the leftmost column selected is the one before which you want the new columns added. Then choose one of the commands above. You can also use the Tab key to add a column to the right side of the table.
To delete a single row or column, hold the pointer over the row or column reference tab to see the menu arrow, and then choose Delete Row or Delete Column from the pop-up menu.
To delete several adjacent rows or columns, select the rows or columns and then choose Delete Selected Rows or Delete Selected Columns from the pop-up menu of a selected row€™s or column€™s reference tab.
To delete empty rows, drag the lower-left Row handle up or drag the lower-right Column handle up.
To remove rows with content, hold down the Option key while dragging.
To delete empty columns, drag the upper-right Column handle on inward.
To remove columns with content, hold down the Option key while dragging.
Moving a cell or groups of cells: select and choose group by using cell handles or commands, immediately click on the same selection again, and drag it to a new position within the same table. Moving the selection outside the table, onto a blank portion of the sheet creates a new table.
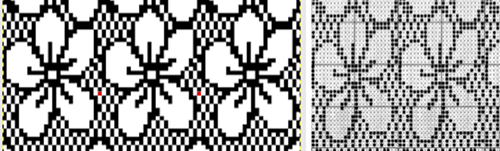
Having a large table area to work on allows for copying and pasting repeats in different configurations. 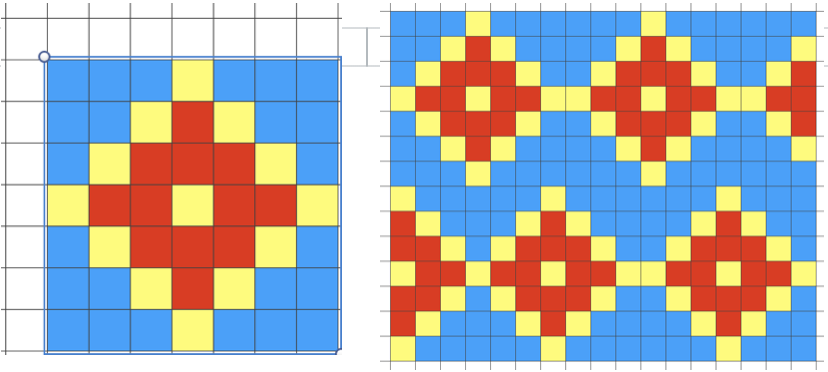
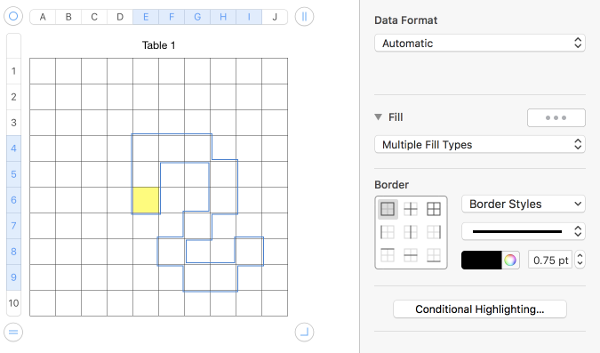
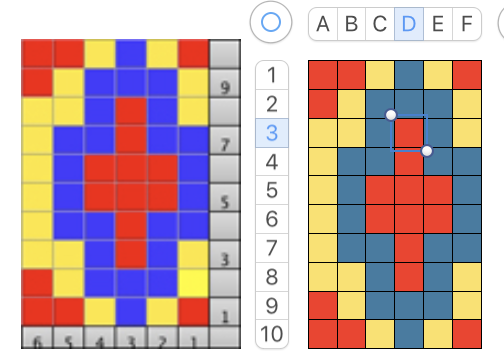
Added ways of working with cell groups: to select adjacent table cells, select a single cell, and then hold down the Shift key as you select adjacent cells. You can also click a cell, press, and then drag its handles through a range of cells. As seen above, to select nonadjacent table cells, hold down the Command key as you select cells. Continue to hold the key, and use Command-click to deselect any cell in the group.
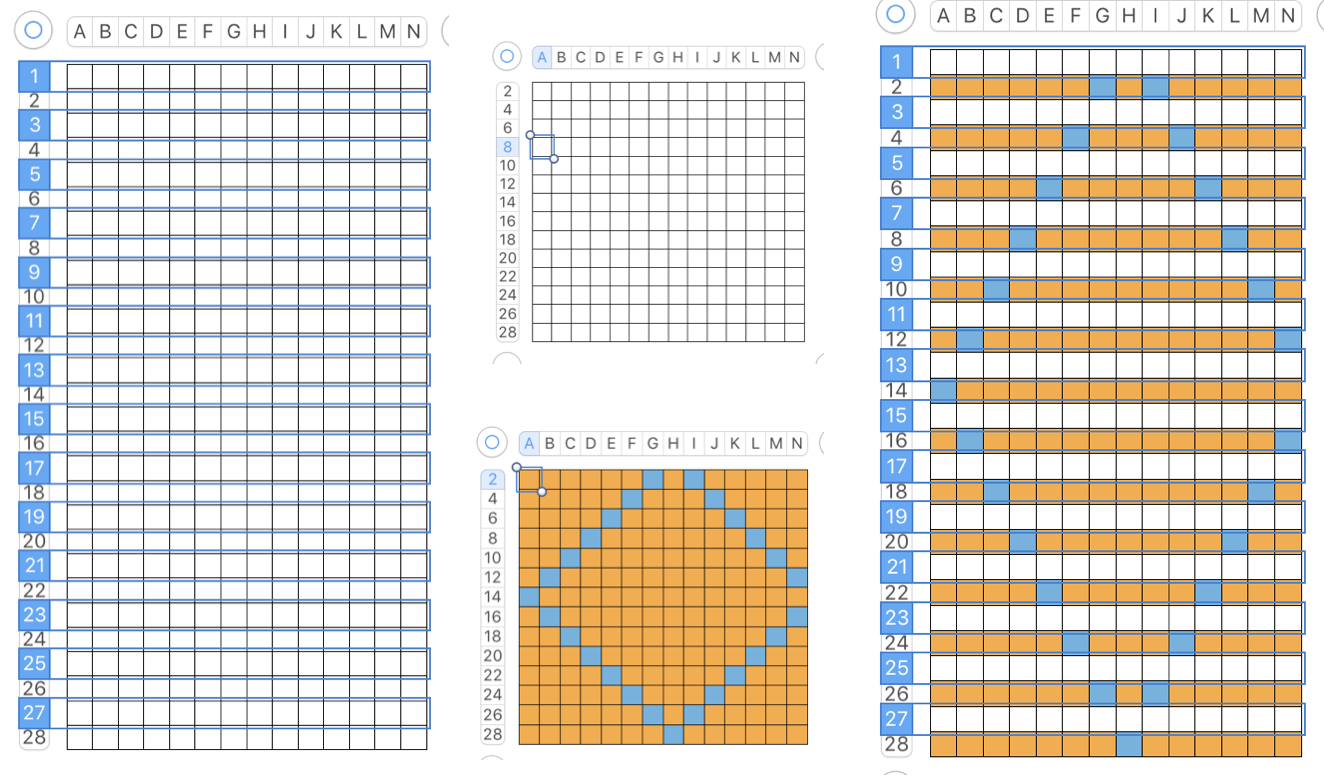
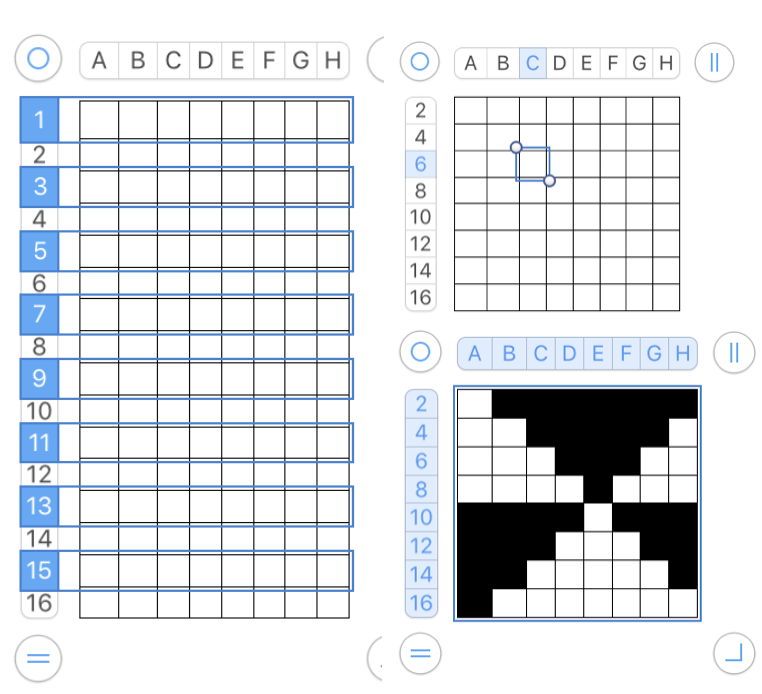
Adding, copying, and pasting tables or portions of them. Clicking on the + beside sheet # will create a new default table, on a new sheet, a new sheet of “graph paper”.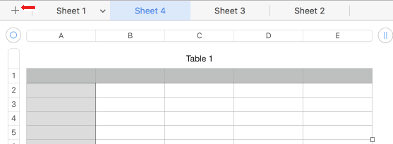
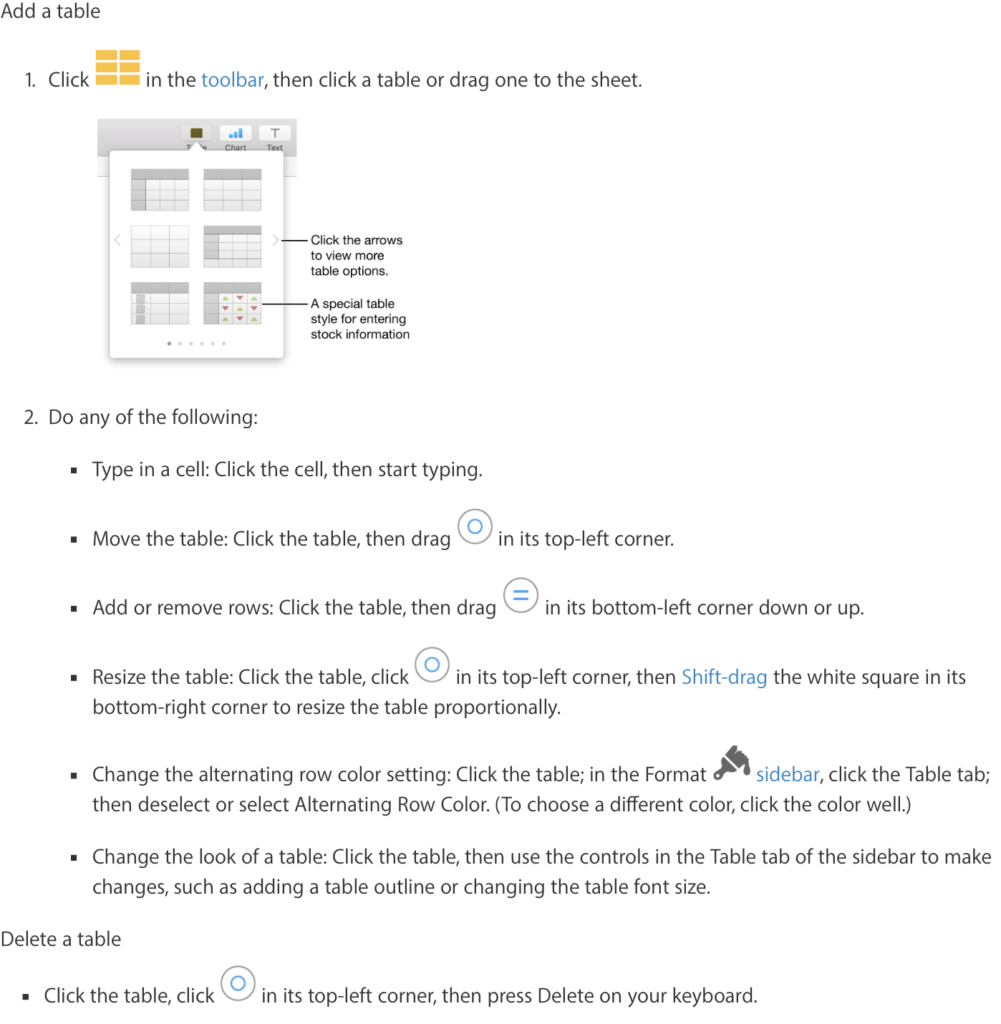
Tables and their data may be copied and pasted from one sheet onto another, or on the same sheet. To add a new table in the same sheet from available templates click  in the toolbar, then click a table or drag one to the sheet. Reviewing process once more: Move the table: Click the table, then drag in its top-left corner. Add or remove rows: Click the table, then drag in its bottom-left corner down or up. Resize the table: Click the table, click in its top-left corner, then shift-drag the white square in its bottom-right corner to resize the table proportionally. Change the alternating row color setting: Click the table; in the Format
  sidebar, click the Table tab; then deselect or select Alternating Row Color. (To choose a different color, click the color well.). Change the look of the new table: Click the table, then use the controls in the Table tab of the sidebar to make changes, such as adding a table outline or changing the table font size. To delete the table click the table, click in its top-left corner, then press Delete on your keyboard. An alternative way to create a new table matching presets is to copy a blank segment of one of your existing tables and paste them, adding and subtracting more blank squares, or even to copy a full table with color designs, and simply remove color fill after pasting.
Selecting a portion of a table that contains graphics and choosing copy and paste will reproduce the selected portion as a new table, usually at the upper left of the sheet, sometimes on top of a preexisting table. When working on large charts, the pasted table may be “hard to find”. Reducing magnification to 25% sometimes makes that easier, since larger sheet area then comes into view. Clicking on any tables and dragging on the at their upper left allows one to move the contents to its desired location.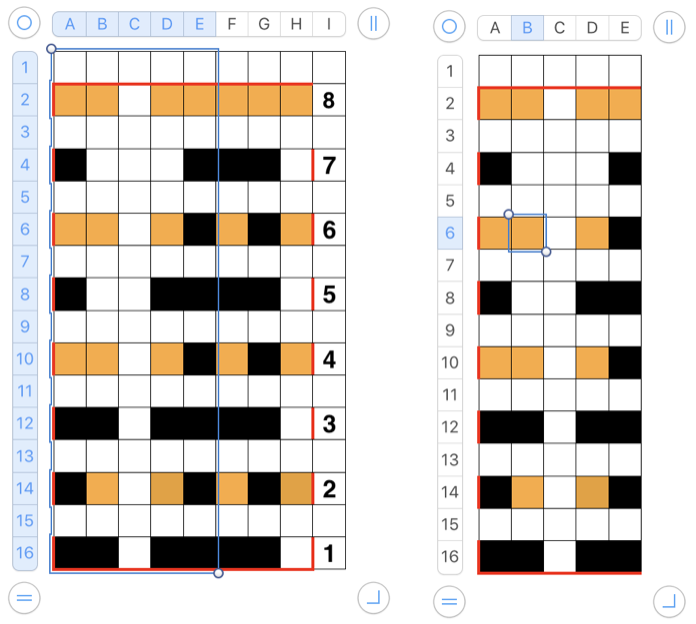
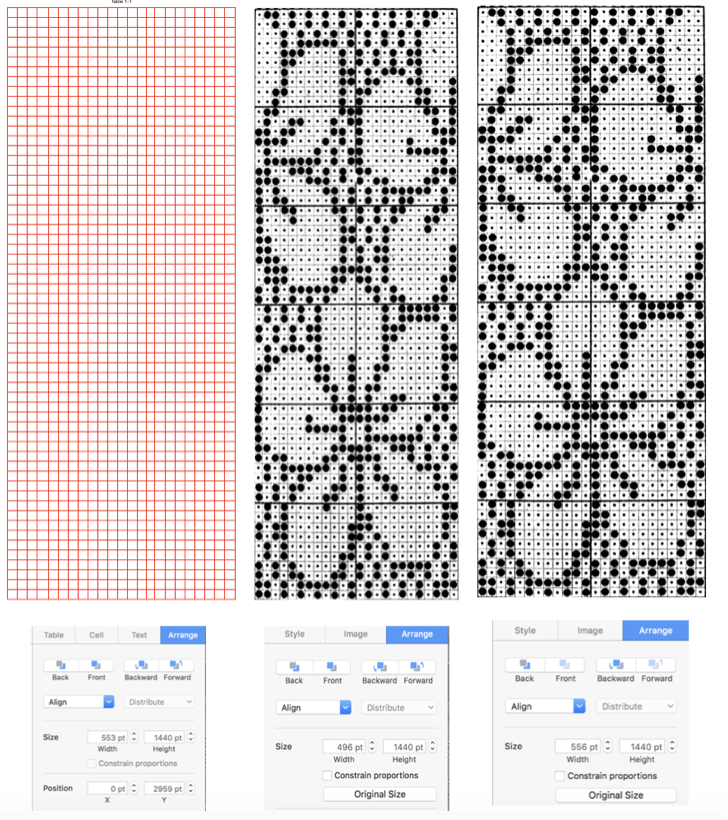
Fine-tuning table size and positions may also be achieved by changing values in the size and position sidebar format options. Click on arrows for default size moves, or click in respective value boxes and type in the desired number, hit return 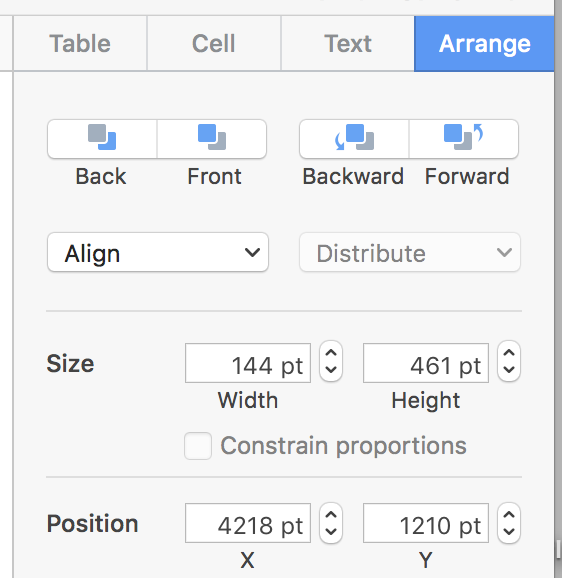
Some of my tables have table 1 above the graphics, some not. That can be changed by clicking on the table name box in the format table menu 
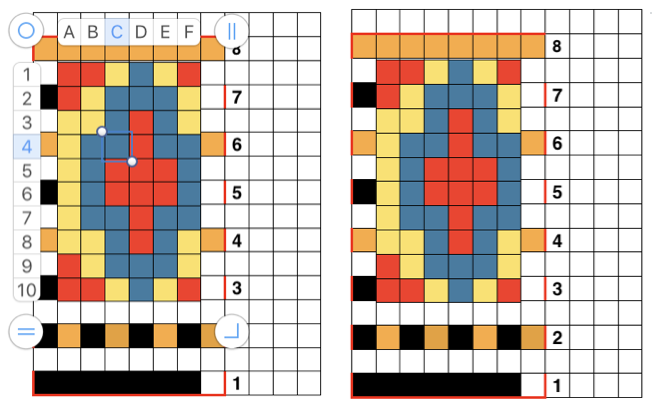
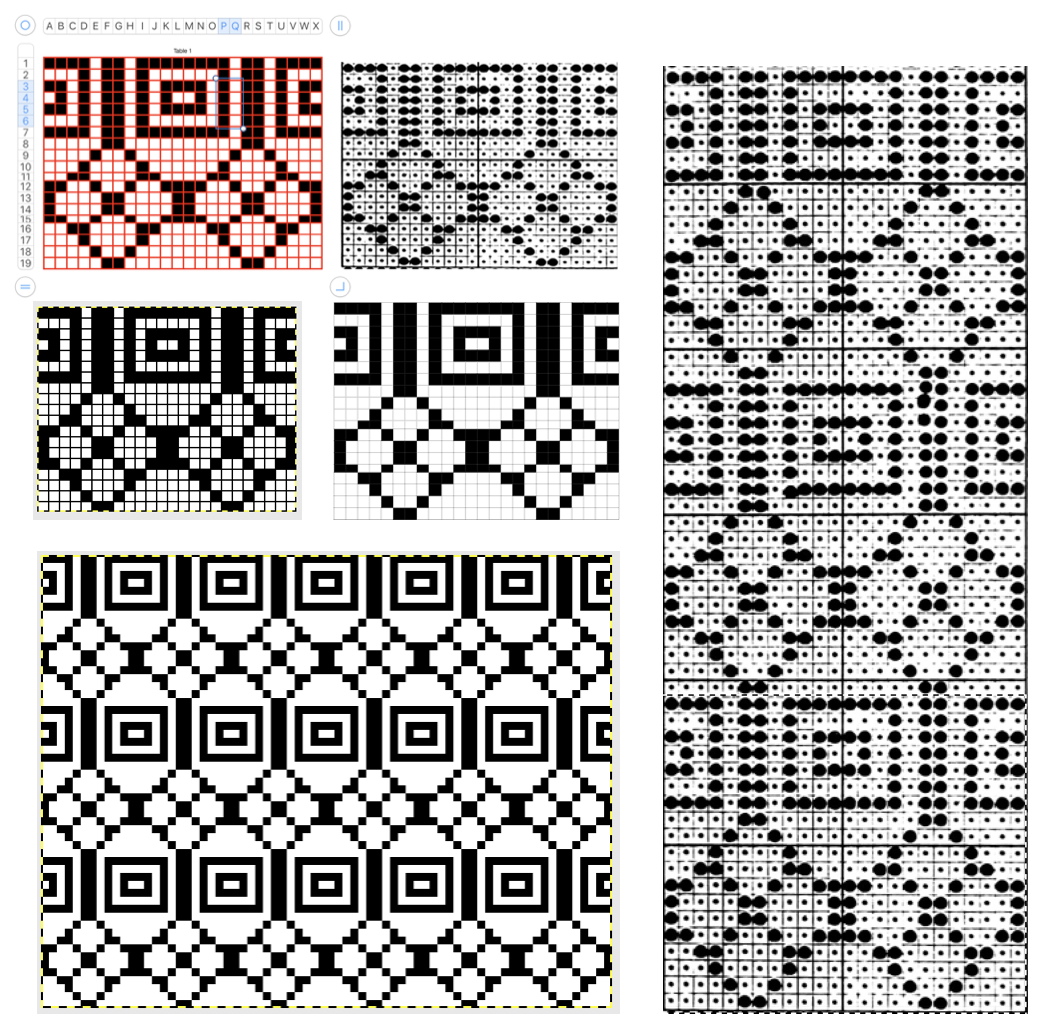
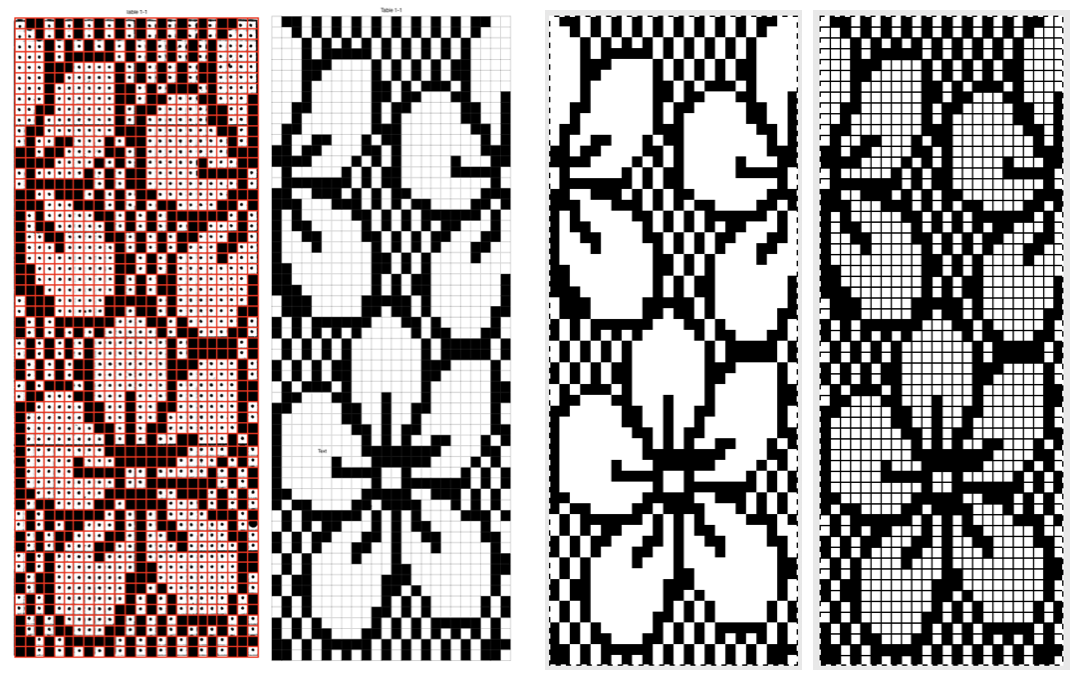
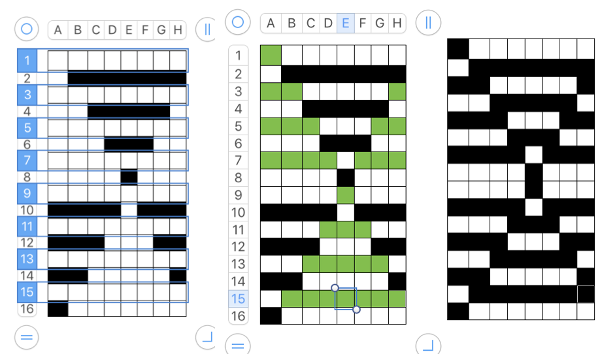
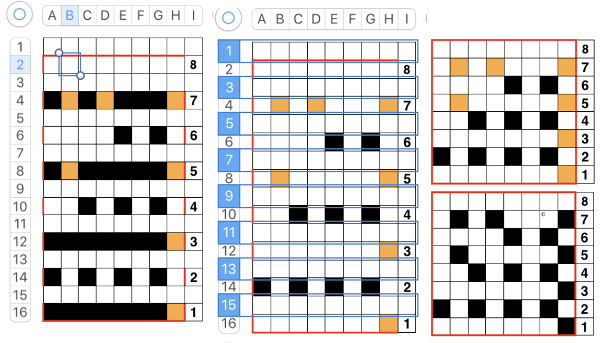
or click the table, Control-click the row number for row 1, then choose Hide Table Name or Show Table Name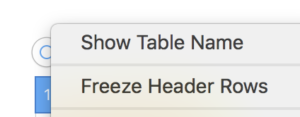 Triple-click the name at the top of the table, then type a new name to rename it. Keeping a “name” helps track versions such as when working in color separations, where a whole table is repeated and altered in a series of steps while preserving the previous one. Below a table segment is selected, copied and pasted as a new table. The new table is moved into a position next to the original. To combine the tables in order to create a new design, choose arrange from the format menu. In this instance, I chose to position the new table by clicking on it and selecting the back paste option. Once you click on a blank part of the sheet, the table tabs will disappear. The tables are visually merged, but in fact remain separate tables, each of which can be moved, resized, added to, and otherwise altered.
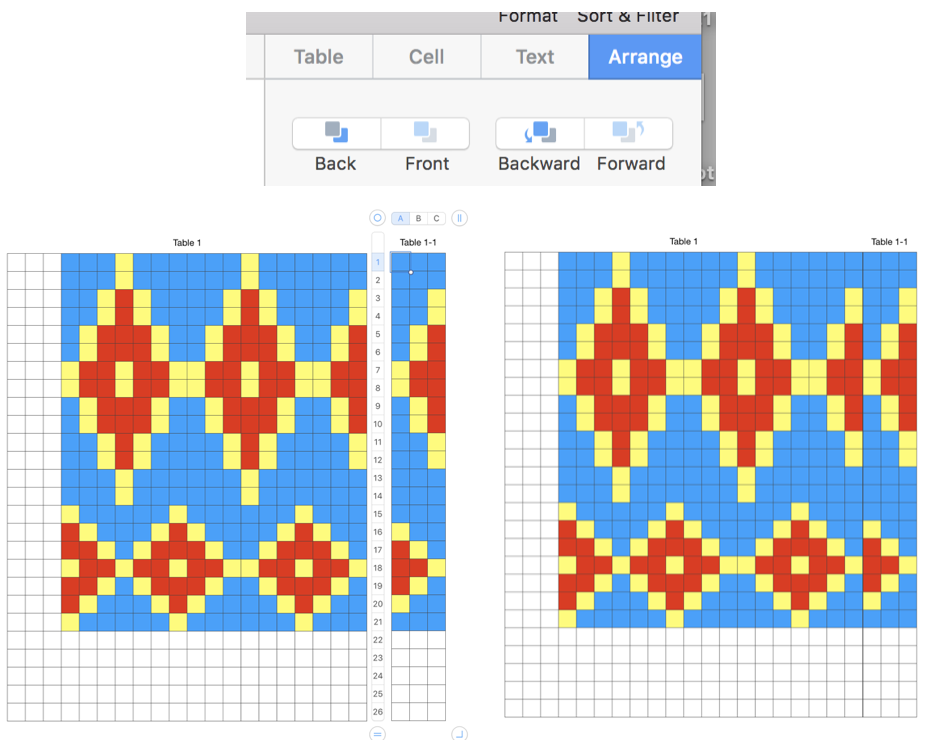
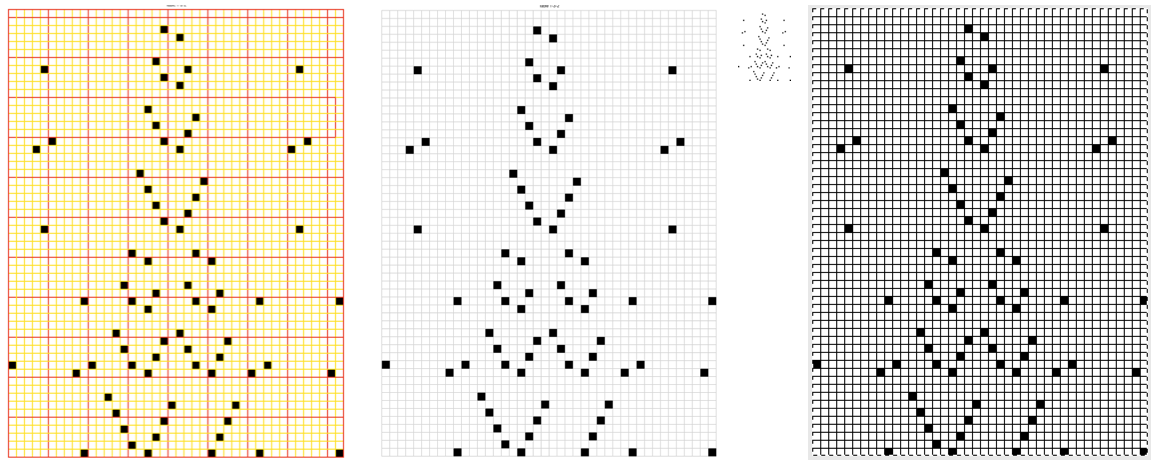
It is also possible when working on 2 tables to select and cut out a segment or more. Below, the table with the cut-out window is moved onto its unaltered table twin and shifted up (note numbers on right, and red border segments) 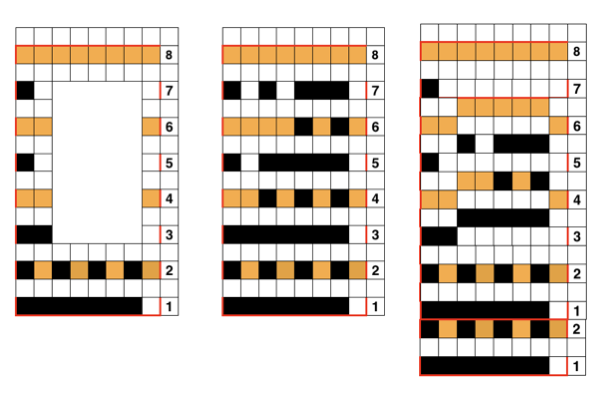
A different “table” with the same cell dimensions, may also be dragged and placed under (or over) the “cut” portion of the first. My placement here is slightly off intentionally to show table placements for under/ in back 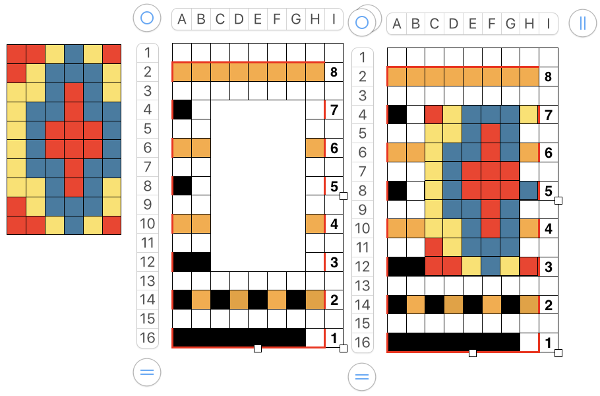
and placement over/ in front
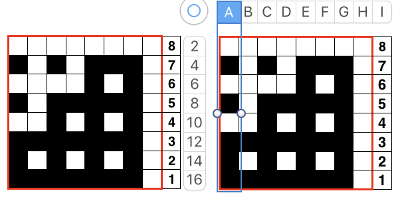
To screen grab tables with row, column tabs, and corner bullet markings click on any individual table cell (note the outlined cell with handle markings upper left and lower right), and use shift-command-4 to select area for saving. For a multiple-table grouping, hold the shift key while clicking anywhere in any single cell contents of multiple tables, and while still holding shift, add command-4 commands, select and save. Clicking anywhere outside the tables on the “sheet” results in tabs and bullets disappearing. Click on any cell in any table again, to move it, or make any other adjustments needed.
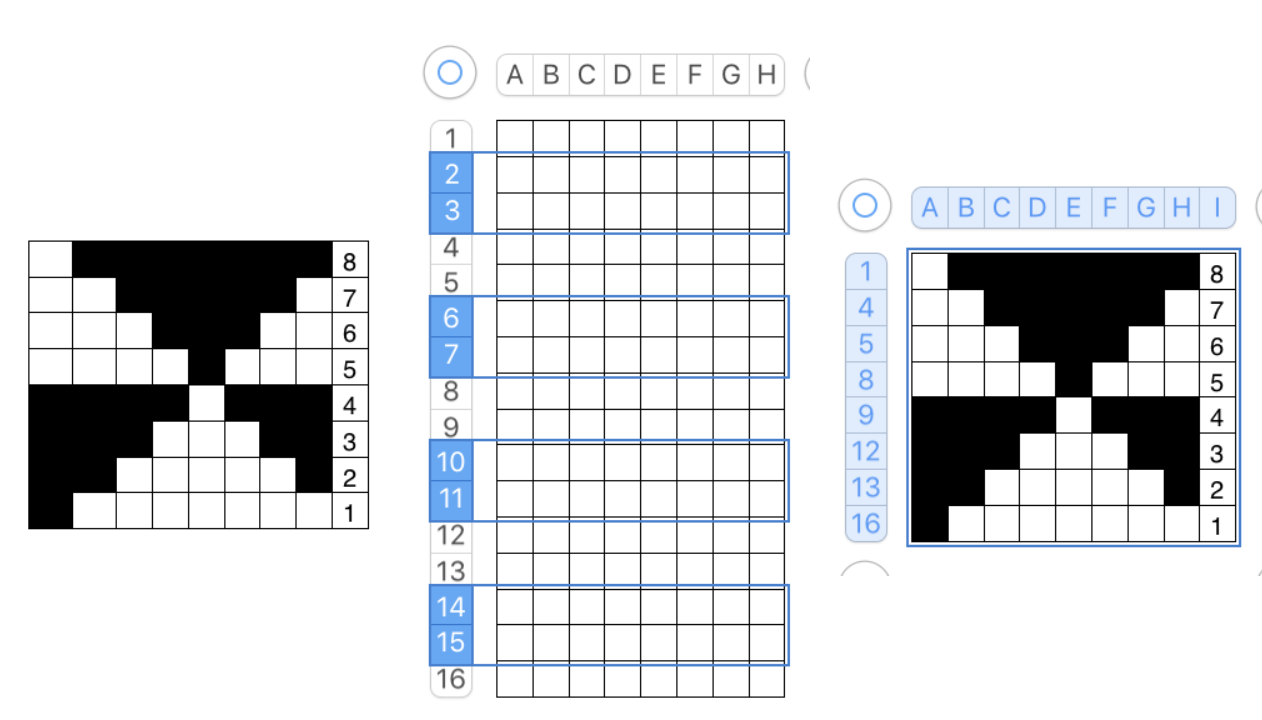
A helpful yellow dot: for sequential numbering in any row or column, fill in a minimum of 2 with number values ie 1, 2, 3, select all the numbered cells, a yellow dot will appear on the right 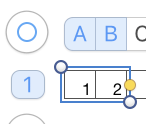 click on it and drag across the row of cells you wish to number and done
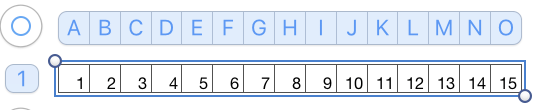 For numbering in the opposite direction, simply begin numbering on the right in reverse order for at least 2 cells, and use the same technique. For vertical numbering, once again, use the same principle at the top or bottom of the column you wish to number.
Multiple numbers, symbols, or letters in repeat (wish I knew of this feature or its possible availability in my earlier charting) Any table may be adjusted to accommodate adding text, shapes, or to expand on instructions. Working with shapes merits its own, separate discussion.
My favorite font, used in most of my charts that begin to address specific fabrics such as lace by adding symbols, is no longer available for distribution. For more on symbols and fonts see post
If colored cells are in use and text or symbols are added to any such cell, the ground color may be lost. If a color is added to that cell after the text/symbol entry ie by copy and paste of a colored cell, the text is lost. Arrange behind from the format menu does not work in this instance. The quickest method is to use the command key, click on any cell containing only the chosen color you wish to use behind the text, drag and drop selected content onto text, and the color will appear behind it.
Another method is to use command key, click on the chosen colored cell, use format menu to choose color fill, click on the original cell and the one you now wish to color, finally choose color fill from the format menu again
Online published shortcuts for using the program with downloadable as PDF
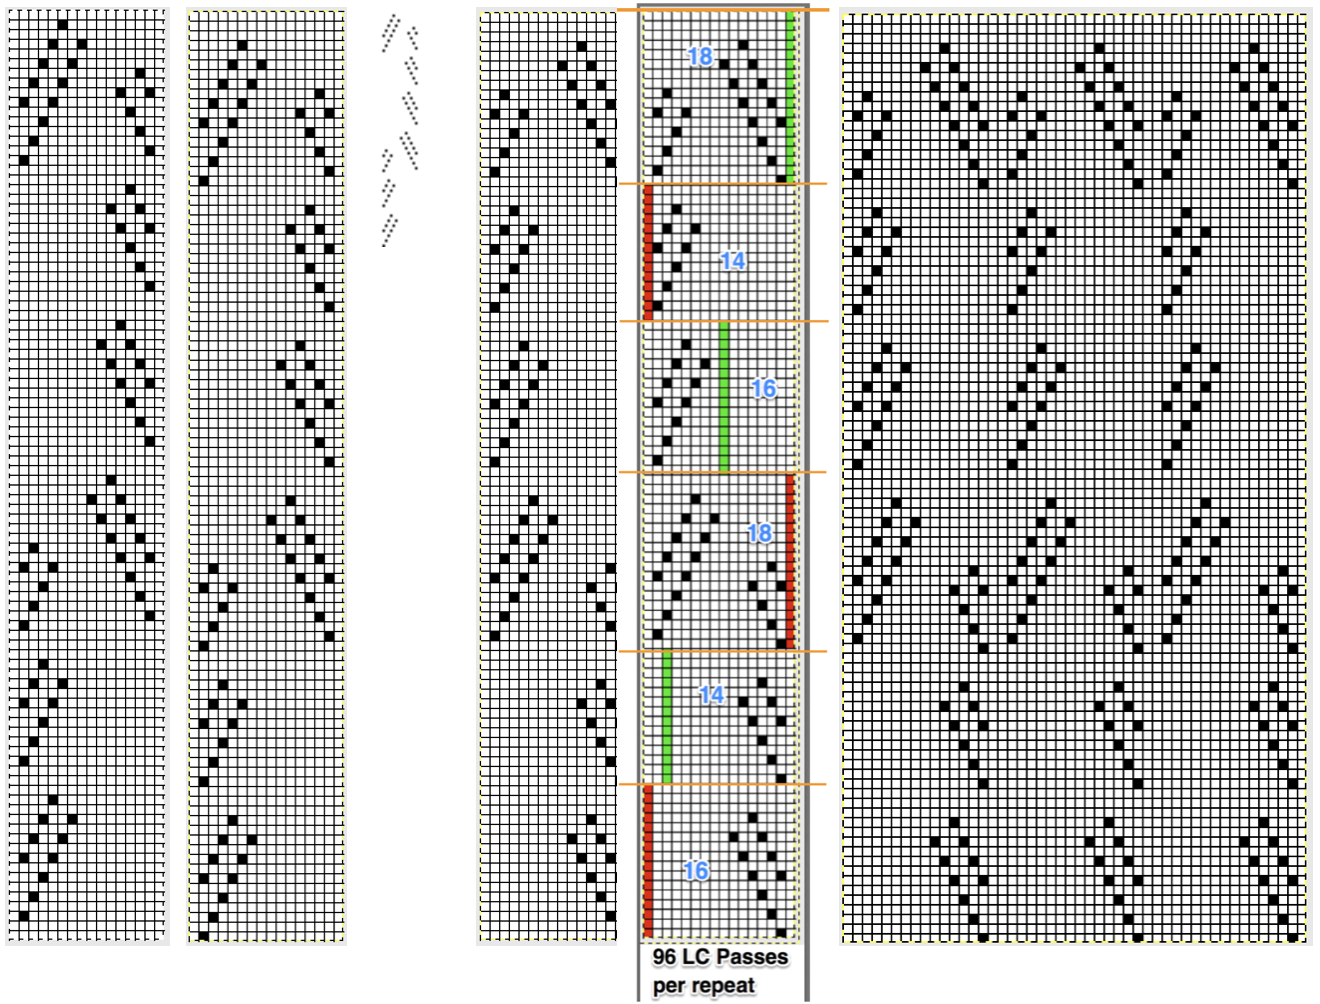


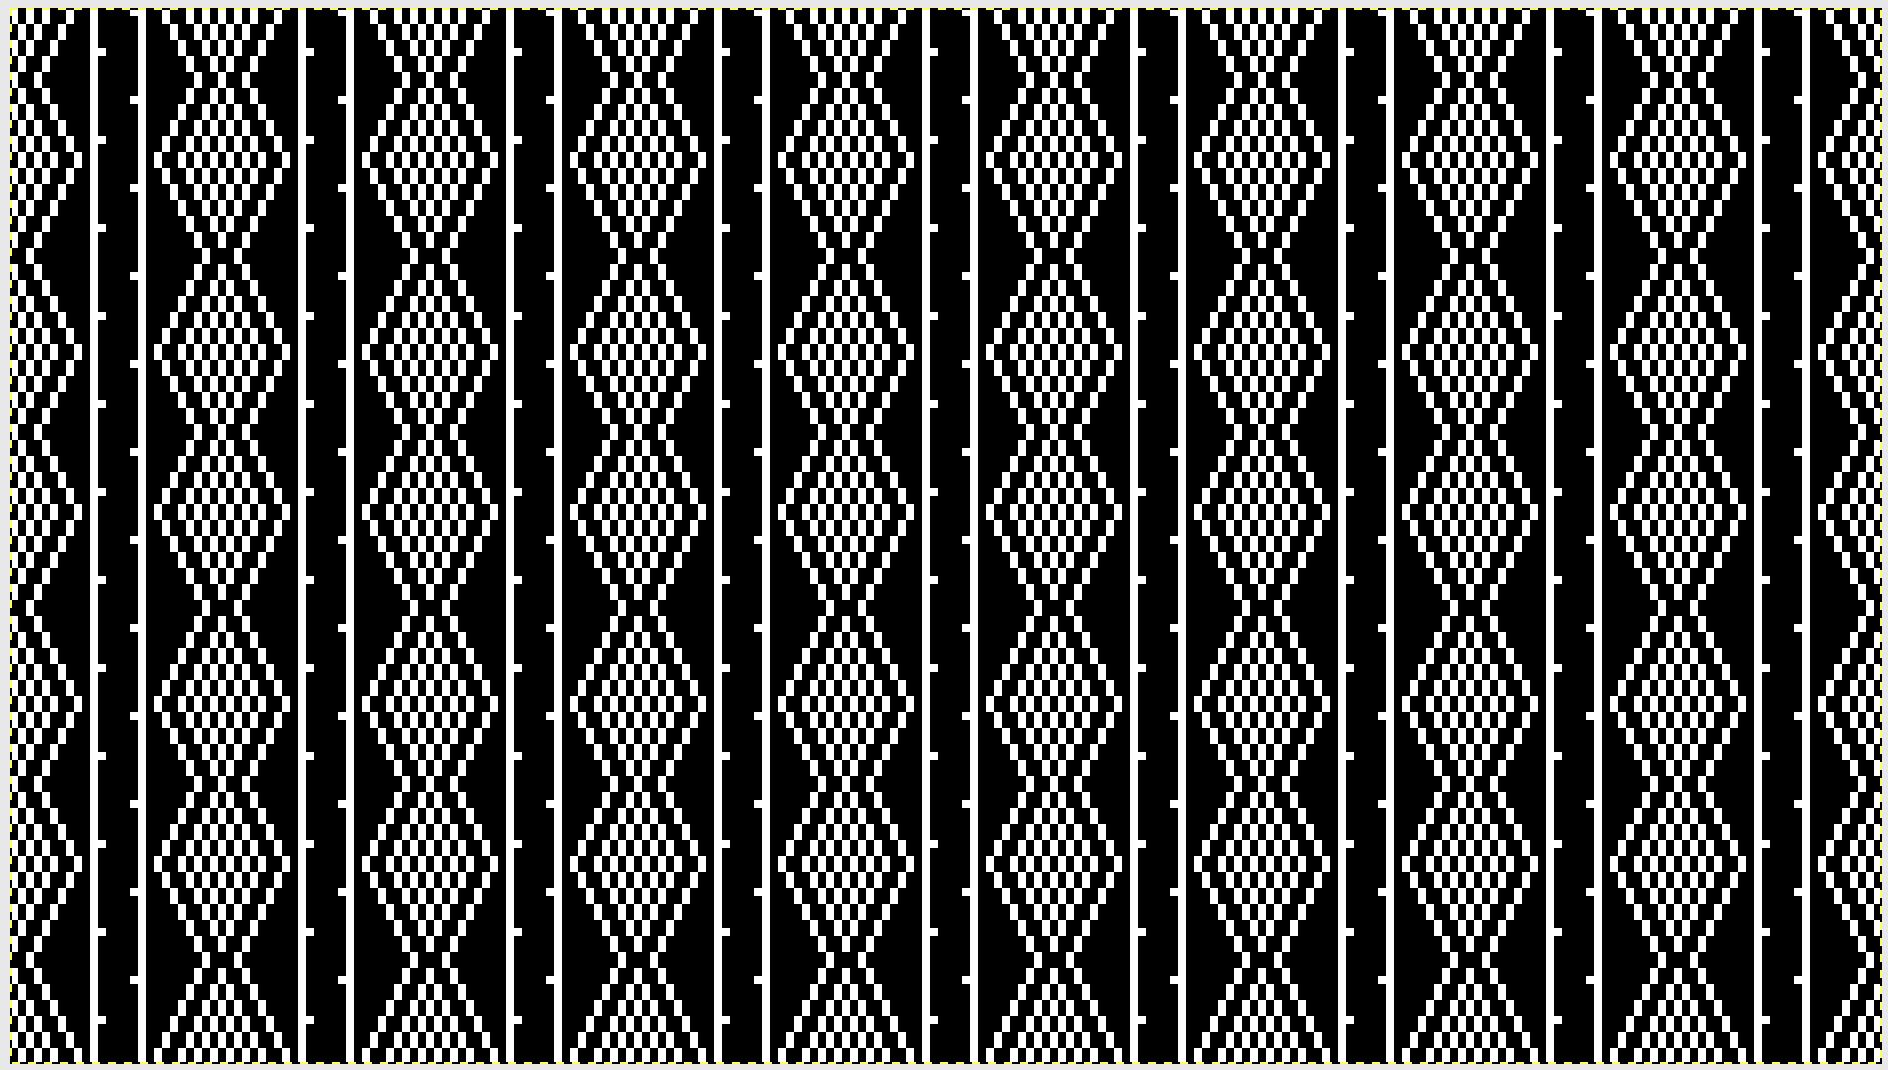
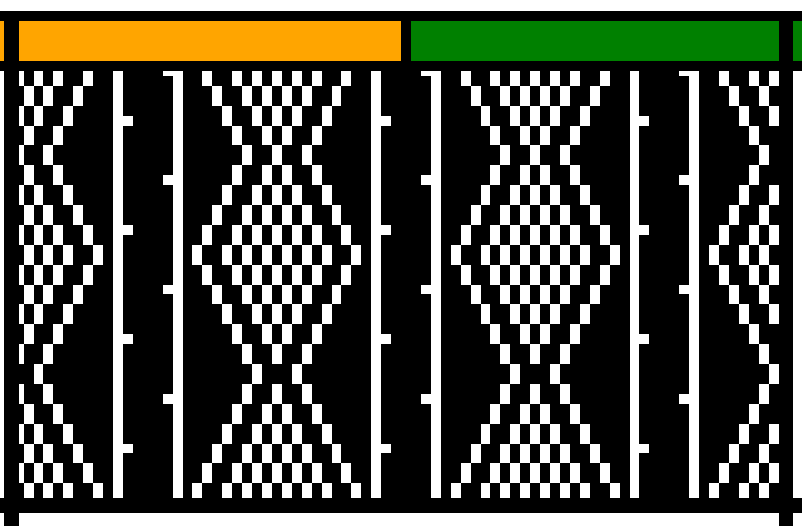
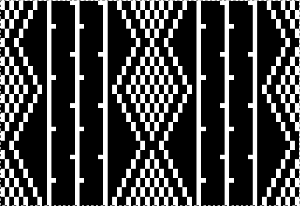
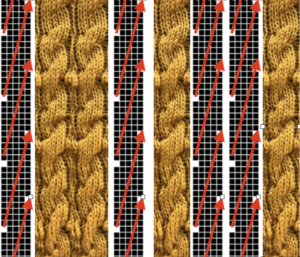
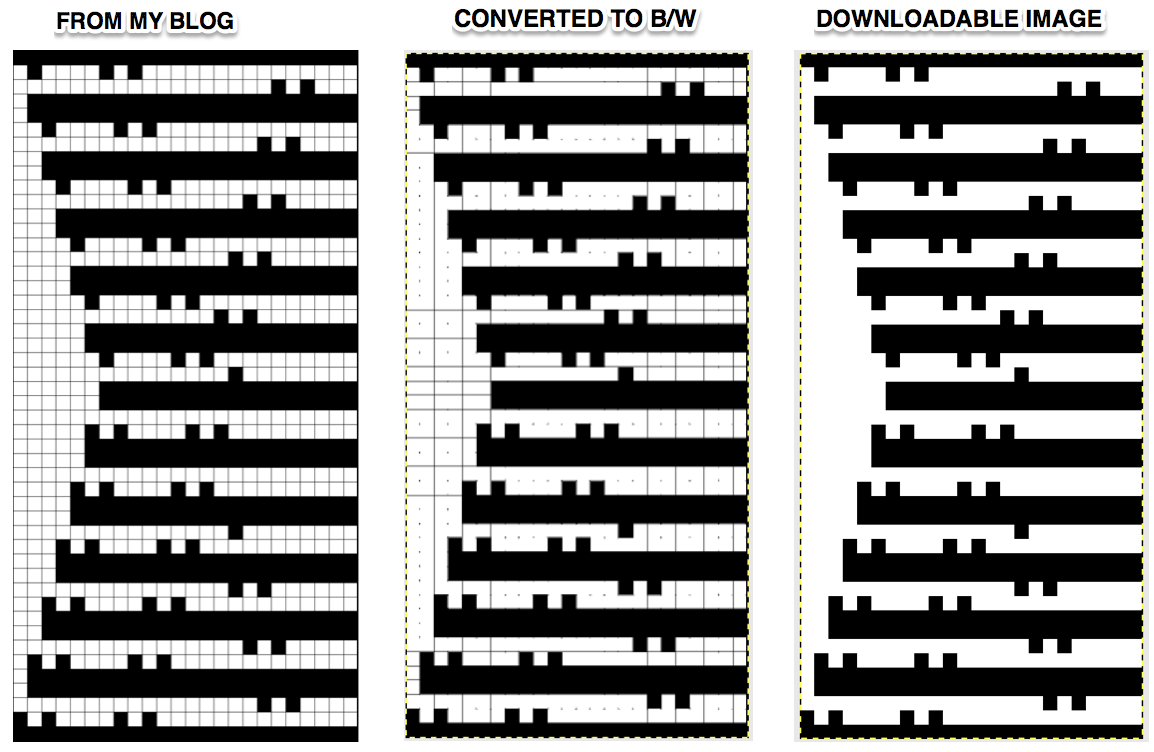
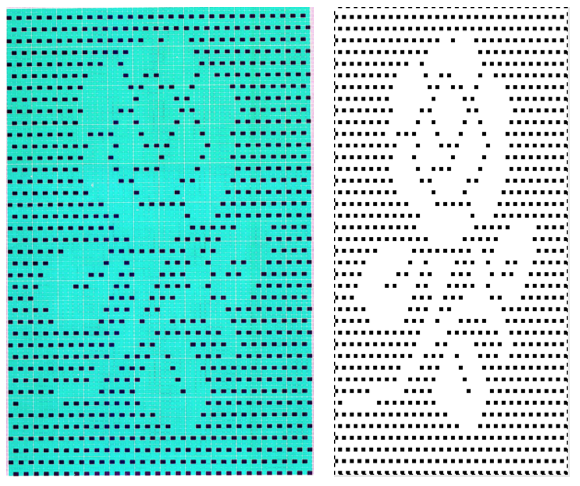
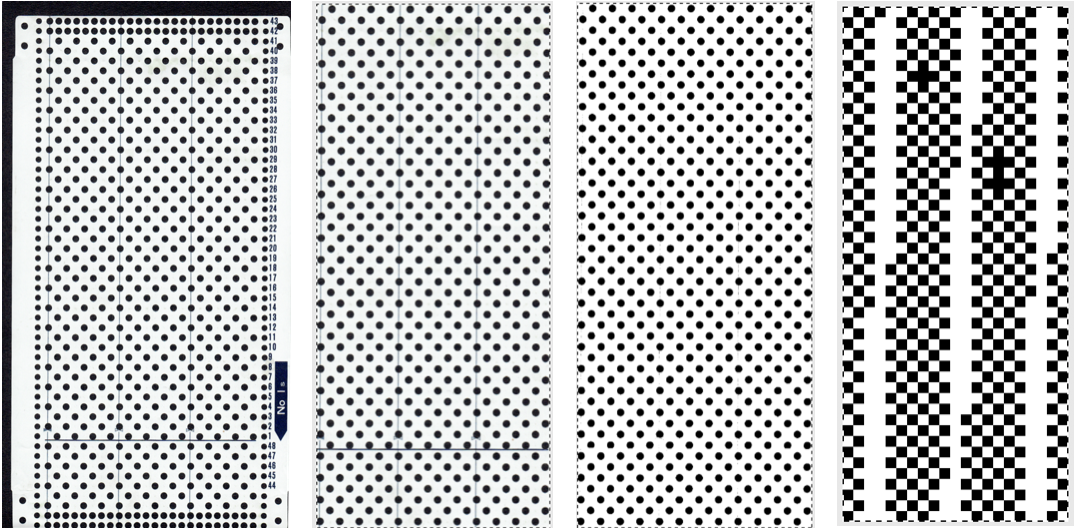
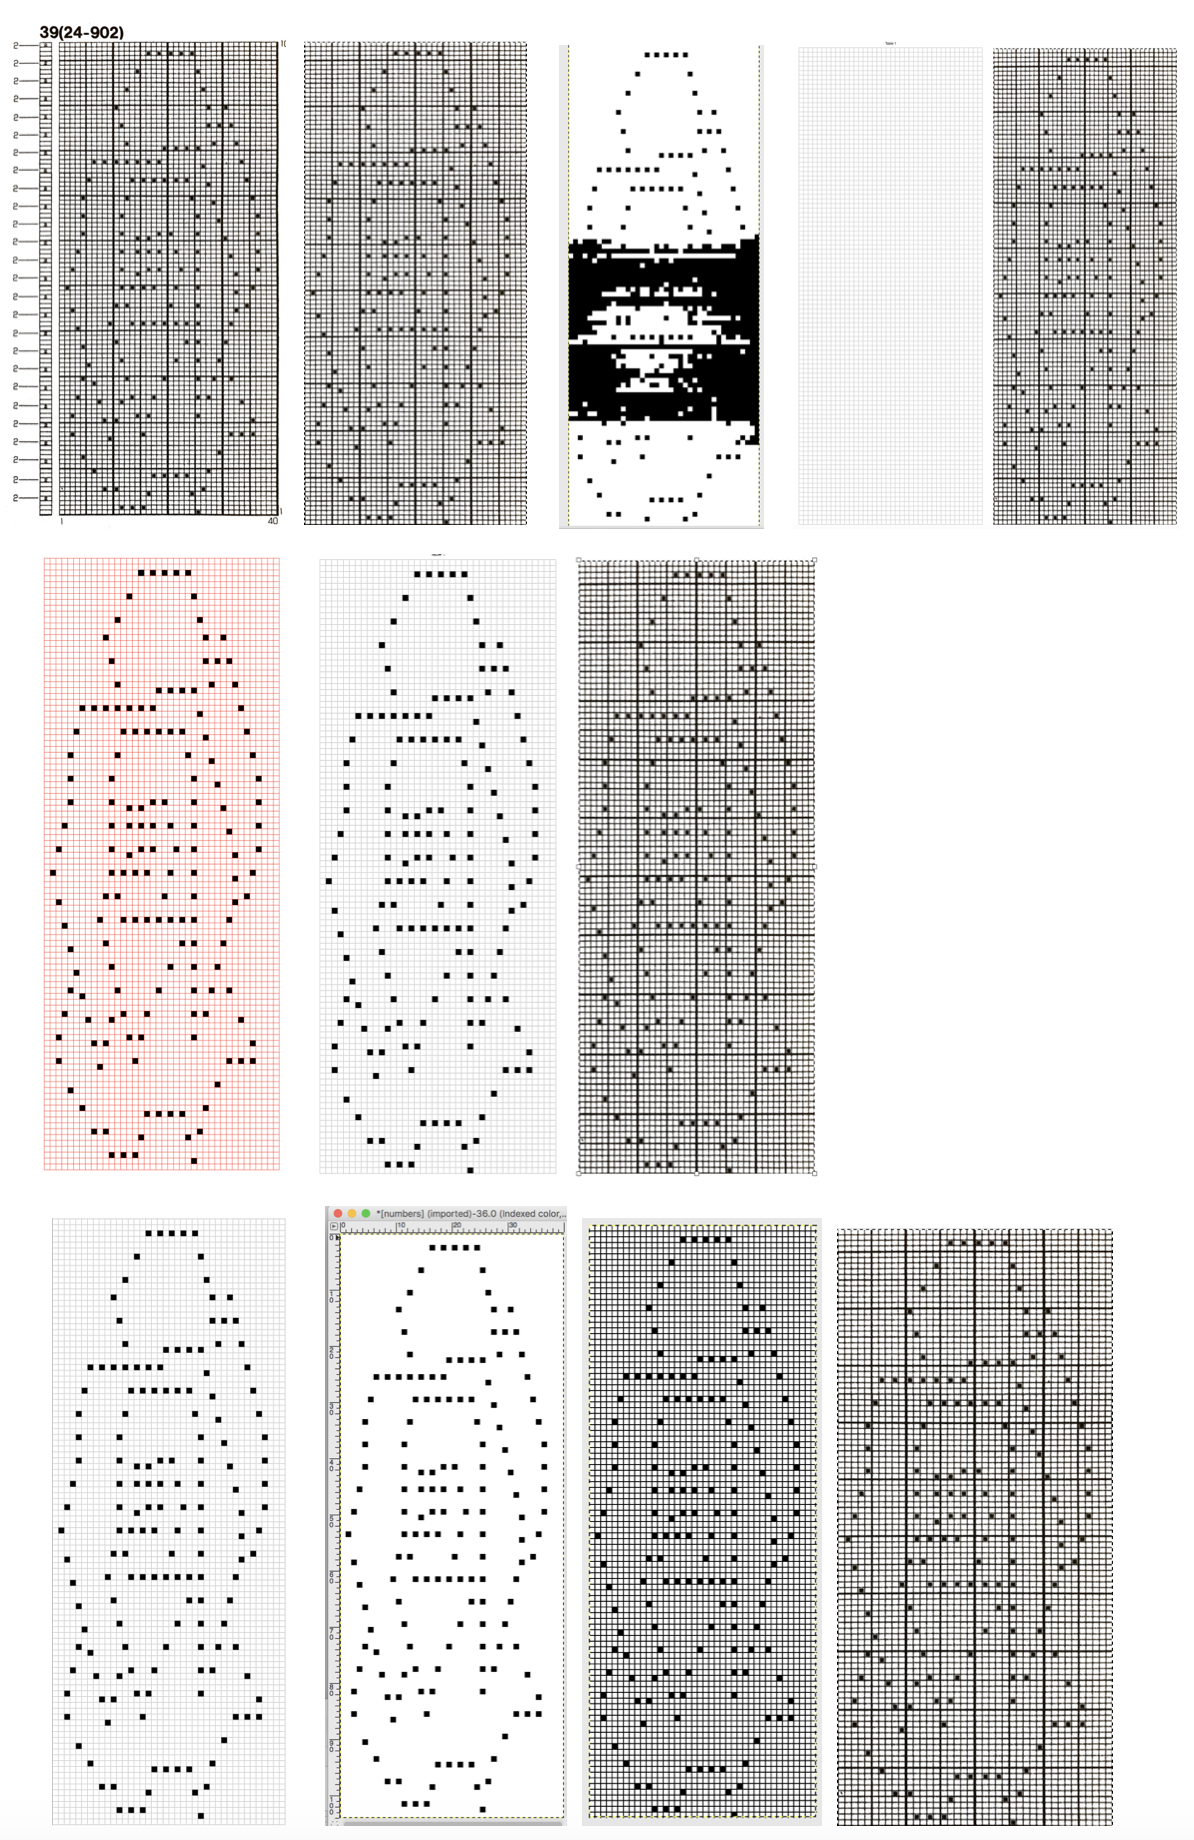
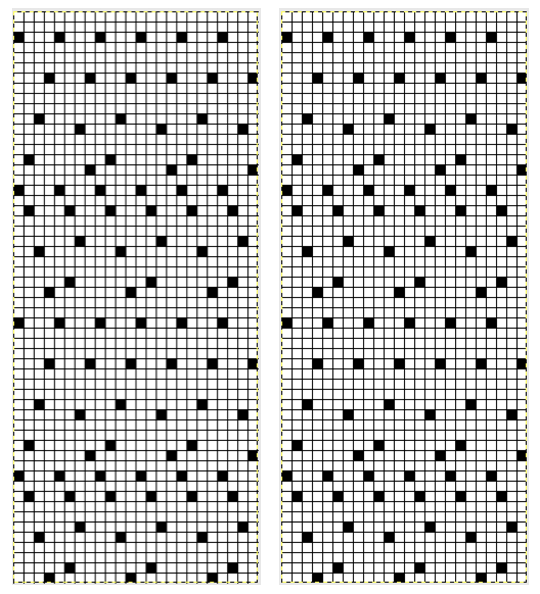
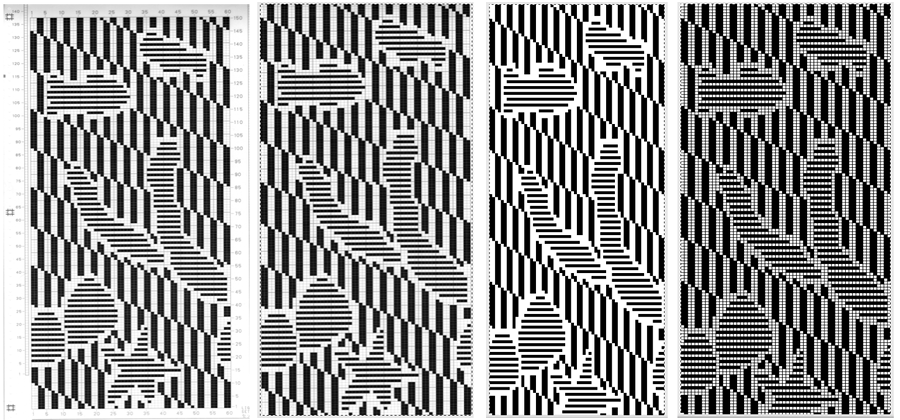
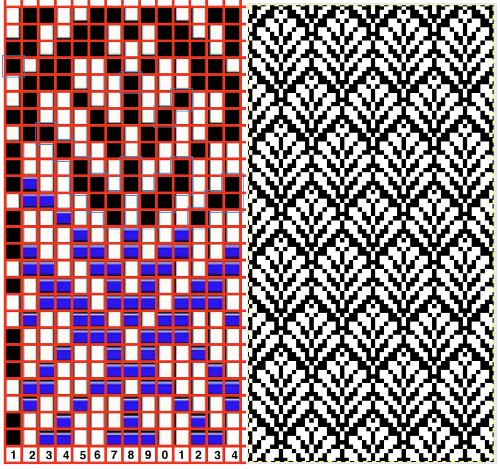
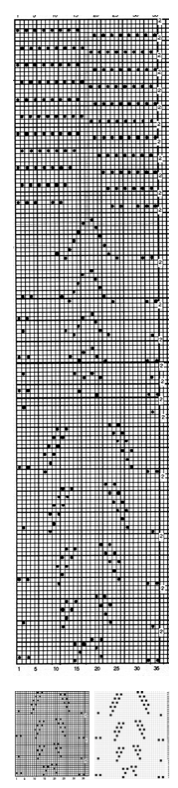
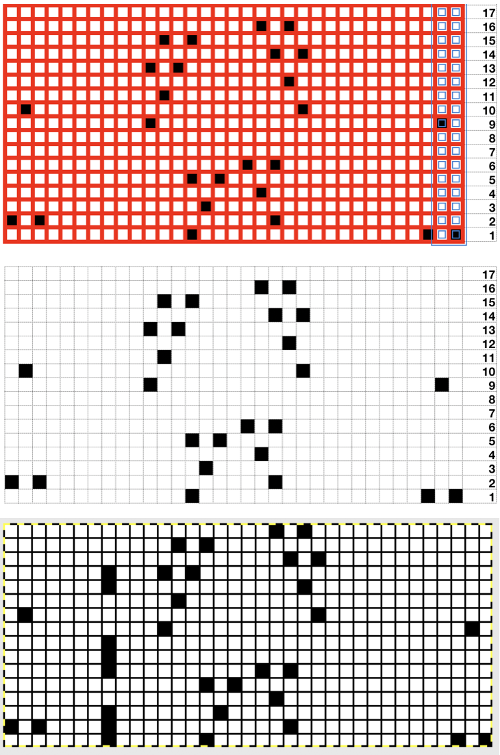
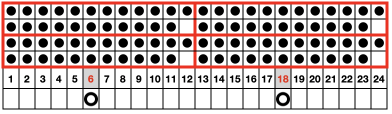
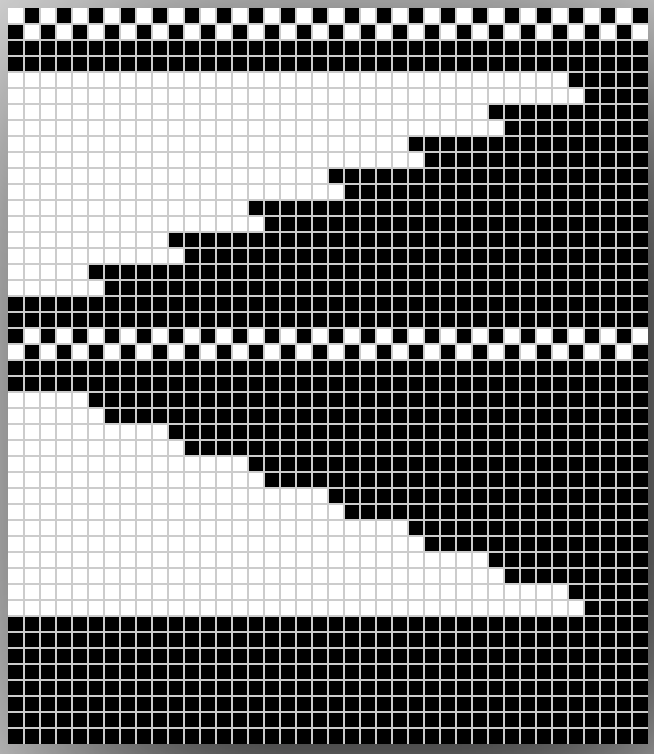
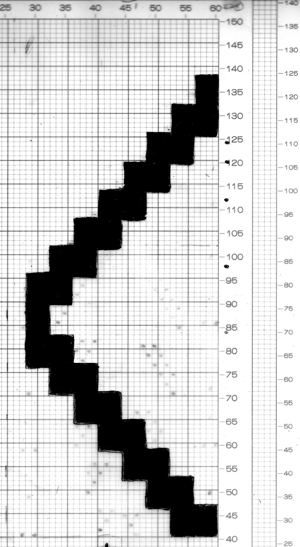
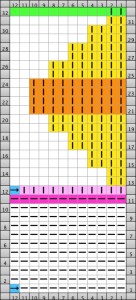
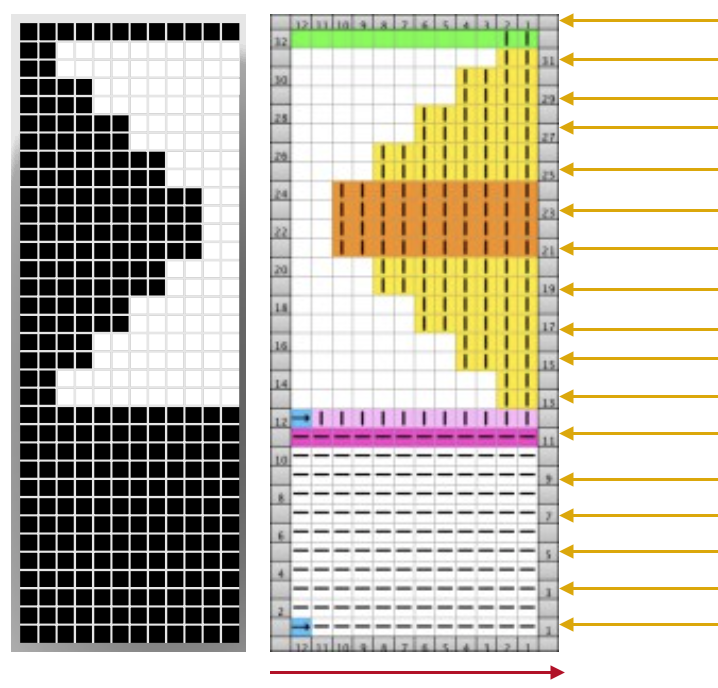
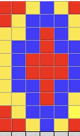
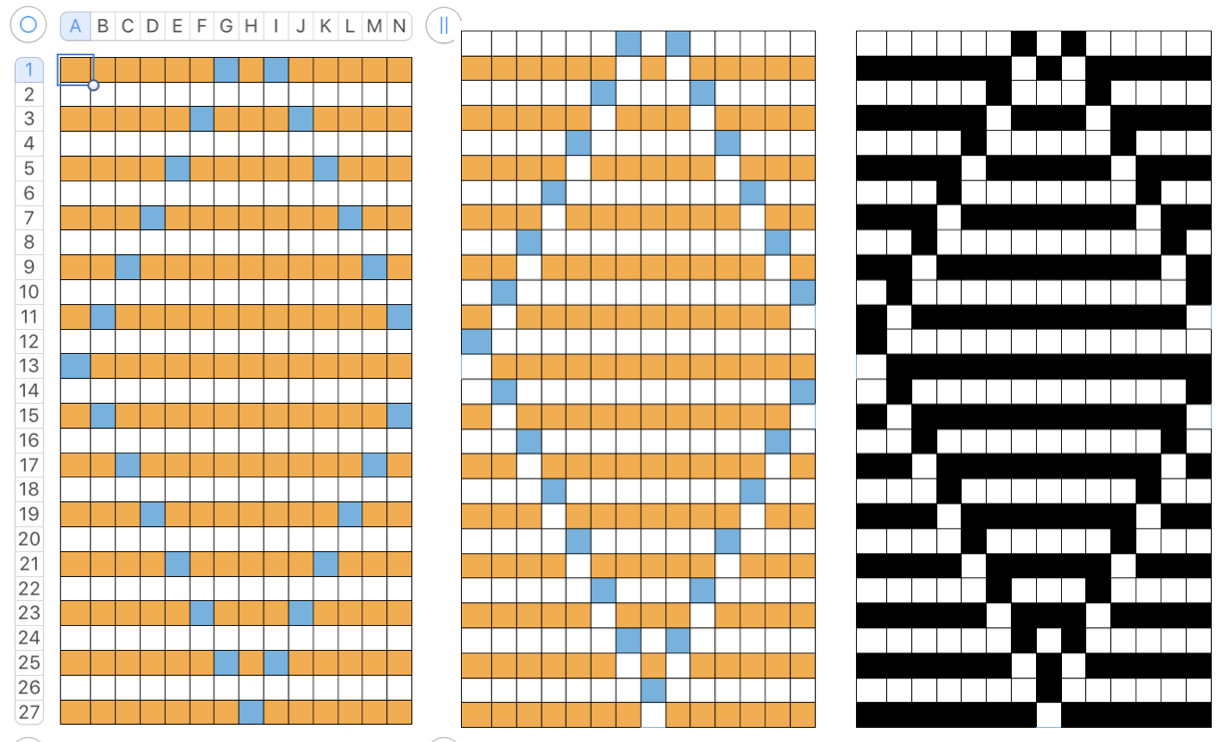
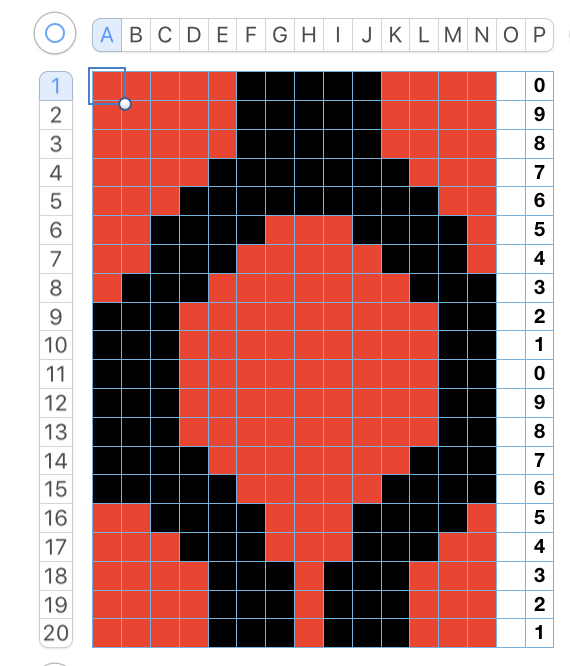
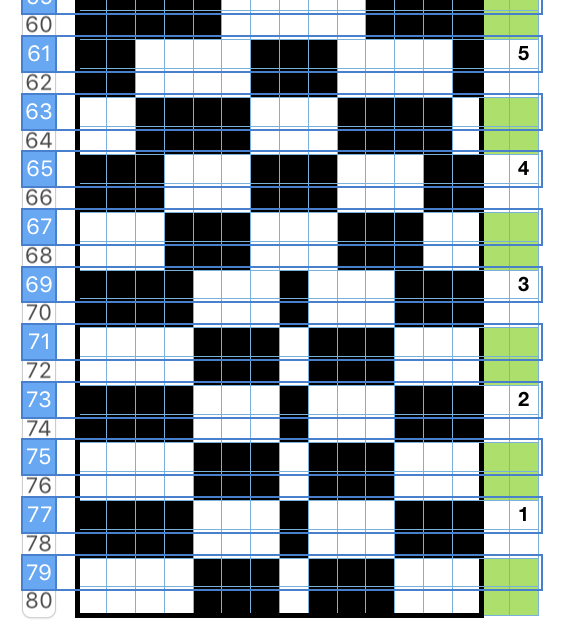
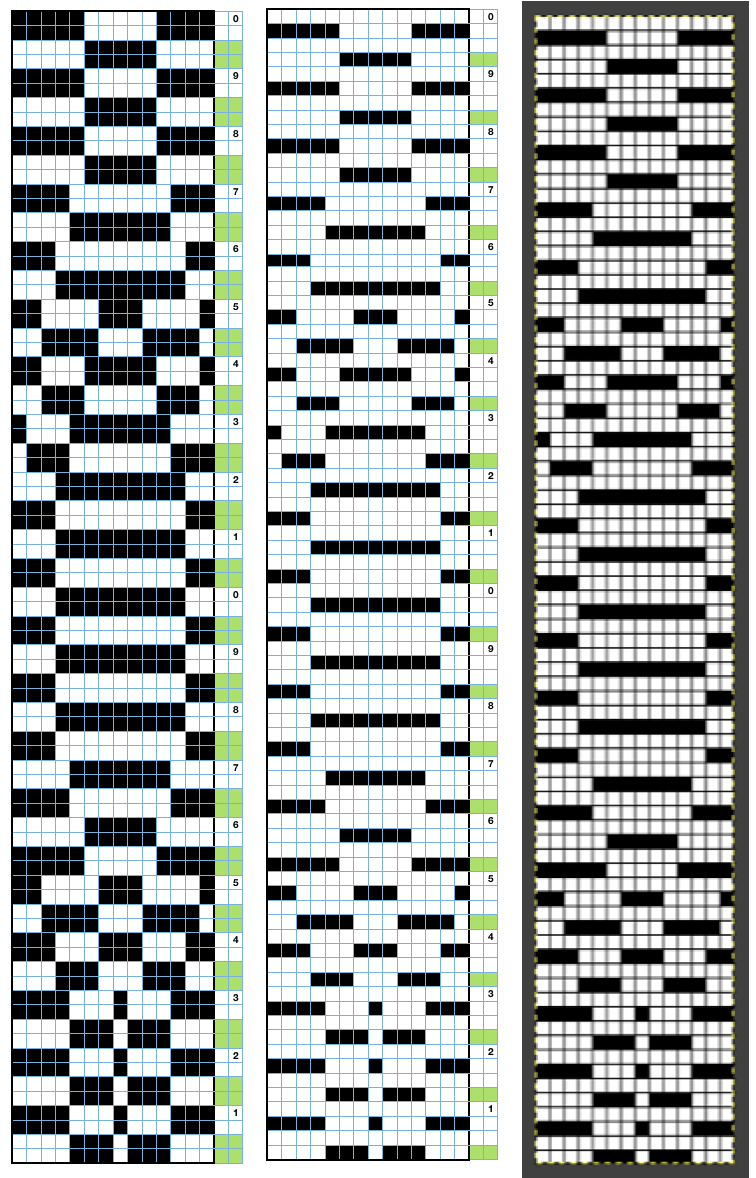
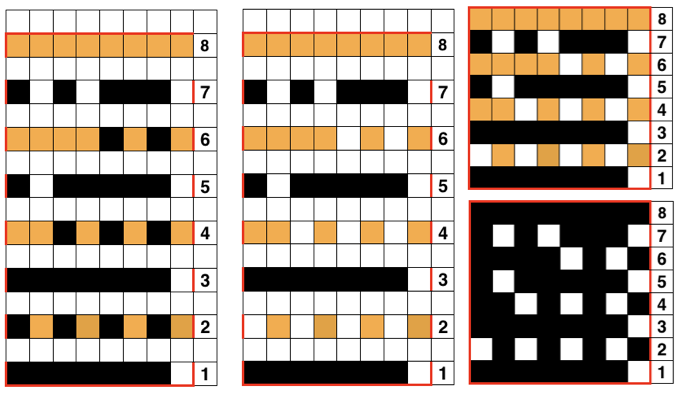
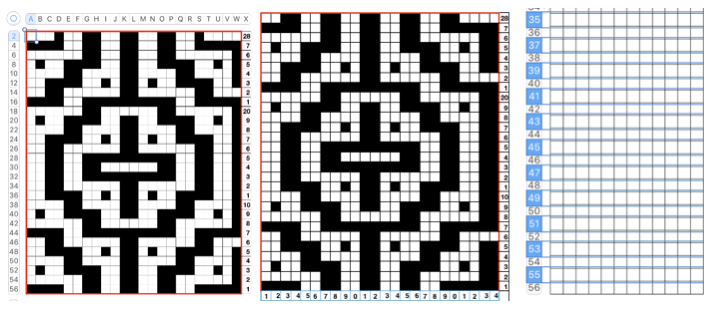
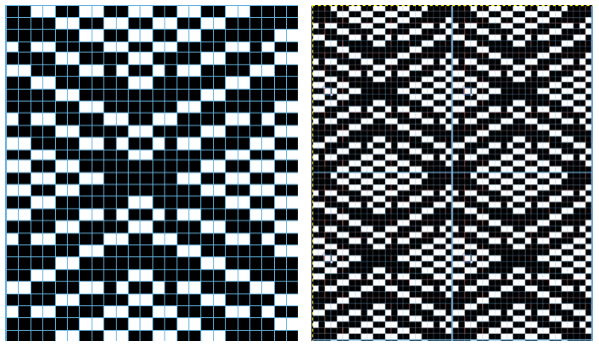
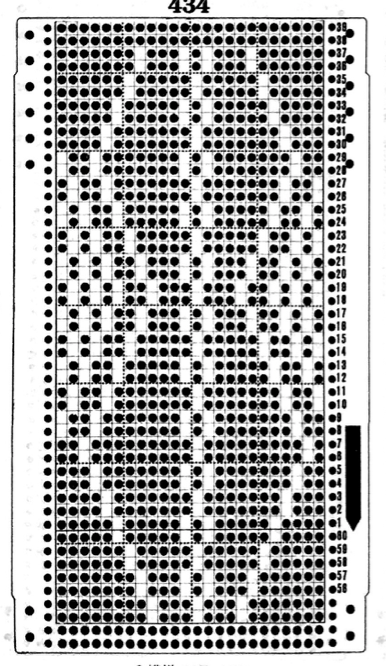 The card is cropped to the 24 X 44 stitch in width and height for the repeat to be worked in electronics. The area colored blue on the far right indicates possible all knit rows for hooking up “cables” during knitting, mustard color indicates ladders created by an out of work needle on each side of the central, all knit column. The ladders make it easier to identify each all knit column. The tape over holes idea does not work for masking a punchcard since that blue area would need to be all punched holes. The tape over would result in “unpunched” ones.
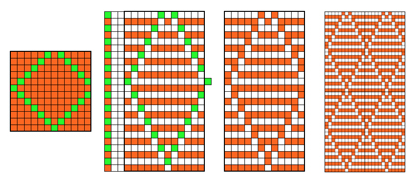
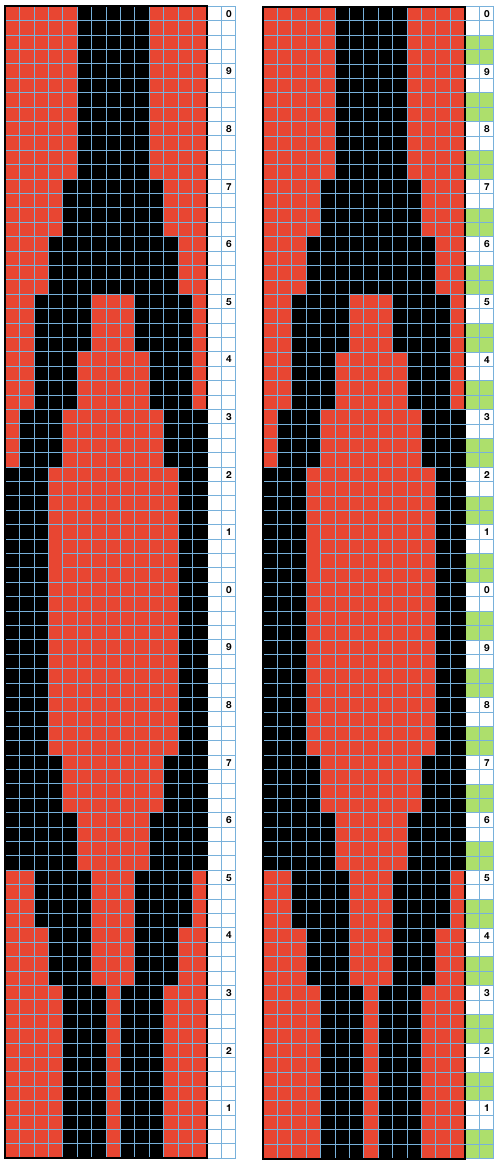
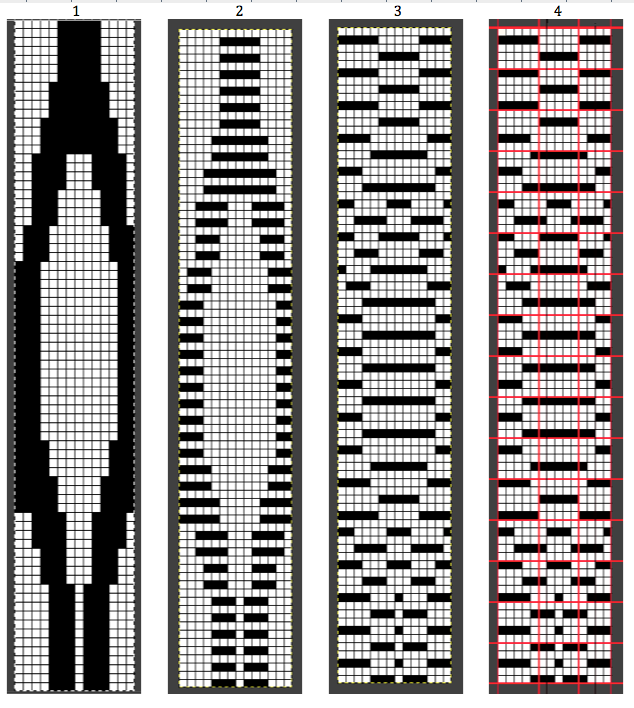
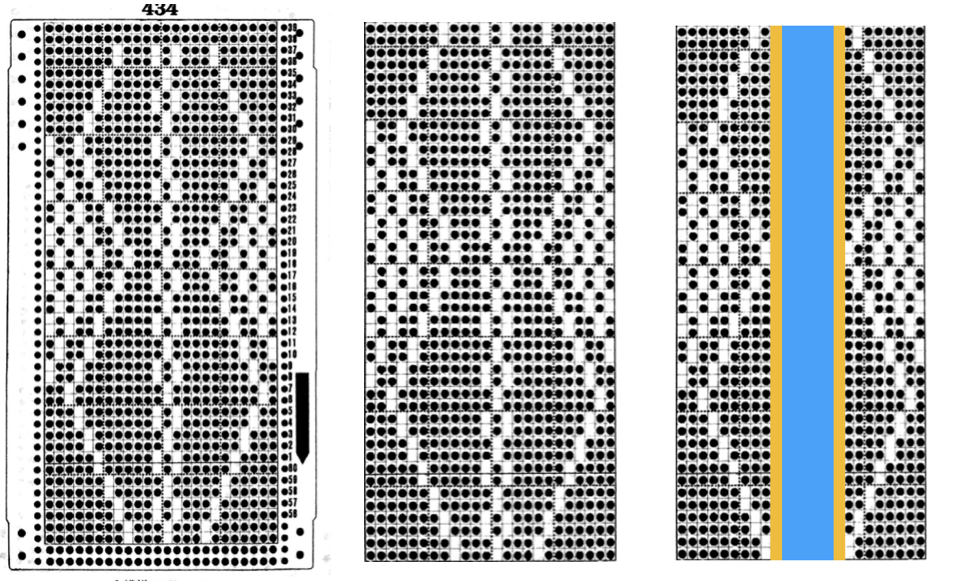 This takes the revised card single repeat and indicates some quick possibilities for altering it
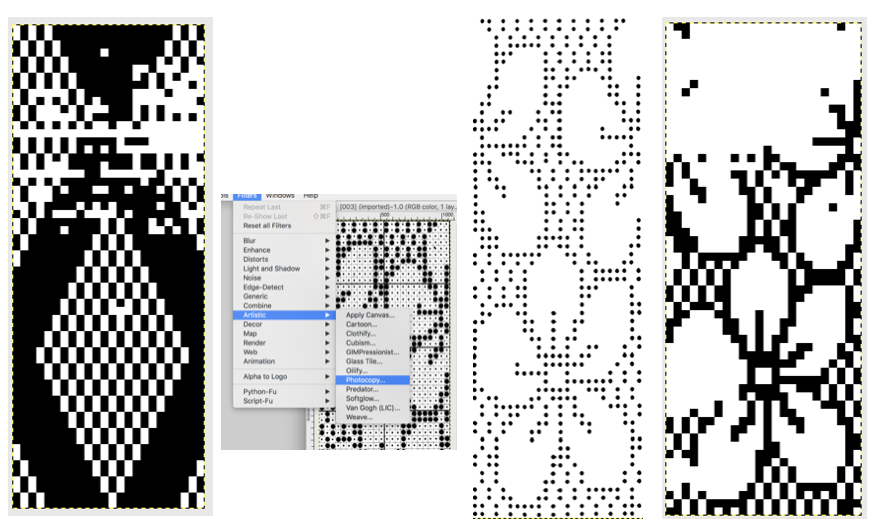
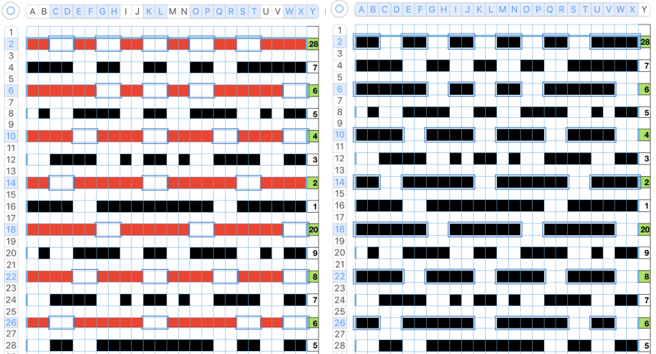
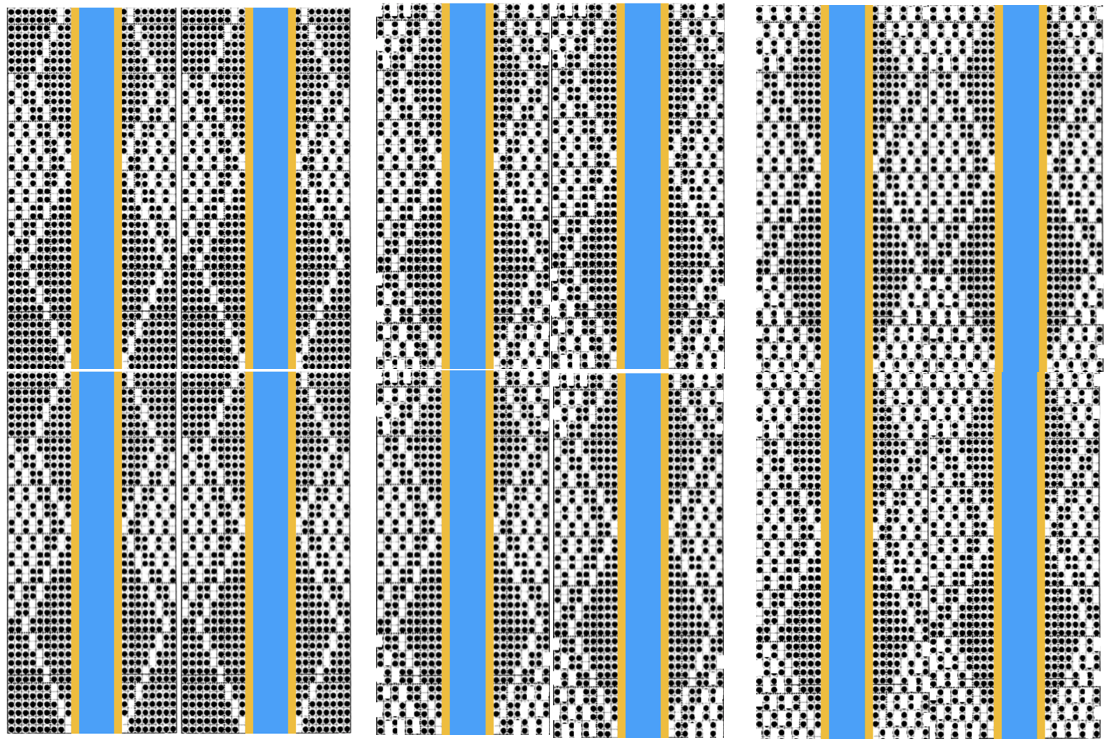
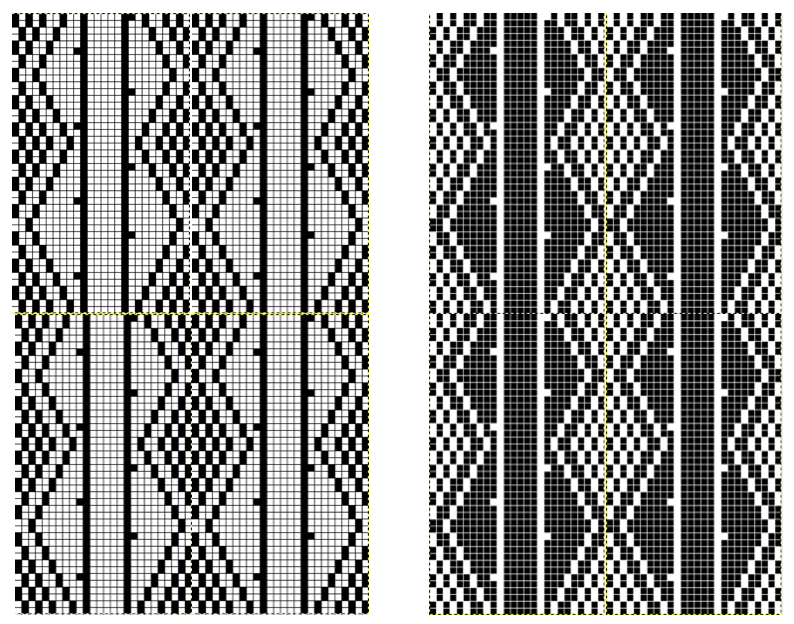


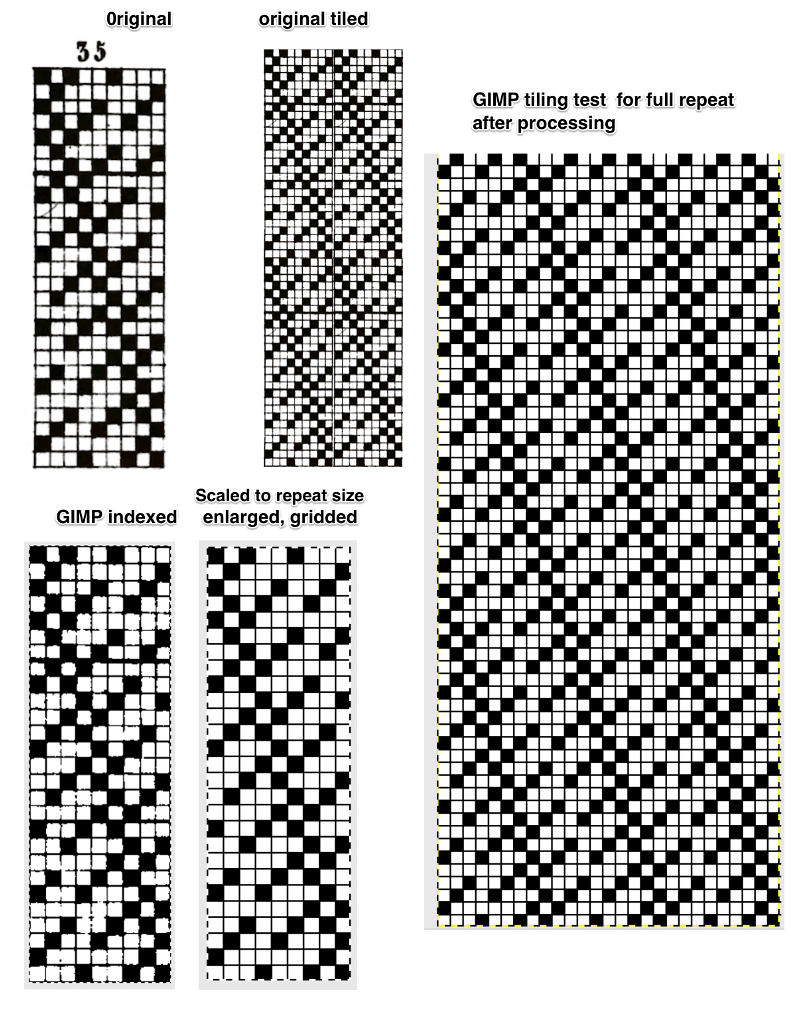
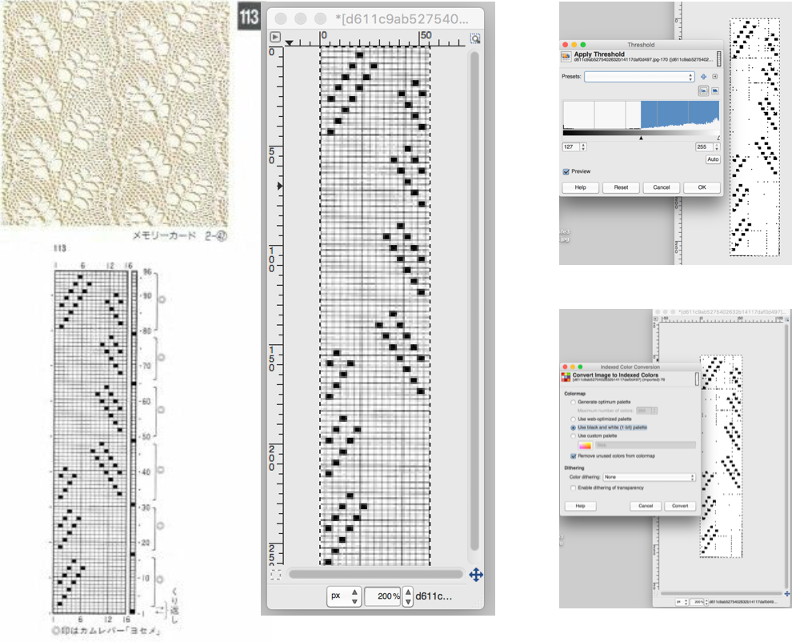
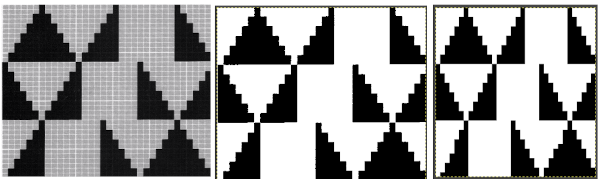
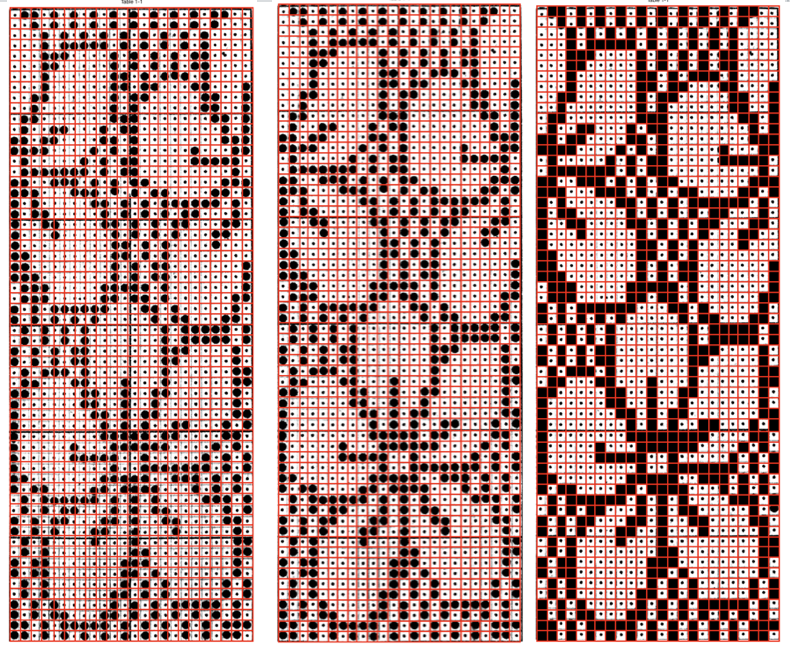
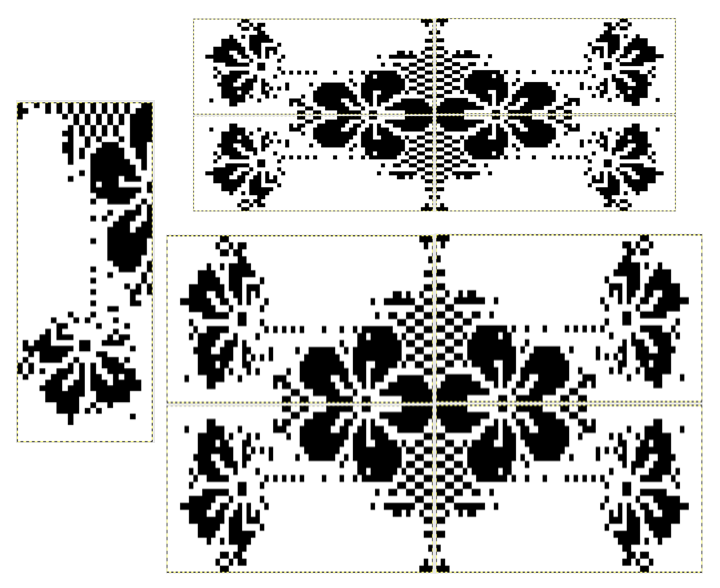
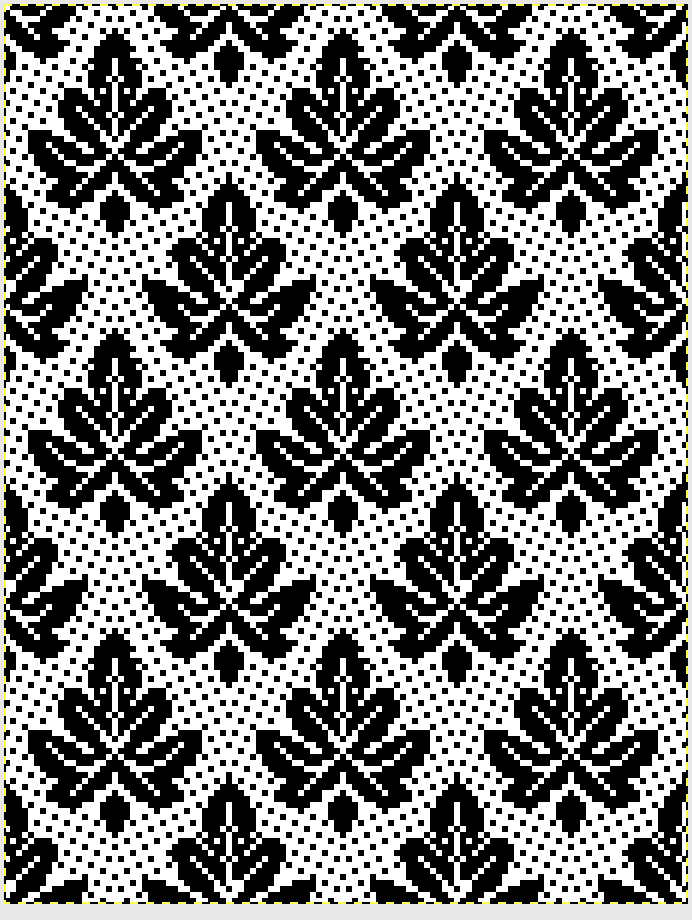
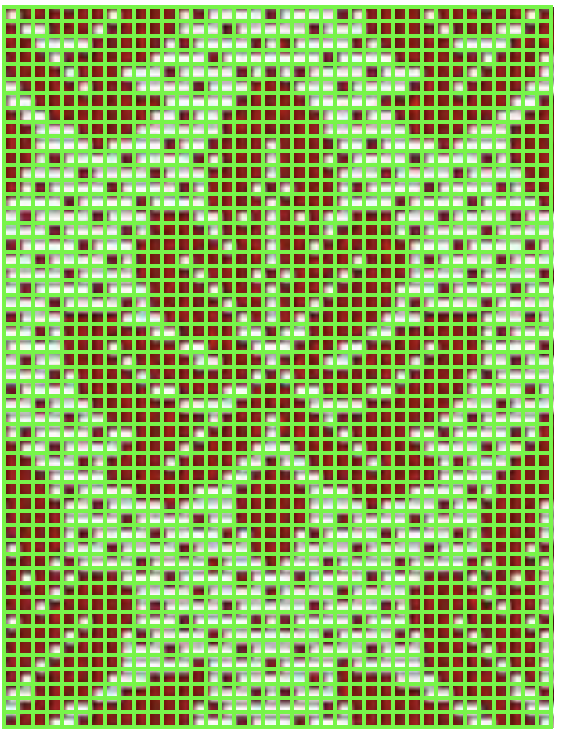
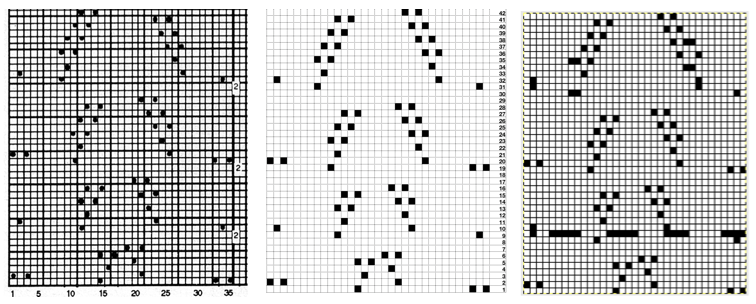
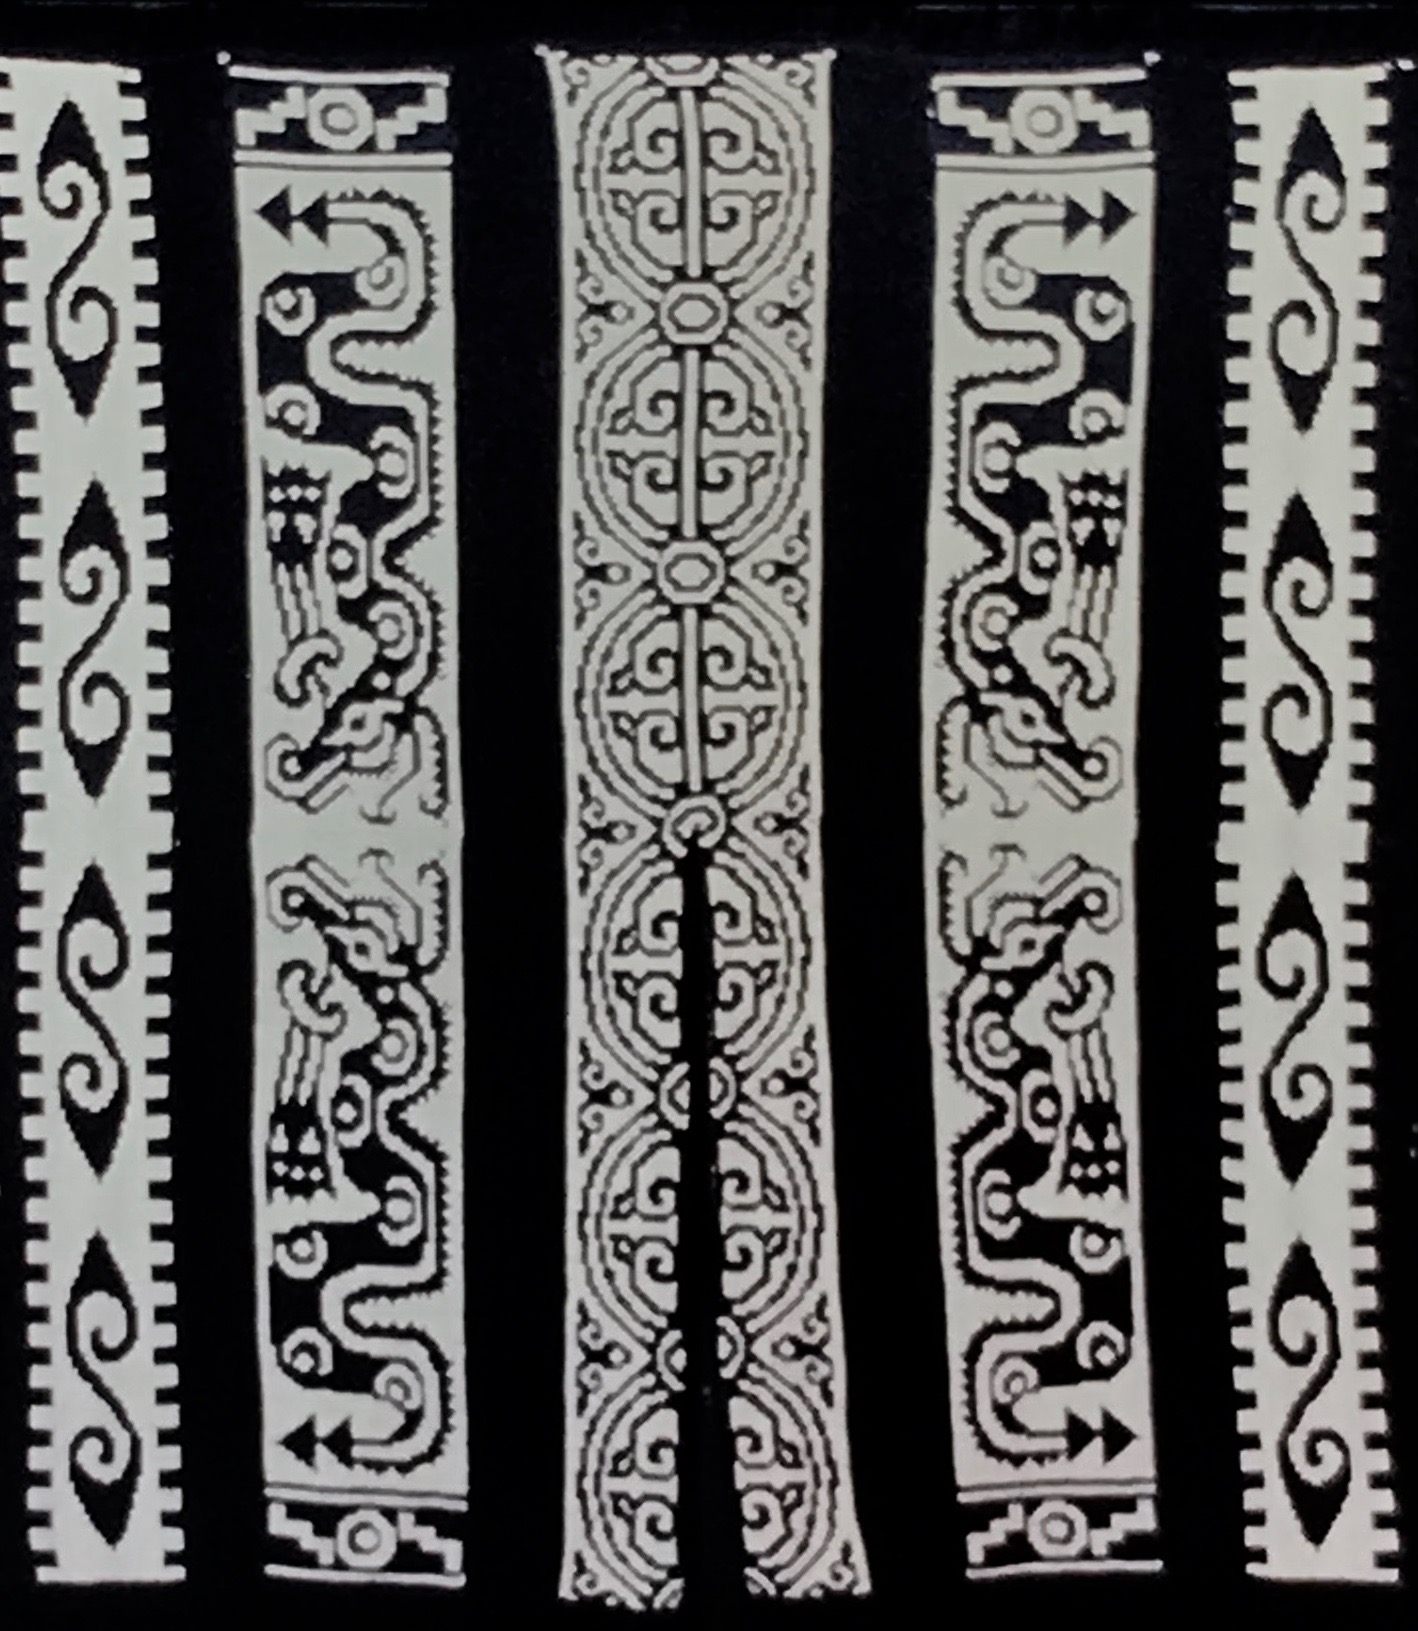
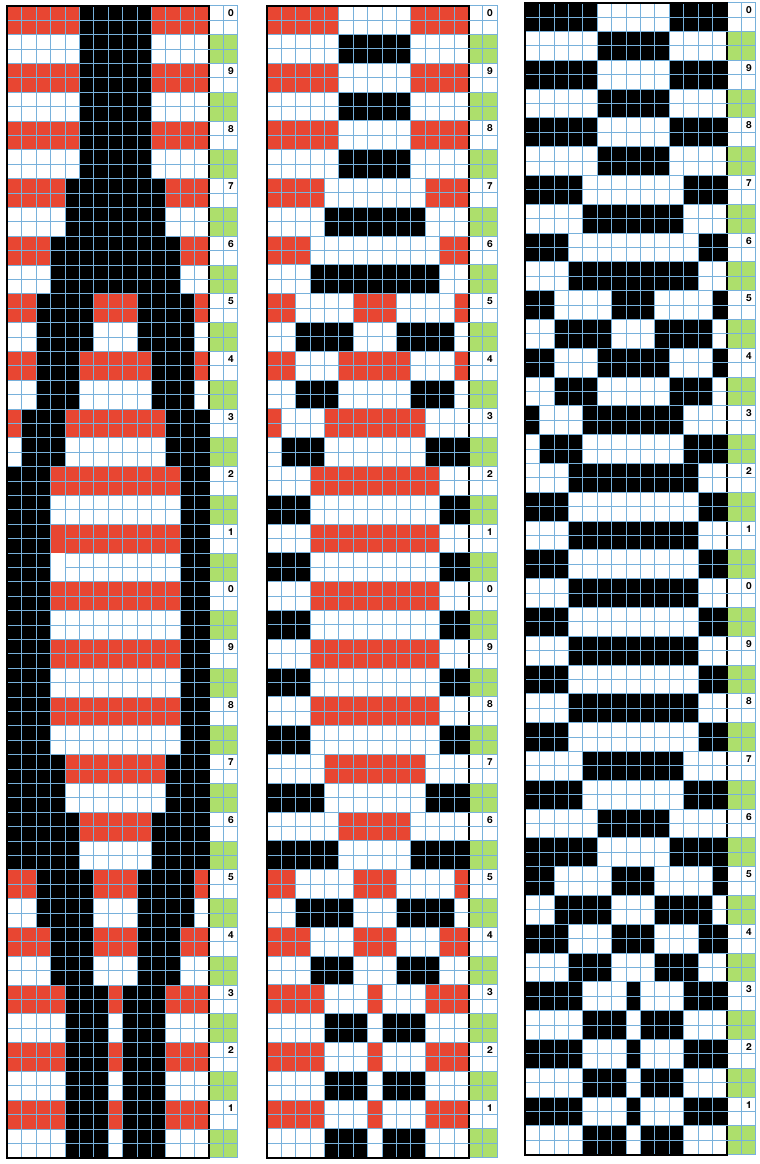
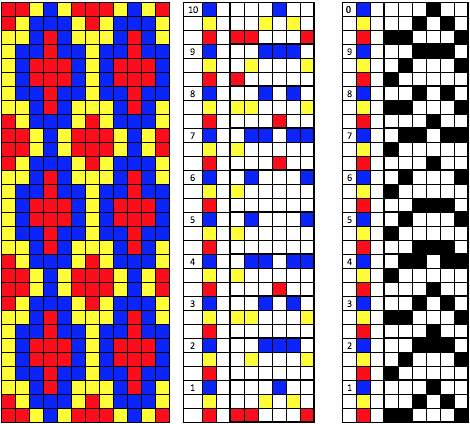
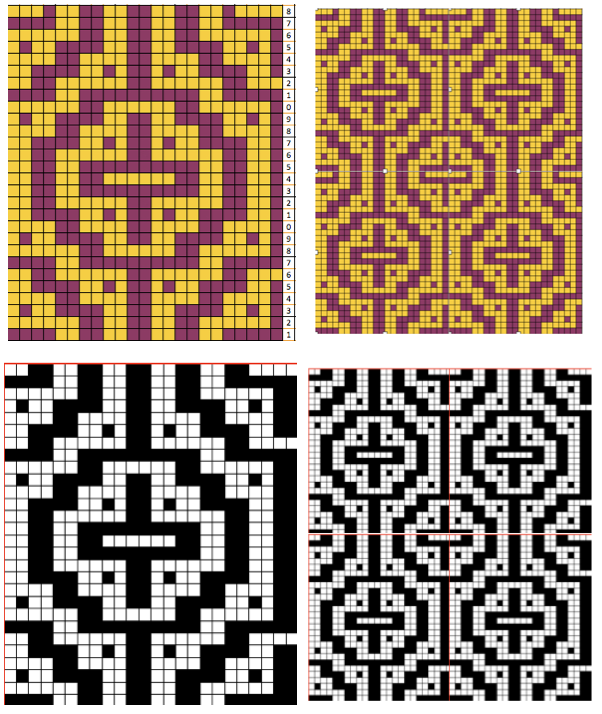
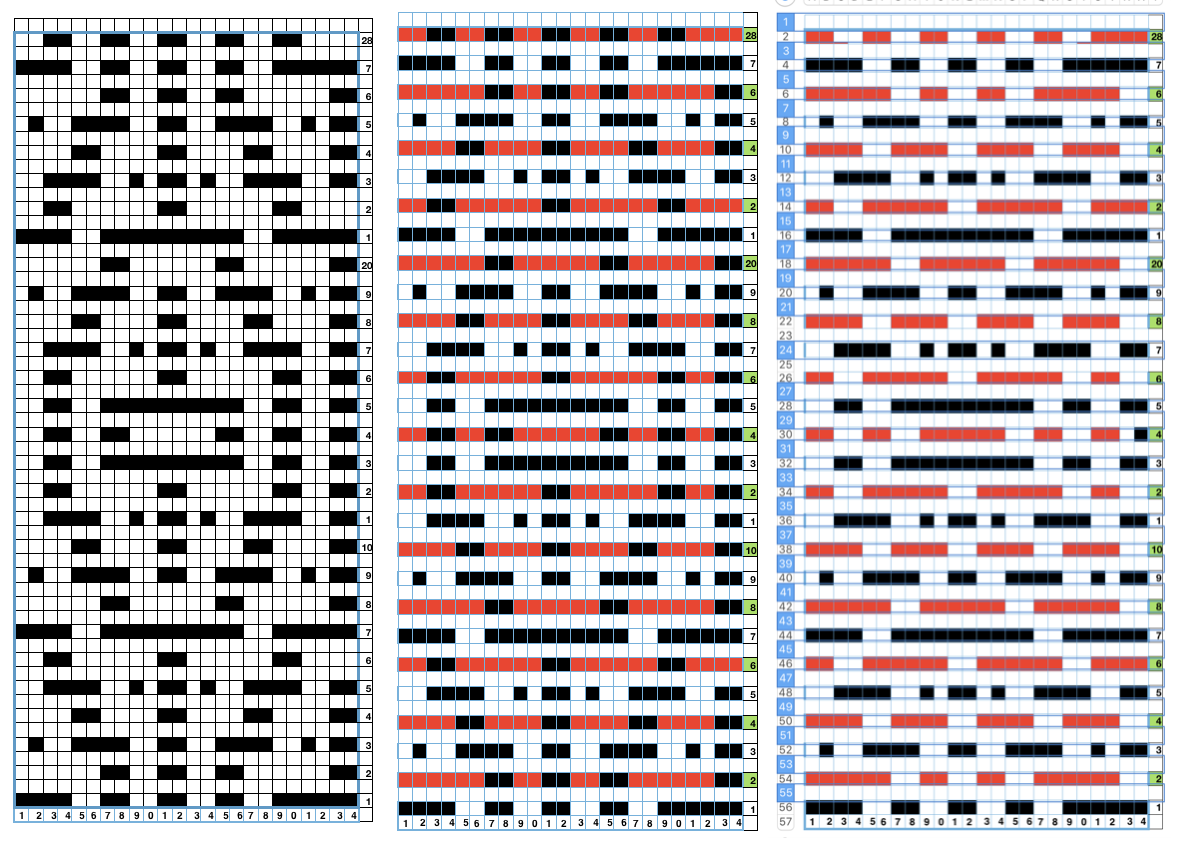
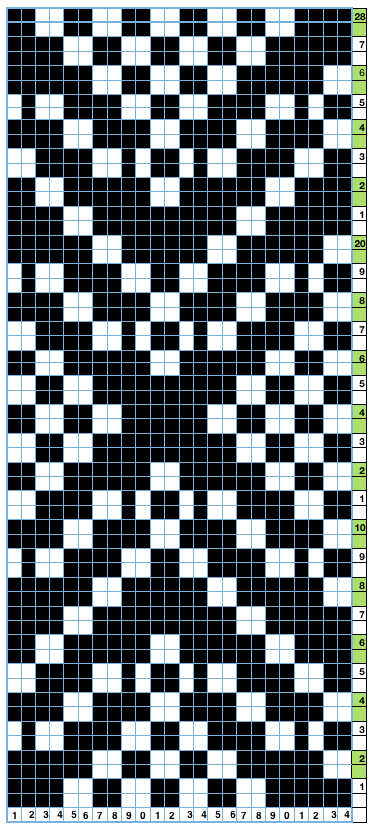
 From colored repeats in Brother electronic collections: with some color adjustment after a first attempt that required some clean up of pixels, the conversion and scaling are easily achieved. The originals were designed on a rectangular grid, within blocks defined 6 wide by 10 tall
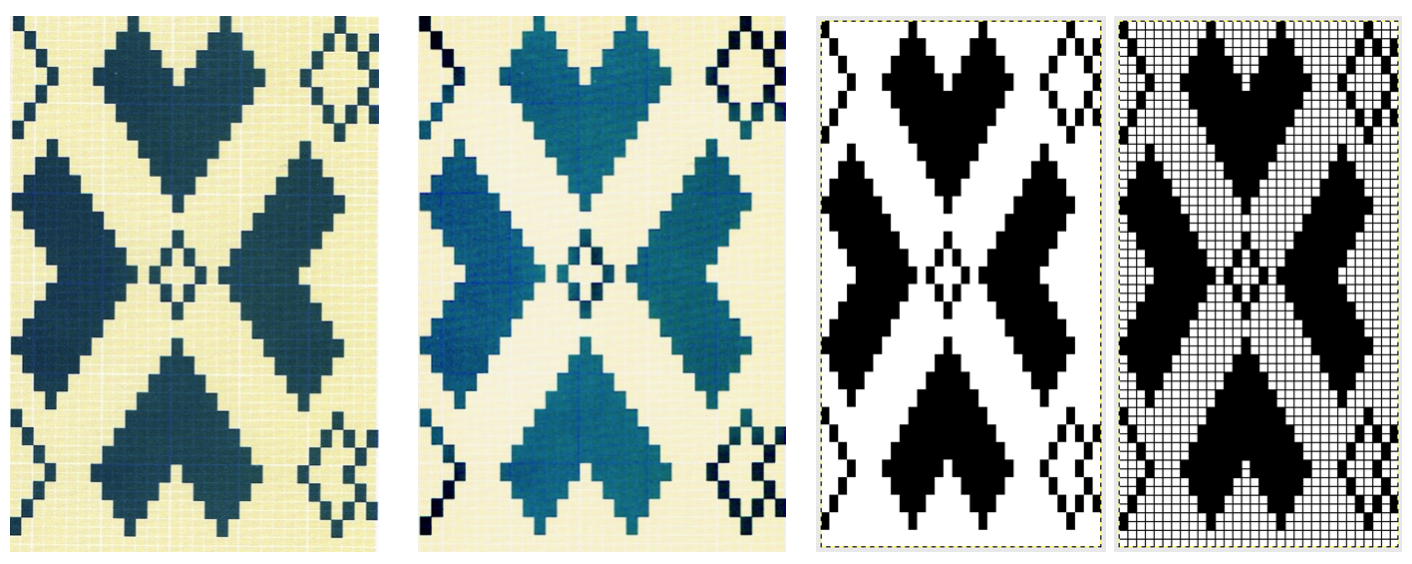
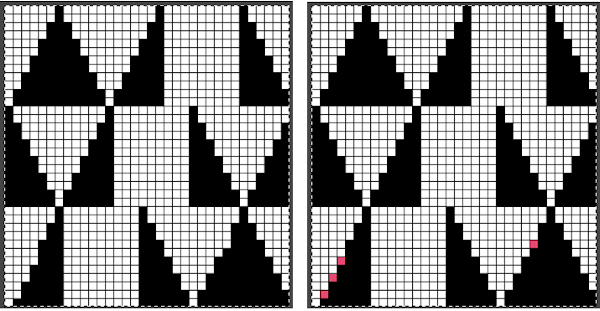
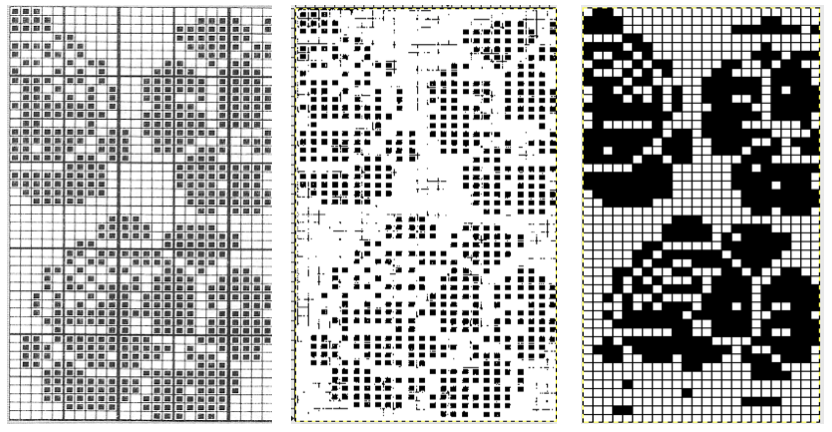
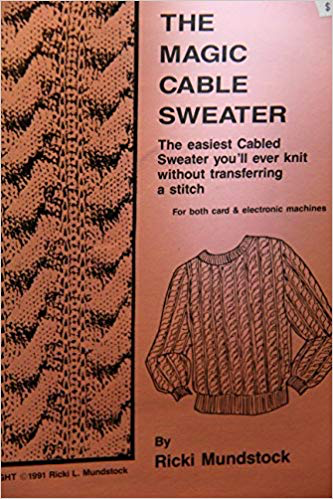
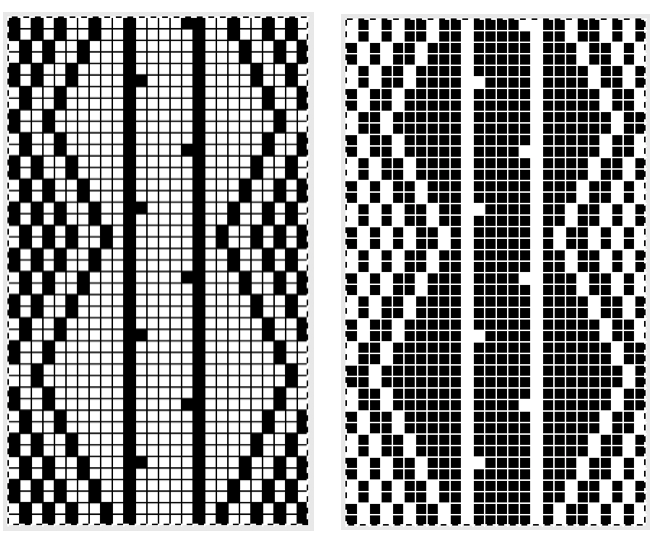
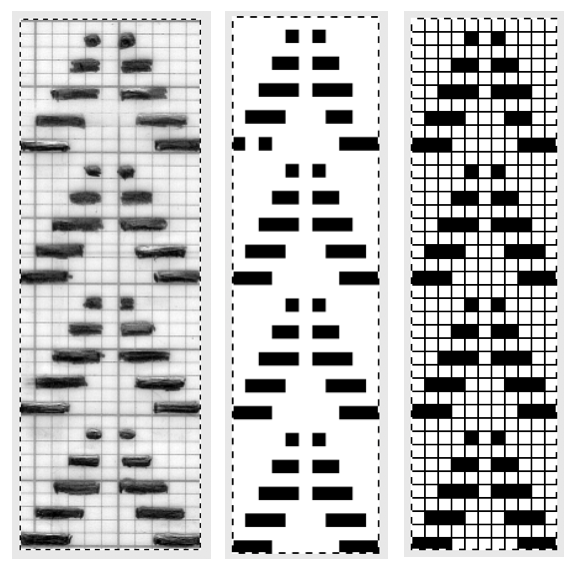
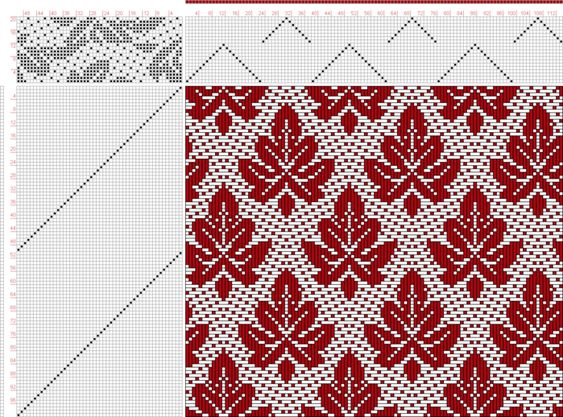
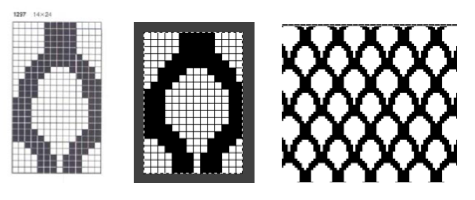
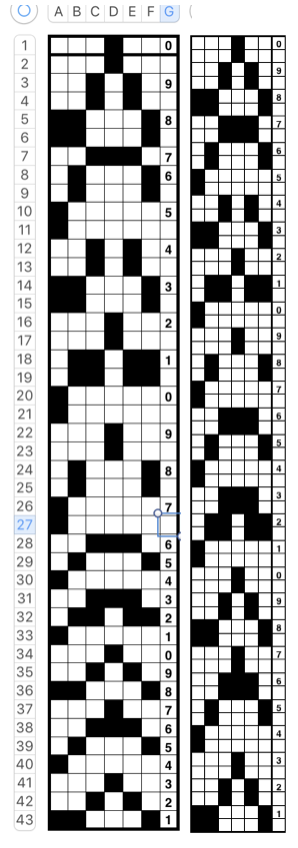
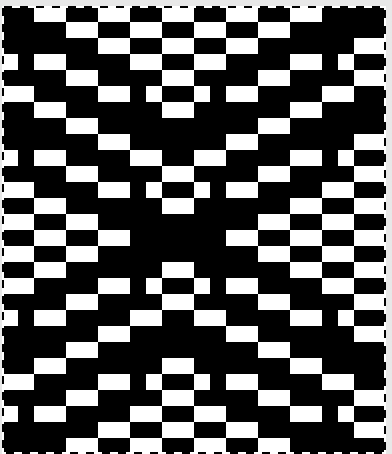
 and one from a BW punchcard reference pub
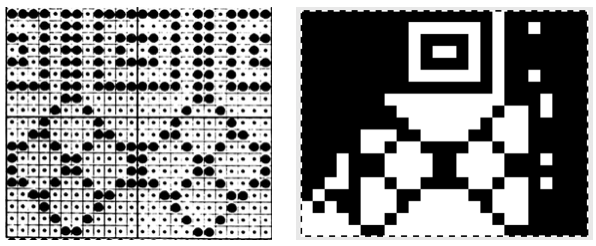


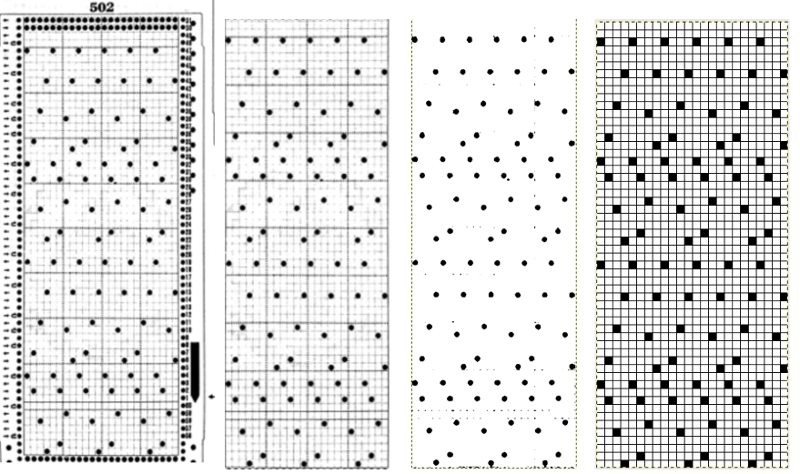


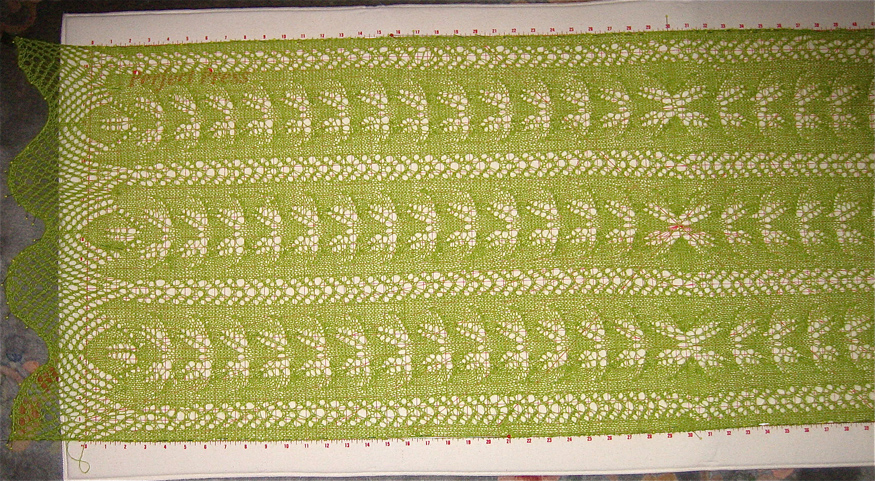
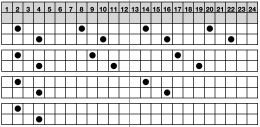
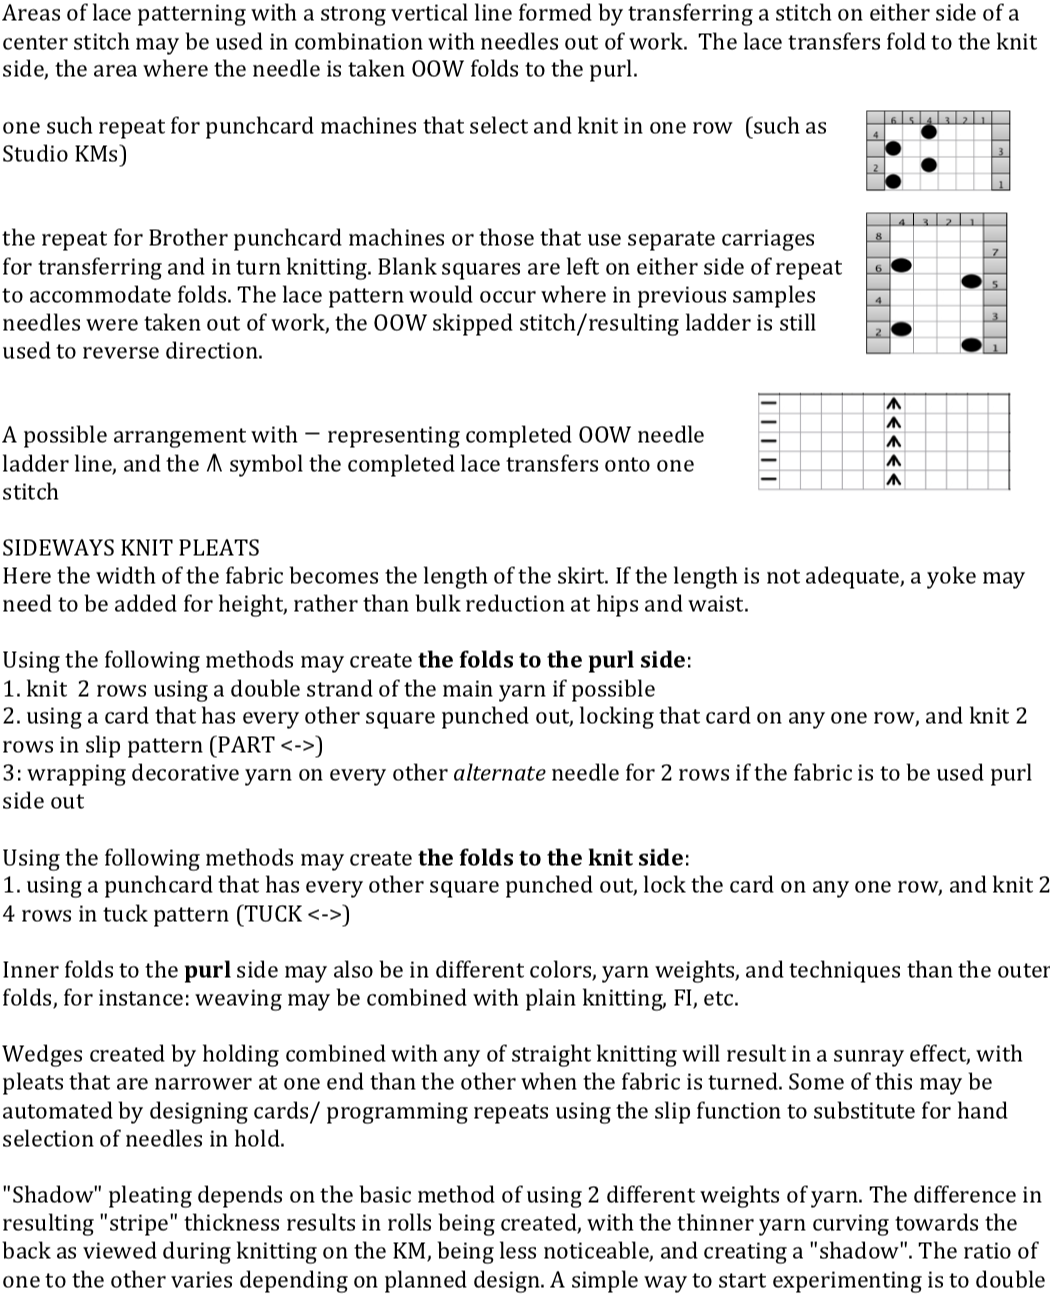
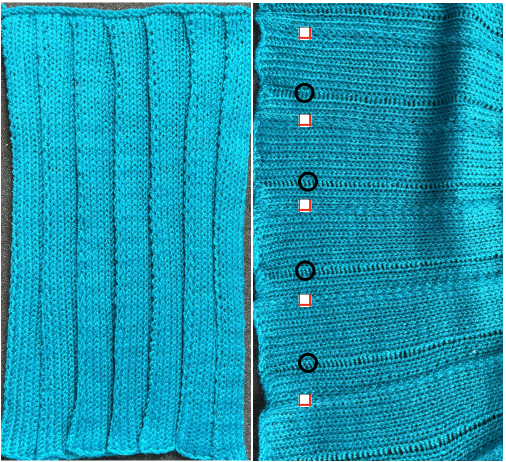
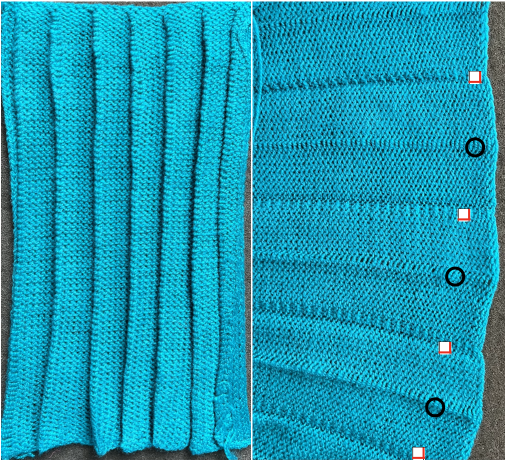
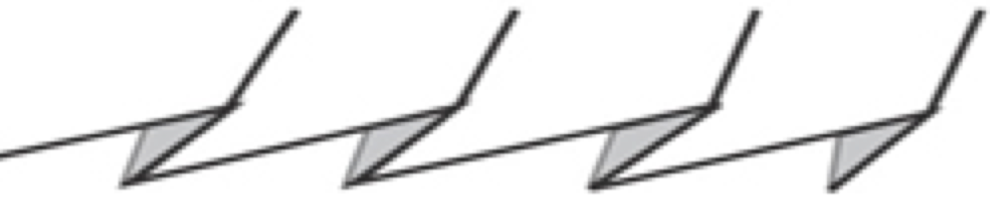


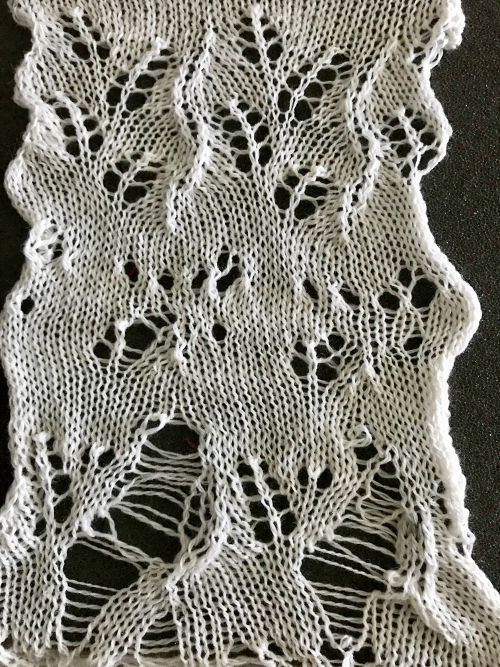
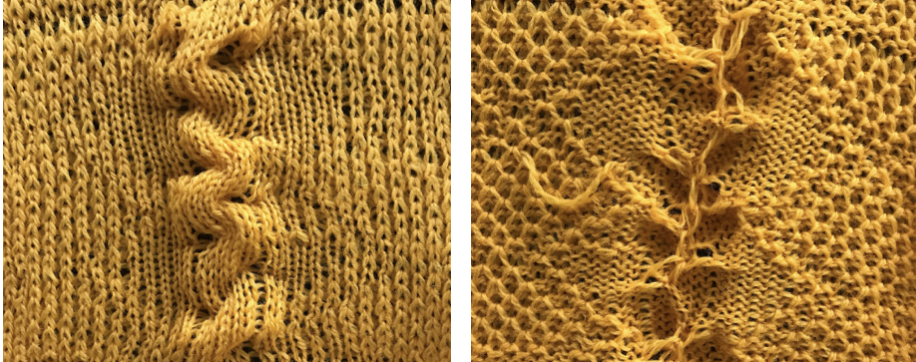
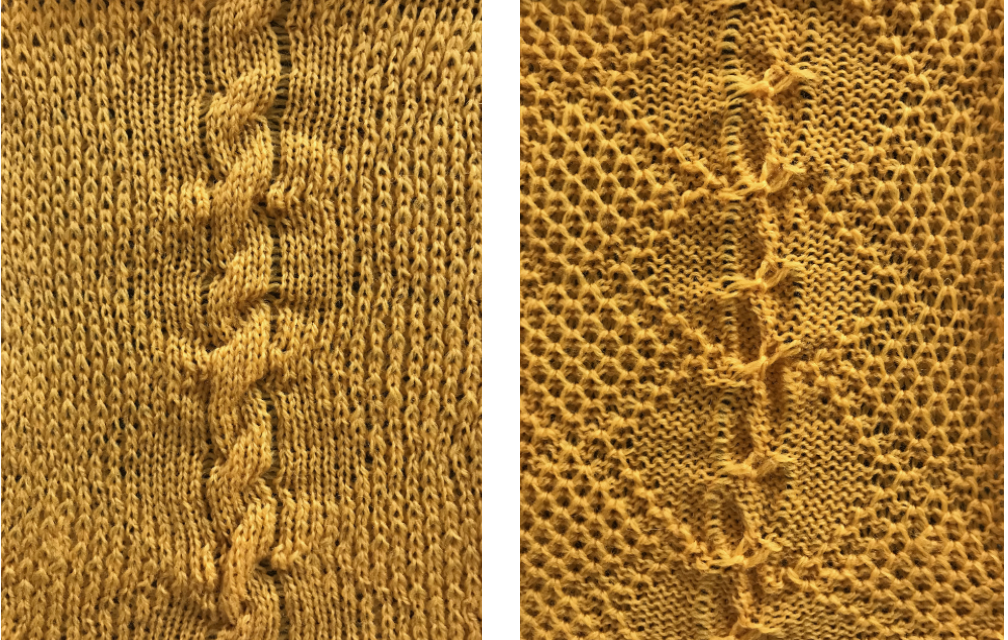
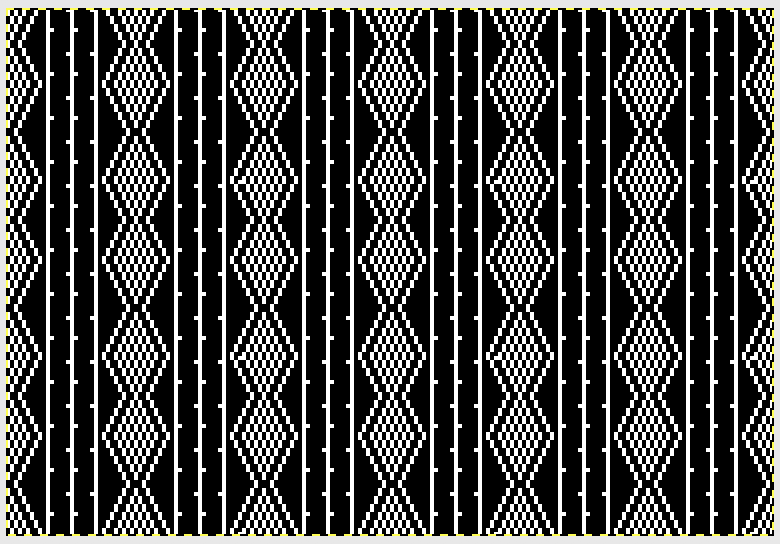
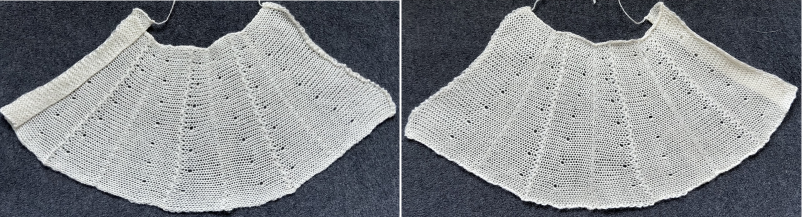
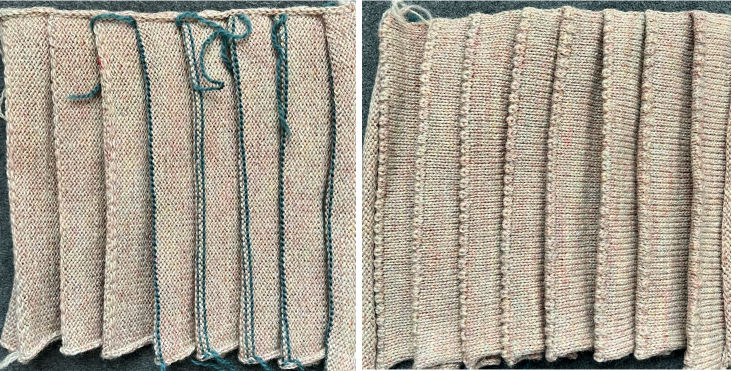
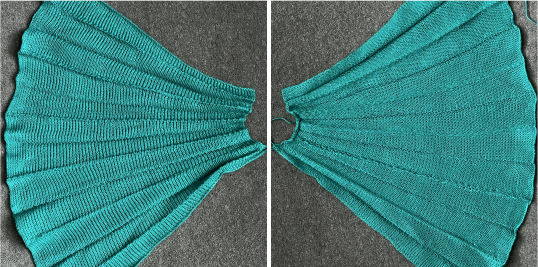
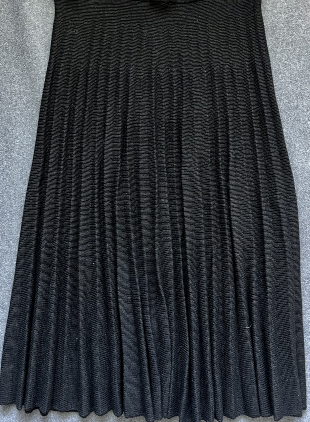
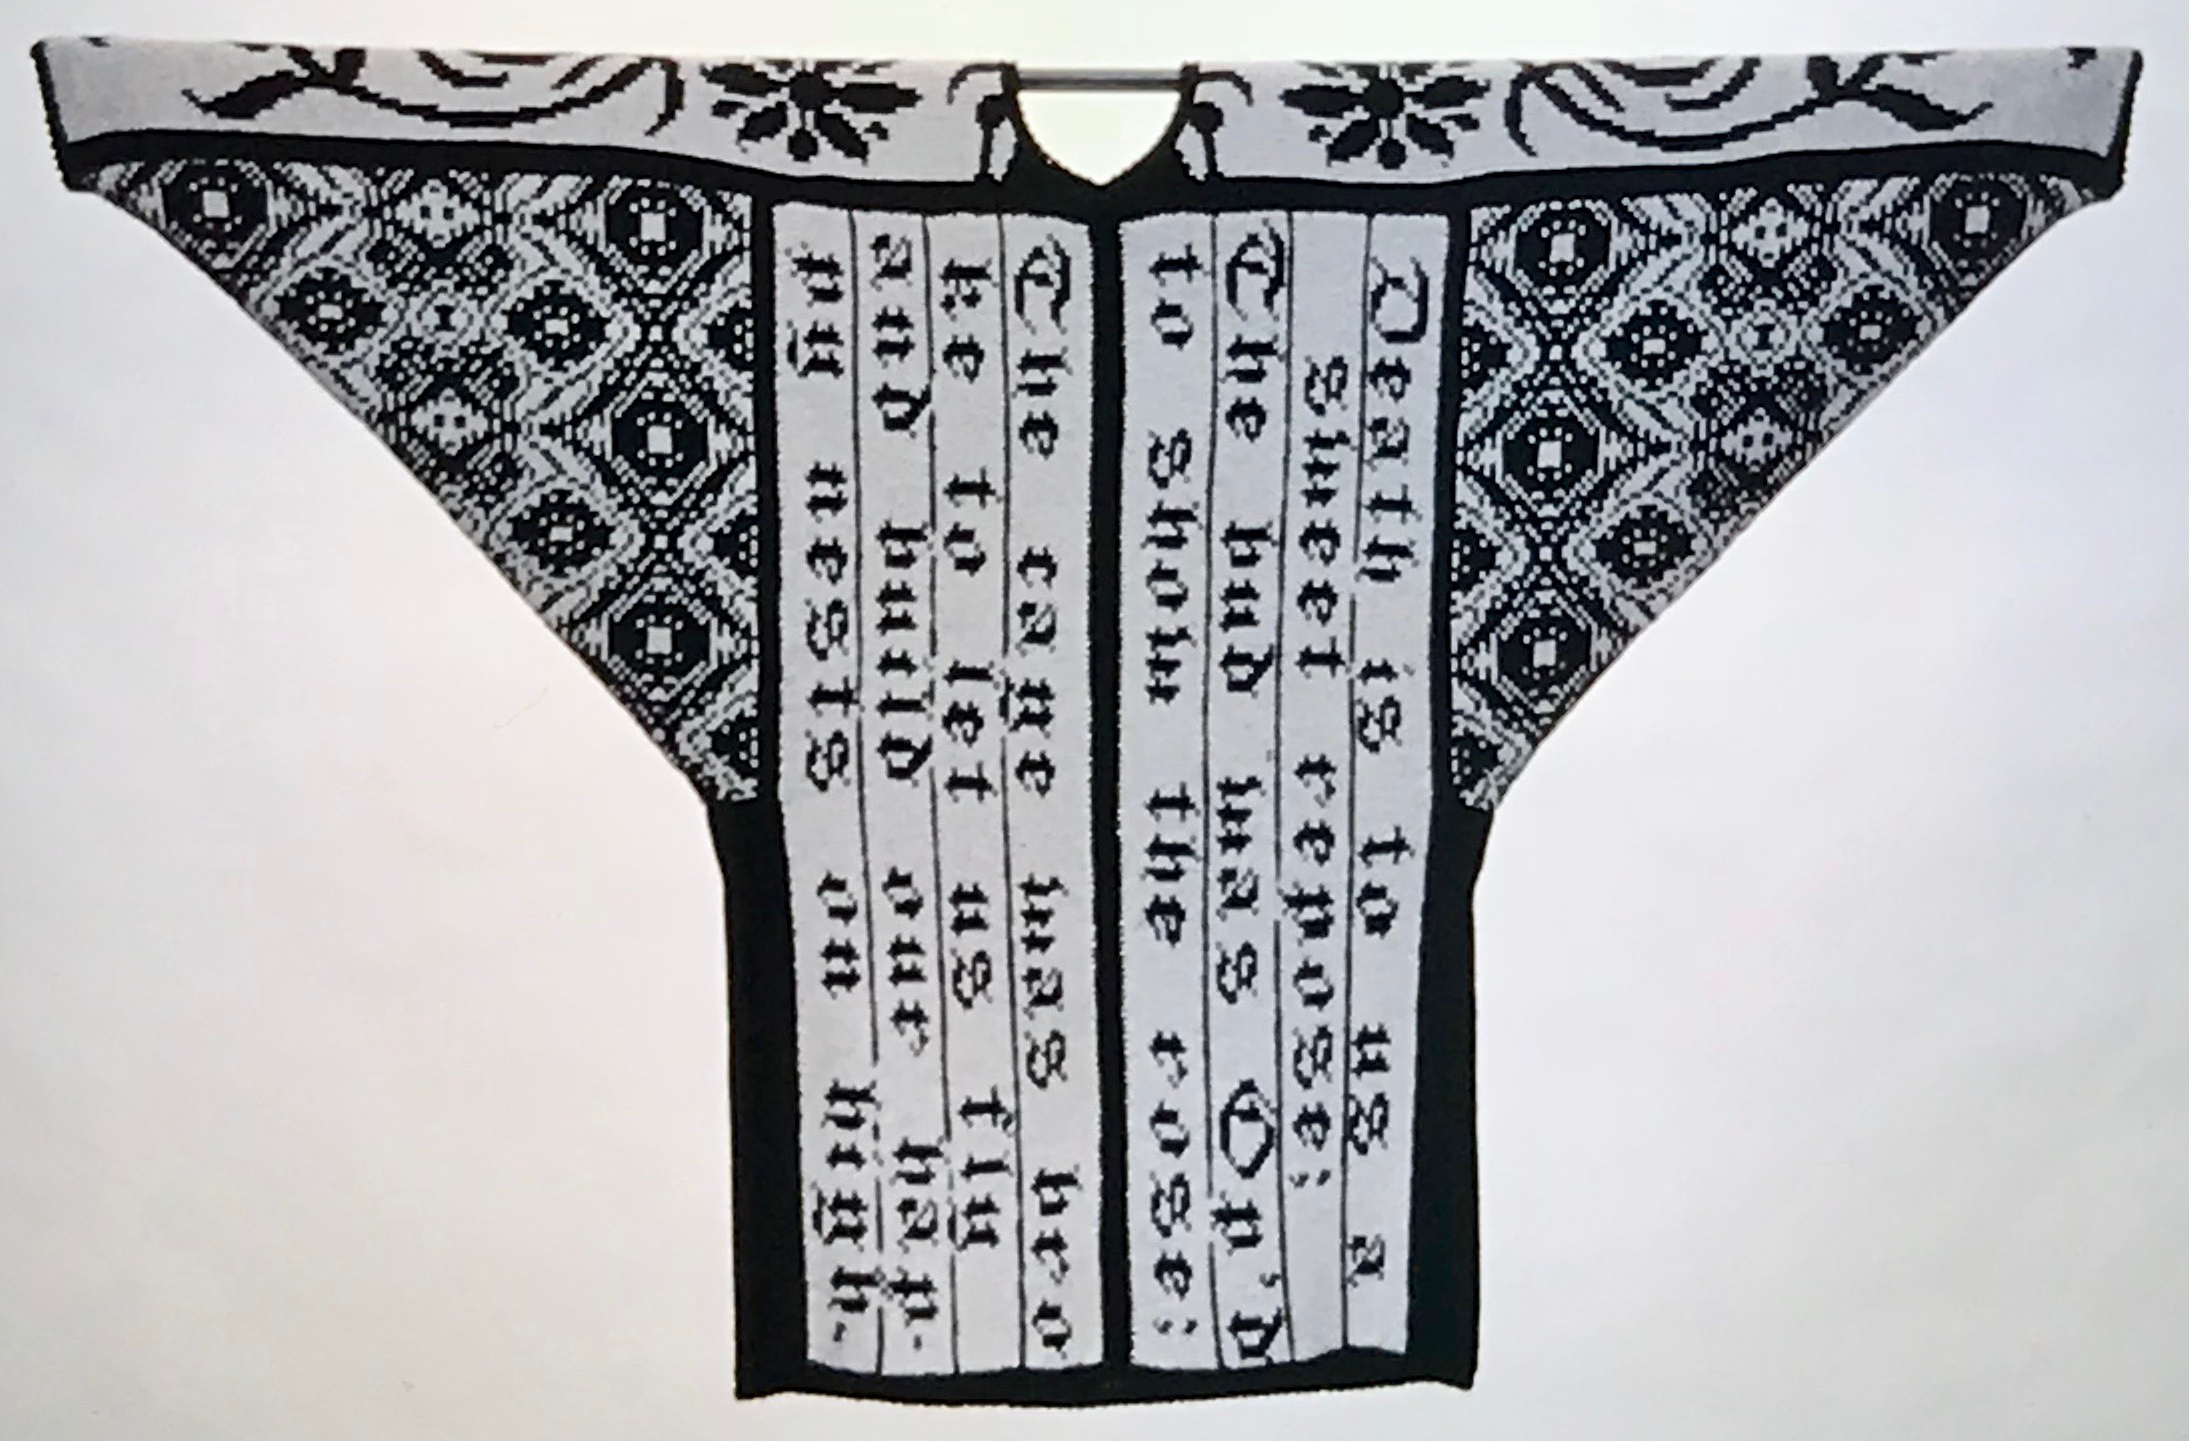
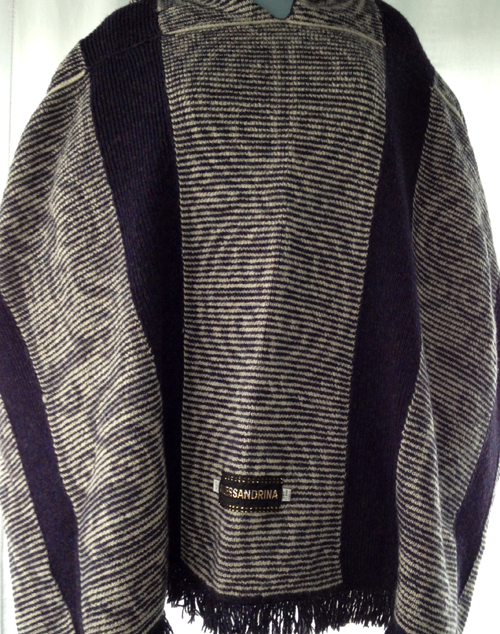
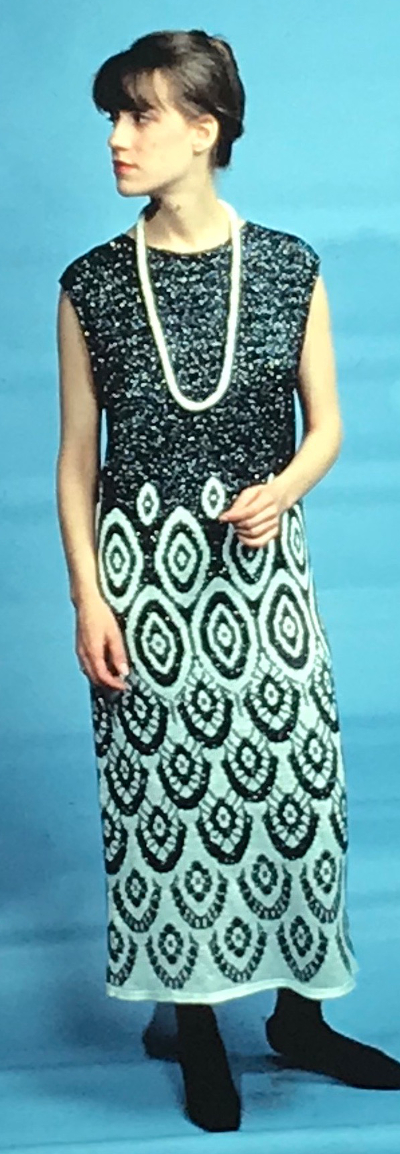
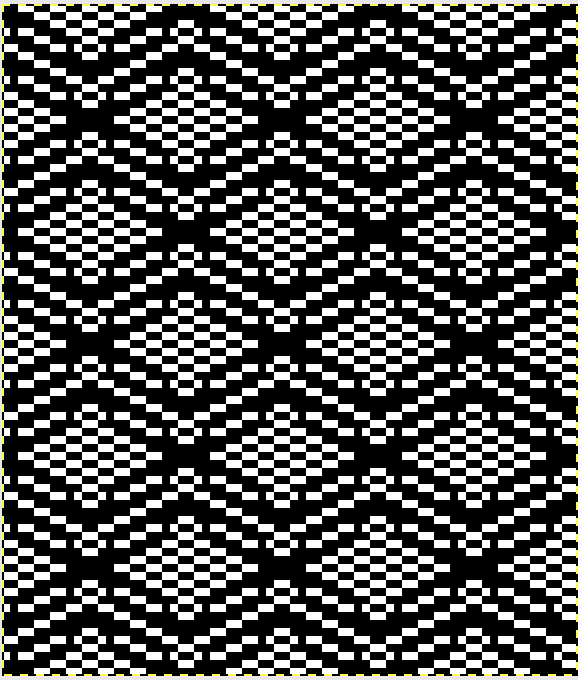
 The fabric narrows considerably as it is stretched lengthwise to set the stitches. Several panels would be required for a garment such as a skirt. Such an item would need to be pulled into shape, pinned, and hot pressed. Fiber content will determine the crispness of the pleats after blocking, and their retention after cleaning. The swatch below is turned sideways for the sake of space.
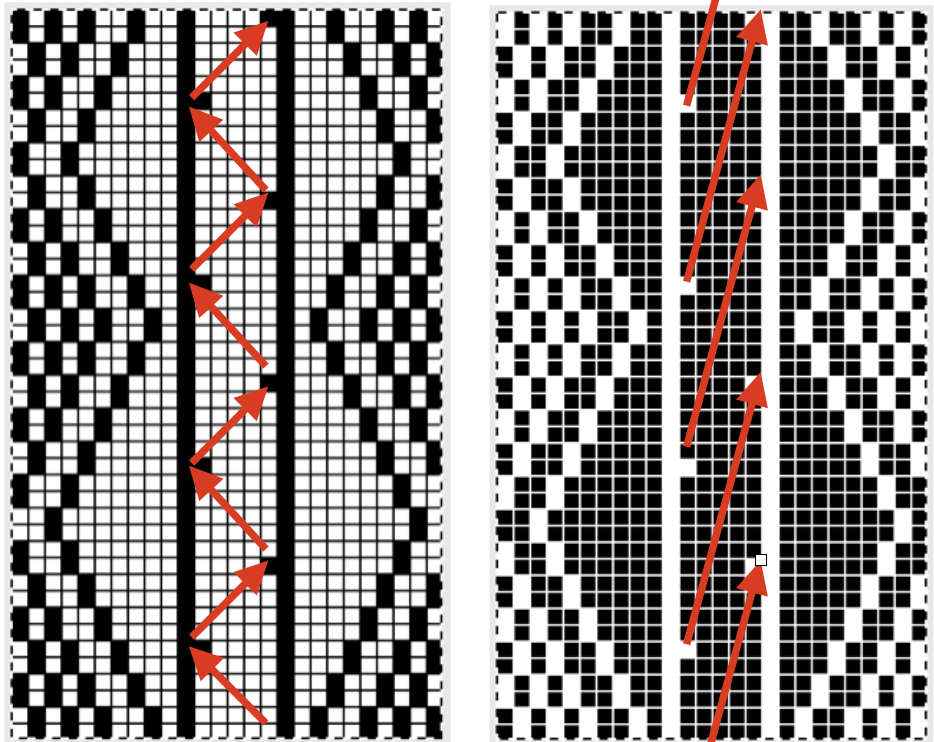
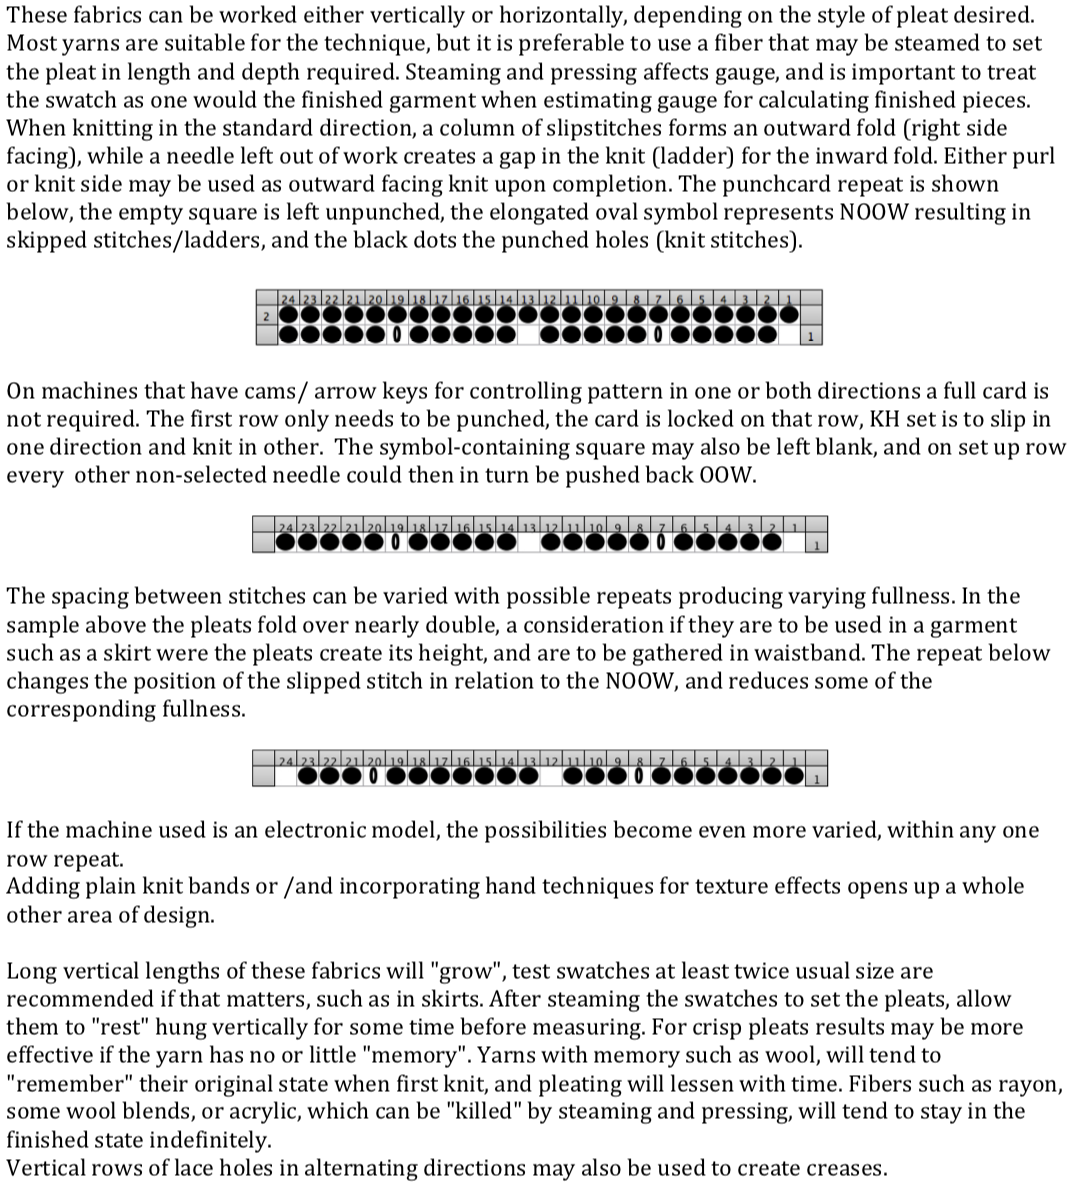
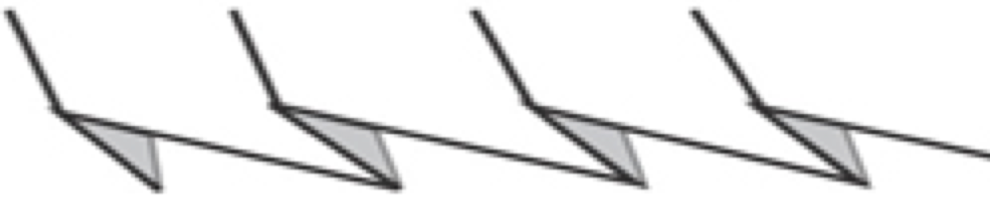
 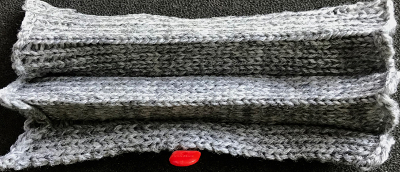 More variations with folds can be made by varying the “rules” commonly recognized for creases. Working sideways once more: on a punchcard machine, using card # 1 locked, cast on making certain every other needle as well as the first and last are selected.
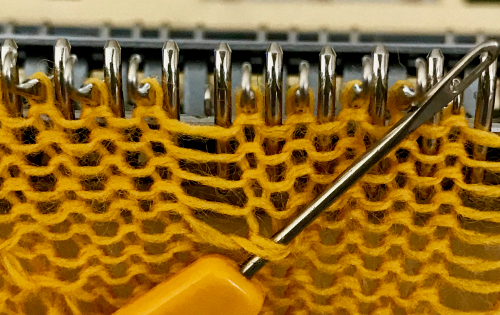
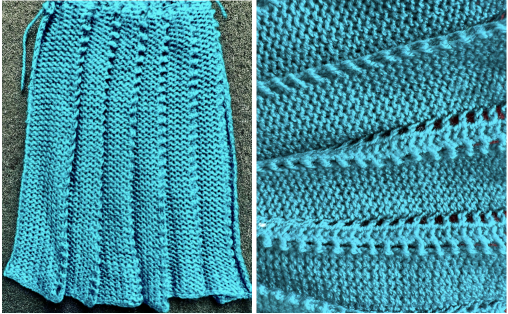
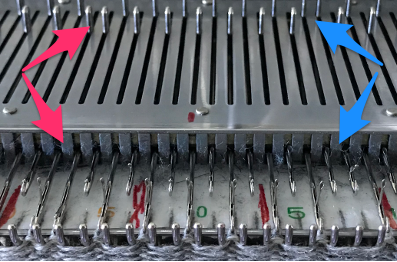
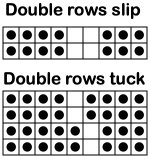
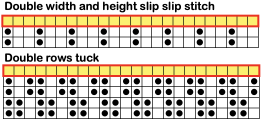
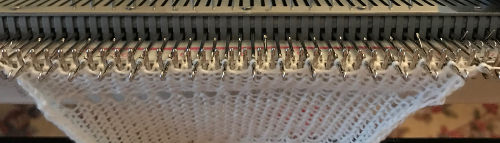 Cancel the slip setting, complete the next knit section, and transfer every other needle to the adjacent one on either the right or left.
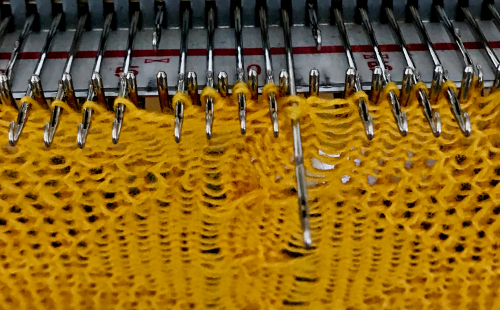
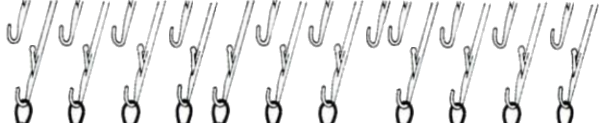
 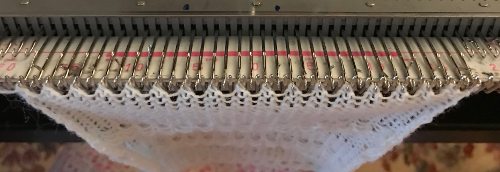 The needles holding 2 stitches may be brought out to the hold position as each transfer is made, or pushed out to hold after the fact to insure the stitches have been transferred and will knit off properly. The number of needles in work remains constant.
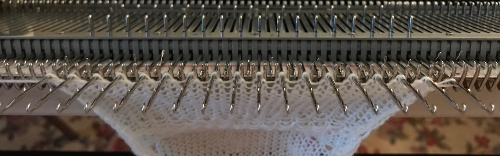
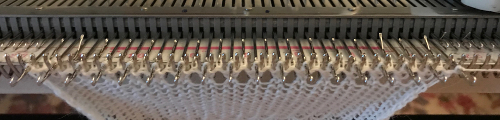
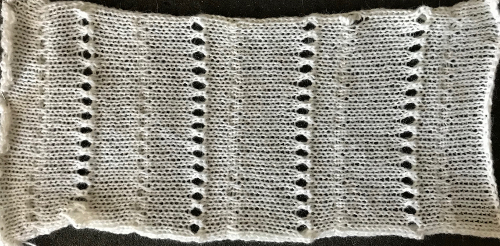
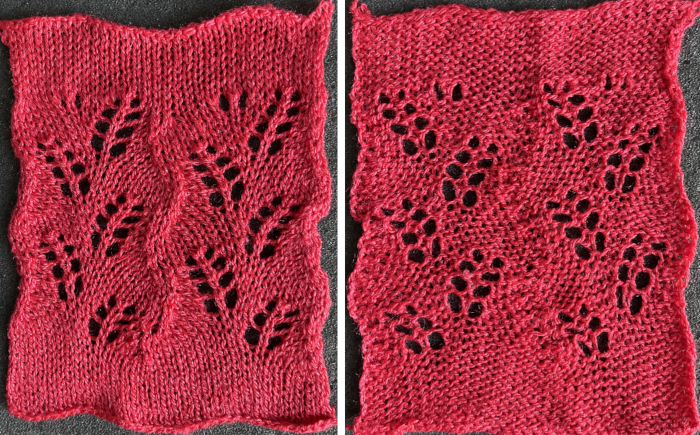
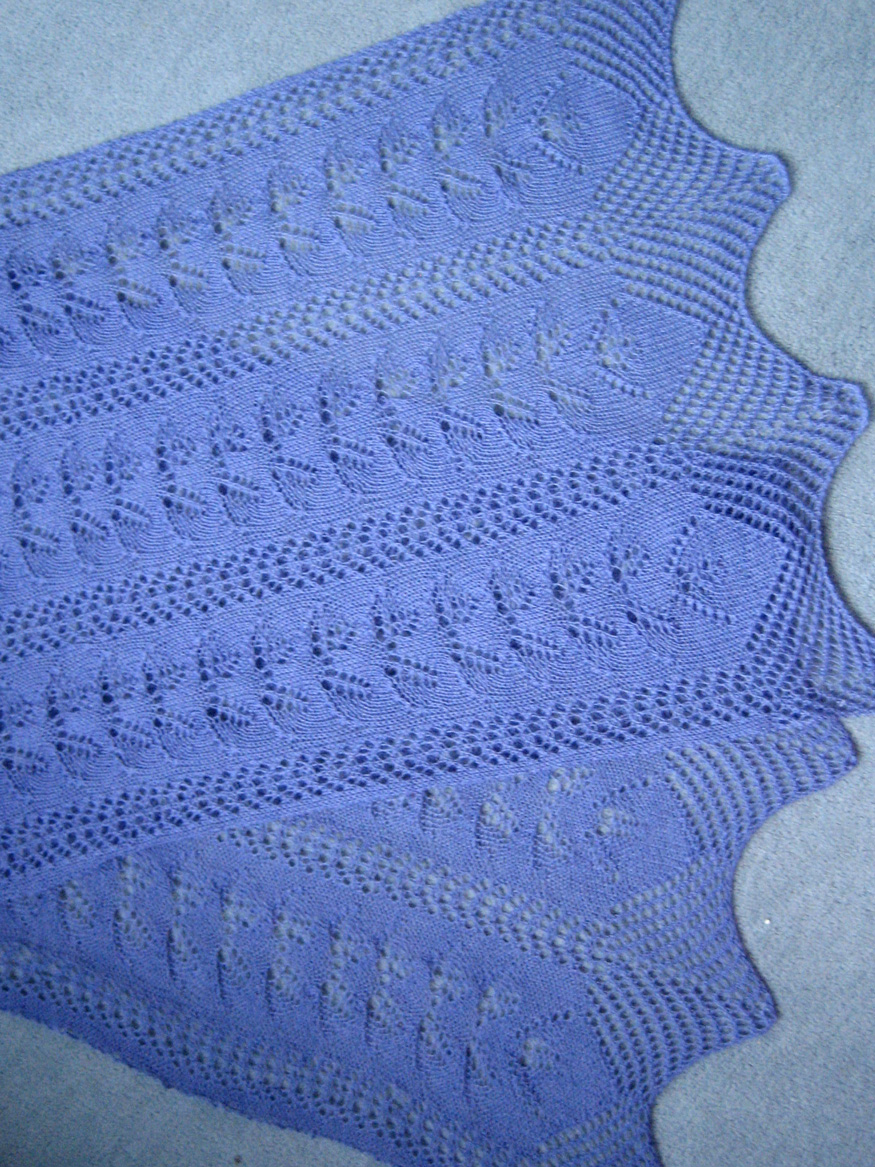
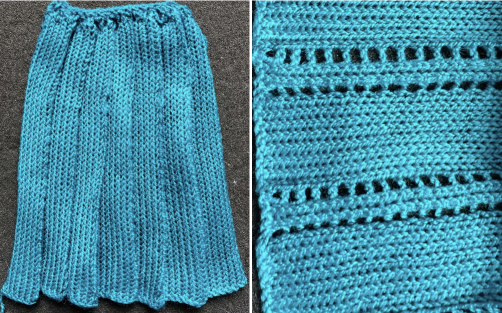
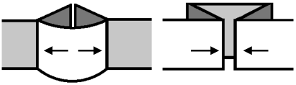
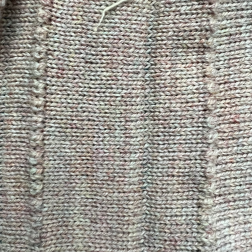
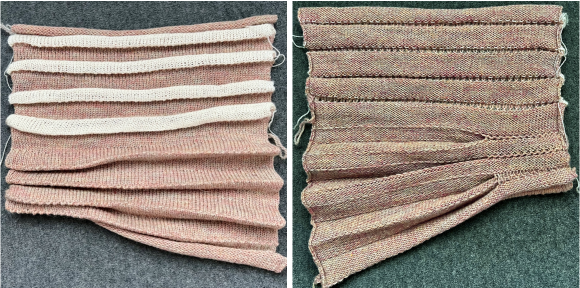
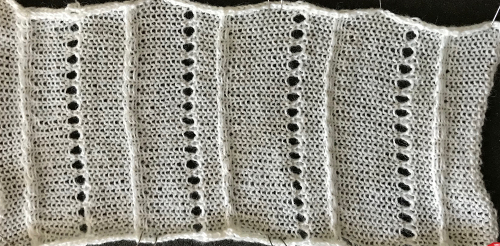 The slipped stitches form the inside folds in the pressed swatch, while eyelets and tuck stitches fold a picot edge to the outside.
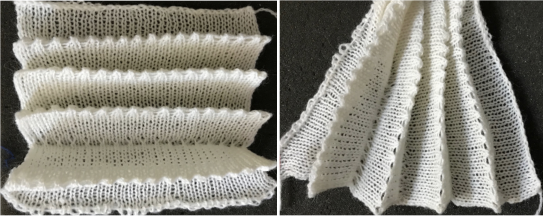
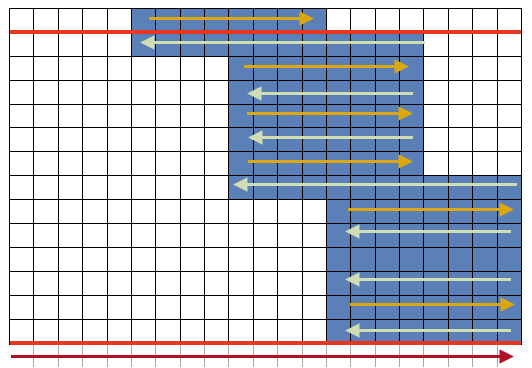
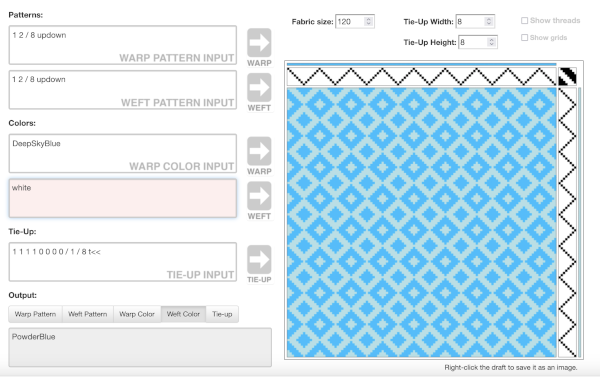
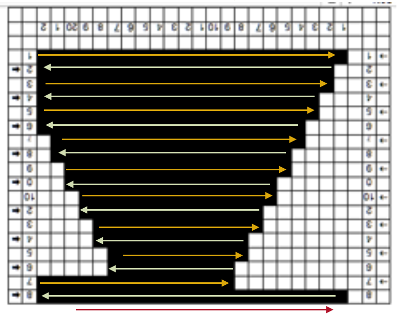
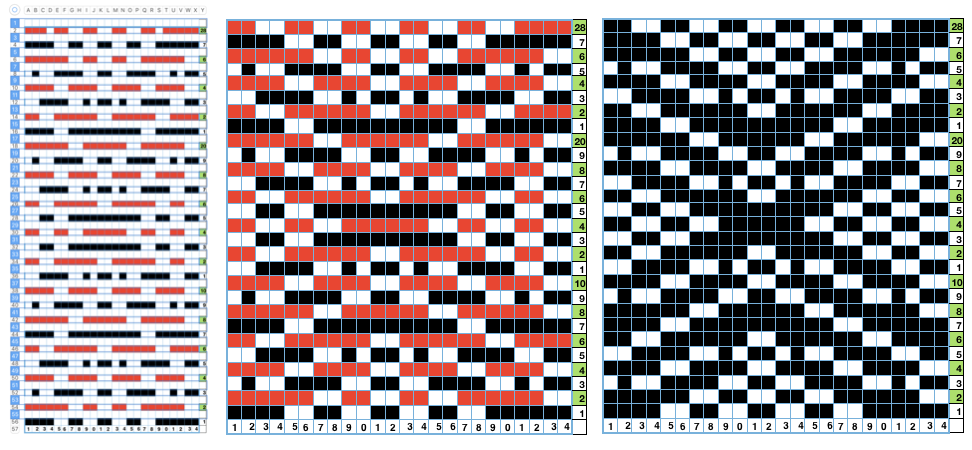
 Ayab will mirror it if drawn as is, which will place carriages in position for first preselection row to start from left, decreasing stitches in work
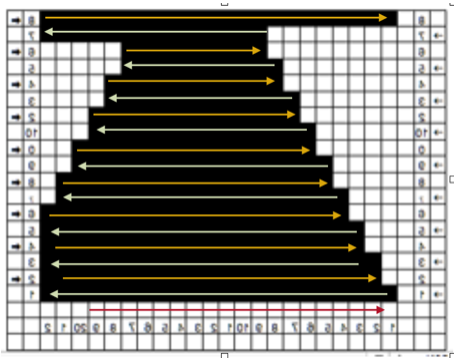


