Hems 1: previous post. Guidelines generally given for stocking stitch hems do not take into consideration if the body of the knit is going to be considerably narrower or wider than the stocking stitch, and whether the purl side of the fabric is to be used as the “public side”. In the latter case, the solution is simply to reverse tension changes from the inside to the outside of the hem. For wider or narrower fabrics the number of stitches for the hems may need to be recalculated, depending on whether a series of simple tension adjustments can solve the problem. Fiber content, yarn weight, and even color can affect results, so always test a swatch. It is possible to knit tubular hems using the ribber, but here the discussion is for the single bed only.
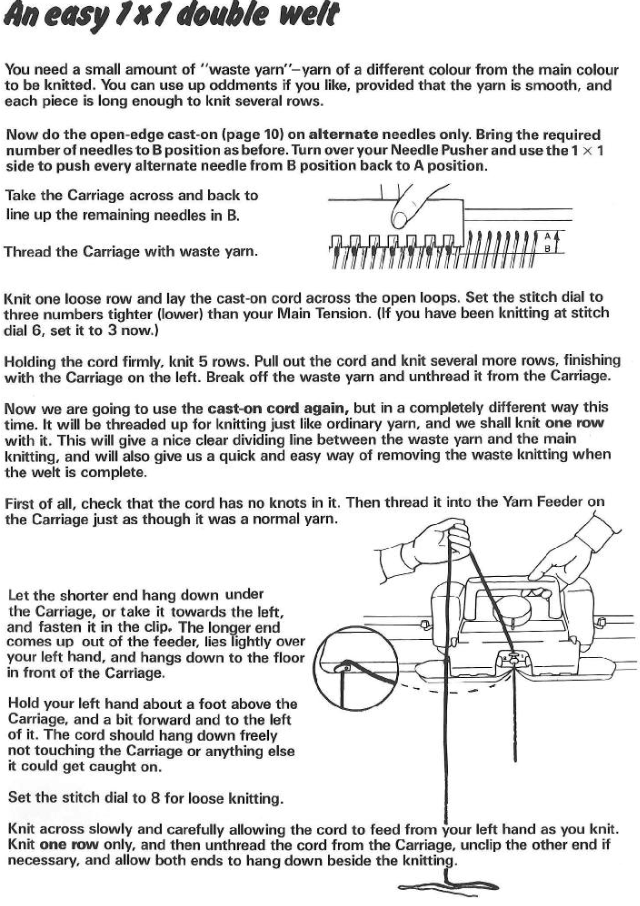
Hems at the beginning: cast on and knit several rows of waste yarn, ending with ravel cord. Following step 1 below: set the stitch dial one number lower than that used originally in stockinette knitting. Knit the number of rows required for the inside of the hem. Loosen tension by 2 numbers for one row (helps get a neater turning row). Tighten tension by one to the original stockinette tension, and proceed as indicated in steps 2 and 3 below. Illustrations are from Brother techniques Book, pp. 16 and 17. 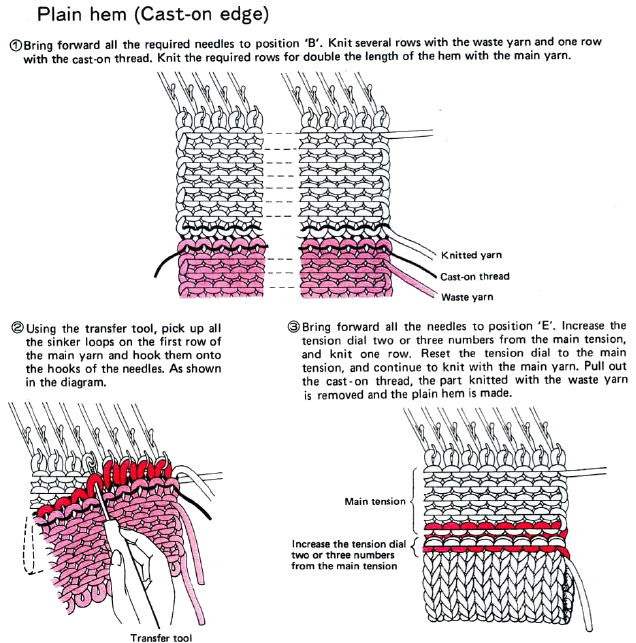
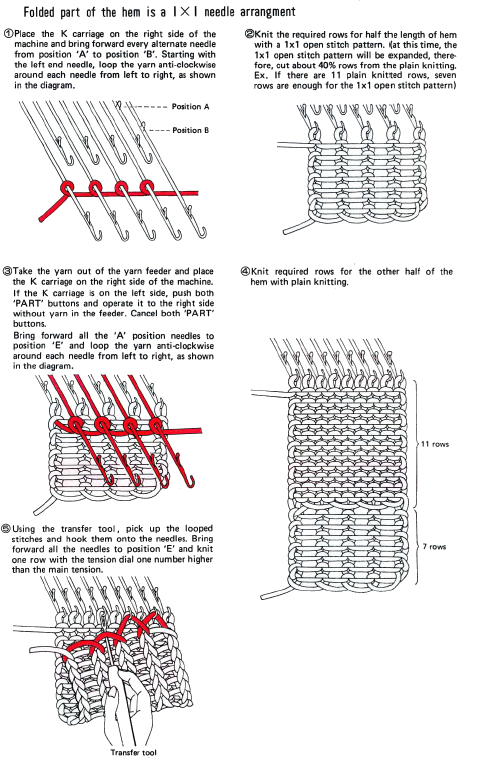
Picot hems: odd number of needles are required.
1: Cast on an odd number of stitches and knit several rows of waste knitting followed by 1 row knit with ravel cord. Set the stitch dial one full number (guideline) tighter than the main yarn and knit as many rows as required for the depth of the hem.
2: Picots are made by transferring stitches onto adjacent needles, making transfers to either left or right (shown in illustrations below).
3: Reset the stitch dial to stockinette tension and knit the same number of rows. 4: Place the sinker loops on the corresponding needles, making sure to pick up the edge sinker loop as well. Directions usually say to pull our ravel cord at this point, I like to knit a few rows and to make certain things have knit properly before removing the cord.
5: set the stitch dial 2-3 whole numbers higher than the stocking stitch tension and knit one row. This keeps the joining row from bulging out due to its double thickness.
6: Reset the tension dial to stocking stitch tension and continue to knit.
 After transfers, always check that proper transfers have indeed been made and that each needle holds 2 stitches. Bringing all needles out to E before knitting the next row helps facilitate a visual check.
Hems with the 1X1 needle arrangement below will often require at least one more row for the outside of the hem than for the backing since the EON-produced stitches will grow in size and lengthen when the fabric is set
 In step number 3 the e-wrapped row essentially casts on those empty needles, so that when the following row is knit, full stitches are formed on each needle, and when the hem is folded any appearance of eyelets is minimized.
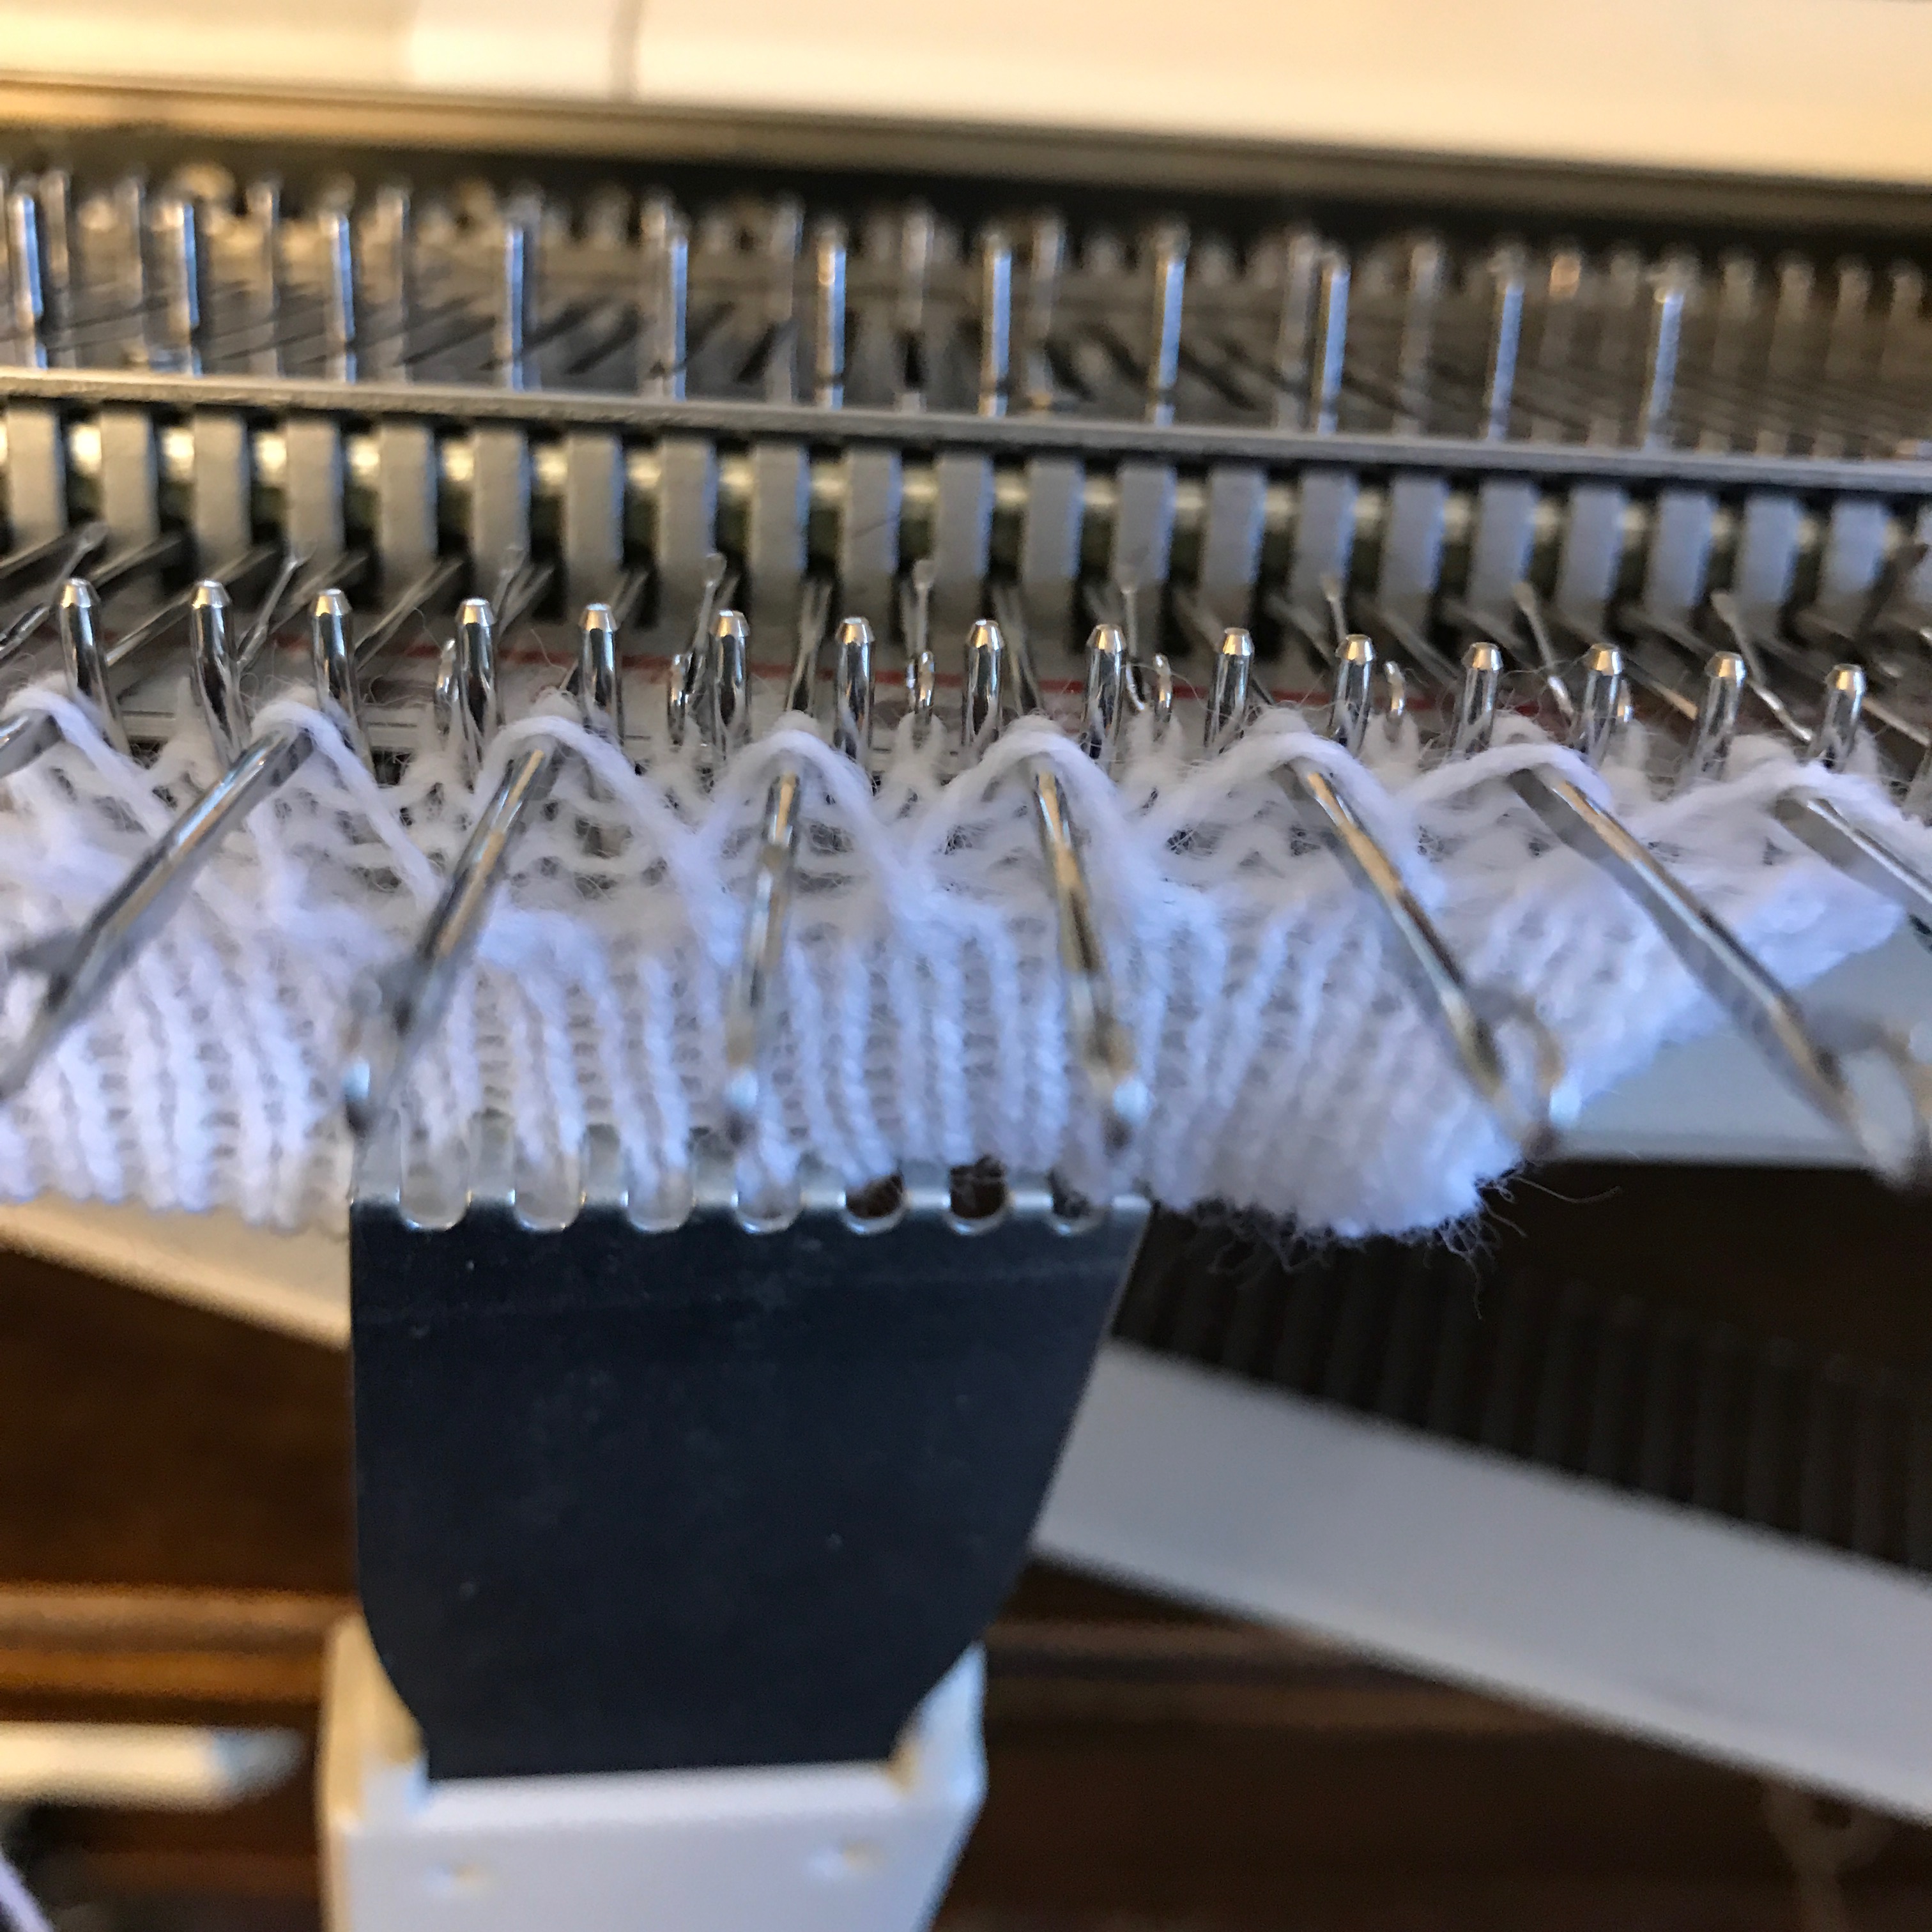
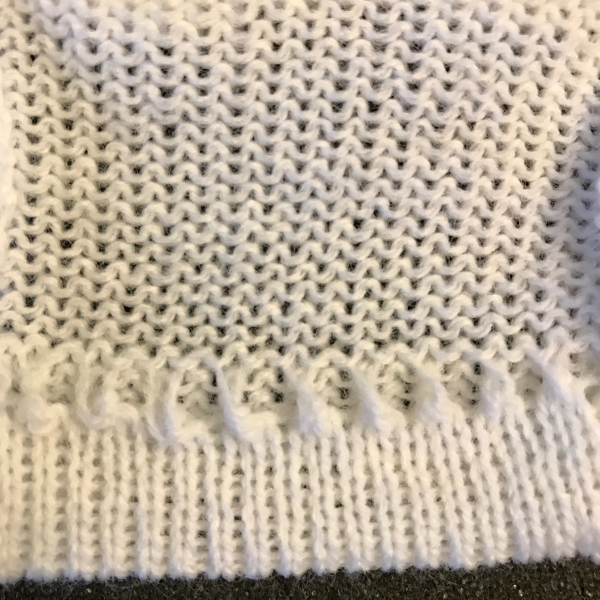
for illustration, the e-wrap row in a contrasting color (white is acrylic fiber)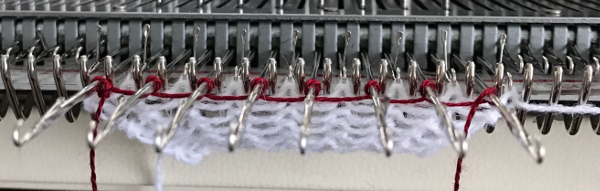 as knitting continues
 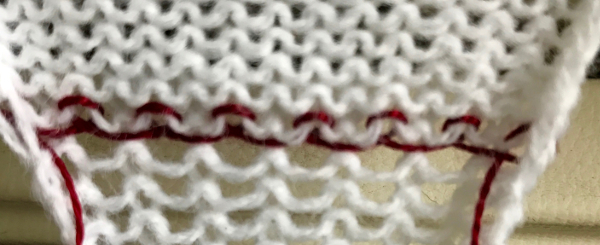 the hem exterior after some pressing
 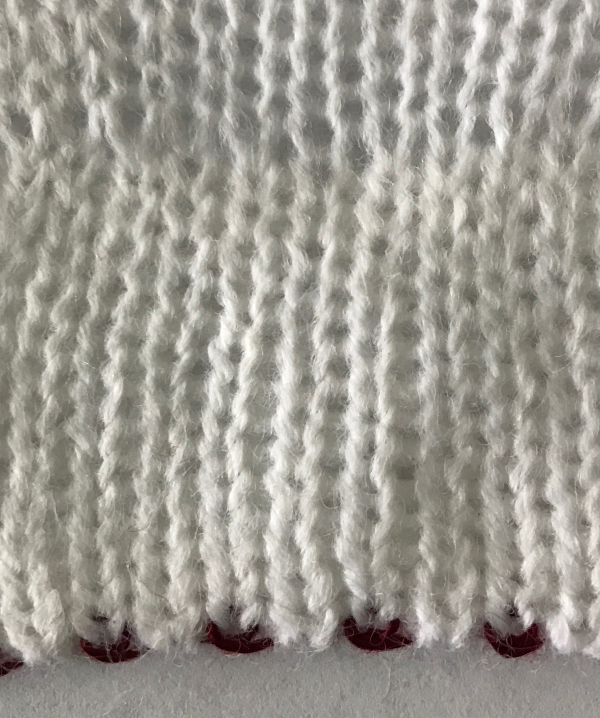 hem interior
An alternate method to step 3, producing a picot at the turn of the hem: bring empty needles out to hold position, and knit across to the opposite side. With the first pass, loops will form on empty needles, with the second pass reversing direction, an eyelet is formed and full knitting is restored for the outside hem. EON knitting tends to grow in length. I prefer to reduce EON tension by at least 2 numbers. Test on a swatch to determine the percentage of total rows needed to place the picot at the hem fold rather than having it roll out to the knit side, it will vary depending on the yarn used.
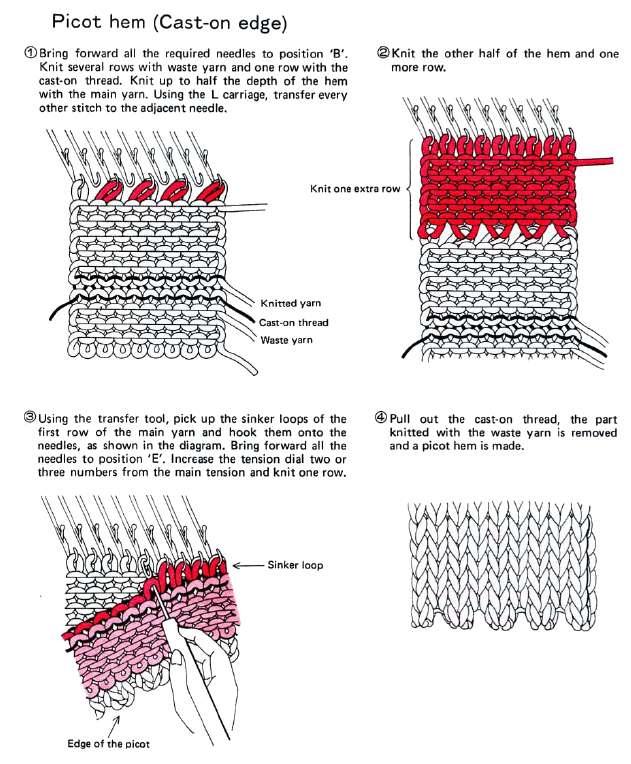
For the picot hem transfers using the lace carriage: after knitting with waste yarn and ravel cord, knit half the depth of the hem. Place the Lace carriage opposite the knit carriage, on either the left or right-hand side. Starting with the second needle from either side, bring forward every other needle to the D position using the 1X1 needle pusher. End needles must be in the B position. Move the lace carriage to the opposite side, every other stitch will now be transferred onto the adjacent needle. Remove the carriage by using the release button, and continue to knit as described above.
Again, I like to knit several rows after picking up stitches and completing the hem before removing the ravel cord and waste yarn.
If you prefer not to use waste yarn, for the inside hem on every needle (method 1 from the previous post). If using the comb: e wrap EON on an odd number of needles, hang the cast-on comb with teeth pointing away from you and proceed as below. 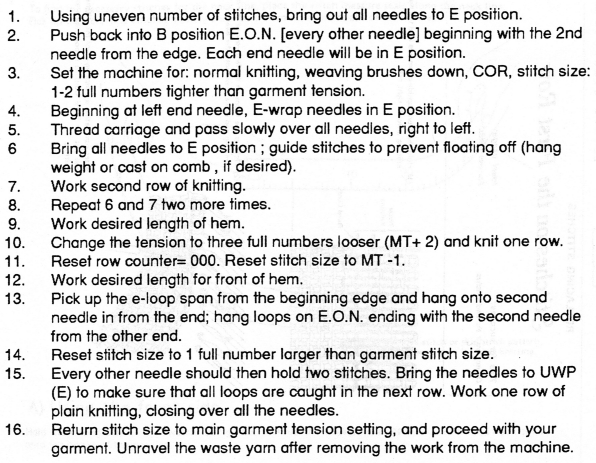 Using the cast-on comb to speed up rehanging stitches to close hem: a foreign language video showing its use on the mock rib at the top of socks. The method can be used for any configuration needle setup. It is possible to use ribber cast on combs for the same purpose, I will address that in another post. When EON loops are used to join the hem, the inside of the hem will “drop” some when set, so fewer rows are required on the inside hem.

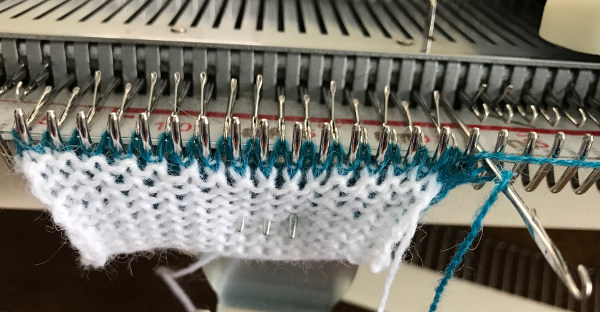
When hanging any hem, one stitch is lost on the side of the cut yarn end. Also, on the knot side, the stitch may be less noticeable, so you want to make certain that that outside loop/ stitch is also included in the count (green arrow)
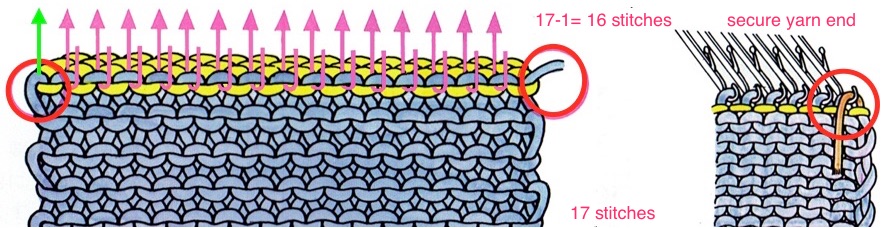 I like to secure the main color yarn end as seen below around the adjoining empty needle as seen below
 continue knitting
 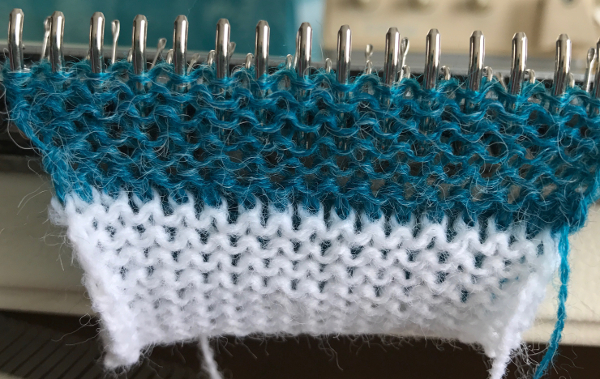 forgot ravel cord? find the outside of the last stitch knit in waste yarn, opposite yarn ends
 clip stitch, pull out “ravel cord”, continue knitting
Note: ravel cord ideally should be smooth, nonshedding fiber, and strong enough not to break when pulled on. If like fibers are used and they shed as the cord is removed, you may have tiny fibers of the contrasting color permanently mating with your garment yarn. Check for any knots in the cord at each side of the knit before pulling it out.
Instructions for single-bed mock rib from