Any discussion of crochet like fabrics on home knitting machines, whether single or double bed, invariably lead to looking at gathered loops, whether created as a hand technique using holding or automated by using the tuck setting. The function of the card remains the same when cam buttons are engaged, regardless of whether knitting single or double bed. In Brother machines punched holes result in needles being selected to D position (brother has no C), those needles will knit (second color in FI, thin yarn in thread lace / B feeder). Unpunched areas remain in B position, and will tuck or slip, (color 1/A feeder FI, both yarns together in thread lace) based on cam settings. Another Brother feature is that the needle tape to help with markings for stitch counts, pattern repeats, etc. centers between 2 # 1 needle positions. This can cause some confusion when translating patterns from other makers that rely on needle position numbers only for their directions.
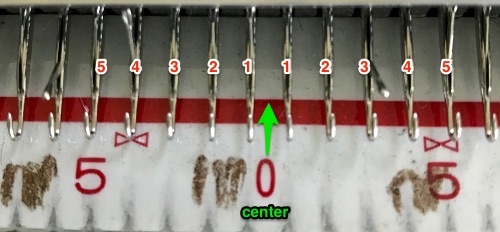
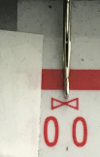
I often use punchcard designs on my electronic machines after isolating the repeat, most often for the sake of speed and convenience. Swapping out the needle tape for the electronic with one for a punchcard machine makes identifying and placing repeats easier. In Brother punchcard machines tapes the heavy solid line, followed by a thin line on alternate sides, reflects each 24 stitch repeat. Repeats on these KMs are fixed, there is no option for altering the starting position. When using electronics in some patterns, aside from the added convenience of color-reverse for minimal “drawing”, it is helpful to know that the punchcard design reflects what happens on the purl side, so letters, etc are reversed on the knit side. As a result, when translating for electronics, some patterns may also require being flipped horizontally. Using the markings on needle tape is pointless if the tape is not properly centered. Check needle “bow” mark at 100 on the left side, the last needle on that side should rest directly in its center. As the retainer bar begins to loosen a bit from wear, the tape may start shifting position, and cello tape may be needed to anchor it in place
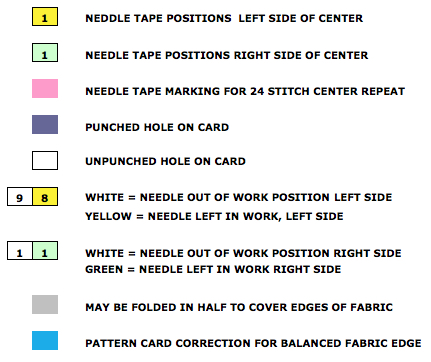
Marking colors have varied over the years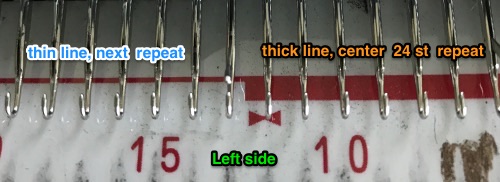
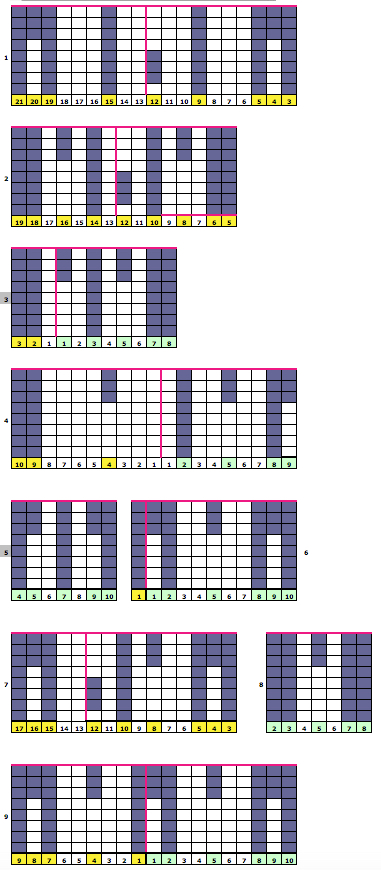
 “Trims” can be any width, from narrow to wider bands. Punching cards is enough work so that it is worthwhile to get as many functions or fabrics out of each card as possible. Various software makes it easy to check repeat tiling, or simply scan/copy the card with black paper behind it, cut it up, and cello segments together to sort out needle placement. I chart mostly in Excel, old fashioned colored pencils, and graph paperwork just fine
self-drawn punchcard for Brother side by side repeats
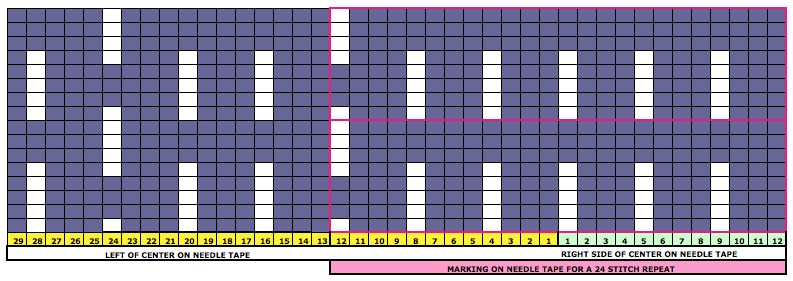
 in this instance, left side needs some adjustment
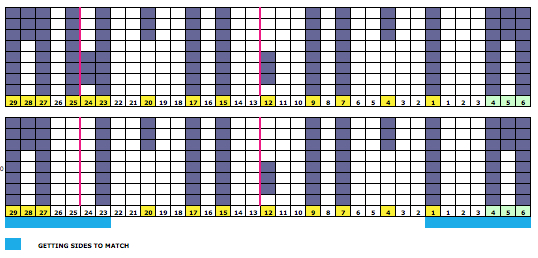
got a pre-punched card? tucks occurring for 3 rows  for an all-over pattern, or trim choosing a section of repeat
 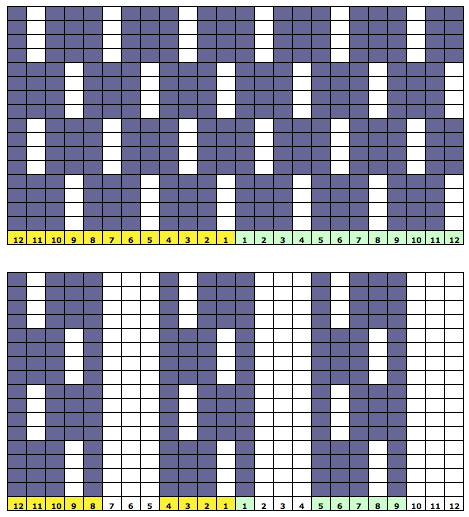 Studio card (use appropriate starting row for the machine)
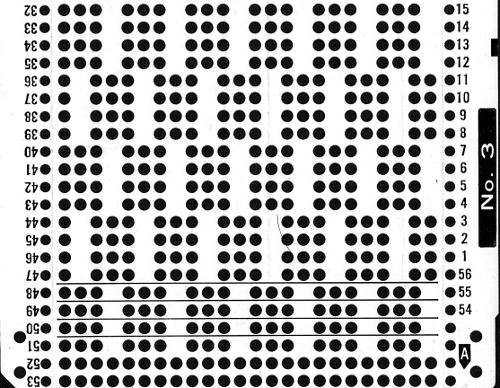 same needle arrangement, tucks will now occur for 4 rows
Love your ribber? use any tuck lace appropriate card. Transfer any or all of the needles to be left in A position (OOW) on the main bed onto the ribber, and you will have a pattern combining knit and purl stitches. Use waste yarn, ravel cord, and ribber comb with weights through waste yarn. Cast ons and bind-offs may require planning and choice depending on yarn used and the number of rows tucking. These in turn result in a stretch in width and diminished length proportionately in the body of the finished fabric. After casting on and setting up both beds, set ribber on P (so needles on both beds are directly opposite each other) to center ribber created vertical columns between those on the opposite bed.