I found this on a random sheet tucked away with references from some seminar or other eons ago, its origin is not known to me
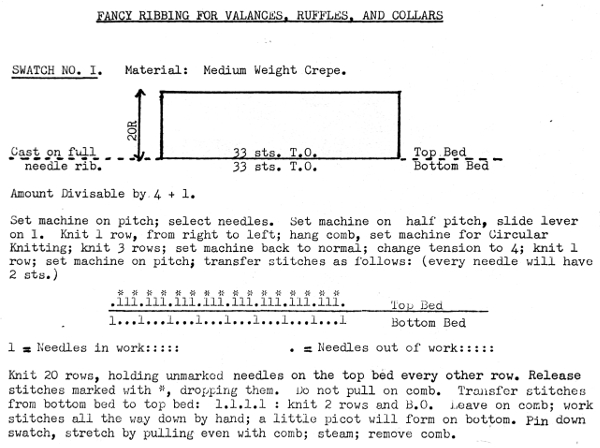 I like to chart out my repeats and plans for executing fabrics, along with ideas for possibly varying them in ways other than suggested, this was my beginning
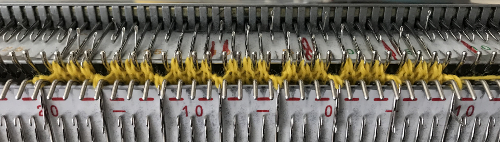
 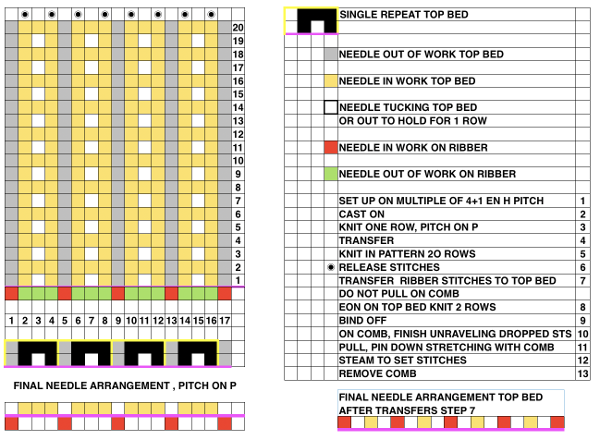 The sequence in photos, beginning with the cast on, 2/24 acrylic yarn, zigzag row with inserted ribber comb, half-pitch
 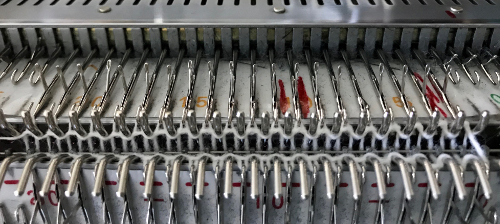 1 row is knit across all stitches to complete cast on,
 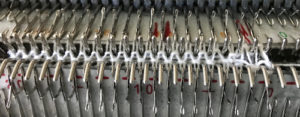 knit one more row to return to the opposite side
 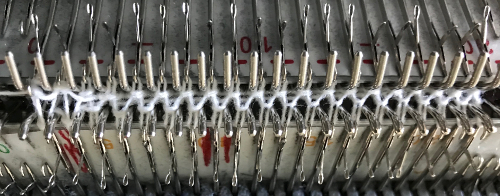 the setting is changed to full pitch, stitches are transferred between beds to match diagrams
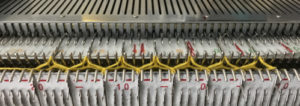
 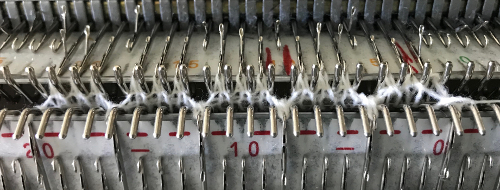 the center needle in each group of 3 is brought out to hold for one row, knit one row to return to the other side
 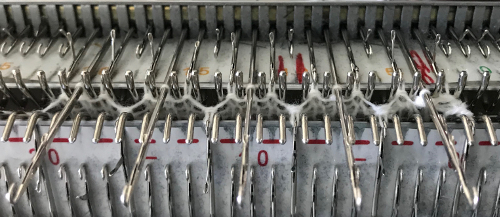 center needles are pushed back to D position in order to be knit on return pass to the opposite side
 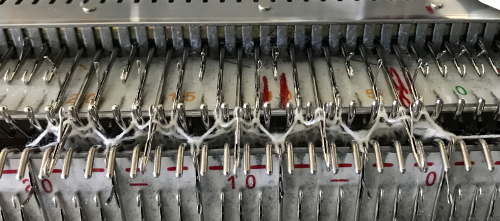 this tool makes that needle selection faster and easier
 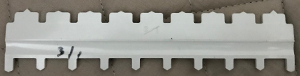 when the 20 rows had been knit in pattern drop stitches on each side of center stitch
  transfer ribber stitches up to main bed
 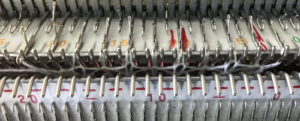 I knit 3 rows rather than 2, to return to right side for bind off
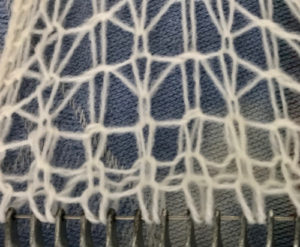
 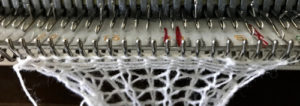 here is the swatch, still on comb for “setting stitches”
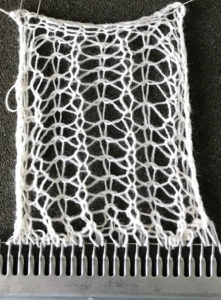
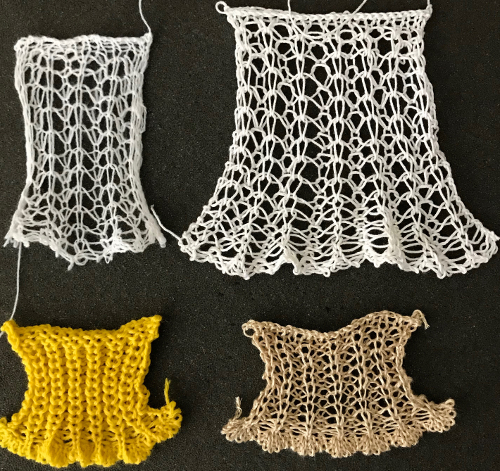
I found the above results upon completion disappointingly wimpy, then tried the same steps in tightly twisted and slightly thicker cotton, achieved better results, but was still not happy. That set me thinking about an alternative way to produce a similar fabric with changes in needle arrangements. The full series of swatches is seen below. The yellow is knit in a 2/8 wool, the beige in the same weight cotton as the white on the right. All swatches were knit on the same tension, for the same number of rows.
The adjustments on the original pattern are as follows. At half-pitch begin as above with zig zag to left, 2 circular rows, knit back to right. Set pitch to P, transfer between beds
 knit back to the opposite side, transfer each of the side stitches on the top bed onto the center needle in each group,
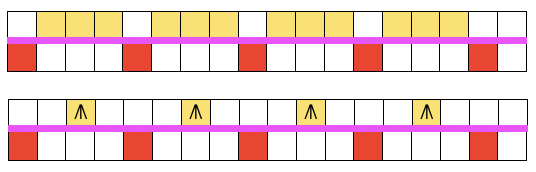 bring those needles out to hold for easier knitting on the next pass
 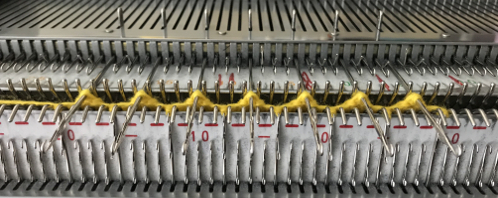 knit one row back to the right, making sure stitches have knit off properly. When you have returned to the right side, set the carriage to tuck from right to left only (left tuck button), RC000
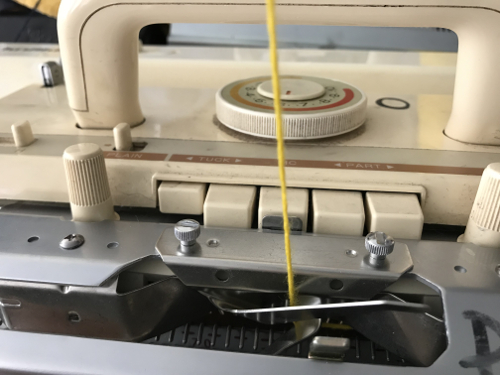 loops will be formed on the center needles as they would have been formed over the needles as if holding was in use
 when the 20 rows are completed the carriages will once again be on the right, all stitches will have been knit on the previous row
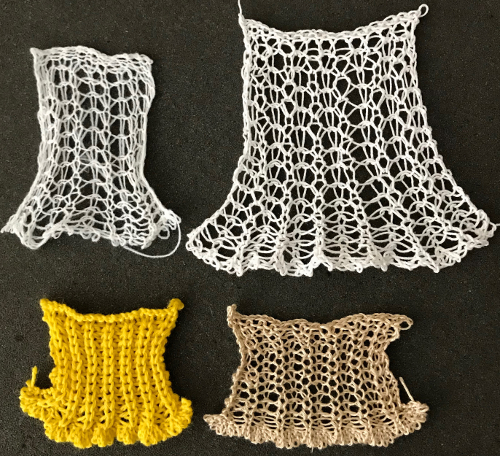
 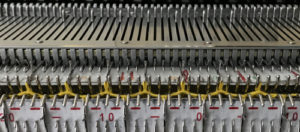 transfer all ribber stitches to top bed, knit 2 rows, bind off. None of my swatches were blocked other than by some tugging, particularly along the bottom edge. The spacing between stitches is narrower because ladders created by single needles left out of work are formed by yarn lengths that are shorter than those that happen when stitches are knit and then in turn dropped. The height of the swatch is also affected, and the half fisherman texture in the wool swatch, in particular, is more evident.
More variations to try in a multiple of 3+1: using either method or a DIY cast on, dropping (yellow) stitches marked with a * at the end, or transferring them to right or left and setting the main bed to tuck in one direction only. 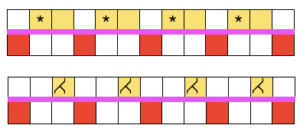 When the work is removed from the machine, stretch cast on outwards, then give each “scallop” a really good pull downwards. Steam lightly over the scallops to set them. Variations of the double bed trims may be worked on the single bed as well.