I have long since wanted to experiment with a variety of folds in knits other than “simple pleats”.
I am sharing some of my earlier starts looking at some concepts beginning with the single bed.
For a diagonal pleat, I began testing the waters by bringing some needles to hold-position every other row and creating a “moving ladder” or eyelet in the center space between tucked stitch columns. The modified eyelet performed better than the simple one in creating a fold.  The next question for me is always how to automate any part of the process. Tucking for 2 rows seemed more likely to create a sharper crease. Since the transfers associated with the ladder space are all in the same direction this is a fabric that will definitely bias. The swatch below shows the results, the blue arrows point to operator error in ladder placement, the red arrow at the top of the swatch points to multiple rows of knitting. Multiple rows of stocking stitches at either end are likely to flare out and “ruffle”.
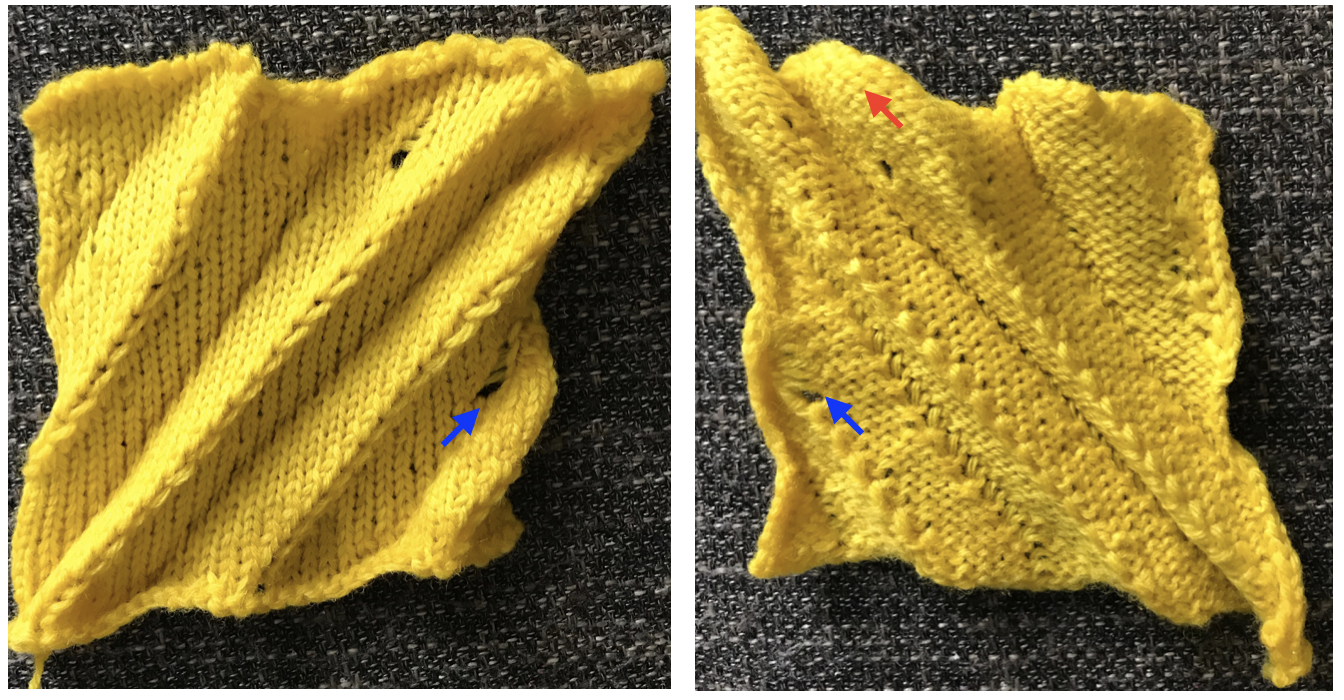 The fabric had an interesting twist and roll if tugged in opposite diagonal directions when first off the machine.
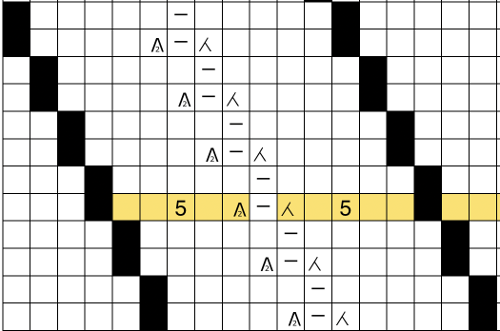
  This is the working repeat, suitable for a punchcard machine. On the far left it is shown for use with electronics and color reverse, with the green grid highlighting black squares indicating holes that would need to be punched in a card, and lastly, as a tiled repeat looking for any errors in repeat sequences.
 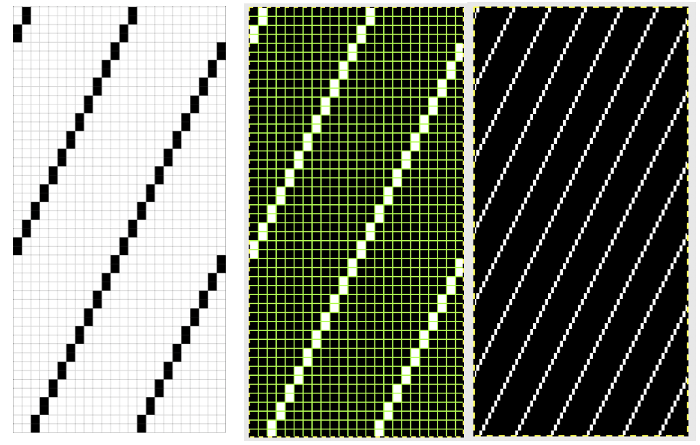 Below the actions taken in part of the overall repeat are represented. The model year Brother machine in use may require you also flip the image vertically before knitting it. This is what is planned for the purl side.
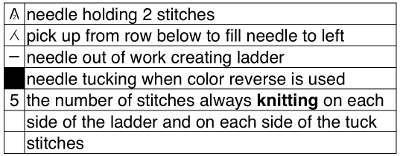
 One of the issues with self-published patterns is the adaptation of or use of symbols that are different than that in any published consensus. The transfers to the left are commonly indicated this way in lace knitting. If the needle that is emptied is left out of work, a ladder will form. If it is left in work the first pass creates a loop on that needle, the next pass to the opposite side completes the stitch, resulting eyelet on that same needle.
 ![]() Picking up from the row below is usually represented this way
Picking up from the row below is usually represented this way 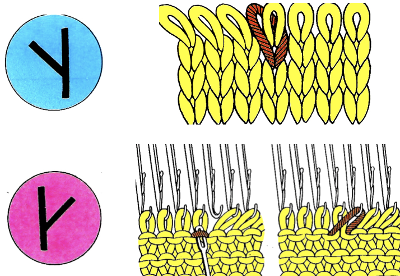 This shows my swatch in progress. ? indicates operator error, in evidence if needle count on each side of the future tuck stitch or ladder space is checked
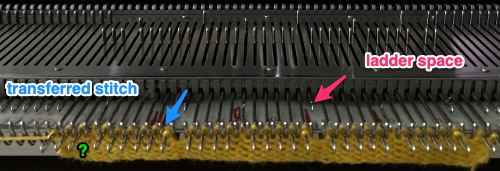 picking up loops from the row below to keep ladder width constant
 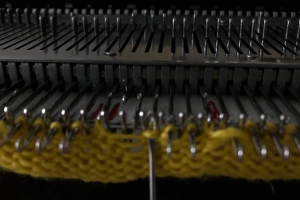 transferred stitch (blue) and 1 needle ladder (pink) marked by arrows
 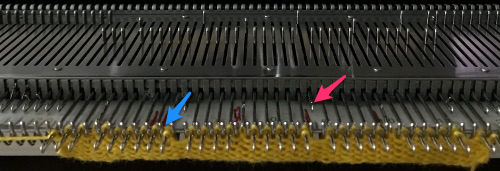 Check that stitches have knit off properly
 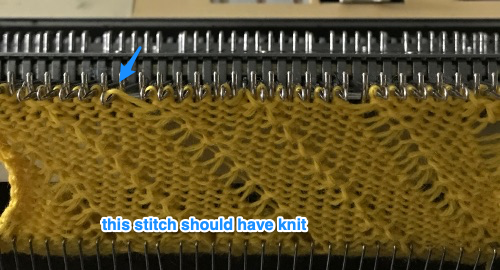 Needles with transfers or moved stitches may be brought out to hold position (E in Brother machines) for easier knitting. If this is done, be sure not to disturb needle selection or lack of it in location for next pair of tucked rows.
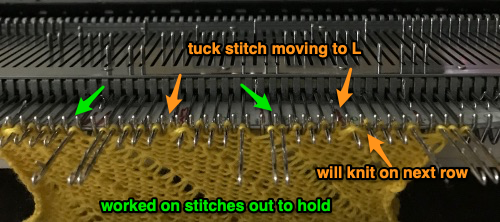
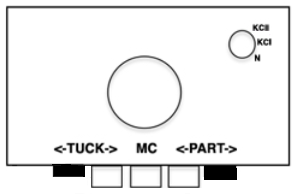
If one is exploring a DIY search for creating fabrics, the journey is often one of trial, error, and an investment of time with not always yield good results, but may yield pleasant surprises and an opportunity for learning and new ideas. These were some of my trial swatches in thinking of more varied directional folds single bed 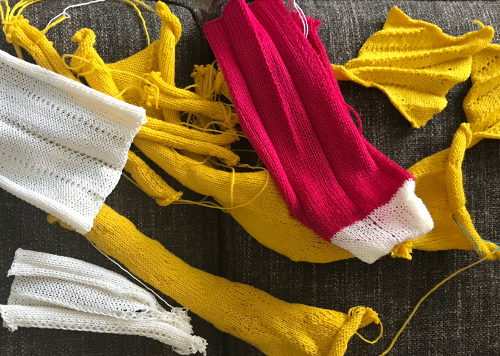 I was led back to slipping or tucking every other row for creating some of those folds, and the possibility of having both actions happening on the same bed automated in some way. Often forgotten and unused in the Brother machine settings is its capability of tucking in one direction and slipping in the opposite one. These are the 2 possible settings. It does make a difference in resulting fabrics which stitch type happens first as one travels back and forth across the knitting bed. Arrows in opposite directions are chosen for each stitch type.
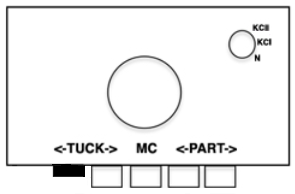
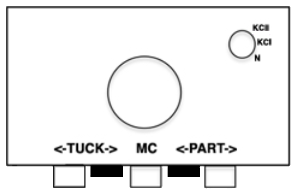
 Setting up a working repeat with blue representing tuck, purple slip (or vice versa). The distance between the vertical column, in this case, is fixed and seven stitches in width for a center folding repeat width of 16, color reverse is required
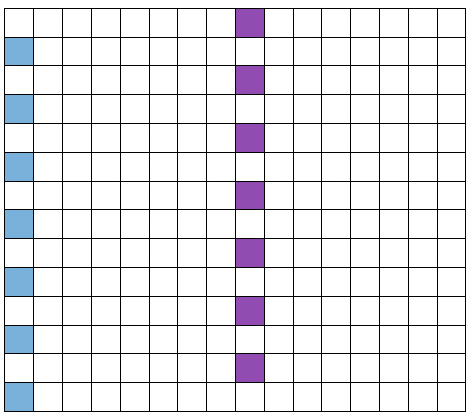 12 stitch version color reversed for actual knitting
 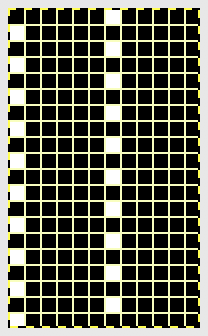 This is the purl side of the fabric with both stitch types happening on the main bed. It pretty much flattened out with some light pressing, not much of a pleat
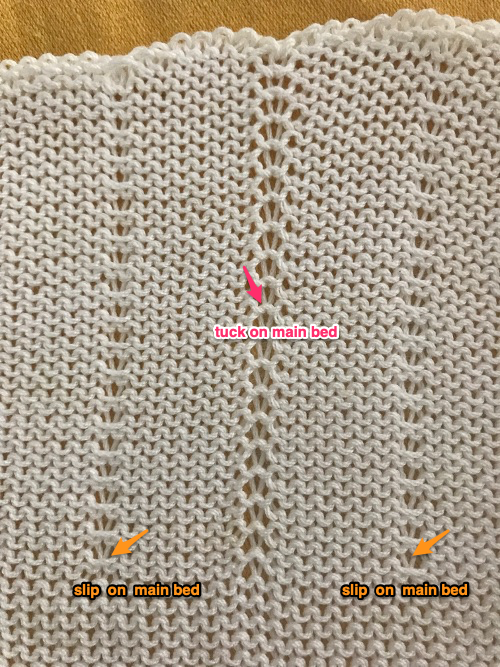 This is what happens once the ribber needles are brought into action.
 Set up the cast-on as preferred. I used plain knitting, weighted it, and began my pattern work from the right-hand side of the machine. COL my preselection row was made from right to left. White squares in the chart with black ground and green grid become non selected needles on the main bed. Transfer nonselected stitches down to the ribber. Set the ribber to slip to the right, those stitches just transferred will slip moving to the right, knit on the return pass to the left. The knit carriage is set to knit until that first row is completed
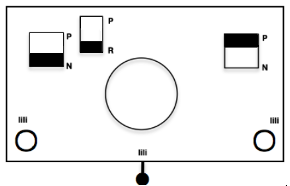 COR the ribber will knit on the next pass to the left. Set the knit carriage to tuck while the ribber is knitting
 Continue in pattern to the desired length. Fabric narrows considerably, so several panels may be required for items ie. skirts. The repeat on the knitting bed should also be adjusted to allow for as close to invisible seaming as possible. The stitches on either side of the single needle in work on the ribber may be inclined to drop off. I was unable to use tuck on those same needles for any significant length for that reason. It pays to visually check for stitches knitting off properly to avoid this
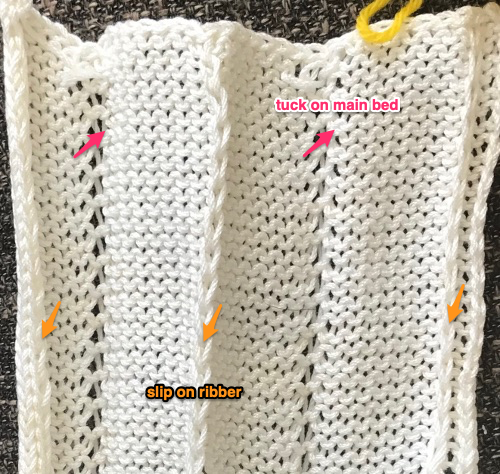
 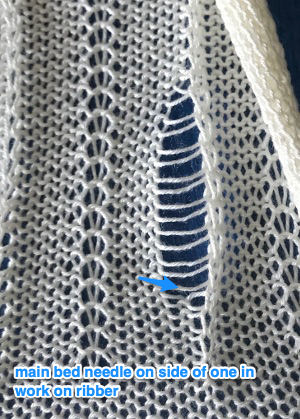 The start of vertical pleats, with the slip stitches folding to the purl side, the tucked stitches folding to the knit side on the machine, just after binding off.
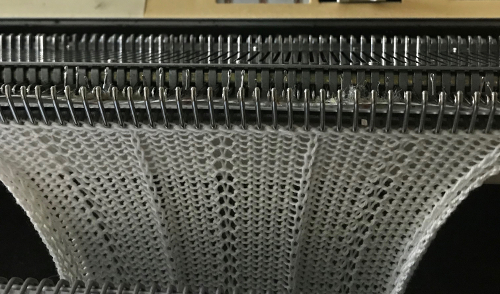
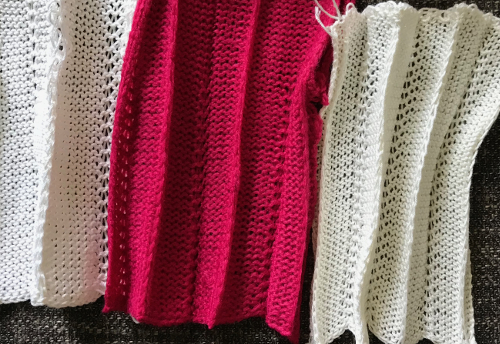
 The two fabrics side by side
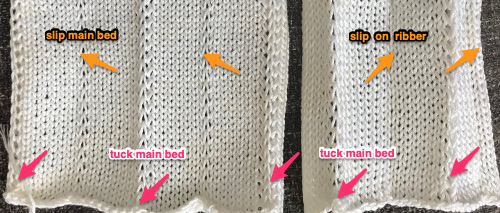 Different fibers can produce varying results in fold and drape. Setting either bed function for the wrong direction will produce an all-knit fabric (top of the red swatch).
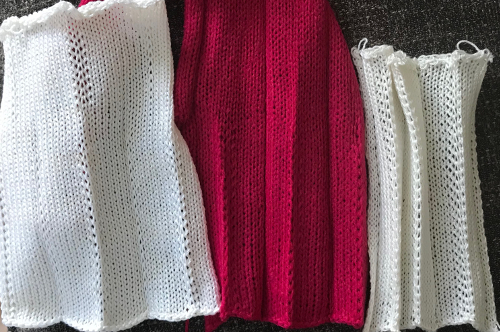
 This starts to address incorporating hand techniques and manual ones from the diagonal swatch and the one with vertical folds while also developing a design repeat to aid with planning or actions to be taken. It will be altered in future experiments
 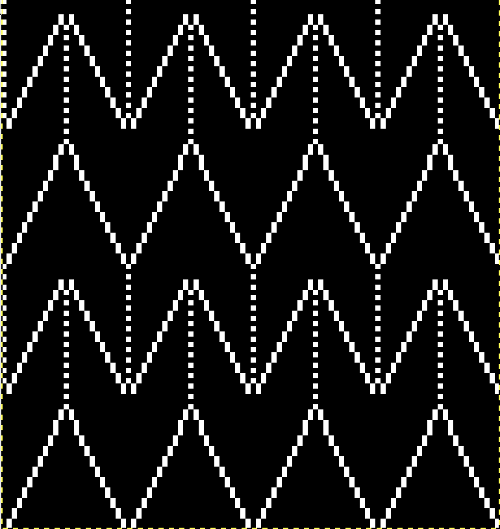 The yarn choice is a poor one. The fiber is a very softly spun rayon, which could benefit also from being knit at a tighter tension, and since rayon has no “memory” it fails to have any spring back and is flattened out permanently with pressing and steam.
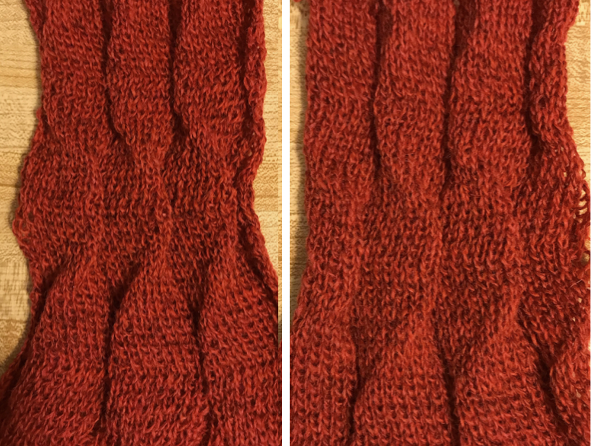
 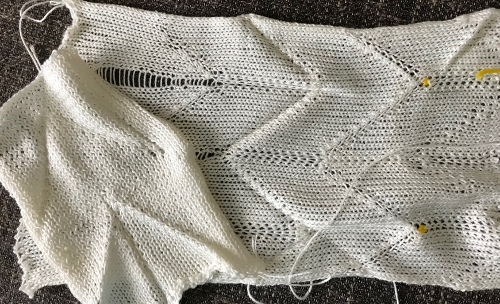 This swatch is knit in wool, trying to sort out what does what and by how much. I am starting to get a bubble, but not a dramatic folding effect. The bottom folds more than the top. The filled eyelet technique has a hand-tooled tuck column on the reverse side. The top is automated using tuck stitch.
 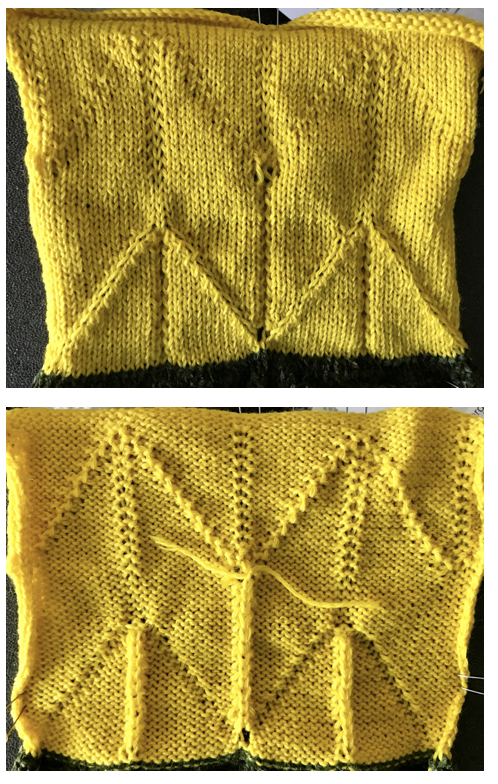 A different repeat: the bottom with carriage set to knit with needle selection as a cue to hand transfers, the top set to tuck automatically. Transition rows need to be considered further and altered where the twain meet.
 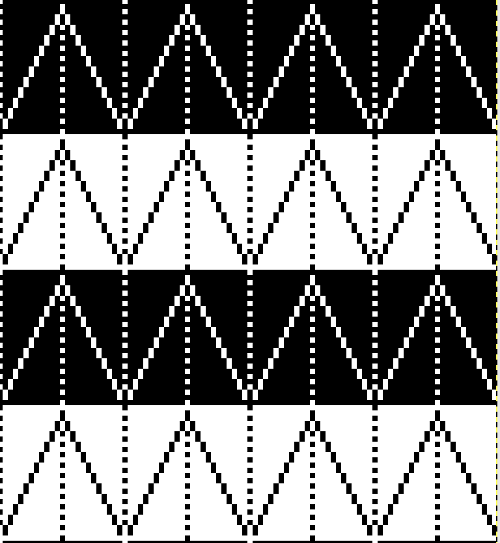 Returning to simpler creases and folds: a first experiment in racking double bed with NOOW. The setup and racking positions were not pre-planned. I knit 4 rows without racking at unplanned intervals as well; they produce a noticeable change in texture. The fabric is reversible, I actually rephotographed it adding a marker to make certain I had not shot the same side twice. The needle set up:
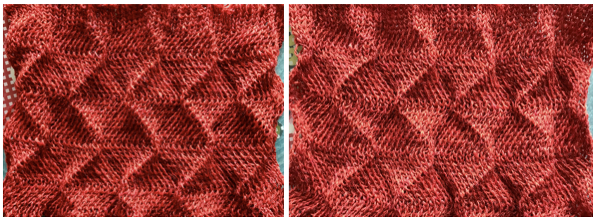
  the resulting swatch presented sideways for the sake of space:
 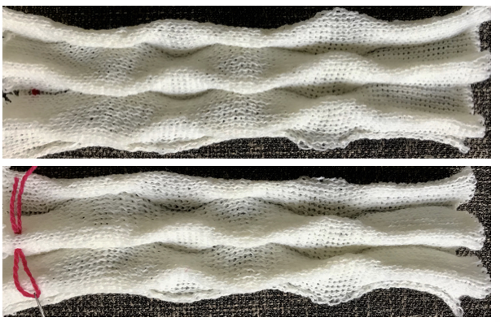 working with single needles out of work rather than two, with even spacing between them on each bed
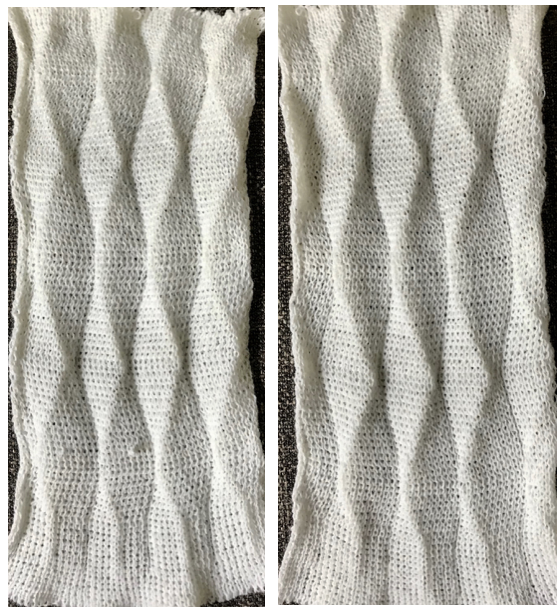 both swatches flattened to note differences between needle arrangement folds
 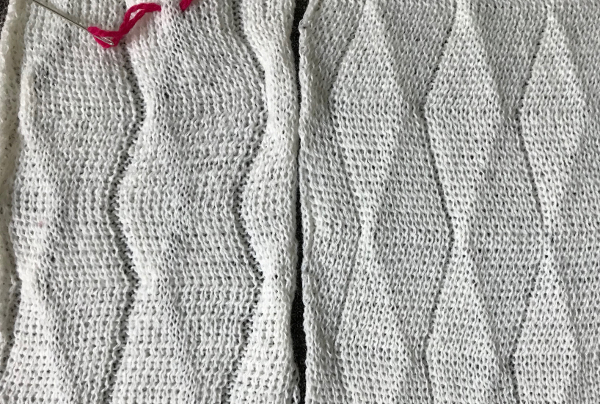 getting more organized, with a planned repeat: the needle set up
![]() cast on with racking position on 5, rack every 2 rows, move from position 5 to 0, to 10, back to 0, to 10, end on position 5; the yarn is a 2/17 wool, definitely retains a more 3D quality than the acrylic 2/24. The fabric may benefit from 2 rows not being racked added at positions 0 and 10
cast on with racking position on 5, rack every 2 rows, move from position 5 to 0, to 10, back to 0, to 10, end on position 5; the yarn is a 2/17 wool, definitely retains a more 3D quality than the acrylic 2/24. The fabric may benefit from 2 rows not being racked added at positions 0 and 10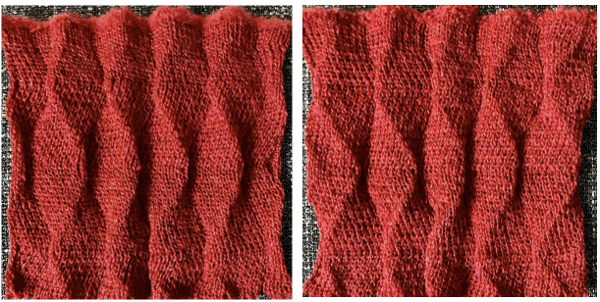 Here the arrangement here is with 2 needles out of work, racking every 2 rows in the same sequence. The resulting fabric has clear “spring” and foldsRR
![]()
 Returning to the previous needle set up, now racking every row from position 5 to 0, knit 1 more row with no racking; rack to position 10, knit one more row with no racking, reverse direction, end knitting on position # 5
![]()
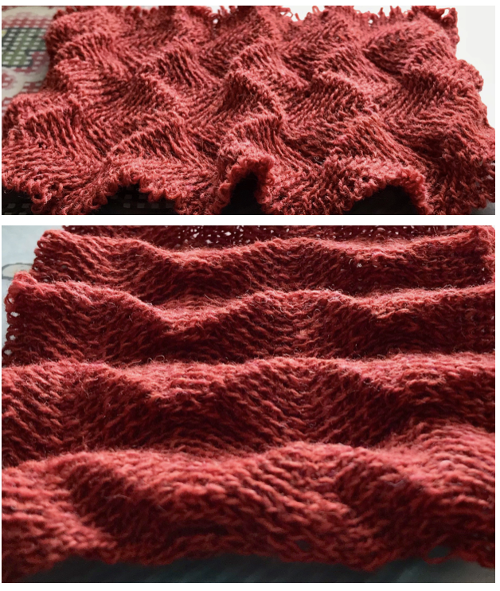 This last in the series is a personal favorite. I found racking from the center to 10, to 0, and back easy to track. One moves in the opposite direction when not allowed to go any further in the continuing direction by the machine. Single needles out of work appear to be enough to create the folds.
Exploring starting the pattern at 0, to 10, and back. The bottom segment is knit with no needles out of work, the middle with NOOW on the top bed only, the top with NOOW on both beds. Dotted lines separate each, and outline a second, smaller shape occurring along with the beginning of changes in the larger one. I had issues with edge stitches on the main bed. My final needle set up
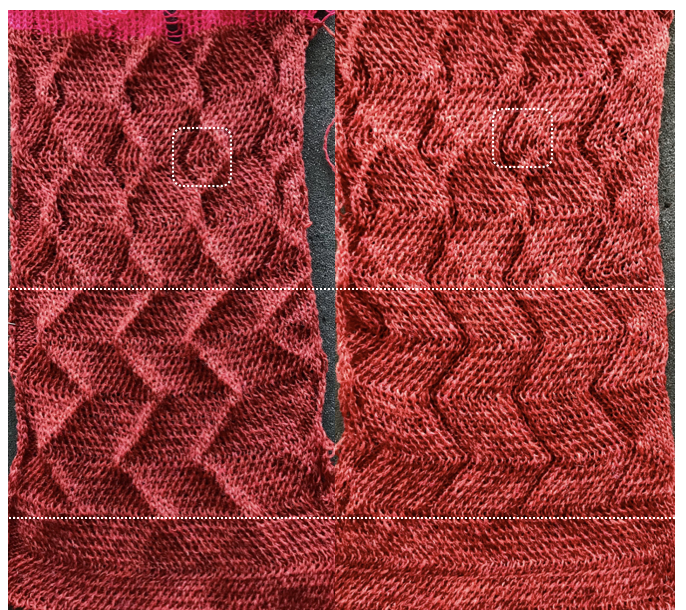 Racking starting position on 7:
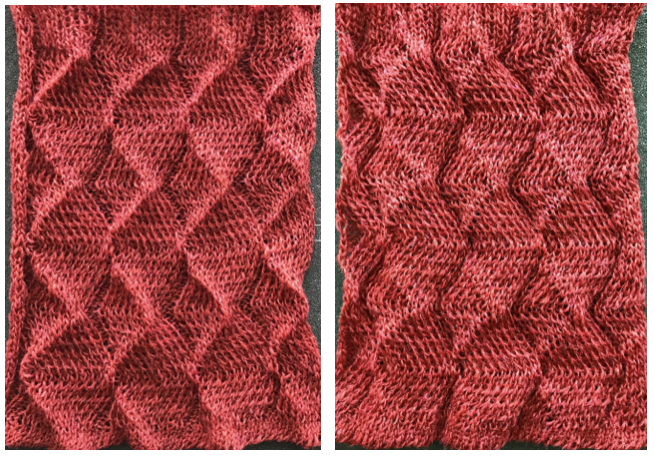 Consider playing with racking positions within the total number of needles in work on the main bed. For other possible needle arrangements and more on pleats created with needles in/out of work on both beds please see 2015/04/22/ribbed-pleated-folding-fabrics/