Below are some ideas for creating long loops on the machine using only a single bed. The essential difference between stitches and loops as mentioned before is that long stitches must be individually knit through the previous row, loops sit on the purl side surface. Yarn weight, loop concentration, number of looped stitches, and their locations open up endless possibilities. If loops for any reason are wanted on the knit side, the garter bar may be used to take knitting off the machine and hold them, loops are formed, the piece of knitting is then returned onto the machine, and continued. Swatching helps determine operator tolerance and preference as well. Some of the old manuals and pattern books such as the very early Brother Home Course offer this guide under the category of “weaving” while others refer to the same technique as “pile”. Punchcards may be used to preselect needles for patterning with the technique. 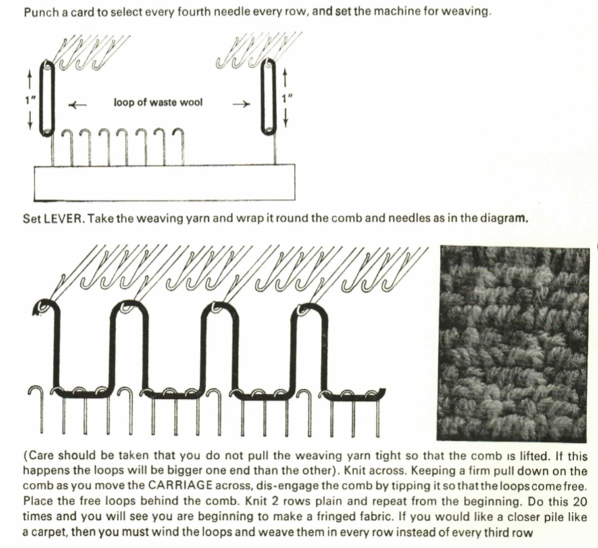 Working single bed:
1. knitting in place on the machine with its cast on edge weighted to keep it from curling up (use waste yarn if loops need to be close to the same edge), paper clips and weighted cast on the comb in place

this technique may be used on every needle, or only on selected parts of the needle bed; for the sake of speed for this ‘demo’ I will be working on EON; desired pattern area needles are brought out to the hold position

the loop yarn is mohair; slip knot secures start to cast on comb, yarn is wrapped counterclockwise in this instance up, around EON selected needle, and back down and around corresponding EON cast on comb tooth; if desired this could be done multiple times on anyone needle depending on the tolerance of KM in knitting next pass

the carriage now knits across all needles, yarn is secured

the cast on comb is removed, plain knit continues until the next set of loops

2. a ruler or other tool may be used to determine loop length; I prefer to use 2 rulers, yarn is secured, and wrapping follows as above around selected needles and then rulers

the second ruler is removed, allowing the first to drop down a bit, which will hold loops in place, while in most instances allowing the knit carriage to move across that row with the alternate ruler still in place

knit at least one row to secure loops, remove the ruler

3. once again using 2 rulers secure yarn, and wrap, creating a crochet chain with tested size crochet or latch hook

remove the second ruler, this will give you some ease along the chain edge

hook chained edge onto selected KM needles

knit at least one row across the area, remove the ruler

4. the samples: as can be imagined EON may be sufficient for a thick pile if fewer rows of knitting occur between looped rows
 It is possible to cover a knit with long loops of any sort. Using the same mohair, here the swatch is covered with loops, and the mohair is brushed
 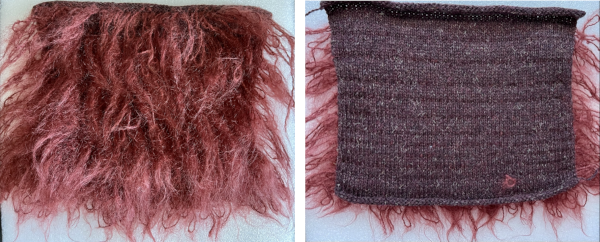 If loops out of thin or slippery yarns are desired, as an alternative, create wide ladders with narrow outside edges of the single or double stitch, fold in half, rehanging the sides of the strip onto the body of the knit
later post with tips for creating long stitches, no photos
long stitch swatches
A 2020 FB post led me to quickly explore another method for creating loops using ribber gate pegs. Normally one would begin with waste yarn, ravel cord, at least one row of knitting before beginning in any pattern. In tests that is not necessarily relevant. Begin with some knitting on the machine. Ribber setting on P, ribber brackets set to middle position
Have an every other needle pusher tool on hand and yarns of different thicknesses, knit a few rows and hang weight evenly across all stitches at any time in that process 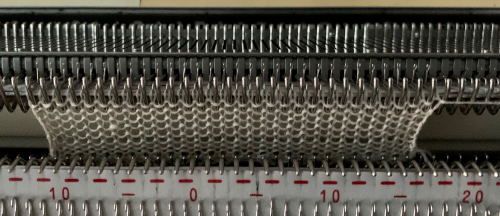 bring every other needle out to E (Studio D)/ aka holding position
 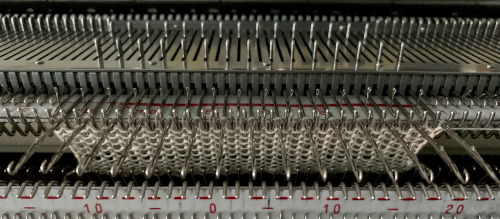 *work your way across the beds, wrapping every other E position needle clockwise and the gate peg directly below it, resulting in the twist
 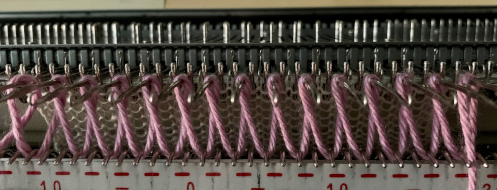 knit one row, repeat wraps counterclockwise in the opposite direction
 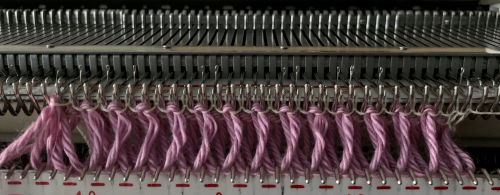 knit 3 rows, returning to starting side
 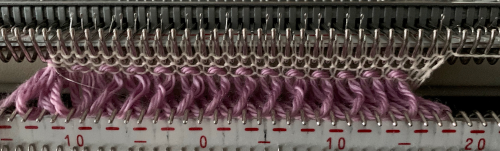 use a tool to lift loops off the ribber sinker posts
 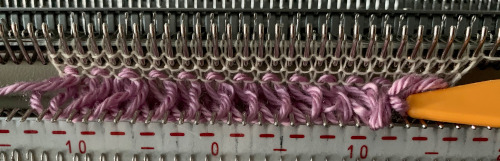 push loops down between the beds**
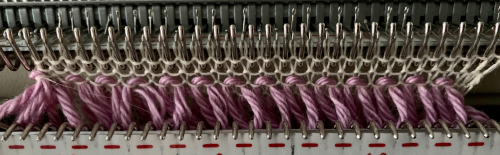 repeat * to **, knit at least one more row across any loops at the top of the piece and bind off.
The loops are directional, so if this were a scarf, their “lean” would be down at one end, and up onto the other. My loops are formed using a loose twist acrylic yarn, one less so would avoid any splitting issues as the piece grows. Steaming acrylic can flatten it permanently. I did steam my swatch to try to keep it from rolling as much, so the resulting loops are a bit flattened.
This technique is a variation of weaving. The heavier yarn will tend to force the stitches in the background apart, resulting in “bleed-through”. The frequency of creating the loops can vary, and just as in single bed knitting their location as well, but they will be fixed height throughout.  After testing consideration may be given to automating the needle selection to make the process faster and perhaps more accurate. Brother preselects, so after that is done for each row, bring only the selected needles out to D consistently, and proceed as above. Below is a possible repeat to imitate my swatch based on the 24 stitch width restriction for punchcard machine users, remembering that any punchcard height minimum is 36 rows
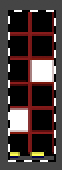
 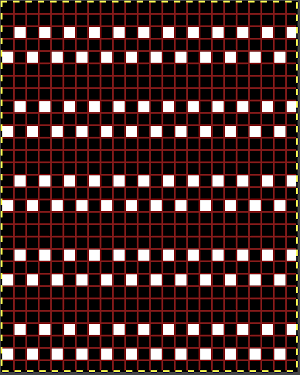 The minimum electronic repeat: