WORK IN PROGRESS
When drawing with brushes in ArahPaint 6 you can now set the angle and zoom of the brush pattern, and even if rotated at different angles, the pattern will flow seamlessly across the canvas.
Excellent videos illustrating the methods in general and new features including this one may be found on Instagram and Facebook.
Currently, though there is an Apple Silicon version, some features are being updated only for the Mac Intel due to some issues with code signing, finances and Apple, so to use the latest version which allows rotation /zoom of patterns, you have to install the Intel version which works well with Rosetta on Apple silicon.
Investing time in “playing” with software tools aids in finding personal methods for developing DIY designs. Who needs Wordle, or Crossword puzzles?!
The same goals may usually be achieved in a variety of ways.
Pattern fill was introduced in ArahPaint meets Gimp in knit design 1 as a method for developing tuck designs, here the beginning goal is to develop larger scale electronic patterns that to some degree fool the eye into visual shifts.
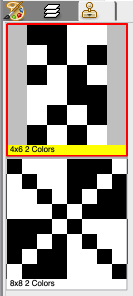
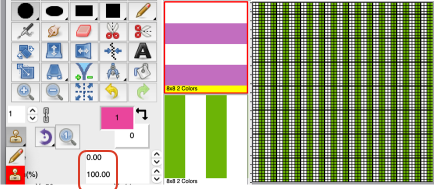
Reviewing and expanding on the concept: to save a brush, click on the brushes panel tab, the small highlighted stamp tool. In this instance, a previously saved brush was stored and appears automatically. To save a custom brush, build a small file or use one from the program’s weaving library, ie this 4X6 pixel one
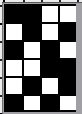
![]() Create a layer and send it to the brushes panel by using Tool> Layer to Brush and it will appear in the brushes panel or by clicking on the right blue triangle in the brushes panel toolbar toward the bottom right.
Create a layer and send it to the brushes panel by using Tool> Layer to Brush and it will appear in the brushes panel or by clicking on the right blue triangle in the brushes panel toolbar toward the bottom right. ![]()
 To edit the brush you can use Tools> Brush to Layer or click on the left blue triangle in the brushes toolbar. After editing, the new brush can be sent to the brushes panel. If the Keep checkbox is checked, the old previous version is retained
 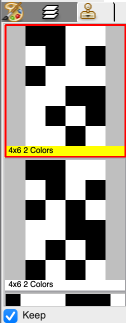 To edit a brush in a new window, select a brush in the palette, click on the ArahPaint icon on the right of the blue arrows in the brushes panel, and a new window will appear with the brush already loaded. It can be edited, saved, and be available for use in the previous window.
To delete a brush from the panel, click on its icon to select it, and then click on the delete icon, the red X in the brushes panel toolbar, or hit delete on the keyboard.
An exercise beginning with two small brushes, once again to achieve movement of lines if not a full on illusion, while keeping in mind the repeat will be worked on a canvas no larger than 200 pixels, working in a chosen palette, begin with a filled rectangle in a base color, 60X60 pixels.
Select brush drawing mode 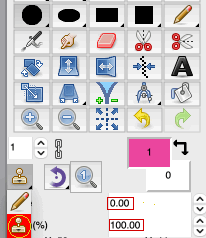 Choose the filled rectangle drawing tool, select the brush, and hold down Ctrl (Cmd on Mac) and draw the brush across the canvas.
The relevant settings and alternating 2 pixel brushes
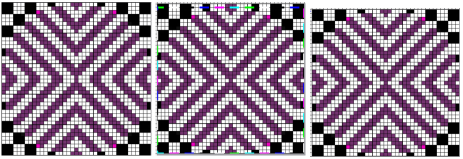
 For the circle, repeat the process, choosing fill from center first from the menu on the right
 ![]()
 reduce the palette to BW, clean up edges
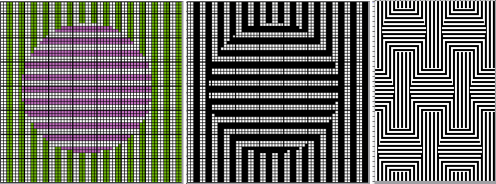
 to expand the design, draw it in repeat, offset 28 pixels
 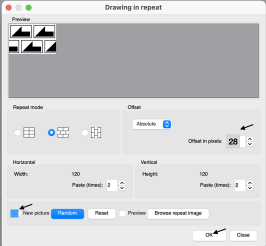 120X120
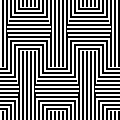
Tools > Find Repeat > 60X114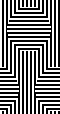 Tiled to 180X228
 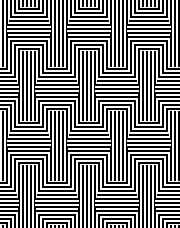 The shapes and their placement can be varied, using the same general ones helps the eye recognize differences and develop sequence in design preferences.
Here single pixels vertical and horizontal brushes were used on a 60 pixel picture, and cropped to 54X51 ![]()

 Adding another shape, still 54X51
 Developing brick repeats
 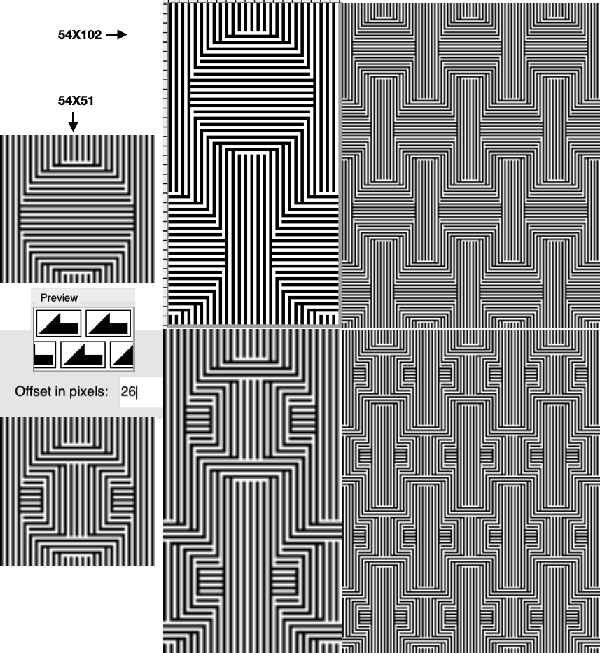 The respective 54X102 files
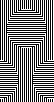
Removing pixels from 4X4 blocks, beginning with a 30X26 quarter repeat select the empty circle tool, the pixel color, and check off ![]() The cyan pixels are for convenience, will be changed to white in the final designs
The cyan pixels are for convenience, will be changed to white in the final designs
View > Grid Properties may be adjusted to block size and for increased visibility. 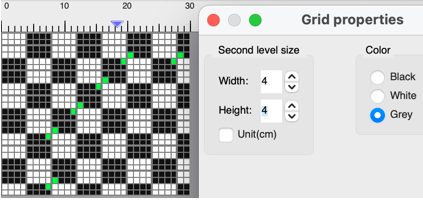
![]() mirrored horizontally, 60X26
mirrored horizontally, 60X26![]()
drawn in repeat 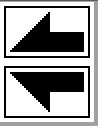 to 60X52
  with blocks added for proper alignment to 64X64
  its brick 64X128 companion
 it takes a bit of squinting to see the subtle effect
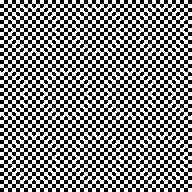
Adding and subtracting pixels from small blocks and working in quarter shapes:
a first slow look at some of what can happen with a bit of math and multiples of 3X3:
the black pixels are added to selected spots, the magenta will be swapped to white, with the ultimate plan to end up with a black and white png, measuring 39 X39 pixels in width. The abbreviated visual summary: 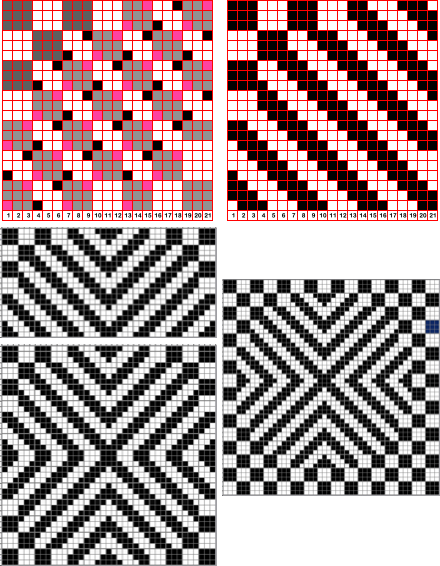 the associated files: 20X20
 ![]()
mirrored X-1, 39X20 ![]()
drawn in repeat, 39X40 ![]() working between 2 windows, open a new picture, 39X39 in the second window. Use rectangle tool in the first, selecting half vertical segments, and copy and paste on the new file eliminate one of those two doubled central rows, 39X39
working between 2 windows, open a new picture, 39X39 in the second window. Use rectangle tool in the first, selecting half vertical segments, and copy and paste on the new file eliminate one of those two doubled central rows, 39X39 ![]() In a new window, open a new picture, 48X48, (a multiple of 6), fill with pattern
In a new window, open a new picture, 48X48, (a multiple of 6), fill with pattern ![]()
![]() copy the 39X39 image and paste it in place, it is not necessary to reduce any color to alpha,
copy the 39X39 image and paste it in place, it is not necessary to reduce any color to alpha, 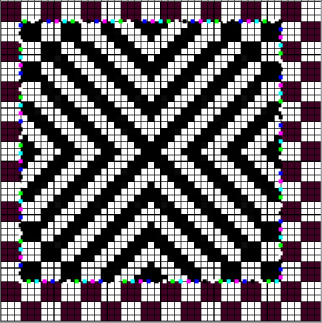 the final 48X48png
![]() drawn in repeat, BW, 192X192
drawn in repeat, BW, 192X192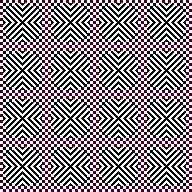 Achieving a similar file more quickly and easily a 6X6 pattern is saved
 ![]()
 Using brush fills, begin with a 20X20 picture, using the 6X6 blocks, selecting the filled square icon, place blocks from the upper left corner down, it is not necessary to fill the wholecanvas
![]() using the 6X6 color pattern, the filled circle icon, selecting fill from center, begin in lower right corner, filling the quarter 20X20 shape
using the 6X6 color pattern, the filled circle icon, selecting fill from center, begin in lower right corner, filling the quarter 20X20 shape ![]() mirror X-1 to 39X20
mirror X-1 to 39X20![]() draw in repeat as in previous patterns to 39X40
draw in repeat as in previous patterns to 39X40 ![]() eliminate one of the 2 center rows, to 39X39 working in separate windows or selecting either half, ie the top, move it down a row, and rop the extra top row
eliminate one of the 2 center rows, to 39X39 working in separate windows or selecting either half, ie the top, move it down a row, and rop the extra top row ![]() 4 magenta pixels added to the repeat
4 magenta pixels added to the repeat ![]() the file converted to indexed BW
the file converted to indexed BW ![]() copied and pasted on a 48X48 checkered ground
copied and pasted on a 48X48 checkered ground ![]() A visual summary of the steps
A visual summary of the steps 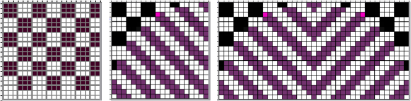
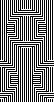
 The file drawn in repeat to 192X192
 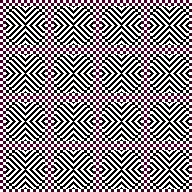 Similarities, and differences in density of markings by the addition of single pixel lines, playing with what ifs:
the last 48X48 image, all pixels to red ![]() rotating 180 degrees in ArahPaint shifts the design one row down, and one column to the right
rotating 180 degrees in ArahPaint shifts the design one row down, and one column to the right
the file using Image >Transform > Rotate 180 in Gimp ![]() white color to alpha
white color to alpha ![]() copied and pasted onto the alternate 48X48 repeat
copied and pasted onto the alternate 48X48 repeat ![]() all pixels to black in new 48X48
all pixels to black in new 48X48 ![]() drawn in repeat to 192X192
drawn in repeat to 192X192 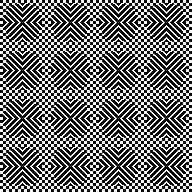 the brick 48X96 version
 ![]() also drawn in repeat to 192X192
also drawn in repeat to 192X192 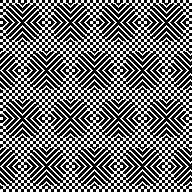 the 48X48 checkered ground is cropped to 45X45
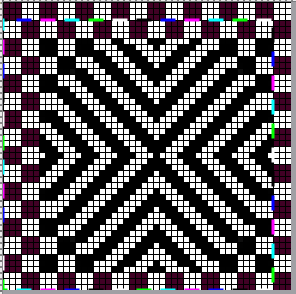
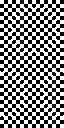
![]() drawn in repeat to 180X180
drawn in repeat to 180X180  and what of that 39X39 design that started so much of this? trimmed to 38X38
 ![]() drawn in repeat to 190X190
drawn in repeat to 190X190 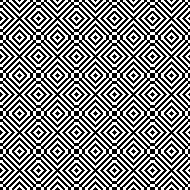 Returning to smaller design repeats, testing zoom and rotate:
