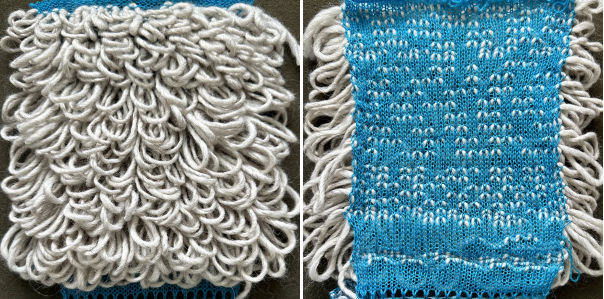
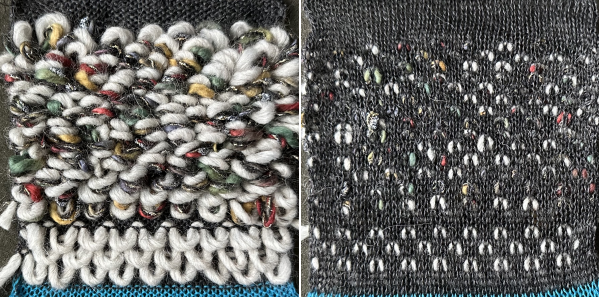
Knit weaving 5: manipulated floats

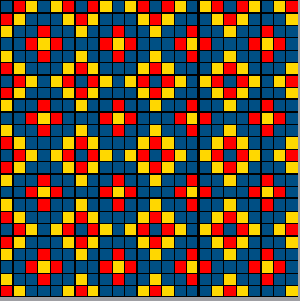
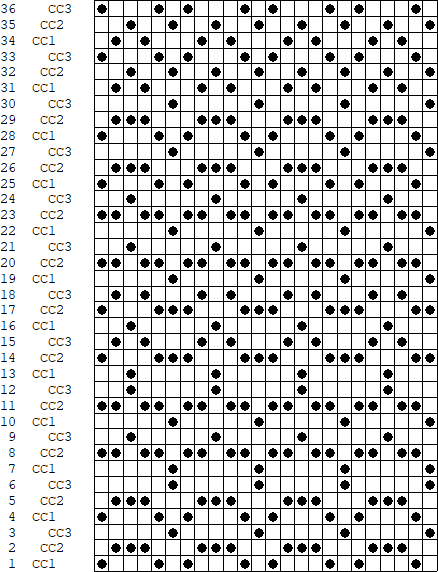
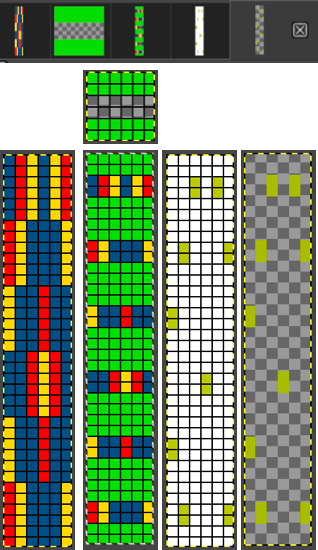
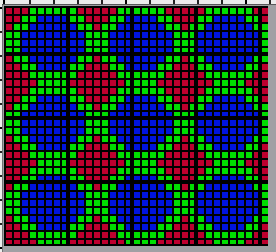
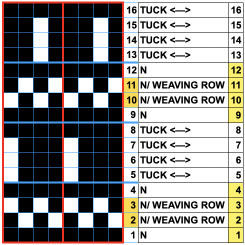
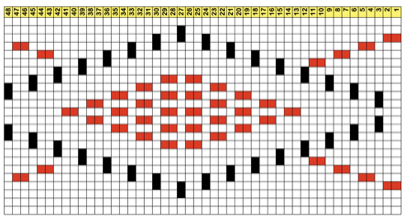
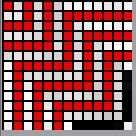
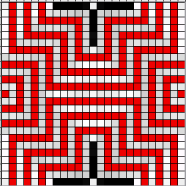
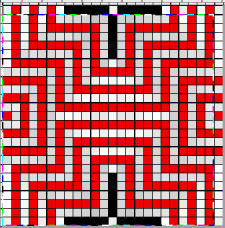
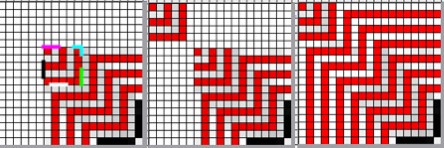
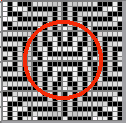
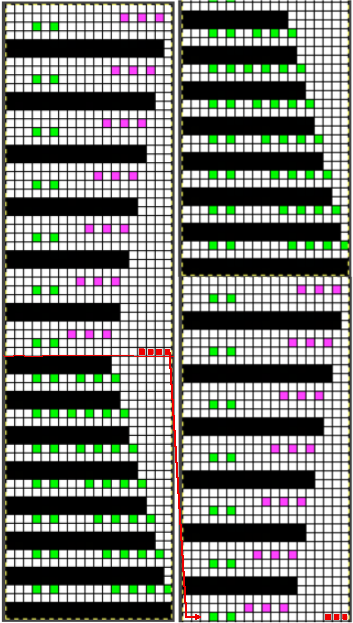
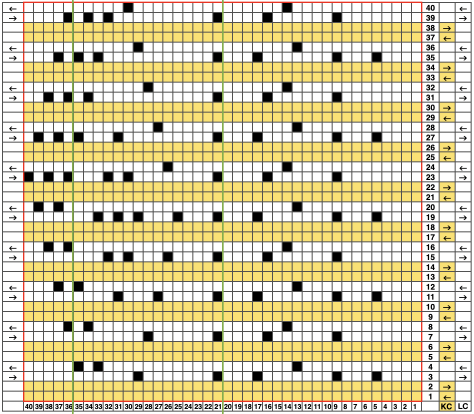
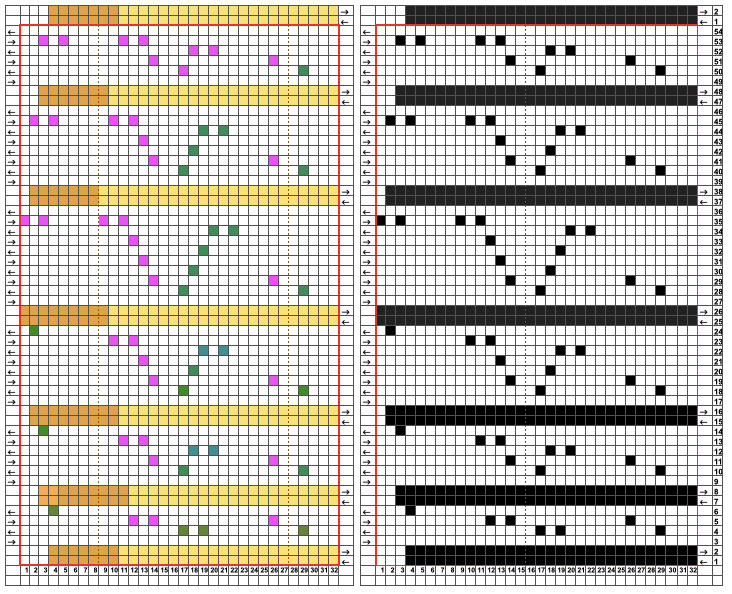
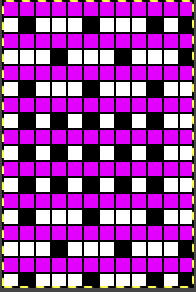
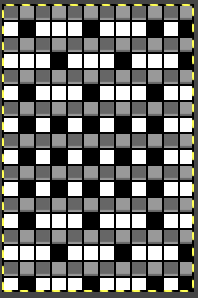
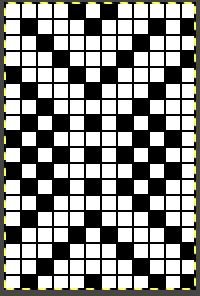
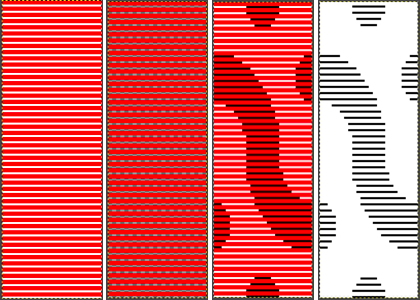
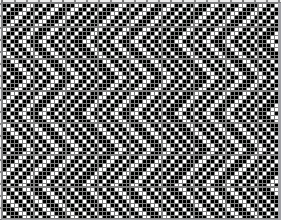
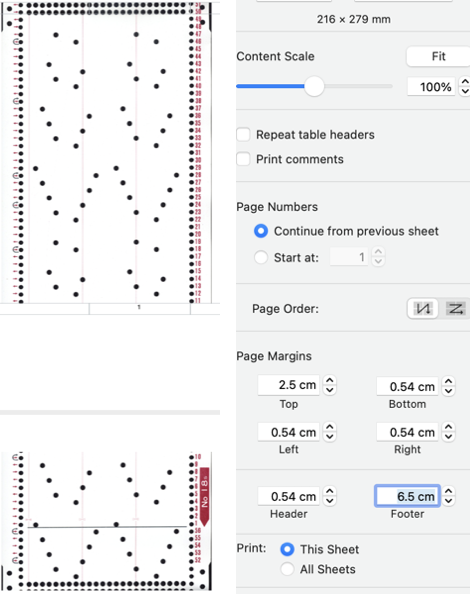
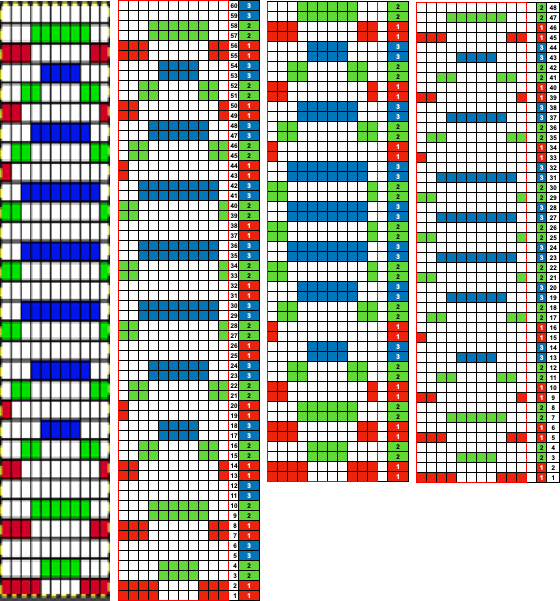
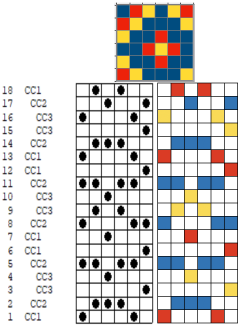
Most pubs include variations of sequences such as in this illustration showing the first float traveling under subsequent ones. This chart visualizing the process for a specific repeat was generated using Mac Numbers.
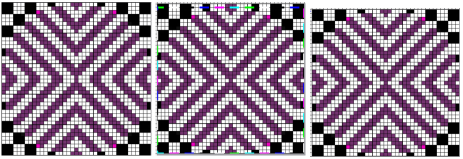
The side edges need to be planned for the best effect, the columns marked with yellow cells indicate possible repeat starts and stops.
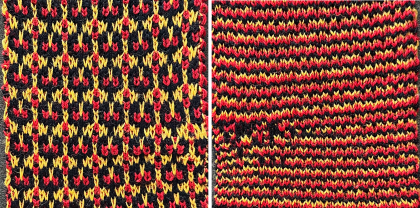
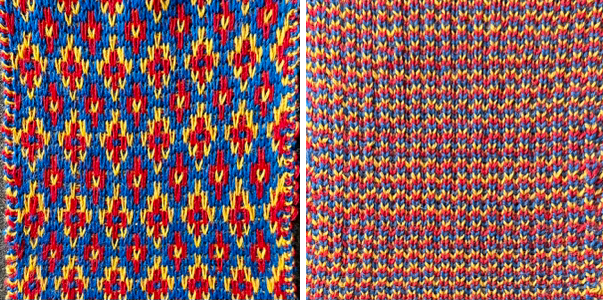
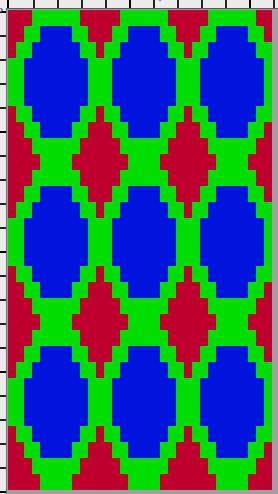
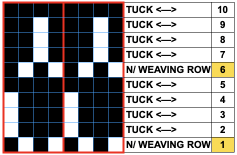
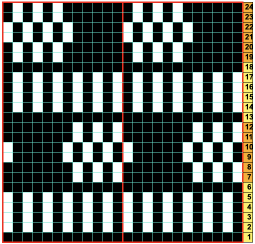
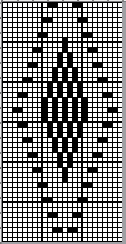
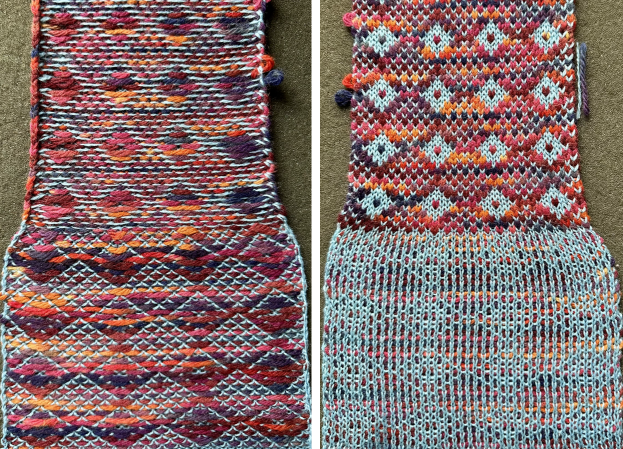
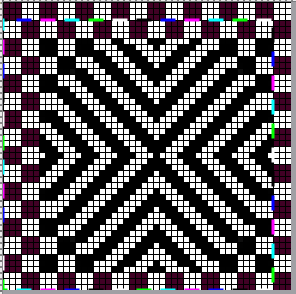
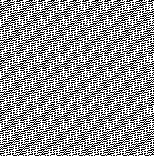
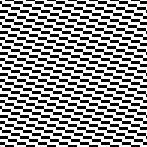
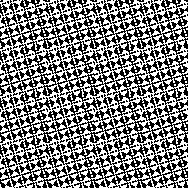
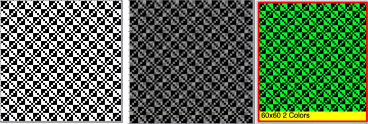
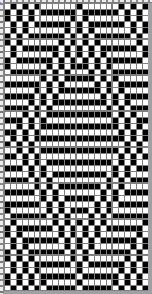
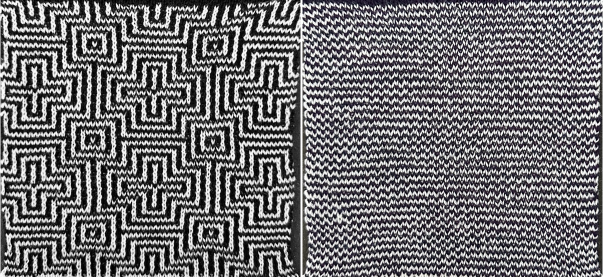
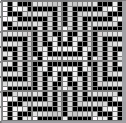
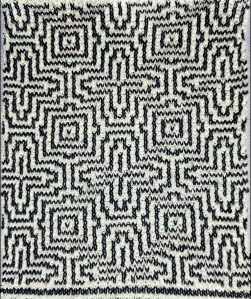
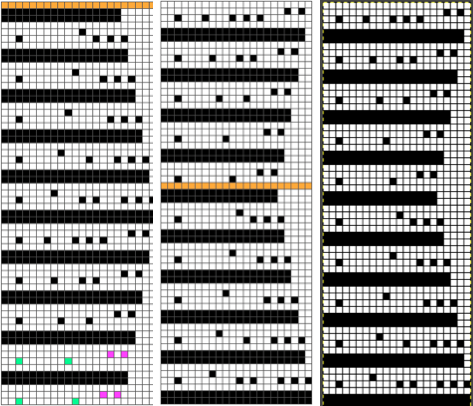
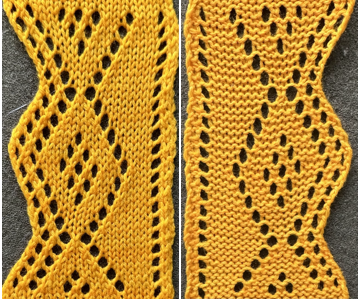
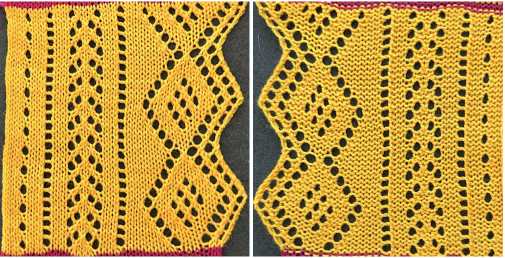
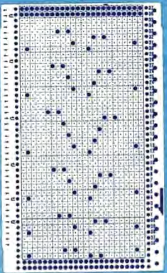
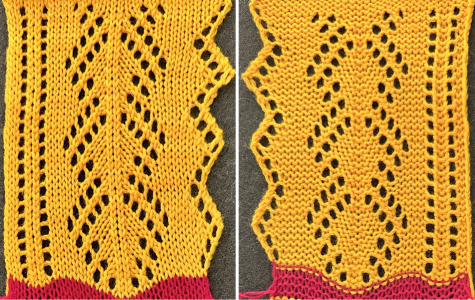
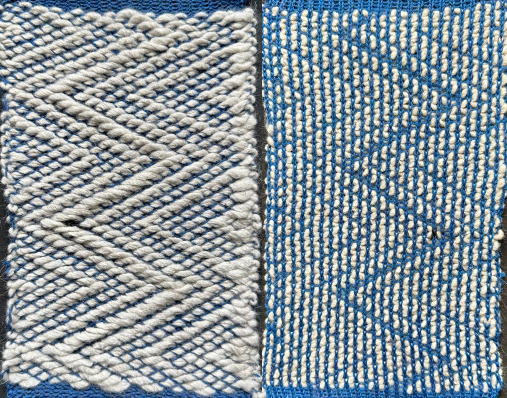
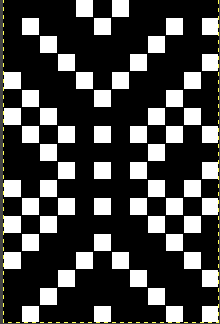
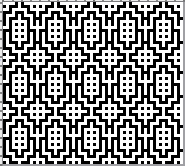
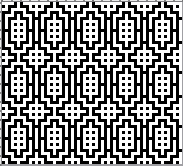
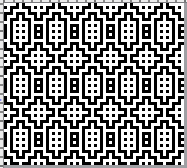
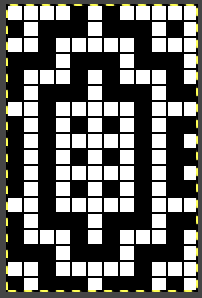
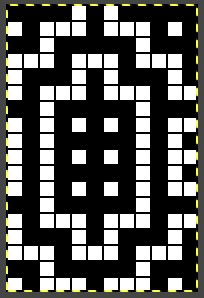
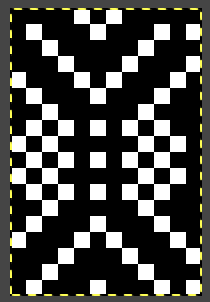
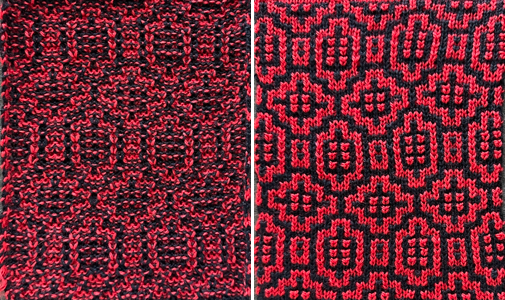
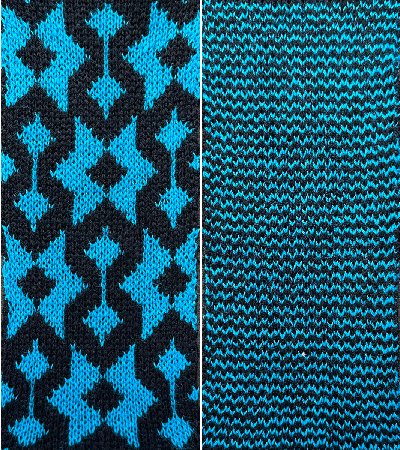
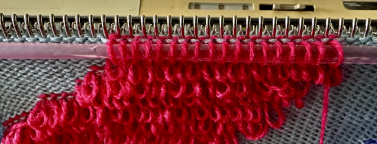
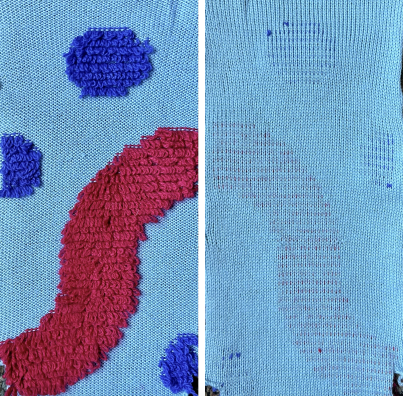
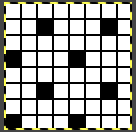
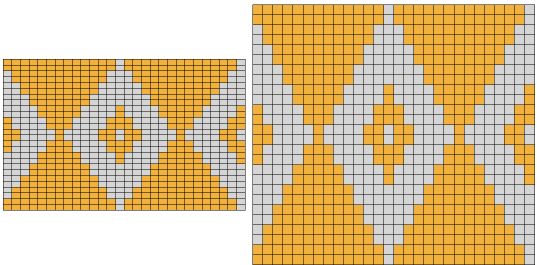
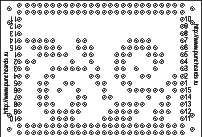
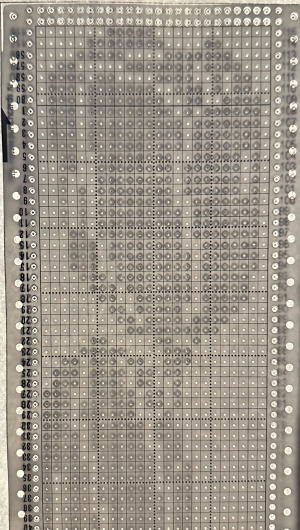
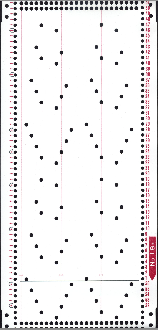
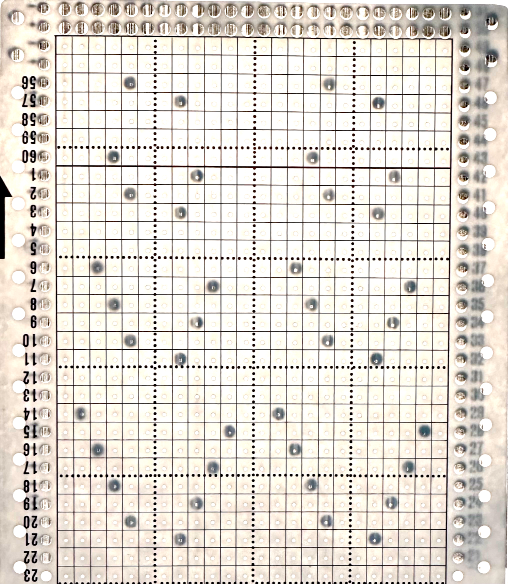
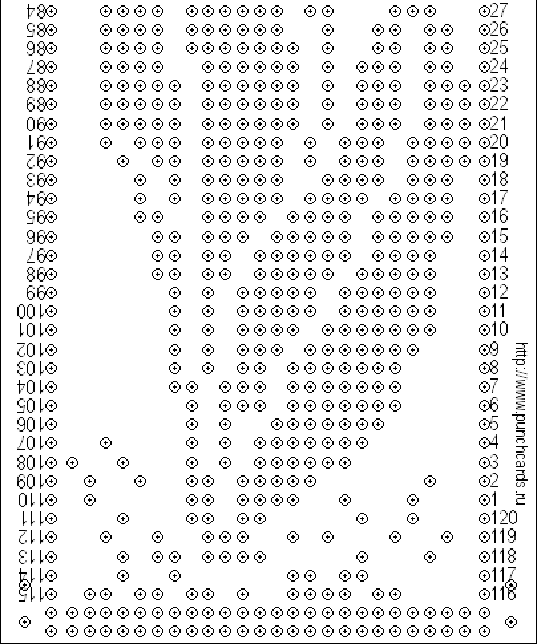
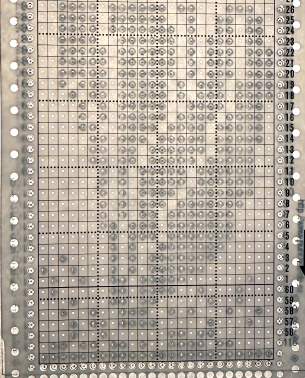
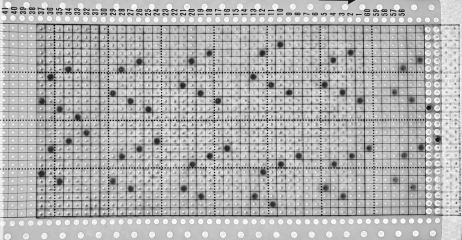
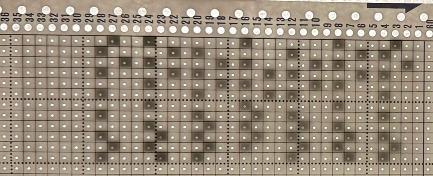
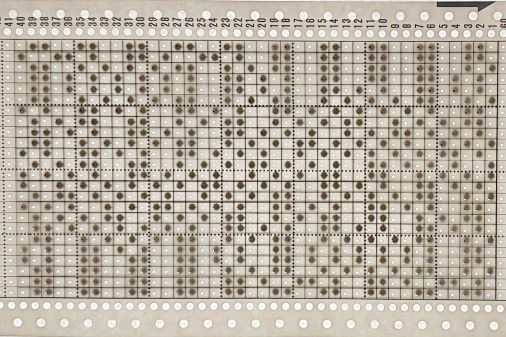
The 8X16 design is suitable for use on electronic and punch card models,   A minimum punchcard repeat is 24stitches X32 rows  This swatch was knit using a chenille yarn for weaving, its fibers expand as the fabric rests, lessening the space that can enhance the definition between the floats
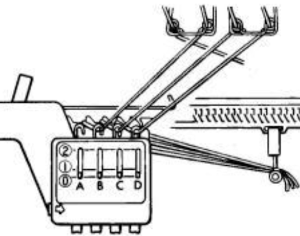
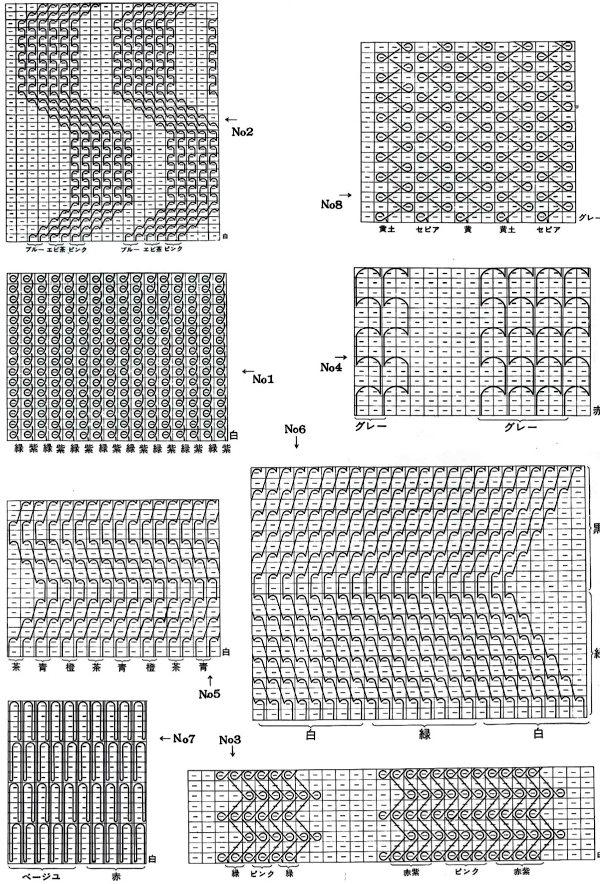
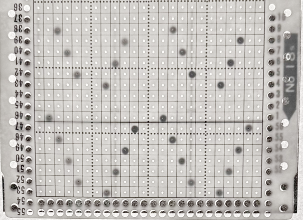
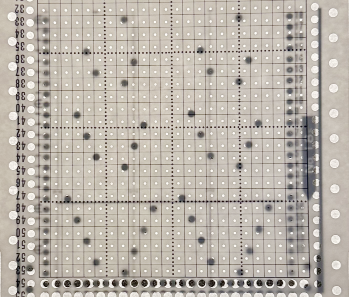
Translating published patterns sometimes requires testing the process by hand-selecting needles to develop programmable DIY designs.  The Brother cassette knitting pattern book  includes a series of samples utilizing the technique, and these illustrations
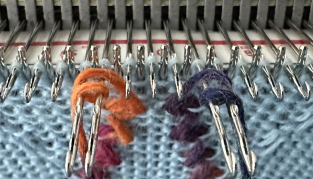
In fabrics such as these, the latch hook is inserted under floats from the first formed up, the last float is caught in the hook of the tool, pulled down behind them, brought forward, up, and lifted onto specific needle locations before further weaving or plain knitting resumes on all needles in work. A random selection:   The repeats are represented in a clockwise rotation,  the first swatch however, disregarded that fact and was a best guess at DIY based on hand-selection of needles.
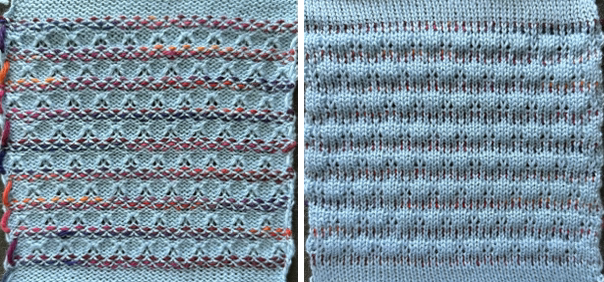
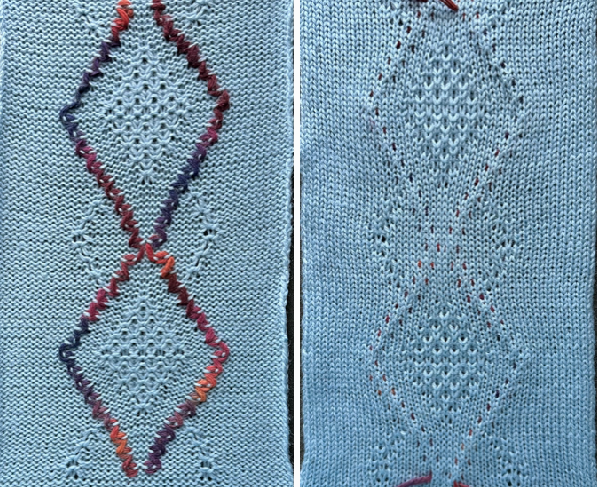
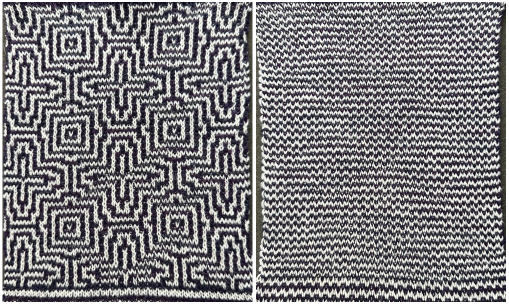
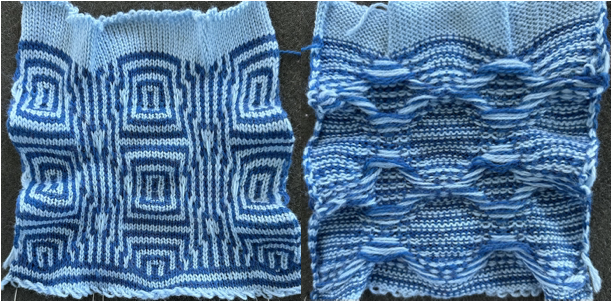
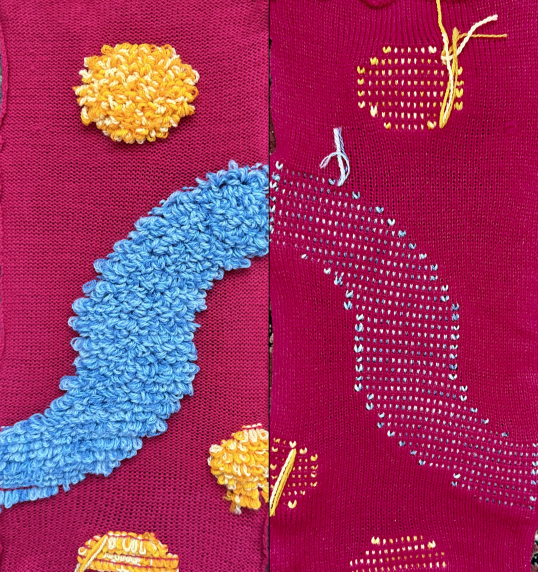
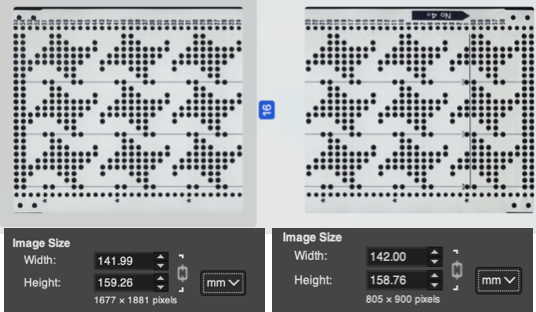
As already mentioned, the latch tool is used to slide under the first 3 floats grabbing the yarn in the newly created longer float, bringing it under and then to the front of the group of three, and the single loop in the tool hook is lifted onto the hook of the needle in the center position between groups of newly preselected needles. That needle must be pushed back to the B position before knitting the next row so as not to pick up the weaving yarn.  the 6X8 repeat    The swatch on the left is the result of hand selection, and to its right both sides of the result from knitting with the programmed repeat As a general principle when multiple colors are used, if they are planned for color changes occurring for odd numbers of passes, the yarn may need to be cut and brought to the opposite side regularly, or 2 different ends starting from opposite sides may in some cases make the process easier and reduce yarn ends.
For speed and ease in tracking, the compromise choice can be made to change the repeat so that actions happen after knitting even numbers of rows.
End needle selection is on with selective hand moving end needles out to catch the weaving yarn if the repeat is used as provided.
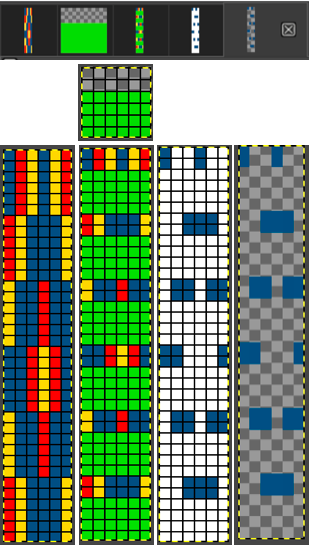
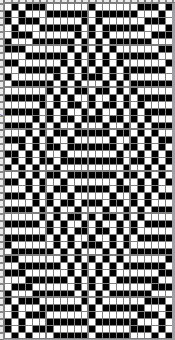
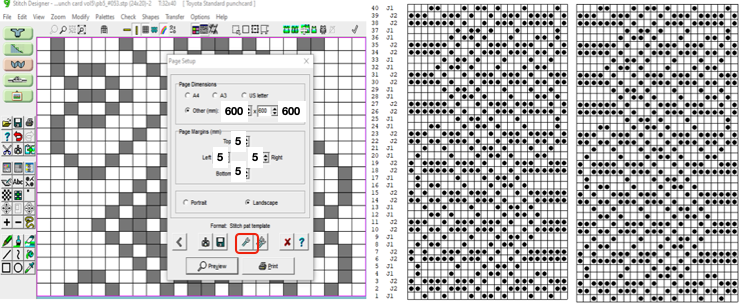
A new, 6X8 repeat:  the 24X40 full punchcard,   If programming the width of the finished piece on electronic machines, pixels for border needle selections can be added, knit with end needle selection off.   Some steps in the process, with # 4 showing the single chained through loops rehung across the row The 930 automatically mirrors any design horizontally. When an odd-numbered design is downloaded and centered with no subsequent changes, the odd-number half of the repeat occurs on the right of 0.
The proof of concept was knit on needles 20 L to 21 R  Here the background yarn is switched to a far thinner cotton, making the woven threads and their bleed-through on the knit side more prominent. In a final piece planned for this effect, side borders could be planned for better edges.   From a Brother electronic pub, an illustration of hooking up multiple loops at once If the needle onto which the floats are transferred is left in work, it will pick up the weaving yarn on the next pass as part of the design and should remain in D or be pulled to E position if preferred.  If that is not the goal, that same needle is pushed back to the B position.  Just as in managing long floats in FI, in this fabric, they may be latched up as well Lifting the stitch in the latch hook onto a needle other than in the center of the space between needle selection or one of the preselected needles, will result in the chain moving permanently in different directions.
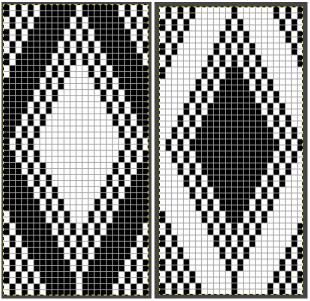
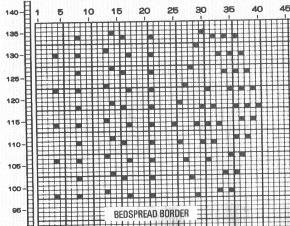
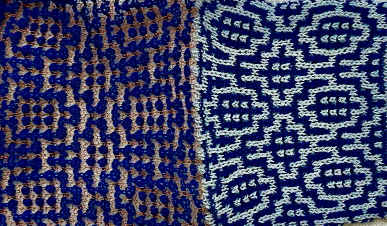
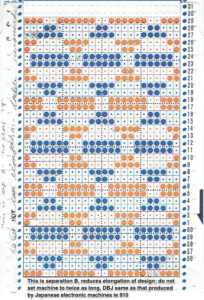
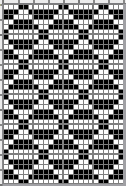
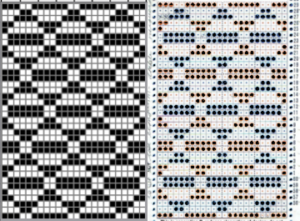
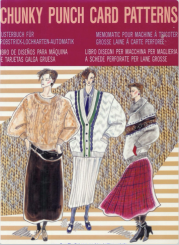
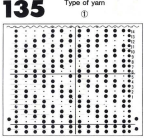
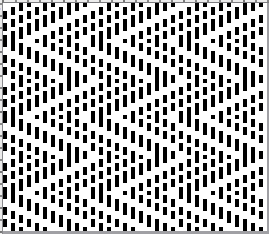
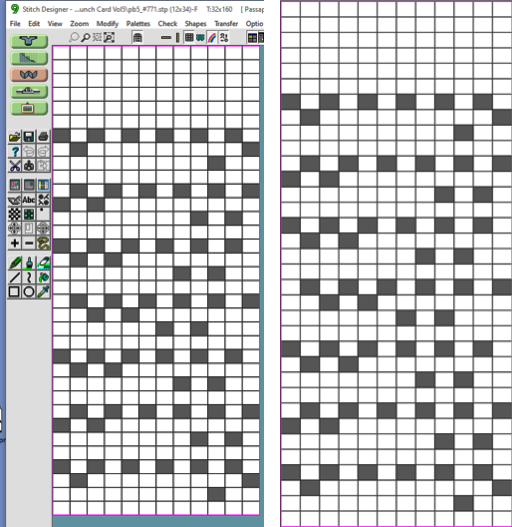
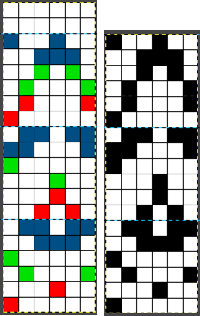
A second early resource for samples of these techniques offered this version along with advice on how to knit it. Such translations are not always understandable. Based on row counts of patterning in the accompanying swatch it is possible to develop a repeat by assigning black pixel locations to specific squares in the stitch symbol chart rather than using the repeat provided.
The horizontal marks for purl stitches can be thought of as needles on the machine.
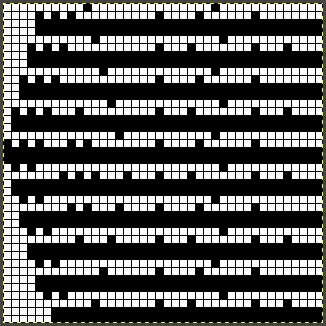
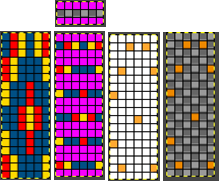
The squares where the traveling weaving thread “wave” in the position above the line are filled are represented with green cells in the spreadsheet and will be converted to black pixels in BW pngs for use in download programs, or punched holes in cards.
The under “waves” symbolize floats and are disregarded in final repeats.
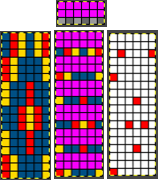
Yellow is used to mark spots for visual reminders of where the floats are to be rehung. They are disregarded in the final BW single repeat. The corresponding needles in those locations must pushed back to the B position before knitting the next row.  

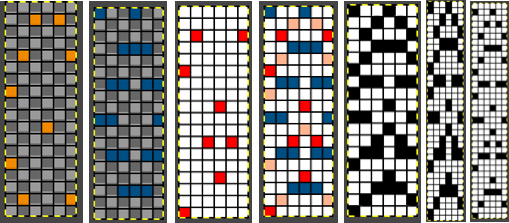
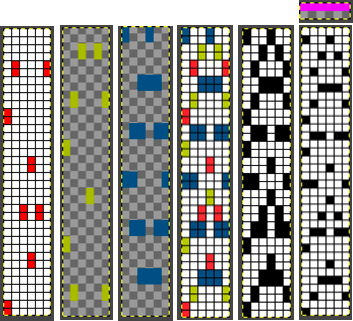
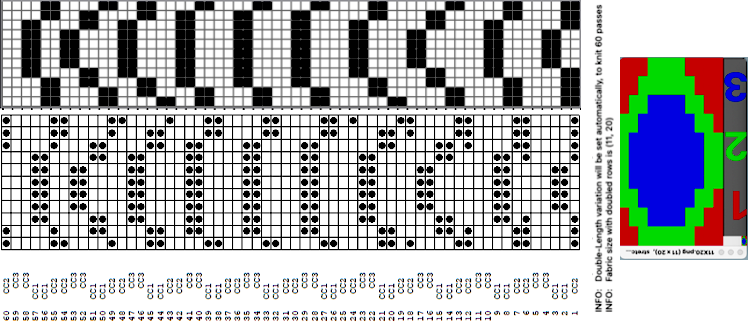
The 8X14 smallest repeat was tested on 48 stitches hand selecting end needles if needed.   Working in vertical columns, a 9X12 design planned on 39 stitches for equal side edges the floats are lifted in pairs every 2 rows, in alternate directions onto preselected needles, which can be brought out to the E position after the transfer.  Those needles are marked with red dots.   The swatch was knit in wool yarns of equal weight. The weaving yarn split easily. Each row should be checked for any errors after hooking before continuing to knit to avoid permanent errors. The result of both is marked with red dots in the photo on the left In summary, black squares indicate yarn over selected needles, and white squares the yarn slipping under non-selected needles, represented in this chart for a 2X2 design repeat/ paintbrush in DIY.  Side by side punched holes or black pixels produce floats in a corresponding stitch width. Blocks of either color can be planned in any direction, with the floats left alone as color blocks or manipulated to echo their movement ie in this illustration

Knit weaving 4: combining stitch types

Knit weaving 3  reviews some basics, and a list of associated blog post links is provided at the bottom of the page, including
Lace meets weaving on Brother Machines 2
Lace meets weaving on Brother Machines

Tuck stitch meets knit-weaving introduced the combined technique.
Many of these repeats are suitable for punchcard models as well. The caveat there is that there is no option for eliminating knit carriage cam button setting changes by using a second carriage to select and knit. They would need to be performed manually.
More on DIY combinations of tuck and knit weaving: if using a single carriage to execute these designs, then it is necessary to switch cam button settings from tuck in both directions to knit with needle selection for the knit woven rows frequently, as in this first swatch.
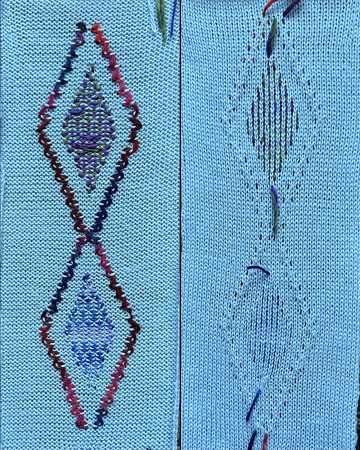
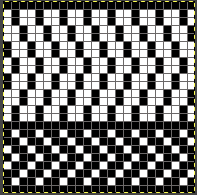
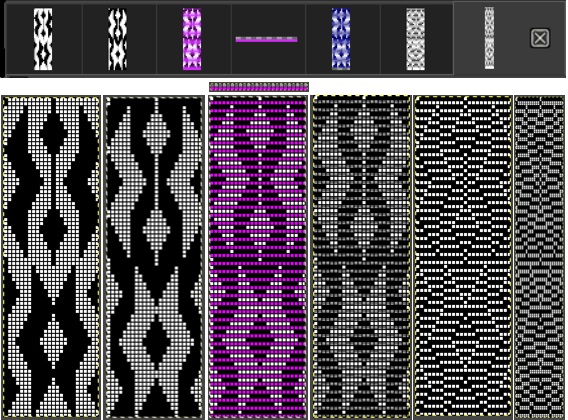
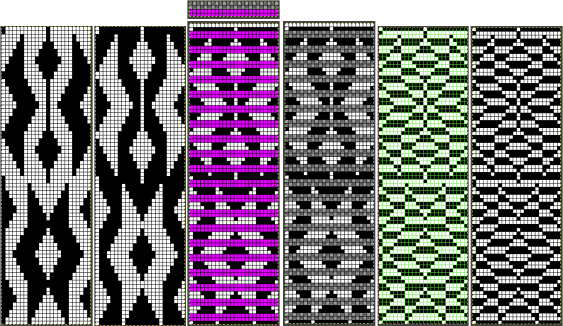
Actions: Altering the repeat while planning on cam settings to be changed every even number of rows also brings the possibility of using 2 carriages in electronic models, with one set to tuck in both directions, the other to normal knit (no cam buttons) but with needle selection for weaving rows, KCII  Here tuck shapes are introduced, again planning for setting or carriage changes every even number of rows, in this case every 6, The tuck diamond is surrounded by a vertically woven one. The original design repeat was color inverted observing tuck “rules”.
The 1X2 white pixels will tuck, and the 2X1 side-by-side ones will serve as guides to the placement of the vertical weaving yarn. They are placed on rows with no conflicting selections.  When the side-by-side needles are not selected, they are manually pushed forward to E and needles are double-wrapped away from the center at the bottom of each shape, toward the center (row30) when the top of the shape is reached.
Start of the second shape in the swatch: While retaining the outer shape of the design, the inner content may altered to provide a guide for horizontal weaving. The 24X48 design The PNG was isolated in the center of 40 stitches.
The surface woven floats may become visually lost when using space-dyed yarns with shades in similar families to the background, as seen in the bottom center diamond.
In the second center diamond, a different color-way yarn was also used double thickness without any change in tension. This resulted in the second thread not always getting caught properly, slowing speed and added caution improved the result.
The swatch was narrower than the sample knit using tuck stitch. The best way to weave in yarn ends would need working out. Combining weaving types with the intent to create a plaid effect:
the starting chart created in Mac Numbers  The 24X28 repeat  The choice of the yarns may require tension or color choice adjustments, when the weaving yarn is not caught properly, the longer floats are formed.  Here simple color striping is added. The background red yarn is a thin 2/10 wool, the horizontal weaving yarn a space-dyed sock one, and the vertical weaving one a varied fiber space dyed hand knitting yarn by Noro.
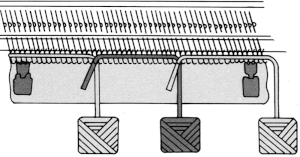
The image on the left shows the vertical weaving setup work on the machine, the ribber gate pegs and needle butts appeared to help to keep the yarn lengths from twisting around each other as the work progressed.  Adding needles out of work:
A common base for knit-weave published patterns is seen in the pattern configuration seen in what is known to many punchcard knitters as card #1  When there are needles out of work in combination with patterning, end needle selection must be canceled.
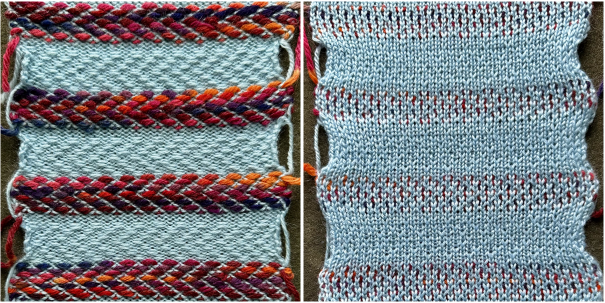
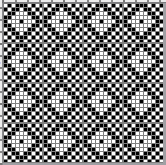
The set up row for adding ladder spaces is planned so that patterning in 3 stitch columns begins and ends on a pair of selected needle In this sample with horizontally woven rows, the ground yarn is a 2/20 wool, the weaving yarn a space dyed sock yarn resulting in random color blocking. Relaxed the knit resembled shadow pleating, here it is shown after pressing and steaming Using separate strands, vertical weaving may be performed along each 3 stitch vertical columns.
The work on the machine: the ribber gate pegs and needle butts helped keep the yarn lengths separate.
Yarn is always laid over needles with the continuing, long end away from the carriage. In this case, the it was lifted over single selected needles to the right, then over pairs of selected needles to the left. Slip stitch is known for compressing the height of the knit and narrowing its width. This attempts to alternate knit woven stripes with slip-stitch ones utilizing a similar repeat. For the slip texture to be more visible, the related segment is rendered double height, and color reversed.
Here setting changes to occur in even-numbered blocks of rows. The design is shared repeating across a punchcard width, 24, X 24 rows in height.  Eight rows are knit with the carriage set to knit but selecting needles, and 16 rows with the carriage set to slip in both directions. Comparable or the same yarns are used to evaluate the results when varying techniques and stitch types.
Here a 2/20 wool in a color similar to that used in the above sample forms the ground.
The woven section has some drape and stretch, the stitches are forced apart producing interesting bleed-through on the knit side and making the fabric reversible.
The same repeat and yarns are used in the top half of the swatch as a fair isle, without any change in tension. The knit is dense, stiff, and narrower with no stretch to speak of.
The 10X10 design

Developing designs using pattern fill for use on a range of machine models

When drawing with brushes in ArahPaint 6 you can now set the angle and zoom of the brush pattern, and even if rotated at different angles, the pattern will flow seamlessly across the canvas.
Excellent videos illustrating the methods in general and new features including this one may be found on Instagram and Facebook.
Currently, though there is an Apple Silicon version, some features are being updated only for the Mac Intel one due to some issues with code signing, and  Apple finances, so to use the latest version which allows rotation /zoom of patterns, you have to install the Intel version which works well with Rosetta on Apple silicon.

Investing time in “playing” with software tools aids in finding personal methods for developing DIY designs. Who needs Wordle, or Crossword puzzles?!
The same goals may usually be achieved in a variety of ways.
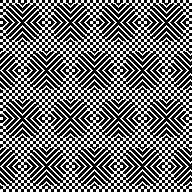
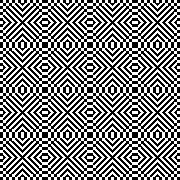
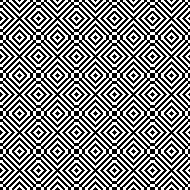
Pattern fill was introduced in  ArahPaint meets Gimp in knit design 1 as a method for developing tuck designs, here the beginning goal is to develop larger-scale electronic patterns that to some degree fool the eye into visual shifts.
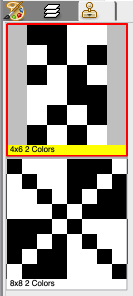
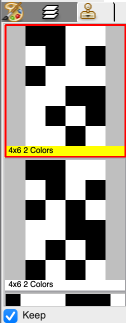
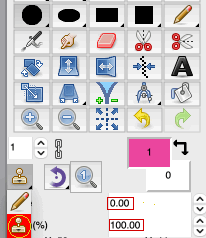
Reviewing and expanding on the concept: to save a brush, click on the brushes panel tab, the small highlighted stamp tool. In this instance, a previously saved brush was stored and appears automatically.  To save a custom brush, build a small file or use one from the program’s weaving library, ie this 4X6 pixel one Create a layer and send it to the brushes panel by using Tool> Layer to Brush and it will appear in the brushes panel or by clicking on the right blue triangle in the brushes panel toolbar toward the bottom right. To edit the brush you can use Tools> Brush to Layer or click on the left blue triangle in the brushes toolbar.  After editing, the new brush can be sent to the brushes panel. If the Keep checkbox is checked, the old previous version is retained To edit a brush in a new window, select a brush in the palette, click on the ArahPaint icon on the right of the blue arrows in the brushes panel, and a new window will appear with the brush already loaded. It can be edited, saved, and available in the previous window.
To delete a brush from the panel, click on its icon to select it, and then click on the delete icon, the red X in the brushes panel toolbar, or hit delete on the keyboard.
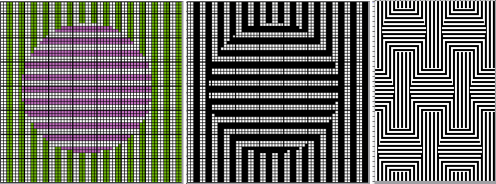
An exercise beginning with two small brushes, once again to achieve movement of lines if not a full-on illusion, while keeping in mind the repeat will be worked on a canvas no larger than 200 pixels. To follow along, working in a chosen palette, begin with a filled rectangle in a base color, 60X60 pixels.
Select brush drawing mode Choose the filled rectangle drawing tool, select the brush, hold down Ctrl (Cmd on Mac), and draw the brush across the canvas.
The relevant settings and alternating 2-pixel brushes
For the circle, repeat the process, choosing fill from the center first from the menu on the right  reduce the palette to BW, clean up the edges

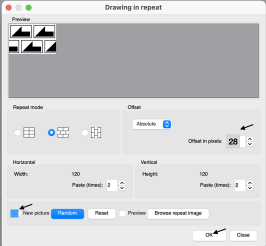
to expand the design, draw it in repeat, offset 28 pixels 120X120

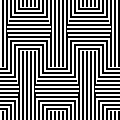
Tools > Find  Repeat > 60X114Tiled to 180X228  The shapes and their placement can be varied, using the same general ones helps the eye recognize differences and develop sequence in design preferences.
Here single-pixel vertical and horizontal lines brushes were used on a 60-pixel canvas, then cropped to 54X51 Adding another shape, still 54X51Developing brick repeats The respective 54X102 files  

Removing pixels from 4X4 blocks, beginning with a 30X26 quarter repeat select the empty circle tool, the pixel color, and check off   The cyan pixels are for convenience, and will be changed to white in the final designs
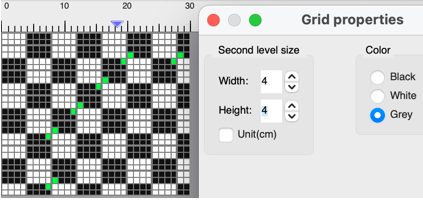
View > Grid Properties may be adjusted to block size and for increased visibility.  mirrored horizontally, 60X26
drawn in repeat  to 60X52 with blocks added for proper alignment to 64X64 its brick 64X128 companion
it takes a bit of squinting to see the subtle effect  

More adding and subtracting pixels from small blocks and starting with quarter shapes:
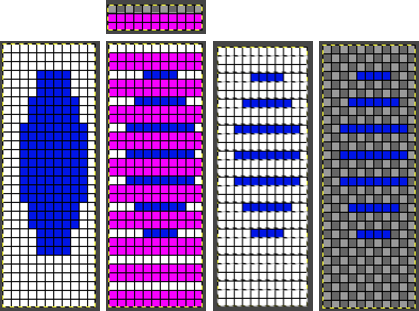
in a first slow look at some of what can happen with a bit of math and multiples of 3X3, the black pixels are added to selected spots, the magenta will be swapped to white, with the ultimate plan to end up with a black and white png, measuring 39 X39 pixels in width. The abbreviated visual summary: the associated files: 20X20
mirrored X-1, 39X20
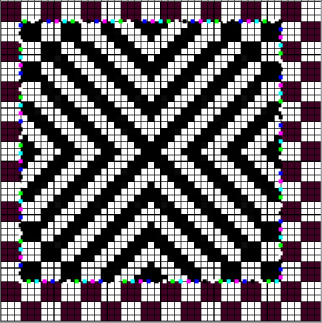
drawn in repeat, 39X40 working between 2 windows, open a new picture, 39X39 in the second window. Use rectangle tool in the first, selecting half vertical segments, and copy and paste on the new file eliminate one of those two doubled central rows, 39X39 In a new window, open a new picture, 48X48, (a multiple of 6), fill with pattern  copy the 39X39 image and paste it in place, it is not necessary to reduce any color to alpha, the final 48X48pngdrawn in repeat, BW, 192X192Achieving a similar file more quickly and easily a 6X6 pattern is saved Using brush fills, begin with a 20X20 picture, using the 6X6 blocks, selecting the filled square icon, place blocks from the upper left corner down, it is not necessary to fill the wholecanvasusing the 6X6 color pattern, the filled circle icon, selecting fill from center, begin in lower right corner, filling the quarter 20X20 shape   mirror X-1 to 39X20draw in repeat as in previous patterns to 39X40 eliminate one of the 2 center rows, to 39X39 working in separate windows or selecting either half, ie the top, move it down a row, and rop the extra top row  4 magenta pixels added to the repeat the file converted to indexed BW copied and pasted on a 48X48 checkered ground A visual summary of the steps The file drawn in repeat to 192X192 Similarities, and differences in density of markings by the addition of single pixel lines, playing with what ifs:
the last 48X48 image, all pixels to red rotating 180 degrees in ArahPaint shifts the design one row down, and one column to the right while using Image >Transform > Rotate 180 in Gimp white color to alpha with the result copied and pasted onto the alternate 48X48 repeat.   All pixels to black/white in a new 48X48 drawn in repeat to 192X192 the brick 48X96 version,    also drawn in repeat to 192X192  the 48X48 checkered ground is cropped to 45X45 drawn in repeat to 180X180,  and what of that 39X39 design that started so much of this? trimmed to 38X38 drawn in repeat to 190X190 Returning to smaller design repeats, testing interactive zoom and rotate:
open a new picture, 60X60
draw a repeat and export it to Brush, ie 7X7 select the brush drawing mode.
choose a filled rectangle drawing tool
select the brush, hold down Ctrl (Cmd on Mac), and draw the brush across the canvas. release Ctrl; the program is in modification mode.
set the angle and zoom, and observe how the image changes in the main window. use Tools > Find Repeat > 24X52check alignments, 154X156 The same brush, 60X60 filled canvas Tools >Find Repeat > 21X1 check alignments, 147X147 Working with small identifiable shapes: 80X80 canvas, repeating the process with an 8X8 repeat  standard rectangle fill: use the command key on Mac, Angle 60, Zoom 200 find Repeat, 47X47 check alignment, 188X188 It is possible to overlay brushes using a series of them while working in multiple windows, my choices are random when testing concepts.
The first brush, 7X28 pixels,  the second, 8X8and the third, 60 x60 with white color to alpha The first brush is used to fill the first square, 60X60 In a new window, fill a matching size 60X60 square with the second brush To render a color transparent aka color to alpha, in the second window, below the palette icon, select the white color icon repeatedly until a checkered box appears in its center indicating that color is now transparent  The transitions: from the filled square, to the same with the white color to alpha, and the layer saved as a brush Use the 60X60 brush to bucket fill the very first square for a combined pattern and use Tools > find repeat, with the result: 24X48 The color inverted design: the appearance of both in repeat Working with diagonal patterning in machine knitting previously discussed some ways to obtain such patterns.
Developing diagonals using 45 degree angles and brush fill with pattern, using files matching in width and height, this began using a 12X12 image on a filled 100 X100 pixel canvas, and using Tools >Find Repeat X2 produced the final 17X17 design.
The process in shorthand:
the 17X17 png, also shown drawn in repeat to 102X102 Testing the same process on a canvas with a multiple of 24, 120X120 with a new brush also yields a 17X17 final repeat drawn in repeat to 136X136 The results are consistent when the approach is used on smaller canvases, here on a 40X40
Using multiple colors in uneven spacing also yielded a 17X17 final repeat checking alignments, 119X119

Some other effects with pattern fills:
dithering 

Developing 24 stitch optical illusion patterns for use on punchcard machines and more.

I have recently become obsessed with designs that fool the eye in any number of ways, and although knitting them in more than 2 colors is possible, I prefer the ease of only using 2.
Floats are likely to be too long in these knitting patterns for knitting them as single bed fair isle.
Software facilitates but is not necessary to develop repeats, the process may even be performed on graph pater with colored pencils if one so chooses.
Punchcard machine users are not always included in conversations, this post  addresses some ways of developing full 24 stitch designs and performing the necessary color separations for knitting them as DBJ where each color in each design row knits only once.
Brother KMs: punchcards and their use  reviews the basics including DIY development of simple motifs repeated in symmetrical tiled patterns.
The Manual for the Brother KR 830 offers this advice on DBJ knitting: Using lili buttons along with the slip stitch setting in both directions on the ribber carriage reduces motif elongation and keeps the aspect ratio of the planned designs closer to that in the originals than when choosing other DBJ techniques.
Ribber needle tapes are marked with lines followed by spaces. If the start under the first ribber needle on the left is on a blank space on the needle tape, simply end on the right with a needle over a line marking, or the reverse.
I am often asked why in my own illustrations the slide lever on the ribber carriage, a Brother “thing”, is always in the center position.
Reducing variables exponentially reduces errors.
If the lever position is not changed after those first rows or accidentally changed during knitting, the knit gauge will change. An example: working on final projects, more than one student in my knit studio design classes realized only after completing front and back or the second sleeve that the rib with the alternate lever setting not changed resulted in a visibly different rib height in the second piece.
Necessary adjustments can be made in yarn mast and respective carriage tensions, along with yarn choices appropriate for the technique.

ArahPaint and/with/or Gimp with a sprinkle of Mac Numbers have become my preferred go-tos for developing knit designs.
Designing can begin with simple drawings which do not require complex software knowledge and help to build confidence, using the electronic equivalent of graph paper and colored pencils.
Beginning with ArahPaint, with the goal of developing a 24 stitch pattern: load a new square picture, with an odd number of cells, in this case 13X13
Choose from the default palette, or set the number of colors to 3 and adjust the the results to include white, black, and one other clearly contrasting color Draw some starting lines/shapes that can be outlined with single pixels pencils Using the single pixel pencil tool, fill outlines in with color 3 To eliminate double pixels, mirror the image using the 25X13 pngrepeat mirroring using the 25X25 png Using the rectangle select tool, again to avoid double pixel lines, trim a row from the top and the right side of the design the 24X24 cropped result tiled as is with with the palette reduced to black and white The question remains as to how best to knit similar designs on any machine.
The floats are too long for FI, the repeat is best suited for DBJ.
The easiest color separation for DBJ is the one where each color in each design row knits twice.
To have each color in each design row knit only once, electronic machines offer the KRC button. The same result can be obtained in punchcard knitting by custom color separating the design.
When knitting DBJ with these separations, the 2 most common causes of stripes on both sides of the fabric are beginning the preselection row on the right, rather than the left, or as in my swatch, forgetting to push in both slip buttons.
This separation process for me is a very quick one using Gimp, I have not yet sorted a similar one in ArahPaint.
Using color to alpha as described in previous posts, the required files:
24X24 BW
24X48
24X48 color invert
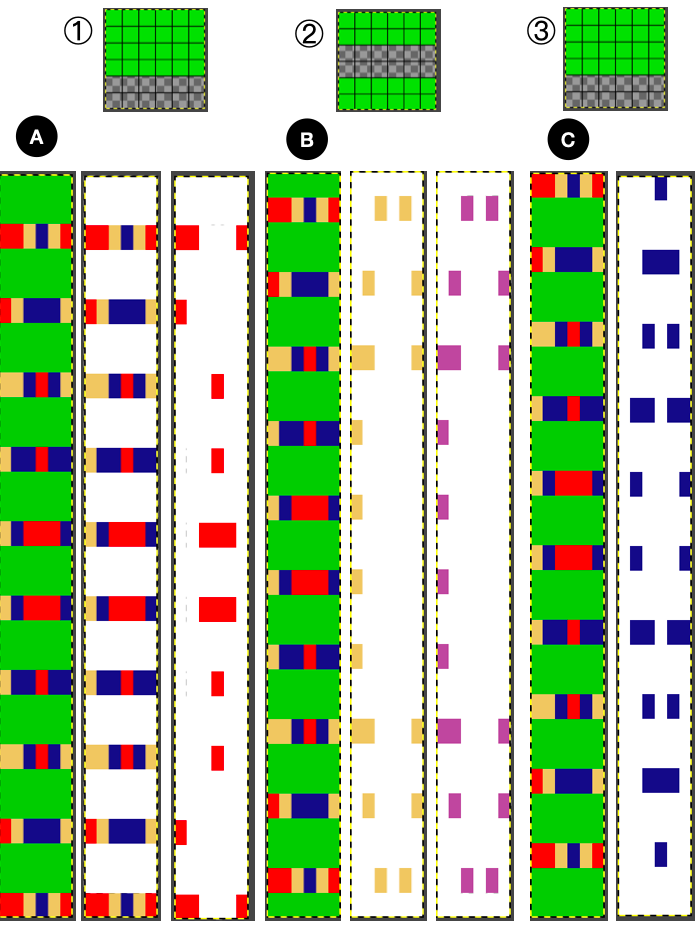
24X4 with the top rows in a color picked from the program’s built in palette. Use Colors, white to alpha, to render the white see through. Copy the file to the clipboard, and use it to bucket fill with pattern  a new 24X49 (col inv png 48+1 blank row at top) bucket filled with the clipboard patternthe pink color to alpha, renders it see through, th last row is cropped, to 24X48, and is copied and pasted on the original 24X48 imageThe proof of concept swatchIf you enjoy designing with pencils in paint programs, the same approach can be used to produce a larger repeat, which makes the illusion more noticeable, ie in this 36X36 design.
Open a new window with an odd number of cells,  ie. 19. Copy and paste the upper left of the design on the new upper left corner, keep filling in linesRepeating the steps described previously, the 19X19 png is mirrored -1 in both directions, and trimmed to a final 36X36 design Modifications resulting in added shapes beginning to appear can be small in developing variations while continuing with the 24 stitch constraint.      Repeating the process, the files in sequence   The proof of concept was knit using the color white for the first preselection row to the right and as the first knit color row to the left, the color inverted version of the original repeat.  The KRC electronic separations are intended to begin with the white pixels in the designs, but the knitter can change that sequence based on their preferred placement of dark vs light colors.
Visualizing the reverse color placement in a knit swatch using Gimp  Mosaic and maze knitting, also known as floatless fair isle, has been discussed in many other posts.
The appropriate color separation shares much of the process with that for DBJ but the starting image is used as is, not rendered double length to start with.
The convention is the same as for fair isle, floats wider than 5 stitches are generally avoided.
In the 40 stitch design, there are spaces as wide as 15 cells with no contrasting color ones, which will be responsible for float formation.
Answering the “what if” question if the 24 stitch design design was used as a possible maze design.
The Gimp process in shorthand While the DDJ separation is used as is, this separation must be rendered double length in order for it to be executed single bed with the knit carriage set to slip in both directions, and color changes every 2 rows.
Using color invert on the final file, reduces the white cell, skip stitch float counts from a maximum of 15 to one of 6. Tiling will check on repeat alignments but has no relationship to the final look of the knit, where the slipped stitches will be gather the knit ones near them. The resulting swatch is highly textured, some of those extra long slipped stitches could be amended by making small changes in the design if it were to be developed further.  

For electronic models, the second 24 stitch repeat extended to 30X30
36X36  

ArahPaint in knit design 4 illustrates a way where following guidelines in Easily generate random weaves it is possible to quickly generate more random DIY designs for use in multiple techniques and stitch counts.

Lace edgings on Brother machines- automated with slip stitch 3

WORK IN PROGRESS
This website offers inspiration for hand-knitting 100 lace collars, edgings and insertions. 
The charts may be used by machine knitters who enjoy portable hand-knit projects to complement their machine knitting ones, or machine knitters whose only option is hand manipulation, can follow the charts provided taking into account whether they are presented with knit side or purl side facing.
The images alone can be a springboard to variations of edgings that have already been worked out and tested.
Previous related posts:
Lace edgings on Brother machines- automated with slip stitch 2
Lace edgings on Brother machines- automated with slip stitch .
In a recent FB discussion it was suggested my edging repeats were “missing rows.”
The edgings shared up to this point were often shaped with transfers along the left edge, with the straight edge of the pieces on the right, and began with transfers to the right rather than to the left, with a fixed number of passes for both the LC and KC carriages throughout.
They were intentionally designed to minimize the number of LC passes.
As with many other knitting techniques there are multiple ways to achieve similar goals.
The number of LC passes and whether the starting selections result in a start with transfers to the right or to the left vary depending on the project and the designer’s published source inspiration, if any, their preference and end use.
There are no fixed rules.
The trims may be executed on any brand and gauge knitting machine, using hand needle selection and transfer techniques guided by specific charts.
They are not a new find or invention, were popular in the late 80s and in 90s on punchcard models, shaped with hand transfers, frequently taught at MK seminars.
If the edging is used as a border, the latter can be created horizontally rather than vertically, even using the ribber in some cases.
Automated versions make production are practical in forming lengths to be joined onto projects ie shawls and blankets.
Lace can be temperamental to knit, and when experimenting one can begin with what has already been worked out.
In this first design the shaped edge of the trim occurs on the right during knitting, the straight edge on the left.
Assigning color values to the direction of the transfers facilitates decisions in determining starting points.
Beginning at the widest part of the design, the cyan cells represent transfers to the left, the magenta transfers to the right, the black the all knit rows that will be formed with slip stitch.
End needle selection is turned on in both directions in the LC, canceled with the KC set on KCII.
The first preselection row is from the left with the KC set to knit.
When it reaches the right, the carriage is set to slip in both directions, makes 2 more passes, returning to rest on the right.
In the bottom of the design, at the decreasing angle, the LC starting from the left preselects but does not transfer any stitches on its way to the right, transfers to the left and preselects for all knit stitches as it returns to the left making only 2 passes to complete required transfers.
As the top of the design and the increasing angle is reached, four lace passes/rows in the design are required to make the necessary transfers to the right and to then allow the LC to return to its place on the left.
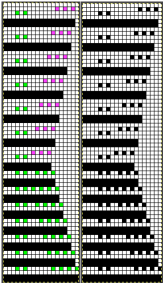
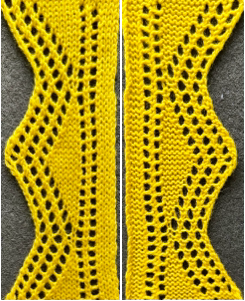
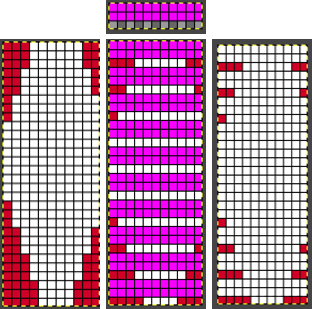
The charts are oriented this way to visualize how the direction of the transfers relates to the shaping.The 20X70 png, may be in need of mirroring depending on the KM model  being used and/or the download program. When in doubt, the needle selections are easy to recognize and some air knitting helps ensure that the pngs are oriented properly on your needle bed.  The proof of concept swatch For a narrow end start with the LC making the first preselection row from the left, the repeat, provided here in a larger view, can be shifted as indicated by red markings, and used after several rows of of base knit This 22X60 png, is charted with a start at the narrow for use with the LC preselecting the first row from the left for the increasing angle, then divided in for a start with the decreasing angle and the KC preselecting the first row, also from the left. The chart on the right shows the BW pixels actually programmed.
The LC makes 4 passes followed by 2 passes of the KC throughout the piece.
The shared version of the png did not require added mirroring on the 930, that was done automatically by the machine.
Shaping occurs on the right, with the straight edge on left. When charting in spreadsheets, in addition to assigning a color to the direction of transfers made by the LC, arrows may be added to indicate the direction of the respective carriage movements.
This design was published for use with a Brother Mylar sheet when the 910 was new to market. It is wider than most such borders, intended for use in a blanket or afghan edge. The transfers were intended to be made by hand to attain the curved edge.

Working in Numbers the image was mirrored and duplicated, planned for a shaped edge on the left. Arrows mark the direction of movements for each of the carriages The repeat adjusted for automated shaping The 40X40 png required mirroring on my 930  There is a non selected needle on the left near the center of the design, it is not a selection error The proof of concept swatch If the chosen design inspiration is from a punchcard pattern and the goal is to match the transfer sequences intended by the pub beginning with the fist row of transfers to the left, the approach is different.
Using randomly chosen Brother 636 from Punchcard volume #5,  pairs of rows are added after each transfer segment and in this case, a 42 row repeat becomes a 54 row one. In addition, pixels are shifted to form double eyelets along the straight edge on the right, and added and subtracted for shaping with increases and decreases that form matching eyelets on the left.   The png 32X54 png, used mirrored on the 930
and its proof of concept swatch

“Lace” patterning terms

This post was actually begun in 12/2020, but never published.
A list of blog posts on lace knits may be found by searching for specific topics, or using the lists of related links provided in the “start of an index”.

The term lace is often used in machine knitting publications referring to fabrics created with techniques other than the familiar hand or automated transfers.
In turn, the ribber may be added to working with many of the same patterns, adding varying degrees of complexity.
Some variations are possible only with specific machine brands or model year carriages, but at times may be rendered possible on alternate brands or models with adaptations, hacks, or the addition of other techniques.

This post for the moment is a quick reference guide of associated terms
Hand transfers  used to create eyelets, possibly in combination with stitches out of work,  and moving stitches singly or in groups
Simple lace:  executed with carriages that transfer and knit, seen in Studio brand
Multiple transfers/ fashion/ fancy/ lace: executed with lace carriages that transfer only, Japanese machine models
Fine lace: stitches are shared between needles rather than completely transferred, brand-specific changes need to be made to carriage settings
Lace and fine lace: may be created combined with either simple or multiple transfers lace, stitches are episodically shared between needles rather than completely transferred, brand-specific changes need to be made to carriage settings and will require changing to shift from one type to the other
Variations using L point cams: punchcard machines method for isolating and/or spacing lace motifs or columns
Tuck and lace: transfers combined with tuck stitch patterning
Woven lace: transfer lace combined with the weaving technique
Lace and fair isle: reference in Toyota punchcard pubs
“Lace like patterns”: possible in machines such as Brother and Passap, which allow for the same stitches tucking in one direction, slipping on the return of the knit carriage to its starting side. It matters which function leads in the pattern
Punch/ thread lace: thick and thin yarns used together in machines that have the option of a setting that allows for knitting both yarns together in unpunched areas or blank pixel rows, with traditionally, the thin yarn knitting in the front of the fabric, the thicker floating behind it
Tuck lace: tuck setting in both directions with specific needles out of work
Ladder Lace: worked with columns created by needles left out of work
Punch tuck rib: every needle rib combined with tucking pattern on the knit bed Drive/ drop stitch lace: stitches start on either of the 2 beds, loops are picked up and dropped on the opposite bed
Shadow lace: stitches are moved between beds in pattern to create knit stitches on purl ground or vice versa

Knit weaving 3

The first single-bed machines to produce what is now referred to as knit-weaving were the Japanese model ones from the early to mid-1960s.
The Knitmaster 302 had a separate brush unit operated manually to guide the yarn above and below stitches.
On the Brother 585 and 588 models the weaving brushes were built-in and were pressed into place.
Early patterns used aran-weight yarns as weft on 12-stitch machines.
From 1971 onward as 24 stitch machines came on the market, the wider repeat allowed for the use of thinner yarns in the technique.
Later manuals including those for some electronic models describe this achingly slow method when using a single-color weaving yarn fed through the yarn mast 
The subsequent technique shift advice was made for using an intarsia-like method for more colors:  The method is so much faster than when using the mast and knit carriage it makes little sense to use the former.
The technique begins with the carriage on your preferred side,  from the right or left, the yarn is generally laid in starting on the carriage side, with the long end to cone or ball away from it.
The wraps are needed in each direction: For work on the machine, swatches, punchcards, tools, and more information on types of weaves, ie laying in the yarn with vertical wrappings Another illustration of the movements in the laying in of the yarn on specific needles.  For more info on horizontal weaving, see Knit Weaving 1.
The resulting knits often lose stretch and drape widthwise, a consideration when making garments. As an alternative, one may knit pieces sideways.

Some ways to push limits, and new swatches:
Knitweaving encompasses an extensive range of fabrics. At times the type of machine available places constraints on materials.
One way to use chunky and bulky yarns on standard machines when they do not work with the ground knit on every needle, an option is to use every other needle patterning.
A visual comparison of yarn thicknesses for beginning experiments Here a commercial twine is used, programming a 4X4 repeat,  and laying the weaving yarn over the preselected needles when the long end of the yarn is away from the knit carriage, thus adding extra all-knit rows between woven ones.  This yarn has been in my stash for decades unused, it is 92% wool, and 8% polyamide. It was e-wrapped in alternate directions on every row, with care to maintain the thrumbs below sinker plate levels during carriage passes.  An option for electronic models: open a PNG suitable for knit weaving, as this 24X24 one, double the PNG in width before downloading it, or use the double-wide button after the fact, cast on every other needle, and continue in the technique. Planning the repeat on the needle bed would render better edges than in my swatch, if there are multiple non-selected needles on either side, bring the last needle on that side out to E before laying the yarn for the next row of pattern.  The floats created through knit weaving can share similarities with those from fair isle or slip stitch.
Slip stitch textures compress the knit lengthwise, and narrow it, while knit woven pieces lie flat, and provide far more predictable gauges.
This sample explores various float widths, beginning with a 24X24 pixel PNG.
When sampling on an electronic, one can plan for repeat widths equal in number to the needles in work or greater based on preference or a requirement by some software.
In designing for planned fabric widths, borders for better side edges than those resulting only from engaging end needle selection may be isolated or added with a preferred pattern fill.
The 24-stitch repeat was drawn in repeat X4  and cropped to 50X48, retaining a 2-stitch vertical border on each side and shared repeated in height X2, a final 50X48  Samples of the three yarn thicknesses used in the test swatch are shown at the bottom of the image on the right

More links for browsing
A return to loopy knits
Machine knit fringes 4, long loop patterning 
Long loops: a bit on method
Knit weaving 2: swatches, experiments
Knit weaving 1
Tuck stitch meets knit-weaving
Lace meets weaving on Brother Machines 2 
Lace meets weaving on Brother Machines

More separations for various knits using Gimp, color to alpha

WORK IN PROGRESS

a caution: 4/26/24 Gimp crashed repeatedly at the step when I tried to copy the brush from the clipboard to bucket fill any images with the pattern. The same reoccurred after an iMac restart and after a Gimp reinstall.
The problems appear to have been eliminated by uninstalling 2.10.36 and downloading and installing the previous, stable version 2.10.34.

Other posts have used the Layer> Transparency> Color to Alpha or Colors> Color to Alpha as part of other menu options, but in the last post and here the selection is the primary tool in developing transparencies.
This design was originally shared in the post: Gimp Update for Mac 3_more on color separations, where the goal had been to reproduce a published 12X18 chart. 

The PNG matching the chart on the right may be used in several ways. On electronic machines, it would be ready for knitting using both the color reverse and the double length buttons if planning to use tuck or slip settings with color changes every 2 rows.
Punch card machine users must punch the color-reversed file and set their models for double length,  but punching out the lengthened version 36 rows in length provides enough for the card to advance properly in the drum and makes correcting errors easier.
Revisiting the photograph of a swatch using the design using wire and chenille in half, and wool rayons in the other, I was bothered by the breaks at the midline of each repeat. Tiling the first design provides evidence of the area at issue, led to adding/subtracting a few pixels at a time, seeking slight changes, and ending with two final variations:  
Variation 1
Variation 2  The Gimp color to alpha process in RGB Mode for mosaic knitting: file 1 is opened. Several new files may be opened in sequence for altering, copying and pasting onto each other, with steps performed as a continuous process or with saving results and returning to them in separate steps    file 2: its color reverse
file 3: a 2-row brush with white color to alpha file 4: file 3 used to bucket fill 2 with pattern file 5: magenta color in 4 to alpha

file 6: file 5 copied and pasted onto file 1.
Change Mode to BW Indexed
file 7: file 6 color-reversed for knitting with the tuck or slip setting,   will need to be doubled in height for color changes every 2 rows using the double height button or use the file rendered double height to 18X36 pixels using Image> Scale in Gimp The proof of concept:  1: The StitchWorld #548, 24X40 pattern was also used in that post, it is suitable for punchcard machines as well  Using bucket fill with pattern makes the process faster than using the pencil tool to fill in color manually before converting colors to alpha in separating it.
While mosaics are processed in their original length, DBJ files are doubled in height.
2: the file is scaled to 24X80 3: and color reversed 4: a 2-row brush with white color to alpha 5: is copied to the clipboard and is used to bucket fill with pattern the color reversed image   6: the cyan is rendered transparent by using color to alpha again,  7: and 6 is copied and pasted on #2, the first 40X80 image,  8: and doubled in length to 40X160, it is exported as a BW PNG for knitting as DBJ. The results with both methods match.   Each color in each design row will be knit twice.
The method for emulating the separation that is built-in in Japanese electronic models, where each color knits once reducing elongation is a bit more fiddly to perform.
Charts from left to right:
1: the scaled 24X80
2: is color reversed
3: a new file, 1 row longer, 24X81 is opened, 2 is pasted onto it, leaving an all white pixel row at the top of the design
open a 24X4 row file, with two top white rows to alpha, use it as brush to bucket fill 3 with pattern
4: magenta color to alpha
5: crop that last blank row from the file, now 24X80 once more, copy and paste it onto 1.
The green grid is to differentiate this result from the one obtained in the other post, shown at its right
Change image mode to BW Indexed, export as png for knitting.
The proof of concept Returning to the repeat used to produce this punchcard the very low tech wayRepeating the steps used for the last designWorking in RGB Mode the 24X6 starting repeat was lengthened X2 to 24X12, and colors exchanged to black and white, because using color invert in RGB mode introduces a different palette confusing the process.
1: To produce the separation for a full punchcard, the image is tiled X3 in height to meet the 36 row minimum card length and 2: is copied and pasted on a new file of the same dimension, and color inverted 3: the color inverted file is copied onto a new 24X37 one with with an added blank row at the top 4: a new file 24X4 is opened, the bottom 2 white rows are rendered transparent using color to alpha, and saved to clipboard 5: to be used to bucket fill in pattern the color inverted 24X37 image (3) with pattern  6: the pink color is now rendered transparent as well using color to alpha crop the last blank row, the file will now be 24X36 again,
7: copy and paste it on the first image for the final KRC emulating png, check the file mode, and save as indexed BW for use in electronic models. When color inverted
the repeat matches the punchcard separation. It is possible to magnify, screengrab, and scale the pngs to print templates for counting stitches or even tracing to mark cards prior to punching holes.

DBJ, more than 2 colors per row 4

Revisiting older posts often brings to mind new or slightly different ways of looking at and achieving the same tasks.
Links to some related previous posts:
DAK DBJ color separations, templates, and other software
Revisiting Ayab_multiple colors per row DBJ 2
Revisiting Ayab_multiple colors per row DBJ 1
Img2track_multiple colors per row dbj, each color knitting only once
DBJ: more than 2 colors per row 3
DBJ: more than 2 colors per row 2   img2track
DBJ: more than 2 colors per row 1

Color separations for knit designs in only 2 colors are more straightforward than those for 3-4 colors.
The built-in KRC function in Japanese models will yield results automatically where each color knits in each design row only once, reducing the elongation in the designs often seen when employing other techniques.
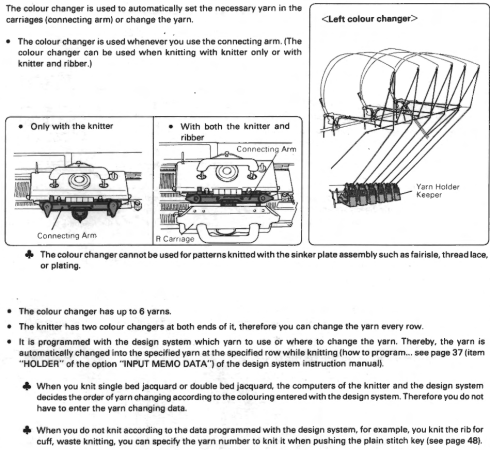
Japanese machine models for home use (not the semi-industrial ones) have a color changer that resides on the left, and aside from whether each color in each row knits once or twice, the combined carriages need to move to and from the color changer on the left for each color selection.
The color-changers for brands differ slightly and matter in cross-brand use if one relies on published separated designs and pictured swatches.
Yarn changers for:
Brother Studio Sometimes the placement of the colors within palettes will result in the colors not being read and downloaded properly.
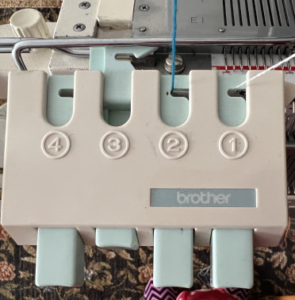
As described in the Ayab post: when using each color, it is coded in a range of 8-bit values. For 4 colors, it would be 0-63 color A; 64-127 color B; 128-195 color C; 196-255 color D.
When only 2 colors are in use, in manual color separations, the ultimate goal is to produce BW-indexed PNGs. They are then downloaded and programmed as one would FI patterns, palette placement is not a concern.
Working in default or limited palettes produces familiar visual clues in DIY, to save custom palettes see ArahPaint and Gimp in knit design 3 
If the goal is to imagine the results in colorways based on yarns planned for use in the finished piece, that can be easily achieved after the fact.
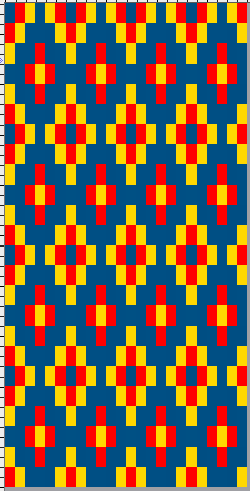
This design has been used in past posts and is 6 stitches wide; hence, repeated X4 in width will also be suitable for punchcard machines. Looking at it again:
checking alignment when tiled
Stitches on needles not worked on the top bed are held while stitches in the other color(s) knit, and get longer. Some degree of alteration in the aspect ratio in the appearance of the design on the knit side in the final result is to be expected, also influenced by the addition of varied knitting techniques and carriage settings.  Methods I have explored in DIY repeat the same color sequence throughout even when any one of the colors is not represented in that design row: one way to decrease the visual lengthening of designs in dbj is to eliminate a row of knit stitches from each pair of passes by pushing Brother’s preselected needles back to the B position on the top bed before knitting from the right back to the left, thus skipping all needles in work on the top bed.
The HOP separation in Ayab performs this function automatically in addition to shuffling around repeat segments while keeping a fixed color rotation, making repeats that fail with other separation methods knittable.
In images where not all colors are represented on every row, there are more knit rows on the ribber than on the main bed, even with birdseye backing, another added cause of stitch elongation observable on the knit side.
When using birdseye backing, the ribber will knit every other stitch, alternating needles on each pass. An even number of needles is required. Patterning is akin to using a 1X1 card on the knit bed.
By the time the carriages have returned to the left only one row of knitting on every needle will be completed on the ribber.
The setting is not available in every model machine, including very early Brother ones.
When knitting in tuck or slip stitch, stitches grow in length until they are knit off again. This remains true when working in DBJ fabrics as well.
Yarn and tension choices can affect the final appearance.
There will be some degree of bleed-through behind the elongated stitches.
Blocking also influences the final appearance of the completed knit.
Exploring possibilities:
The initial 6X6 file is converted to stp and opened in DAK resulted in the following messages and pattern error corrections A second design was also tested in DAK and yielded the same error messages:  The 6X6 stp doubled in length to 6X12 cells allow for the option of selecting the type of dbj color separations, creating files that can, in turn, become PNGs for working outside the program, and for printing traceable templates for punchcards. That work is achieved through hacks since DAK does not allow direct import or export of file formats other than its proprietary ones ie stps or txt for use with Kniterate.    A closer look at the diagram of the color sequence options in each
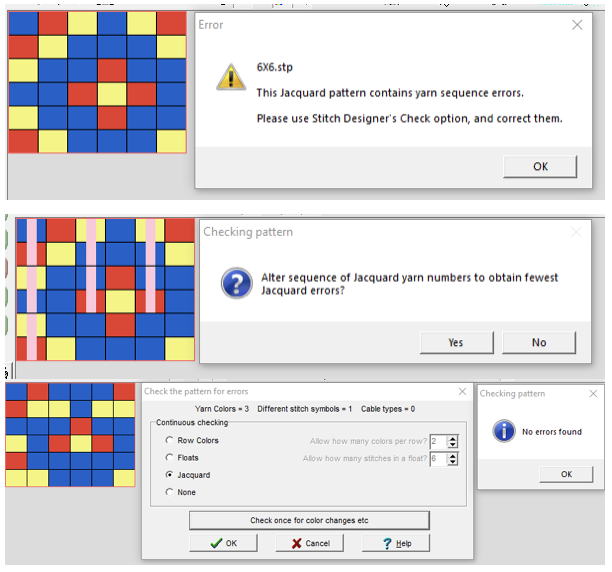
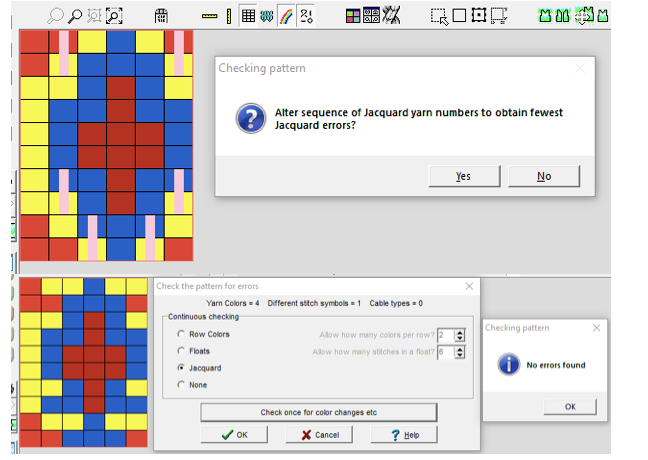
The characteristics of the more commonly used methods in review:
Method A
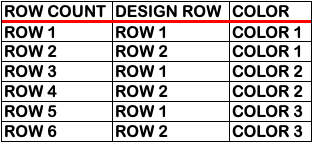
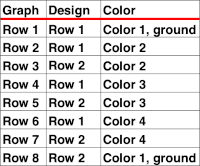
works on pairs of rows, Method B creates the same separation as the default built-in KRC one in Japanese electronics with each color in each design row knitting only once, Method C separates each color row into separate rows of knitting, rows do not have to be repeated in pairs in DIY, and the double-length switch will need to be used in Japanese knitting machines It is possible to generate an output of the separation and to process it to generate files usable in img2track or for printing traceable punchcard templates.
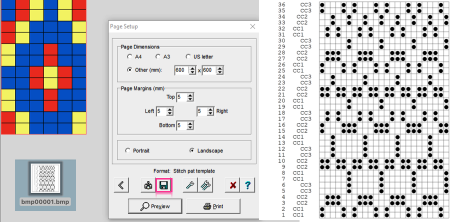
The program does have an option to save a bmp but the save is of the separation on a grid with added data, not as a file immediately usable in other programs. Click on the floppy disk icon outlined in red to save as bmp as an alternative to screengrabs.   Using the same 6X12 file, the generated printable templates and associated converted PNGs:
A B  the repeat here is also for the original lengthened X2, and 36 pixels high with no segments repeated. The essential difference is that the first preselection row is made from left to right, with the pair of rows for color 1, design row 1 split between the top and bottom of the separation.  C
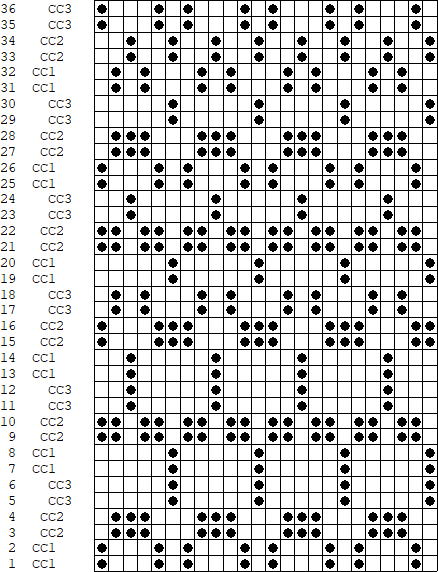
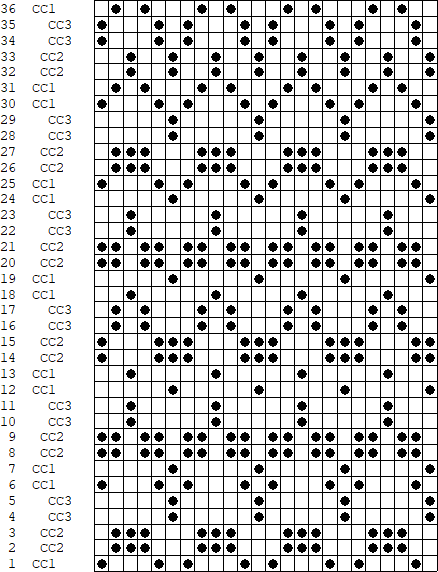
elongated X2=24X72, handy for other knit structures, but not for reducing elongation in DBJ Using img2track set at knitting in 3 colors, there is no error message, but the 6X6 file will not produce the planned design.
A proof of concept is provided in the post DBJ: more than 2 colors per row 2. Starting with the double-length 6X12 file, each color in each design row will be knit twice:  and the machine will offer prompts for its pre-determined color change sequences.
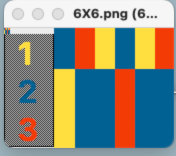
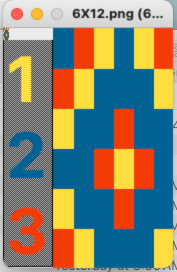
Most recently, my separation experiments using Gimp use transparency methods and are are shared in the reverse order of their development 
#3
The briefest and last method: working in RGB mode, begin by multiplying the pattern in height X3, to 6X18 Isolating the red color on a white ground:  isolating the yellow on a transparent ground:  isolating the blue on a transparent ground: copying and pasting the isolated yellow and blue with transparent grounds in  turn onto the red design isolated on the white ground
changing all 3 colors to black
doubling the image in length to 6X36
remove every second row using the pencil tool or bucket fill it with the 6X2 pattern, and change the cyan to white. Any other color can be used instead of the magenta at that point
change Mode to BW indexed, and save the final file for knitting.   Comparing the results for the full repeat from other methods on the left, with the one using this method on the right
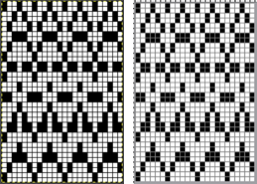
Returning to that 6X6 repeat that was prone to error in both DAK and img2track, with each color represented once in each row, exploring the possible separation to knit each color only once, and using a final 6X18 PNG led to patterning failure.
The Image menu progression of its process in Gimp: the number of thumbnails grows and one can travel through the images using simple clicks until any image is discarded or the program is quit, the X appears aside the file viewed in the work window.  Each color was isolated on a white background, with guides placed horizontally across every pair of pixel rows.  Pairs of rows of each color were copied and pasted in alternating sequences on an all-white file longer than 18 pixels rows and the results were trimmed to a 6X18 file for a knitting test.  Though the built-in KRC separation takes that first design row and moves it to the top of the repeat, thus knitting a single row with color 1 and completing it in a pair on the last row of the program, the first knitting test began with preselection from the right, and color 1 knitting for 2 rows.  A second try at an 18-row repeat, also a design fail, with odd breaks in the lili action on the ribber, seen in Passaps when pusher selections on the back bed are disrupted.  When the motif was doubled in length, and the same method was used, the results matched the 24X36 file.
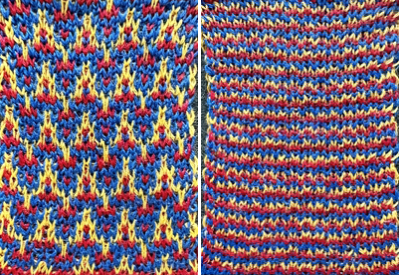
The 6X6 design, however, expanded and separated to a 6X18 file may be used in machines with color changers on each side, with a different color sequence, see DAK Method E notes toward bottom of post.
#2 Working with the 6X6 design lengthened X6 to 6X36

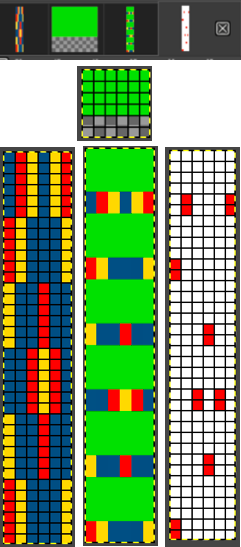
with every other row rendered in all white cells The proof of concept swatch
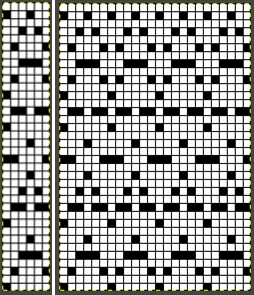
DAK
owners see the 36-row file and similar knit sample for the Half Milano separation F toward the bottom of the post.
In my #1, first separation draft, the 6X10 file is elongated X6, to 6X60, considering that each color in each design row will be carried for two passes.  The latest Gimp version for Mac is 2.10.36
Sometimes there are differences in commands in the Windows version.
Begin the work in RGB Mode.
The color-to-alpha command in Gimp makes all pixels in a selected color transparent.
The option can be activated through the Layers Menu by choosing Layer> Transparency> Color to Alpha or the filter via Colors> Color to Alpha from the pull-down menus at the top of the work window.
No threshold or blending adjustments are needed in the small 8-bit files used in designing knits.
Some previous repeats using  colors to alpha in 2-color separations can be found in the posts
Color separations for larger scale mosaics and mazes 
and on Using Layers in Gimp for Color separations
Magnify the image to a comfortable viewing size, ie 800% or more.
When the color to alpha dialog window opens, there will be a small preview of the image you are working on on the upper right that relates to how many images are available for processing in the work window at the time.  When the color white is in the mix using the 8-bit files, the preset color selection for transparency in the color bar is white.
To change the color selection, click on the white color, the palette window will appear, select the new color, and click OK.
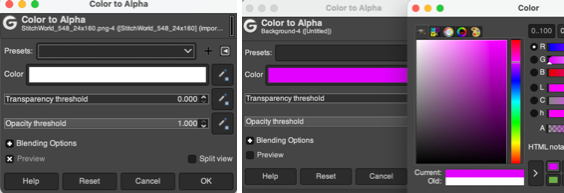
To Bucket Fill with pattern: create a custom brush size, matching the starting design width in pixels. The number of rows varies with intent. White is used as one of the colors, and the second color can be any other.
Click on the rectangle tool and then on the pattern thumbnail, an icon for it will appear on the upper right of the work window. The brush will be copied to the clipboard and will be available to use to pattern fill until the program is quit. It can also be saved for future use as explained in other posts.  To fill specific groups of pixels with FG or BG colors, click on the select by color tool,  and then on the color you wish to change, use bucket fill, selecting foreground or background color.
The fuzzy select/magic wand tool mentioned in previous posts is designed to select areas of the current layer or image based on color similarity. It appears to the left of the select-by-color tool. It can be used when pixels in that color need to be changed in contained single areas rather than throughout the whole image.
If using the bucket fill with foreground or background color alternating with fill with pattern, remember to switch between the two as needed.
If an error is made, use Image> Edit> Undo to move back to any previous steps.
If at any point the image in the work window is surrounded by dotted lines, click on the rectangle tool and then again in the work window to essentially fix the layer.
The Image menu provides access to nearly any operation you can perform on an image.   Clicking on any one of those images will produce a dotted outline around it making it identifiable and usable in work such as for copy and paste followed by bucket fill with pattern,   or for navigating between series of open files.
#1  the longhand first practice run began with the 6X10 file multiplied in height X6 to 6X60. Good practice for sorting out a technique, but guessing the aspect ratio in the final knit would be bothersome.  1. has the first 2 of the 6 design rows rendered transparent, so when used to fill the original, only rows planned for color 1 are left exposed
2. will leave design rows 3 and 4 exposed for color 2
3. will leave design rows 5 and 6 exposed for color 3
Repeat these steps on the original design 3 times, and save each completed step until comfortable with working on several files open at once.
A. select by color, bucket fill each with white except for the color red
B. select by color, bucket fill each with white except for yellow, if the color seems too hard to identify, change it to another
C. select by color, bucket fill each with white except for blue. The red and white in the last step in A are left undisturbed, while the white background in the last steps in both B and C is rendered transparent, as seen in 2 and 3. Both 2 and 3 are copied and pasted onto A, rendering the final tricolor image, 4.
Using select by color and bucket fill, the three colors are replaced with black, 5.
A last brush bucket fill, 6, leaves only the first row of black cells exposed, changing the cyan to white and converting the final result to BW-indexed mode, 7, is saved for knitting with each color in each row knitting only once.  When all 3 colors are not represented on every row,
The 11X10 image was used in previous posts,   tiled,   the tiled elongation:  The separation uses method#3:  the process with the image lengthed X3 to 11X30 representing each color in each design row once:  working with Gimp transparency, isolate the red, retain the white ground isolate the green, render it on a transparent ground isolate the blue, render it on a transparent ground,  copy and paste the green and blue rendered on transparent grounds onto the red on the white ground initial image, obtaining a 3 color separation.
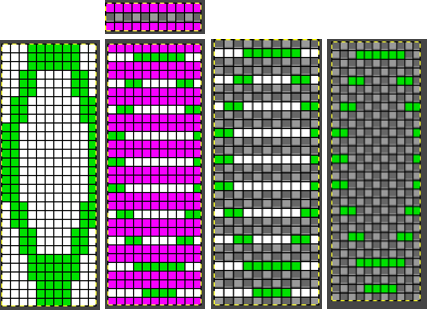
Replace colors with black. For knitting each color in each design row for 2 passes double the file in height to 11X60 pixels. To knit each color only once in an attempt to further reduce changes in aspect ratio, erase every second row. Images for knitting are saved in BW-indexed mode.  The DAK template (set for 950i) and img2track screen image compared to my result:  the 11X60 PNG, all pixels, 
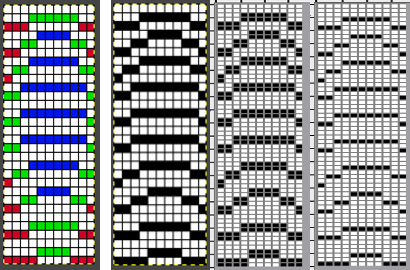
and with black pixels on every second row changed to white The proof of concept swatch: the vertical lines between pairs of stitches result from the drag on the ribber stitches to the right and then the left as the birdseye pattern is formed, they are frequently also seen in ladderback dbj.
The yarns used are not of equal thickness.
Balanced yarn weight and tighter tensions would diminish both those lines and any bleed-through behind the stitches on the knit side.
The dropped stitches on the purl side indicate the need for troubleshooting the condition of ribber needles and their latches.Img2track_multiple colors per row dbj, each color knitting only once used the same 11X10 repeat, explored the results using HOP, pushing needles back to B manually EOR, and a color separation with the same 11X60 final file. 
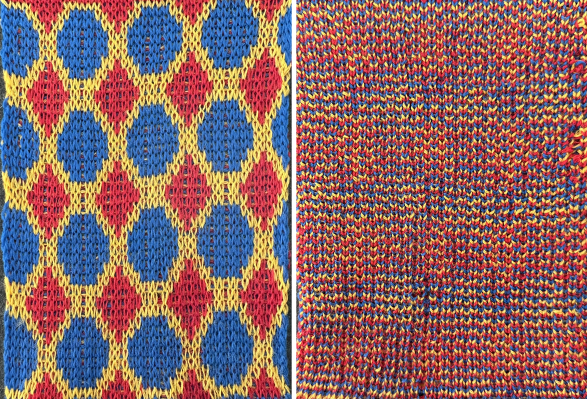
An additional way to decrease changes in the aspect ratio of the original design
relies on eliminating as many passes as possible, by eliminating design rows with “no color” out of the color change rotations.
The color changes in continuing identical sequences vs skipping any one of the colors from the rotation when not in use:  The 11X60 repeat is now to 11X48  its companion with every other second row of black cells erased.  Both create the need to track what color to use and when. If the machine or software cannot provide prompts and reminders, a spreadsheet is easy and quick to create, listing colors and corresponding row counts:  Tracking those shifting color changes is more than my bandwidth and patience allow.
As I was working on this post, a friend asked about the separations for 3 color designs in the StitchWorld Pattern Book #3.
I randomly chose # 484, with the swatch pictured on p 57 and the design separation repeat found on pp 96-98. The shortest segment can be quickly converted to a knittable 140X50 PNG. Other factors to be considered and examined:
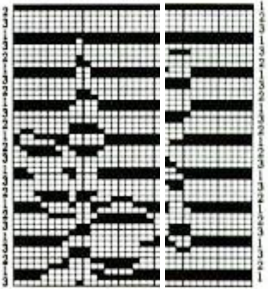
the color-changing sequences are provided on each side.
Each design row appears different from the row below it, raising the question as to whether each color is knitted only once.
The built-in KRC function in Japanese electronic machines automates that option when only 2 colors are used.
Passap E6000 users have a programmable reader technique that accomplishes the same for 3 and 4 colors.  This SW III segment is for rows 521-570, p98, with two more full pages in the pub beginning on p 96 with rows 1-260, and p 97 with rows 261-520.
Gimp Guides were placed on a screengrab of the file and it appeared each number was associated with 2 design rows.  The color numbers are not in fixed sequences and differ on each side, as seen in this magnified view.  Found when browsing through the SW III pub for added clues: the fair isle section symbols are suggestive of the CK35 Brother semi-industrial machine, produced in small numbers decades ago. The CK 35 has a color changer on each side.  From the manual regarding their use:  If the files are intended for the CK 35, additional information is needed for emulating or adapting them for use on home knitting models, not always possible.
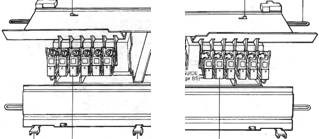
The same is often true when traveling between machine brands manufactured in different countries.
DAK owners can use Method E jacquard separation for machines with a color changer on each side, like the Brother CK 35. According to the manual, the process works on pairs of rows and separates each row into a pass with each color.  A sample separation with no error messages when the 6X6 file is opened.   Untested DIY for the same separation:
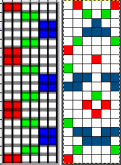
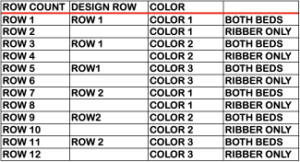
The 6X18 repeat opened in Gimp, using a single-pixel pencil to fill in all except the color for that row with white.  Using the custom brushes and bucket-fill with the pattern, begin with isolating the red color, retaining the white background,  repeat to leave the isolated green exposed, and convert the magenta color from the brush to alpha repeat with the isolated blue,   in two steps, copy and paste the green and white on alpha and the blue and white on alpha on the red-on-white ground image, the tricolor final result, which matches the result from the pencil color replacements, is then rendered in BW for knitting. The last DAK Method F is referred to as suitable for Half Milano. It is directly translatable for use in the Japanese models.  The corresponding separations for both the 6X6 and its elongated sibling, 6X12 The 36-row repeat was quite different from mine, but a knitting test resulted in a matching result while trying out the 11X10 design in DAK resulted in obvious patterning fails, likely because the repeat is not an even number of pixels in width.
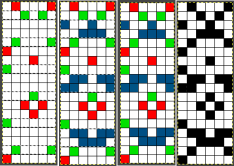
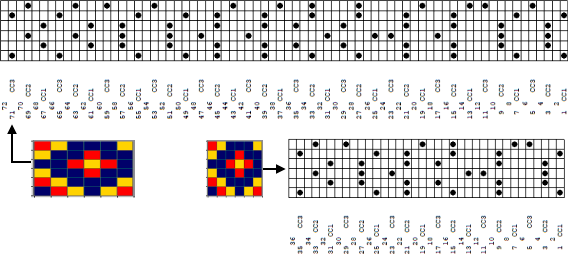
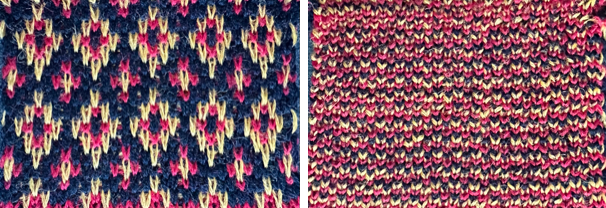
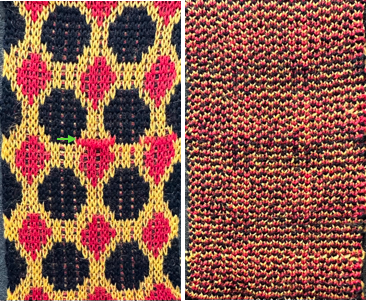
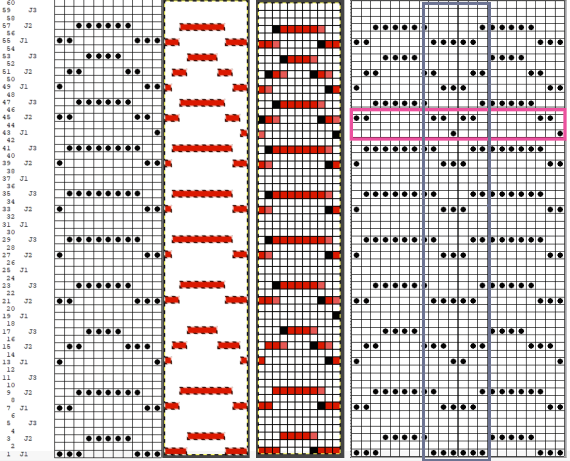
A repeated knit test of my 11X60 repeat, the arrow points to operator error when I failed to notice the color changer was carrying 2 colors at once. It is possible to superimpose final repeats on each other to look for errors and differences. The DBJ separation in DAK was 60 rows high as well, but it appears to be inaccurate, pointing to possible unidentified errors when working with a stp that is an uneven number of pixels in width.
A return to loopy knits

Fringes, loops, and pile/carpet knits are populating Fall knitwear runways.
Pile knitting is best executed on Studio knitting machines. Love the knit structure? find a Studio KM to borrow for the project.
Fringes are essentially long loops, and share principles with knitweaving.
Previous posts
Pile knitting on Passap and Brother KMs 4
Pile_carpet stitch knitting on Passap and Brother KMs 3
 
Pile knitting on Passap and Brother KMs 2
 
Pile knitting on Passap, Brother, and Studio KMs 1
With Studio KMs outside the range of possible use, there are loop techniques that can be executed manually on any gauge machine
The first sample is knit on a 4.5 mm 930.
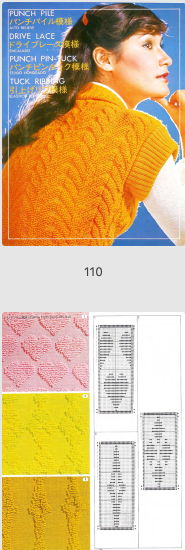
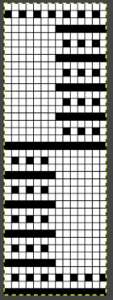
A downloadable punchcard volume for Studio aka Silver Reed machines offers punchcards for the double bed technique referred to as punch pile In analyzing the repeats, the black cell rows represent loops picked up on the main bed, the blank rows the carriage passes knitting every stitch on the ribber alone holding the loops down.
Applying permanent loops to the surface of a knit using Brother knitting machines falls into the knit weaving family.
The knitter can choose color placement and changes, as one might in intarsia.
Previous related posts:
Machine knit fringes 4, long loop patterning , my first use of straws, bulky loop yarn, the main bed programmed repeat:  Long loops: a bit on method includes instructions on the use of single bed cast on comb, rulers, ribber gate pegs.
As usual, my swatches begin with random yarn choices from my stash, using colors that will help identify proper stitch formation, and just as a random return to designs intended for other fabrics in previous shares.
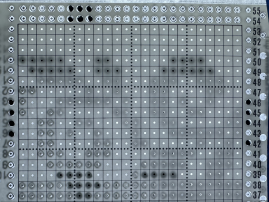
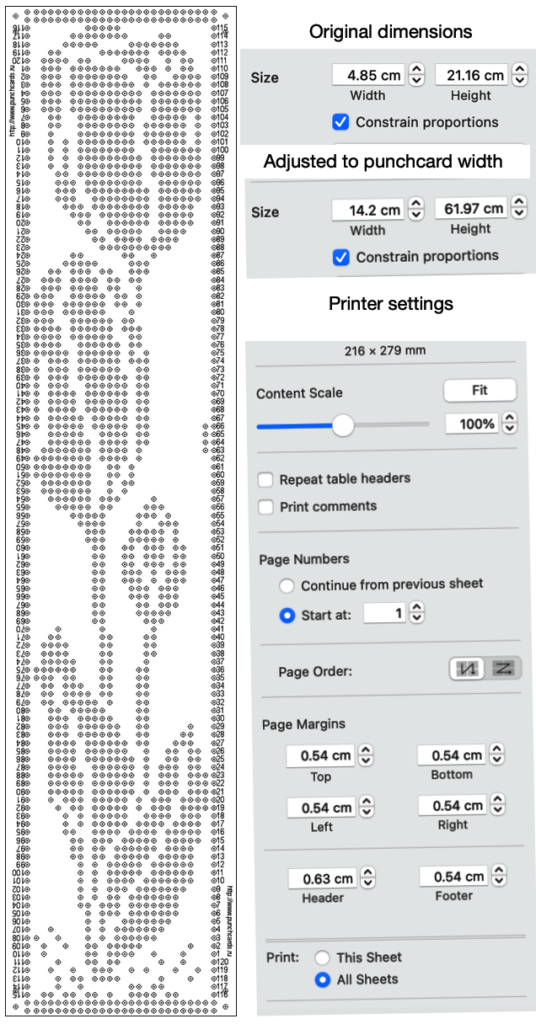
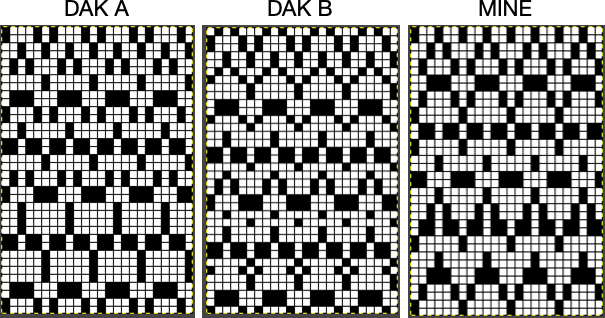
Developing a repeat: since the loops are created by hand, the goal is to work with larger loops than those in automated punch pile designs.
In the past, I was drawn to and explored truchet tilings
Truchet tiling design inspiration 1
Truchet/Smith inspired designs 2 meet ArahPaint
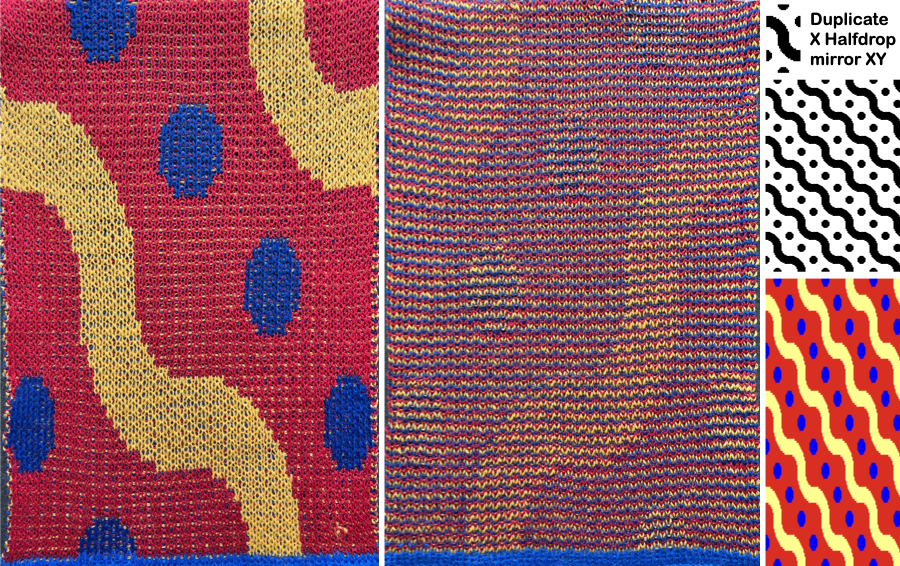
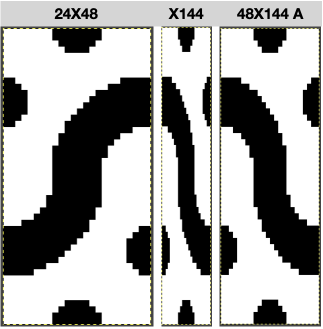
More Truchet inspired tiles, a brief look at gradient filter use included this 3-color knit sample resulting from an img2track color-separated DBJ repeat Aiming to form large loops and a larger scale motif with more than one knit row between rows of them, the original 24X48 repeat,  evolved into a very different 48X48 repeat.   The full design in gridded view: The process used to attain it: the original repeat was scaled x3 in height, and then again in width X2 for visual balance  Working in RGB mode the 48X144 image was opened in Gimp, and a new image file in the same size was added with a white ground, and then a third 48X3 image with rows 2 and 3 colored in red. The latter saved to the clipboard, may be used to bucket-fill the all-white second image.
The white is rendered clear using layer, transparency, and color to alpha.
The result is copied and pasted on the original.
The red is selected by color, filled with white, and fixed by clicking on the rectangle tool.
The mode is changed to BW indexed, and the image is saved for knitting. I grabbed yarns for color visibility and thickness, not fiber content, and in the resulting knit the loops flattened permanently in the red acrylic and the blue acrylic blend. The technique might be better served using a 3/8 wool for the loops.
The work in progress:  The full repeat in the final swatch measures 6X11.5 inches The same repeat was used again, and the red acrylic yarn was switched to the background for a result that would steam flatter permanently, while the loops were formed with triple yarn strands.
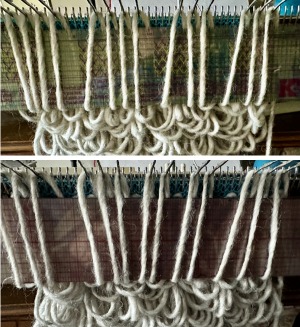
It took testing adjustments in tension and loop length, noticeable at the bottom of the swatch images, to achieve consistent coverage and a new tool to form them.   When searching through published sources and adapting them, results can be random or outright failures. Pondering patterning on every other needle, with end needle selection off, this design from:   for 12 stitch punchcard models came to mind, including this chunky machine design The what if repeat, expanding it to a 22 stitch version with every other column blank and checking for proper tiling was not useful as a knit woven pattern, but when used to form loops on preselected needles and graduating the height of the loops the result proved interesting.
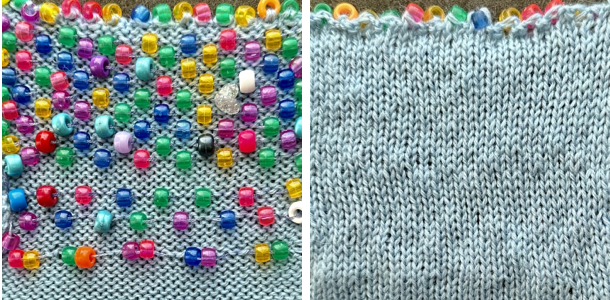
Rulers of different widths and thicknesses were used as tools used to form the loops including but not shown, the metric ruler supplied with Brother knit leaders. Diagonal designs, in particular, can be hard to force into 12 or 24-stitch conventions. With further editing, the published repeat is adjusted to larger 23X18 pixel dimensions, appears to align correctly, and will be returned to in a post containing more knitwoven samples.   This test begins with caution, then produces a dense pile testing the limits on yarn thickness using the repeat:   Pony beads were threaded on a double strand of cotton from an unmarked cone, and loops were formed with beads advanced and placed between and below preselected needles.
Spacing was tested before committing to the final choice, the same repeat as in the above swatch.
The bead-carrying yarn was pulled to tighten it across the previous woven row just before laying it in place for the next patterned row.
Bead addition was also tested between chains in bind-off.