I began to machine knit in the glory days of using the tool and developing techniques. There were internationally attended seminars, hosts of wonderful teachers, and a community of potential peers brought together physically in pre-internet and online forum days. Punchcard machines were the standard. As more electronic models became available it was not uncommon to find the rep for DAK at one end of the market spaces at seminars, and Cochenille at the opposite end, promoting early interface and design programs. My choice at that point was the Cochenille products. I attended design school beginning 1989, the computer lab at the time was all Amiga, and I never really became interested in DAK or for that matter, Garment Styler. I was up and running soon with Bitknitter for the Passap, had the option of the Forma on the Passap or the Knit leader on Brother for less traditional shapes, and the magic formula worked for any of the math I needed in days of using graph paper or that other paper that has lots of lines in it for keeping notes. The calcuknit and styler at the time worked on established default curves, the same that could be achieved by charting math or even simply connecting lines between dots on graph paper, drawing lines in between the dots, and following the drawn lines guesstimating increases and decreases along the edge of the drawing. I have never had any experience with DAK, was never really interested in owning it. 😉
A bit of early low tech: when aspect ratio mattered pages of acetate sheets with vertical lines spaced at different intervals could be lined up atop of each other and placed on a design to approximate knit gauge, and the result could then be charted out and planned for a punchcard repeat or intarsia. Some acetates were sold gridded to approximate stitch and row default proportions, there were also published paper charting aids for both standard and bulky gauges. Some examples: 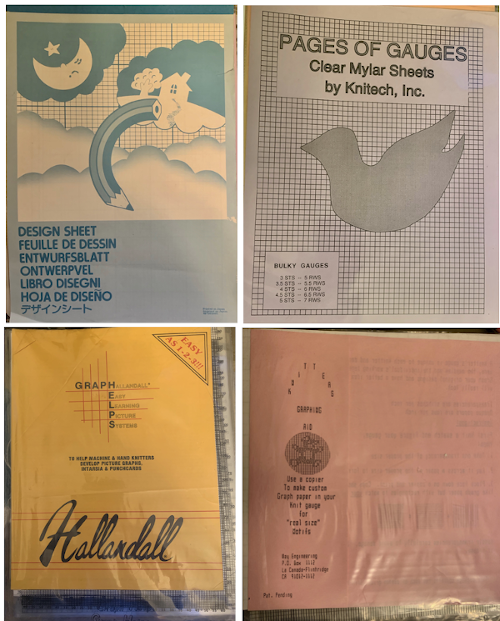
Laying acetate or even plastic wrap on the computer screen itself and outlining designs and processing them with overlays, was a version of “poor man’s digitizing”. The technological advancement of black and white security cameras used in combination with RGB filters made the first digitizing of non-repetitive images possible.
I had never really planned on teaching. As it turned out I interviewed a few weeks before completing a textile program, had several finished pieces with me from my undergrad work, and was amazingly hired instantly as the machine knitting instructor for apparel and textiles. I found myself faced with a Brother punchcard lab and a summer of crash learning on the specific models followed. In order to teach effectively, I learned to analyze and break down stitch types and techniques in order to help others understand them. Summers would often include studying trends and knitting lots of swatches. Many of those are still in a couple of bins I held onto when I downsized a few years ago, giving up my studio space. It is that analysis that keeps me interested still in working out how-tos. Although I use electronics, I still like to break things down when I can so punchcard knitters are not left out.
Getting to the topic of multiple colors and nonrepetitive images in the “early days”: punching holes in cards is time-consuming and without the aid of electronics or specific software, color separations for dbj and assorted double bed fabrics need to be worked out manually before punching, and accuracy is important. Consequently, some knitters found compromises to achieve the look of multiple colors per row. Julie Schafler Dale’s Julie-Artisans Gallery on Madison Avenue became the central plug-in point for the wearable art movement, eventually representing artists, some of whom are no longer knitting, and some may still be found presently online
Susanna Lewis, Norma Minkowitz, Jean Williams Cacicedo, Linda Mendelson,
Nicky Hitz Edson, and not caring about floats, often working single bed with some linings and over-dyeing additional colors Janet Lipkin .
The non-repetitive image was worked out in length by dividing the image lengthwise into panels often 40 stitches wide for use with early Passaps and continuing on to the desired height. Widthwise, the design was split into the maximum width of 40 stitches with added seaming allowance and consecutive panels were joined to compose the large image. The kimono was the most common shape because of its simplicity in components. As for getting the look of more colors per row: multiple thin strands in color families were used in each yarn feeder. For example, one can knit with 4 strands of red shades, 4 yellow sequentially lined up, used in pairs in the same feeder. Keeping the red constant, for the second strand, the work may begin with either the lightest or darkest yellow, knit X rows, switch yellow to the second shade for X rows, switch to each of the next hues, and in theory, the final set of rows should look like a different color than the one used in that feeder at the start of the process. the ratio of red could be played with as well, expanding the range. Knitting pieces in black and white particularly allows for limited edition knitting. The third color may be applied on portions of the white, providing a look-alike for 3 colors per row. With the range of space-dyed yarns or custom dyeing blanks and then unraveling them for larger pieces to control pooling one can also get the look of more colors per row. Not to be forgotten are hand embroidery and fabric applique.
The question remains as to how to knit more than 2 colors per row on home knitting machines, and color separations to make the fabrics possible. The more colors per row, the more passes to complete any design motif. The final result may be thick and unyielding unless thin yarns are used. More rows are often knit in the back than on the front of the fabric, resulting in further elongation of the shapes involved. The easiest default separation is to knit 2 rows of each color for 2 rows sequentially, allowing paired passes to and from the color changer. This results in an elongated design, even with playing with standard backing variations to reduce vertical stretch such as in birdseye. In a post years ago I began to look at 3 colors per row and some potential issues with separations for dbj using it 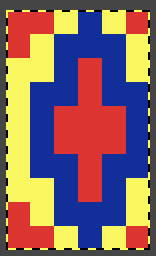 the initial method:
Each row will have to knit twice to get 2 and from the color changer for color changes every 2 rows, for less punching, each row can be represented once, but the result will need to be elongated X 2
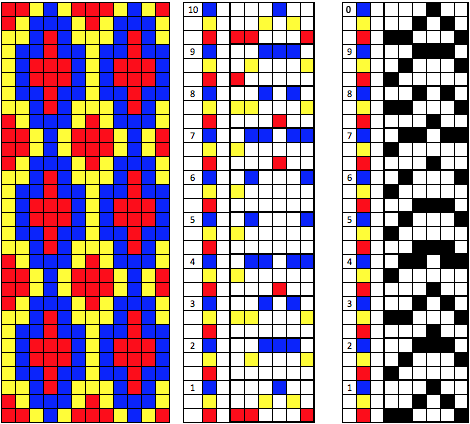
The graph below shows the motif in repeat, the next column the color separation, with expanded rows, and in the third, the black indicates the knit stitches (black squares on mylar, punched holes in card) prior to elongation.
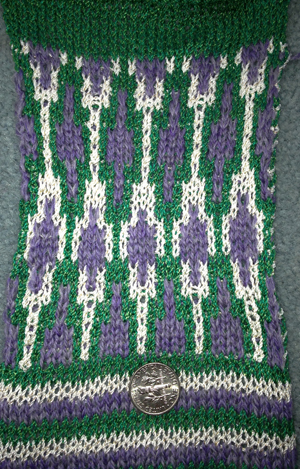 The repeat was not workable when using the standard method used to avoid elongation, where each color for each design row knits only once. There are segments where the new color would not align properly on stitches knit on the previous row, and to get the design to work I had to amend it.
Fast forward 5 years. I now have access to both ayab and img2track, no longer use Photoshop and Excel, still use GIMP and Numbers as my way to color separate and produce charts for my blog. There are active forums both on Ravelry and Facebook with general machine knitting information, or specific to both interface options and methods for using them.
Sarah Spencer @ heartofpluto developed code that reduces the number of rows knit making the common impossibles possible. The code is freeware, has been implemented in Ayab and available there as a menu option. Adrienne Hunter’s posts on Ravelry explore the concept involved.
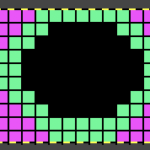
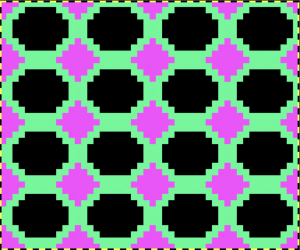
To begin, I was interested in using part of the concept on my own while keeping the color sequence constant ie 1,2,3,1,2,3,1,2,3 and so on throughout the piece and always begin tests with simple shapes that allow me to note what is happening to stitches, changes in scale as the result of the techniques used and started with designs where each color is represented at least once in each row. The color separation used: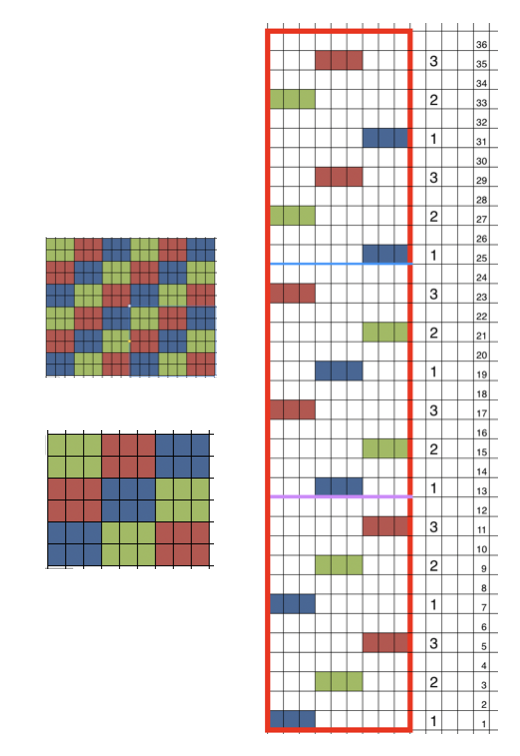 The ribber was set for birdseye at the start of the swatch pictured. At its top, N in one direction and slip in the other were used, with the ribber set for knitting every needle when the main bed slips them all on blank punchcard or pixel rows. The tension remained constant throughout. The KC preselection row can happen from either side with this particular color separation depending on whether one starts the design with a blank row or one containing pixels. Since 2 rows knit in each “color”, I prefer to start the first preselection row on the right. Both birdseye and N settings on the ribber produce a single row stripe on the back of the piece for every 2 passes of the carriages and completed 2-row color change sequence. The N setting contributes to elongated stitches on both faces, leading me to prefer the lili birdseye one.
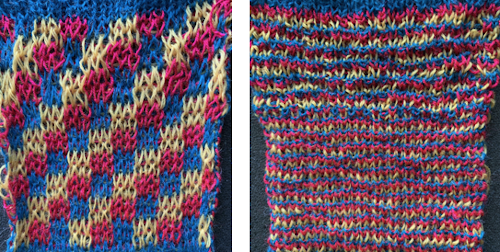
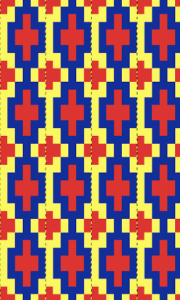
In theory, because of the way the birdseye rows set up a base for the next row of knitting, that makes the stitches in any color workable in pattern colors. I created a new repeat for that motif working in Numbers 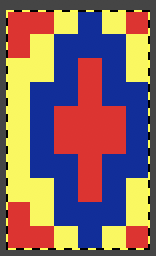
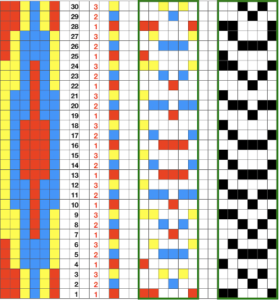 following that up, I planned for the 60 rows needed to complete the repeat, hid 30 rows, using this menu
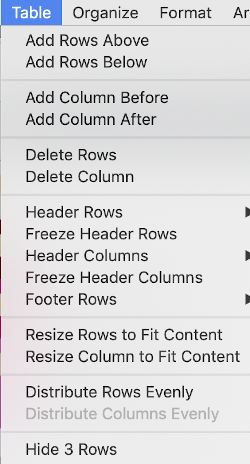 copied and pasted the black and white repeat on the above right, then unhid the 30 hidden rows (see previous posts using command key selections), having a new color separation repeat, created the final 2 color BMP in Gimp (whew!)
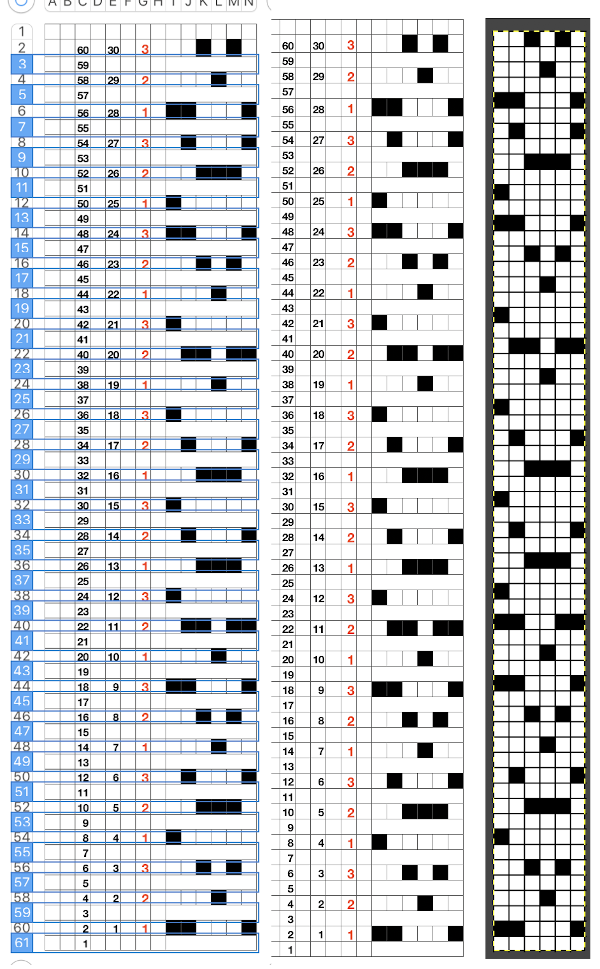 Since my separation is planned on 2-row sequences, I began with COR and my preselection row was from right to left.
 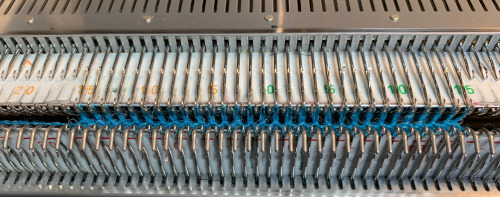 I initially had issues with the lili buttons behaving erratically, once the ribber carriage was oiled again that seemed to solve the problem for me. I did not arrange colors in the yarn changer to match the illustration in any way, but that could certainly be done to match a chart. With COL pick up the first color in the sequences, there will be no needles selected on the top bed (no black squares on the first row of repeat). Remember to have both carriages set to slip in both directions and the rule for even the number of needles in work on the ribber. As the carriages move to the right, every other needle will knit on the ribber, the first row with black squares will be preselected.
 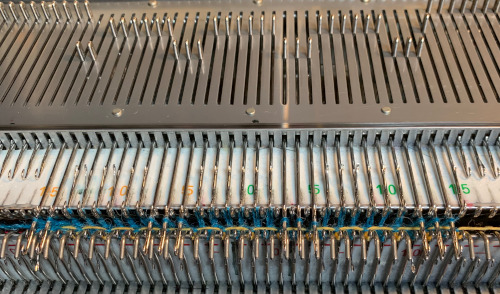 With COR on the pass back to the left, the pattern squares will knit, a blank row will be preselected, and the ribber will complete a single row of the background color by knitting on the alternate needles from its previous pass.
  As a result, one row of backing and one design row for each color (including no color in some instances) are completed with every 2 passes of the carriages.
I had a better edge and needle selection on the ribber with an extra needle in work on its left as compared to the main bed, adjusting after the cast-on row, maintaining the ribber needles in pairs, and evaluating the swatches after the fact would probably set up an extra needle on the right side as well.
This swatch and the ones following it use yarns in 3 different weights and different fiber contents. The blue is acrylic and the thinnest of the three. Some bleed-through of the colors traveling behind the blue shapes, in particular, can be seen behind it. The magenta is cotton, the yellow wool. Better choices of both the fiber content and colors of the yarns used would improve the overall look. If one plans color changes to match the chart, a paint program can help visualize some of the possible results 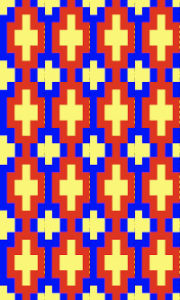
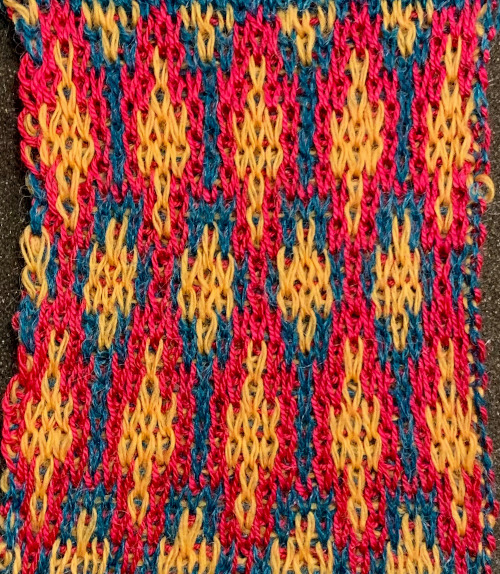
What of shapes with fewer than 3 colors in some rows? 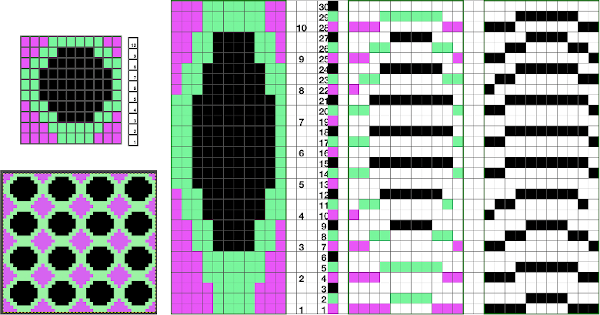
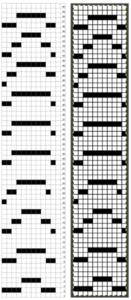
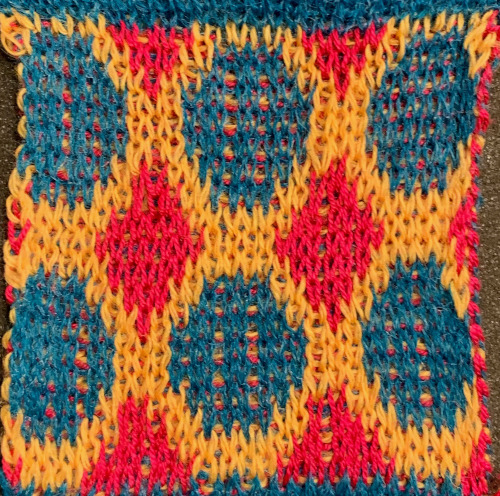 Again, there is some bleed-through, and even with this technique there is some elongation of each of the shapes, but less so than with other techniques. The backing of all these fabrics produces single lines in each color used
 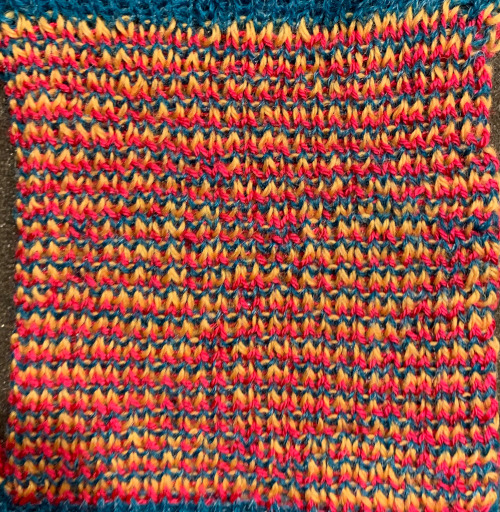 Even fairly small repeats can take time to color separate in this manner. The technique, however, is the only method available to punchcard knitters. Electronic machines with download cables and varying software open a very different world in terms of ease and range in repeat size possibilities.
Here the repeat is adjusted from 11 stitches in width to 12, making it suitable for punchcard machines, and widening the center shape by one stitch may also reduce lengthwise stretch and help it appear rounder after knitting 