Revisiting older posts often brings to mind new or slightly different ways of looking at and achieving the same tasks.
Links to some related previous posts:
DAK DBJ color separations, templates, and other software
Revisiting Ayab_multiple colors per row DBJ 2
Revisiting Ayab_multiple colors per row DBJ 1
Img2track_multiple colors per row dbj, each color knitting only once
DBJ: more than 2 colors per row 3
DBJ: more than 2 colors per row 2 img2track
DBJ: more than 2 colors per row 1
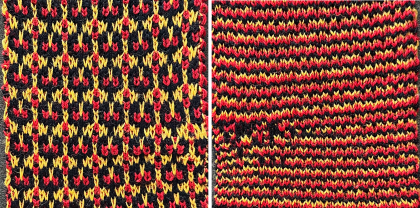
Color separations for knit designs in only 2 colors are more straightforward than those for 3-4 colors.
The built-in KRC function in Japanese models will yield results automatically where each color knits in each design row only once, reducing the elongation in the designs often seen when employing other techniques.
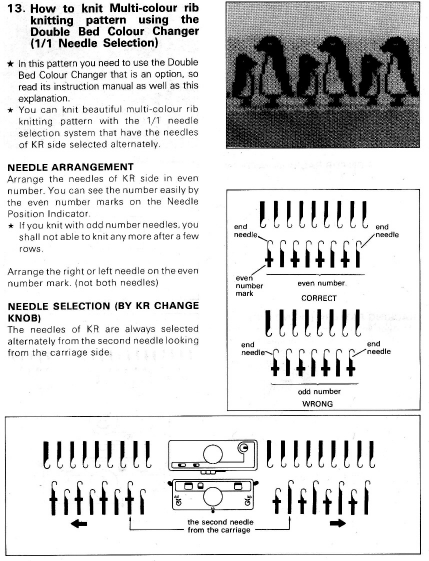
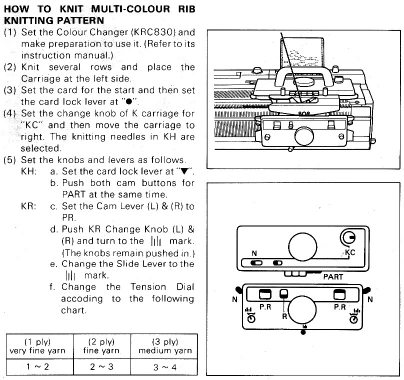
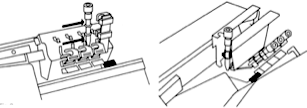
Japanese machine models for home use (not the semi-industrial ones) have a color changer that resides on the left, and aside from whether each color in each row knits once or twice, the combined carriages need to move to and from the color changer on the left for each color selection.
The color-changers for brands differ slightly and matter in cross-brand use if one relies on published separated designs and pictured swatches.
Yarn changers for:
Brother 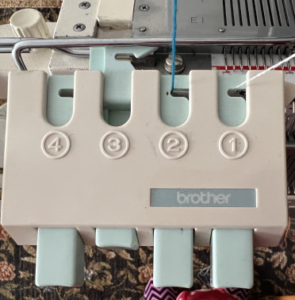 Studio
  Sometimes the placement of the colors within palettes will result in the colors not being read and downloaded properly.
As described in the Ayab post: when using each color, it is coded in a range of 8-bit values. For 4 colors, it would be 0-63 color A; 64-127 color B; 128-195 color C; 196-255 color D.
When only 2 colors are in use, in manual color separations, the ultimate goal is to produce BW-indexed PNGs. They are then downloaded and programmed as one would FI patterns, palette placement is not a concern.
Working in default or limited palettes produces familiar visual clues in DIY, to save custom palettes see ArahPaint and Gimp in knit design 3
If the goal is to imagine the results in colorways based on yarns planned for use in the finished piece, that can be easily achieved after the fact.
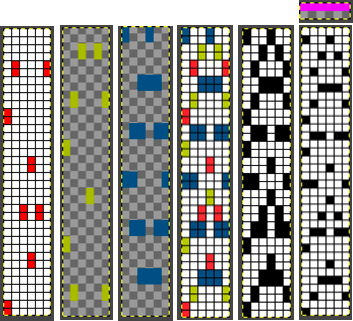
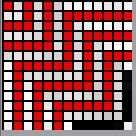
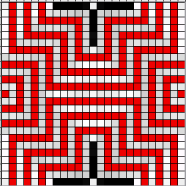
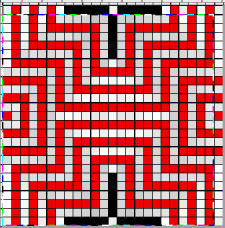
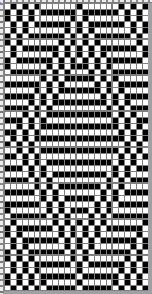
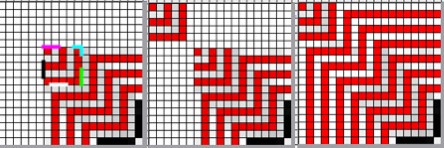
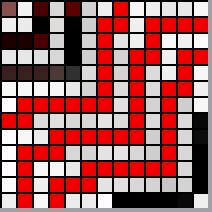
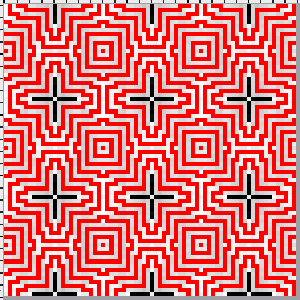
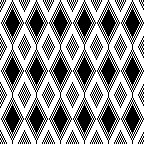
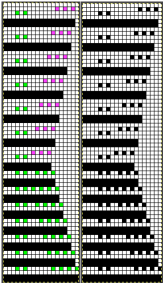
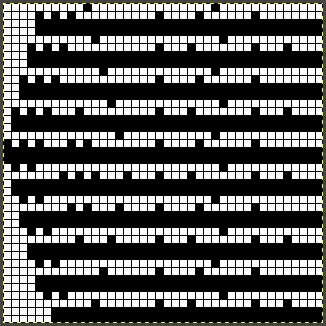
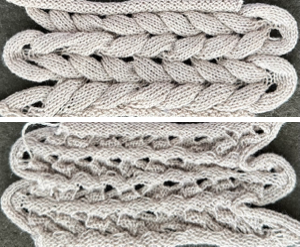
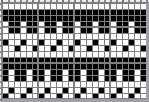
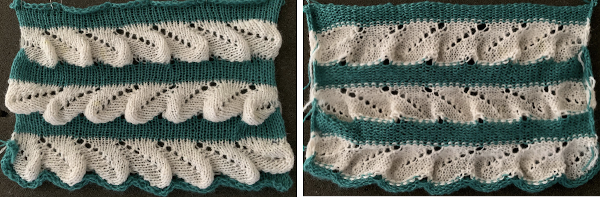
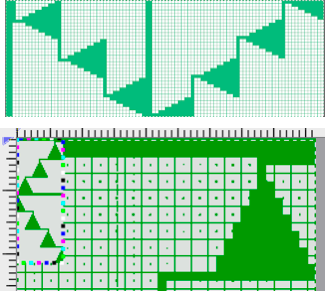
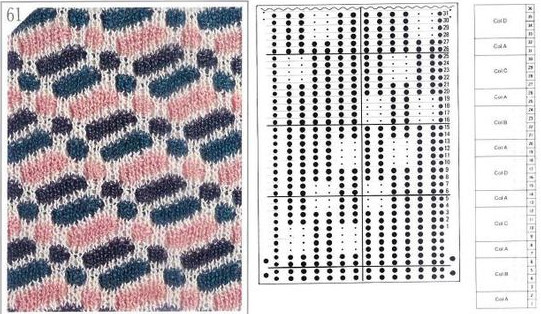
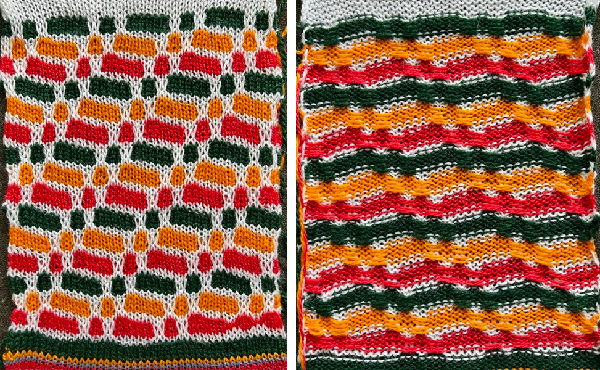
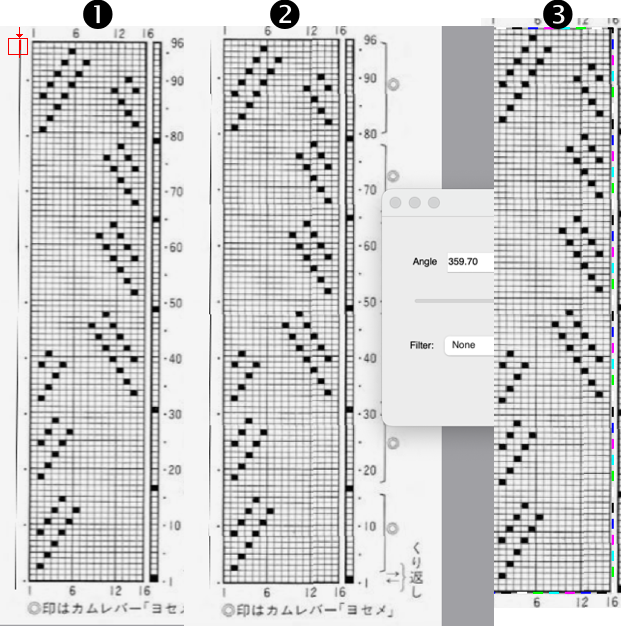
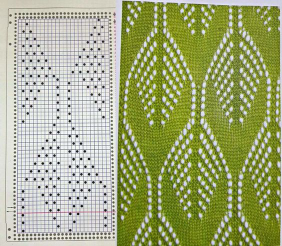
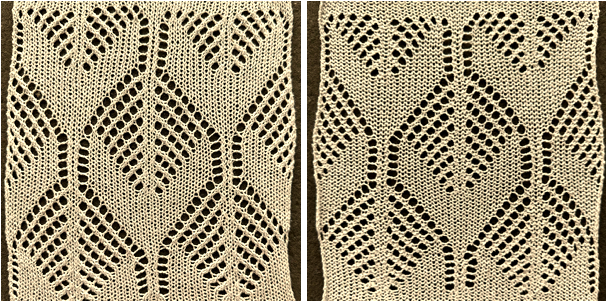
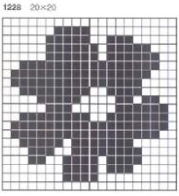
This design has been used in past posts and is 6 stitches wide;  hence, repeated X4 in width will also be suitable for punchcard machines. Looking at it again:
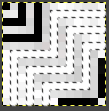
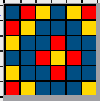 checking alignment when tiled
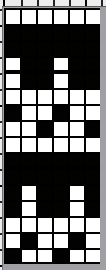
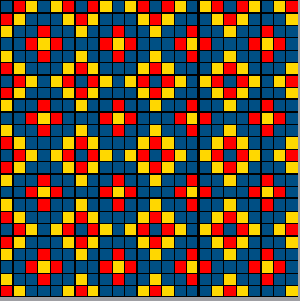 Stitches on needles not worked on the top bed are held while stitches in the other color(s) knit, and get longer. Some degree of alteration in the aspect ratio in the appearance of the design on the knit side in the final result is to be expected, also influenced by the addition of varied knitting techniques and carriage settings.
 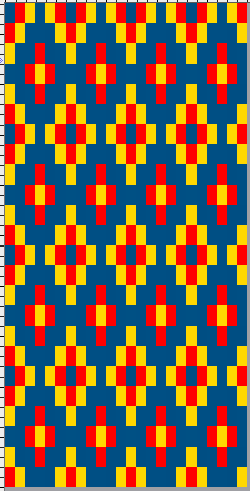 Methods I have explored in DIY repeat the same color sequence throughout even when any one of the colors is not represented in that design row: one way to decrease the visual lengthening of designs in dbj is to eliminate a row of knit stitches from each pair of passes by pushing Brother’s preselected needles back to the B position on the top bed before knitting from the right back to the left, thus skipping all needles in work on the top bed.
The HOP separation in Ayab performs this function automatically in addition to shuffling around repeat segments while keeping a fixed color rotation, making repeats that fail with other separation methods knittable.
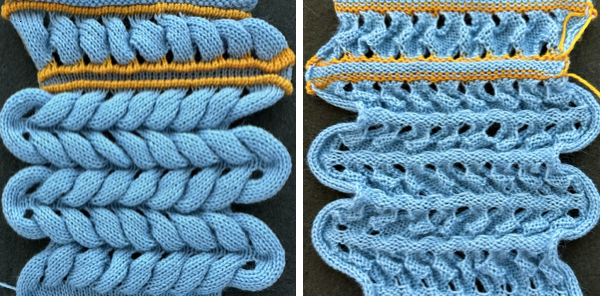
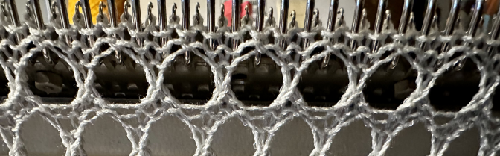
In images where not all colors are represented on every row, there are more knit rows on the ribber than on the main bed, even with birdseye backing, another added cause of stitch elongation observable on the knit side.
When using birdseye backing, the ribber will knit every other stitch, alternating needles on each pass. An even number of needles is required. Patterning is akin to using a 1X1 card on the knit bed.
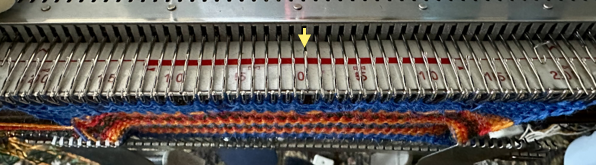
By the time the carriages have returned to the left only one row of knitting on every needle will be completed on the ribber.
The setting is not available in every model machine, including very early Brother ones.
When knitting in tuck or slip stitch, stitches grow in length until they are knit off again. This remains true when working in DBJ fabrics as well.
Yarn and tension choices can affect the final appearance.
There will be some degree of bleed-through behind the elongated stitches.
Blocking also influences the final appearance of the completed knit.
Exploring possibilities:
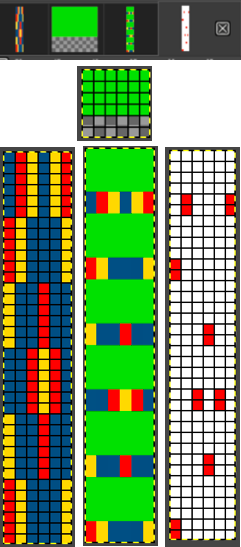
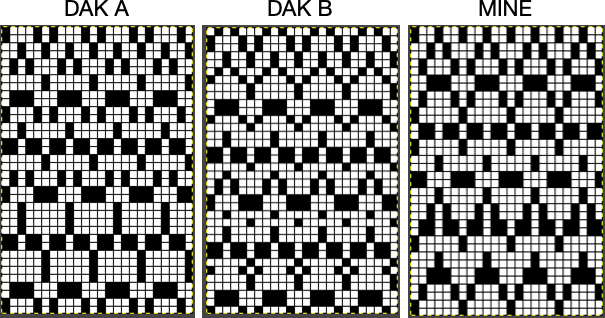
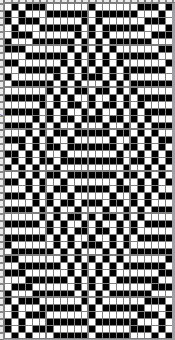
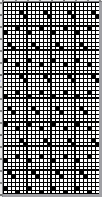
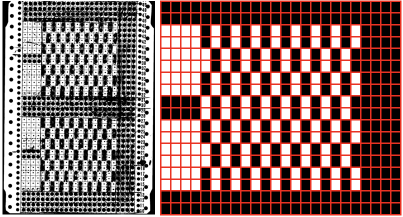
The initial 6X6 file is converted to stp and opened in DAK resulted in the following messages and pattern error corrections 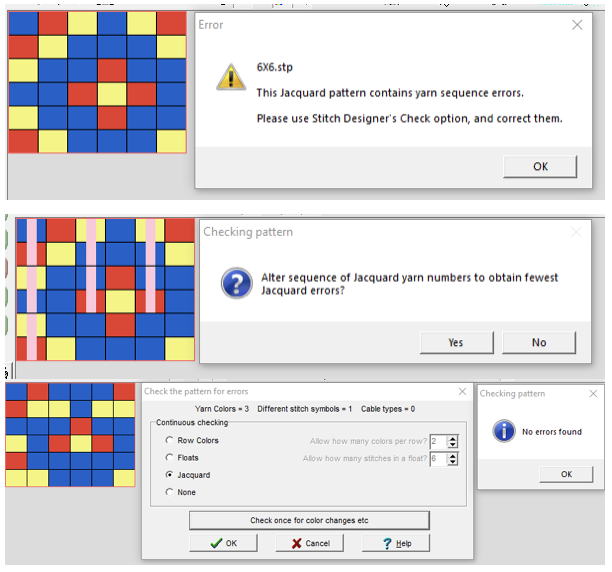 A second design was also tested in DAK and yielded the same error messages:
 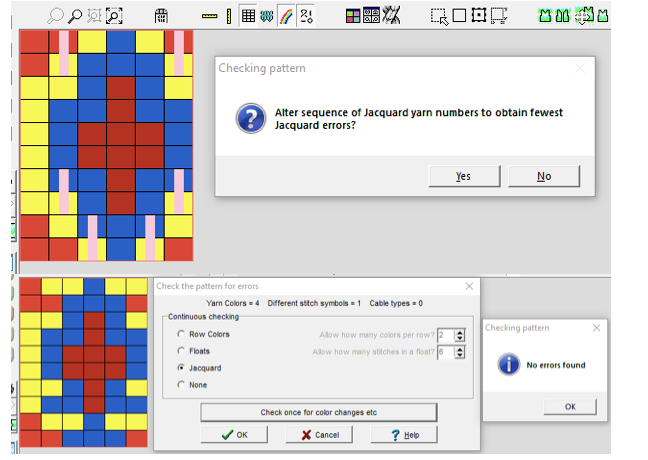 The 6X6 stp doubled in length to 6X12 cells allow for the option of selecting the type of dbj color separations, creating files that can, in turn, become PNGs for working outside the program, and for printing traceable templates for punchcards. That work is achieved through hacks since DAK does not allow direct import or export of file formats other than its proprietary ones ie stps or txt for use with Kniterate.
 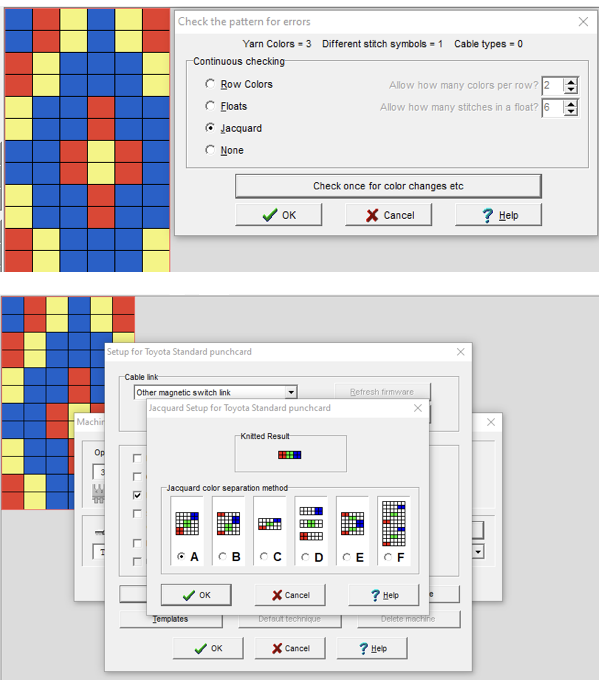 A closer look at the diagram of the color sequence options in each
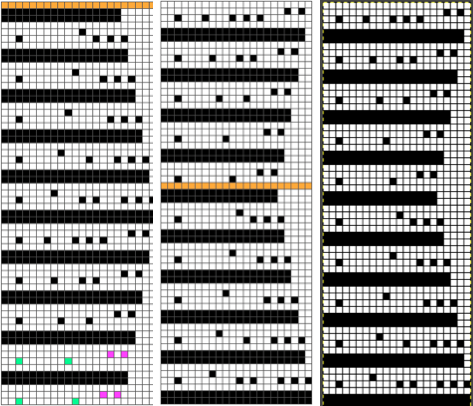
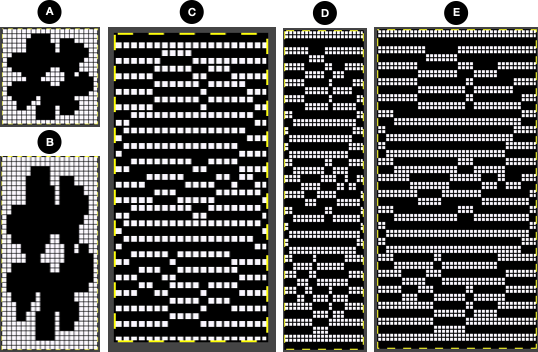
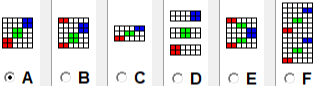 The characteristics of the more commonly used methods in review:
Method A works on pairs of rows, 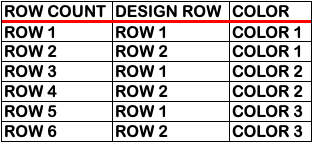 Method B creates the same separation as the default built-in KRC one in Japanese electronics with each color in each design row knitting only once,
 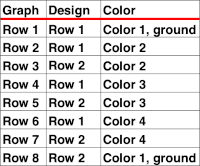 Method C separates each color row into separate rows of knitting, rows do not have to be repeated in pairs in DIY, and the double-length switch will need to be used in Japanese knitting machines It is possible to generate an output of the separation and to process it to generate files usable in img2track or for printing traceable punchcard templates.
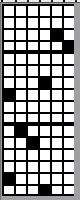
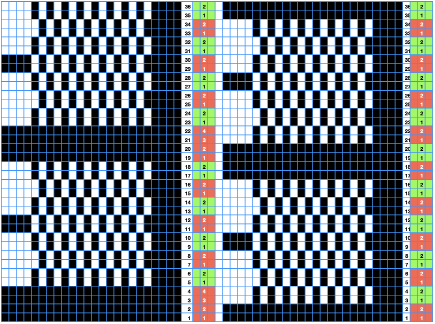
The program does have an option to save a bmp but the save is of the separation on a grid with added data, not as a file immediately usable in other programs. Click on the floppy disk icon outlined in red to save as bmp as an alternative to screengrabs. 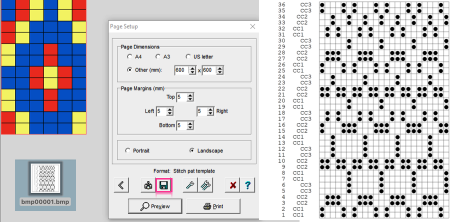 Using the same 6X12 file, the generated printable templates and associated converted PNGs:
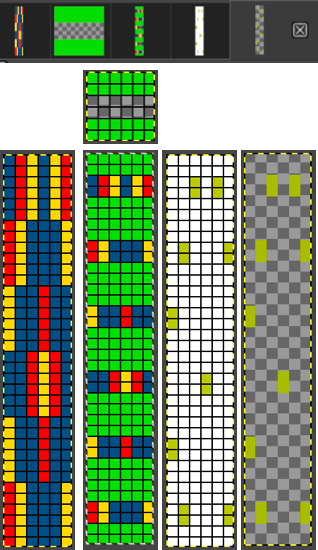
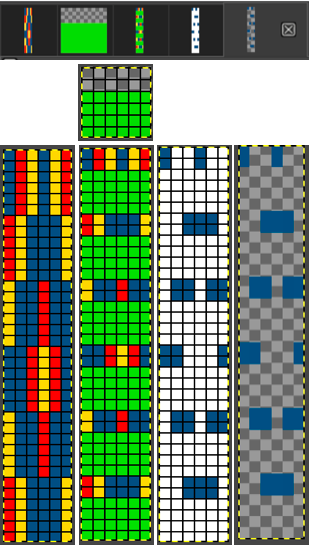
A 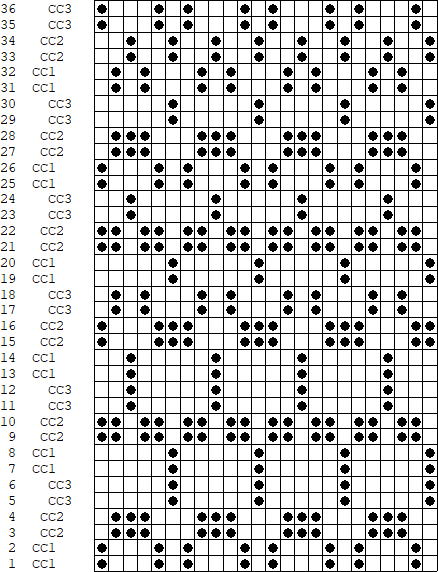
 B the repeat here is also for the original lengthened X2, and 36 pixels high with no segments repeated. The essential difference is that the first preselection row is made from left to right, with the pair of rows for color 1, design row 1 split between the top and bottom of the separation.
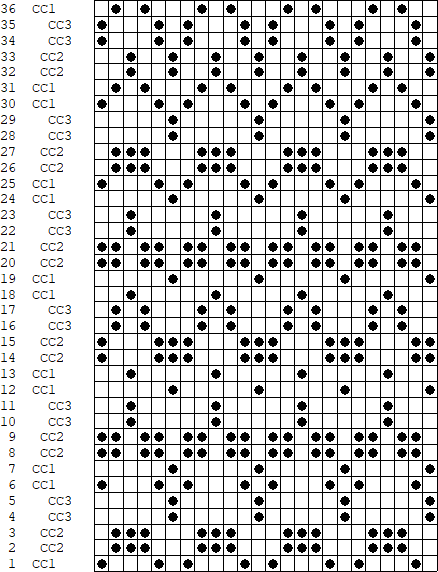
 C
C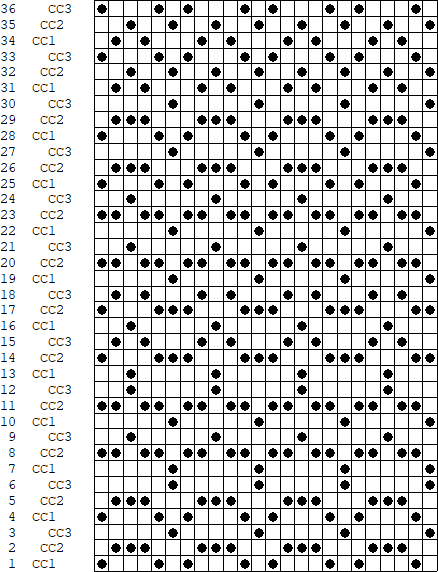
 elongated X2=24X72, handy for other knit structures, but not for reducing elongation in DBJ
  Using img2track set at knitting in 3 colors, there is no error message, but the 6X6 file will not produce the planned design.
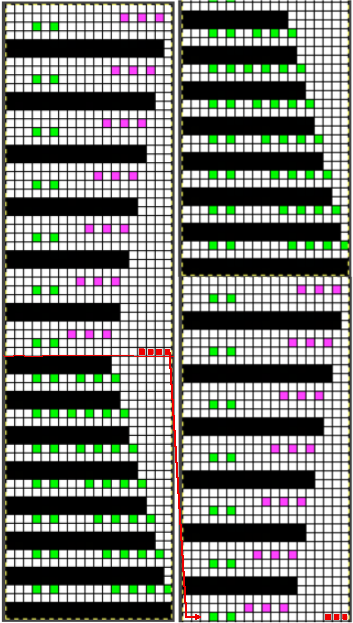
A proof of concept is provided in the post DBJ: more than 2 colors per row 2. 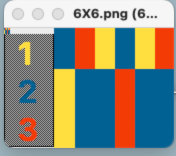 Starting with the double-length 6X12 file, each color in each design row will be knit twice:
 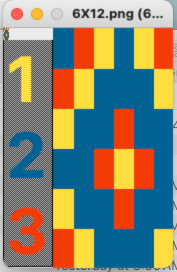 and the machine will offer prompts for its pre-determined color change sequences.
Most recently, my separation experiments using Gimp use transparency methods and are are shared in the reverse order of their development
#3 The briefest and last method: working in RGB mode, begin by multiplying the pattern in height X3, to 6X18  Isolating the red color on a white ground:
 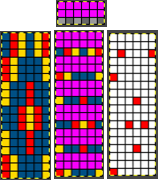 isolating the yellow on a transparent ground:
 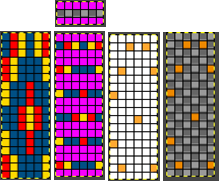 isolating the blue on a transparent ground:
  copying and pasting the isolated yellow and blue with transparent grounds in turn onto the red design isolated on the white ground
changing all 3 colors to black
doubling the image in length to 6X36
remove every second row using the pencil tool or bucket fill it with the 6X2 pattern, and change the cyan to white. Any other color can be used instead of the magenta at that point
change Mode to BW indexed, and save the final file for knitting. 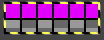
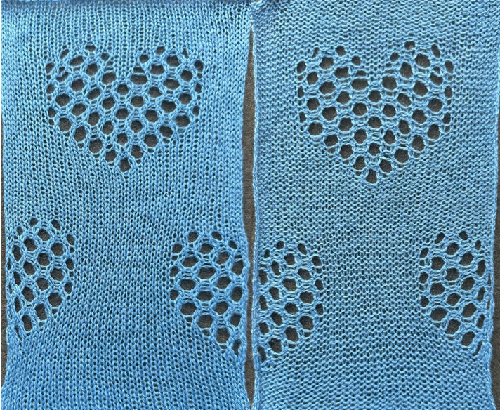
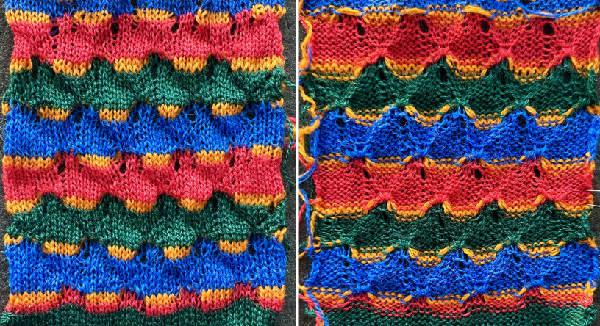
 Comparing the results for the full repeat from other methods on the left, with the one using this method on the right
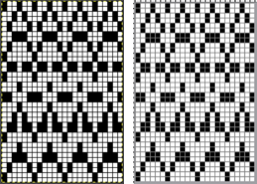
Returning to that 6X6 repeat that was prone to error in both DAK and img2track, with each color represented once in each row, exploring the possible separation to knit each color only once, and using a final 6X18 PNG  led to patterning failure.
The Image menu progression of its process in Gimp: the number of thumbnails grows and one can travel through the images using simple clicks until any image is discarded or the program is quit, the X appears aside the file viewed in the work window.  Each color was isolated on a white background, with guides placed horizontally across every pair of pixel rows.
 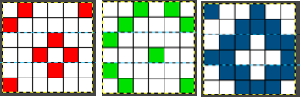 Pairs of rows of each color were copied and pasted in alternating sequences on an all-white file longer than 18 pixels rows and the results were trimmed to a 6X18 file for a knitting test.
 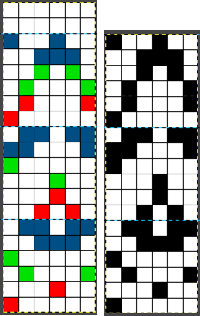 Though the built-in KRC separation takes that first design row and moves it to the top of the repeat, thus knitting a single row with color 1 and completing it in a pair on the last row of the program, the first knitting test began with preselection from the right, and color 1 knitting for 2 rows.
 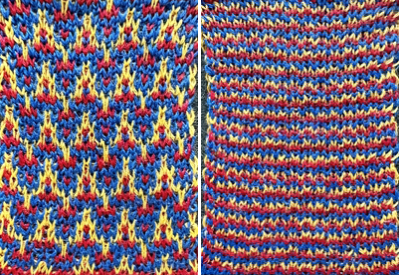 A second try at an 18-row repeat, also a design fail, with odd breaks in the lili action on the ribber, seen in Passaps when pusher selections on the back bed are disrupted.
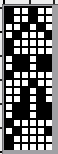

 When the motif was doubled in length, and the same method was used, the results matched the 24X36 file.
The 6X6 design, however, expanded and separated to a 6X18 file may be used in machines with color changers on each side, with a different color sequence, see DAK Method E notes toward bottom of post.
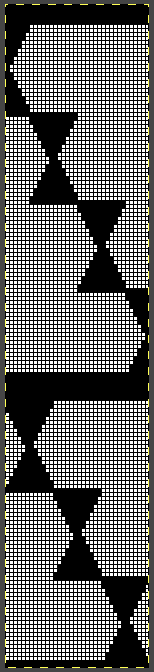
#2 Working with the 6X6 design lengthened X6 to 6X36

 with every other row rendered in all white cells
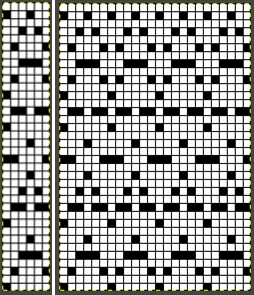
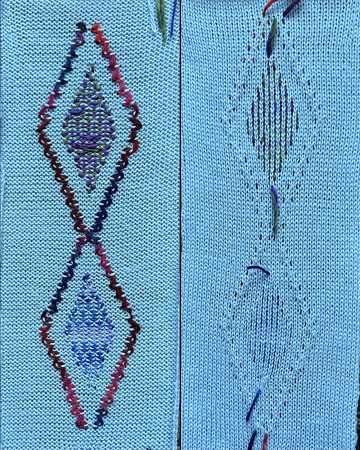
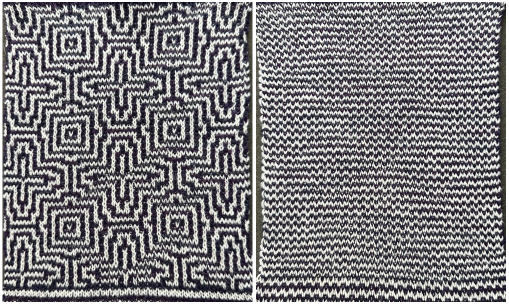
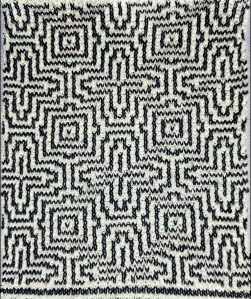
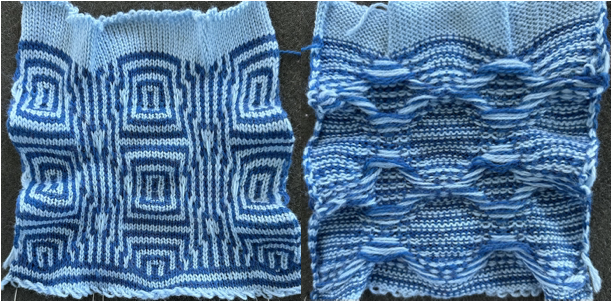
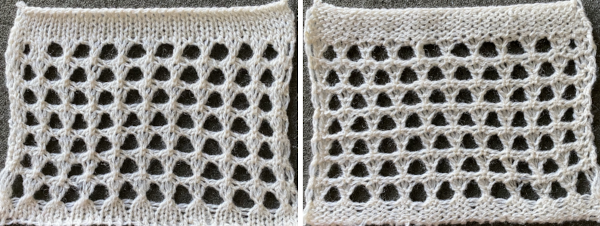
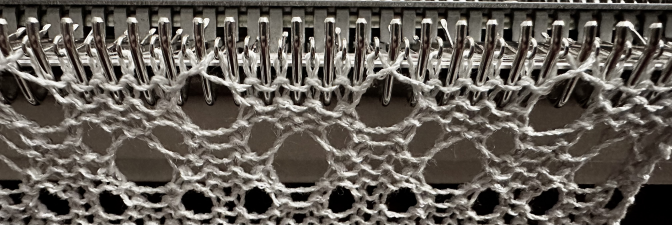
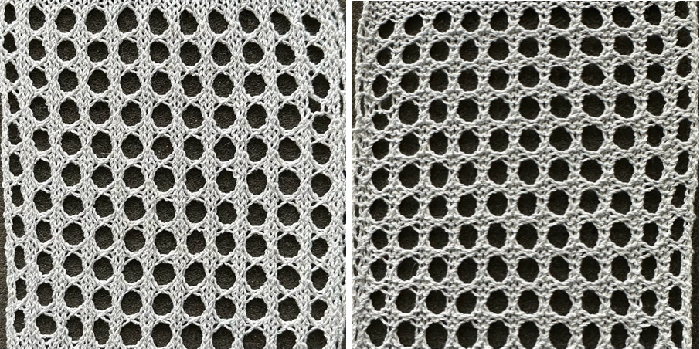
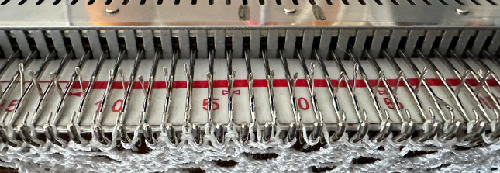
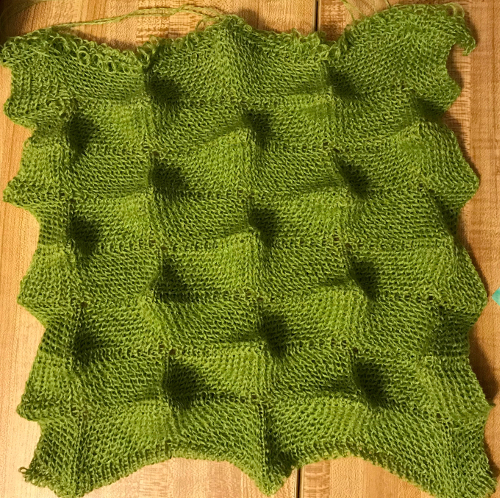
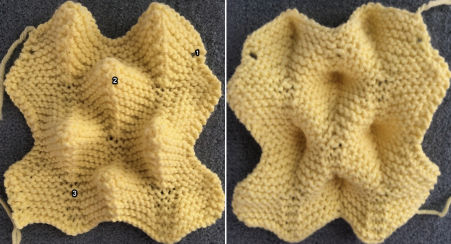
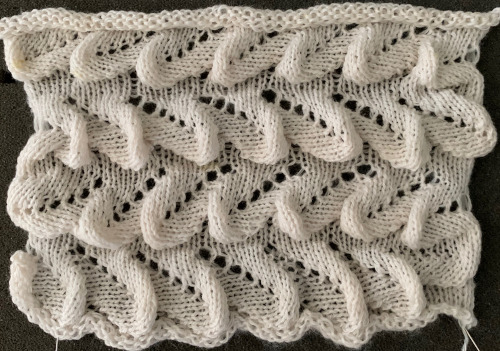
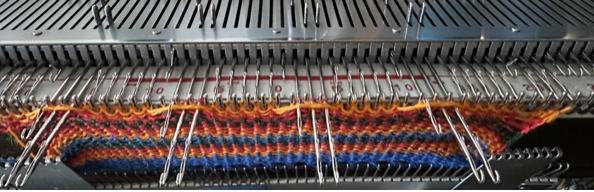
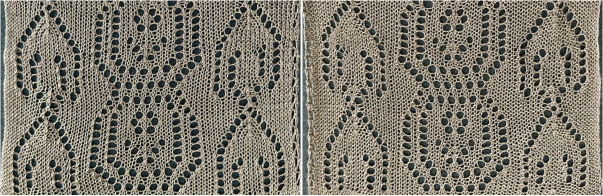
 The proof of concept swatch

DAK owners see the 36-row file and similar knit sample for the Half Milano separation F toward the bottom of the post.
In my #1, first separation draft, the 6X10 file is elongated X6, to 6X60, considering that each color in each design row will be carried for two passes.  The latest Gimp version for Mac is 2.10.36
Sometimes there are differences in commands in the Windows version.
Begin the work in RGB Mode.
The color-to-alpha command in Gimp makes all pixels in a selected color transparent.
The option can be activated through the Layers Menu by choosing Layer> Transparency> Color to Alpha or the filter via Colors> Color to Alpha from the pull-down menus at the top of the work window.
No threshold or blending adjustments are needed in the small 8-bit files used in designing knits.
Some previous repeats using colors to alpha in 2-color separations can be found in the posts
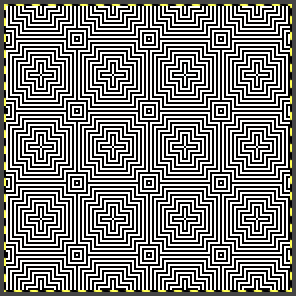
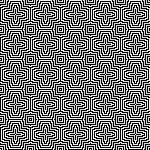
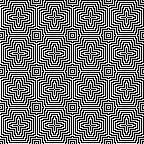
Color separations for larger scale mosaics and mazes
and on Using Layers in Gimp for Color separations
Magnify the image to a comfortable viewing size, ie 800% or more.
When the color to alpha dialog window opens, there will be a small preview of the image you are working on on the upper right that relates to how many images are available for processing in the work window at the time.  When the color white is in the mix using the 8-bit files, the preset color selection for transparency in the color bar is white.
To change the color selection, click on the white color, the palette window will appear, select the new color, and click OK.
 To Bucket Fill with pattern: create a custom brush size, matching the starting design width in pixels. The number of rows varies with intent. White is used as one of the colors, and the second color can be any other.
Click on the rectangle tool and then on the pattern thumbnail, an icon for it will appear on the upper right of the work window. The brush will be copied to the clipboard and will be available to use to pattern fill until the program is quit. It can also be saved for future use as explained in other posts. 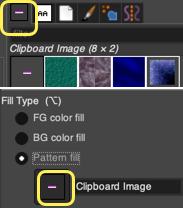 To fill specific groups of pixels with FG or BG colors, click on the select by color tool,
  and then on the color you wish to change, use bucket fill, selecting foreground or background color.
The fuzzy select/magic wand tool mentioned in previous posts is designed to select areas of the current layer or image based on color similarity. It appears to the left of the select-by-color tool. It can be used when pixels in that color need to be changed in contained single areas rather than throughout the whole image.
If using the bucket fill with foreground or background color alternating with fill with pattern, remember to switch between the two as needed.
If an error is made, use Image> Edit> Undo to move back to any previous steps.
If at any point the image in the work window is surrounded by dotted lines, click on the rectangle tool and then again in the work window to essentially fix the layer.
The Image menu provides access to nearly any operation you can perform on an image.  Clicking on any one of those images will produce a dotted outline around it
  making it identifiable and usable in work such as for copy and paste followed by bucket fill with pattern,
  or for navigating between series of open files.
#1 the longhand first practice run began with the 6X10 file multiplied in height X6 to 6X60. Good practice for sorting out a technique, but guessing the aspect ratio in the final knit would be bothersome. 1. has the first 2 of the 6 design rows rendered transparent, so when used to fill the original, only rows planned for color 1 are left exposed
2. will leave design rows 3 and 4 exposed for color 2
3. will leave design rows 5 and 6 exposed for color 3
Repeat these steps on the original design 3 times, and save each completed step until comfortable with working on several files open at once.
A. select by color, bucket fill each with white except for the color red
B. select by color, bucket fill each with white except for yellow, if the color seems too hard to identify, change it to another
C. select by color, bucket fill each with white except for blue. 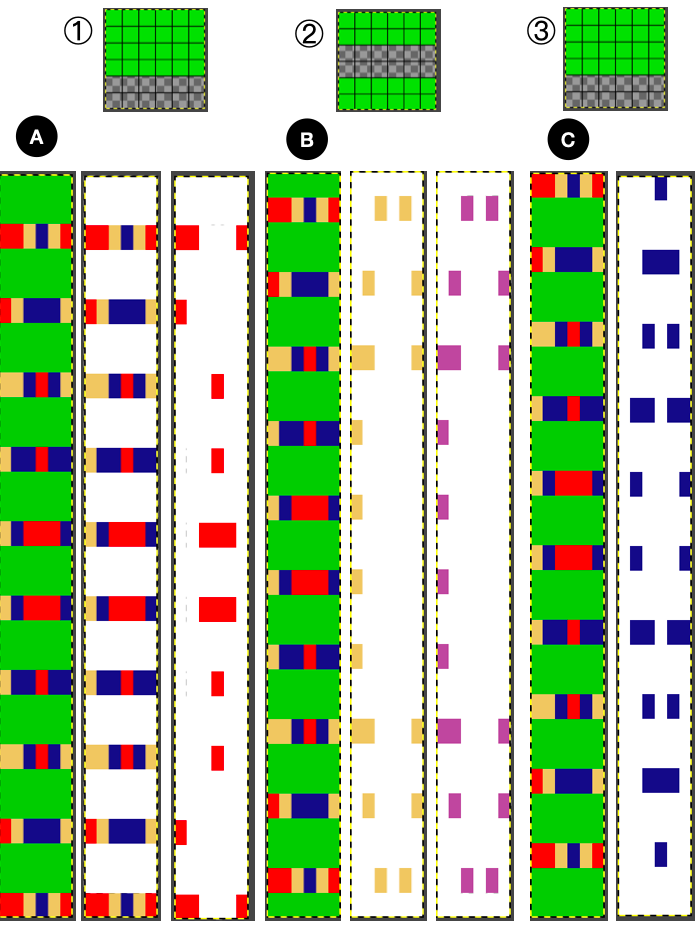 The red and white in the last step in A are left undisturbed, while the white background in the last steps in both B and C is rendered transparent, as seen in 2 and 3. Both 2 and 3 are copied and pasted onto A, rendering the final tricolor image, 4.
Using select by color and bucket fill, the three colors are replaced with black, 5.
A last brush bucket fill, 6, leaves only the first row of black cells exposed, changing the cyan to white and converting the final result to BW-indexed mode, 7, is saved for knitting with each color in each row knitting only once. 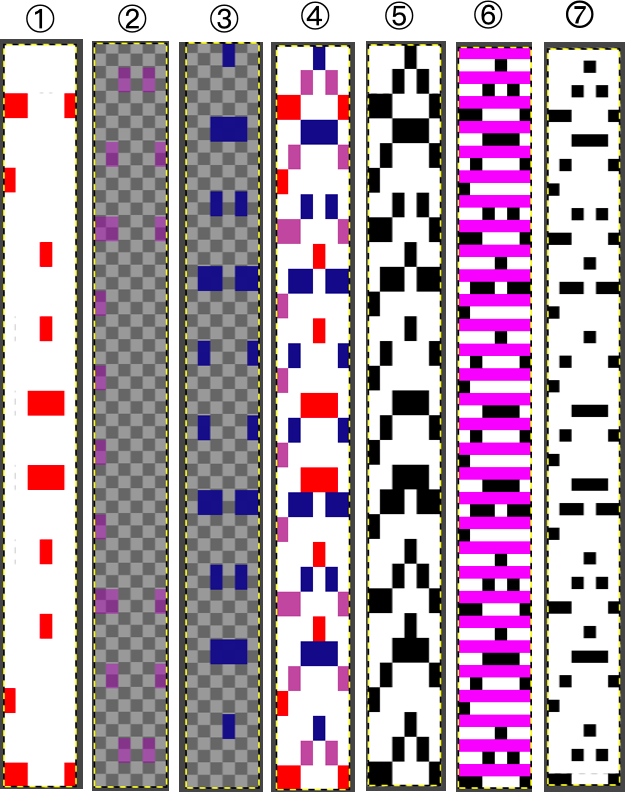 When all 3 colors are not represented on every row,
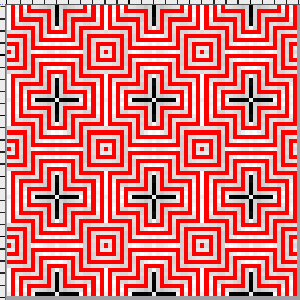
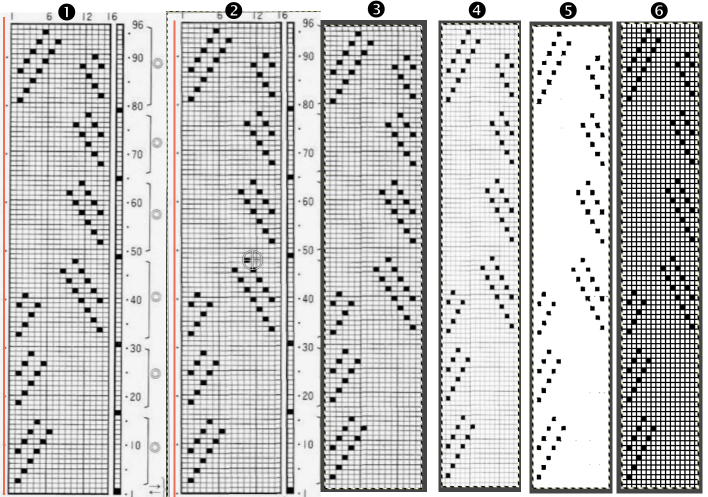
The 11X10 image was used in previous posts, 
 tiled,
 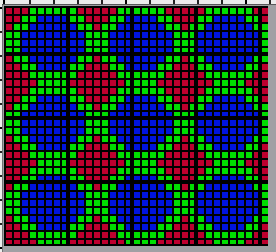 the tiled elongation:
 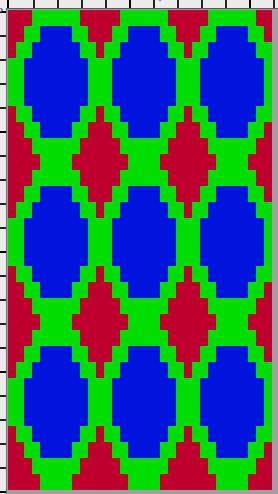 The separation uses method#3: the process with the image lengthed X3 to 11X30 representing each color in each design row once:
  working with Gimp transparency, isolate the red, retain the white ground
 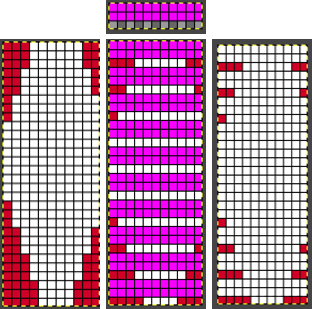 isolate the green, render it on a transparent ground
 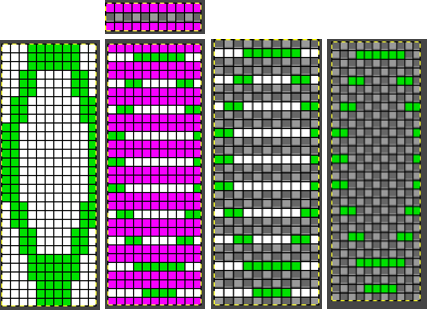 isolate the blue, render it on a transparent ground,
 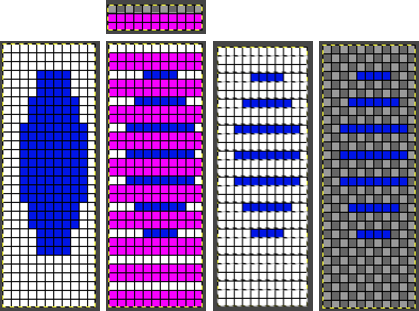 copy and paste the green and blue rendered on transparent grounds onto the red on the white ground initial image, obtaining a 3 color separation.
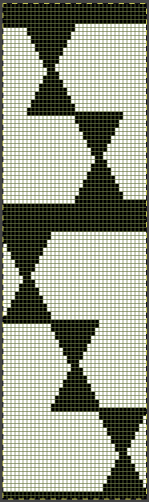
Replace colors with black. For knitting each color in each design row for 2 passes double the file in height to 11X60 pixels. To knit each color only once in an attempt to further reduce changes in aspect ratio, erase every second row. Images for knitting are saved in BW-indexed mode. 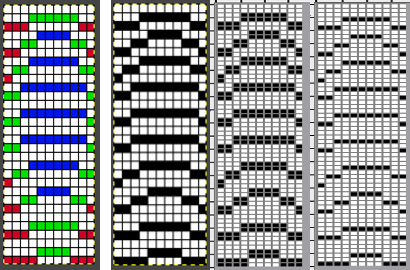 The DAK template (set for 950i) and img2track screen image compared to my result:
 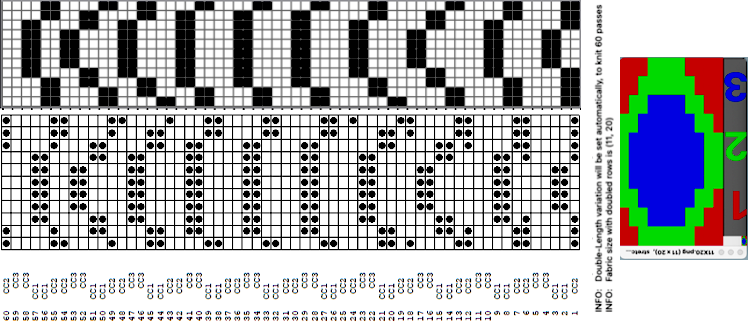 the 11X60 PNG, all pixels,
 and with black pixels on every second row changed to white
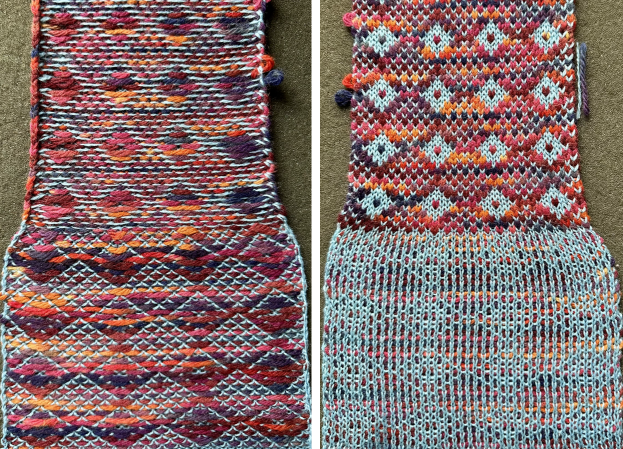
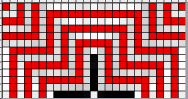
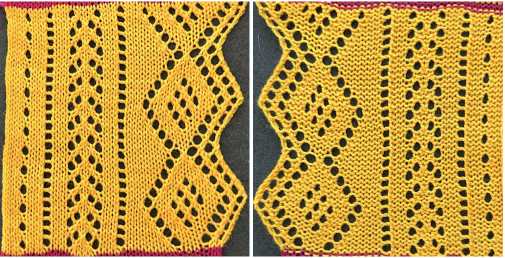
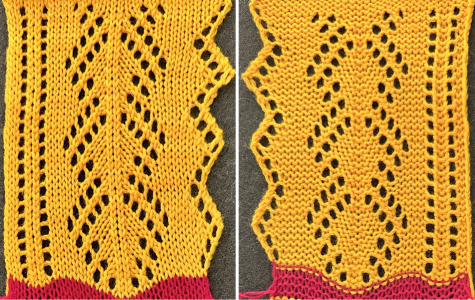
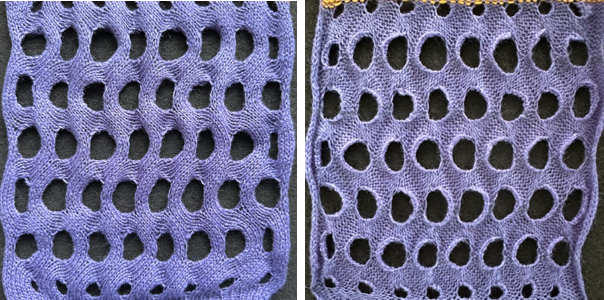
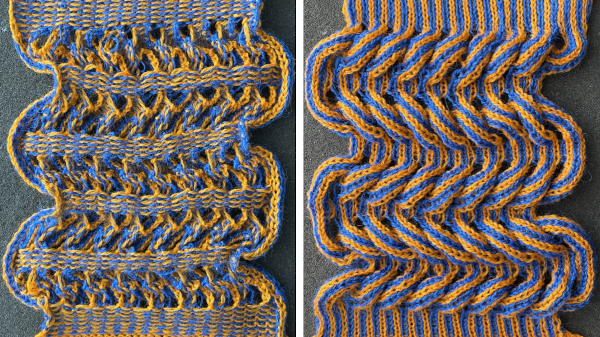
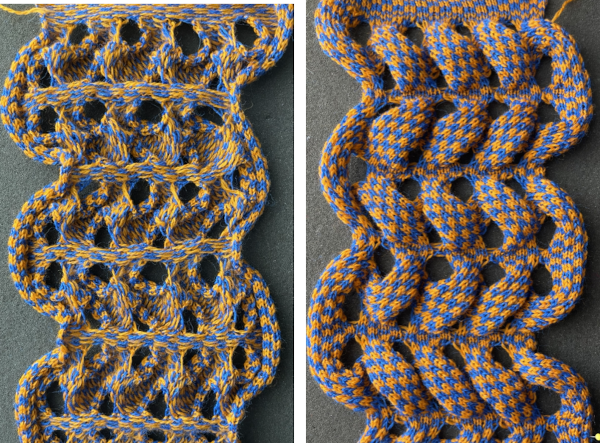
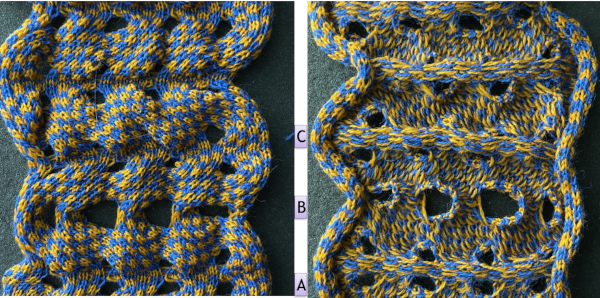
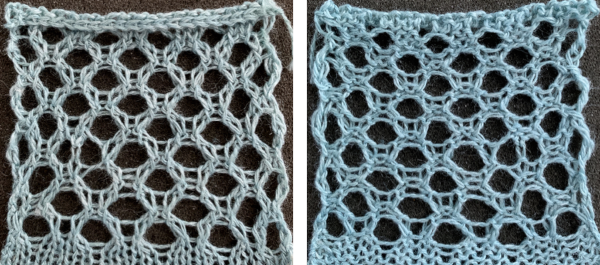
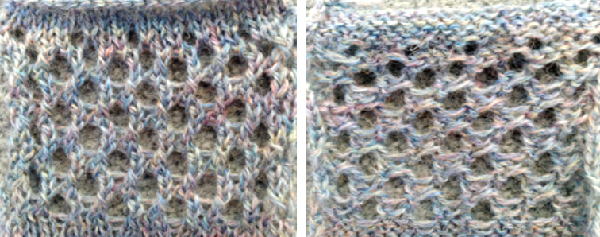
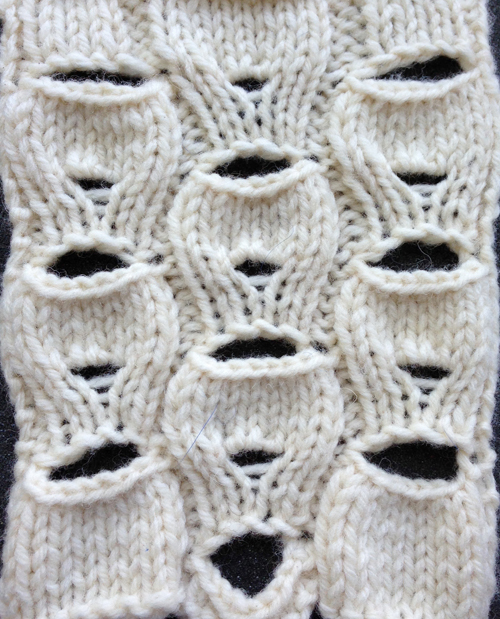
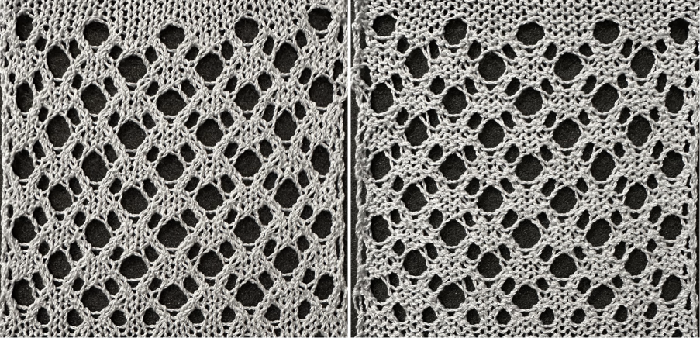
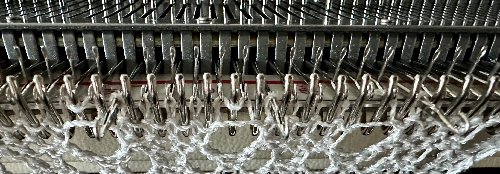
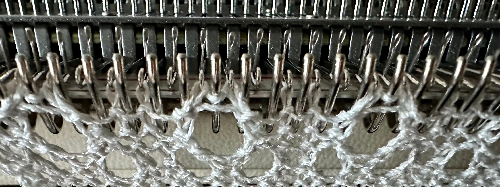
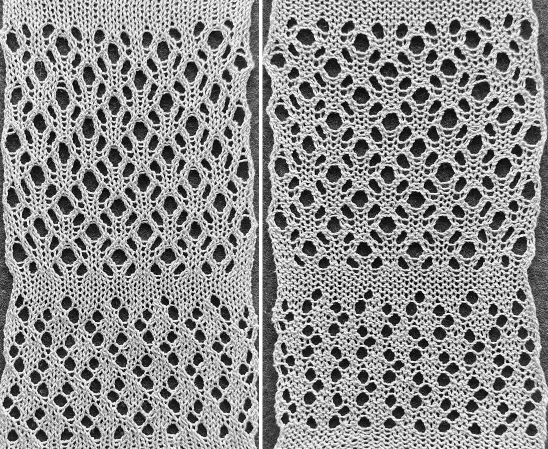
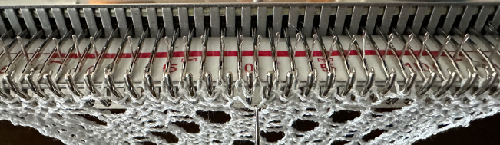
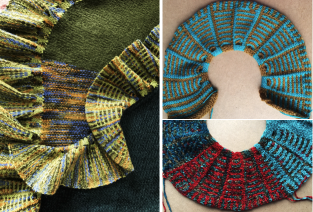
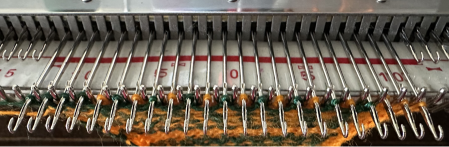
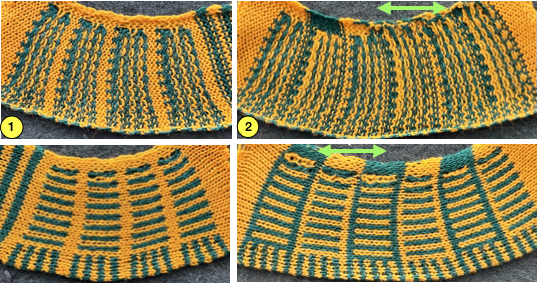
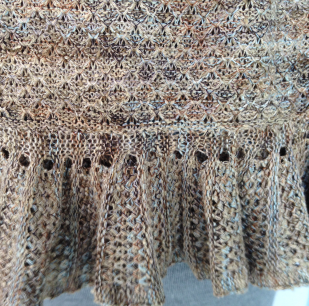
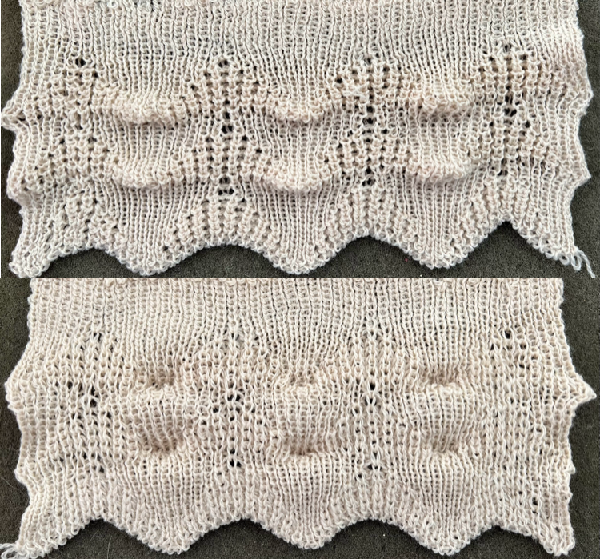
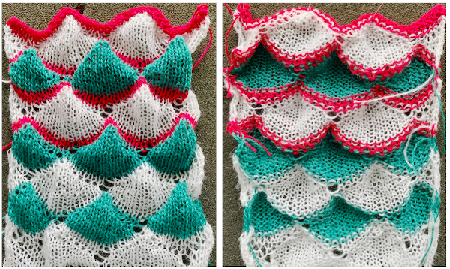
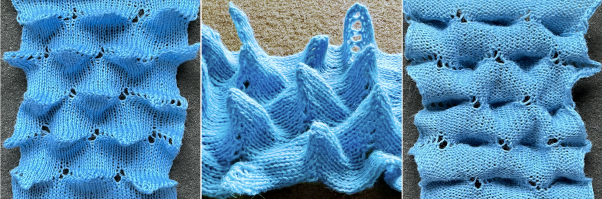
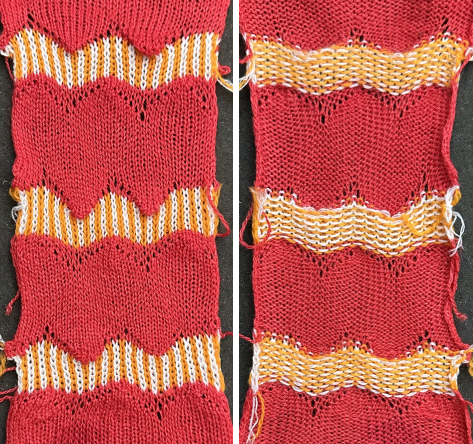
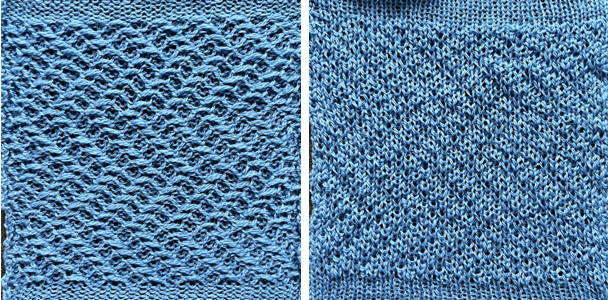
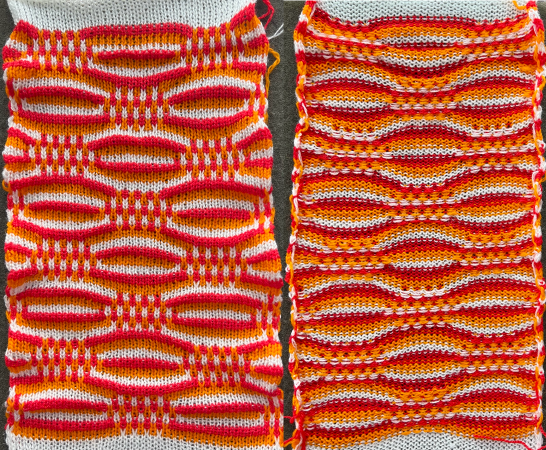
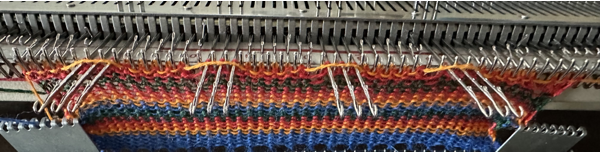
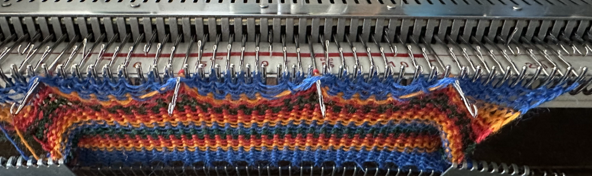
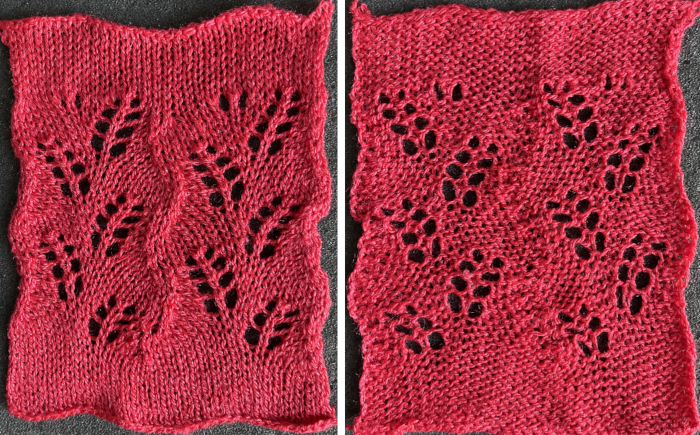
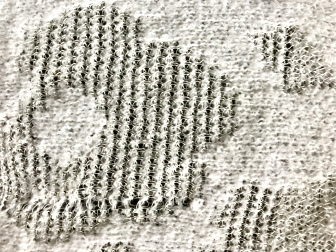
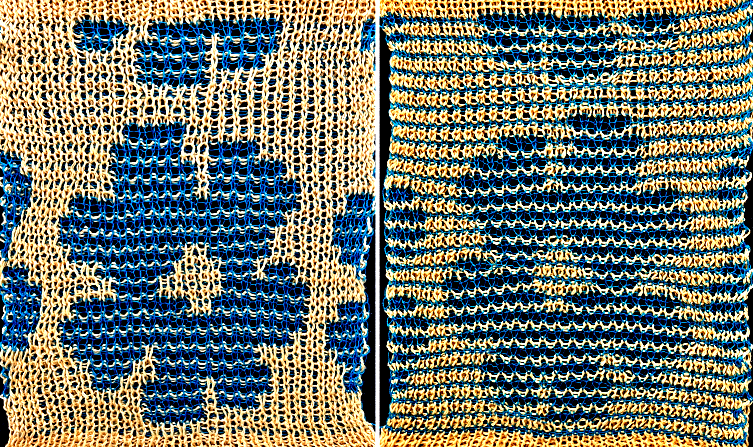
  The proof of concept swatch: the vertical lines between pairs of stitches result from the drag on the ribber stitches to the right and then the left as the birdseye pattern is formed, they are frequently also seen in ladderback dbj.
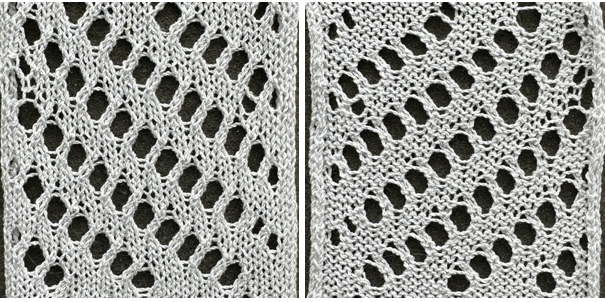
The yarns used are not of equal thickness.
Balanced yarn weight and tighter tensions would diminish both those lines and any bleed-through behind the stitches on the knit side.
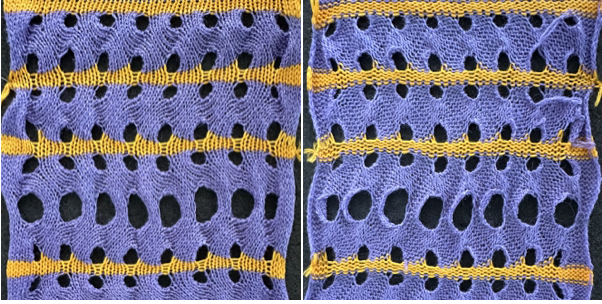
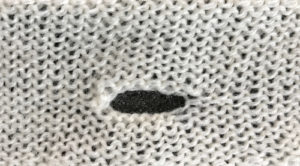
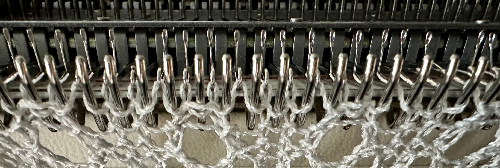
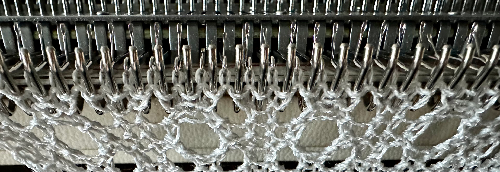
The dropped stitches on the purl side indicate the need for troubleshooting the condition of ribber needles and their latches.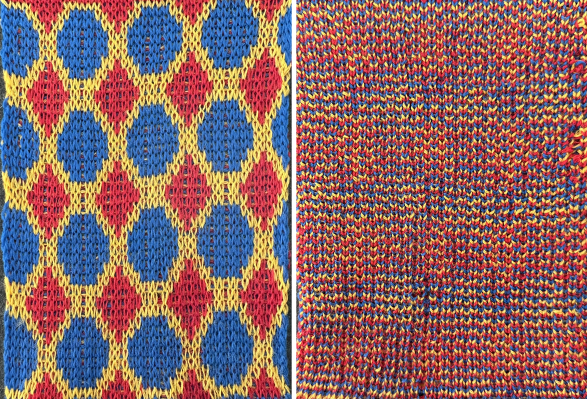 Img2track_multiple colors per row dbj, each color knitting only once used the same 11X10 repeat, explored the results using HOP, pushing needles back to B manually EOR, and a color separation with the same 11X60 final file.
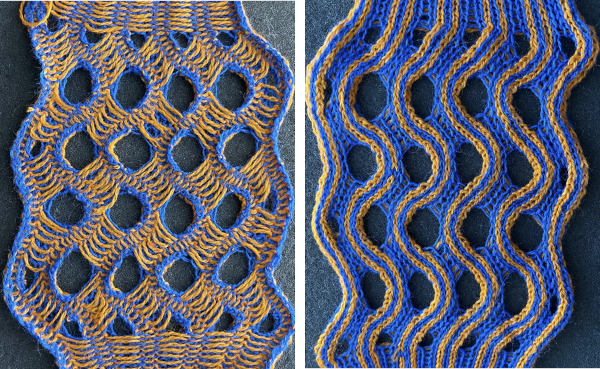
An additional way to decrease changes in the aspect ratio of the original design
relies on eliminating as many passes as possible, by eliminating design rows with “no color” out of the color change rotations.
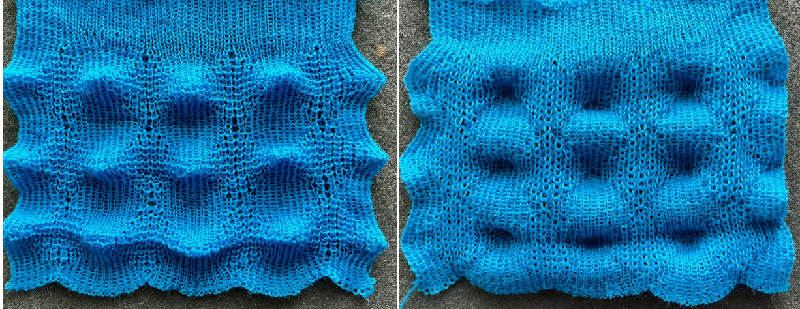
The color changes in continuing identical sequences vs skipping any one of the colors from the rotation when not in use: 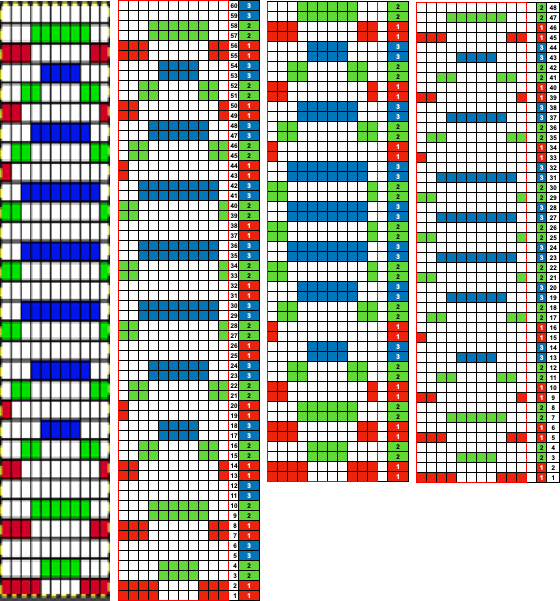 The 11X60 repeat is now to 11X48
  its companion with every other second row of black cells erased.
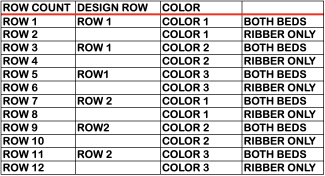
  Both create the need to track what color to use and when. If the machine or software cannot provide prompts and reminders, a spreadsheet is easy and quick to create, listing colors and corresponding row counts:
  Tracking those shifting color changes is more than my bandwidth and patience allow.
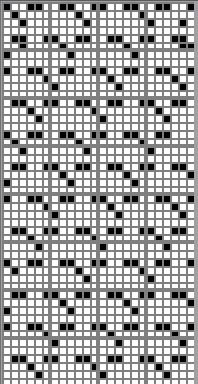
As I was working on this post, a friend asked about the separations for 3 color designs in the StitchWorld Pattern Book #3.
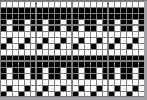
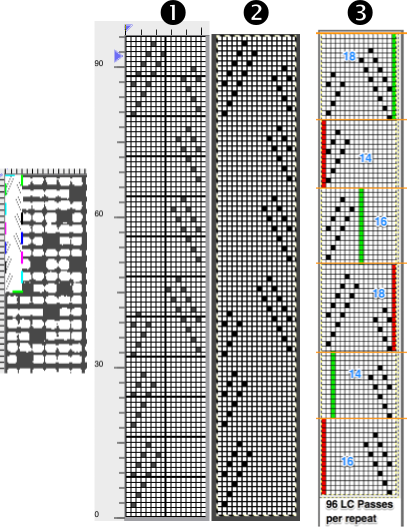
I randomly chose # 484, with the swatch pictured on p 57 and the design separation repeat found on pp 96-98.  The shortest segment can be quickly converted to a knittable 140X50 PNG.
  Other factors to be considered and examined:
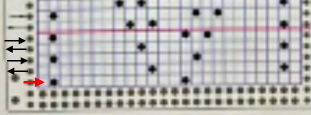
the color-changing sequences are provided on each side.
Each design row appears different from the row below it, raising the question as to whether each color is knitted only once.
The built-in KRC function in Japanese electronic machines automates that option when only 2 colors are used.
Passap E6000 users have a programmable reader technique that accomplishes the same for 3 and 4 colors. 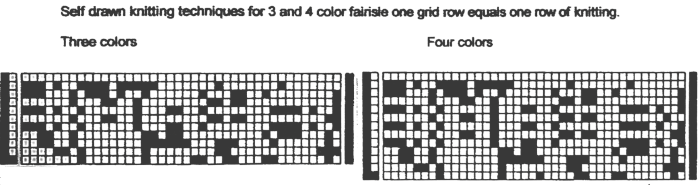 This SW III segment is for rows 521-570, p98, with two more full pages in the pub beginning on p 96 with rows 1-260, and p 97 with rows 261-520.
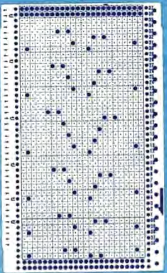
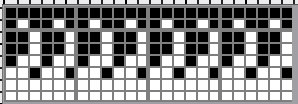
Gimp Guides were placed on a screengrab of the file and it appeared each number was associated with 2 design rows. 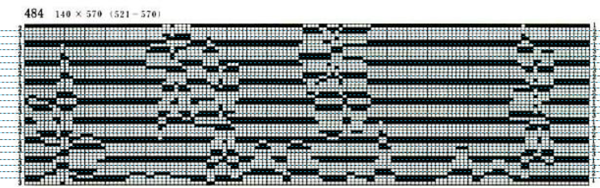 The color numbers are not in fixed sequences and differ on each side, as seen in this magnified view.
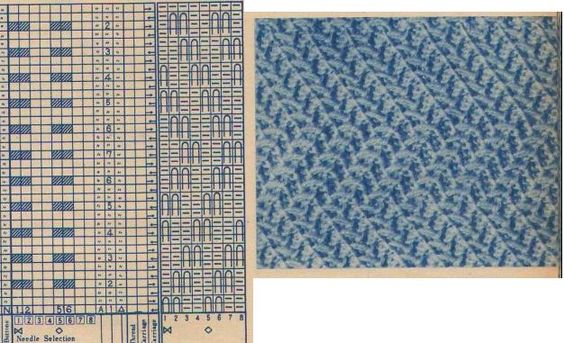
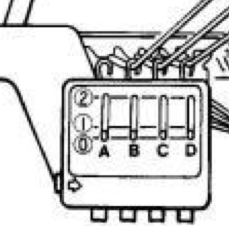
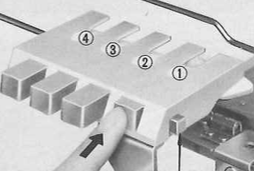
 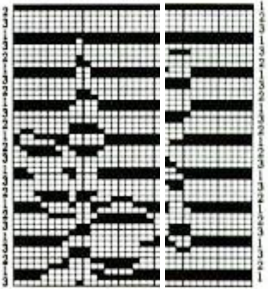 Found when browsing through the SW III pub for added clues: the fair isle section symbols are suggestive of the CK35 Brother semi-industrial machine, produced in small numbers decades ago.
  The CK 35 has a color changer on each side.
 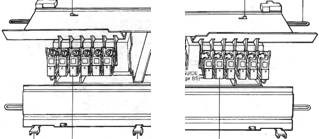 From the manual regarding their use:
 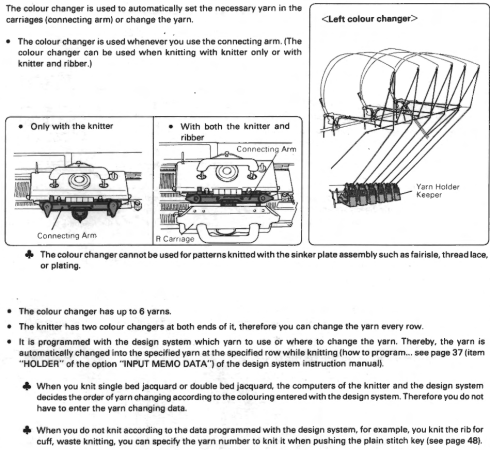 If the files are intended for the CK 35, additional information is needed for emulating or adapting them for use on home knitting models, not always possible.
The same is often true when traveling between machine brands manufactured in different countries.
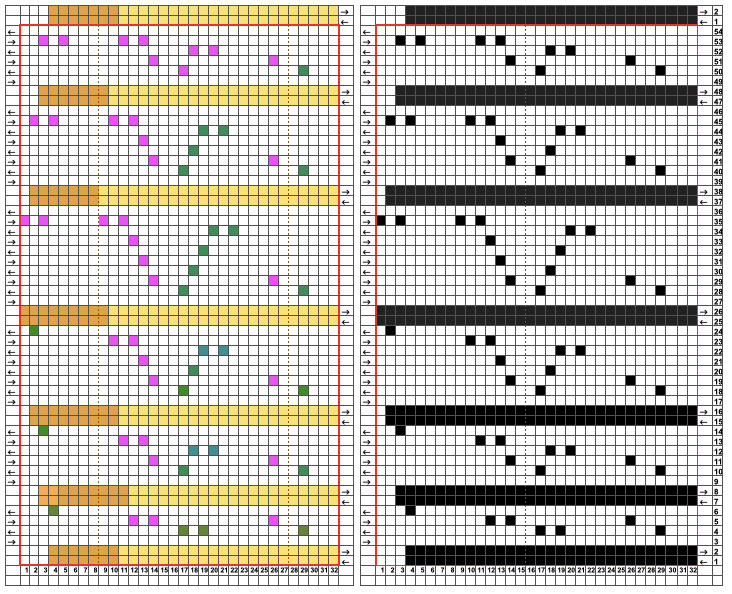
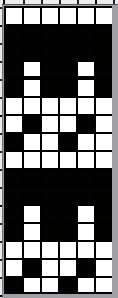
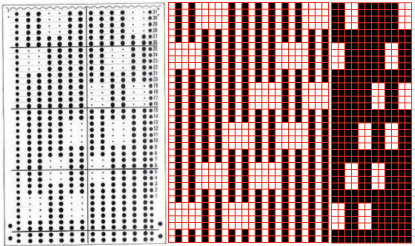
DAK owners can use Method E jacquard separation for machines with a color changer on each side, like the Brother CK 35. According to the manual, the process works on pairs of rows and separates each row into a pass with each color.  A sample separation with no error messages when the 6X6 file is opened.
 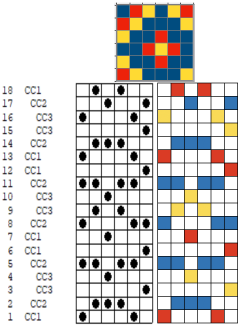 Untested DIY for the same separation:
The 6X18 repeat opened in Gimp, using a single-pixel pencil to fill in all except the color for that row with white. 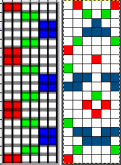 Using the custom brushes and bucket-fill with the pattern, begin with isolating the red color, retaining the white background,
 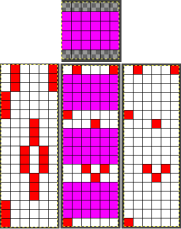 repeat to leave the isolated green exposed, and convert the magenta color from the brush to alpha
 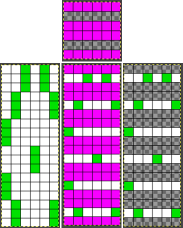 repeat with the isolated blue,
  in two steps, copy and paste the green and white on alpha and the blue and white on alpha on the red-on-white ground image, the tricolor final result, which matches the result from the pencil color replacements, is then rendered in BW for knitting.
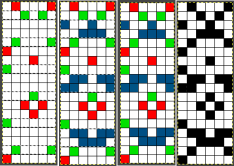 The last DAK Method F is referred to as suitable for Half Milano. It is directly translatable for use in the Japanese models.
 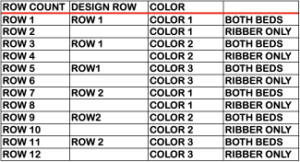 The corresponding separations for both the 6X6 and its elongated sibling, 6X12
 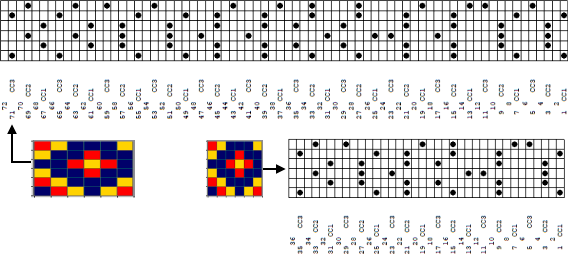 The 36-row repeat was quite different from mine, but a knitting test resulted in a matching result
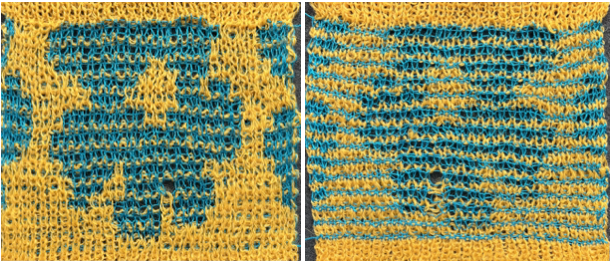
 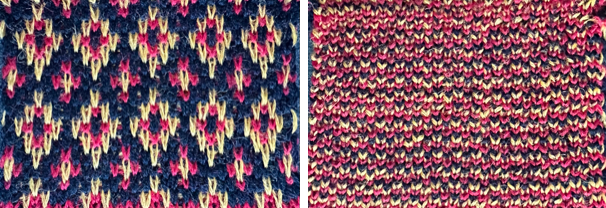 while trying out the 11X10 design in DAK resulted in obvious patterning fails, likely because the repeat is not an even number of pixels in width.
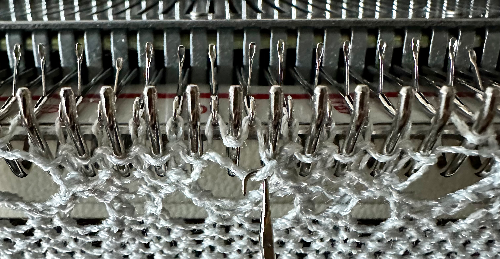
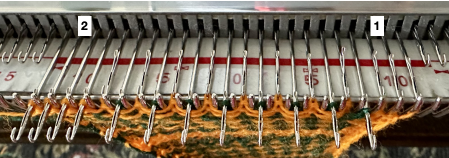
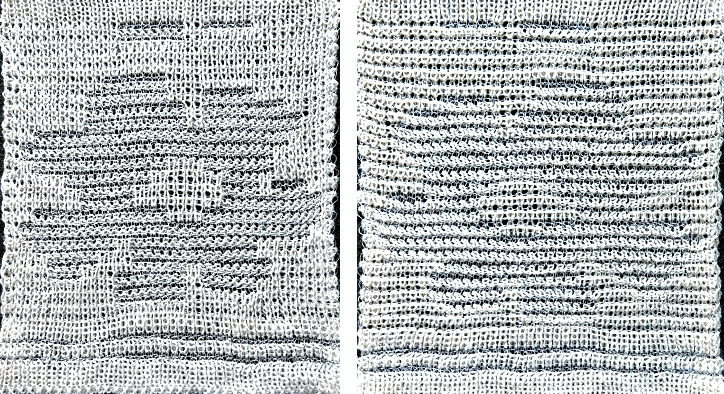
A repeated knit test of my 11X60 repeat, the arrow points to operator error when I failed to notice the color changer was carrying 2 colors at once. 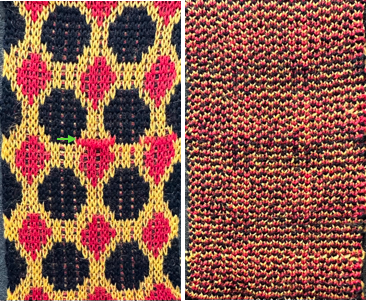 It is possible to superimpose final repeats on each other to look for errors and differences. The DBJ separation in DAK was 60 rows high as well, but it appears to be inaccurate, pointing to possible unidentified errors when working with a stp that is an uneven number of pixels in width.
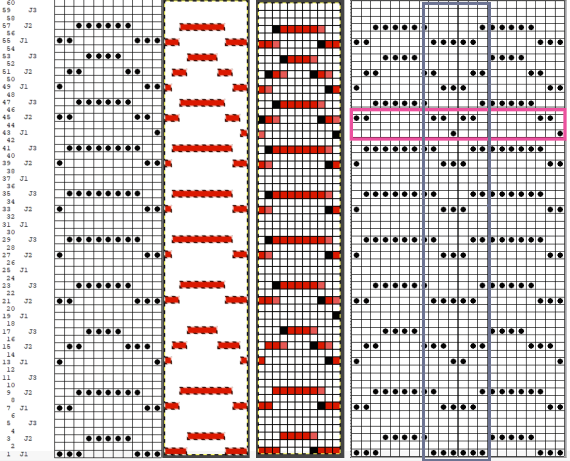
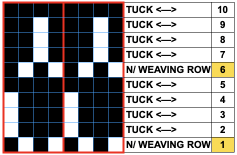
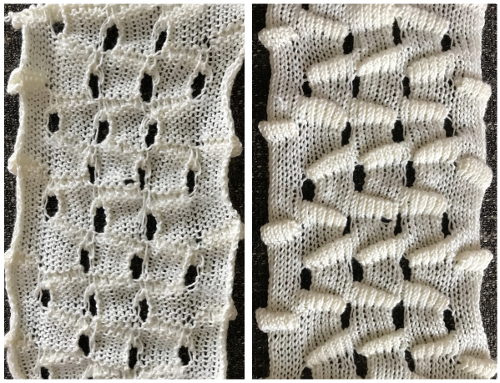
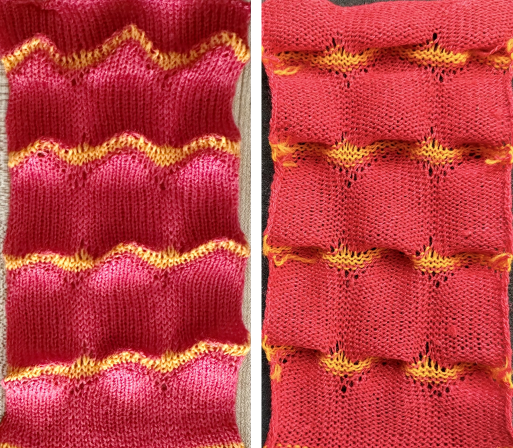
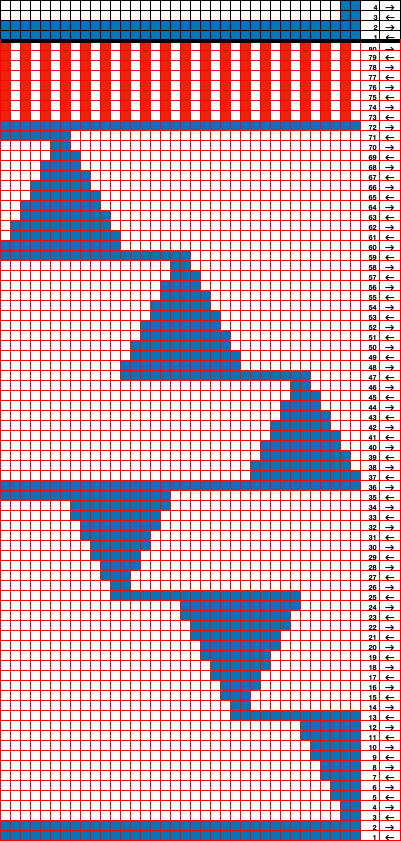
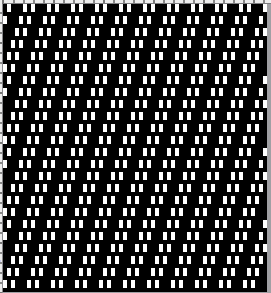
 Altering the repeat planning on cam settings to be changed every even number of rows also brings the possibility of using 2 carriages in electronic models, with one set to tuck in both directions, the other to normal knit (no cam buttons) but with needle selection for weaving rows, KCII
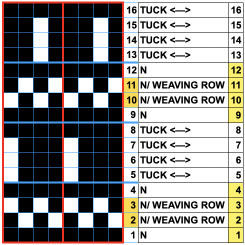
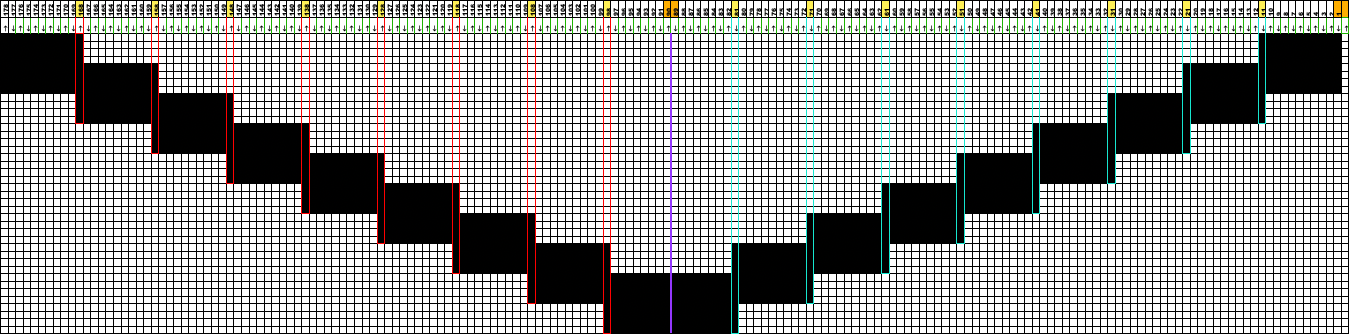
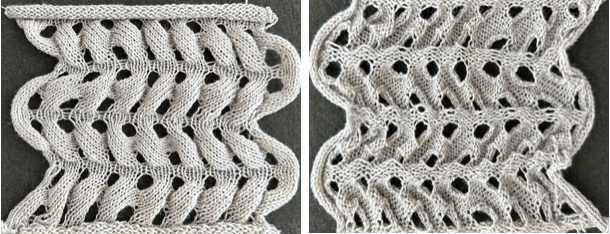
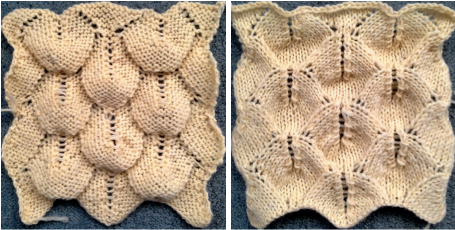
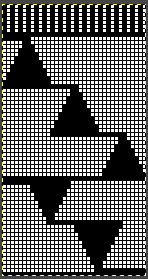
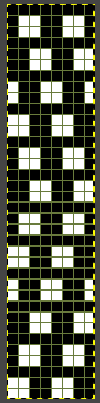
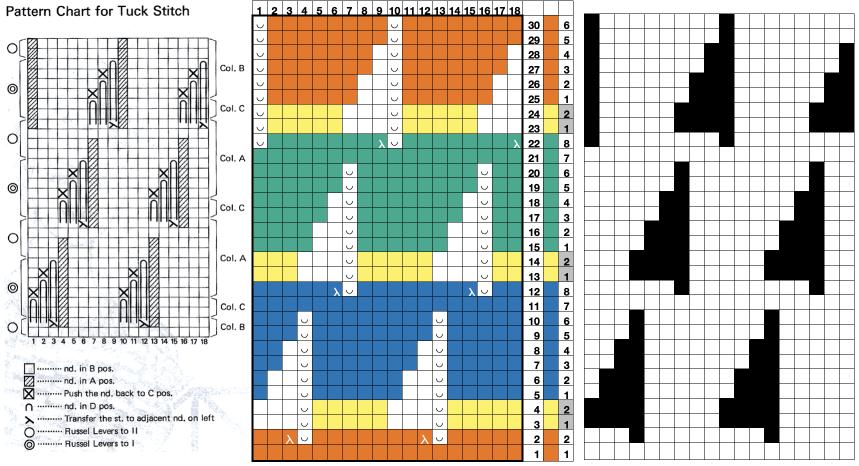
 Here tuck shapes are introduced, again planning for setting or carriage changes every even number of rows, in this case every 6,
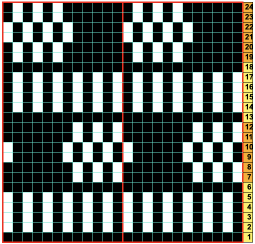
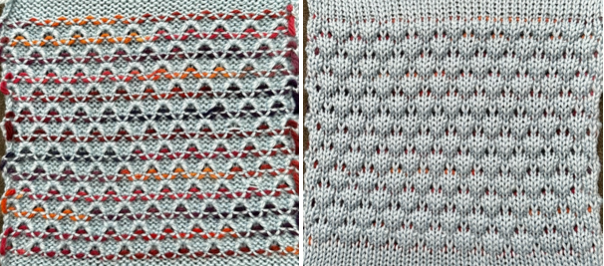
 The tuck diamond is surrounded by a vertically woven one. The original design repeat was color inverted observing tuck “rules”.
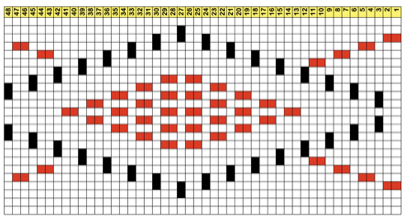
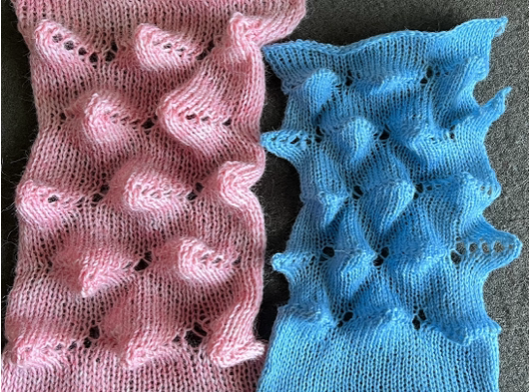
 When the side-by-side needles are not selected, they are manually pushed forward to E and needles are double-wrapped away from the center at the bottom of each shape, toward the center (row30) when the top of the shape is reached.
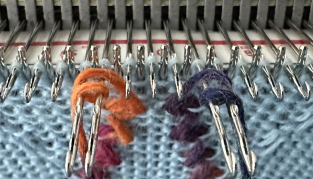
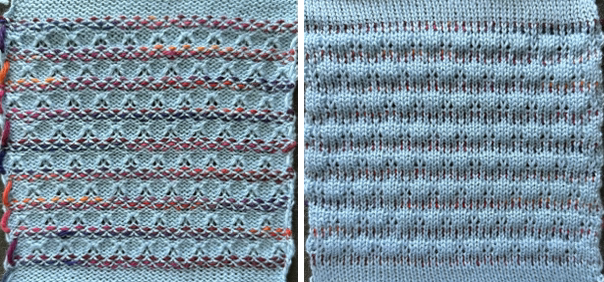
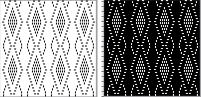
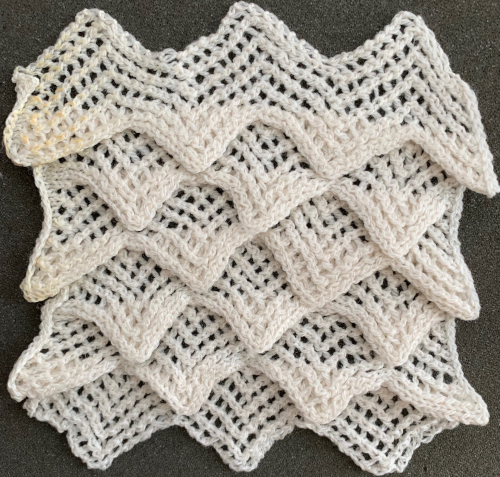
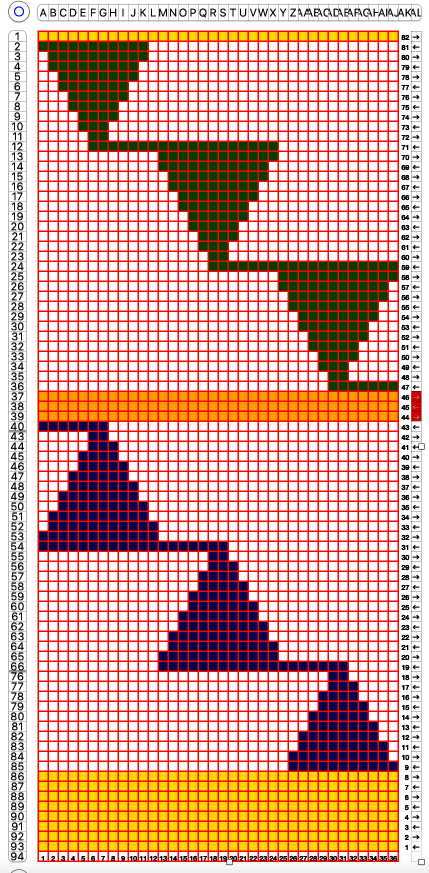
 While retaining the outer shape of the design, the inner content may altered to provide a guide for horizontal weaving. The 24X48 design
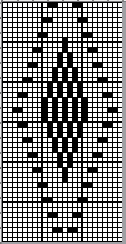
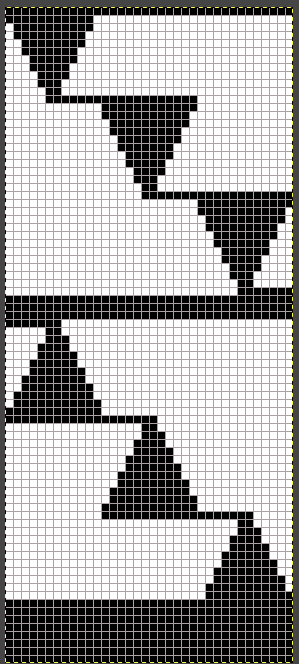
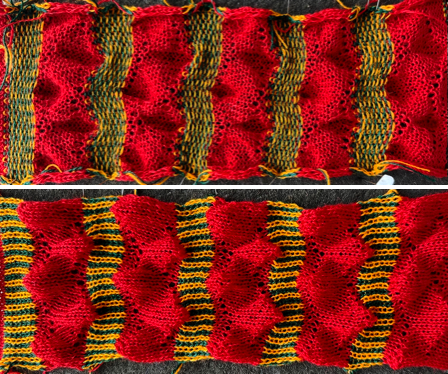
 Slip stitch is known for compressing the height of the knit and narrowing its width. This attempts to alternate knit woven stripes with slip stitch ones utilizing a similar repeat. In order for the slip texture to be more visible, the related segment is rendered double height, and color reversed.
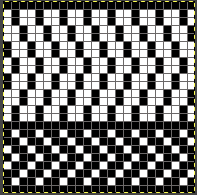
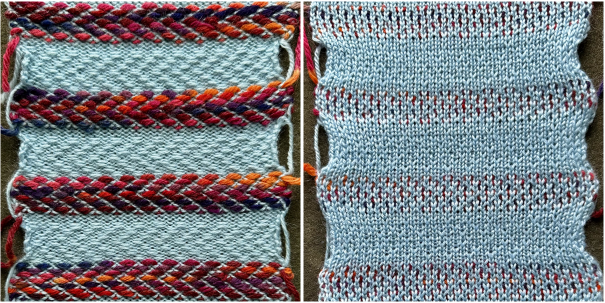 Comparable or the same yarns are used to evaluate the results when varying techniques and stitch types.

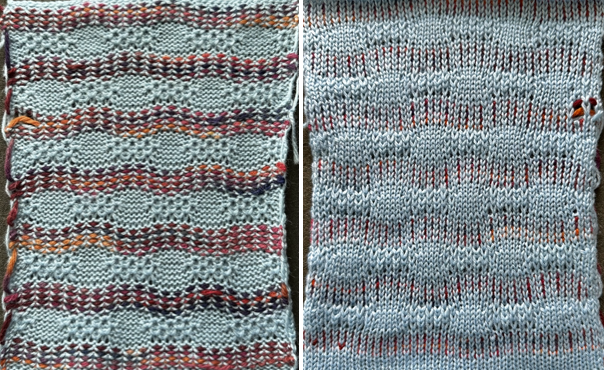
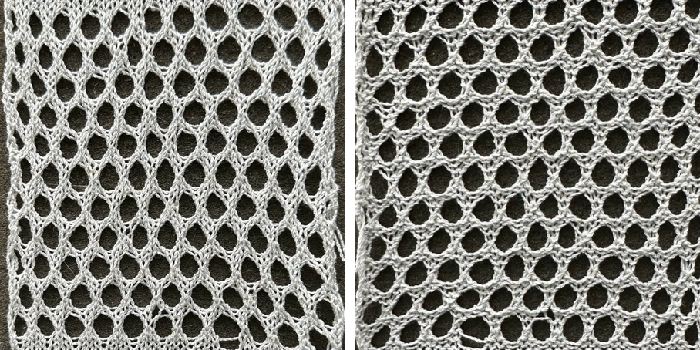
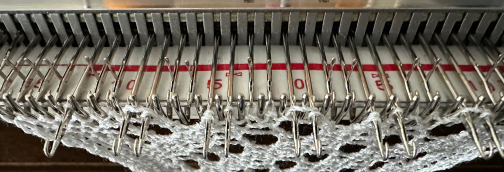
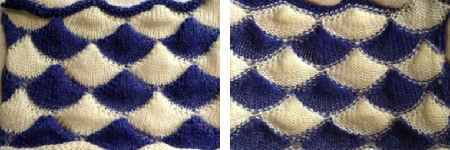
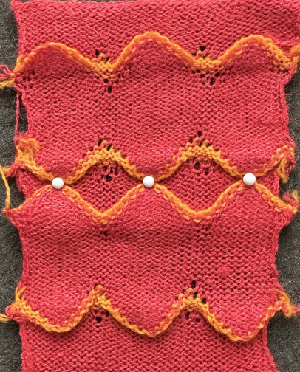
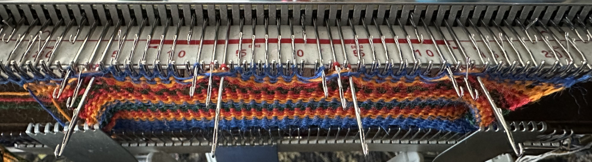
 The proof of concept swatch
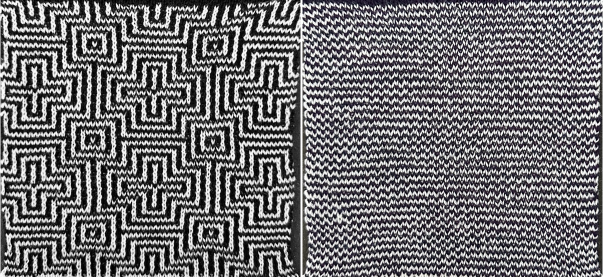
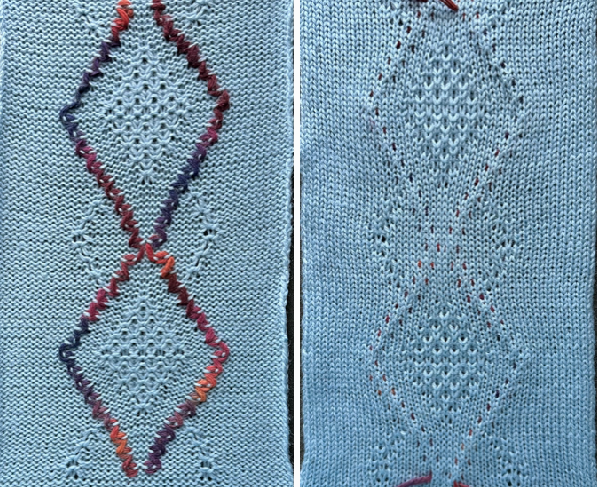
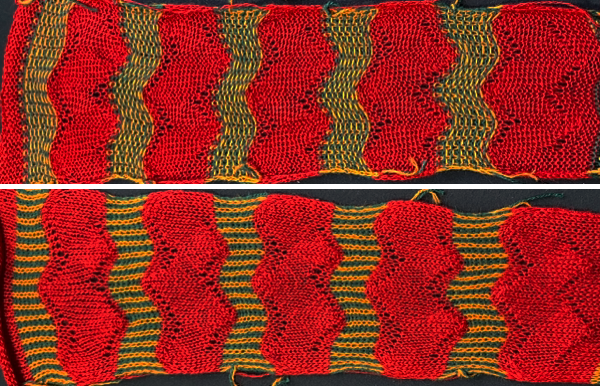
 While the DDJ separation is used as is, this separation must be rendered double length in order for it to be executed single bed with the knit carriage set to slip in both directions, and color changes every 2 rows.
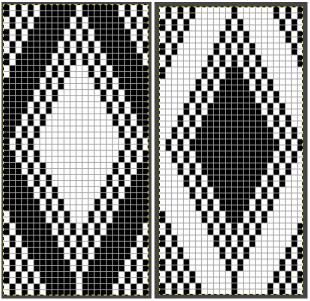


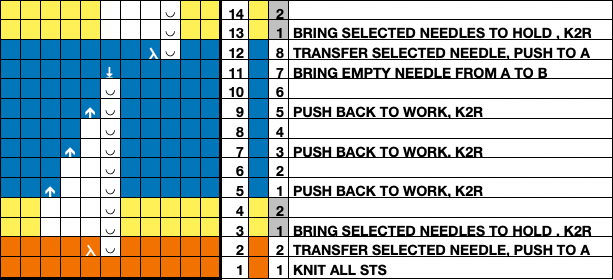
 When charting in spreadsheets, in addition to assigning a color to the direction of transfers made by the LC, arrows may be added to indicate the direction of the respective carriage movements.
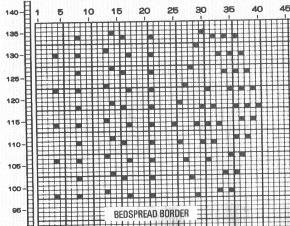


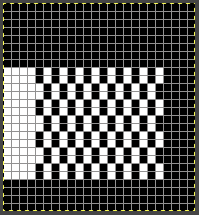
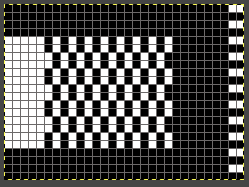


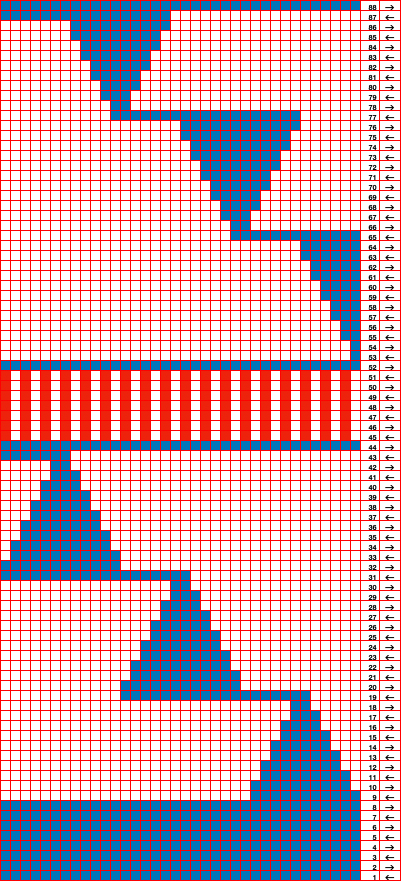
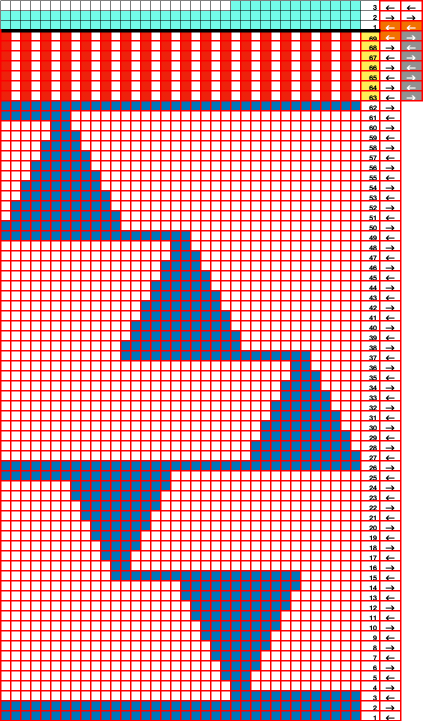


 the 60X74 png

