In 2012 I had a sort of leaf obsession, which led to my exploring a range of shapes created in both hand and machine knitting, including a series of shawls that were machine knit, using the lace carriage, intended for both gifts and sale.
Online resources were not as abundant back then, searches are more productive now via browser searches, pinboards, and Ravelry.
I have always been interested in holding techniques and automating them on both punchcard and electronic machines. In recently revisiting shell shapes I was reminded of leaves once more and thought I would return to working with them.
An early abandoned effort in trying to construct leaf shapes automating their shaping using holding in combination with slip stitch followed other earlier posts is shown below. In all honesty, I have been blogging long enough so I often do not recall previous writings on a recent spark of interest and execute a personal version of reinventing the wheel, starting from scratch, or executed poor note-keeping which in turn requires it.
A variety of lozenge and “leaf”-shaped forms may be found in previous posts on holding intarsia, some are strictly hand-selected, others are automated. There is a series of 5:
2016/06/21/a-bit-of-holding-1/
2016/06/29/a-bit-of-holding-2-moving-shapes-around/
2016/07/12/a-bit-of-holding-3-shape-variations-and-more/
2016/07/24/a-bit-of-holding-4-intarsia-and-more/
/2016/08/13/a-bit-of-holding-5-intarsia-and-more-2/
Checking the repeat for a single shape 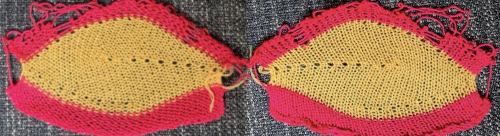 Adding a second color and reversing directions of shapes brings lots of yarn ends and its “price to pay”
 Some handknit large scale inspiration to begin my revisit to MKing them: Garnstudio 1
 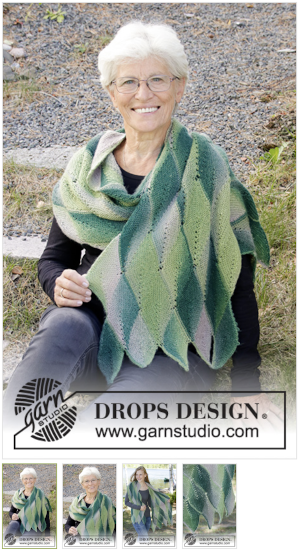 and Garnstudio 2, which introduces lace transfer stripes between leaf forms
 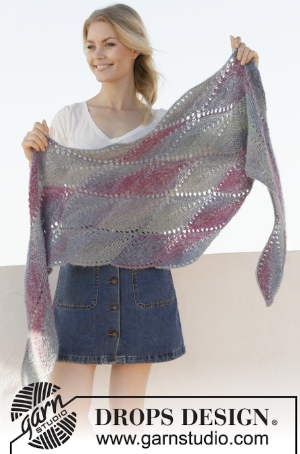 A free hand knitting pattern, “Papagena“, that takes similar shapes to a triangular layout for shawl shaping
 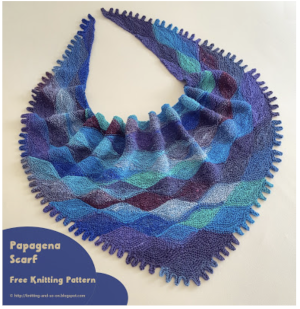 Stitch Maps is an online source for hand knitters with interesting graphics that include some for held shapes, such as this
 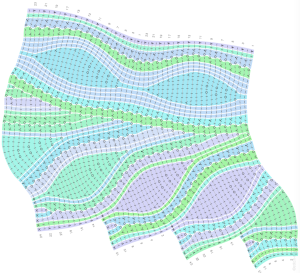 The chart is actually rotated 90 degrees counterclockwise, could serve as inspiration for an electronic pattern.
Returning to a possible far smaller repeat that may be executable on a punchcard machine as well. The central vein in the forms is created by having held stitches with no wraps along and up to its center in height, creating 2 continuous shapes that mirror horizontally and repeat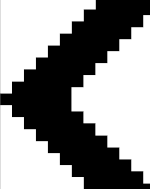 Automated holding sequences may be planned for single or multiple stitches in width, as well as for single and multiple rows in height. For the new initial test, which proved to need editing, this was my repeat
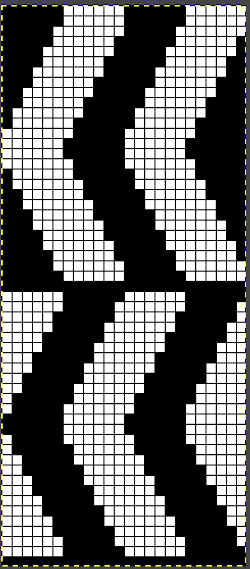 A tiny test in too thin a yarn
 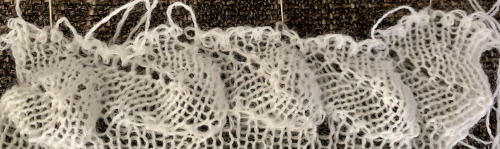 I am knitting on a 930, the image needs to be mirrored in order for it to appear in the direction I intend on the knit side. The above repeat did not work properly when knitting a whole row of shapes. With some patience, a final, edited, and mirrored repeat was developed that enabled a completed a full row of shapes using the slip setting and holding, and starting with working it from right to left. Sometimes differences are subtle, especially in designing using single-pixel units. The new repeat proved to also work for rows of shapes in the reverse direction after horizontal mirroring and restarting the pattern or design row 1. When working from right to left, the initial preselection row is from left to right, while when working from left to right, the first preselection row is from right to left. After a full row of repeats is completed, the pattern is rolled back to row 1 and mirrored. Punchcard knitters could turn the card over and start again on the proper row. I used contrast color knit rows initially in between rows of shapes to help me note transitions more clearly. The “leaf” is not pointy enough for me, but at times what was not planned may lead to a pleasing result of a different sort.
The amended, corrected repeat is shown on the right 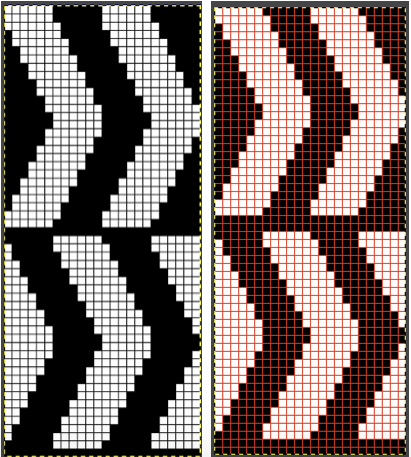
 To knit: cast on with a multiple of 12 stitches on each side of the center 24 on the needle bed
Cancel end needle selection
COL: first preselection row from left to right
COR: set machine for both slip <– –> and hold
all needles will have been preselected, knitting every stitch, knit 2 rows, return to the right, as the row is knit, patterned preselection occurs
COR: bring all needles to the left of the first 12 on the right into hold position, knit until all needles in the group of 12 are preselected again, the carriage will be on the right
*COR: bring a group of 6 needles to the left of the 12 stitch group just completed into work, knit one row to left
COL: bring 6 stitches from the completed shape on the right to hold, continue in the pattern on the new 12 stitch group until all 12 stitches are once again preselected, stopping with COR***
repeat * to *** end working the full last group of 12 stitches on the left, including the last 12 stitch preselection
At the completion of a row of shapes COL: make a decision about the transition, whether any extra rows knit are a problem or not, and whether added rows in contrasting colors are wanted. To proceed with no changes in cam settings and 4 rows of knitting between the rows of shapes remembering that the first preselection row needs to be made from right to left.
COL: manually return all needles to upper work position (D). They will knit row 1 of the stripe
COR: manually push all needles to D again, return program to design row one, check settings, as the first design row pattern is preselected an all knit row 2 will be added. As patterning resumes from the left another 2 all knit rows will be produced before selective patterning occurs.
If any extra all knit rows are wanted cancel patterning on the knit carriage, set it to N, knit the extra rows, remember to end on the proper side for the first preselection row, and what options may be necessary to complete that row correctly.
To reverse patterns without extra knit rows:
COL: store yarn. The carriage can be removed and brought to the opposite side, or stitches need to be manually be placed in the B position for a free pass to the right. This involves placing the cam selector button on N, returning the cams set to slip in both directions.
COR, all needles also need to be in work in B position, no yarn, in order to make a free pass to preselect from right to left, ending COL
COL: pick up yarn and continue in pattern. These textures require a lot of carriage passes, which tend to fuzz up the yarn on the purl side of the knit a bit. The shape I created was not very leafy to my mind, but still interesting, especially on the purl side. The yarn used in a 2/15 wool, knit on Tension 5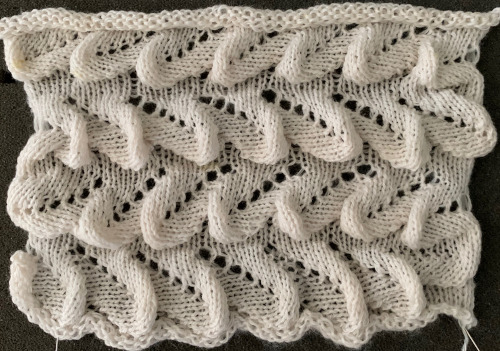
 Moving on to a wider version, using 24 stitches in width to allow for using the pattern on a punchcard: this repeats works both as-is and mirrored, the groups of stitches moved in and out of work is now half of the new design repeat = 12.
 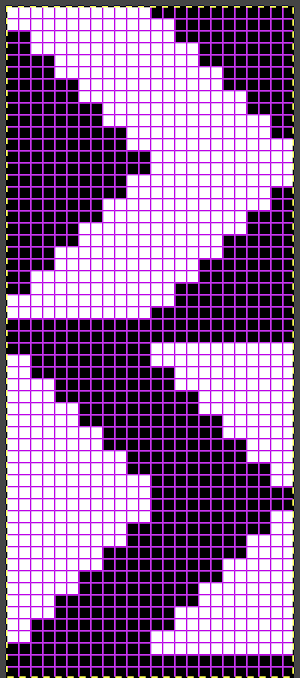 Making the repeat work in any number for this shape involves lining up the needle selection in each group of needles and constant counts for holding sequences. Punchard knitters would need 2 separate cards.
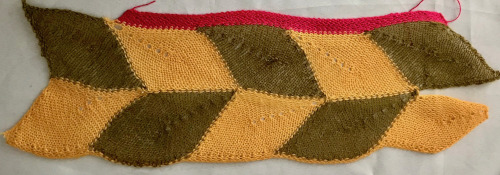
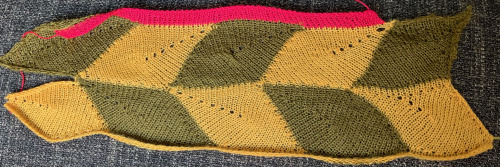
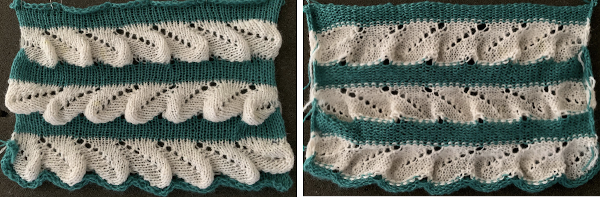
 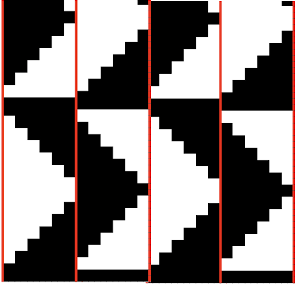 The lovely mess in the swatch happened when I stopped paying attention to everything but what was happening on the needle bed and missed the tangle of yarns in my yarn mast. There is enough knitting, however, to note that the repeat is sound and that the edges on both sides are formed by the narrowest part of the shapes in each direction. One way to solve that is by casting on and binding off along tops and bottoms of shapes as seen in the yellow and green swatch at the top of the post.
 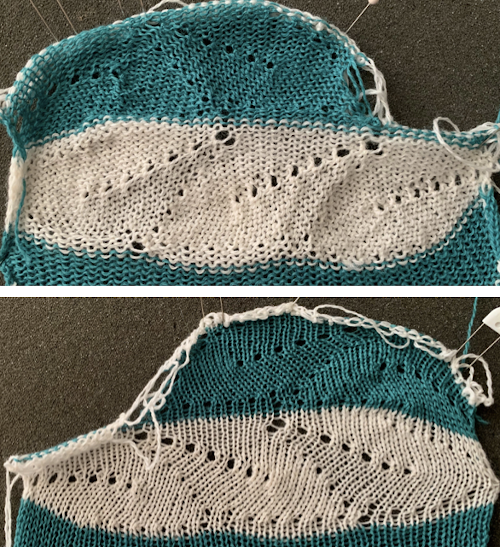 Planning things out to release those edges as seen at the top of the post
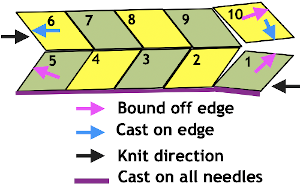
Working on outlining the shapes with contrast color: 
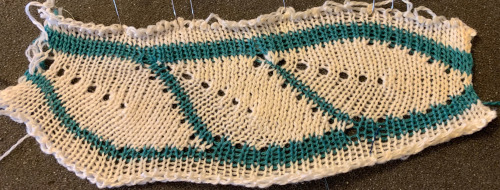 Problems to solve: maintaining an even number of rows in-between shapes and a straight edge along both sides. The latter could happen with triangles prior to knitting full shapes at either or both ends, the first sample failed on the left side due to both triangles being knit in the same sequence;
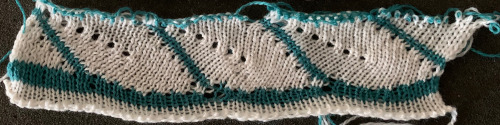 that may be solved by beginning shaping on 2 stitches on the left rather than the full 12, mirrored. The proper sequence for actual knit stitches for the first, bottom set, and mirrored for the second, top set
 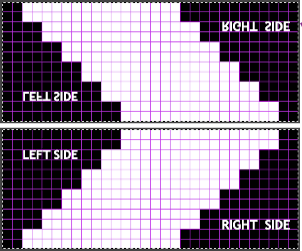 still only partway there
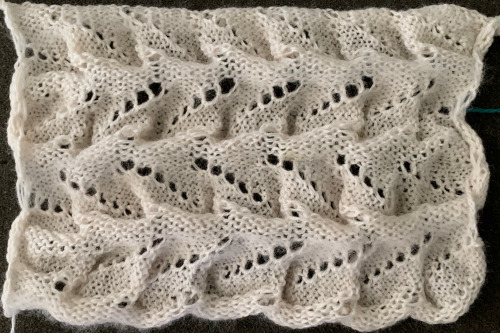
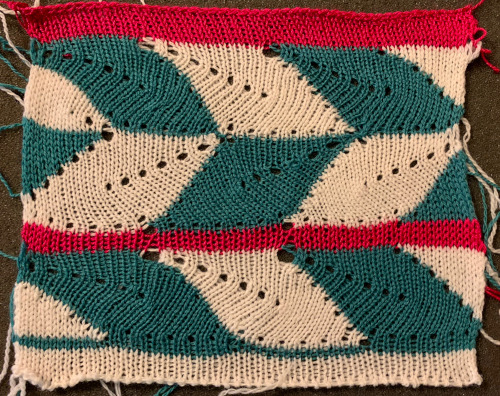
 I am presently knitting with my left hand in a splint that has exposed velcro teeth, which has caused some interesting issues with actual knitting and with yarn snags. To end this latest effort, in yet another knitting aaargh! moment, it appears my iron is now overheating and burned the wool! From observing the above swatch on the purl side it looks as though each row of shapes needs to have a triangular shape at each end. Also, the contrasting color line thickness is not constant. The purpose of automation should be to make things easier, not confounding. After yet another trial, I decided to give up on attempting to use the automated repeat to produce an effect that was consistent and made me happy.
Setup for a leaf in each color is far less fiddly and simpler to execute. A tentative layout and knitting sequence:
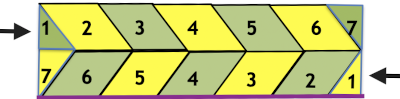 Begin on waste yarn, decide on the color of the cast on, and any additional knit rows prior to beginning in the pattern. Each of the side triangles is shaped using manual holding techniques over 12 stitches. If starting on the right, the first preselection row needs to be made moving from left to right as above on the first 24 stitches. With knit carriage set to both slip in both directions and holding with COL make certain the first 24 stitches on the right in B position make a free pass to the right.
COR: cut yarn, change color, knit the first shape repeat, end COR
COR: when all needles in the group are preselected, push the first 12 needles on the carriage side out to holding position, push 12 stitches on their left back into upper work position as you would in any holding pattern, they will knit in the slip setting as well. Cut the yarn, change color, repeat across the row of shapes
COR: when the last group of 12 needles on the left is preselected with all needles out to hold or removing the carriage and positioning it on the other side, begin knitting COL.
COL: manually knit triangle at top of the previous row of shapes
If a contrasting color stripe or any other pattern is intended between a full row of shapes, execute them and end COL
COL: shape the second triangle for the start of the reversed row of shapes, get the carriage to the right side by a pass over all needles in holding position or removing the carriage and bringing it to the opposite side
COR: the second pattern is programmed. Punchcard knitters use the second card, electronics mirror the shape. With the first 24 stitches on the left in B position and the knit carriage set for holding and to slip in both directions, make a preselection pass to left.
COL: change color, knit shape, and continue on as described above reversing shaping
As with intarsia, there will be lots of yarn ends to weave in and clean up those eyelets at the start of each color change. The swatch after a quick pressing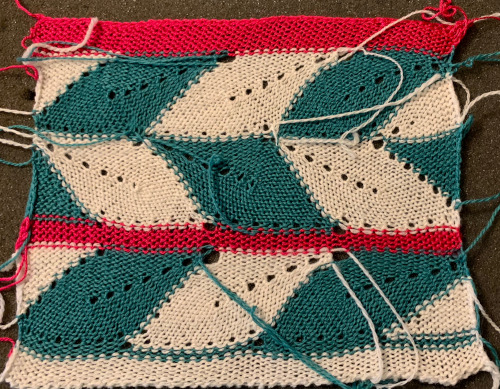
The possibilities could be endless. Electronic machines do not have the limitation of working within the 24 stitches maximum design width. Shapes can be fully automated using only slip stitch setting, no holding, but repeats become exponentially wide and long. The technique merits its own post.