There are many handknit patterns floating around the internet, placing shapes similar to these, with many variations, along with a variety of locations in accessories and sweaters. The same shape discussed in the previous post is shown here placed near and then at the edge of the knit. There are many things to consider in addition to the choice of shape. In hand knitting these patterns are usually knit in garter stitch, a fabric that does a good job of lying flat when completed. Short rows are used in both hand and machine knitting; the Brother G carriage produces it “automatically”, but is not short row friendly. The more practical solution is to try a plain knit version. Edges of the knit are still going to curl toward the purls side. Some of this can be averted by using acrylic or other fiber yarn that responds to being “killed” with ironing/ steaming, and will lie as close to flat as possible after the fact. Section A shows the shape knit with no color change and close to the side of the knit, note the vertical edge remains fairly straight. In section B stitches were cast on, and at the end of the holding sequence all stitches are knit moving from right to left. An increase in the number of stitches cast on is now reflected in the total width of the fabric. The result of multiple repeats would appear as a sort of “ruffle”. In section C the same number of stitches are bound off as cast on. The bind off is critical for shape retention. I prefer a latch tool cast off for most knits, here I used the *transfer over one, knit one* method, note: the turning point sharpness is lost and the bound-off edge is very different from the cast on one. In this instance, because the number of stitches increased and decreased stitches are identical, if repeats were executed and no other increases were made anywhere, the width of the final piece would remain constant. If the goal was to achieve a triangular shape such as in a shawl, increases would have to be made along the edges of the plain knit sections, prior to the color change for section C. In testing repeats I do not wrap any needles. Evaluate whether the extra step is needed when swatching in your final yarn choice.
the swatch 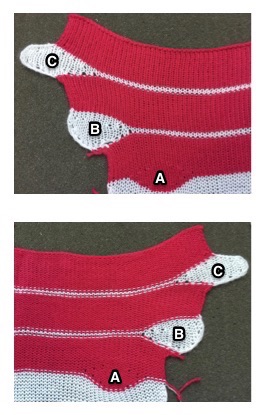
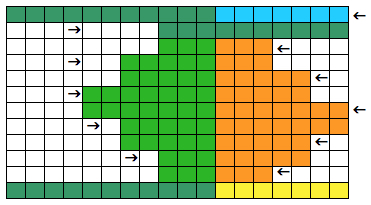
planning the shapes, arrows indicate the direction of carriage moves
cast on stitches are knit as part of the last row

cast on stitches are bound off prior to last row
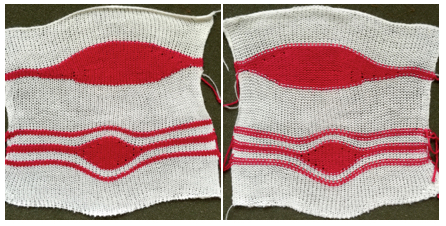
The last sample was also knit using the same yarn, followed by pressing. Again, I did not do any wrapping, and holes created along the edges of the holding sequences are more visible. The swatch was knit from the bottom edge up. The cast on used was a weaving cast on. Both the bottom and the top edges show some of the distortions in the knit caused by the extra rows of knitting that occur in the shapes. Striping is added to the now-familiar sequence, additional colors could be used, with shapes and stripes varied in the placement along with a wider, longer piece of knitting to create interesting repeats. The top shows the start of a larger shape that could be altered to resemble leaves, etc.
for a larger shape 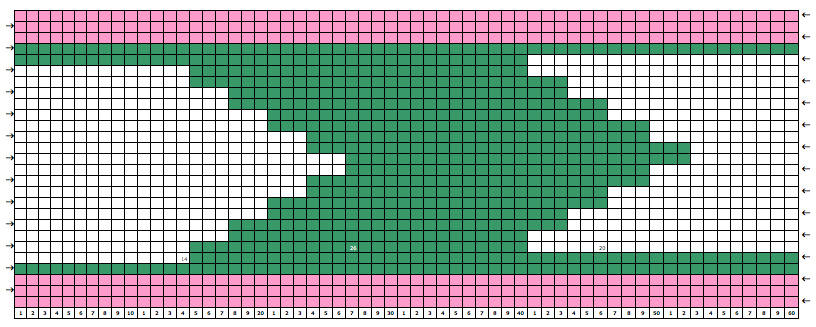
for a striped surround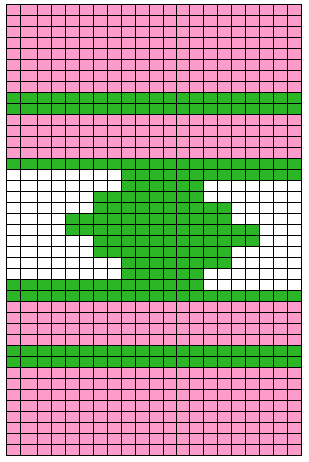 knit side purl side