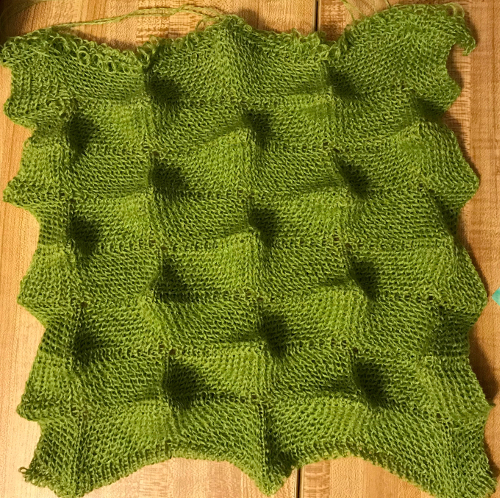
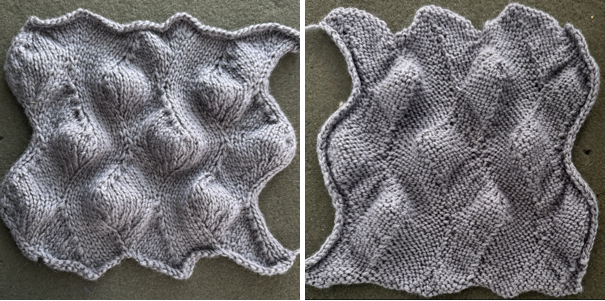
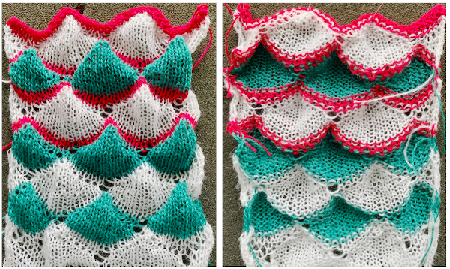
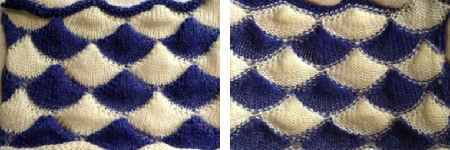
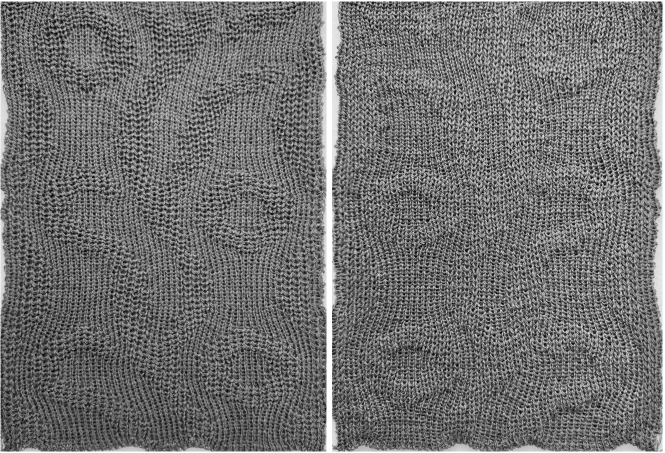
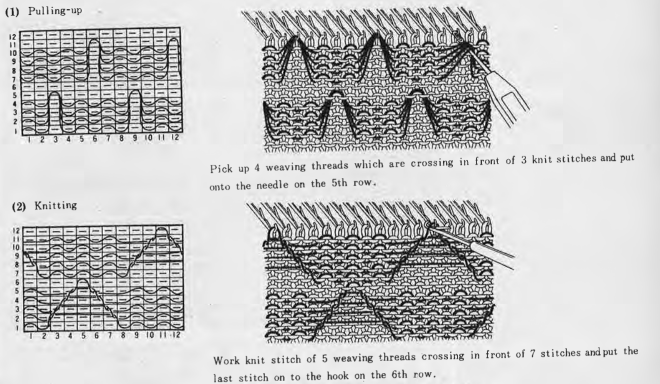
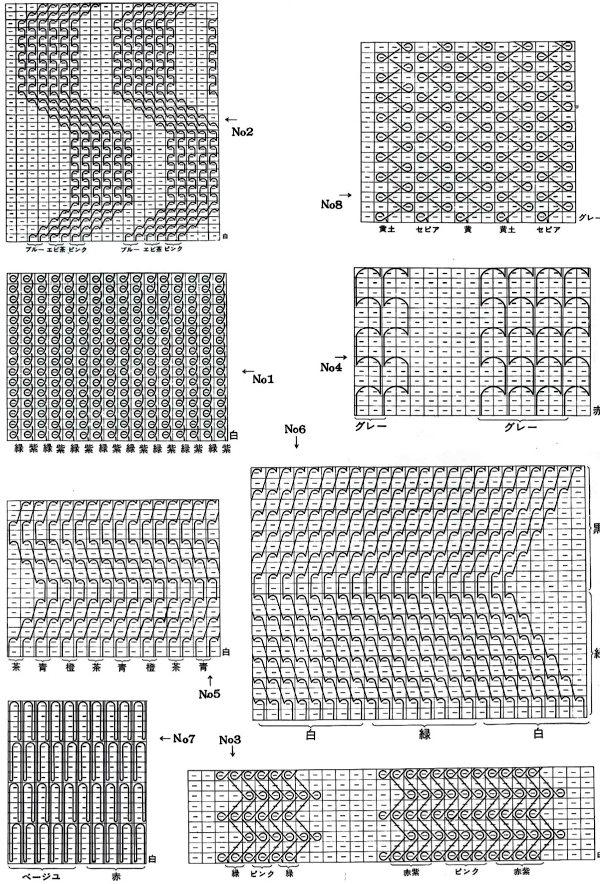
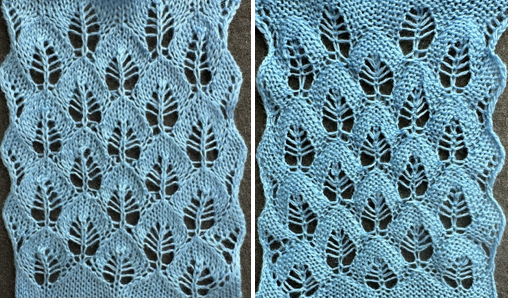
The term brioche in knitting is often used loosely in any references to tuck stitches. Here the term refers to vertical designs specifically produced with hand techniques, moving groups of stitches on the top bed.
Designs may be worked in single colors, or with more complicated planning, they may be executed in 2 colors.
For executing blocks of texture in one or two colors with and without racking see Fisherman_ English tuck stitch rib 1_ checks patterns_ Brother, Passap
racked, single-color sample.  Other explorations of the use of tuck stitch settings in 2-color double-bed every needle rib fabric began with attempting to create a solid color shape on a vertically striped ground in Geometric shapes on ribber fabrics with tuck stitches 1
 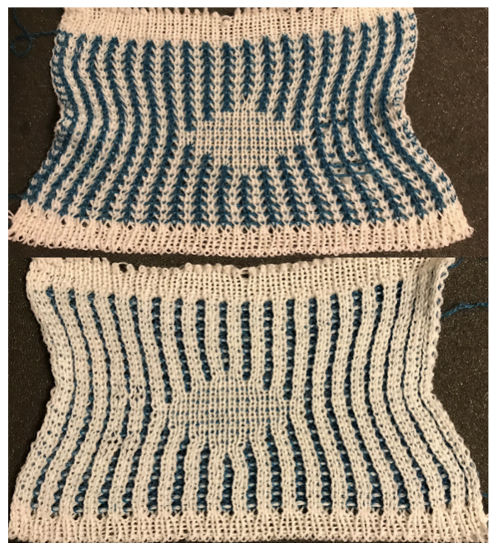 Another simple shape was programmed, and varied carriage settings on either or both beds were explored in Geometric shapes on ribber fabrics with tuck stitches 2; knitting with 4 carriages.
 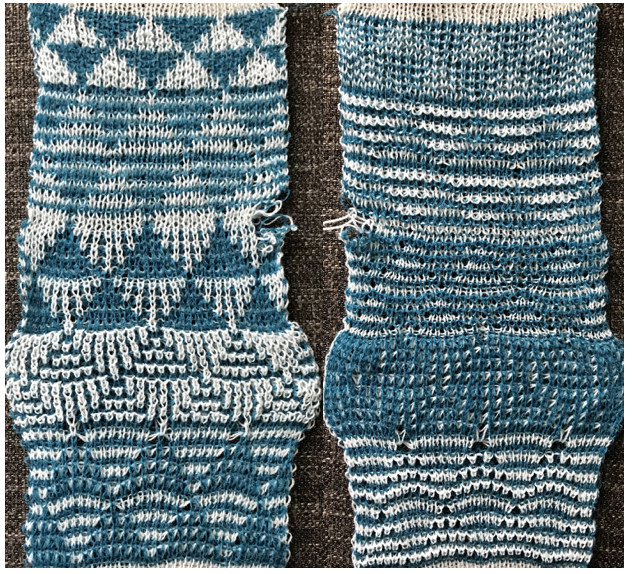 Geometric shapes on ribber fabrics with tuck stitches 3 uses self-drawn repeats and multiple colors.
 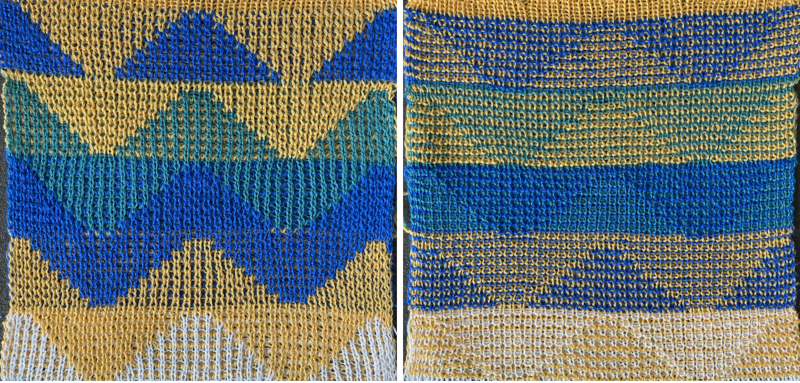 varying carriage settings while using only 2 colors
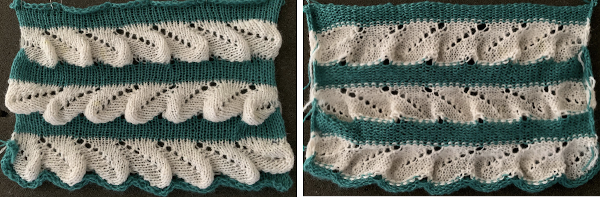
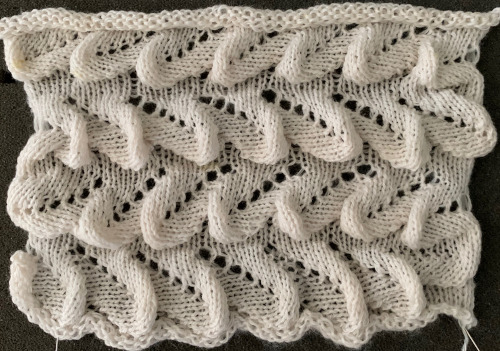
 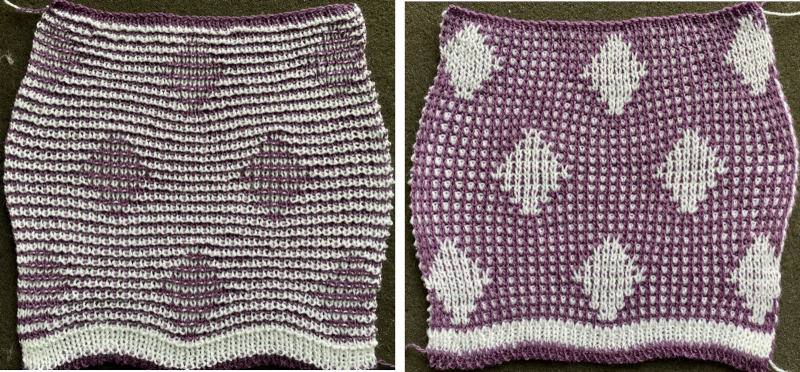 Lace transfers meet fisherman rib in 2 colors on Brother KM 1
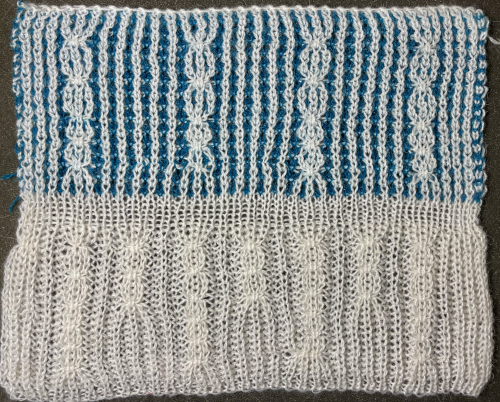 Lace transfers meet fisherman rib, 2 color ribbed brioche on Brother machines 2 , one of several swatches.
  These are advanced, complex fabrics. The repeats for 2 colors can grow exponentially in length.
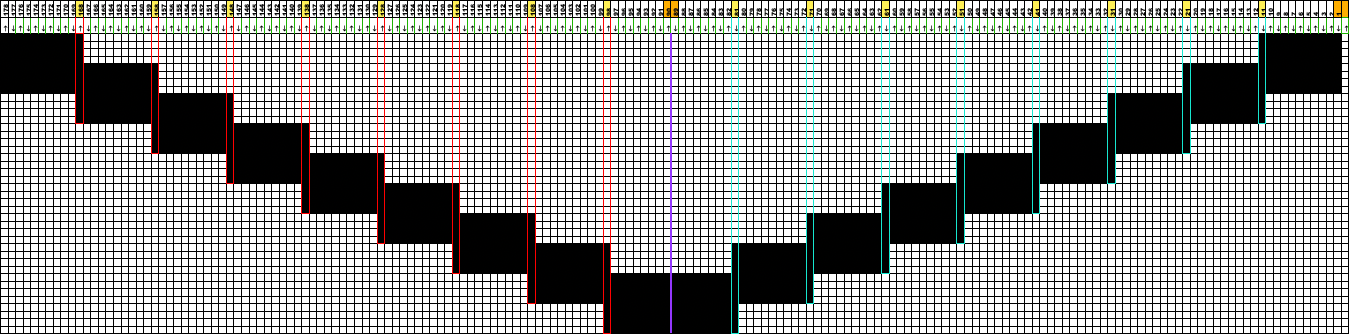
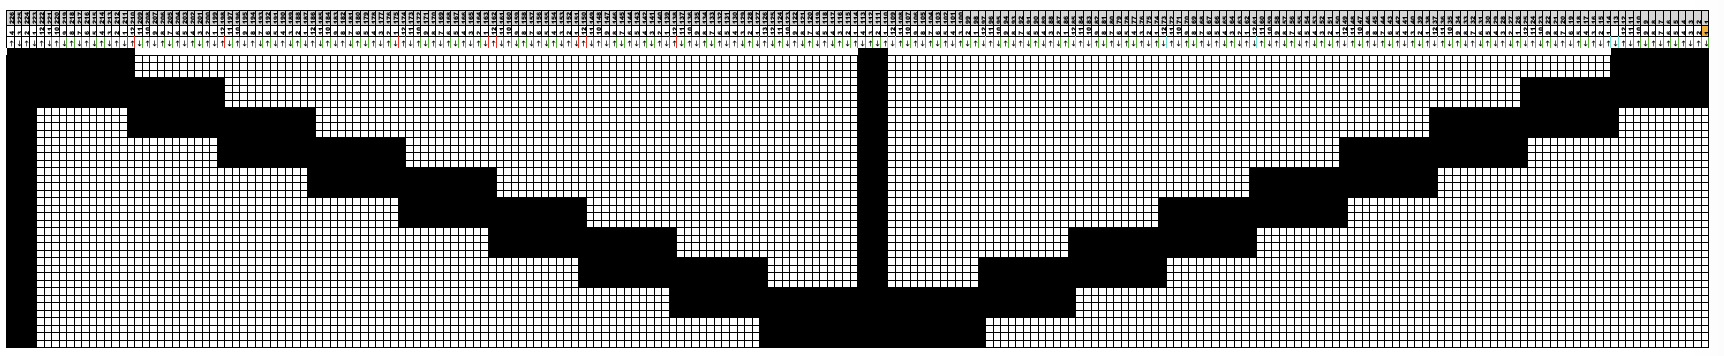
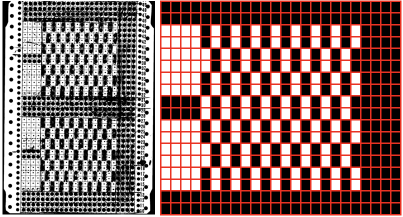
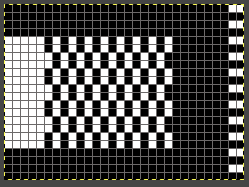
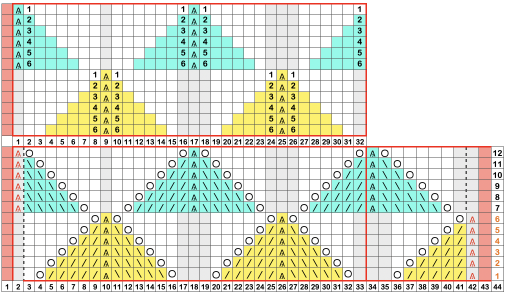
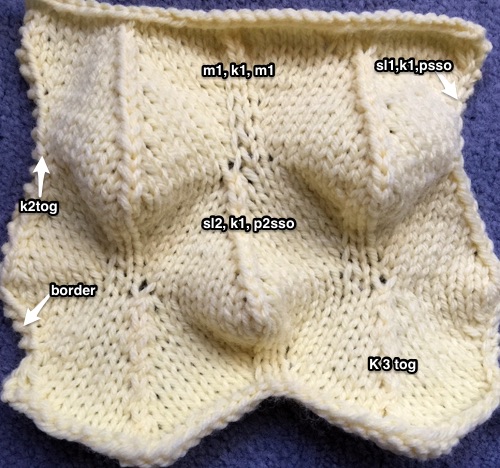
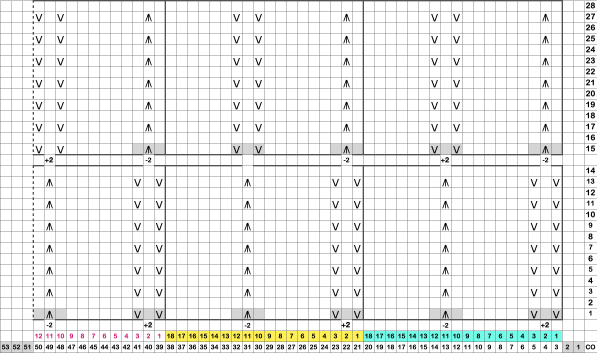
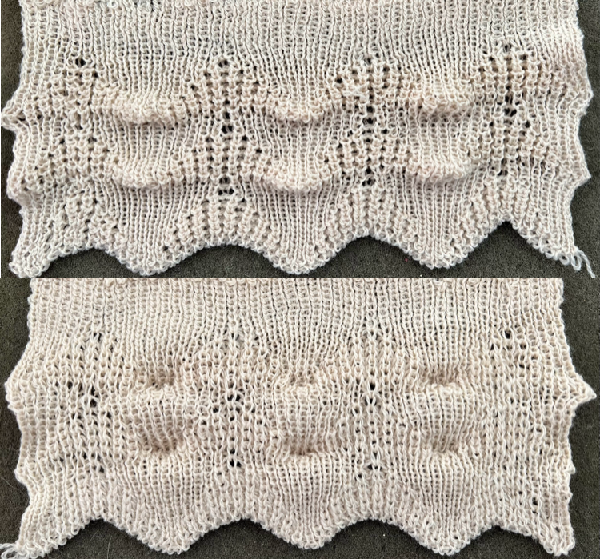
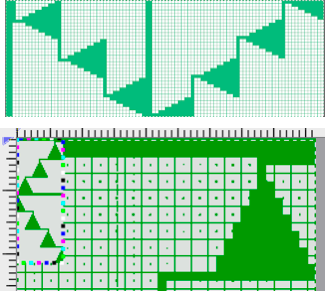
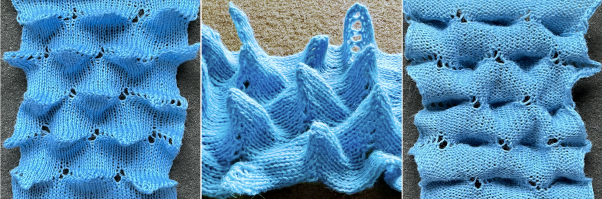
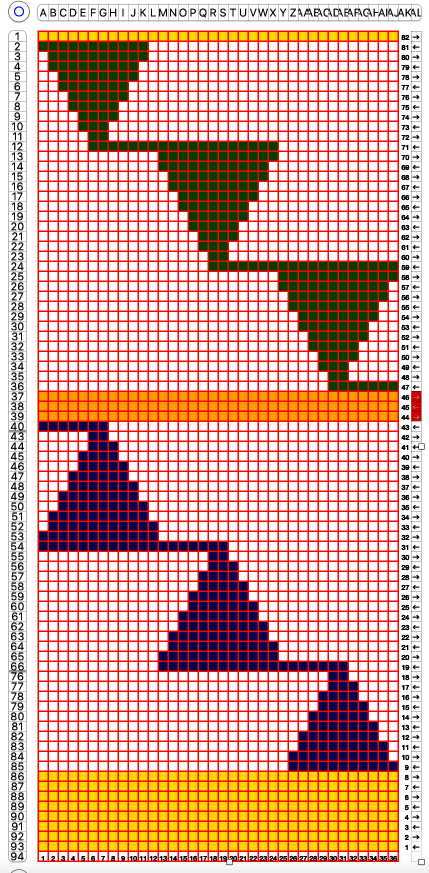
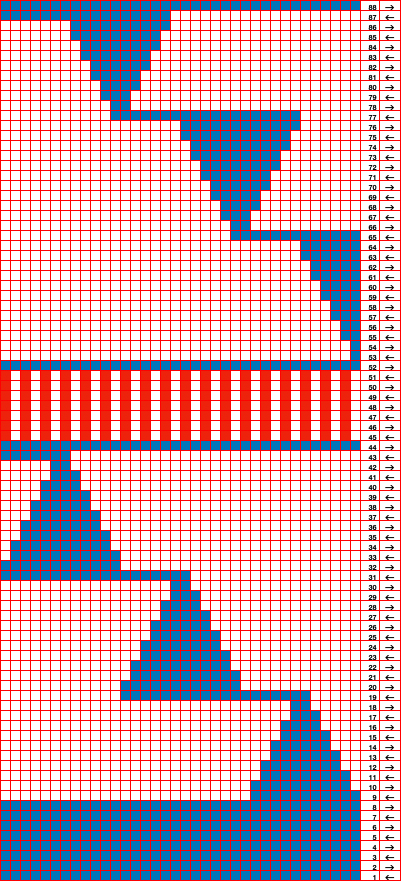
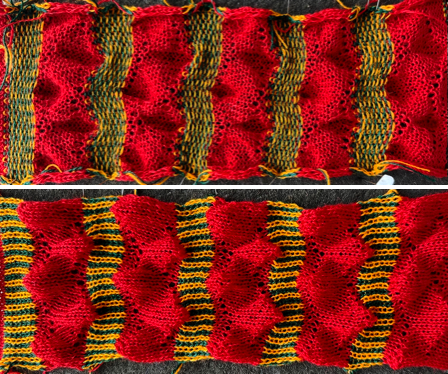
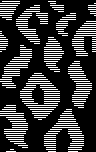
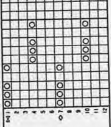
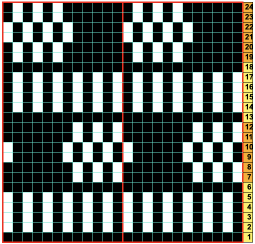
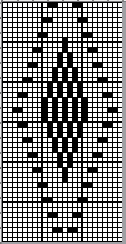
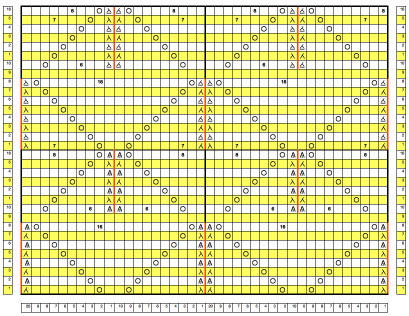
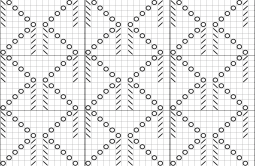
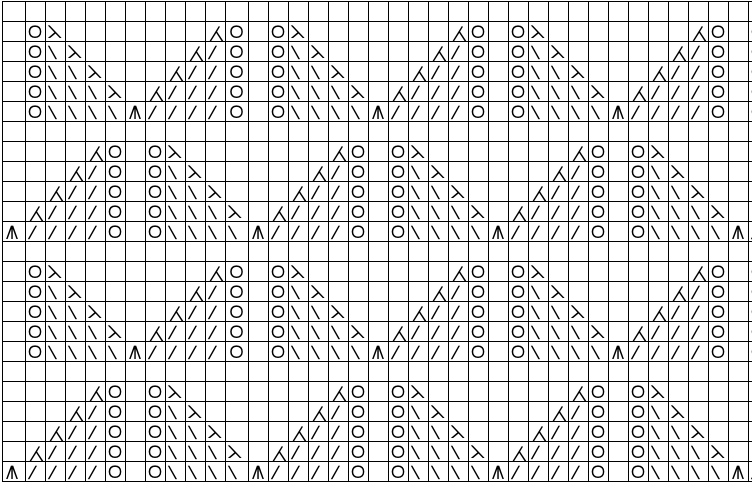
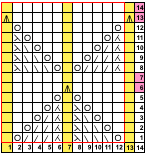
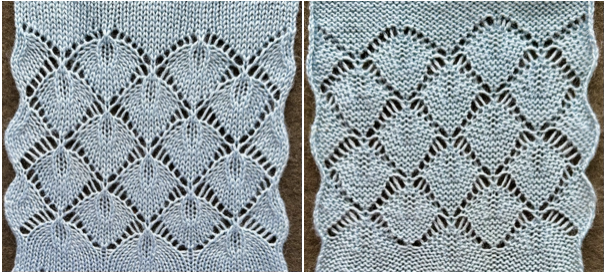
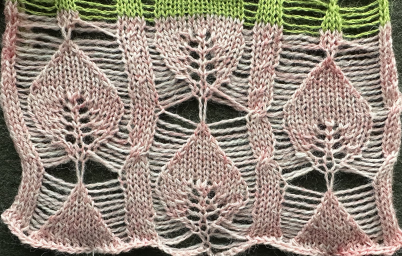
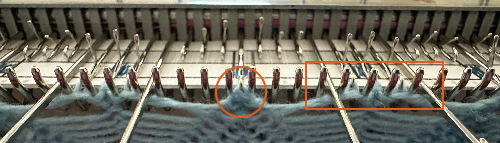
Returning to designing suitable repeats, beginning in a spreadsheet: grey vertical lines represent stitches on the ribber, which will force apart stitches created on the top bed forming the more familiar tuck rib surface. Mac Numbers offers the opportunity to hide either/ both columns and rows. In this instance, with the 10 grey columns hidden, one begins to get the sense of shapes and movements needed on the top bed 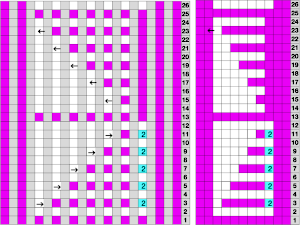 Working toward a repeat for knitting the shapes in a single color, imagining the location of eyelets resulting from stitch transfers,
 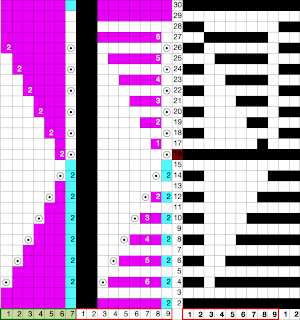 I used two repeats, adjusting the first one to vary the resulting shape slightly
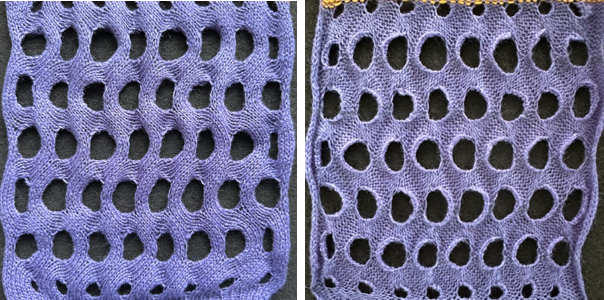
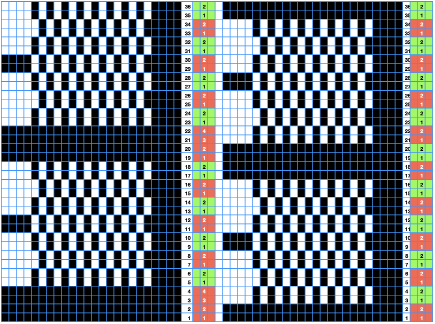
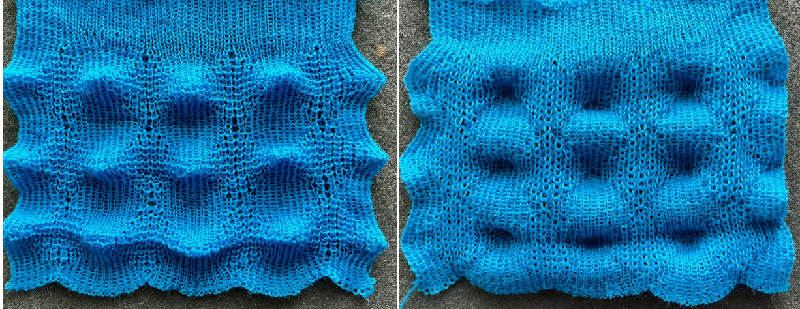
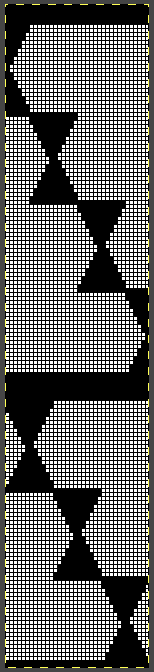
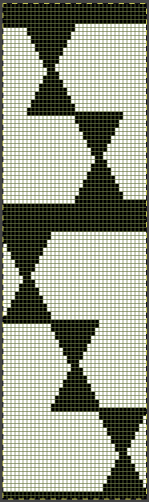
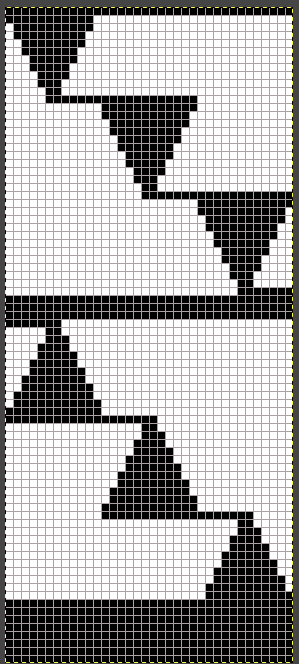
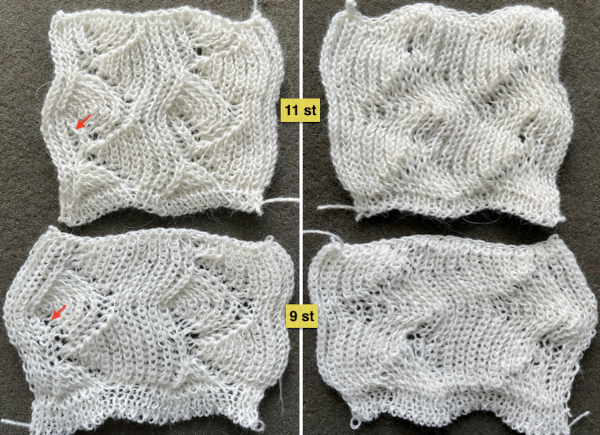
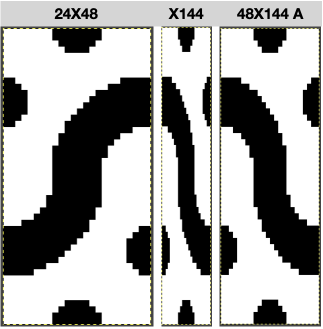
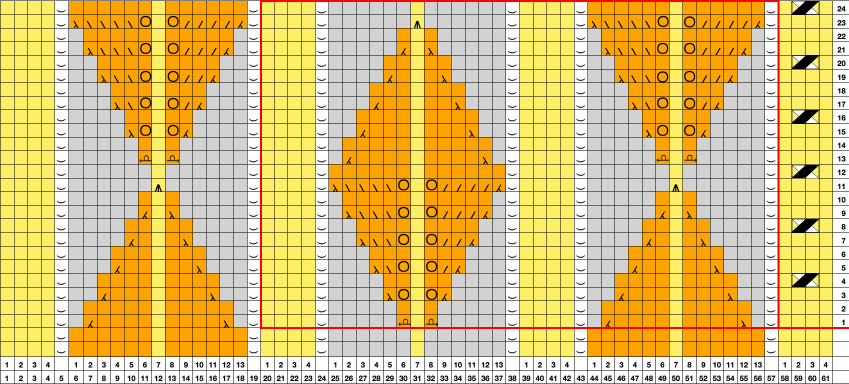
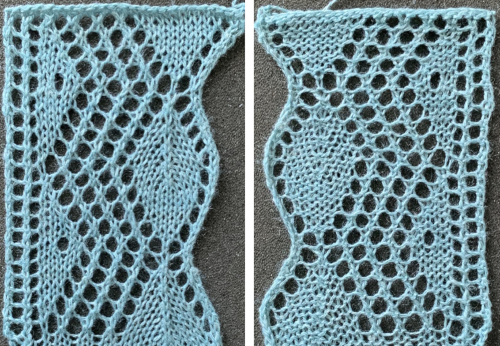
 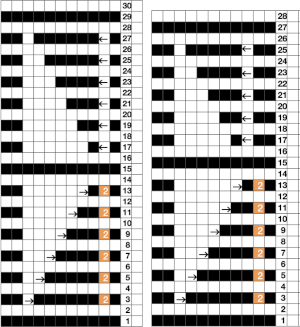 A 11X30 repeat mirrored horizontally for use on my 930, tiled twice horizontally before programming and downloading, used as a 23X30 single motif to obtain a matching border on each side,
 ![]()
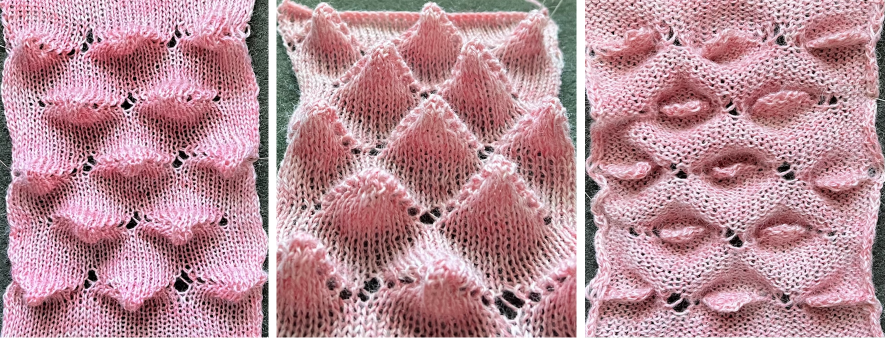
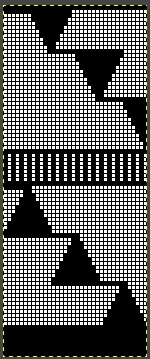
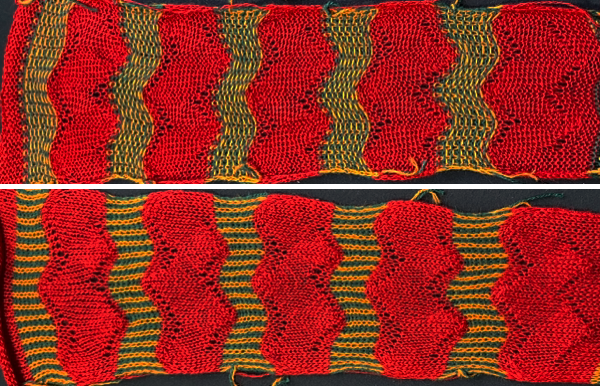
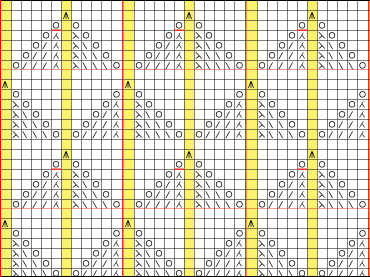
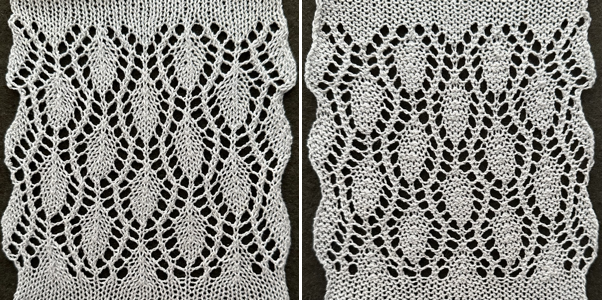
 A 9X28 repeat, my second try, programmed as a 20X28 single motif,
 ![]()
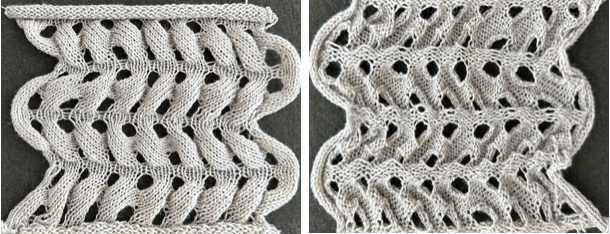
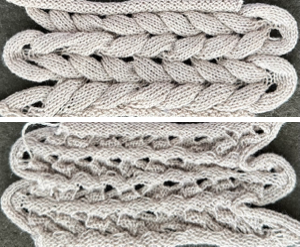
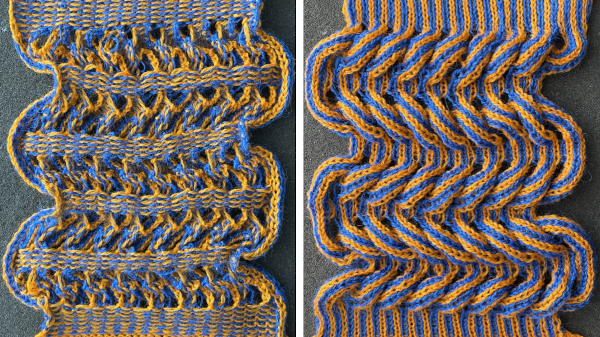
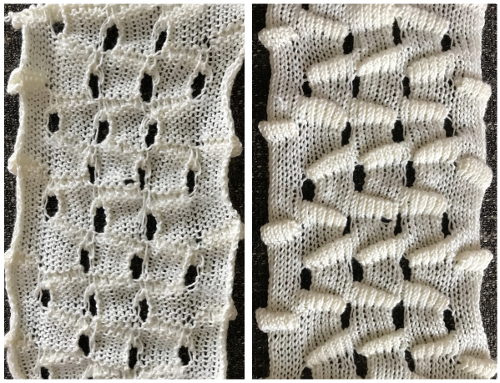
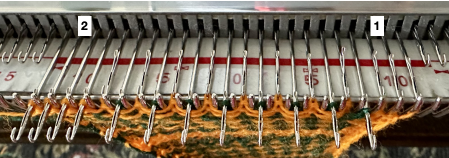
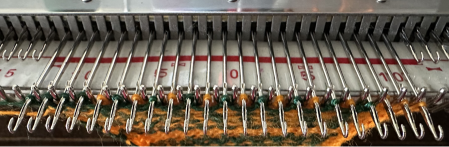
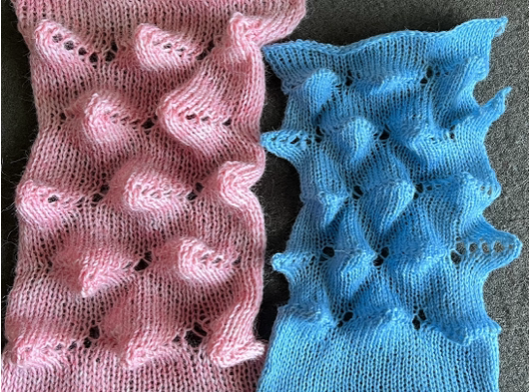
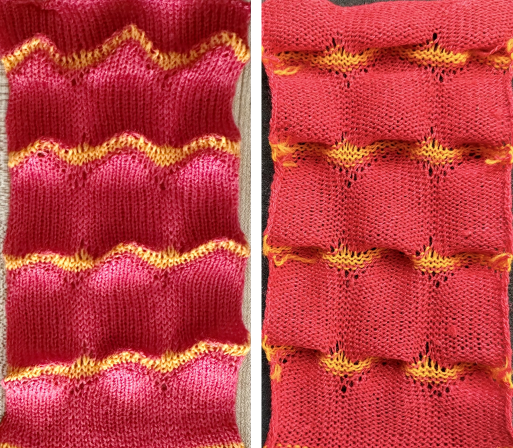
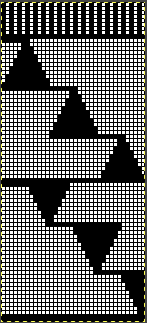
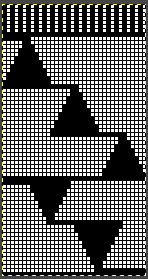
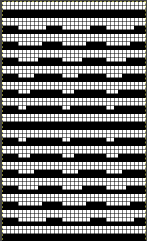
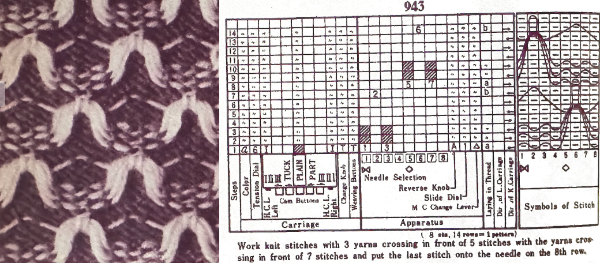
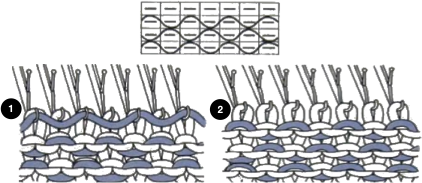
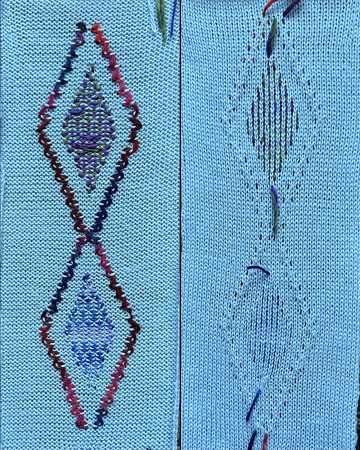
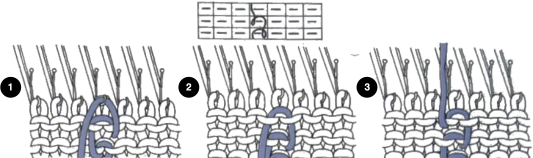
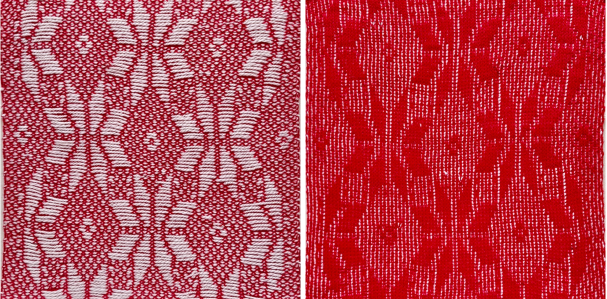
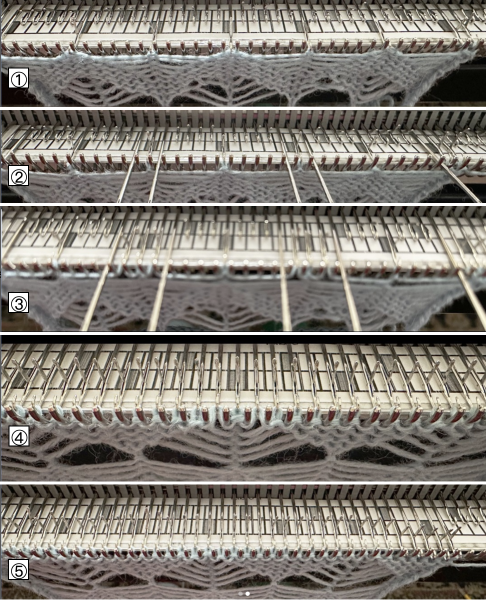
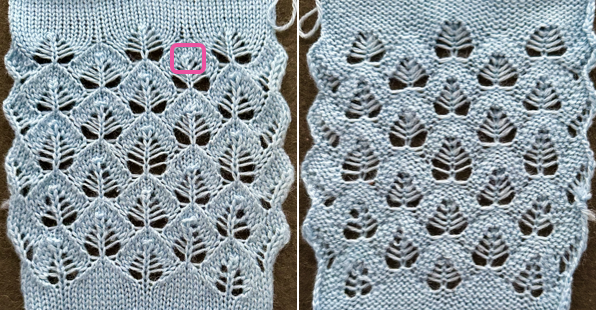
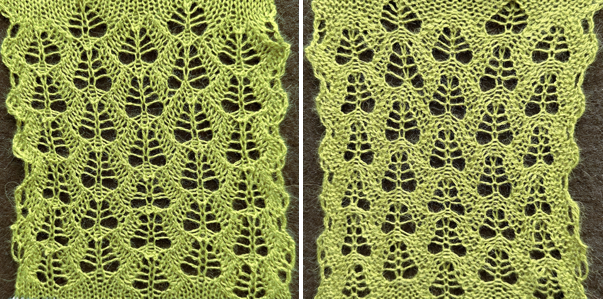
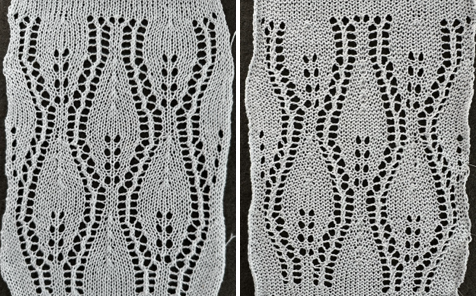
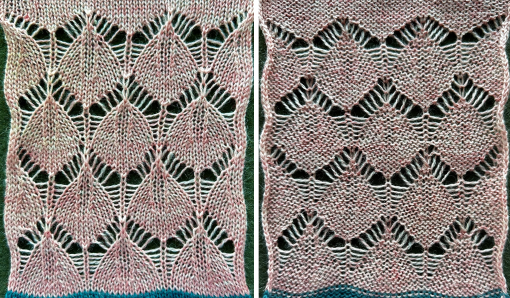
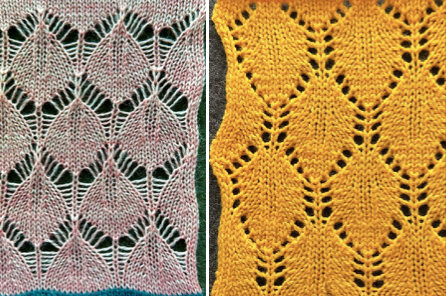
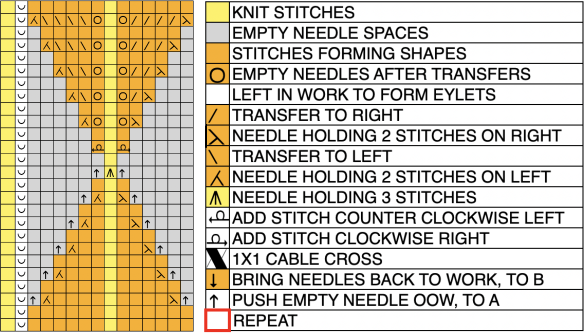
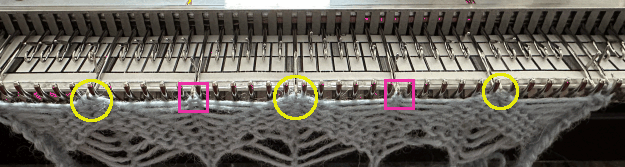
 As described in previous posts, in knitting using only one color, the machine is set with the main bed tucking on every needle in one direction, followed by knitting on every needle as it returns to the starting side, the ribber does the same but in the opposite direction. It is a circular tuck, also referred to as fisherman’s rib. A slight shift in patterning may change the outline of the desired shape, requiring introducing or removing stray lines or secondary shapes.
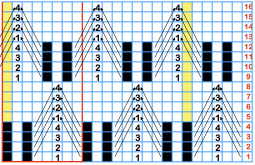
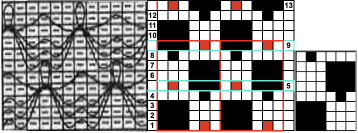
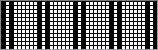
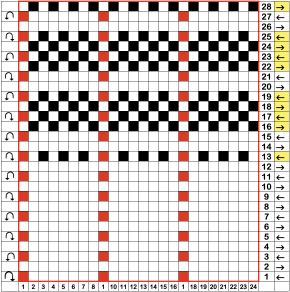
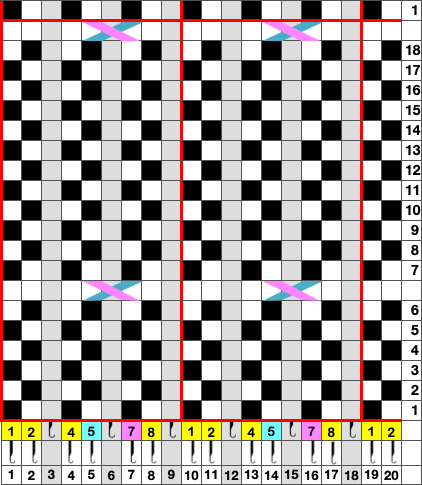
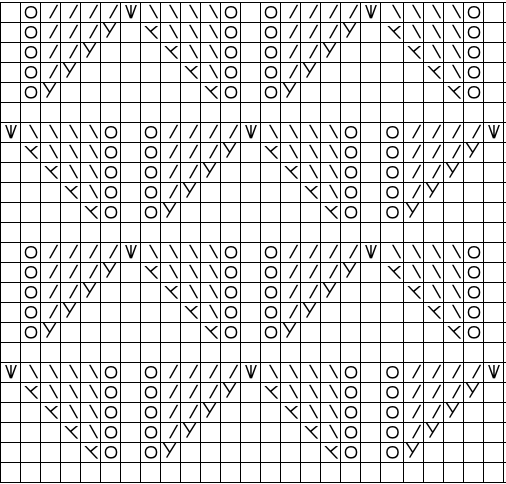
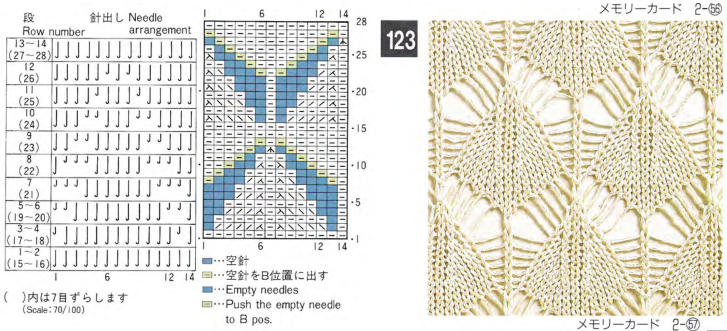
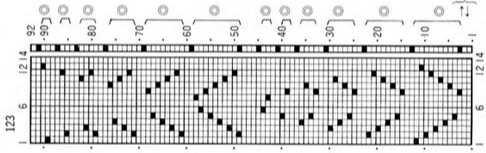
The cam setting options: 
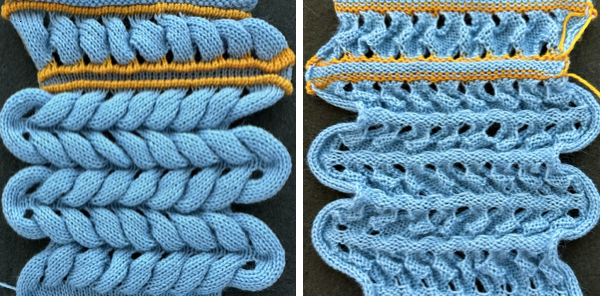
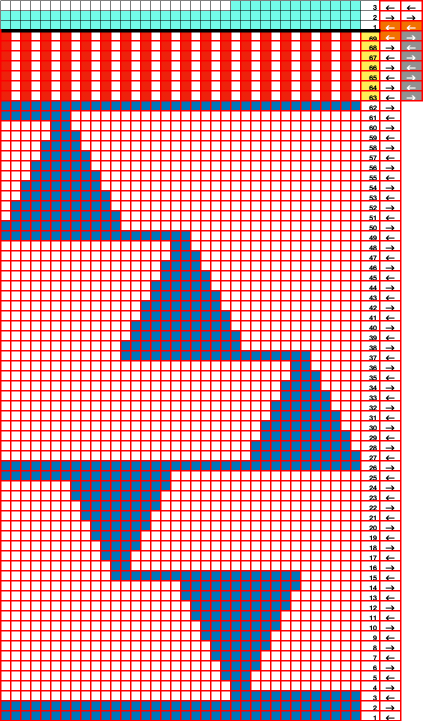
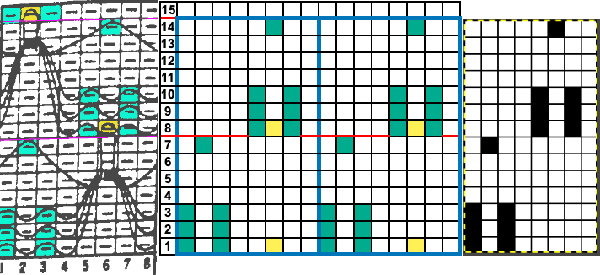
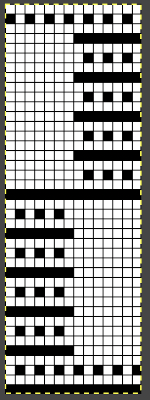
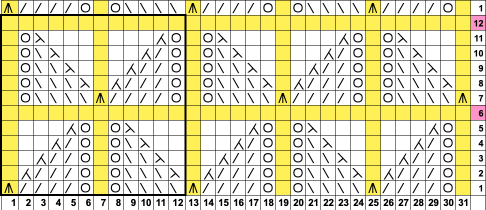
 In a two-color brioche, when no needles are selected on the top bed (white squares), the top bed will tuck every needle; the ribber is set to knit.
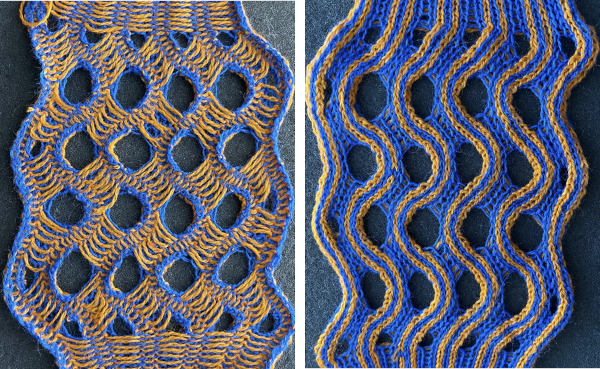
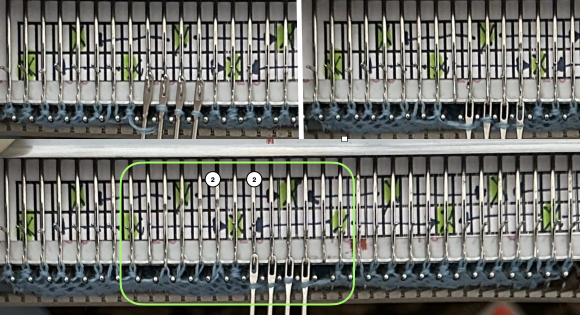
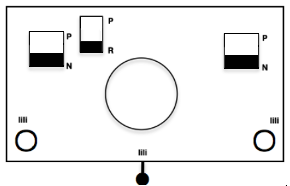 When needles are selected on the top bed (black squares), the ribber is set to tuck in both directions.
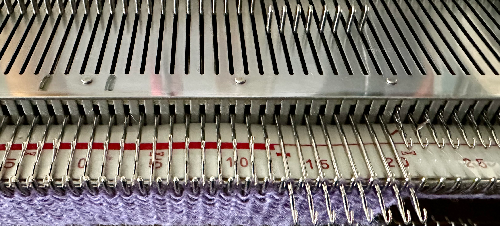
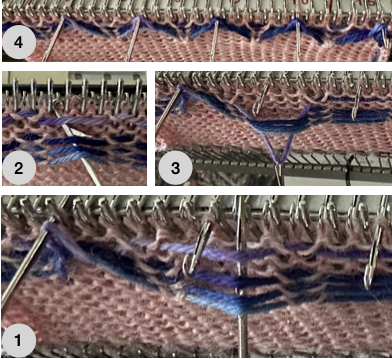
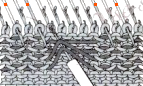
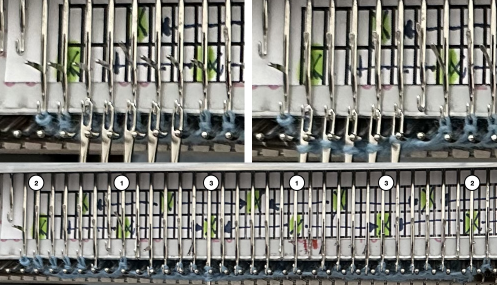
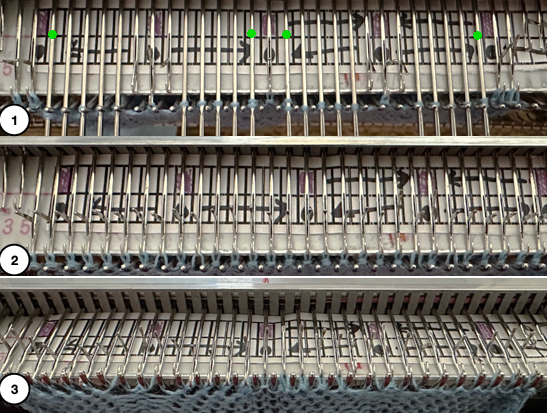
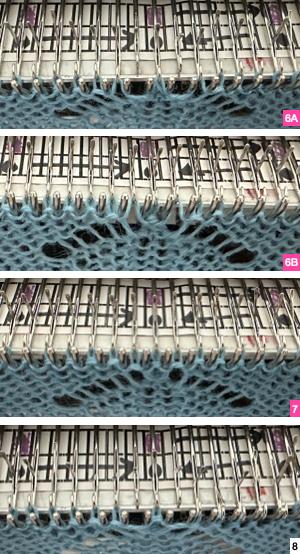
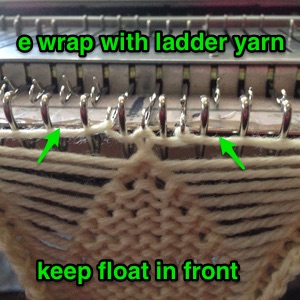
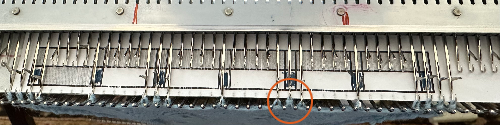
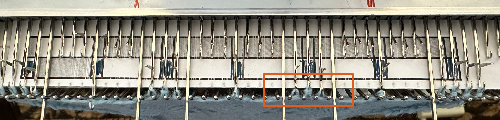
  Brother preselects needles for the next row to be knit, on rows with partial selection and some needles in the B rather than the D position, with an appropriate transfer tool, move the stitches on the non-selected needles to the adjacent selected needles to their right after pushing it (them) back to the B position.
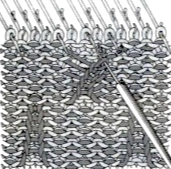
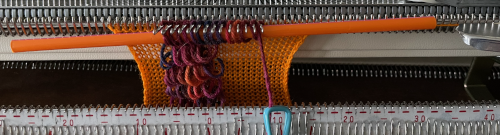
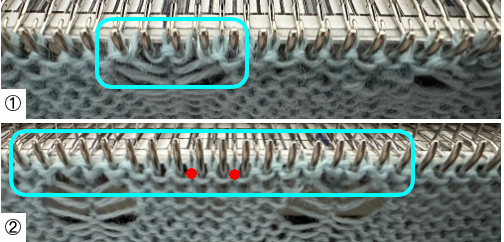
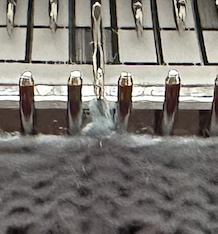
After each transfer, push all needles involved in the transfer and the now empty needle to the E position.
As the carriage returns to the opposite side an all-knit row will be completed. Several tension adjustments may be needed to ensure loops are not hung up on gate pegs as stitches move across the bed, while still being loose enough to knit off properly.
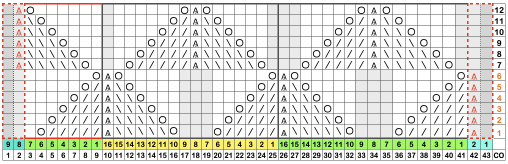
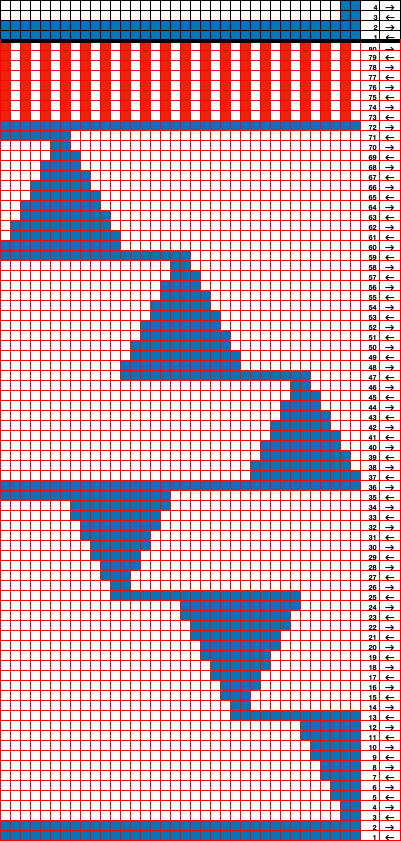
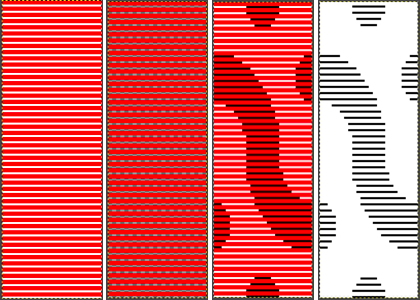
A first repeat, plotted in a spreadsheet including borders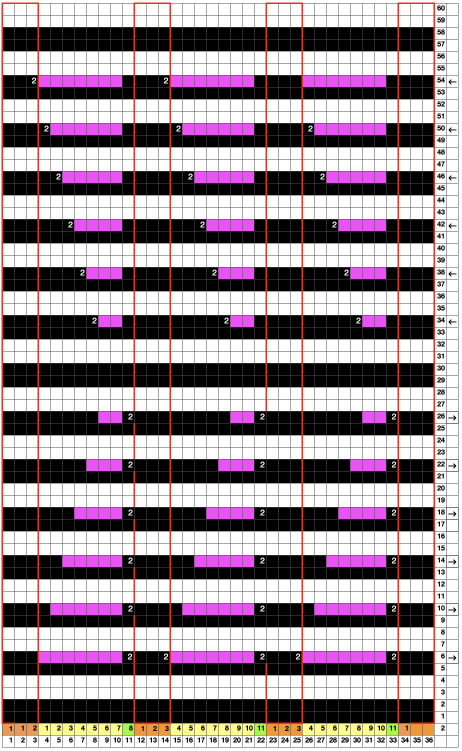
![]()
 Here groups of columns are eliminated to bring the shapes close together
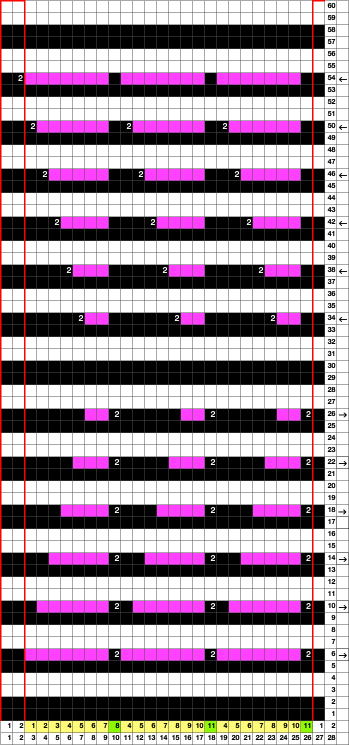
![]()
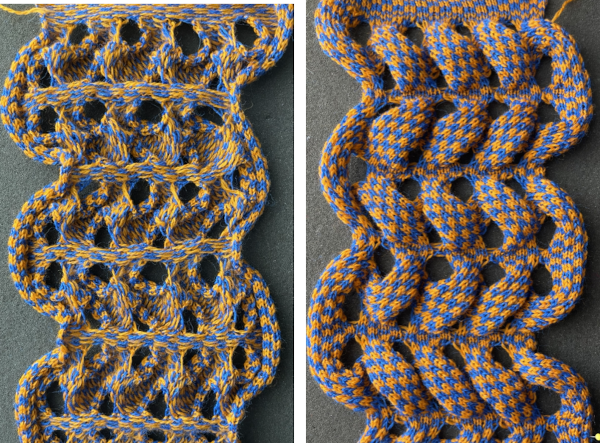
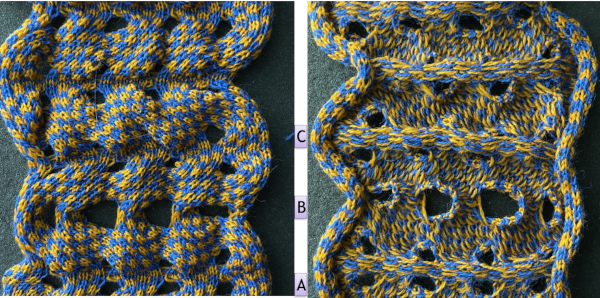
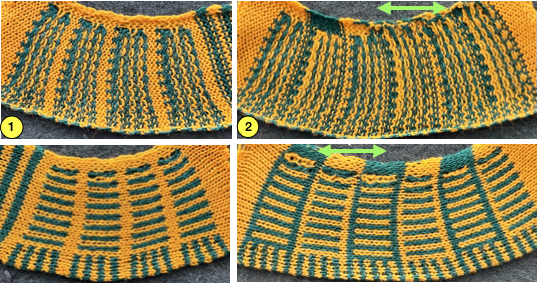
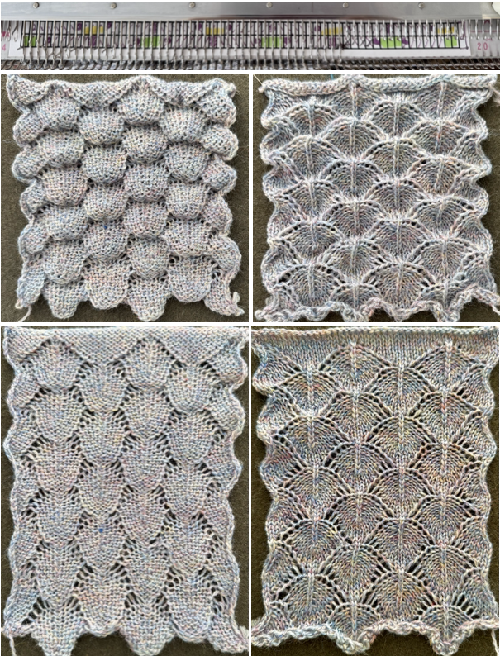
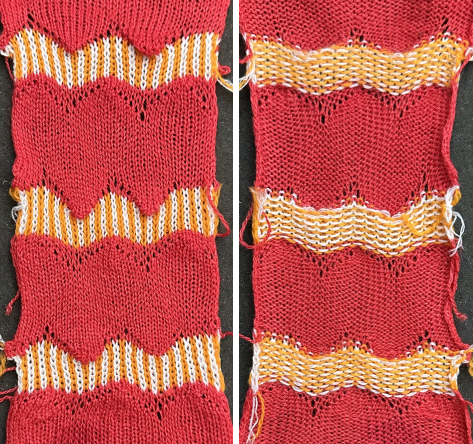
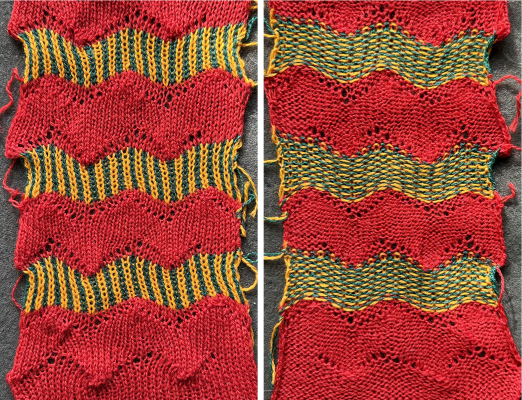
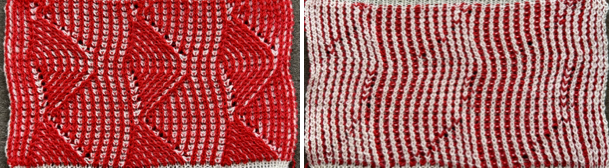
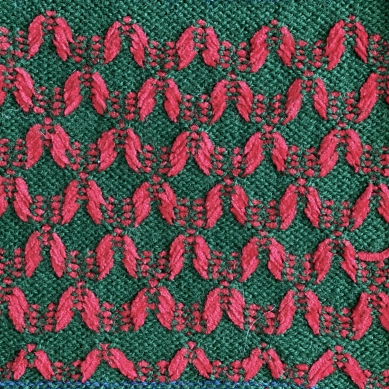
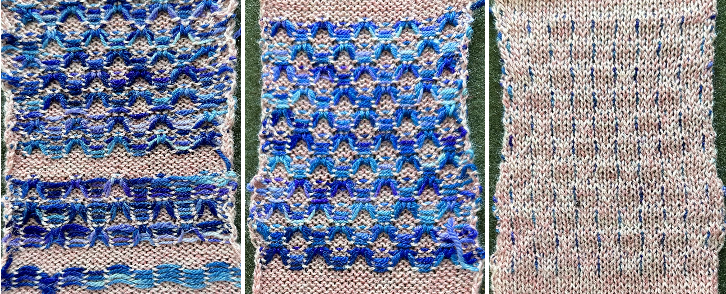
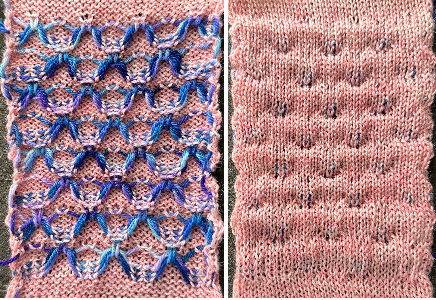
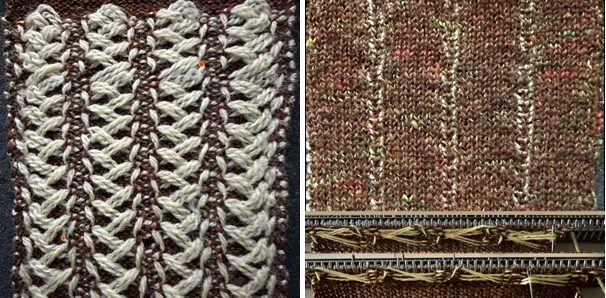
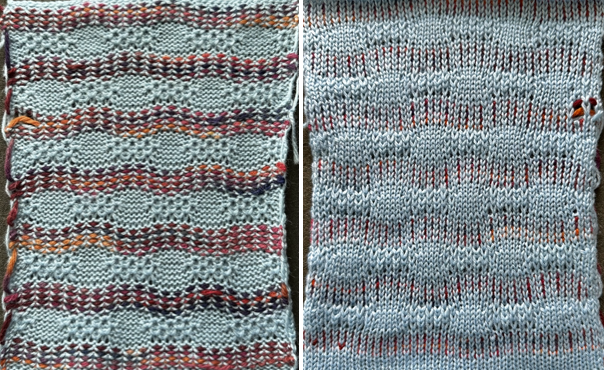
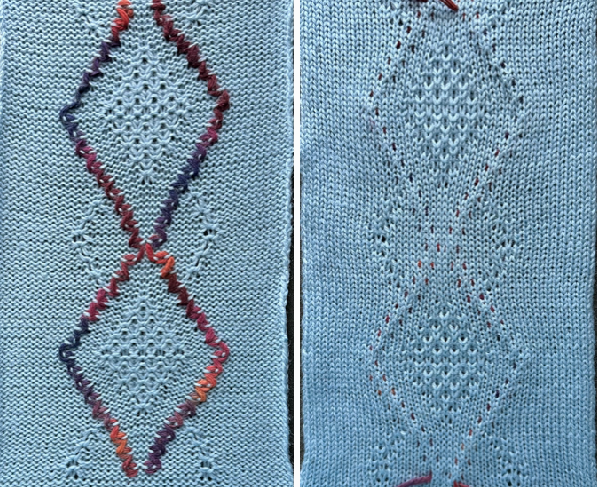
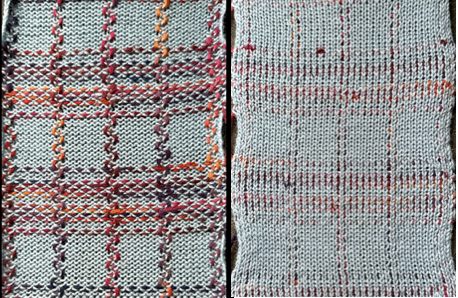
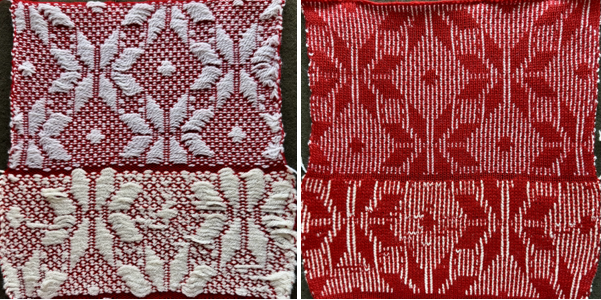
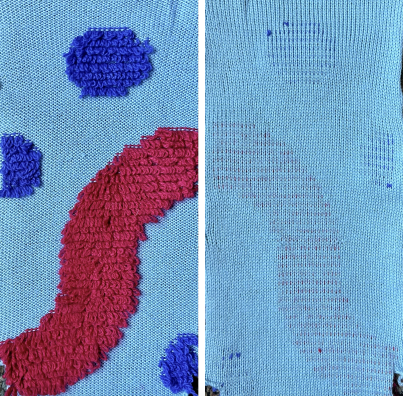
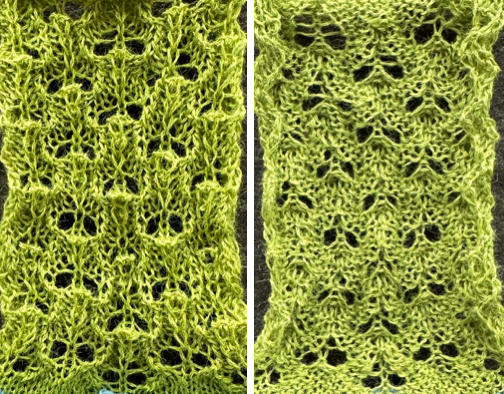
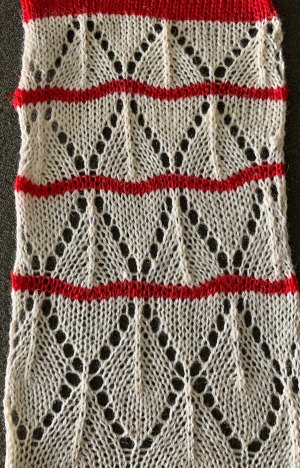
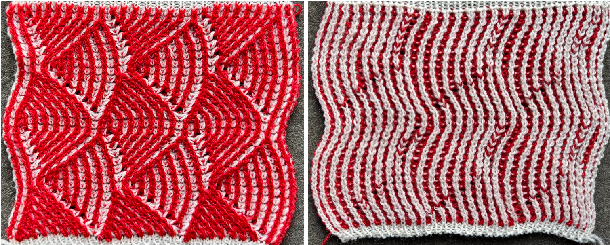 The yarns used are white 2/15 and red 2/10 wool. The latter is coarsely spun and tends to split and occasionally not properly knit off, resulting in the specks on the white columns on the reverse, making it a poor choice for final projects.
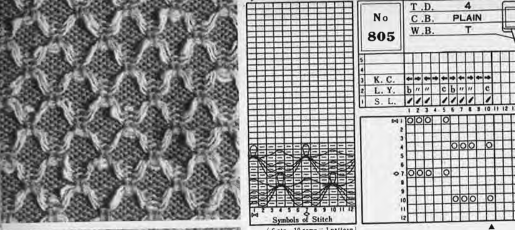
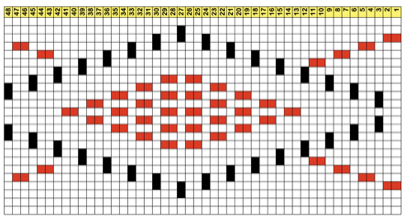
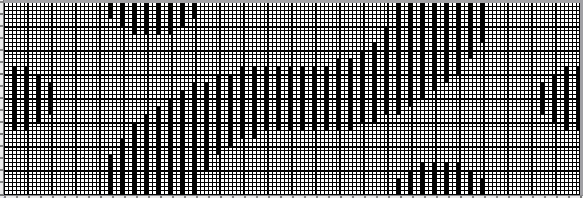
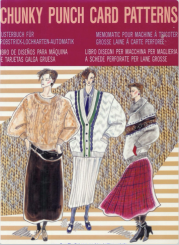
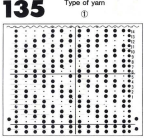
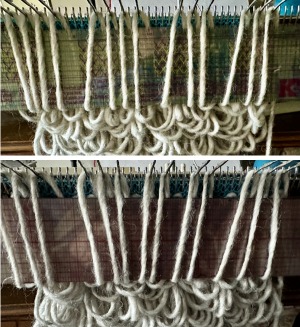
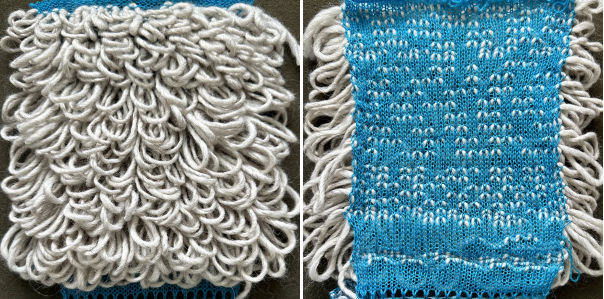
Studio/Silver Reed machines published some designs for pile knitting in their punchcard volume 
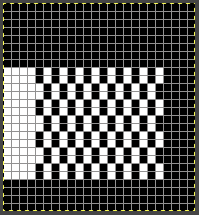
The inspiration page 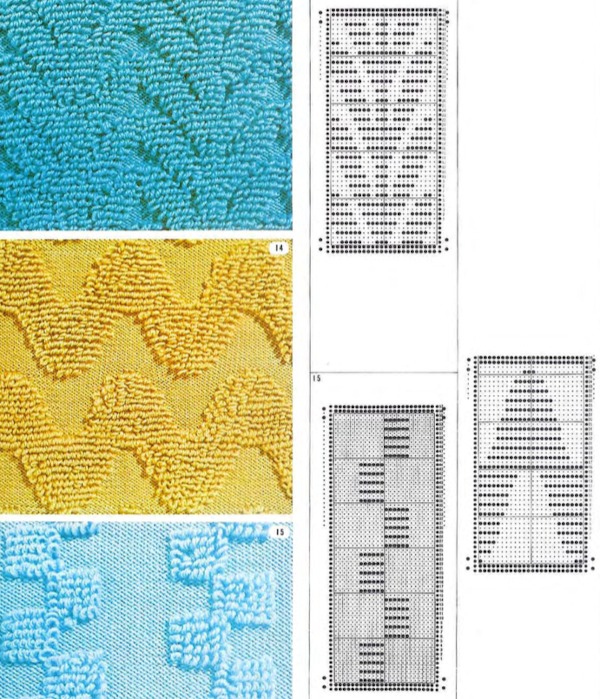 The #14 24X42 repeat
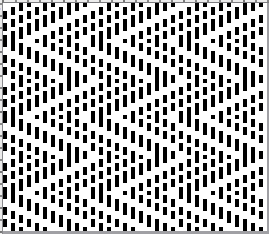
 ![]() used in this sample was color-reversed before being downloaded to the 930
used in this sample was color-reversed before being downloaded to the 930 ![]() checking tiling
checking tiling 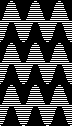 punchcard machine users would punch all black cells.
 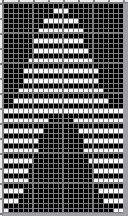 The pattern is worked with end needle selection canceled, the knit carriage is set to tuck in both directions and the ribber carriage to knit in both.
The first and last needles in work are on the ribber bed. 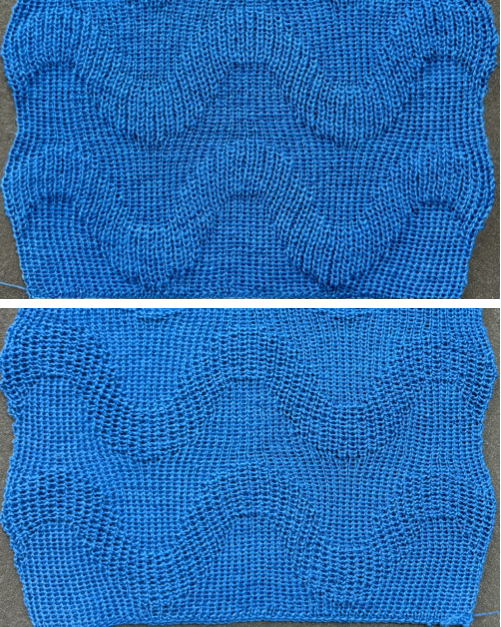
The #13 design, is composed of 24X16 segments ![]() repeated X2
repeated X2 ![]()
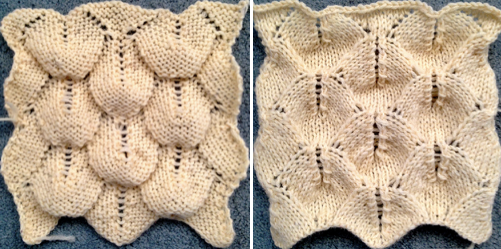
The 16X32 rendered double length to 24X32 ![]() was used to knit this slip-stitch double bed fabric
was used to knit this slip-stitch double bed fabric 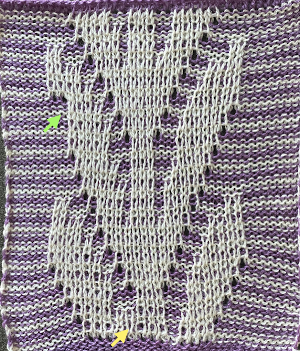 The 24X16, file color was reversed
 ![]() and this 26X32 file added black pixels in width for more definition of the shapes
and this 26X32 file added black pixels in width for more definition of the shapes ![]()
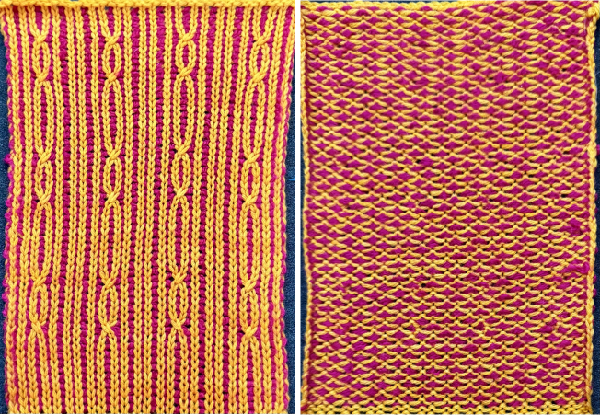
 The yarn used is a 2/20 wool, so thin that there is less definition between the two stitch types and enough open space between the stitches to show the surface beneath the swatch, which measures 13.5 inches in width, 7.25 in height
 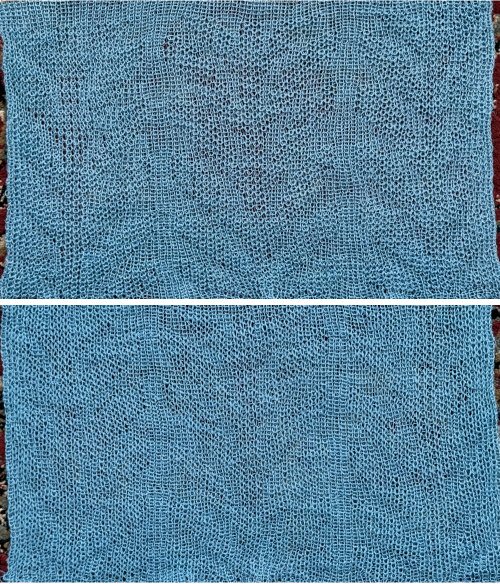 A DIY attempt at a large scale design: the 24X38 was found in Pinterest, published in 2018 and credited to a Russian site.
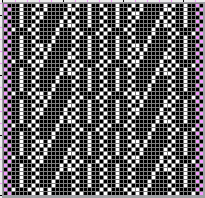
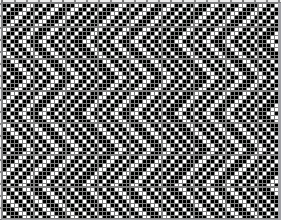
The starting design, in BW indexed mode 24X38 ![]() the tiled repeat results in a horizontal striping
the tiled repeat results in a horizontal striping 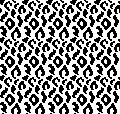 24X38 scaled in Gimp X4 to 96X152
 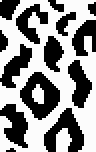 Mode >RGB
open a new file, in this case, 8X2 using a color and white
white color to alpha, ![]() copy to clipboard to use it as a brush
copy to clipboard to use it as a brush
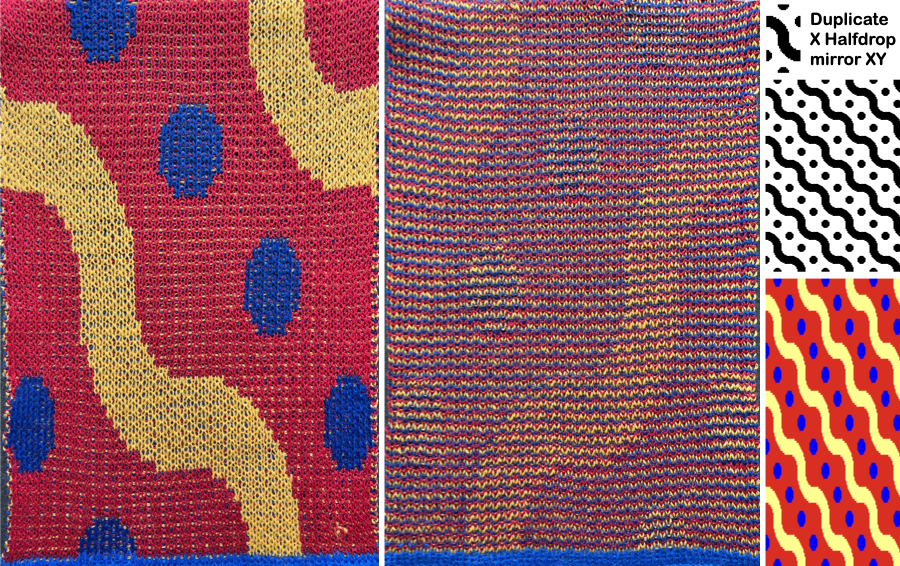
bucket fill the first image with the pattern 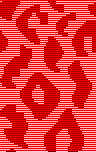 click on the select by color tool, click on the red, and use the bucket fill tool again, making certain that the background or foreground colors are selected, not pattern fill
 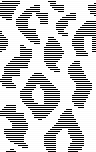 click on the rectangle select tool and back in the work window to fix the layer, Mode >BW indexed, color invert the result for knitting using the tuck double bed setting
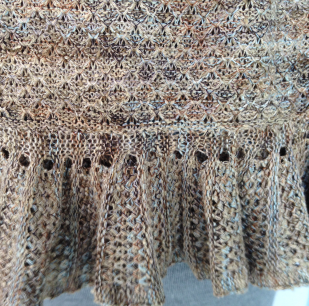
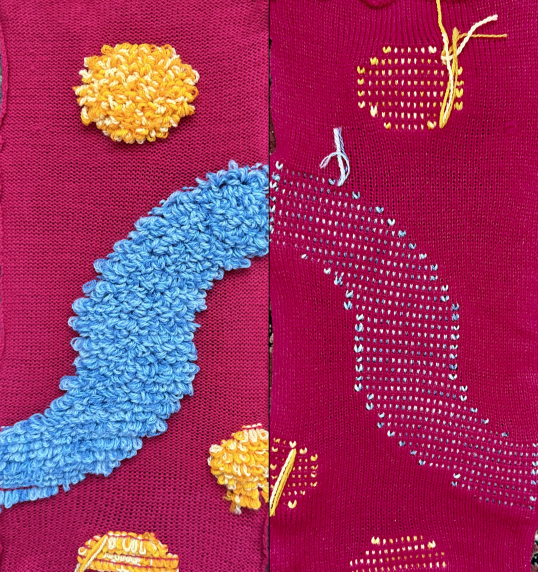
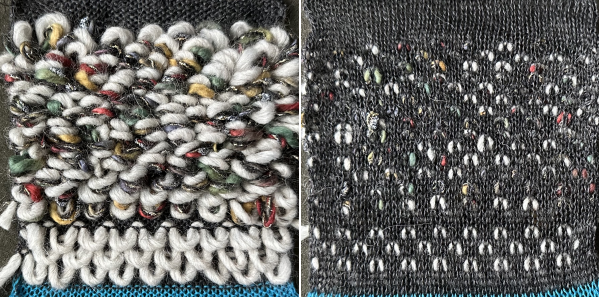
 The yarn used in this swatch is a 2/20 coarse and unevenly spun wool, which leads to the variable moiret-like bleed-through of the fabric colors behind it.
  The same yarn was then used double-stranded. Some spots were harder to knit than others due to changes in ply quality resulting in snags in texture as well. The shapes are more clearly defined, the largest shape measures 7.5 inches of the 11-inch swatch width and 3 3/8 inches in height.
 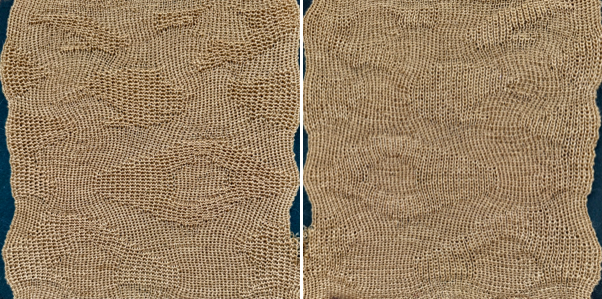 This swatch began with a 25X25 pixel file, processed in Arahpaint
 ![]() drawn in repeat using the random >preview option until a final version was chosen
drawn in repeat using the random >preview option until a final version was chosen  and rendered double-length. Brush fill was used to expose every other row, and the resulting 75X150 file
  was color-inverted for use with the tuck setting
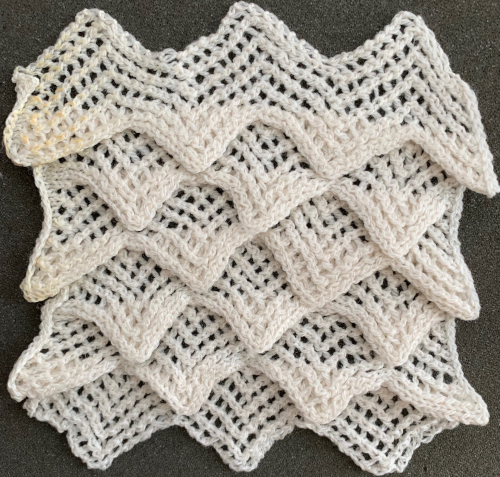
 These knits produce a subtle texture easily on both sides and lie flat.
This design is not suitable for this exercise but is another illustration of the horizontal/vertical striping that can happen when large-scale designs repeat proving the need to tile the patterns before knitting them to visualize whether they meet one’s personal preferences
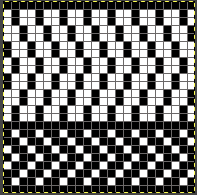
71X64 

Using programming with punched holes or pixels in other ways:
Using punchcards (3) or electronics to track small cables in pattern
Using punchcards to track cables and twists in pattern 2
Using punchcards to track small cables in pattern (1)
Unconventional uses for punchcards 3: lace in rib
Unconventional uses for punchcards 2: thread lace cards for filet mesh
Unconventional uses for punchcards 1: tracking racking positions in ribbed fabric


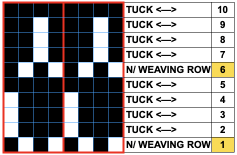
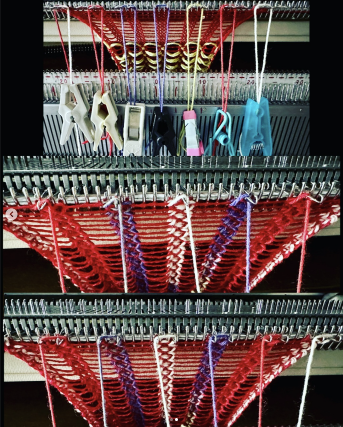
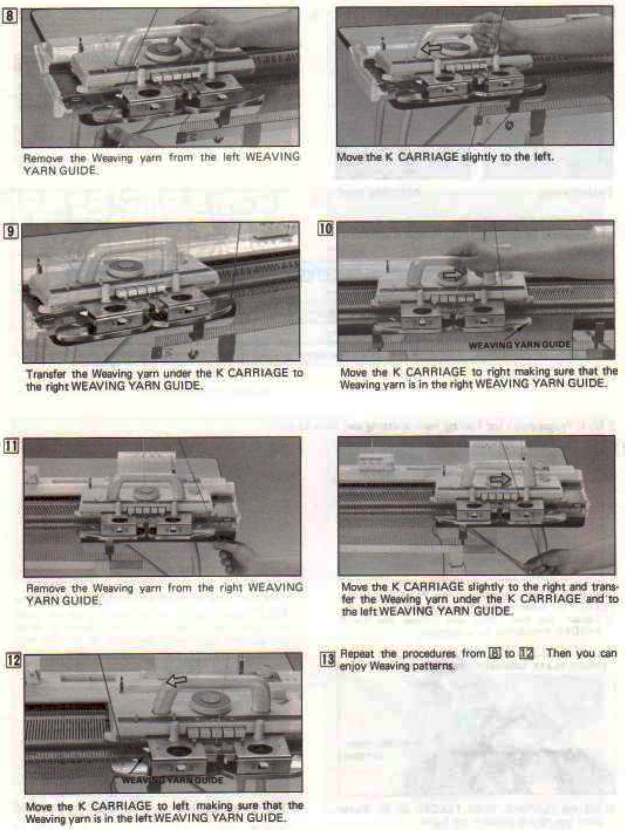
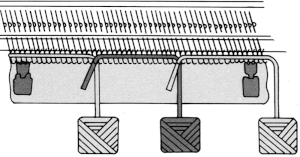
 Altering the repeat while planning on cam settings to be changed every even number of rows also brings the possibility of using 2 carriages in electronic models, with one set to tuck in both directions, the other to normal knit (no cam buttons) but with needle selection for weaving rows, KCII
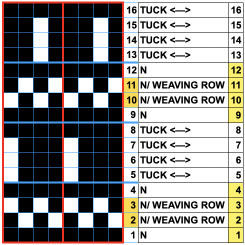
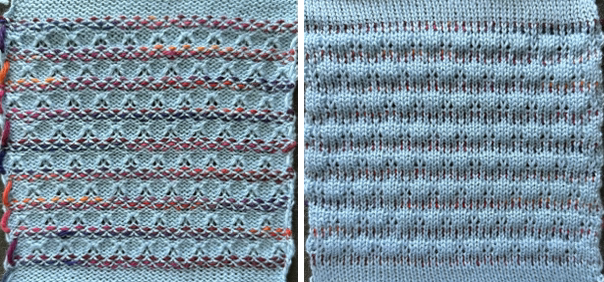
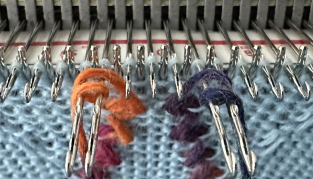
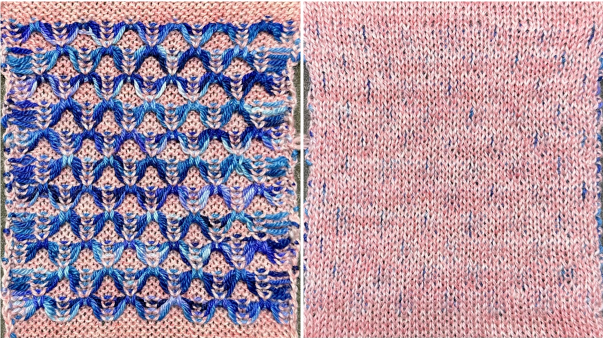
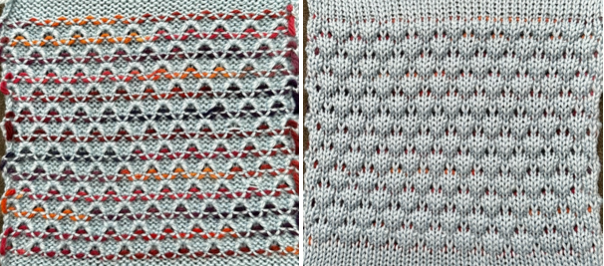
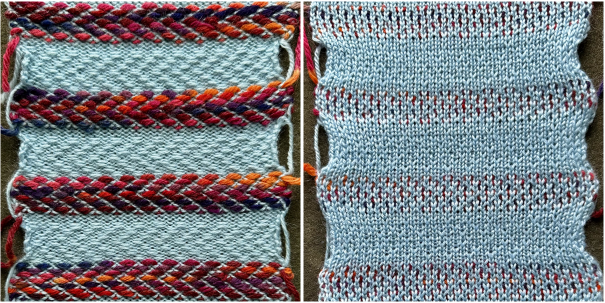
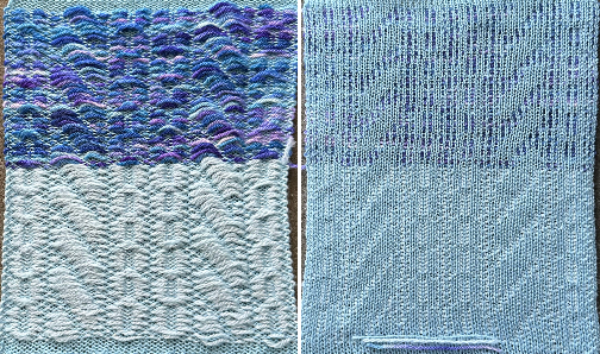
 In this sample with horizontally woven rows, the ground yarn is a 2/20 wool, the weaving yarn a space dyed sock yarn resulting in random color blocking. Relaxed the knit resembled shadow pleating, here it is shown after pressing and steaming
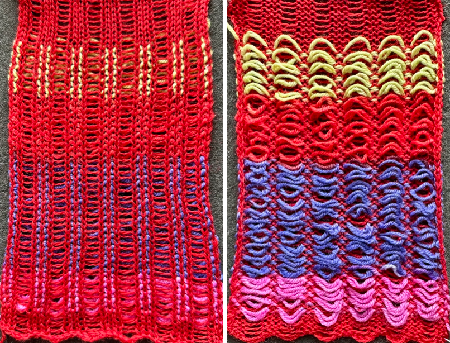
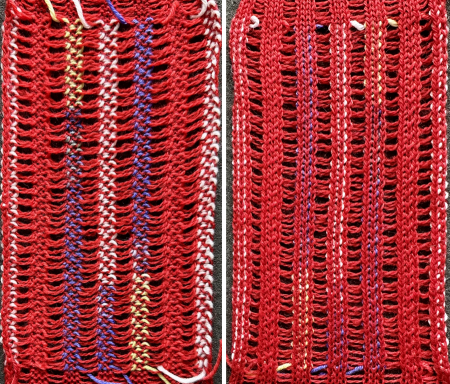


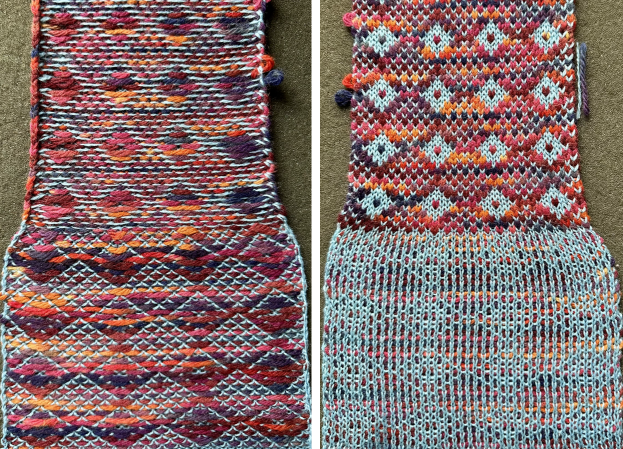


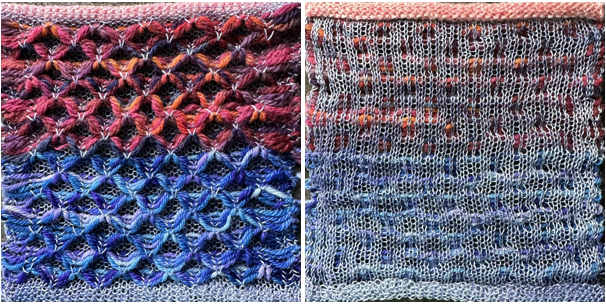
 and this, with both patterns shared in the same blog post