Added explorations of the Smith tiles.
Most common knitting machines capable of accepting electronic pattern downloads have a number of needles ranging between 180 and 200 on either of the available beds.
Punchcard machines have a 24-stitch constraint in width for repeats that are selected in fixed locations on the top bed, while height row counts can be endless if one keeps joining punchcards together.
The narrow repeat width does not allow for impactful tiling such as seen in the truchet variants.
A 24-stitch initial repeat can be created, but will not align properly ie. here:
the 24X56 png, ![]() colored in and repeated in width and height X3.
colored in and repeated in width and height X3. 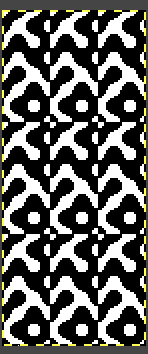 It can, however, be drawn in repeat using ArahPaint to produce a new and successful design repeat ie this 48X112 pixels version
 ![]() and its appearance in repeat on a larger canvas:
and its appearance in repeat on a larger canvas: 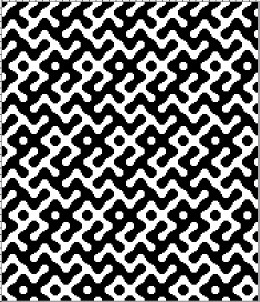 Electronic machines can be used to knit large, non-repetitive designs based on the number of needles available on their beds.
Unless knit-from-screen software is used, the size of the files downloaded to specific machine models varies depending on both the software used and the knitting machine’s available memory.
One of the issues using online generators as seen in the previous post is that the files tend to be high in pixel counts and rendered in RGB mode.
Changing image modes to BW indexed and scaling the large design to a smaller version have an effect on the edge definition of the shapes and are likely to require clean-up to remove or add pixels.
Beginning with small and clearly defined forms, tiling repeatedly to larger ones will allow for results that can be cropped to specific sizes with clean edges along the secondary shapes.
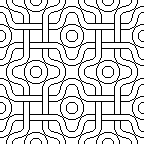
Beginning the proposed method with the Smith tile, a place to start is to choose the smallest successful circular forms.
The repeat works using quarter squares, so the file size needs to be an even number of pixels in width and height.
Getting a sense of the appearance of the edges of small circular shapes, with the intent of choosing one for fabric development, beginning with an 8-pixel diameter, and increasing it in turn by 2 pixels at a time to 20.  The 8-pixel circle is chosen for this exercise.
Following the steps outlined by the developer in the video viewable on Instagram and Facebook, open a new picture, and set the image size to 8X8 pixels 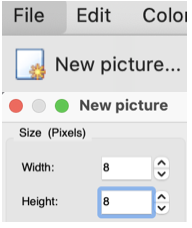 The goal is to create a clean design outline forming shapes that may be filled in to yield the secondary tiling designs.
To zoom in or out in ArahPaint: use Shift+ or – on Mac, click on the magnifying lens icons in the toolbox,  use the command key and roll the mouse wheel or scroll along the vertical center line of the mouse, or press any number from 0-9 on the keyboard to change zoom directly to that level (1 means 100%, 6 means 600%, O means 1000%).
In RGB mode even if the shapes are drawn in black, when converted to indexed BW some pixels will be lost. If any lines are broken, control in using the bucket fill tool on only selected areas is lost.
To begin with, set the number of colors and the pencil size to one pixel 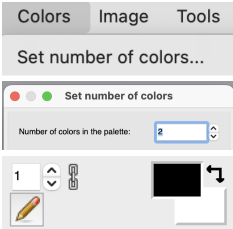 Use the draw circle tool, and select drawing from the center
 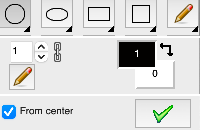 Draw a quarter circle starting on the bottom right of the square, and ending in the center of this image. In this case, there will be 4 white pixels on the left of the line, half the diameter of the planned circle. Click on the pencil tool to set the image.
 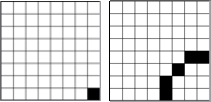 Repeat the Process, drawing a mirrored image beginning on the upper left pixel position, and ending in the center of the image as well
 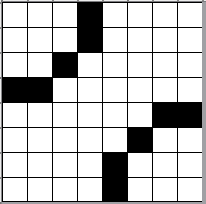 Open the drawing in the repeat window
  and set the number of repeats vertically and horizontally, done here first in standard alignment. Do not click on random, select new picture, OK. If satisfied, save the png.
  Undo may be used to revert to the original file unless new picture was left unchecked.
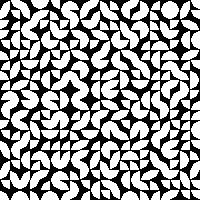
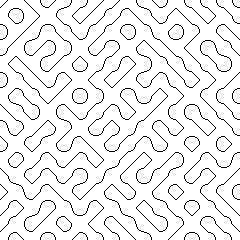
For the Smith tile repeat, do click on random to apply different rotations of the repeat.
Load the 8X8 file
Zoom out to check the pattern and view changes adequately
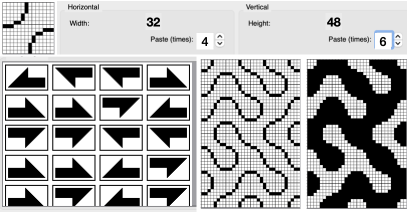
Open the draw in repeat window
Click on random, and the proposed rotations will appear as symbols, 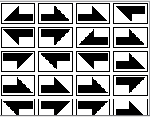 click on new picture and then on OK to view the result, a file that will now be 32X48 pixels. The result can be saved.
 ![]() To preview other arrangements:
To preview other arrangements:
choose undo, return to draw in repeat, random, preview, and with each repeated click on random a new image will appear on the screen. ![]() At any point select a new picture, OK, and save the result.
At any point select a new picture, OK, and save the result. ![]() The final png for test knitting for my test swatch
The final png for test knitting for my test swatch ![]() Its segments bucket filled with black
Its segments bucket filled with black ![]()
 If bucket fill fails selectively and floods the whole image, return to drawing in repeat and click on close. Return to the image and continue the fill-in process.
Developing a larger repeat to select an area of interest while keeping in mind the maximum needle width of 200. This repeat is perhaps usefully cropped to blanket size. 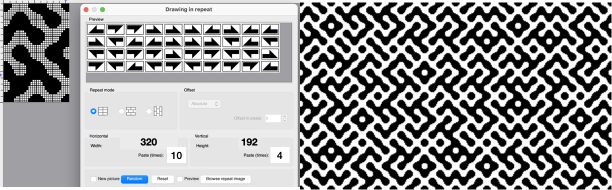 Seeking a shorter and narrower motif for a scarf, in the range of 60 to 100 pixels in width that may not require too many tracks when programming the 930, the same 32X48 design is drawn in repeat X4 in width, X2 in height to 128X96 pixels.
 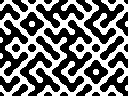 The above is split directly in half vertically for this exercise, rendering two files, each composed of 64X96 pixels. The left half,
  and the right
  Checking vertical alignments
 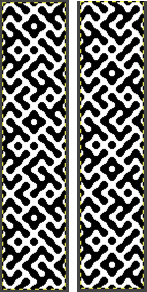 and committing to the one on the right for the test swatch, knitting on 60 stitches for 120 design rows, using KCI, and starting with dark color from left.
 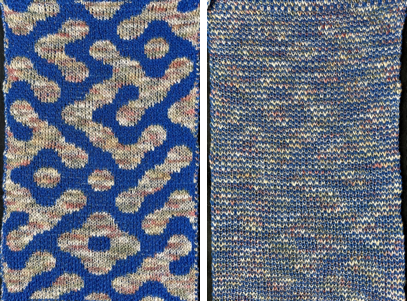 That shape in blue that looks almost rectangular is actually not quite circular in the repeat, seen here color-reversed on the bottom right, with the definition also slightly lost in the knit due to the stitch size and birdseye stitches twist.
  Comparing the 3 swatches in scale and shape definition:
 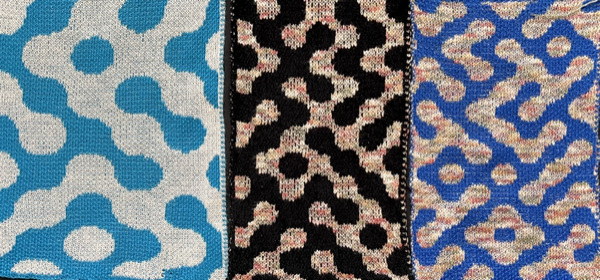 A tiny repeat formed with a thicker line
![]() Drawn in random repeat
Drawn in random repeat 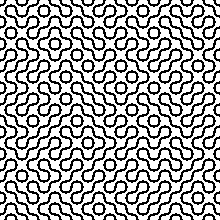 Dividing shapes into symmetrical segments is easy after configuring grid properties, in this case into thirds
  12X12 in repeat
  adding an outline to change the weight of the lines by a single pixel all over without using more specific options
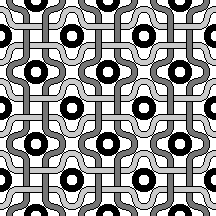
 Using the filled in double circle
  18X18 repeats
 ![]()
![]() drawn in repeat
drawn in repeat 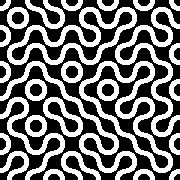 While the definition of true circular shapes may be an issue for some when knitting the Smith variant, others may enjoy variations made by playing with other shapes and angles, here a 16-pixel square was divided into quarters
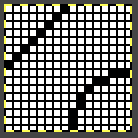
![]()
 adding a single pixel contour
  combining quarter circles sith full squares
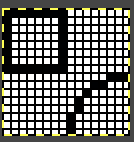
![]()
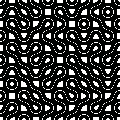
 Building larger repeats with interwoven intersections
 ![]()
![]()

 Playing with adding colors. In many instances when tiles are drawn in repeats requiring rotations of the original file, coloring in needs to be done after the final image has been composed.
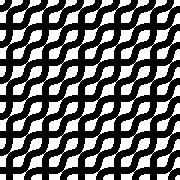
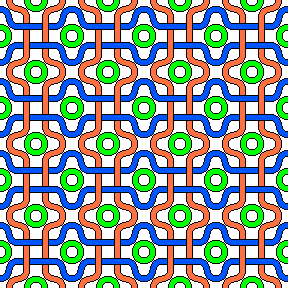 Color exchanging fine black outlines to white, or filling the white background with black in order to reduce files for knitting no more than 3 colors per row.
 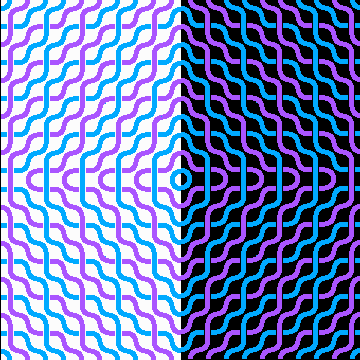 The more complex designs become exponentially larger, require electronic downloads, and must meet the limitations of machine memory. The maximum equivalent for pixel per stitch is 200 pixels in width on 4.5 mm knitting machines, and 180 for Passap, with the possibility of separating the width and length into panels for large pieces ie tapestries, or blankets. Long vertical design segments, depending on their height, may also need to be separated in steps for programming them to produce narrow, long, pieces such as scarves or shawls.
The truchet triangles pose a different issue in knit design.
Quilters are familiar with block designs easily found in print and online that technically may be broken down into triangular blocks joined and meeting to form sharp points.  Truchet in his publication used half-square triangles
 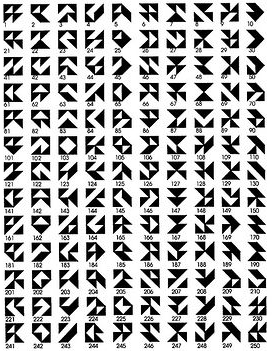 and assigned letters to the segments,
  providing alphabetical references in illustrations for the permutations,
  all far easier to achieve nowadays with the aid of software.
In ArahPaint, begin with choosing a square size, in this instance, 8 pixels by 8 pixels, matching that in the exercise using circles, and draw a triangle filling the canvas from corner to corner ![]() Drawing in repeat, the choice is made to repeat the triangles twice in both width and height, the preview symbols for the rotations of the shape are illustrated pointing in the same direction by default.
Drawing in repeat, the choice is made to repeat the triangles twice in both width and height, the preview symbols for the rotations of the shape are illustrated pointing in the same direction by default. 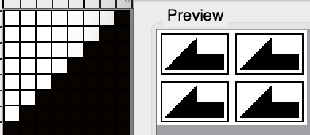 Clicking on any of those half-arrow shapes will rotate the specific shape in the tiled design, this becomes an action that may be influenced manually.
 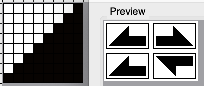 Selecting new image will render this,
 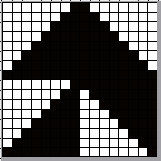 which illustrates what happens when those triangles are used in knit motif designs. Inevitably, there will be areas where corner pixels meet to join others and the choice will need to be made between using the original or the color-reversed version of the repeat.
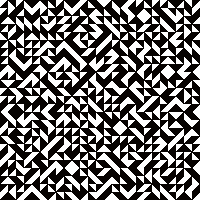
 ![]() Designing for a maximum 200-pixel design, the number of available needles on Japanese knitting machines, and continuing with random selections, paste 25 times in each direction, ultimately saving one of the new images:
Designing for a maximum 200-pixel design, the number of available needles on Japanese knitting machines, and continuing with random selections, paste 25 times in each direction, ultimately saving one of the new images:
 its color reversed version
  Deciding on the first, an isolated area can be cropped to be used in an accessory ie a 72-stitch scarf, retaining full triangles, using the full 200-pixel height.
 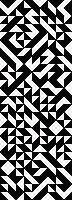 Wanting to retain a 96-row max height for use on the 930, what happens when repeats line up vertically? the isolated 72X96 design
  The assumption is that any change in vertical simple repeats will line up forming new triangles at the intersections not visually interpreted as patterning errors, the above repeated 3 times in height to 72X288
 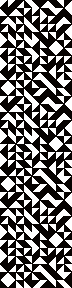 Committing to a test swatch: the wool ply is 2/13, and the space dyed rayon 20/2 and thinner in appearance. The contrast is not high, to begin with, and since the sample is knit as DBJ, as a result of the difference in yarn thickness the dark color bleeds through behind the lighter, reducing that contrast even further.
The places where the single pixels at the individual shape corners meet other shapes in the repeat can still be easily located.
The sample repeat size is 68X96 pixels, designed to include 2-stitch vertical borders drawn with dark pixels,  the knit carriage was set to KCII, which allows the formation of distinct single color edges
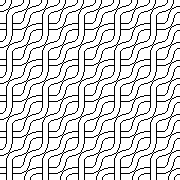
 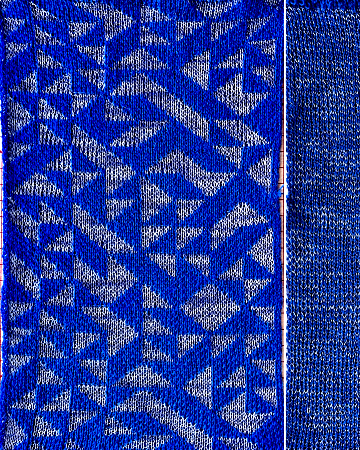 Another alternative: beginning with a 9X9 repeat,
 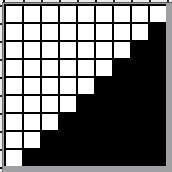 drawn in repeat to 225X225, shapes do not touch in this rendering,
  but do if color-inverted. Isolating a repeat from the “floating” triangles, 45X81
 ![]() tiled X3 to 45X243 may look ok
tiled X3 to 45X243 may look ok ![]() but aside from the issue of choosing visually floating shapes vs still touching ones,
but aside from the issue of choosing visually floating shapes vs still touching ones, 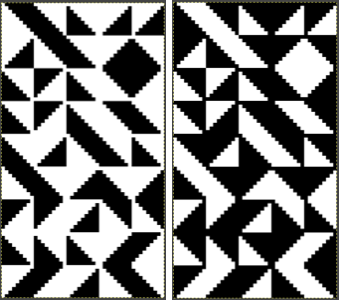 the big problem to be considered is the fact that for the machine KRC color separation to happen correctly, the repeat downloaded must be an even number of rows. A workaround may be to double the original height to 162 rows prior to programming it since one cannot use double height and KRC buttons at the same time in many machine models. Pursuing personal preferences can be endless. I am increasingly fond of the repeat that began with the 8X8 square.
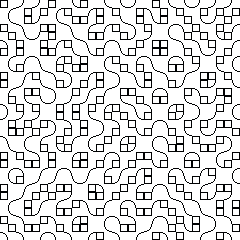
Working with quarter-filled segments: multiplied by 20 in each direction to a 200-pixel repeat. 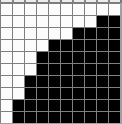
![]() Drawn using random/ preview/ prior to saving the file
Drawn using random/ preview/ prior to saving the file 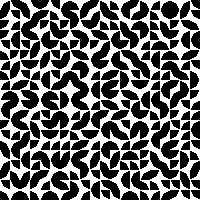 Its color reversed view