Fringes, loops, and pile/carpet knits are populating Fall knitwear runways.
Pile knitting is best executed on Studio knitting machines. Love the knit structure? find a Studio KM to borrow for the project.
Fringes are essentially long loops, and share principles with knitweaving.
Previous posts
Pile knitting on Passap and Brother KMs 4
Pile_carpet stitch knitting on Passap and Brother KMs 3
Pile knitting on Passap and Brother KMs 2
Pile knitting on Passap, Brother, and Studio KMs 1
With Studio KMs outside the range of possible use, there are loop techniques that can be executed manually on any gauge machine
The first sample is knit on a 4.5 mm 930.
A downloadable punchcard volume for Studio aka Silver Reed machines  offers punchcards for the double bed technique referred to as punch pile
  In analyzing the repeats, the black cell rows represent loops picked up on the main bed, the blank rows the carriage passes knitting every stitch on the ribber alone holding the loops down.
Applying permanent loops to the surface of a knit using Brother knitting machines falls into the knit weaving family.
The knitter can choose color placement and changes, as one might in intarsia.
Previous related posts:
Machine knit fringes 4, long loop patterning , my first use of straws, 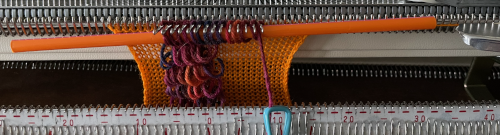 bulky loop yarn, the main bed programmed repeat:
 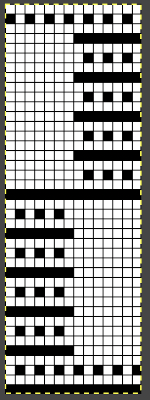 Long loops: a bit on method includes instructions on the use of single bed cast on comb, rulers, ribber gate pegs.
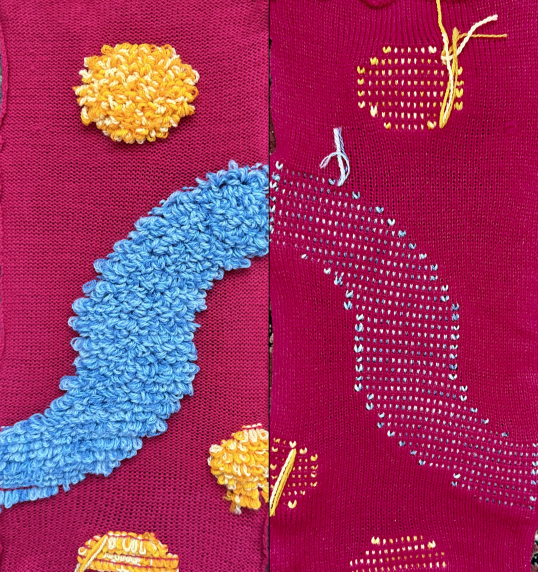
As usual, my swatches begin with random yarn choices from my stash, using colors that will help identify proper stitch formation, and just as a random return to designs intended for other fabrics in previous shares.
Developing a repeat: since the loops are created by hand, the goal is to work with larger loops than those in automated punch pile designs.
In the past, I was drawn to and explored truchet tilings
Truchet tiling design inspiration 1
Truchet/Smith inspired designs 2 meet ArahPaint
More Truchet inspired tiles, a brief look at gradient filter use included this 3-color knit sample resulting from an img2track color-separated DBJ repeat  Aiming to form large loops and a larger scale motif with more than one knit row between rows of them, the original 24X48 repeat,
 ![]() evolved into a very different 48X48 repeat.
evolved into a very different 48X48 repeat. ![]() The full design in gridded view:
The full design in gridded view: 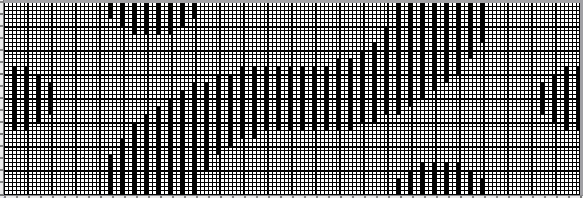 The process used to attain it: the original repeat was scaled x3 in height, and then again in width X2 for visual balance
 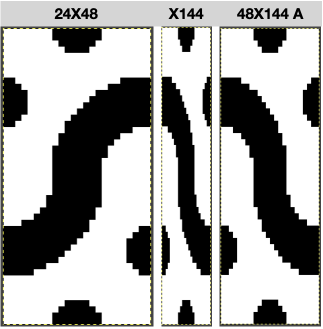 Working in RGB mode the 48X144 image was opened in Gimp, and a new image file in the same size was added with a white ground, and then a third 48X3 image with rows 2 and 3 colored in red.
 ![]() The latter saved to the clipboard, may be used to bucket-fill the all-white second image.
The latter saved to the clipboard, may be used to bucket-fill the all-white second image.
The white is rendered clear using layer, transparency, and color to alpha.
The result is copied and pasted on the original.
The red is selected by color, filled with white, and fixed by clicking on the rectangle tool.
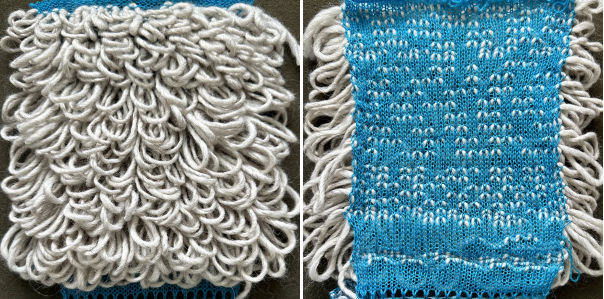
The mode is changed to BW indexed, and the image is saved for knitting. 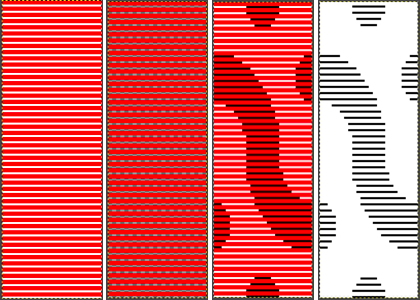 I grabbed yarns for color visibility and thickness, not fiber content, and in the resulting knit the loops flattened permanently in the red acrylic and the blue acrylic blend. The technique might be better served using a 3/8 wool for the loops.
The work in progress: 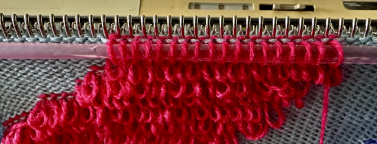 The full repeat in the final swatch measures 6X11.5 inches
 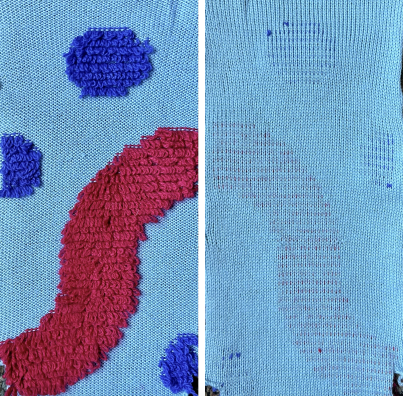 The same repeat was used again, and the red acrylic yarn was switched to the background for a result that would steam flatter permanently, while the loops were formed with triple yarn strands.
It took testing adjustments in tension and loop length, noticeable at the bottom of the swatch images, to achieve consistent coverage and a new tool to form them. 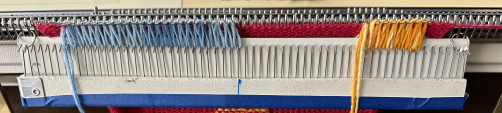
 When searching through published sources and adapting them, results can be random or outright failures. Pondering patterning on every other needle, with end needle selection off, this design from:
 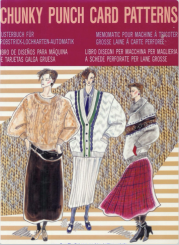 for 12 stitch punchcard models came to mind, including this chunky machine design
 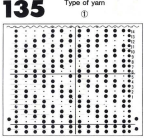 The what if repeat, expanding it to a 22 stitch version with every other column blank and checking for proper tiling
 ![]()
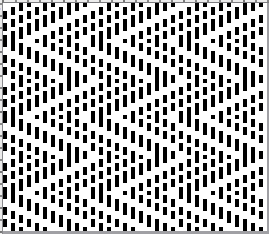 was not useful as a knit woven pattern, but when used to form loops on preselected needles and graduating the height of the loops the result proved interesting.
Rulers of different widths and thicknesses were used as tools used to form the loops including but not shown, the metric ruler supplied with Brother knit leaders. 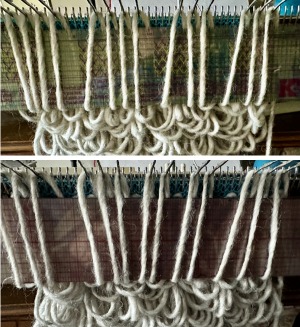
 Diagonal designs, in particular, can be hard to force into 12 or 24-stitch conventions. With further editing, the published repeat is adjusted to larger 23X18 pixel dimensions,
 ![]() appears to align correctly, and will be returned to in a post containing more knitwoven samples.
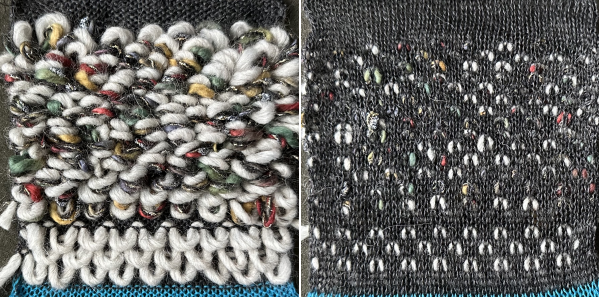
appears to align correctly, and will be returned to in a post containing more knitwoven samples. 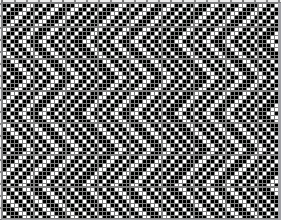 This test begins with caution, then produces a dense pile testing the limits on yarn thickness using the repeat:
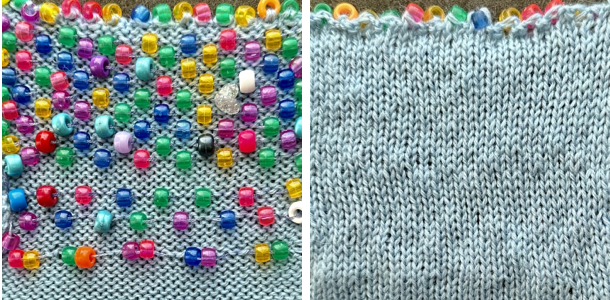
 Pony beads were threaded on a double strand of cotton from an unmarked cone, and loops were formed with beads advanced and placed between and below preselected needles.
Spacing was tested before committing to the final choice, the same repeat as in the above swatch.
The bead-carrying yarn was pulled to tighten it across the previous woven row just before laying it in place for the next patterned row.
Bead addition was also tested between chains in bind-off.