Periodically the question of printing blank templates for DIY drawings or images from published sources to scale to produce traceable images used to mark cards for punching is asked in forums and very recently in Ravelry.
I primarily use Apple and open-source free software in my work.
Creating knit graph paper on Mac, using Excel and Numbers began with Working in Excel 2008 and Mac Numbers 3.2.
The topic was revisited by me here.
A far more recent variety of printable tapes for multiple gauge knitting machines is offered by Claudia Scarpa in her 2022 blog post.
With some exploration, trial, effort, and good note keeping goals can often be achieved with tools on hand.
The concepts for retaining aspect ratio can be applied to other platforms, programs, and printers.
Suggestions exclude using banner paper or legal size sheets.
The assumption is made that only 8.5 X 11 inches stock is available for use.
Acrobat Reader free downloads provide limited functions.
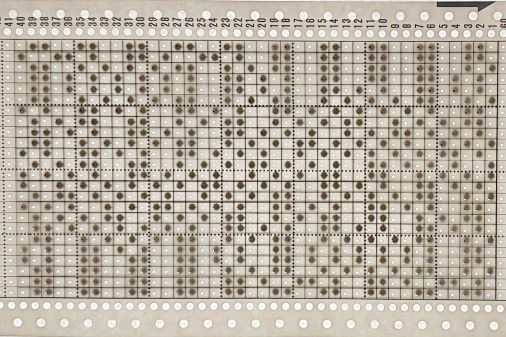
Factory punchcards are marked in what appears visually to be a square grid.
Using a ruler measuring in mm, the blank 24X60 punching content measures 108 mm in width and 300 mm in length.
The 300 mm content length will be adjusted depending on the height of the design repeat and whether the 4 rows of all-punched squares need to be considered in the printout.
The individual squares on the factory blanks measure 4.5 mm in width and 5 mm in height.
Cards can be joined together with snaps for longer repeats, and the additional pieces ought to be a minimum of 20 rows in height for the card to feed smoothly and accurately. Some added taping will further ensure it continues to do so if the card will be used often or in very long projects.
Two editable spreadsheets to download:
Traceable punchcard templates for DIY designs
1. Numbers 13, the greyed-out rows represent the first two all-squares-punched rows
Depending on the program used to process the file, there may be some juggling between the use of cm and mm values, a matter of a decimal point.
The shared table without numbers measures 10.8X22 cm.
The shared numbered table includes an extra column border marked needed to match the full blank card width markings, 14.2 cm in width, and the same length as the first table, 22cm.
2. A test PDF for a template including row numbers: punchcard-blank 35.
To print to scale using Acrobat Reader, select ![]() Matching results for both templates with a superimposed factory card segment.
Matching results for both templates with a superimposed factory card segment. 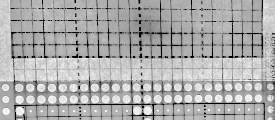 Custom needle tapes
Working in cm, considering that needles are 4.5 mm, 0.45cm apart, eliminates the need for conversion to points, the format used when planning to use the resulting charts for conversion to pixels per stitch PNGs.
Both Gimp and Numbers alter some of the values by default very slightly, as seen here in Numbers for 1-10 cm needle spacings for designing blocks for needle tapes. 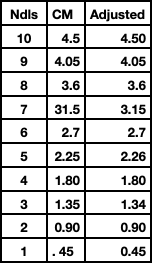 To maximize the available printing space, under print, setup, change all margin values from any preset default, seen on the left, to 0.54
 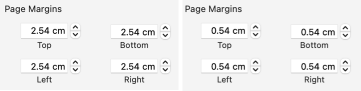 Although the print setup shows page numbers in cm, the page orientation measures are given in mm
 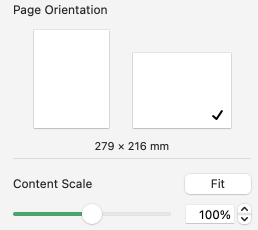 The 2.26 mm, 5 stitch cell unit tape in place on the machine
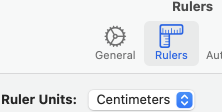
 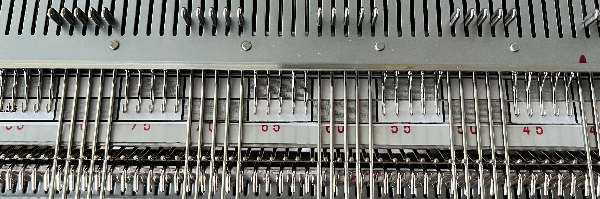 To change rulers in Numbers 13.2 to the Centimeter setting, and thus avoid the need for any conversions of the values to points, from the Numbers Menu at the top of the screen Choose Numbers >Settings, click and scroll on Ruler Units from the pop-up menu, then choose an increment, in this case, centimeters.
When returning to drafting for pixel charts, repeat the process for changing rulers back to points. 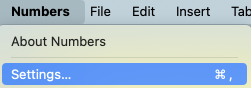
 The math in calculating table cell size is simple.
This export is a revised copy for use in Numbers 09 using cm rulers: needle-tapes-only.
If working in a later OS, this prompt may appear  The matching document created in Numbers 13.2:
needle tapes only_numbers 2
Tapes printed in single blank units may be colored in or scribbled on easily, depending on end use  The same concept could be used to generate printed blank graph paper for intarsia and/or to obtain a sense of changes in aspect ratio resulting from knit stitches forming a rectangular grid while designing using pixels per stitch is commonly on a square one.
The mm ruler settings allow entering the values from the swatch gauge measured in mm and calculated to include decimal points.
The chart grid on the left is shown in 6/4 proportion, a common width-to-height knit stitch ratio, while on the right it is in equal units. 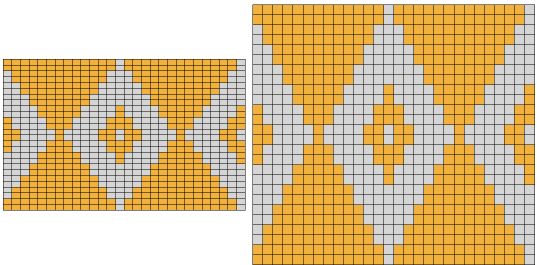 The elongation in most knitting is often reduced by the choice of technique or if working in DBJ, by choosing ribber settings such as slip stitch with lili buttons.
Online published repeats converted to traceable printouts for punching cards
It is possible to produce print-to-size copies of punchcards to trace in a variety of ways.
One alternative is to use Mac Numbers to ready the image for doing so.
Two jacquard tests began with images from a source for massive punchcard repeat collections regularly mentioned in forums (translated to English link ), and at times in my previous posts.
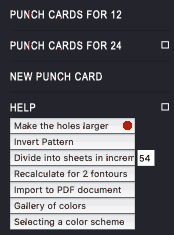
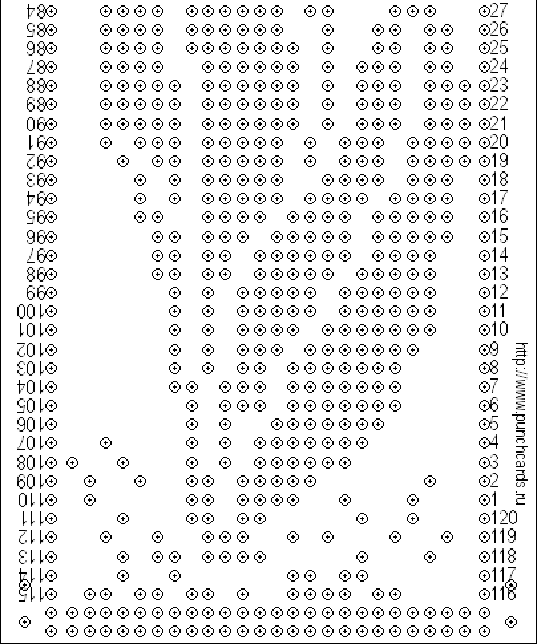
The first is for a border design, #4245 shown here with the holes made larger. 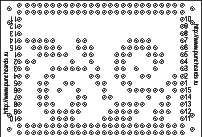 The second design is a far longer one, number 4937
 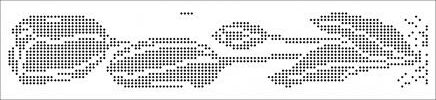 In the help menu on the right, select the first option, make the holes larger
 Save the image or simply drag and drop it into a new sheet in an existing Numbers document or create a new blank doc removing the default table.
Click on the image, and in the top menu right, choose image arrange. 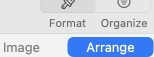 With Constrain Proportions left checked, change the image width to 14.2 cm punchcard full standard width. The height will be adjusted automatically.
The first printout test. Some of the dots were also marked with a pen, not necessary if tracing over a light source. 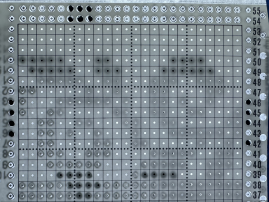 Numbers will split far longer images into segments/sheets, in this case, 3.
The top of the image is displayed on the first sheet, moving down rows to the start of the design in the following “sheets”.
Page margins are all set at .54 cm. Adjusting header and footer values changes and shifts the position of the segments to obtain full dots on each printout.
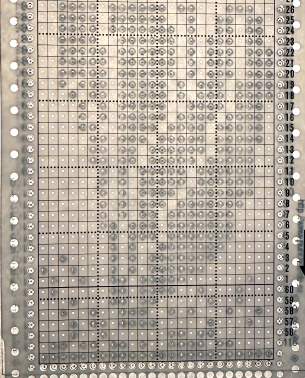
Scale contents to 100%, choose to print all sheets or any single one. 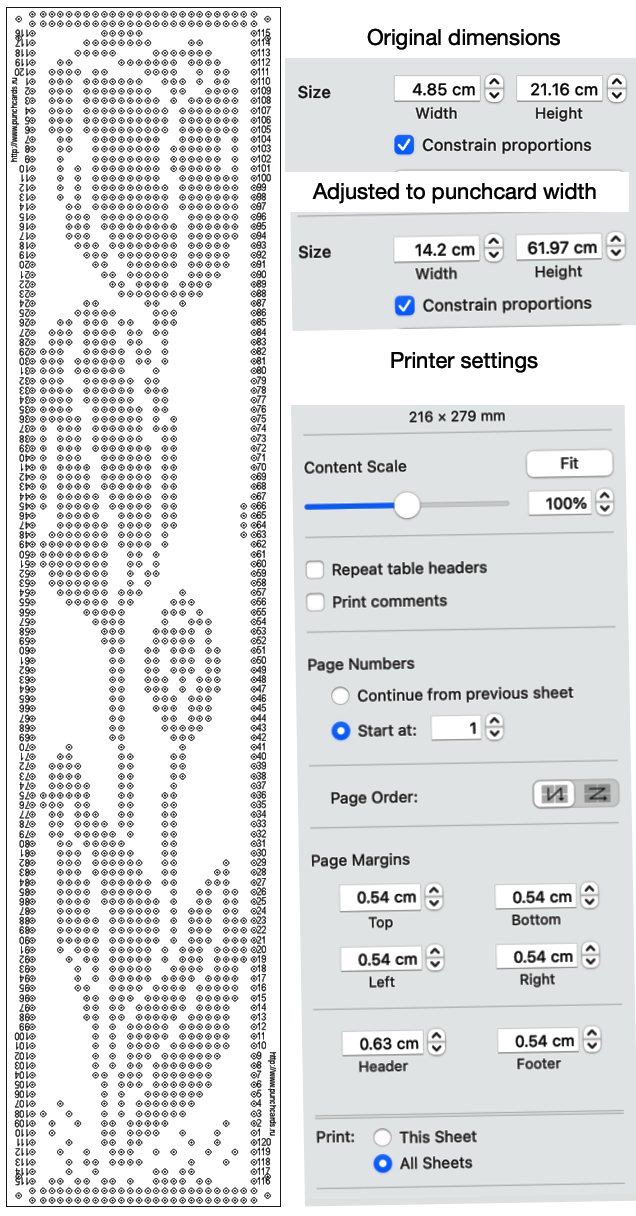 The printout is shown with a card laid over it, placed over a lightbox of sorts.
 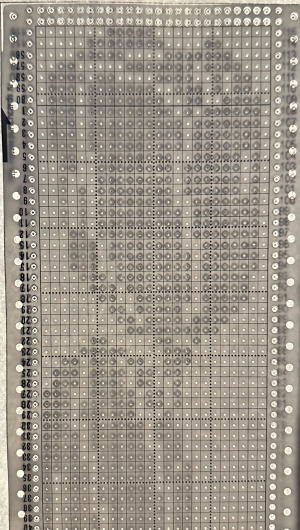 If a spreadsheet is not your preference, the same can be achieved with published cards using Gimp and Mac Preview. Printing from Gimp, even if the display is set to 100% appears not to appear to offer an option for dividing the file in scale automatically on more than one page.
A recent Ravelry query asked about printing individual cards from downloaded PDF sets for Brother machines, including this card for Brother Lace 18, from the set S  Open the full downloaded document, display the thumbnails by selecting the view button in the toolbar, and pick Thumbnails.
Select the thumbnail to print, it will be highlighted, and drag and drop the thumbnail for the punchcard to the desktop, it will be in PDF format as well.
Click on the chosen file, select open with Gimp, and an import PDF window will appear, as seen for this Fair Isle Design 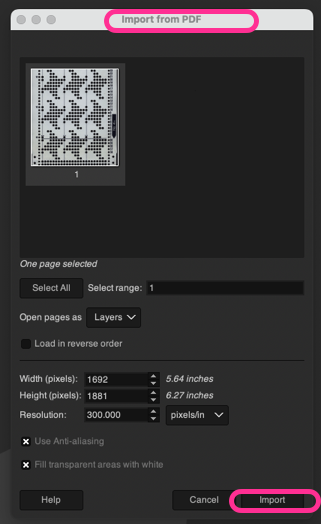 Because transfer lace cards have so few holes to punch and the placement is critical, the lace card 18s was chosen for testing.
Select Import and an image composed of 2550X3300 pixels will open, surrounded by white space.
Using Crop to Content will reduce it to 1485X3052.
Scale it by choosing mm values, and type in the 142 mm card desired width, reduced automatically to 141.99 mm. 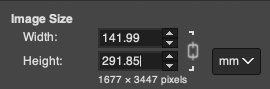 The value for the full, scaled image will still be displayed in pixels at the top of the work window, now 1677X3447 pixels.
Since the repeat is longer than 40 rows, it can be divided into two segments using the mm value. These are the cm and pixel values for my cropped top segment, exported as a PNG. The saved PNG was opened in Preview and with the option for scaling to 100% ![]() produced a good traceable result despite the printer needing a new ink cartridge.
produced a good traceable result despite the printer needing a new ink cartridge. 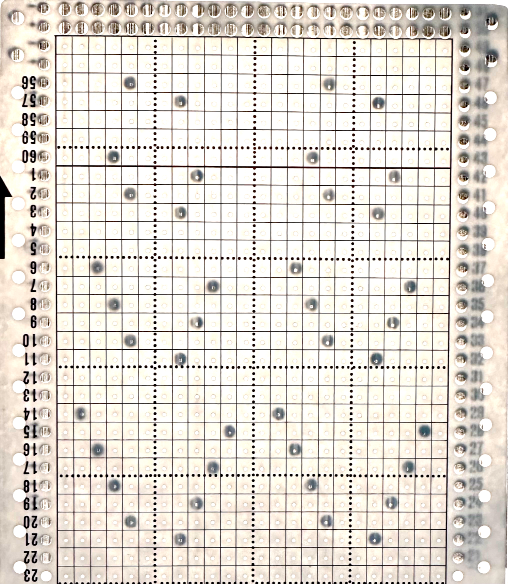 Letting Preview split the image into large enough segments can be achieved by altering page margins.
 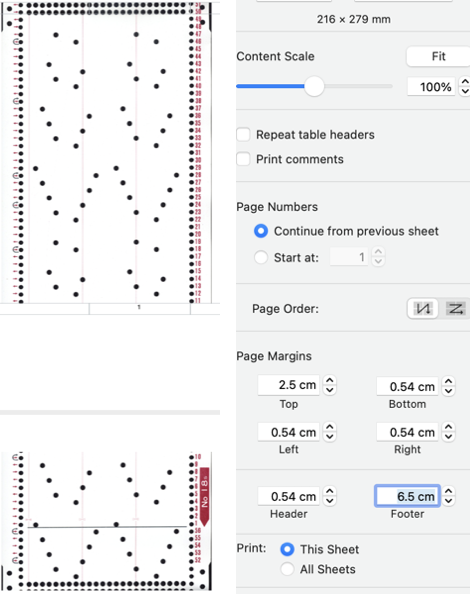 The bottom of the above split printed is good enough considering the starting image was a tad rotated to the left and incomplete.
 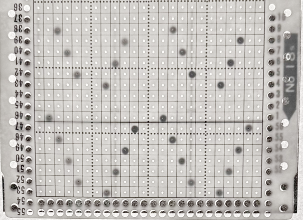 A fail, a screengrab from the PDF full page, working with a PNG and printing from Gimp: the grab, 910X1522, cropped to content 694X1526, scaled to the same mm values,
 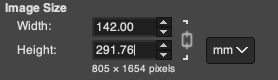 yields an image with a very different pixel count from the PDF converted values,
  and cropped to a segment 694X642 pixels and printed from Gimp was not to scale,
  In the downloadable PDF for that fair isle design #4 from the R series, the punchcard is presented in the two segments required to meet the full punched height for knitting.
The bottom segment opened and scaled in Gimp first as a PDF Import and then as a screengrab PNG, resulted in the same failure in maintaining equal pixel aspect values with scaling for printing as seen with 18S 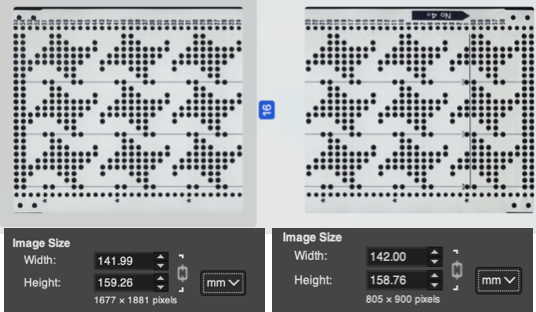 The process was followed on the tulip file PNG: a segment was cropped from the bottom of the saved “larger hole” image, scaled to cm value, and printed in proper aspect ratio,
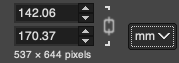
 What of images from Brother Punchcard Volume 5, especially for those lace cards with so few dots?
Choose an image, open it in Gimp, crop it to the edges of the punchcard design
scale the image by multiplying both the number of stitches and the number of rows by 5 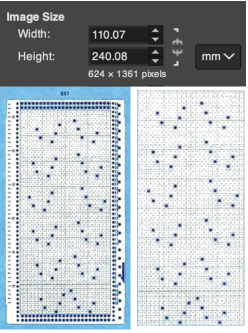 The result printing from Preview (and more ink)
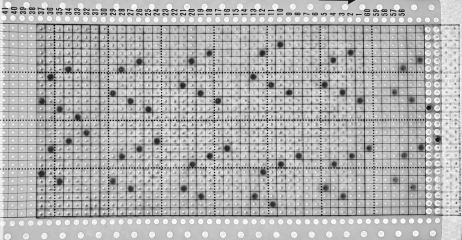 Dak is a Windows-only program. There are multiple volumes of stp files usable only in DAK, downloadable for free, including those for Brother Punchcard Volume 5.
The stp format is only read by the program, and stitch designs cannot be exported in other formats ie. PNGs.
Other posts have suggested hacks for converting screengrabs from DAK to PNGs for use in electronic machines.
I use InSync to move files between my Mac and PC and download to the 930 from there, using img2track.
There are many related ways to achieve the same task using only the PC.
If the goal is to use punchcard templates generated in DAK for traceable printouts to mark cards for punching, both Mac Preview and Numbers may once again be used.
The fixed full width for 24 stitches on a blank card is 108 mm.
Dak loads the files from the punchcard book in the smallest repeat for correct tiling when available, so lace #771 stp opens as a 12X34 stitch repeat.
A screengrab segment of the DAK window. 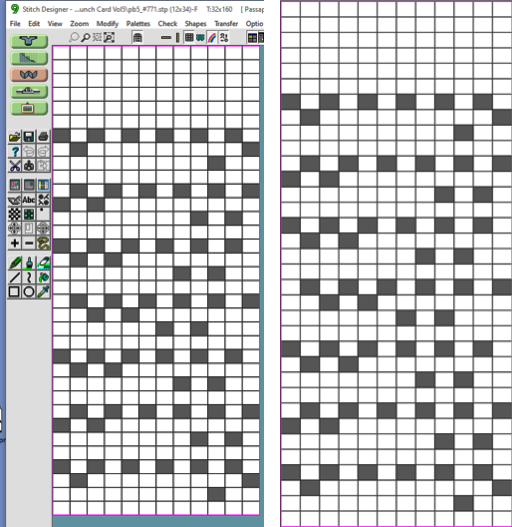 With the repeat isolated and cropped in Gimp, the entered values of 54X170 were adjusted to these by the program, the PNG was saved.
 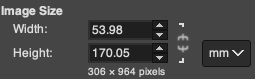 If Numbers is used for printing, under Image/Arrange, adjust the image size
 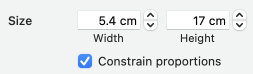 Or if opened in Preview, set the print scale to 100%
 ![]() The results for both matched
The results for both matched 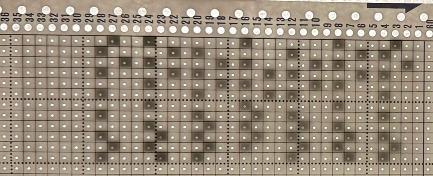 Analyzing the repeat, note the blank first row, not usually seen in a Brother transfer lace design.
Checking the Volume 5 source after the fact identifies the repeat as intended for lace combined with knit weaving, a different knit structure.
DBJ color separations other than the KRC built-in function in Japanese electronic machines require other software or manual color separations.
DAK performs a variety of separations easily and quickly.
In Volume 5, pattern #53 is shown as punched for fair on the left, and separated for DBJ on the right. 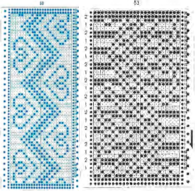 If the # stp is opened in DAK as the 2-color jacquard design.
To knit a traceable punchcard template for the DBJ, the print option generates usable images.
This screen grab of the DAK window shows the jacquard design in the background.
The Page Dimensions window icon outlined in red when selected offers 3 ways to mark the black cells including as dots.
Choosing other (mm) and entering 600 for both values will produce results in a size that allows their being grabbed and saved in full.
The program will conveniently split the design into pages if needed.
The center image shows the generated template for the specific stp, the right one, the image opened in Gimp on the Mac with the content cropped to the dotted chart, 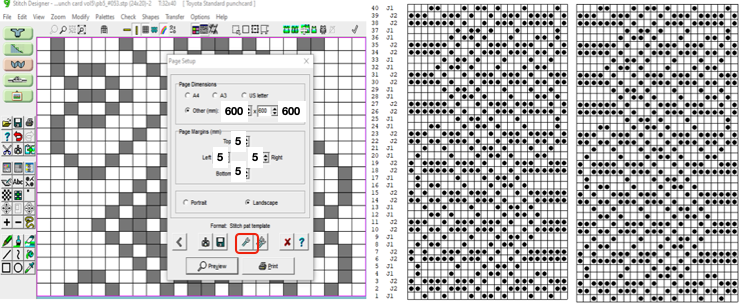 and scaled,
 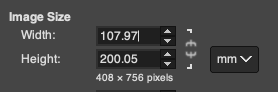 saved, and, in this case, printed using Preview. The punchcard is superimposed beginning with #1 only for an added visual check, punching always begins immediately above the first two all-punched rows