Other posts exploring the scale topic began in 2015 with a swatch experiment 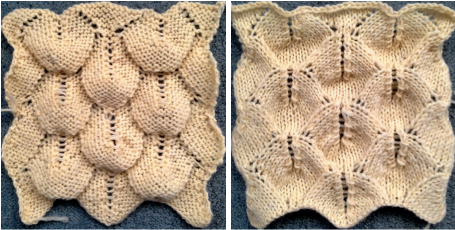 based on an Armani sweater, followed by this group of shares, listed by creation date and beginning with the most recent
More mesh dragon scales, some striped and some not
 Single bed scales made with stitch transfers
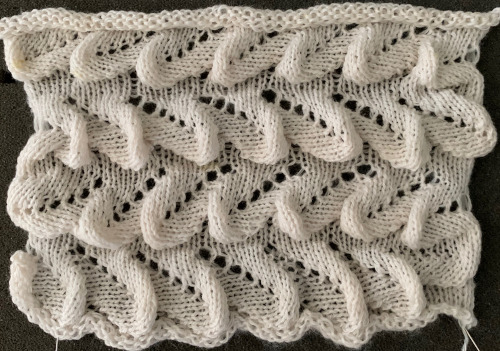
![]() More dragon scales and chevrons in ribbed, racked (4) fabrics
More dragon scales and chevrons in ribbed, racked (4) fabrics
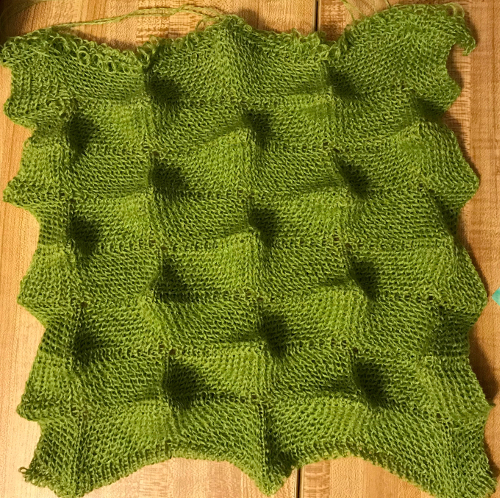 Hand-knit “dragon scales”
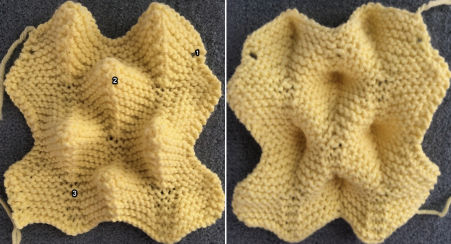
Incidental discoveries Ribber trims 4
Automating 3D textures across full rows of knitting:
Machine knit leaves using slip stitch with holding 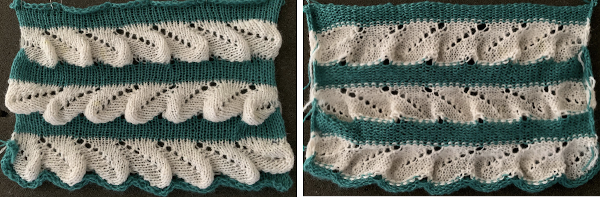
 Revisiting automated shell shapes
 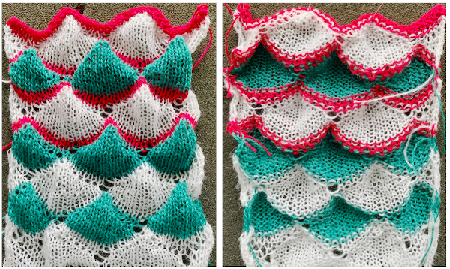 Automated shapes across rows of knitting using slip stitch only various designs
“Automated” shell shapes 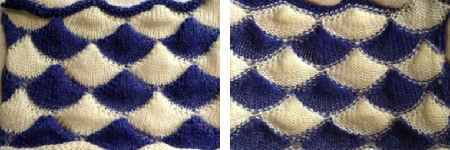 When the construction of the scale and shell shapes was proposed, I did not always share the repeats for the automated version.
After the fact, a screen grab from the shell charts was cropped to its outline, opened in ArahPaint, and using the program’s tool “guess weave from grid“, the 36X98 png is obtained with a few mouse clicks,
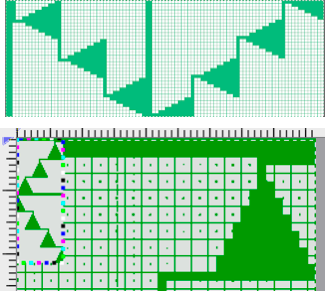
![]() and saved the file for further exploration.
and saved the file for further exploration.
Note that for the “shells”, the shapes are formed by all the triangles pointing in the same direction, while in the “scale” version they mirror vertically.
Tips and reminders:
I find it useful to test techniques in geometric shapes that are familiar and easy to imagine in 3D, hence the return to triangles.
The goal here is to automate needle selection to eliminate stitch counting and hand selection.
The 200 needle max on 4.5 mm machines, as well the amount of memory in the model of electronic being used, ie 2K in a 930 imposes more limitations.
Performing the selection of needles manually and using the setting for short rows may make varying shapes, their scale, row counts, and color changes possible in a way that traveling to and from the same side of the machine in 2 row sequences does not.
When using the slip stitch setting if every needle on the top bed is not in use, the end needle selection must be canceled.
The knit carriage must clear all needles in work with each carriage pass even though small stitch counts may be worked on at any one time.
Just as when working short rows, depending on the fiber content of the yarn, there may be some visible wear on the purl side from the many carriage passes required to complete full design rows.
Test on small swatches for accuracy and aesthetic personal appeal before committing to larger pieces.
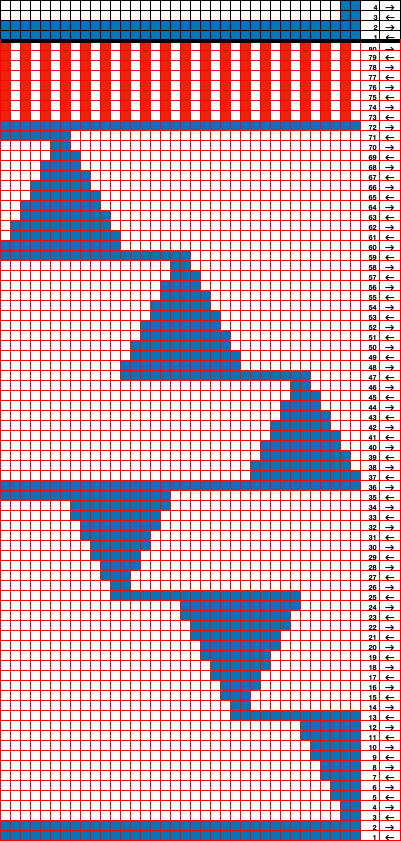
A 36X166 pixel repeat: 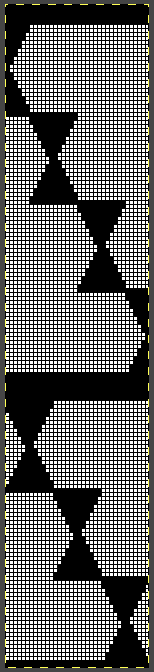
![]()
 The edge half repeats are eliminated in an attempt to yield straight vertical side edges, with the repeat reduced in height to 36X124.
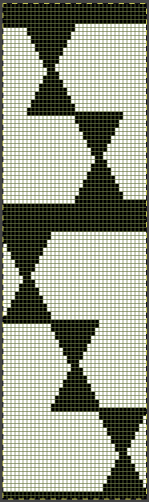
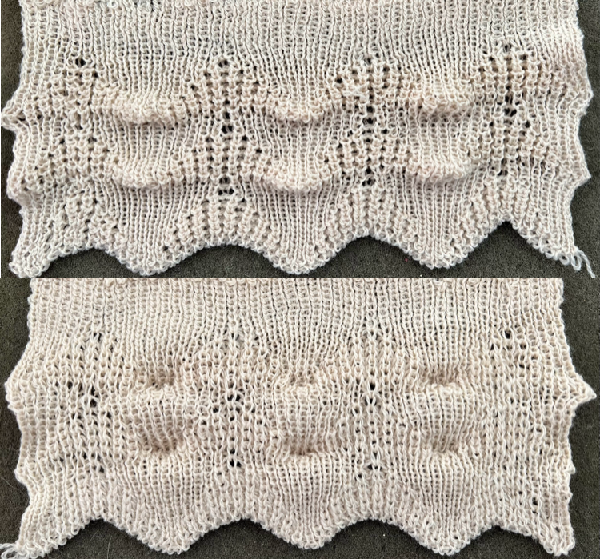
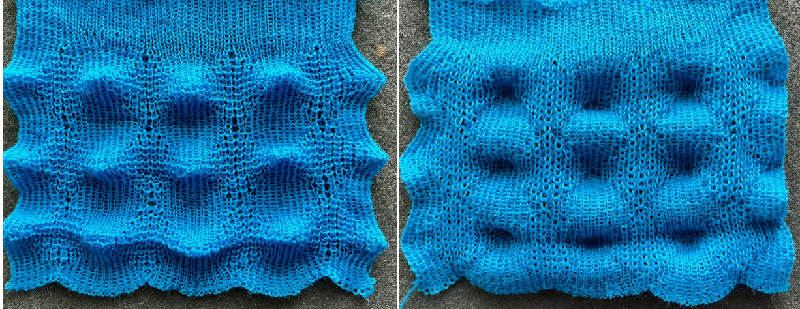
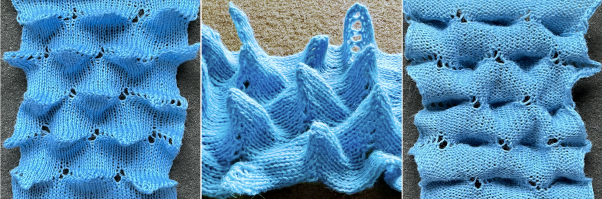
![]() The resulting scales, knit in a 2/8 wool, were resistant to getting completely poked through to the purl side.
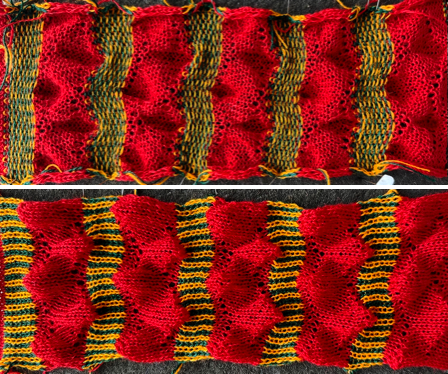
The resulting scales, knit in a 2/8 wool, were resistant to getting completely poked through to the purl side. 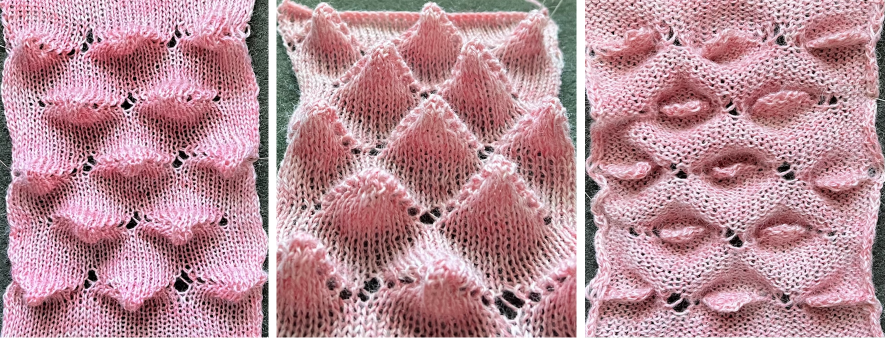 Comparing the difference in the results when knitting the same number of stitches and rows in the pattern; the blue yarn is of a slightly different thickness than the pink.
 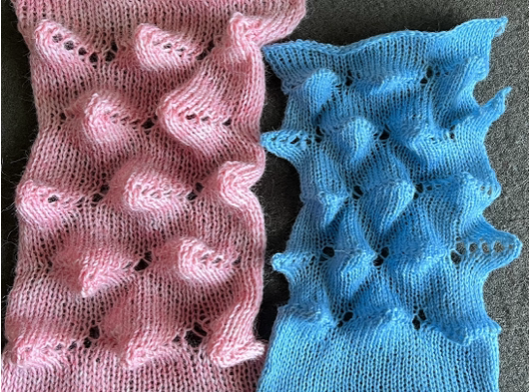 Seeking striping at the center of the triangular shapes, I found what appears to be a one-off error in the spreadsheet numbering of cell rows vs actual design rows, which initially resulted in issues with a correct conversion to PNG.
 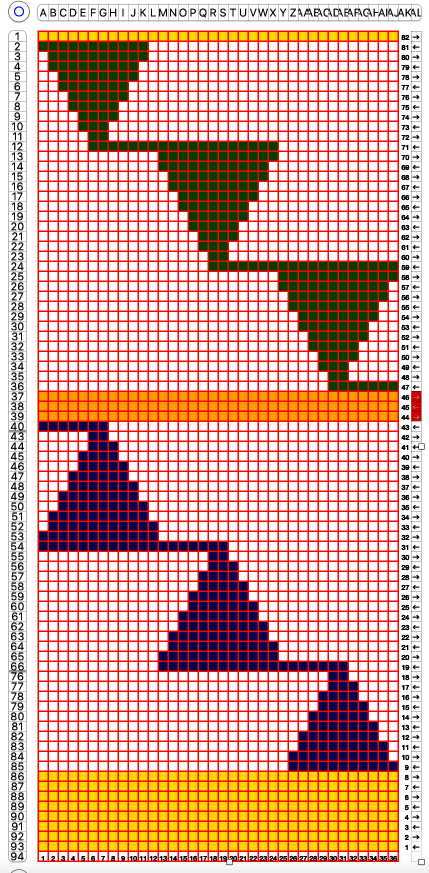 Transitions are made after odd numbers of rows to allow starts from the right for each pattern segment ie. Yellow/ 8+1 rows at the top of the repeat for plain knit segments, orange for the 3-row contrasting color stripe at the peak of the shapes. There will be cut yarn ends at each transition.
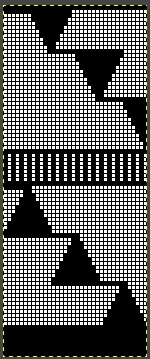
The design, charted in black and white, 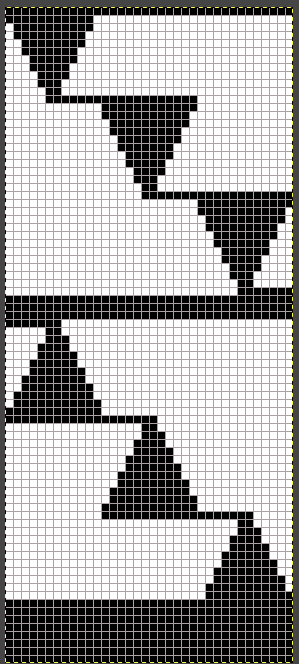 the 36X82 png
 ![]() One may choose on which side to display the resulting shapes, here to the knit side,
One may choose on which side to display the resulting shapes, here to the knit side, 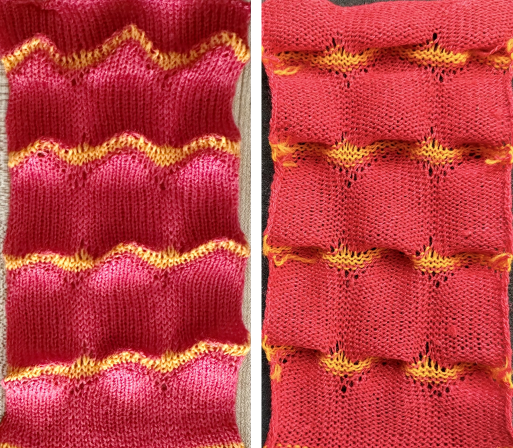 and to the purl, shown also after some pressing. A punchcard snap is inserted in one of the pockets in the last image on the lower right to hint at pocket size.
  Steamed, flattened shapes may also be coaxed in different directions, stitched in place or even together with a contrasting stripe behind them, or added beads at the join
 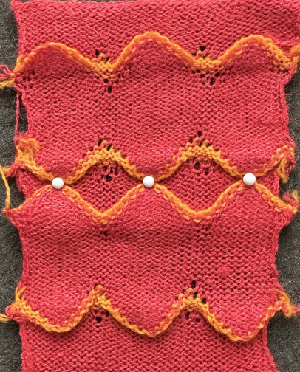 A first draft at adding a FI or slip stitch stripe at the center of the repeat still relies on some segments occurring for an odd number of rows, was rearranged in the later designs, measures 36X88 pixels.
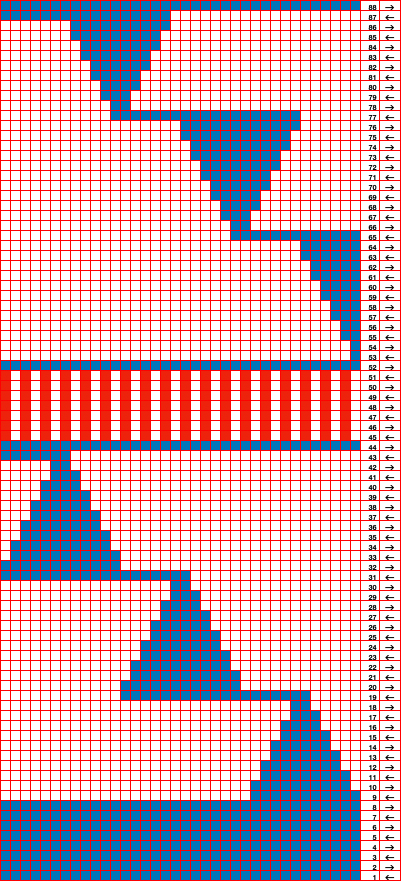
![]()
Analyzing the swatch:
the edges where the triangular shapes meet the striped bands jut out more when pointing down than when pointing up
the eyelet typical when knitting short rows for 2 rows is OK as part of the overall design
the 8 rows of plain knitting between the shapes are too many 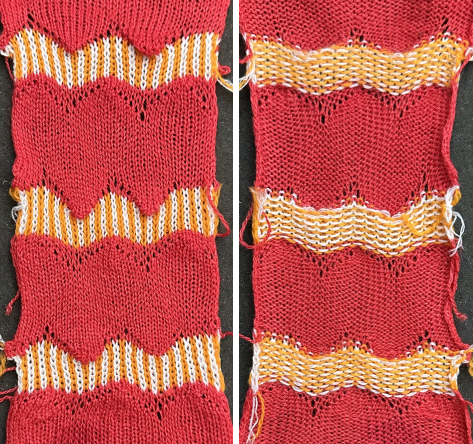 Altering the design 1:
the plan is to retain starting each segment of scales from the right,
the fair isle band is now planned for an even number of rows, making it possible to operate more easily from the same side, but loosening the tension,
 the 36X80 repeat:
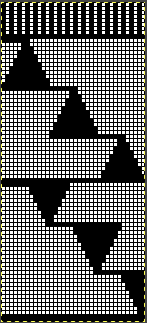
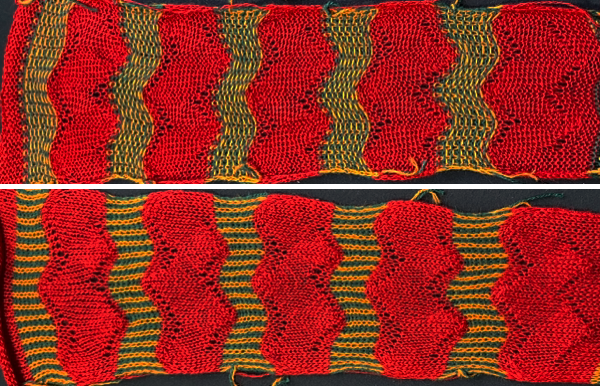
![]() the side edges in the swatch differ from each other,
the side edges in the swatch differ from each other, 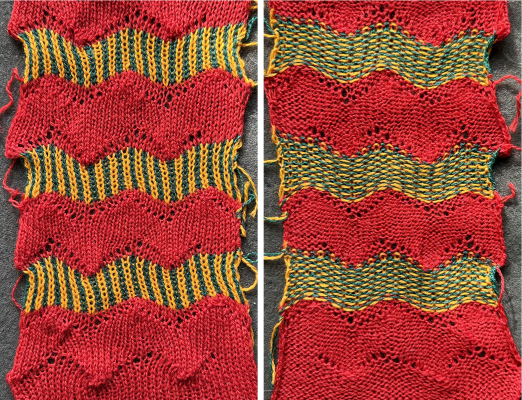 Altering the design 2: whether executed with cam button changes with the knit carriage always operating from the right, or operating a second carriage selecting needles from the left, the fair isle band in this experiment needs to occur for an odd number of rows, the repeat is 36X68. The cells highlighted in yellow on the right of the chart follow the carriage movement from the right when switched from slip to FI, and the gray cells the movements for a second carriage selecting needles from the left.
The recurring shapes are planned to produce straight side edges.
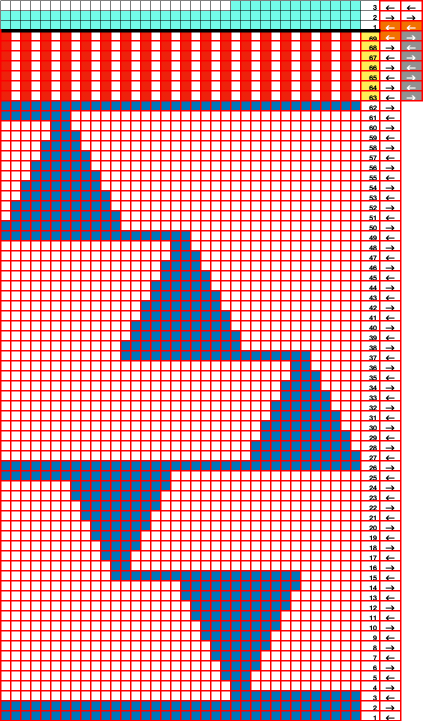 The 36X68 repeat
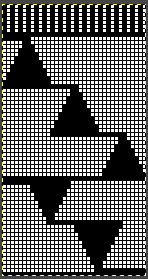
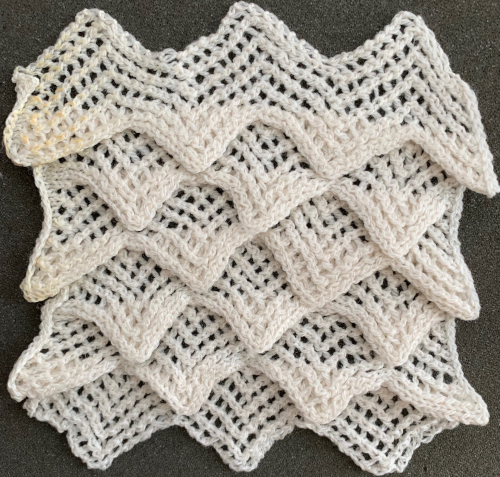
![]() Very often 3D knit structures can change dramatically with steaming and pressing. They can literally be “killed” permanently if fibers such as acrylics are used, while wool has some spring back, but surface retention depends on the specific pattern. The temptation to press is in proportion to what degree the knit rolls, sometimes dramatically, to the purl side. In this instance, the depth of the shapes was lost, and the swatch grew significantly in length.
Very often 3D knit structures can change dramatically with steaming and pressing. They can literally be “killed” permanently if fibers such as acrylics are used, while wool has some spring back, but surface retention depends on the specific pattern. The temptation to press is in proportion to what degree the knit rolls, sometimes dramatically, to the purl side. In this instance, the depth of the shapes was lost, and the swatch grew significantly in length.