Over the years a variety of fabrics have been named dragon scales or crocodile stitch. Here dragon scales have referred to shapes created using a lace technique and resulting in a pattern such as this
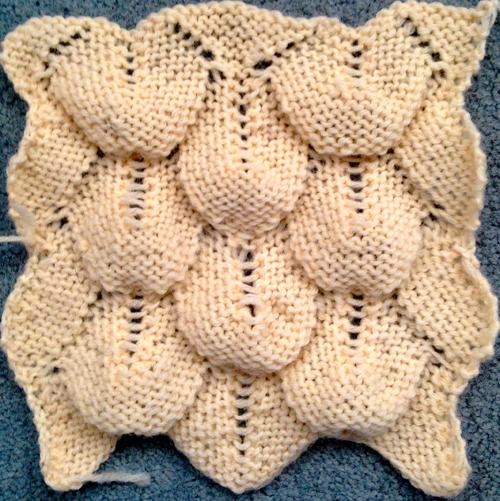 that was followed by hand knit samples
 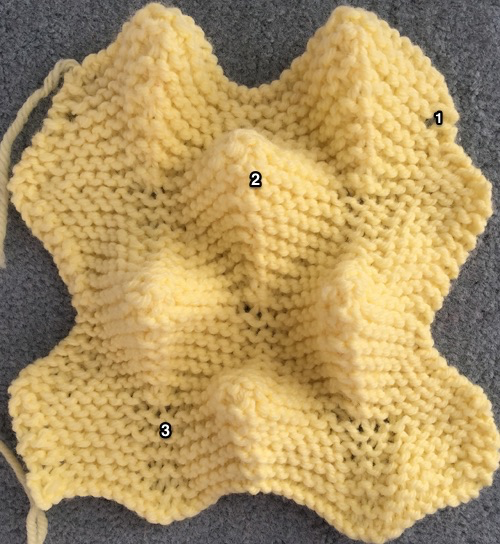 and an investigation into possibly creating a ribber fabric with auto shaping resulting in similar protrusion
ribber-pitch-a-bit-on-racking-1-chevrons-horizontal-herringbone/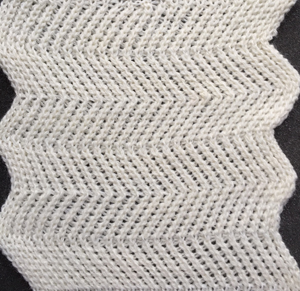
vertical chevrons/ herringbone 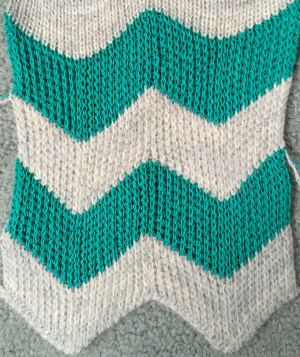
 which eventually led to this, where a reversal in racking periodically shifts the lean in opposite directions
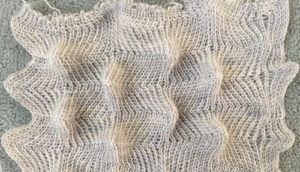 automating the pattern in half fisherman rib/ mylar repeat tracking shown. Any repeat in a factor of 24 may be used on punchcard machines as well.
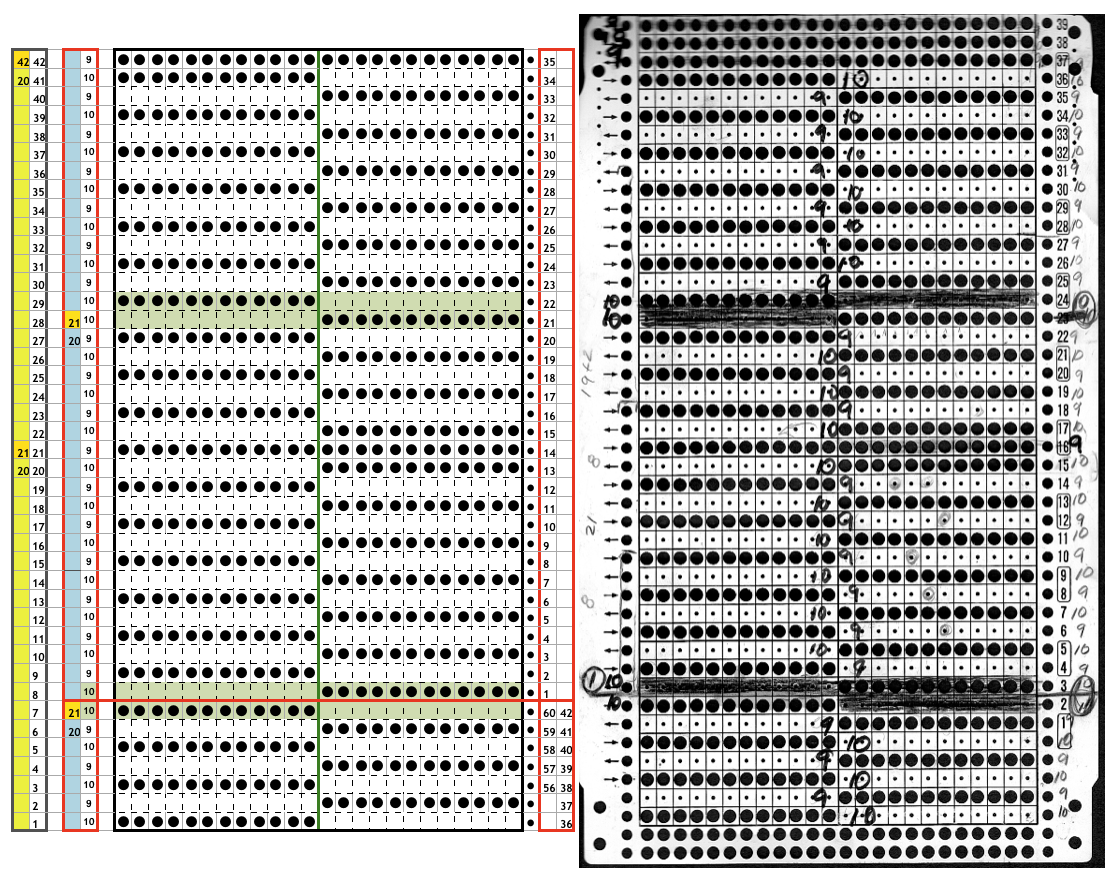
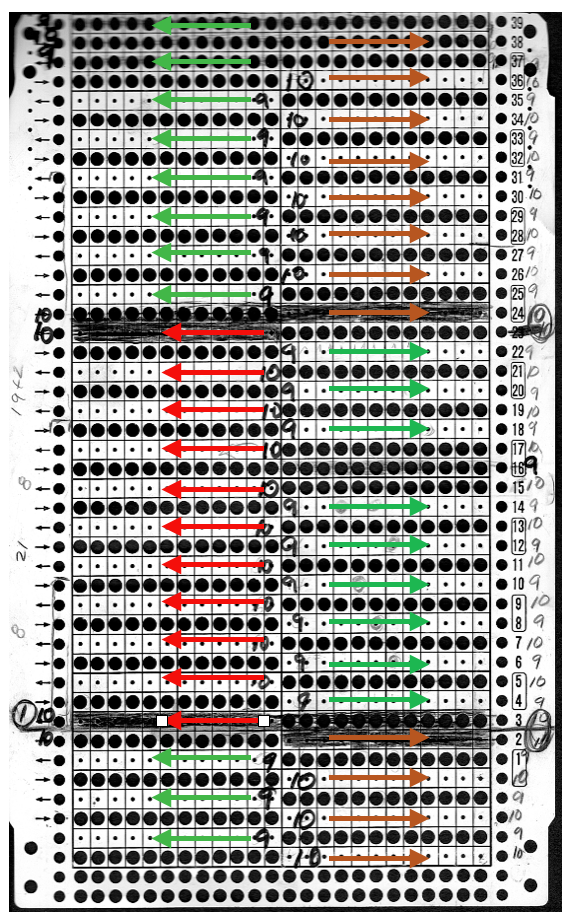
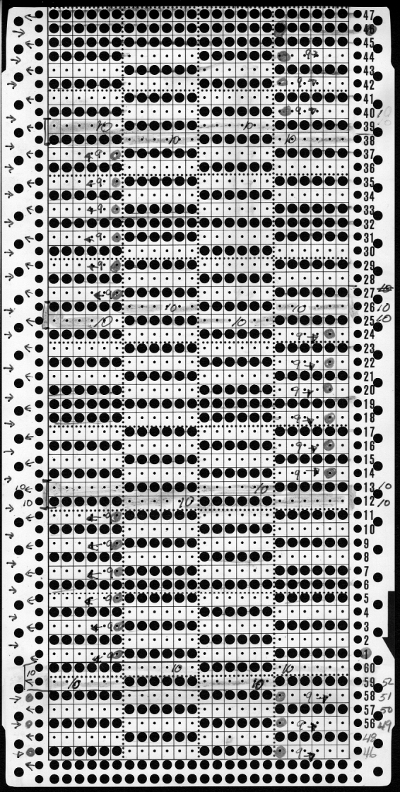
 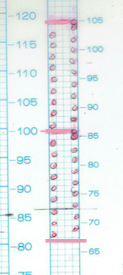 The start of a series in varied colors and fibers: sometimes I enjoy getting back to the simplicity and predictability of punchcard machines, though punching those cards can be slow and a bit tedious. I am presently curious about striping again, and creating a wider “scale”, with a crisper fold. The chart is for the working idea, the punchcard typical of what some of my cards begin to look like as my work evolves. When marking cards for any action, the fact that the eye is not on the same design row as the reader needs to be taken into consideration. Here racking numbers begin to get marked on what would normally be row one on a factory marked punchcard, 7 rows up for Brother KMs on any other brand punchcard, or card roll # position. Though the final repeat is an even number of rows in height (42) note that each half repeat is not (21). The color changer sits on the left, so the first preselection row is left to right, cam button on KCI to insure end stitches knit. Any color changes happen every even #X rows, so they will technically be in a slightly different spot on the alternate repeat.
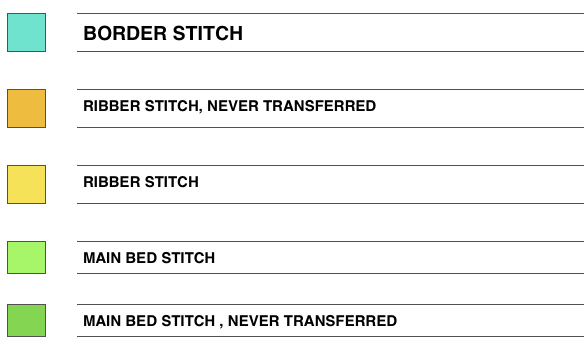
 some of the trial and error, random yarns. The white is a 2/15 wool, the yellow a 2/12, the blue an unknown, also wool.
 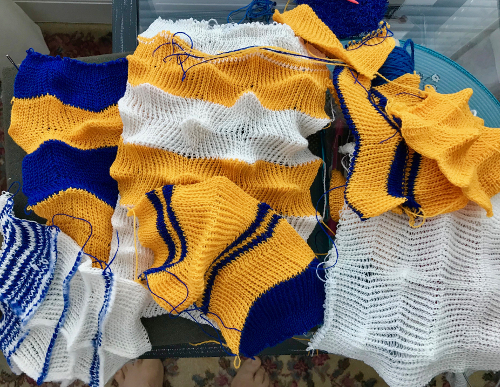 The best of the lot, but not “there ” yet, going back to one color knitting
 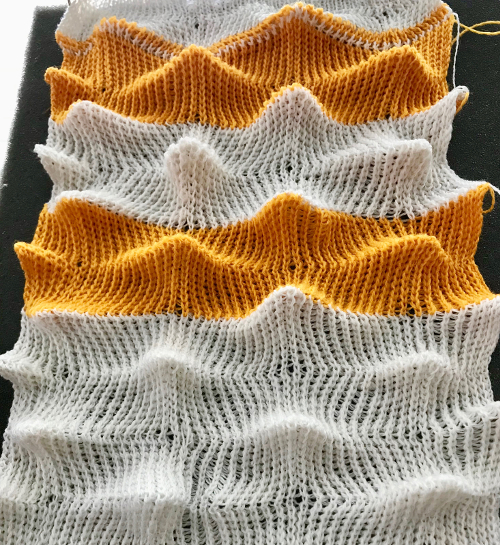 So then you go for a yummy alpaca and silk, make a racking error and manage to correct the pattern, and lo and behold the yarn breaks halfway across the row a repeat up from there! “They” do keep talking about how relaxing knitting is ;-). Yarn specs: Fiber Content: 80% Alpaca/20% Silk; Weight: Lace; Gauge: 8 sts = 1″, 1/2-lb cones/3472 YPP (1736 yards/cone)
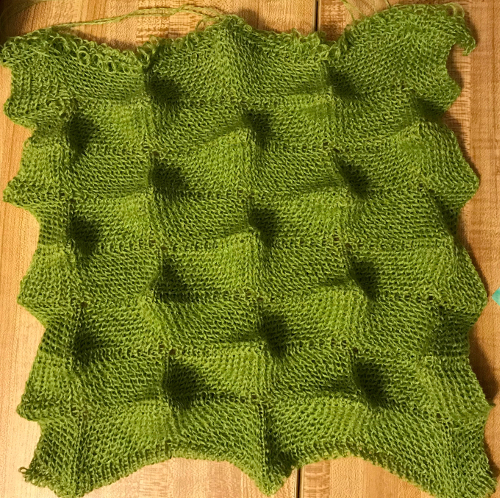 This yarn is an English import, 2675 yards per pound. It felts into a lovely fabric (not the goal here) and knit tolerably well. The fabric is quite stiff, however, and the surface change is minimal and nearly completely lost
 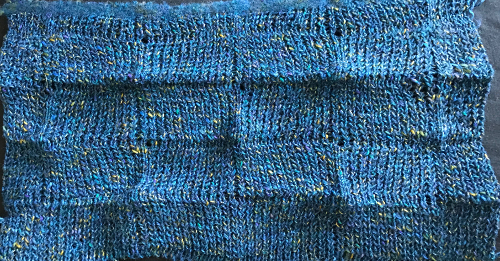 2/18 Jaggerspun wool-silk: worth a shot at a scarf. Starting ribber cast on left, followed by 2 circular rows, one closing row right to left, and first KCI row from left to right will set up patterning in tuck so that the direction of the arrows on the left side of the card, lines up with the racking number appropriate for that row prior to knitting it. The fabrics below are as they came off the machine, not blocking of any sort
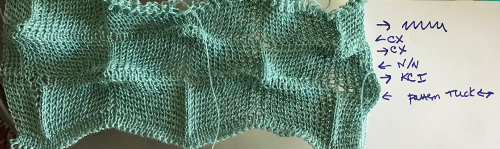
I have some lovely cash wool in 3 colors, 2/48 weight. Using 3 separate strands fed through the yarn feeder separately resulted in uneven feeding, loops, and too many problems. Using 2 strands “worked” easily, but the fabric was nearly flat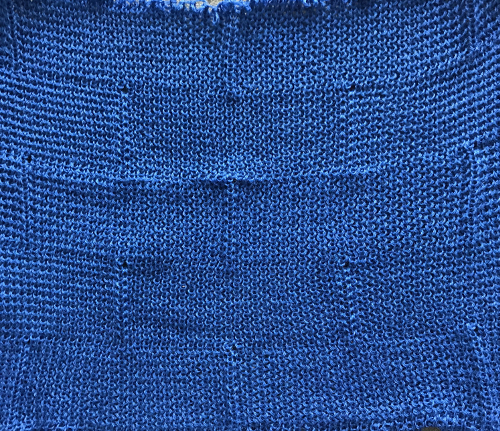 Cautiously winding 3 strands onto a cone prior to knitting gave far more predictable results, and there now is a scarf in progress. The difference in color is due to the lighting at the moment
 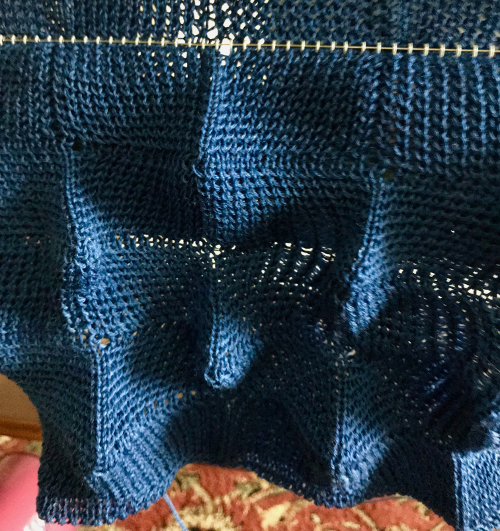 My best advice to anyone attempting this is to knit slowly. The most likely spot for errors in my experience is at the point where 1: no action is taken for a row (or more in later swatches), so racking position remains at 10 for 2 rows, and 2: for racking position 9 the knit carriage position is reversed in each half of the repeat. One can get also reach a left-right rhythm, and without realizing it, begin racking between positions 9 and 8 as opposed to 9 and 10, throwing the pattern off. Another look at racking positions: the numbers reflect racking position before the carriage moves to the opposite side, the arrows the direction in which the carriage will be moving. Once the knit carriage moves the card advances, so glancing at the card after that move will show the action for the next row at eye level, which can be confusing at times.
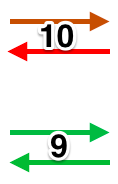
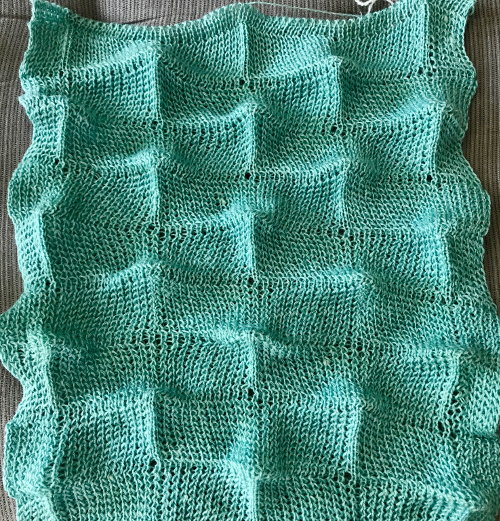
 A finished piece, 9.5″ X 64″, in the coned 3 strands of merino. Occasional single strand caught on ribber gate pegs, no yarn feeding issues as such. The fabric has not been blocked in any way, but allowed to “relax”. I like the larger scale of the “scales”, would still like to introduce striping in a way that pleases my eye. The knitting is slow thanks to all the racking but is probably faster than using single-bed holding for similar shapes, with a very different finished look. Future of the fabric TBD. 8/16: interestingly enough when the fabric relaxed, it became quite a bit less 3D
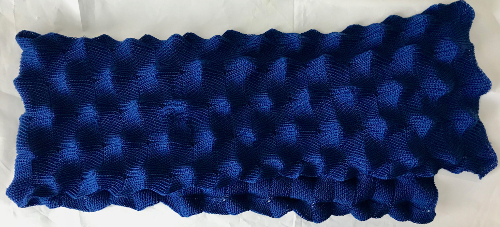 and back to introducing stripes in contrasting color
 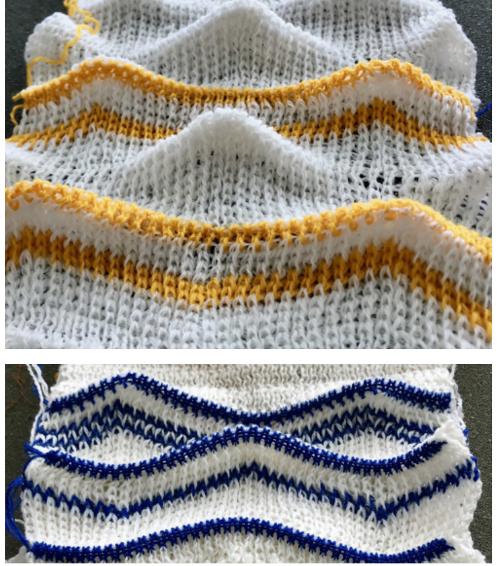 An act of faith after lots of trial and errors and a punchcard redesign, that this may have been worth the effort when done. I am choosing to cut the yarn and weave in ends for longer solid areas, and am giving myself permission to only knit while I feel focused on manual changes in color and racking. It may take a very long time to get to “scarf length”
  and here is the fabric in a completed piece, about 54 inches in length when off the machine. The top right photo shows reverse side of the piece, the bottom right is how it might appear when worn
 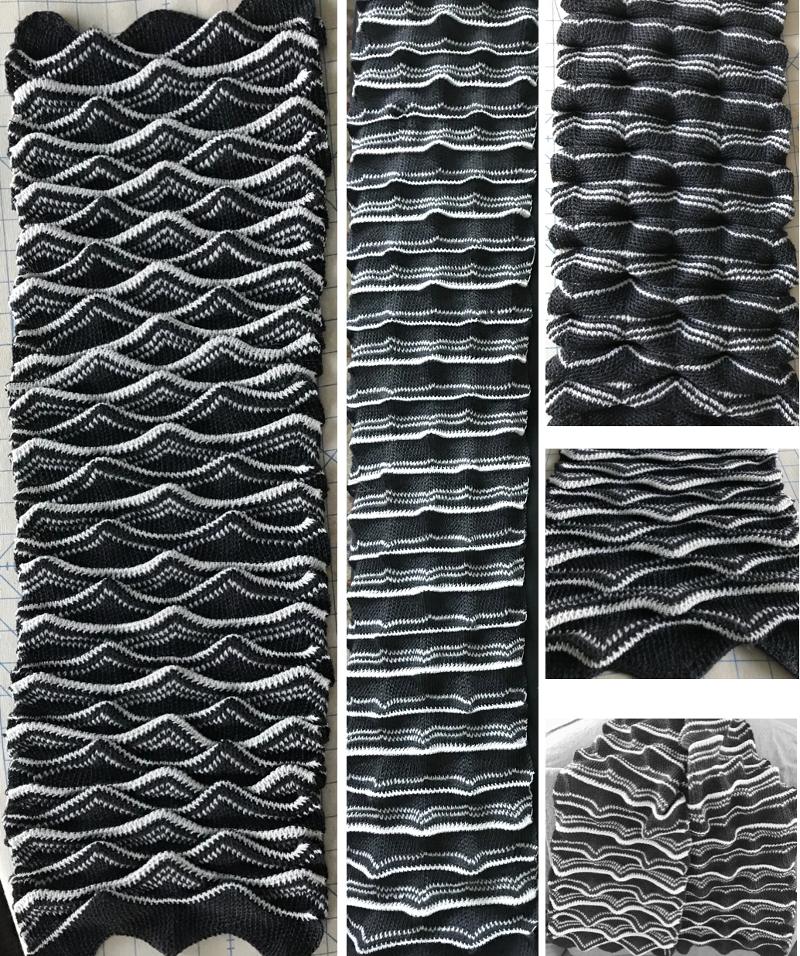 Next up was a test on how to use 2 carriages or changing settings, allowing for the turning stripes to help the scale shape bend more outward into a “point”. I found to get the width I needed, along with striping it was simpler to change ribber settings to slip <– –> for all knit rows and retain the use of the color changer on the left.
It is easy to share successes. There are also those days however when one should not be anywhere within range of a knitting machine and perseverance does not lead to anything positive. The above scarf was knit in charcoal, using 3 strands of cash wool. Two strands of the blue created a nearly flat fabric, 3 strands did the job. So I now turn to true black and white. Knitting 3 strands of the black was impossible at any tension for any length. Then I noticed the ribber on the right was lower than it should be. It turned out the bolt used to adjust the height of the ribber was loose, and the slightest turn of it loosened it completely. So then it took way too long to get it back in place. Got things back together and set up, and with each movement of the racking handle the ribber dropped on the right. After a lot more fiddling that got me nowhere, I decided to use the ribber for another Brother machine that had not been used for years. That was dry, the grease on it had turned black, and time flew cleaning and oiling and waiting. Back on the machine, the right ribber bracket of the alternate ribber will not allow it to drop on that side so it’s back to grease and patience and yes, I finally got up and running, only now the smell of the oil and lubricants makes me want to leave my apartment. Outdoors the temp is a dozen degrees warmer than inside it and grossly humid. I don’t want my knitting to smell like the solvents either, so the remainder of the day is called in as a period of rest and recreation mixed with a touch of, hopefully, amnesia.
Moving on to the next day: success in one color with no major problems or errors, have a black scarf, 64 inches long with lovely bumps, here as it appears immediately off the machine 8/16: 3D shapes held up very well  So what would that true black in the thinner weight do with those stripes in a true white? I found myself forgetting completely to set the carriage to tuck for several tries, then messed up the color-changing sequence. Time for more R&R.
8/7 after several tests with minor variations in the pattern, sorting out yarn weights preferences, I decided to “go” for a version of the same stitch type as the charcoal and white in true black and white. Again, I am not able to use 3 strands of the black 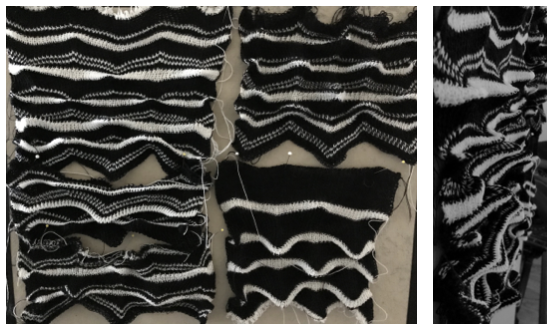 Got a third of the estimated desired length knit, and whoopee! about 10 stitches dropped off both beds on the color changer side. Oh, the joys of unraveling several rows of sewing thread weight black yarn, in racked tuck stitch, down to an all knit row in the white to make certain the proper number of stitches are in work on both beds. Got that far, and am ready for more R&R.
And 8/8 this is the last in the series, at least for a while in true B&W. The 3D pattern is reduced by the weight of the piece as it is worn 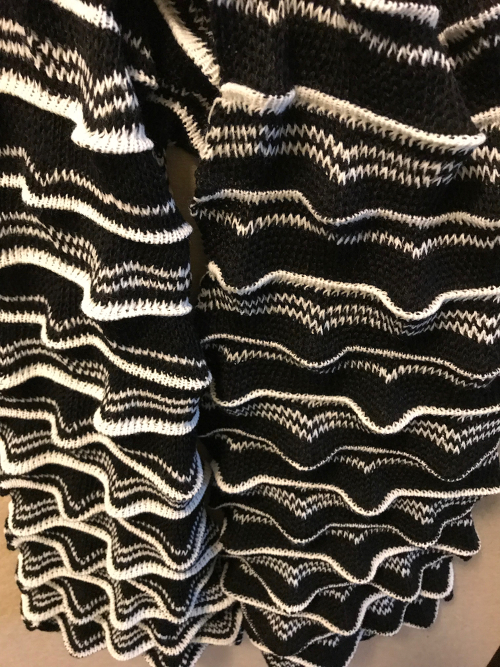 Just a reminder: the service manual http://machineknittingetc.com/brother-kr120-kr710-kr830-kr850-kr230-kr260-service-manual.html provides information on ribber adjustments. The part in question I believe, is #24, the “slide plate guide stud”. In the image below b= the bolt that became completely loose. I discovered after getting things back together that a, which secures the ribber bracket, is actually directional with a barely perceptible difference in shape, and if accidentally rotated 180, it will keep the ribber bracket from changing height positions and working properly. Rotating it restored expected actions, so now I have 2 well-functioning ribbers to work with.
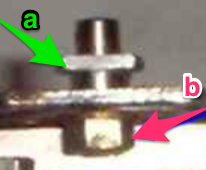
Still at it, 8/16 I now have a lovely, equally bumpy fabric in all 3 colors using 2 strands each of the cash wool at the same tension. The single difference in my execution is that I am now using my alternate KR 850 ribber. The height and other adjustments appear identical to my eye. I am reminded of my teaching days in a Brother punchcard lab, where at times the same model machines might be side by side, and fabric would work perfectly on one machine while not on the other supposedly identical model. Students were not allowed to swap off machines, the one exception being if that was the only way to get the stitch types in their final projects completed after I attempted to work out other possible issues. “They” do keep talking about how relaxing knitting is, but with machine knitting, there are lots of opportunities to wonder about that suggested fact.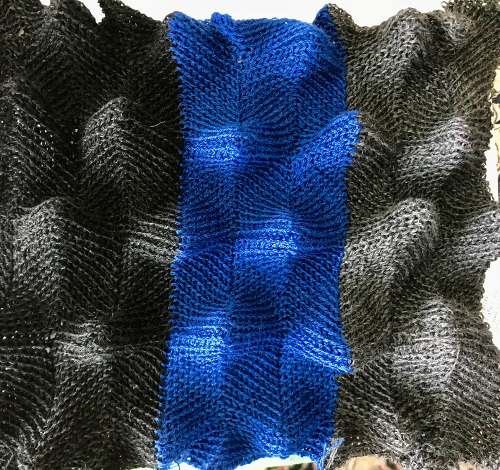 8/17: complete a royal blue scarf in the smaller scale repeat, previously executed on my 910. The punchcard below it image may be used to achieve the same fabric.
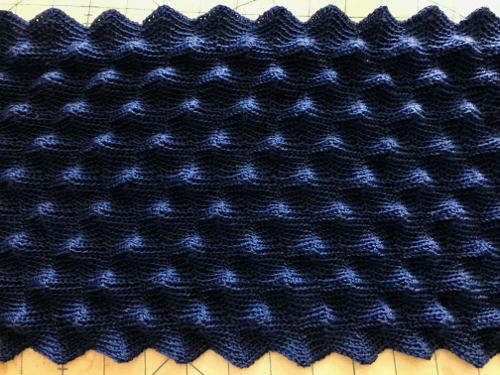
 8/18: trucking on, planning a couple of more pieces with the large-scale repeat. It seems I have been having more drat-it moments than one might ever want, resulting in having to discard hundreds of rows of knitting for any number of reasons including racking operator errors. I have also encountered another problem. In the past, I have used cello clear, or a variety of tapes to seal off holes accidentally punched in the wrong place. I very rarely produce multiples of any of my pieces, and my limited edition items were usually knit on an electronic due to its increased ease in adjusting the repeat width and height to suit. Transitioning from the solid repeat to the striped one, I decided to punch out holes on my original card to test my ideas, and when returning to the large scales I was too lazy to punch yet another card, and taped over sections I wanted to eliminate from the selection. Hundreds of rows into yet another piece I began to notice odd behavior in needle selection, which was fully remedied by investing time into punching a new card, and yes, starting over yet again. Note to self: do not do this sort of taping over in the future, no matter what the tape, and especially when knitting multiple pieces thousands of rows in length!
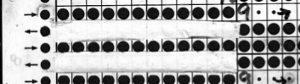
8/21: I am working on a final series of large-scale, single-color scarves. As has often been my experience in knitting long pieces of ribbed fabrics (most of my scarves are 1200 rows or more in length), I have a talent for developing problems after the ¾ point. Two factors that can have an effect on stitches not knitting off properly “suddenly” can be the result of 1: the slide lever setting being changed accidentally when moving ribber sinker plate ie to correct patterning errors and bring it to the opposite side, and the ribber alignment for needle positions relative to each other on opposite beds changing slightly from all the side to side motion in racking nearly every single row.
The slide lever has 3 positions. I have out of habit gotten used to simply leaving it in its center setting (lili) for my knitting, and used to teach students to keep that constant if possible. Sometimes when knitting ribbed cuffs, bands, or collars, I have seen the differences in length and width of them changed for separate pieces and not noticed until one was ready to join pieces. 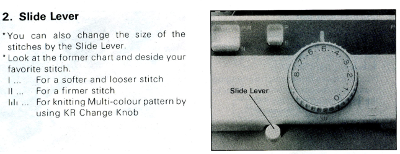
adjusting needle bed positions (for more see https://alessandrina.com/2015/01/13/a-bit-on-ribbers-japanese-kms_-alignment-and-symbols-1/)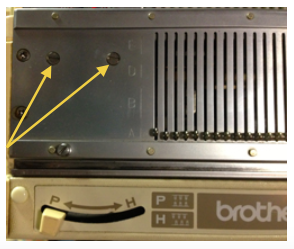
The last piece produced by me was in a charcoal color, using the same yarn brand and weight as the black. All things being equal, using the same tension (required to avoid knitting problems), the charcoal version stitches were considerably looser, and longer, also due to changes in gauge. I think the charcoal scarf will put this fabric to rest for me for a very long time. This was my final, pre-punched card, and its markings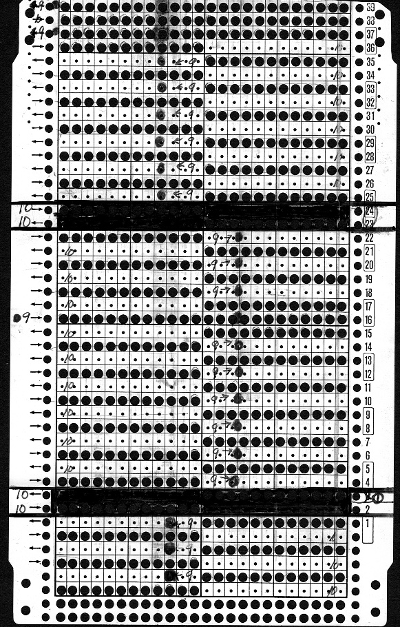
Some Passap patterns 2016/01/13/racking-2-vertical-chevrons-herringbone/
and 2016/01/09/ribber-pitch-a-bit-on-racking-1-chevrons-horizontal-herringbone/
I love your final fabric. The addition of striping to the shaping is quite brilliant, I haven’t seen that combination before.
Hmmmm . . . Relaxing? I can’t imagine anything more mentally stimulating while being fairly physically demanding as well. I have to completely distract myself if I want to keep the gears from spinning in my head, thinking about yet another machine knitting adventure/mystery/impossibility.
I also love your description of two (for all intents) identical machines next to each other, one will, one won’t. It’s this exact phenomena that sometimes makes helping KMers in distress nearly impossible. Sometimes a machine just WON’T.