Previous shares on aids to tracking cable transfers
Using punchcards to track small cables in pattern 1
Using punchcards to track cables and twists in pattern 2
Visualizing knit cables in color 2_ using Numbers and Gimp
Hand knitting patterns are usually depicted with the knit side facing.
If crossings are intended to match them exactly when working on knitting machines, they are made on the purl side, and their direction needs to be mirrored.
The blue dots illustrate hand-knit symbols, and the pink dots the machine-knit companions 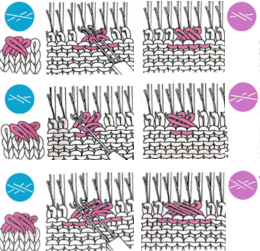 I was recently contacted about the possibility of reproducing the swatch on the far right. The image on the left is an actual knit, first tested with cable crossings mirroring each other along vertical columns.
The inspiration swatch was likely knit on the bulky, twisted every 4 rows, mine on a 4.5 mm machine, twisted every 5 rows.
It is possible to crop, copy, and paste initial photos, as in the center image, to visualize how the process may be altered prior to spending time creating new charts or any actual knitting. 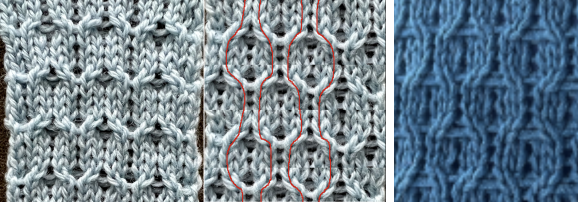 Building charts in a spreadsheet:
begin with creating and saving custom shapes, which can be made editable, and outlined if preferred (magenta) to further define the stitch brought forward, with the other moved behind it (blue).
Symbols used:
1. black cells/ knit stitches
2. white cells/ needles out of work, creating ladder spaces and non-selected needle areas where stitches are to be moved in the direction of superimposed arrows
3. red arrows/ stitches that are lifted off the needle bed, brought to the front on the purl side. The stitch on the adjacent black cell/selected needles is removed, travels behind it, and replaces it. The held stitch is then placed on the now-empty needle. Both stitches are brought out to hold/E position to knit properly on the next carriage pass.
The plan is to use the slip-stitch setting in both directions.
Since there are needles not in use, the end needle selection needs to be canceled.
Proper needle placement is required for patterning accuracy.
One option for achieving it is by air knitting the first row of the design, another is to program the width of the planned knit in electronic machines, establishing pairings, and using the single motif setting with no guesswork.
A chain cast-on can be performed, followed by dropping chains in ladder locations and taking those needles out of work to A position.
Even weight is useful if crossings are to begin after only 4 rows of knitting.
Each repeat is 8 stitches wide, punchcard users repeat it X3 in width, and in the charted height X3. 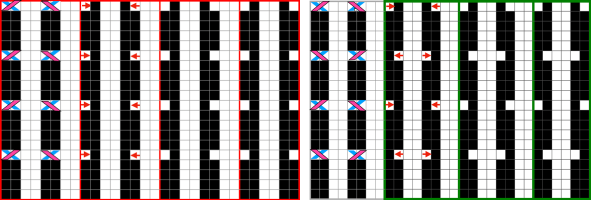 Proofs of concept: 30X20 electronic repeat for vertically mirrored transfers,
 ![]() and the alternating twisted arrangement
and the alternating twisted arrangement ![]() The work on the machine
The work on the machine 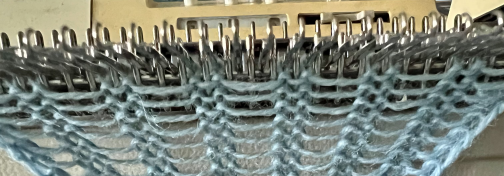 In the resulting swatches, patterning errors such as the marked one become difficult to repair after the fact as stitches grow in size and ladders nearly disappear
 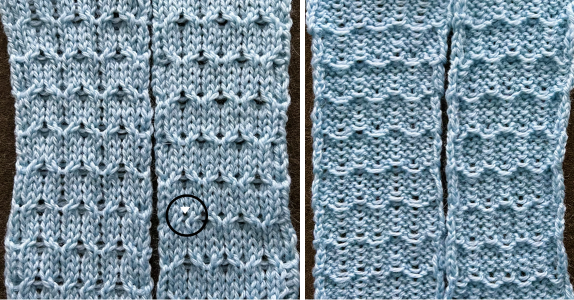 Both swatches measure less than 2.5 inches in width, another reason to explore the results on bulky models if they are to be used in garments.
If planned as panels combined with stocking stitch, careful planning is due to overall gauge differences and those in row counts when seaming and joining.