In previous posts, ie Numbers and GIMP: online punchcard patterns to electronics 2, I shared some ways of converting online images from varied published sources.
This series was edited using primarily ArahPaint and some Gimp, both are available for free.
DAK users have the ability to achieve similar results in that universe, producing stp proprietary files. There is no export (or import) available to other formats ie png or bmp possible.
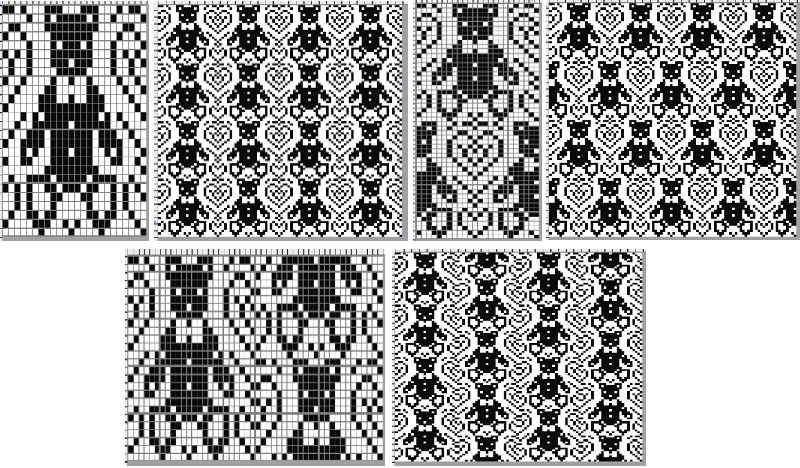
Fair isle is not in my preferred wheelhouse, especially in season specific designs, but that said, I have been sharing these repeats in the FB machine knitting forum and thought I might make them available to others here as well.
The pngs are editable for further DIY modifications.
 24X189
![]() 24X94
24X94 ![]() 24X85
24X85 ![]() cropping given repeats for desired tiling, # 1068
cropping given repeats for desired tiling, # 1068 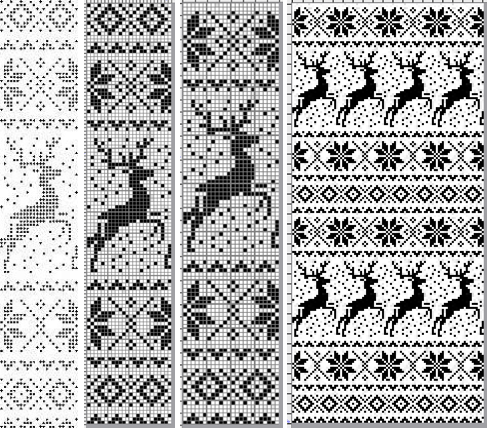 the original 24X119 png
 ![]() cropped to 24X105
cropped to 24X105 ![]() My first encounter with “naughty reindeer” was during a Brother dealer-sponsored small machine knitting club meeting. A present update, using a Pinterest find as the source
My first encounter with “naughty reindeer” was during a Brother dealer-sponsored small machine knitting club meeting. A present update, using a Pinterest find as the source  the original 24X60
 ![]() with 2 rows added to 24X62
with 2 rows added to 24X62![]() in brick repeat, 24X124
in brick repeat, 24X124 ![]()
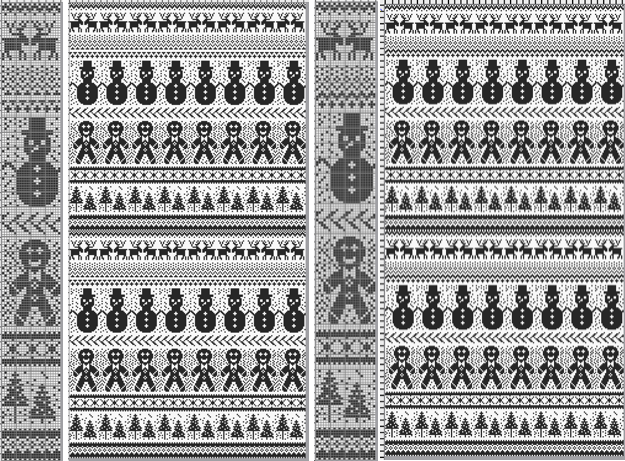
A 40 stitch Madag design 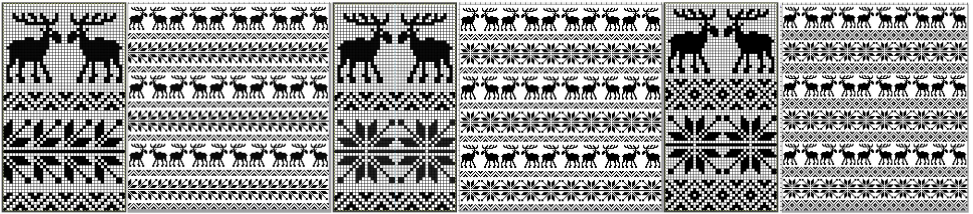 40X68_1
 ![]() 40X68_2
40X68_2 ![]() A 24 stitch version, with the moose, and without
A 24 stitch version, with the moose, and without 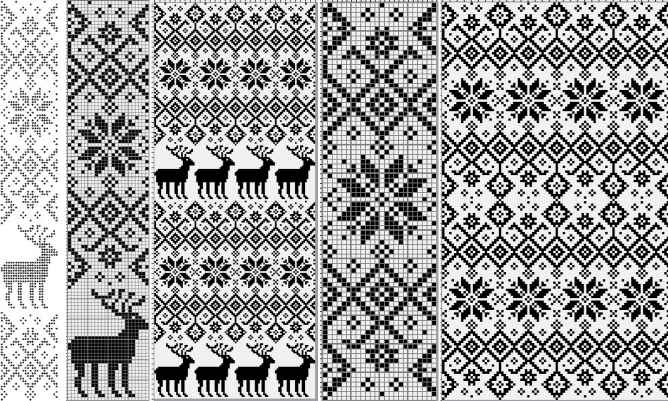 the original, 24X152
 ![]() cropped to 24X118
cropped to 24X118 ![]() with the moose edited out, 24X84
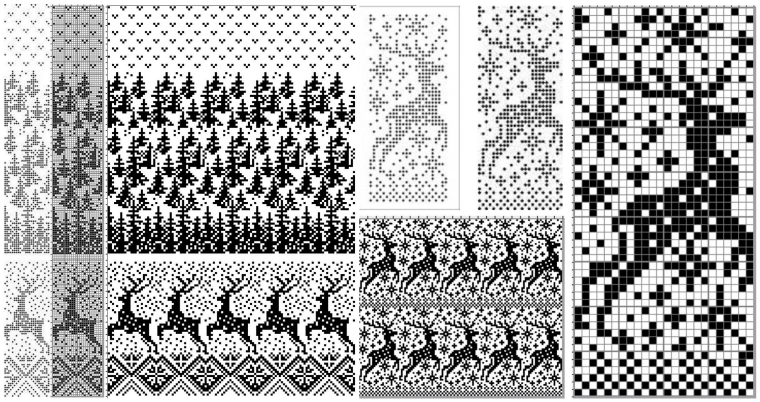
with the moose edited out, 24X84 ![]() Snowmen and trees
Snowmen and trees
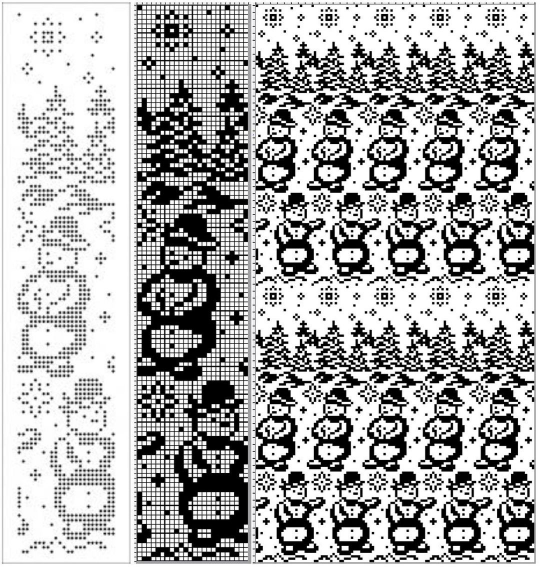 24X120
![]()
 24X50_1
 ![]() 24X50_2
24X50_2 ![]() testing tiling prior to knitting, editing out unwanted symbols
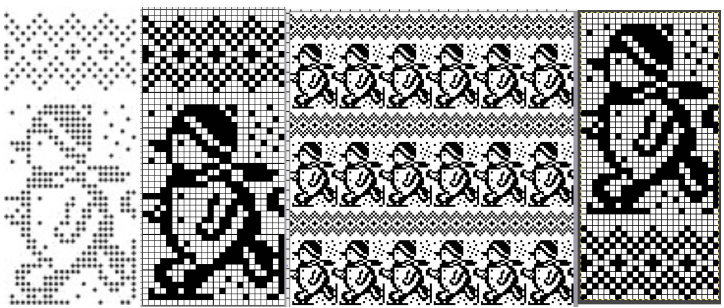
testing tiling prior to knitting, editing out unwanted symbols 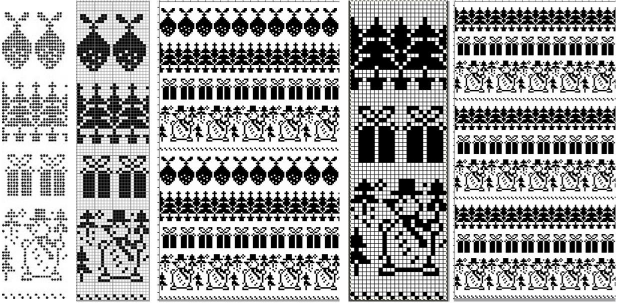 the original 24X99
 ![]() the edited 24X74
the edited 24X74 ![]()
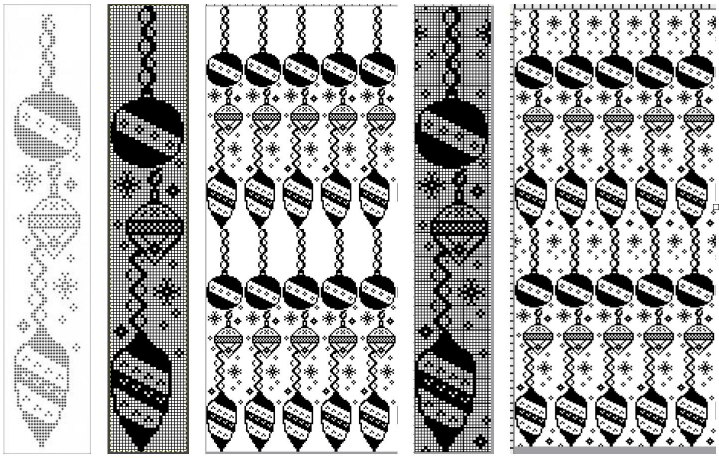 As a 24 stitch repeat, this is suitable only for single motifs, since repeating them horizontally would join the darker ball shapes. Adding a blank pixel column on the far right changes the horizontal alignment. A few pixels added at the top of the motif form an unbroken join vertically, the final 25X146 shown on the right
 ![]() This Santa was identified as being attributable to Knittery, a company long defunct that offered pre-punched cards for purchase. Images where the background is punched out make it possible to introduce striping it with the color changer or using the chart for duplicate stitch embroidery on a knit ground.
This Santa was identified as being attributable to Knittery, a company long defunct that offered pre-punched cards for purchase. Images where the background is punched out make it possible to introduce striping it with the color changer or using the chart for duplicate stitch embroidery on a knit ground. 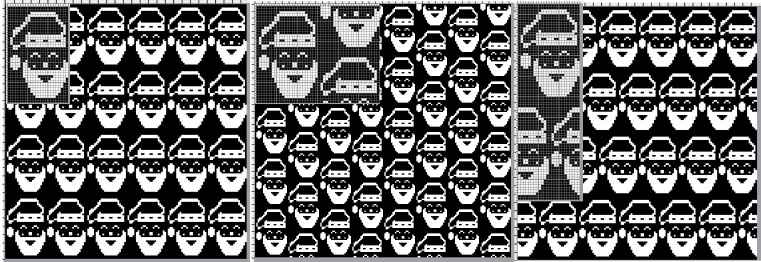 the original, 24X38
 ![]() in half drop, 48X38
in half drop, 48X38 ![]() and in brick repeat, 24X76
and in brick repeat, 24X76![]()
the original, 24X185 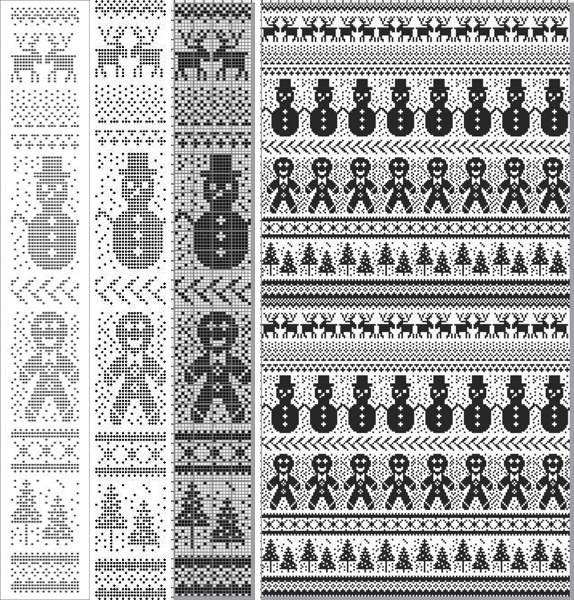
![]() with the elimination of some rows, first at the very top
with the elimination of some rows, first at the very top 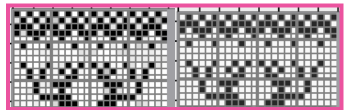 and then just above the snowman’s hat
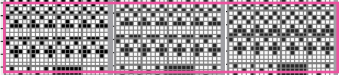
 the final 24X182 png
 ![]() The question as to how to adjust repeats for use on 12 stitch knitting machines often comes up in forums.
The question as to how to adjust repeats for use on 12 stitch knitting machines often comes up in forums.
Continuing in the seasonal vein, the easiest method is to begin with a 12-stitch repeat that occupies only half of the card vertically and twice in width. Here the original “half” is 12 stitches wide, 46 rows tall.
One method for the conversion is to work on a spreadsheet:
Begin with a table 24 cells wide, adding enough rows to the expected planned height to repeat the snowflake border, 46 cells in total
configure the cell borders for easy viewing, ie with a 3 pt red lines
hide 12 columns beginning with the second from the left
fill in black cells matching the original design or the DIY version
unhide all 12 columns for the final repeat 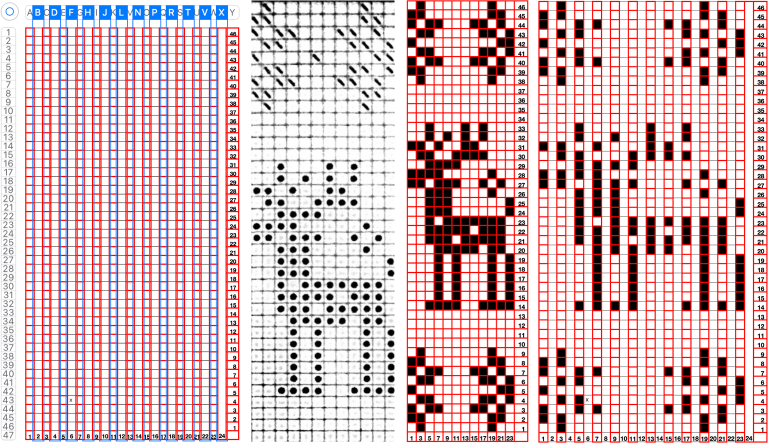 When converting the screen grab from a spreadsheet to png in Gimp, before scaling to final size, a first scaling may be required to make certain the result is divisible by the expected number of stitches and rows using the broken chain link, and then scaled again with closed chain link, the first png
 ![]() Working in Gimp or any paint program
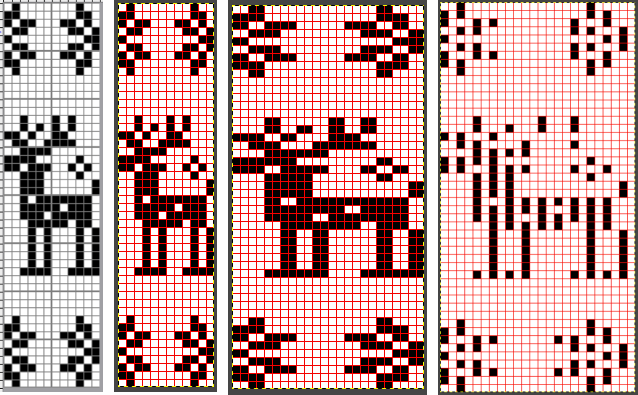
Working in Gimp or any paint program
draw the “original” and save it, mine now has 2 added rows, one above and one below the deer, making it 12X48 pixels ![]() scale it to twice the original width
scale it to twice the original width ![]() configure the grid properties for contrast/easy viewing
configure the grid properties for contrast/easy viewing
fill in every other column with white using a straight line white pencil. To do so, select a pixel with the mouse, hold the shift and command keys down to draw the lines, and release the mouse to stop. The first white pixel may be placed within an easy-to-follow section of black ones and then the mouse may be held and moved up and down to complete each column. Save the result.
 Proof that it is always a good idea to draw the initial image in repeat before committing to color separations or any downloads and actual knitting:
 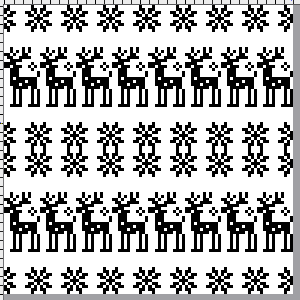 Two possible alternatives in adjusting the design to one’s preference are marked in 6X6 grids in ArahPaint to match markings on blank Brother factory blank cards:
the first removes a snowflake border and is reduced to 12X39 pixels, ![]() the second adds 4 rows at the top of the second snowflake border, 12X52
the second adds 4 rows at the top of the second snowflake border, 12X52 ![]() the number of rows between motif segments can be varied for planning the introduction of stripes in added colors
the number of rows between motif segments can be varied for planning the introduction of stripes in added colors 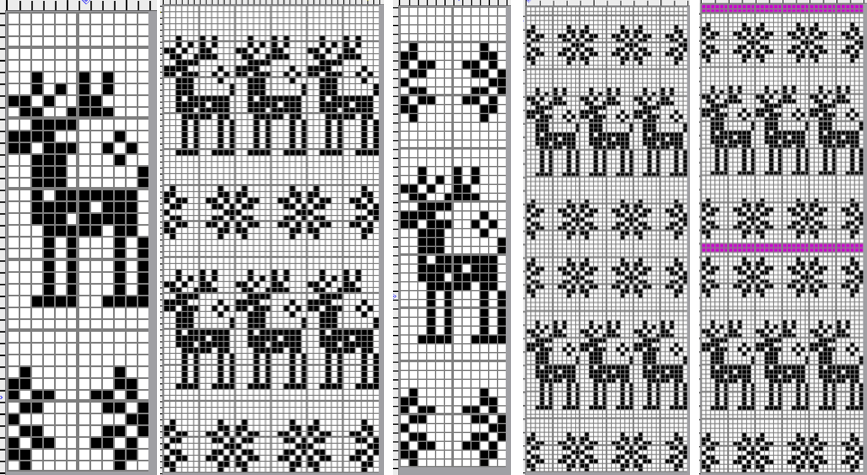 If only Gimp is available, I have not found a way to vary colors in grid borders in blocks other than to use guides, appearing as dotted blue lines.
  A break from reindeer, teddy bears, and hearts follows, perhaps for a baby gift or to save for Valentine’s Day. When there are clear horizontal borders added to motifs the half-drop repeats will produce mixed results.
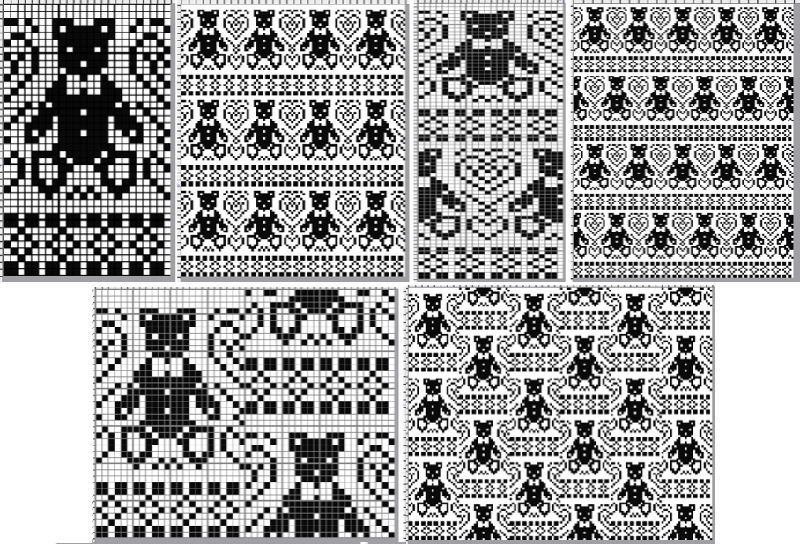
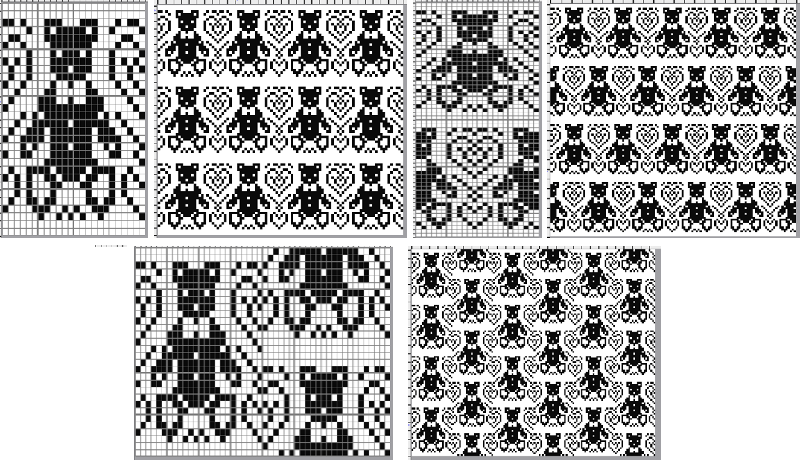
 the pngs:
24X39![]() 24X78
24X78 ![]() 48X40
48X40 ![]() 24X60
24X60![]() 24X30
24X30![]()
48X30 ![]()
24X26
![]() 24X52
24X52 ![]()
48X26 ![]() Bell motif variations
Bell motif variations 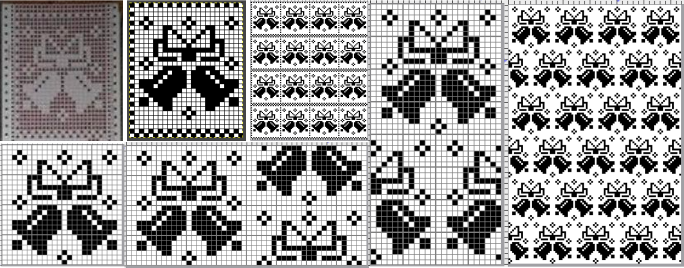
24X30![]() 24X48
24X48 ![]() 48X24
48X24 ![]() The last in this series, a nutcracker motif inspired by a larger scale cross stitch design, reduced by me to a workable 24 stitch MK design with varied borders and collaged small motifs in the background
The last in this series, a nutcracker motif inspired by a larger scale cross stitch design, reduced by me to a workable 24 stitch MK design with varied borders and collaged small motifs in the background 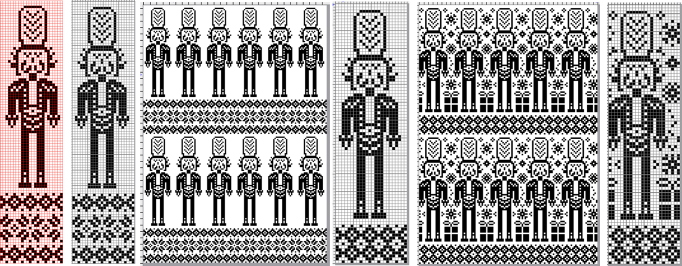 24X101
 ![]() 24X87
24X87 ![]() 24X87 with added background designs
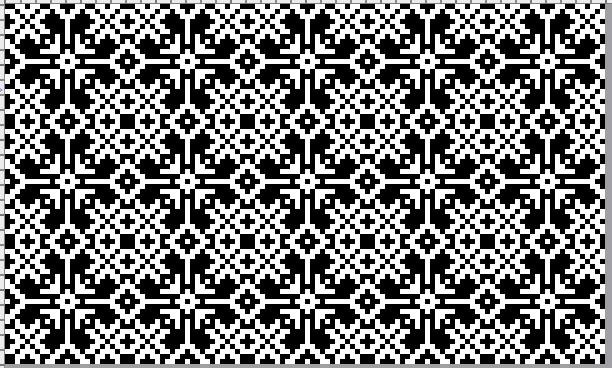
24X87 with added background designs ![]() Considerations in choosing a design are guided by its end use, tiling the repeats leaves fewer surprises in any actual knitting.
Considerations in choosing a design are guided by its end use, tiling the repeats leaves fewer surprises in any actual knitting.
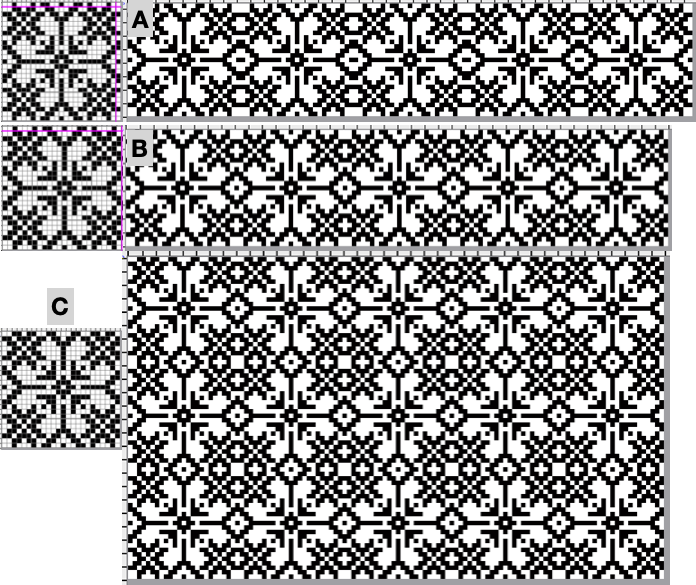
This might appear in casual observation to be a “snowflake”.
The full 25X25 pixel version can be isolated, with matching fragments around the whole. Magenta lines indicate cropping points depending on end use if double stitches not immediately obvious or planned are to be eliminated. 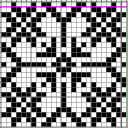
![]() A: the full design as a potential knit border
A: the full design as a potential knit border
B: trimmed a one-pixel width column on the right to 24X25 while retaining matching top and bottom rows ![]() C: trimmed the single top row as well to 24X24 for an all-over execution, drawn in repeat for an opportunity to evaluate whether the design as it now appears produces the initial imagined shapes and effect
C: trimmed the single top row as well to 24X24 for an all-over execution, drawn in repeat for an opportunity to evaluate whether the design as it now appears produces the initial imagined shapes and effect ![]()
 Then there is the optical effect change that happens with color invert, for which an easy test may be made during knitting by simply switching yarn color positions in the knit carriage sinker plate
 ![]()