ArahPaint links
https://www.arahne.si
https://www.instagram.com/arahnecad/
https://www.facebook.com/arahneCAD/
https://www.pinterest.com/arahne0183/
https://www.youtube.com/user/arahpaint4#p/u
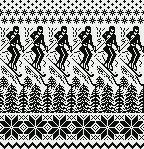
When this post began, I was working using ArahPaint Version 6.0.3688 on an iMac with an M1 chip, OS Sonoma 14.5, now upgraded to OS Sequoia 15.01.
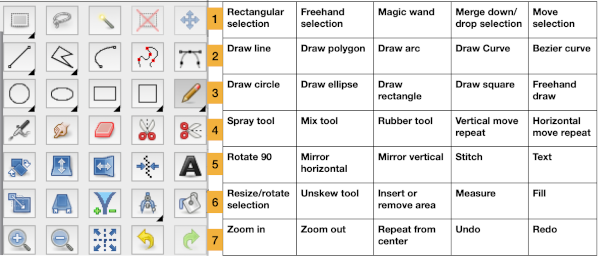
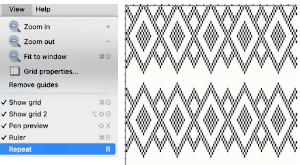
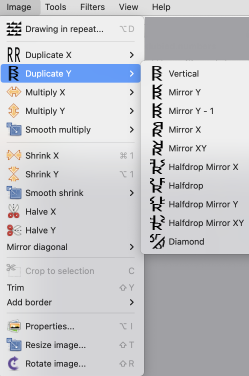
Since the blog is a living document, I often add new tests or ideas to older posts, which can become quite lengthy, so this is intended as the home for the most recent observations and experiments. The tool ![]() has been demonstrated in many previous posts including in the early ArahPaint meets Gimp in knit design 1
has been demonstrated in many previous posts including in the early ArahPaint meets Gimp in knit design 1
 and Developing designs using pattern fill for use on a range of machine models
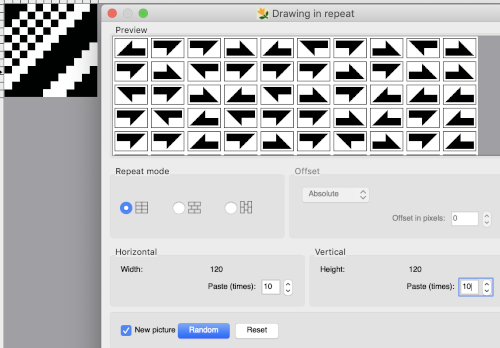
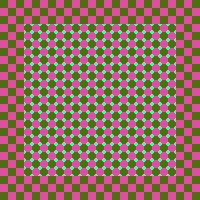
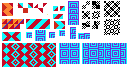
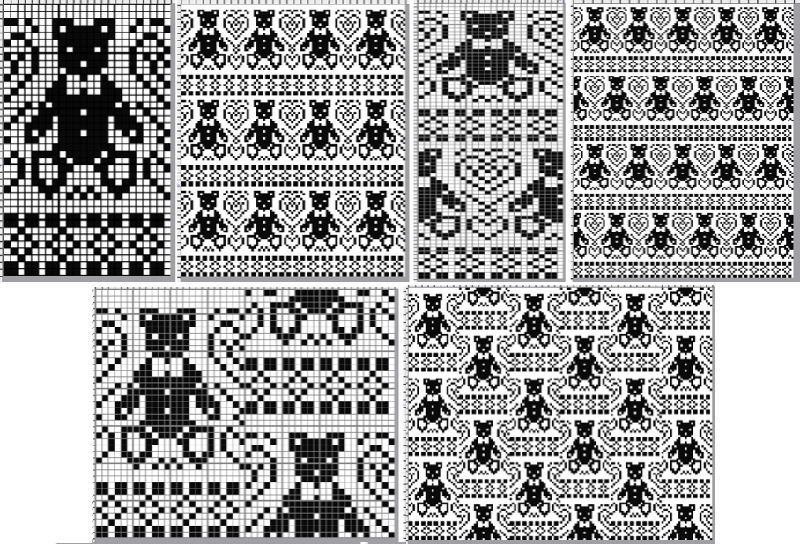
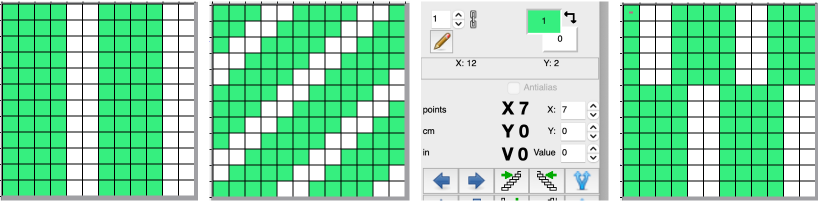
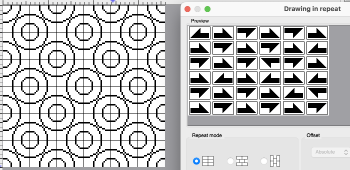
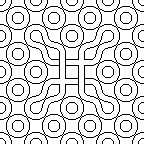
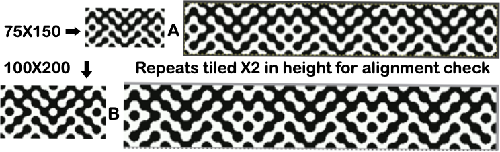
A different approach for varying any original design, which reminded me of the drawing in repeat option in my old Stitch Painter days :
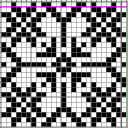
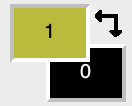
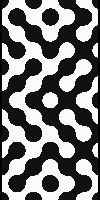
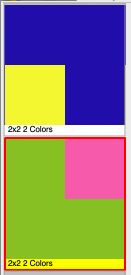
choose a repeat ie this 10X12 one. 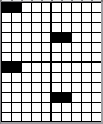
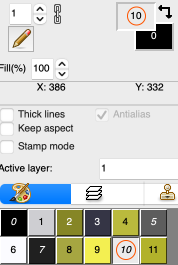
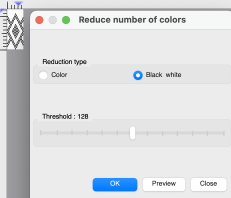
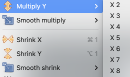
![]() Load the picture, from the pull-down Colors >set the number of colors 2, BW palette, press the r (small case) keycap on the keyboard, and the file will be multiplied in a fixed tenfold of both height and width
Load the picture, from the pull-down Colors >set the number of colors 2, BW palette, press the r (small case) keycap on the keyboard, and the file will be multiplied in a fixed tenfold of both height and width
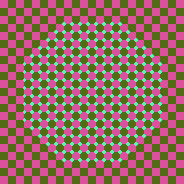
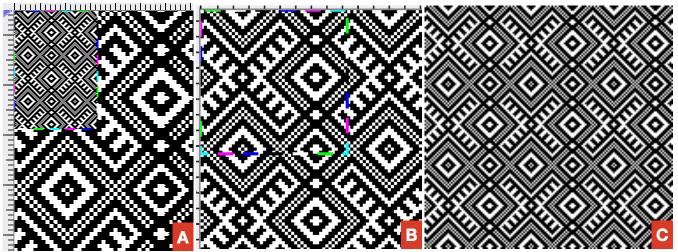
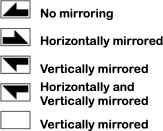
make the following changes in sequence
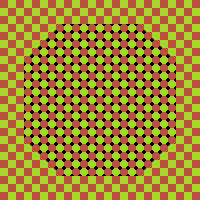
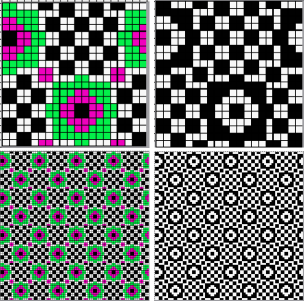
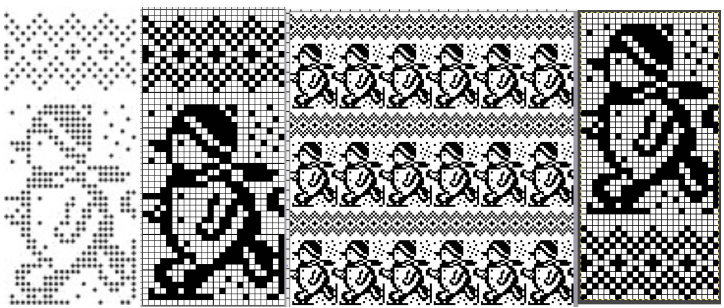
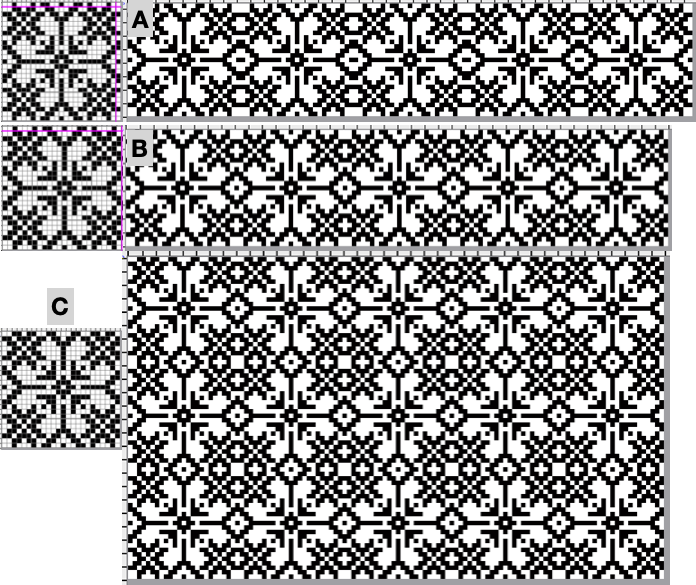
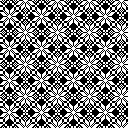
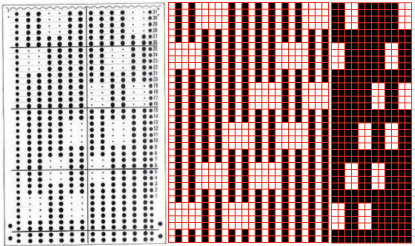
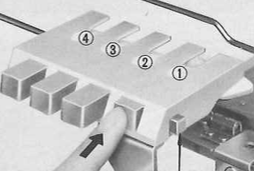
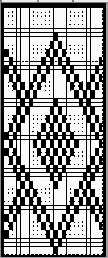
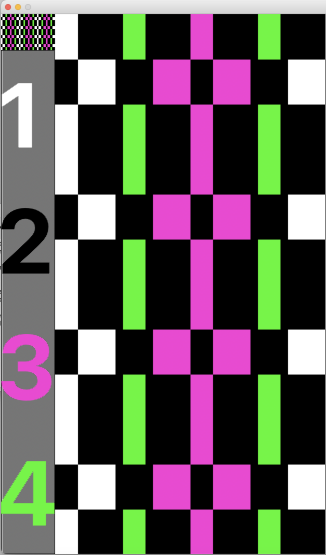
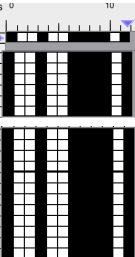
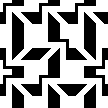
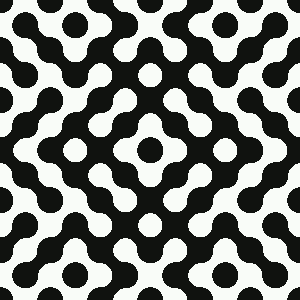
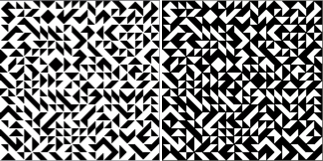
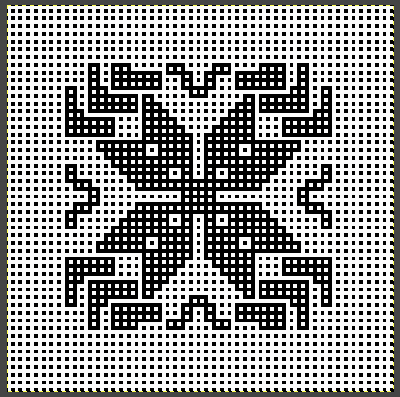
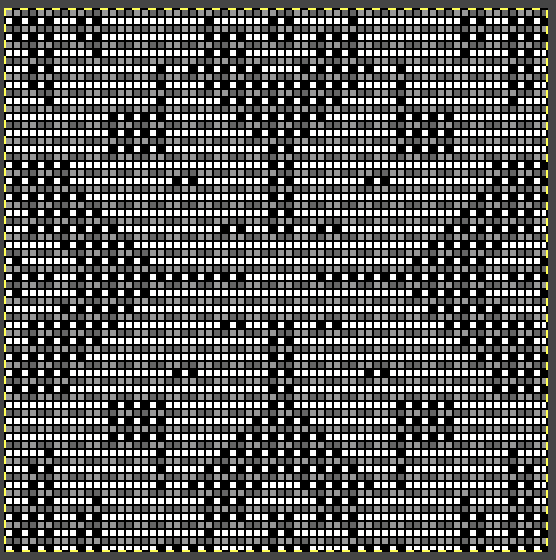
A: the original tiled by the keyboard command r to 100X 120 pixels
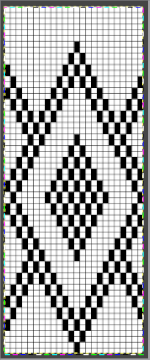
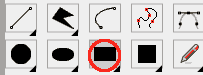
B: use a single-pixel pencil, place single dots with the mouse, and release the mouse button
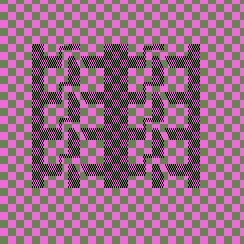
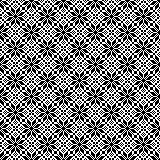
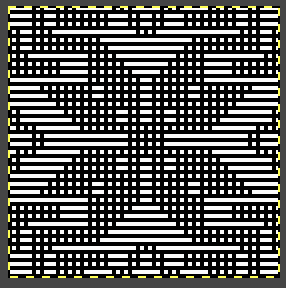
C: select the empty circle icon, and with the mouse click and drag to superimpose the chosen size in place on the previous design, release the mouse button
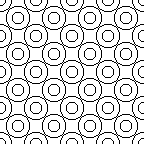
D: select the filled rectangle icon, and with the mouse, click and drag to superimpose the chosen size in place on the previous design, release the mouse button 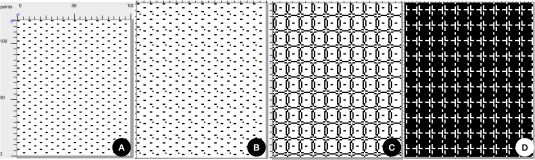 As a first option, use Tools > Find repeat, for a return to the smallest repeat unit matching the size of the original, and save the result.
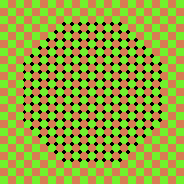
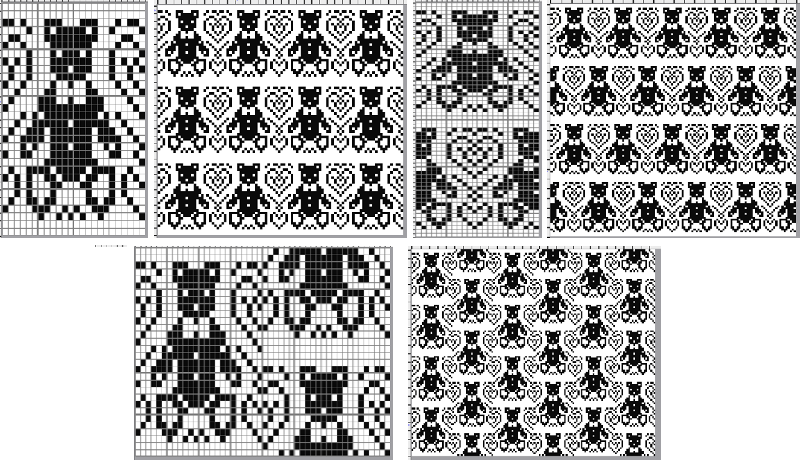
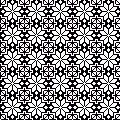
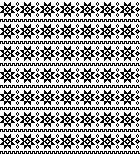
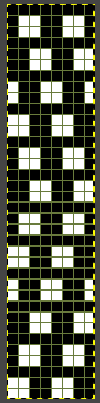
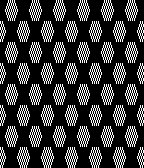
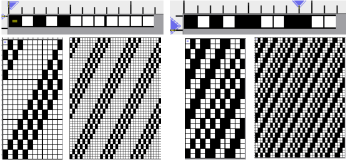
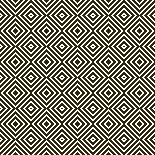
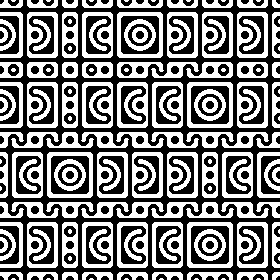
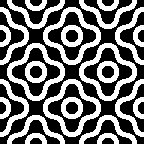
A test with an 8X14 design 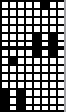
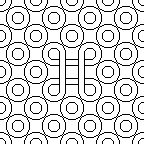
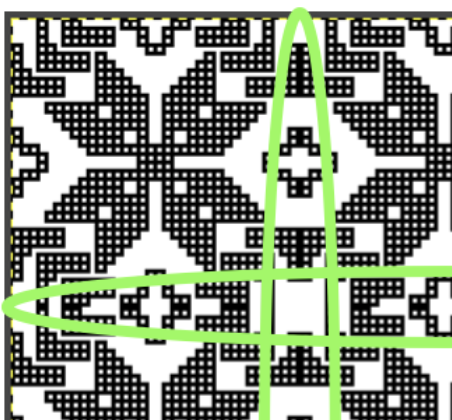
![]() with a superimposed filled oval
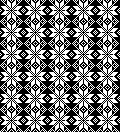
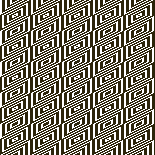
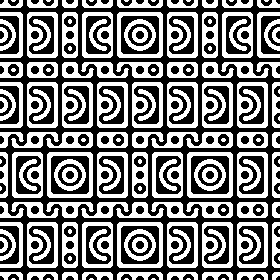
with a superimposed filled oval 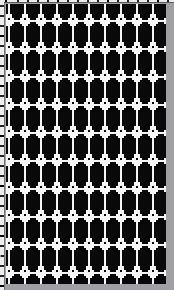 The find repeat step can be eliminated, using “Save the picture as” will automatically isolate the smallest repeat, also 8X14
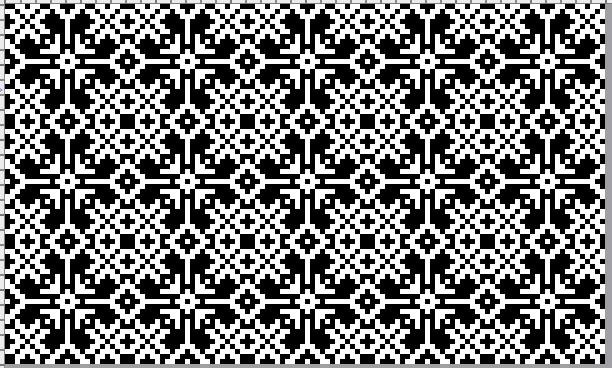
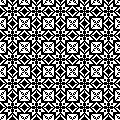
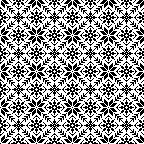
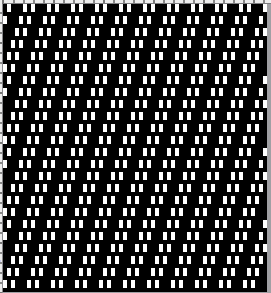
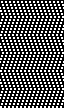
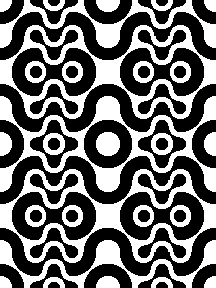
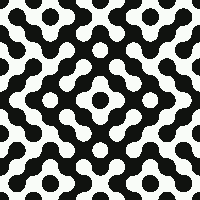
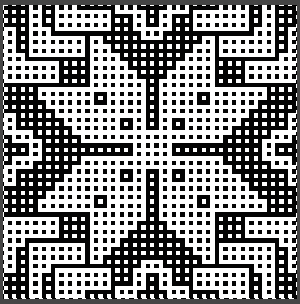
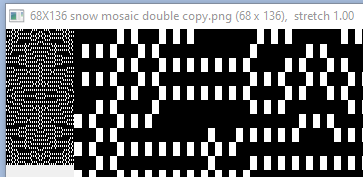
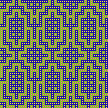
 ![]() is now tiled using Drawing in repeat to produce a 24X42 possible punchcard design
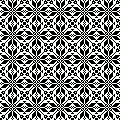
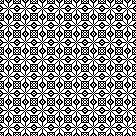
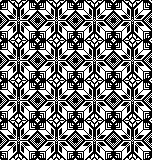
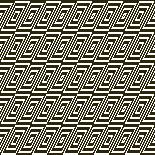
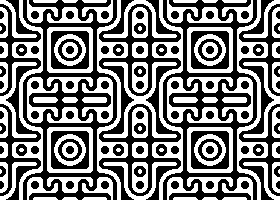
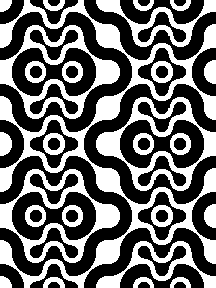
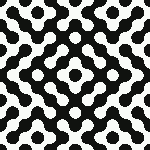
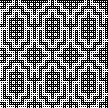
is now tiled using Drawing in repeat to produce a 24X42 possible punchcard design ![]() And one more 8X14 png, repeating the steps using the color white and the rectangle tool outline for another variation.
And one more 8X14 png, repeating the steps using the color white and the rectangle tool outline for another variation. ![]()
![]()
Subsequent files and information are now developed on my iMac upgraded to OS Sequoia 15.0 in September 2024
Developing designs using pattern fill for use on a range of machine models reviewed Pattern Fill, and introduced modification mode to custom zoom and rotate brush-filled shapes using the Command key on the Mac.
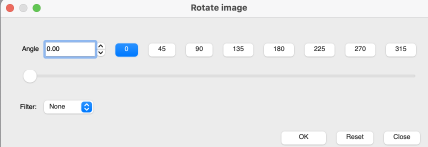
In the program’s most recent updates, there is now an Interactive Rotate and Zoom feature.
Advice from the developer: “The M1 update version is lagging. If you want to use the latest version, which allows rotation /zoom of patterns, you have to install the Intel version. It works just fine with Rosetta on Apple Silicon.”
Create a brush, save it
10X5 pixels ![]() Open a new image large enough to accommodate multiple repeats, ie 120X120.
Open a new image large enough to accommodate multiple repeats, ie 120X120.
Select the brush drawing mode
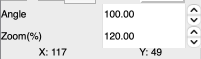
Select any filled drawing tool and the brush, the angle and zoom parameters will appear.
The standard pattern fill:  Move the mouse pointer to the drawing start position
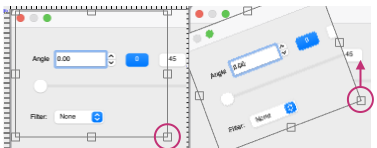
Hold down both the Control and Command buttons while drawing with the brush to enter the modification mode
Use the mouse scroll to change the angle in both clockwise or anti-clockwise directions and zoom by increasing or decreasing its size, changing values until satisfied.
To exit modification mode, click on any drawing tool.
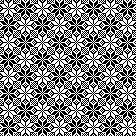
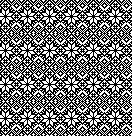
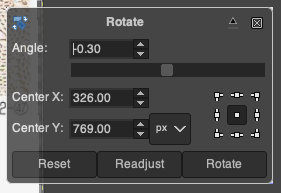
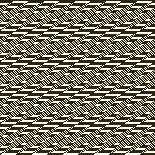
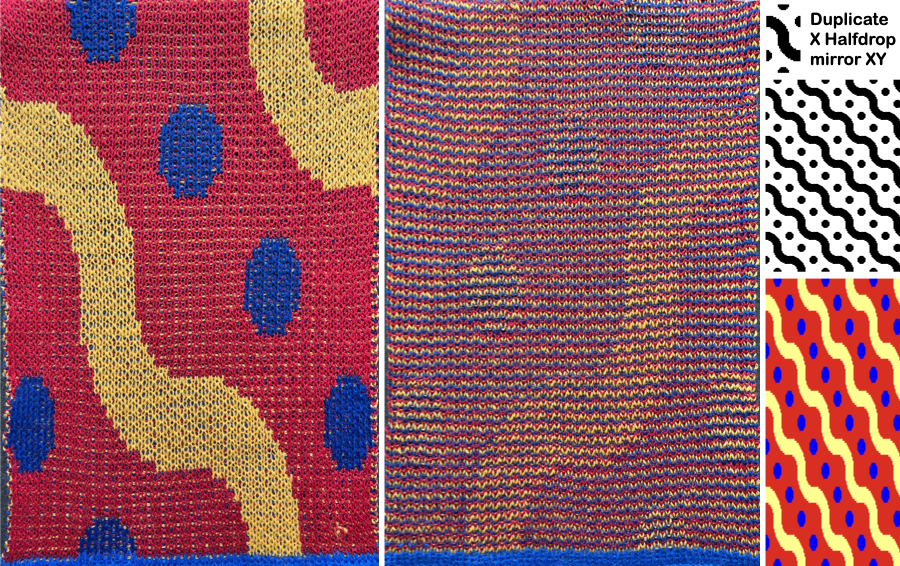
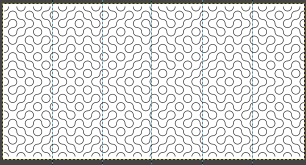
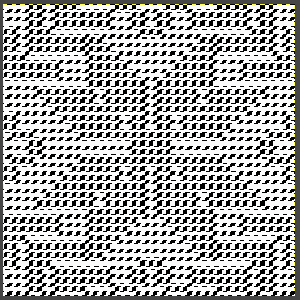
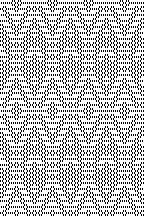
The design was modified to these values on a 120X120 canvas
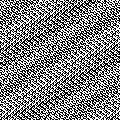 Use Tools >Find Repeat, 111X83
 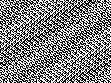 Check tiling using Image > Drawing in repeat, 222X249
  Building collages by using custom brush fills on colored base shapes
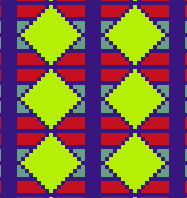
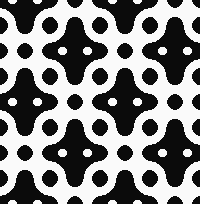
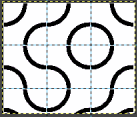
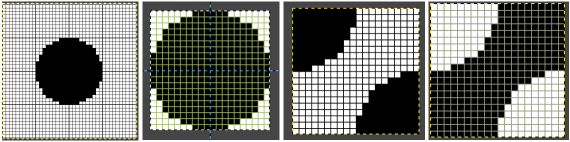
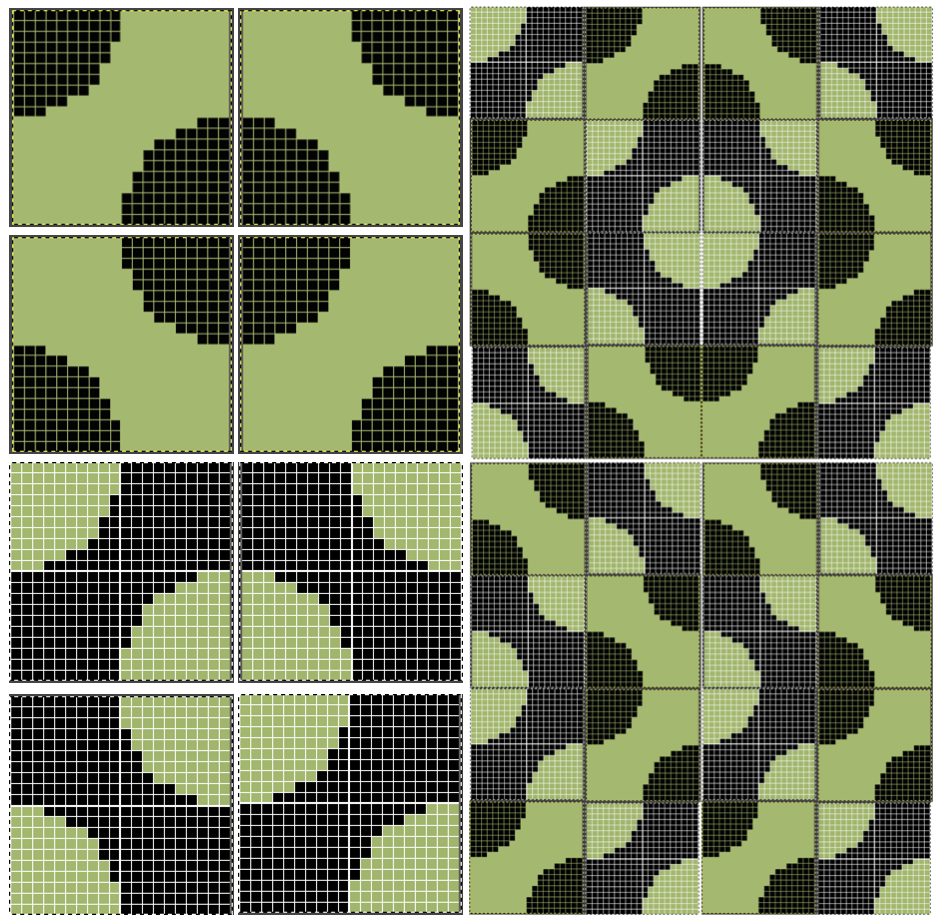
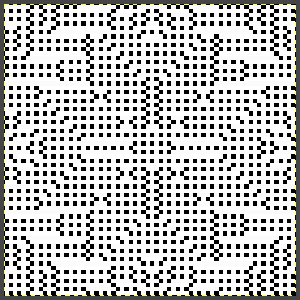
 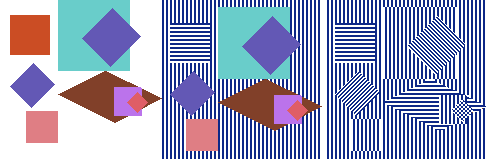 Skipping the colored collage, working simply with brush-filled shapes working from the background then adding decreasing sizes or shapes ie these circles

It is possible to work with added colors, which will factor in the changes in aspect ratios of the patterns in the final knit depending on the yarns and knitting techniques used.
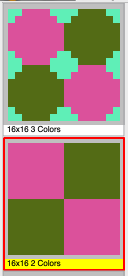
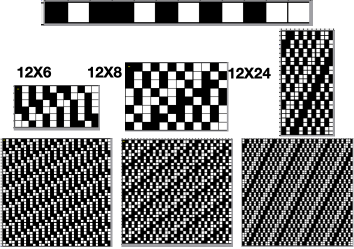
Working with brush fill planned in 8X8 pixel blocks and using View >Grid Properties to 8X8:
sometimes the brush design needs to be rotated for successful placement ie this 16X16 ![]() was rotated to
was rotated to ![]() a second brush, also 16X16
a second brush, also 16X16 ![]()
 planning for the full needle bed/200 needles/stitches, a multiple of 16+8, using brushes and filled rectangle tool, retaining square shapes
  with a 4-block border followed by a 3-block one
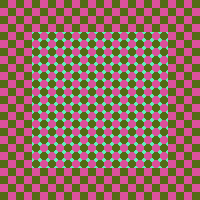
 experimenting with adding/subtracting color pixels, using the pencil or bucket fill tools
  184X184, also a multiple of 16+8 with 3 block border.
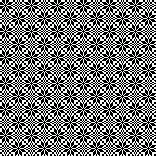
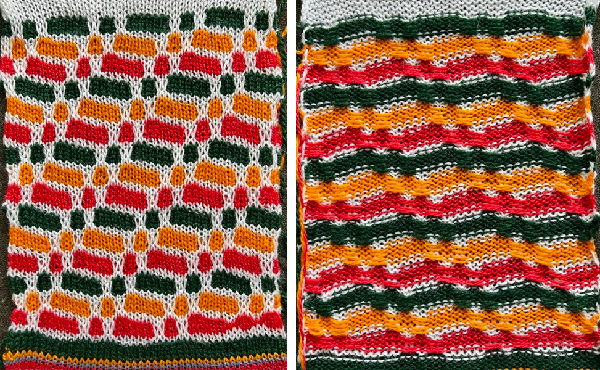
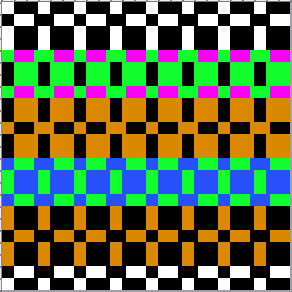
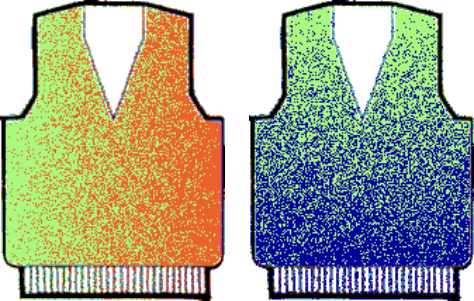
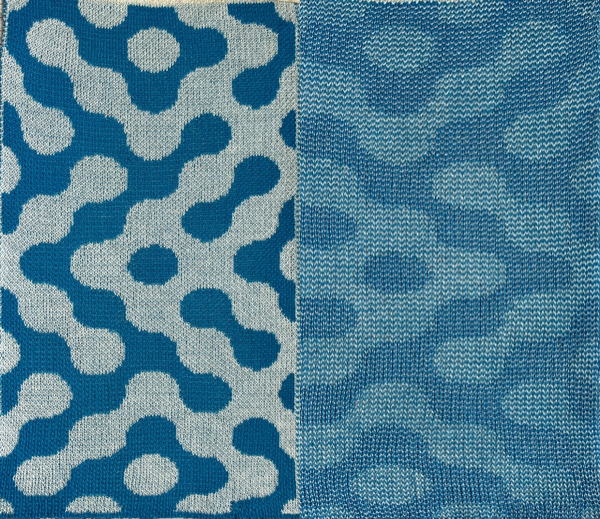
 the 200X200 tiling in both colorways
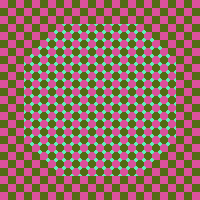
 Adding a fourth color also 16X16
 ![]() tiling check to 136X136
tiling check to 136X136 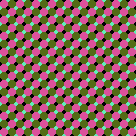 filled rectangle placed on planned block design frame, 184X184.
 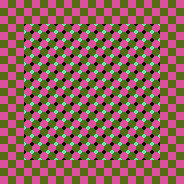 Varying the diagonals, a 64X64 repeat
  tiled to 192X192
 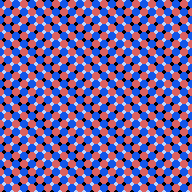 changing the colorway
 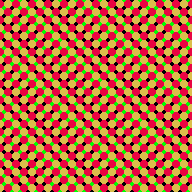 aiming for chevrons, 128X64
 ![]() tiled to 256X192
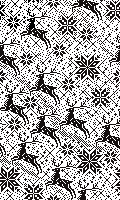
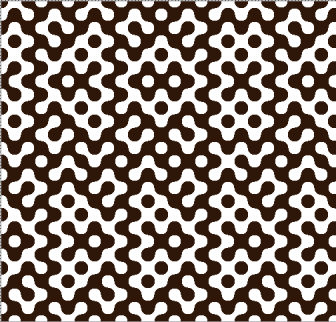
tiled to 256X192![]() A small 24X24 repeat for 2 color knitting with similar diagonal movement from Working with diagonal patterning in machine knitting
A small 24X24 repeat for 2 color knitting with similar diagonal movement from Working with diagonal patterning in machine knitting ![]()
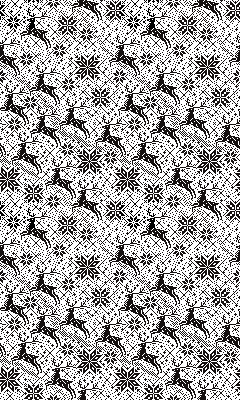
 could serve as the base for added color, easy using bucket fill following uninterrupted black or white cell lines
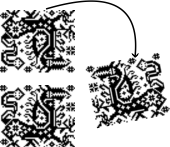
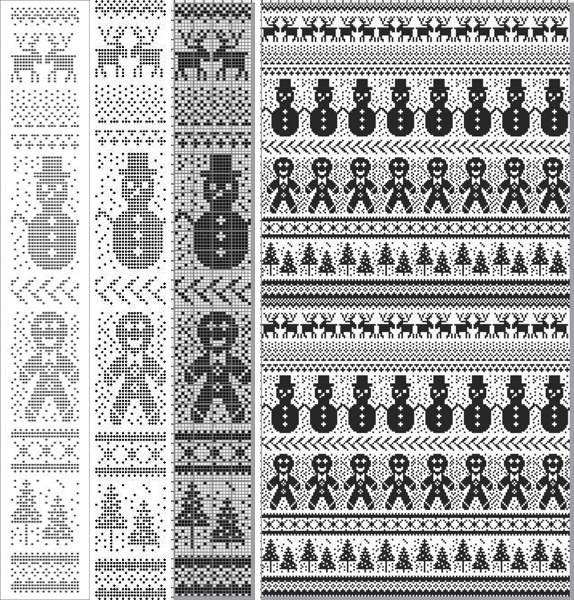
 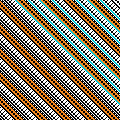 It is now possible to drag and drop selections from the internet browser or personal files into ArahPaint, working from my stash of BW-indexed files
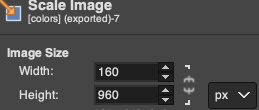
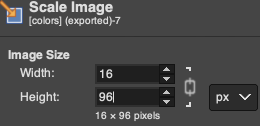
160X160
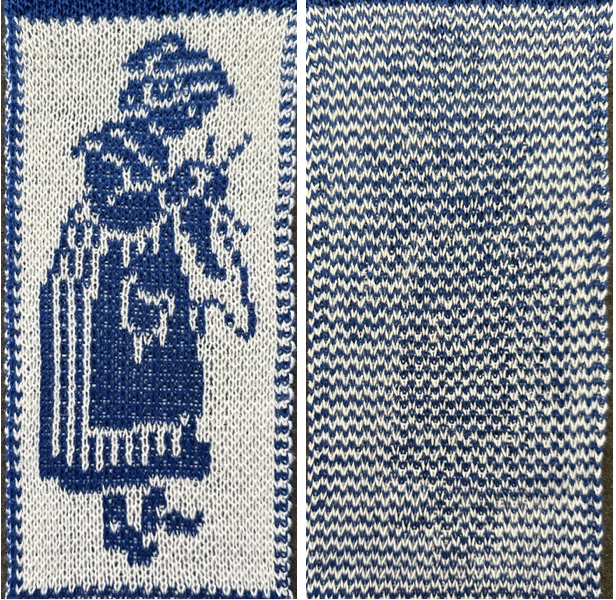
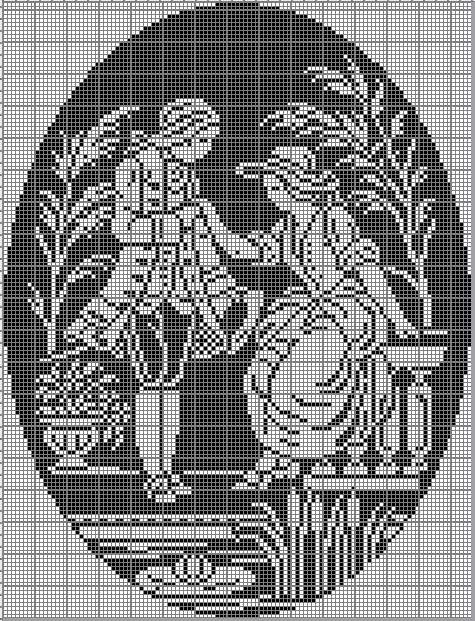
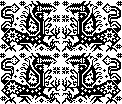
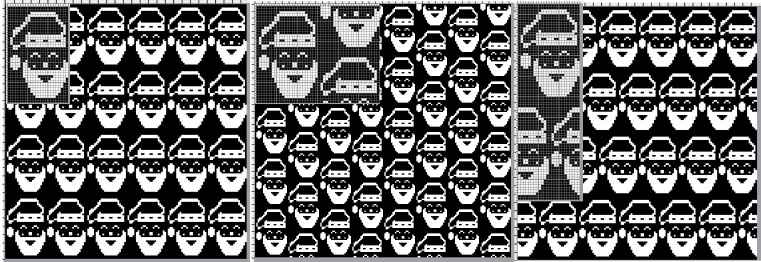
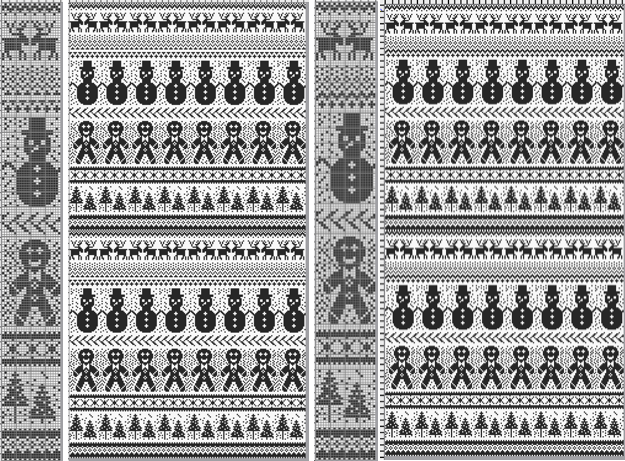
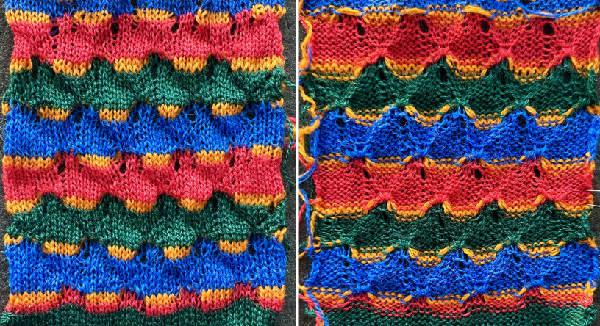
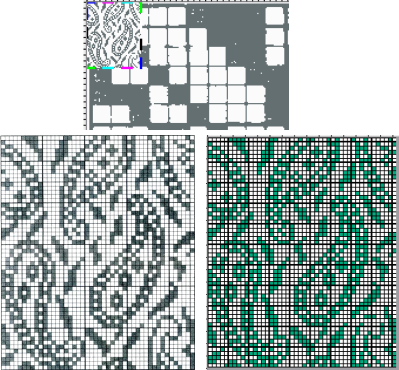
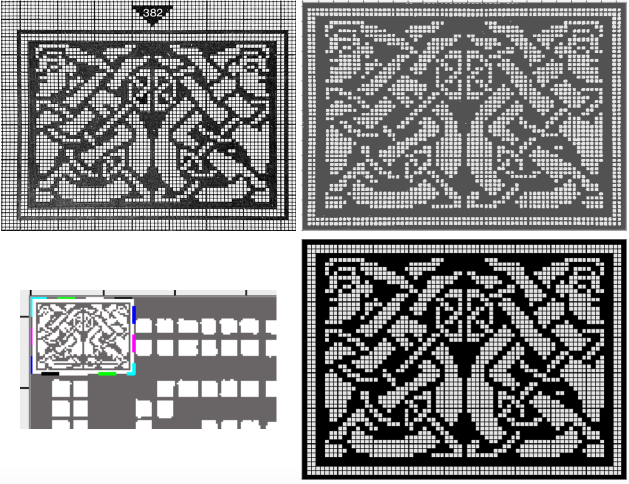
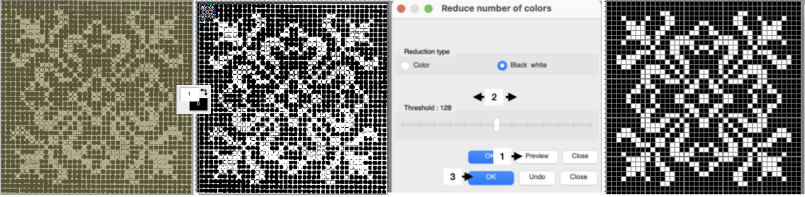
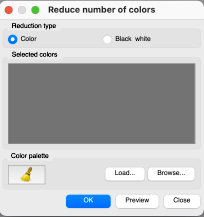
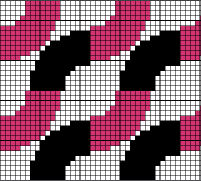
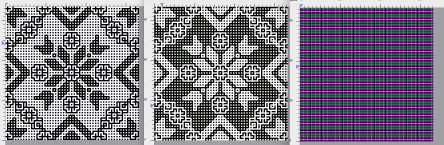
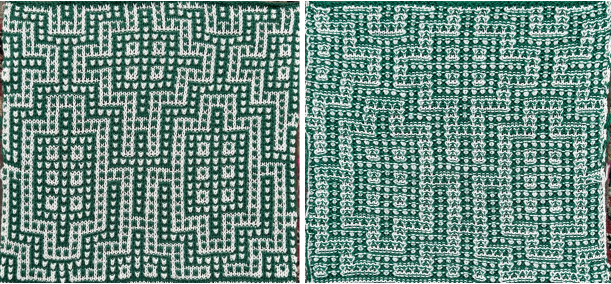
 the image was dragged and dropped from my desktop onto a new Arah picture, 244X244, the black color became transparent by default. The base ground was used both with the default number of colors at 17 and with the number of colors reduced to 2.
 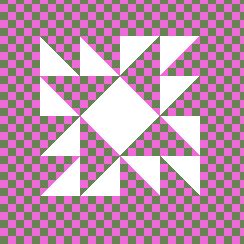 I was not able to drag and drop directly from ArahPaint into Gimp, but here is the image using the Command A, Command C, and Command V commands in Gimp
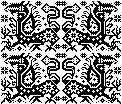
 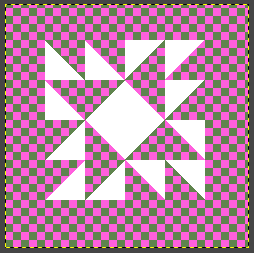 The original BW png altered in Gimp, rendered in 2 colors in RGB Mode and saved to the desktop with palette different from the ground 2 color pattern.
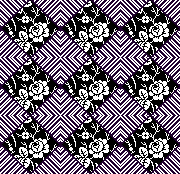
 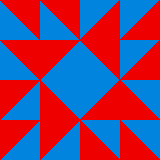 When dragged and dropped onto the 244X244 background, the result is a 4-color file for knitting using 4 yarn colors.
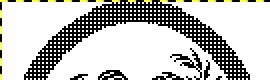
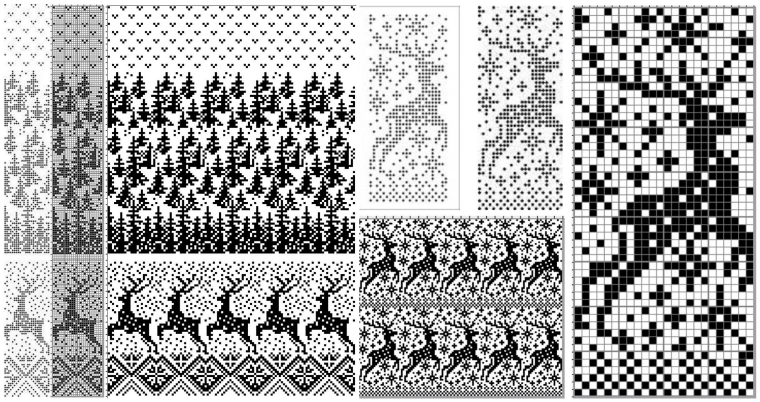
 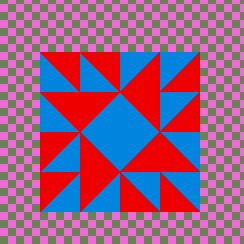 Here there is added patterning viewed more easily when the design is enlarged, and in the dropped file, the white pixels are converted automatically to alpha
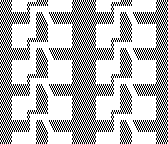
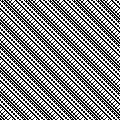
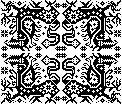
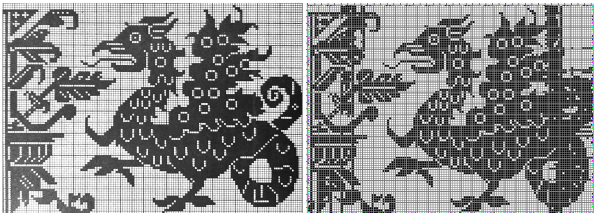
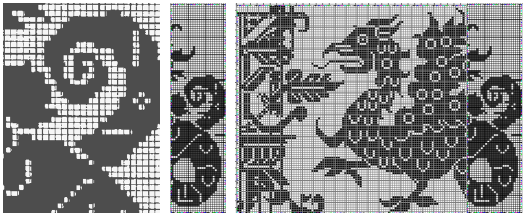
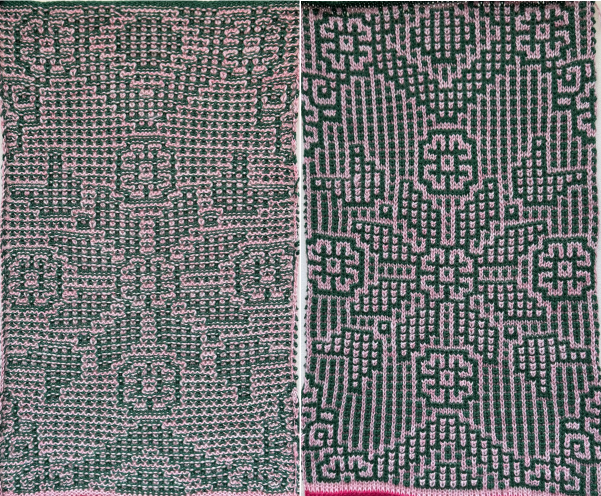
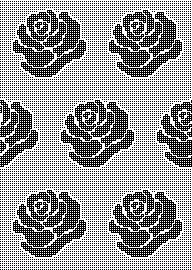
 Another BW-indexed file, 132X132
 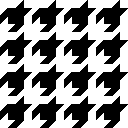 the black is retained, and the result is visually in 3 colors, with the white pixels converted to alpha
 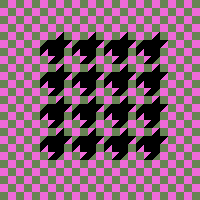 Before the dragged image is fixed, the color to alpha selection can be altered.
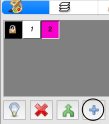
The final palette will contain all four colors.
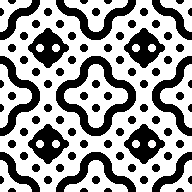
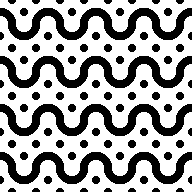
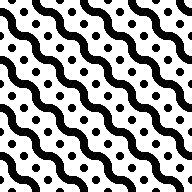
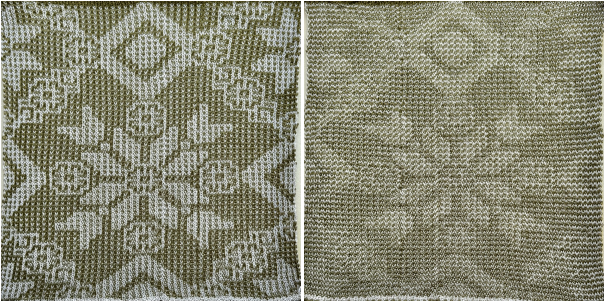
When working on a project where the actual final number of colors is 3, check that >set the number of colors is on #3 before downloading the design to avoid patterning errors in knitting after downloading to KMs. The placement of the shapes in these variations is not knit-ready. 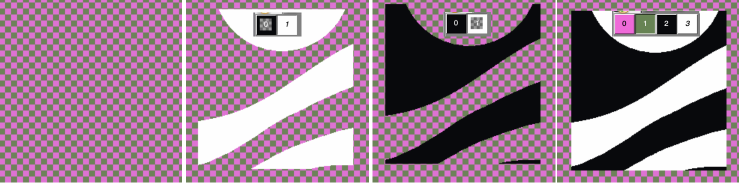 The designs are simplified for 2 color knitting and using the built-in electronic KM separation
 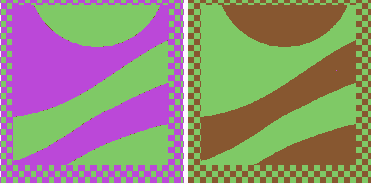 Building patterns using blocks requires attention to eliminating or halving them if the goal is to avoid shapes doubled in height, width, or both and to meet personal design preferences.
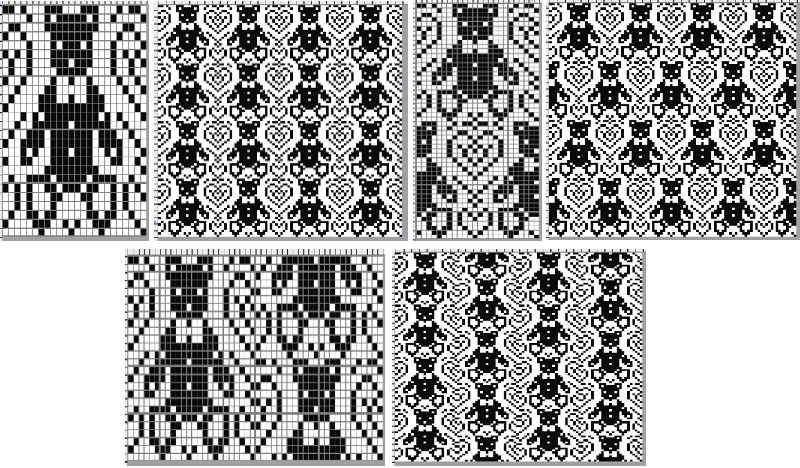
A series of related files beginning with a 12X20 motif ![]() 24X20
24X20
![]() 24X20 color reversed
24X20 color reversed ![]() 23X37
23X37 ![]() tiled to 138X148
tiled to 138X148  playing with color reversed segments, 24X20, suitable for punchcard models as well
 ![]() tiled to 168X160
tiled to 168X160 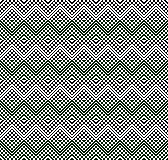 Building diagonals with color inverted blocks
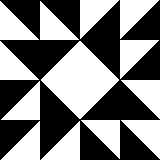
16X16 ![]() color inverted
color inverted ![]() 32X32
32X32 ![]() in repeat X4
in repeat X4 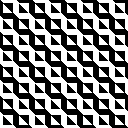 Seeking triangular modules that do not intersect with multiple stitches as seen in the formerly shared truchet tiles.
 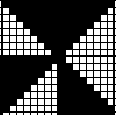 This motif inspiration was found in https://www.mi.sanu.ac.rs/vismath/sarhangi/
  Hand building repeats beginning with colored 5X5 blocks
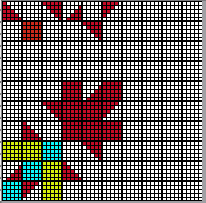
 converting all to single-color
 ![]() isolating the 30X30 repeat
isolating the 30X30 repeat 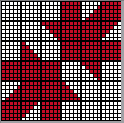
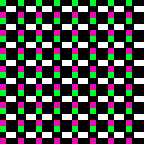
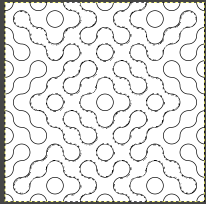
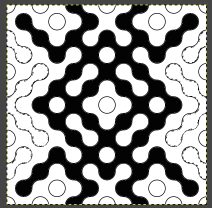
![]() the tiled design, 150X150
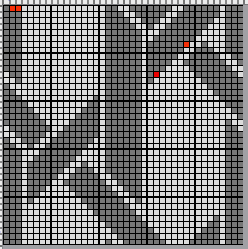
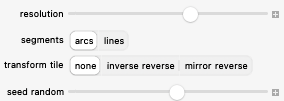
the tiled design, 150X150 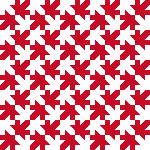 A 60X60 design isolated from the 30-pixel image drawn in random, best viewed with a 5X5 grid
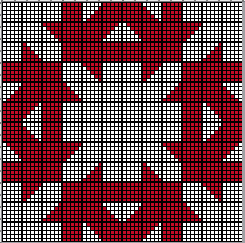

 trimmed to 58X58 eliminating areas with double rows,
A small design, 10X10, 
![]()
![]() with a few added pixels,
with a few added pixels, 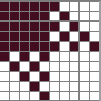
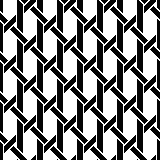
![]() two views of secondary shapes with the design drawn in repeat X4.
two views of secondary shapes with the design drawn in repeat X4. ![]()
![]() Adding a third color to form straight-line diagonal outlines of shapes and frames can help circumvent those doubled-up stitches and retain aspect ratios.
Adding a third color to form straight-line diagonal outlines of shapes and frames can help circumvent those doubled-up stitches and retain aspect ratios.
A 21X17 repeat 
![]() trimmed to 21X16
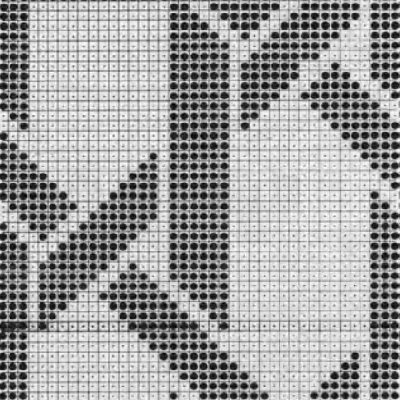
trimmed to 21X16 ![]() tiled to 147X144, followed by a partial magnified view
tiled to 147X144, followed by a partial magnified view 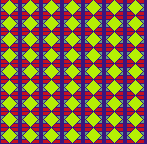
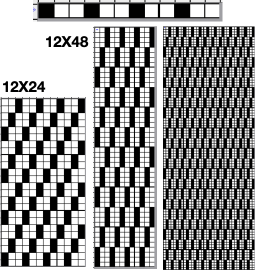
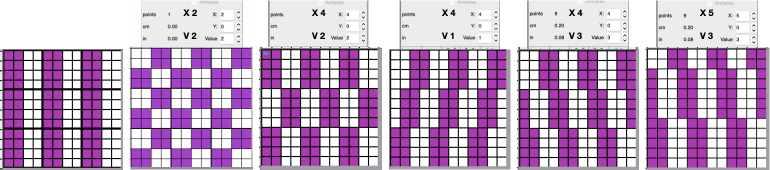
 A simple 24X24 two colors per row design
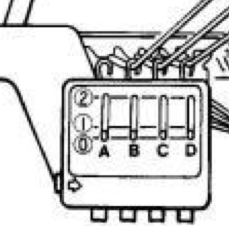
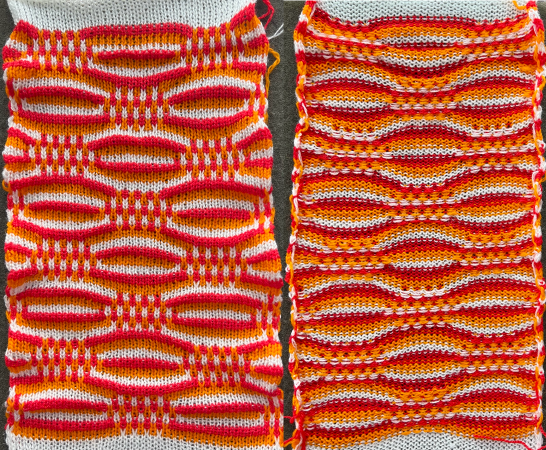
![]() may be varied using the fair isle setting with changing colors in the A and/or/both yarn feeders,
may be varied using the fair isle setting with changing colors in the A and/or/both yarn feeders, ![]() adding a third color per row will require a color separation
adding a third color per row will require a color separation ![]() It is possible to work on a block pattern filled ground, using colors to replace, add or remove pixels to produce a file for knitting in only 2 colors.
It is possible to work on a block pattern filled ground, using colors to replace, add or remove pixels to produce a file for knitting in only 2 colors. 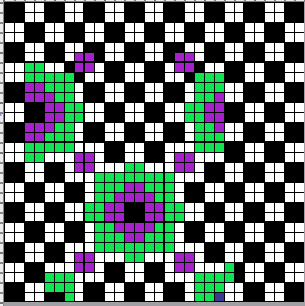
 A new 24X24 start
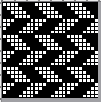
![]() Again, adding a third or 4th color in each row will require a color separation even if knit on a single bed.
Again, adding a third or 4th color in each row will require a color separation even if knit on a single bed.
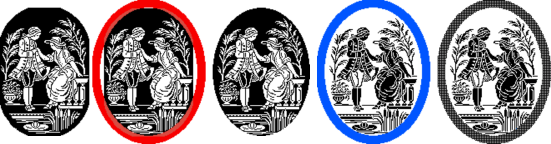
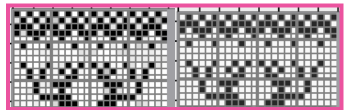
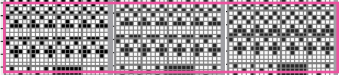
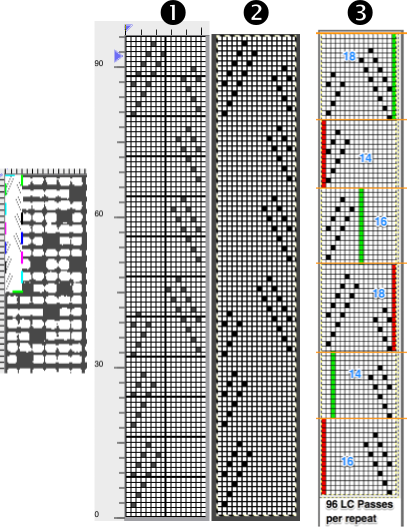
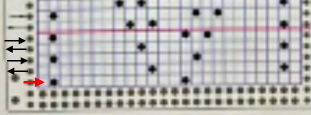
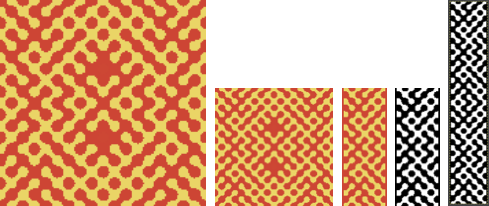
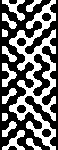
These designs were generated in a spreadsheet and also rotated counterclockwise. Single repeats are bordered in red and were trimmed to avoid any double rows or columns. 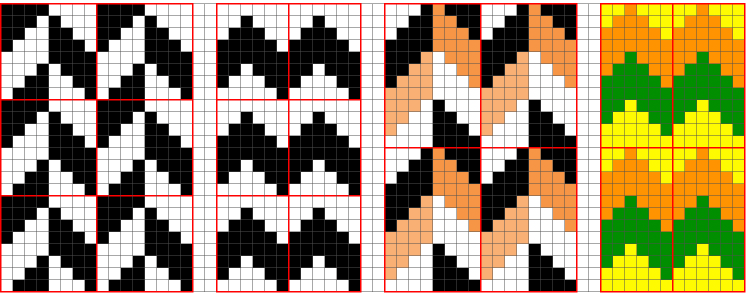 A series of modules to download and play with, check that the repeat selection is not checked when drawing with them.
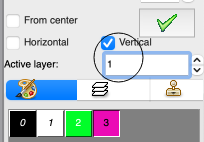
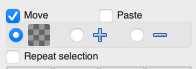
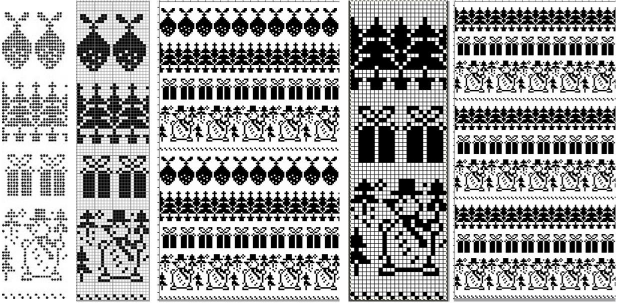
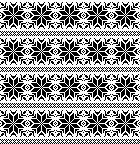
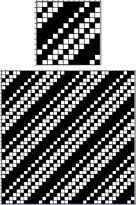
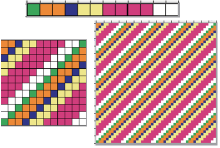
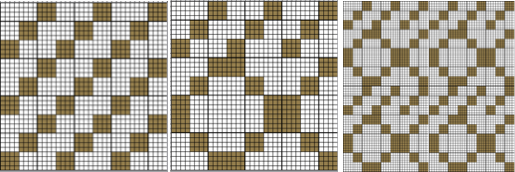
 Building a series of diagonals with shapes that can be used as they are or further edited to form secondary shapes, a starting file for DIY, providing a base for the possibility of filling in segments with added colors
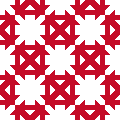
38X36 ![]() tiled to 152X144
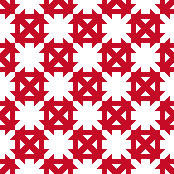
tiled to 152X144 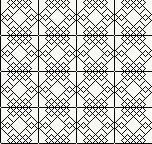 edited to keep the same general shapes but with smaller repeats: the first eliminates the single-pixel square frame, 36X36
 ![]() tiled to 144X144
tiled to 144X144 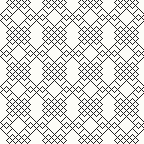 some pixel edits and trimmed to 24X30
 ![]() tiled to 144X150
tiled to 144X150 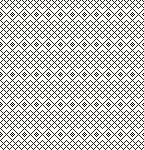 new diagonal shapes, 24X24
 ![]()
tiled to 144X144 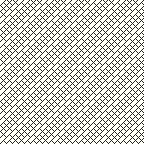 forming a chevron, 47X48
 ![]() tiled to 141X144
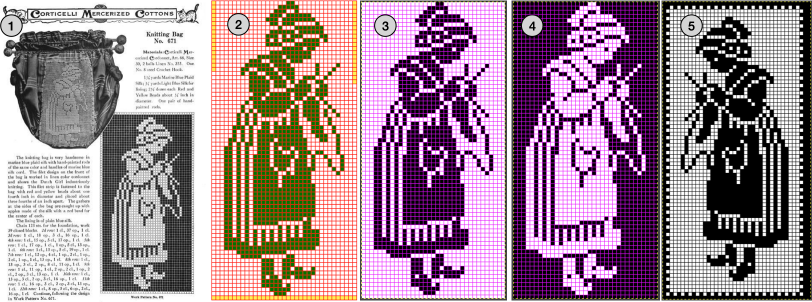
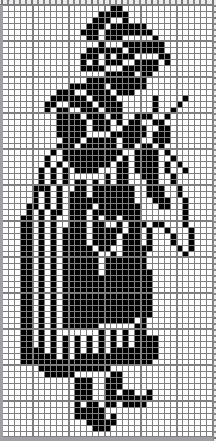
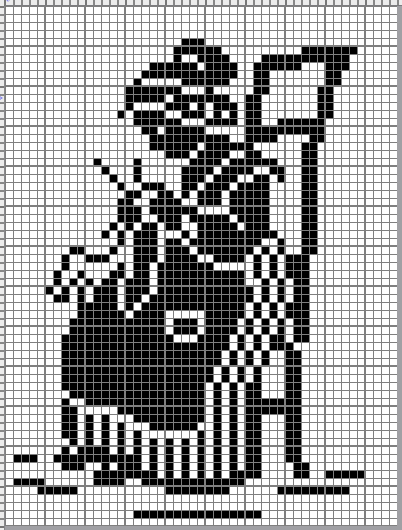
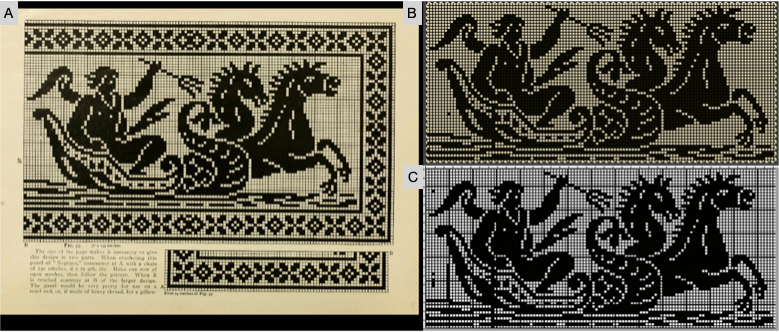
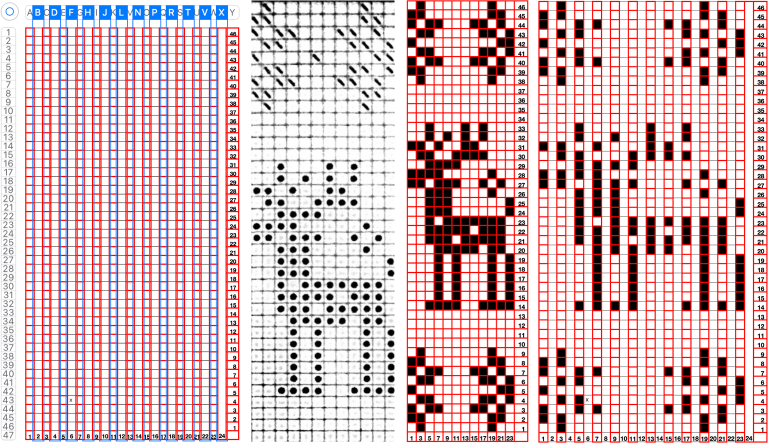
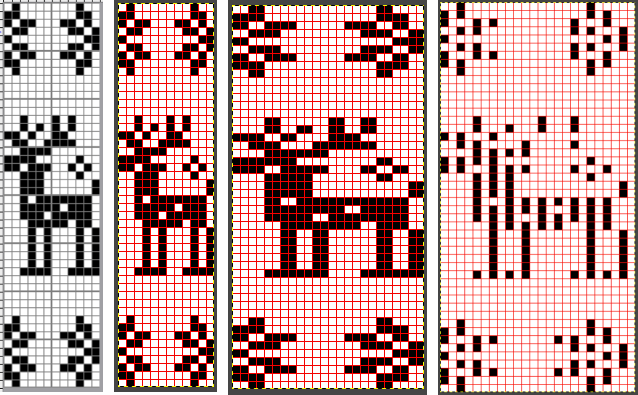
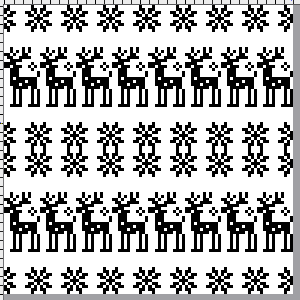
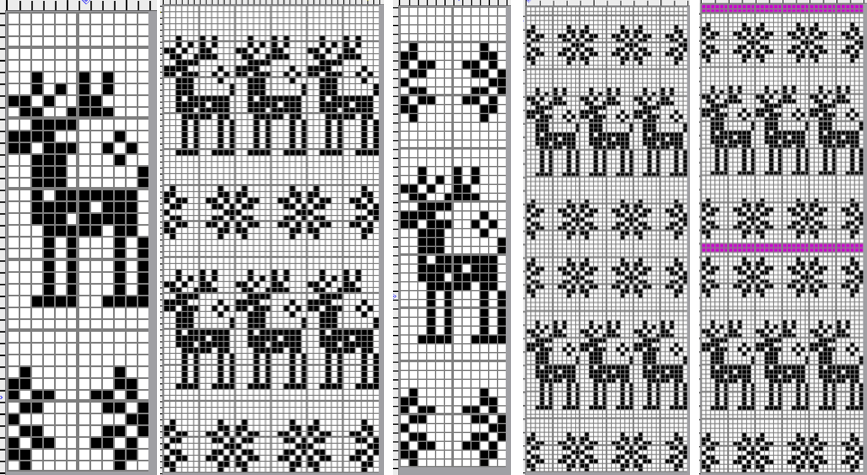
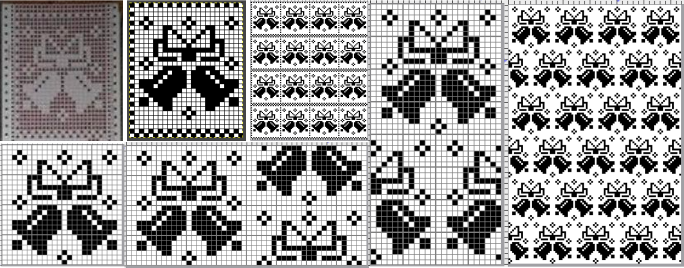
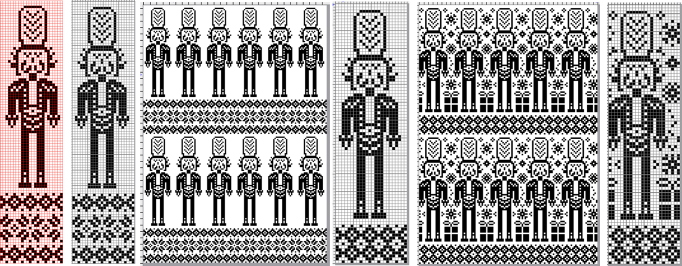
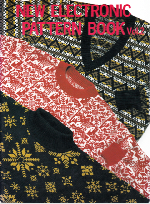
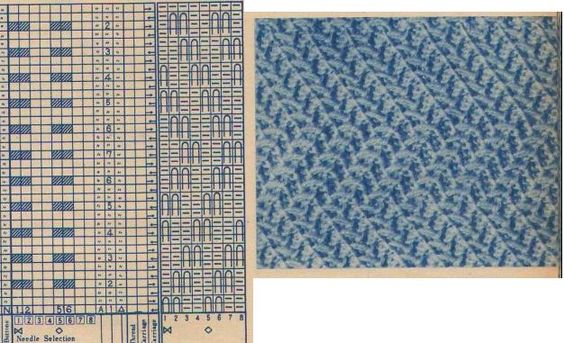
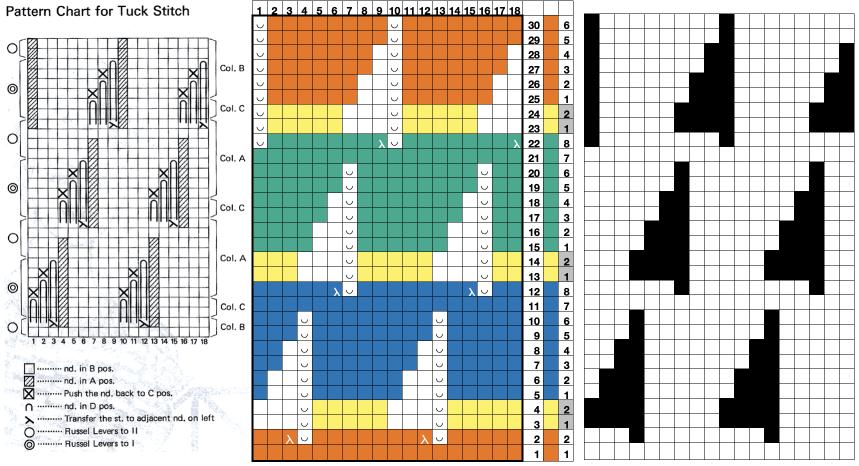
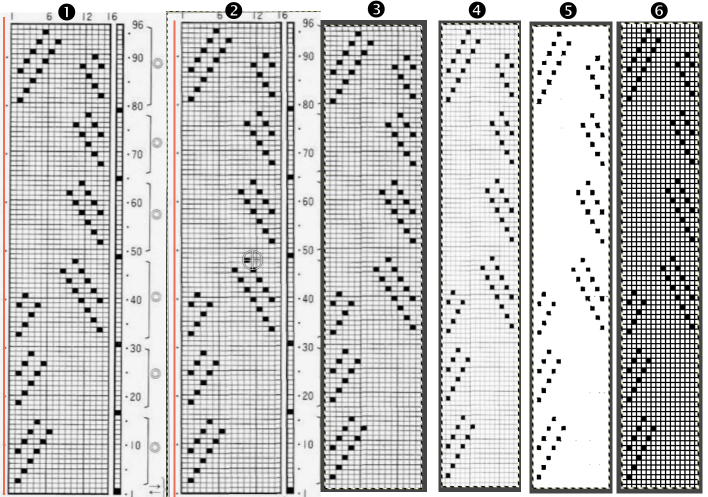
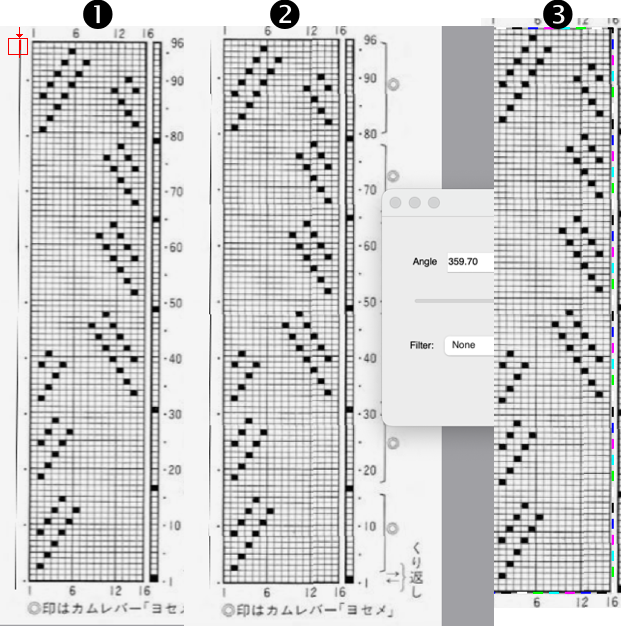
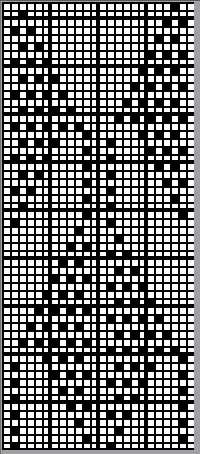
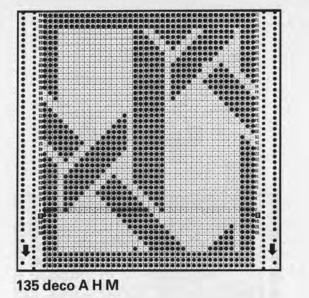
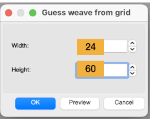
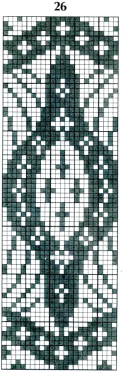
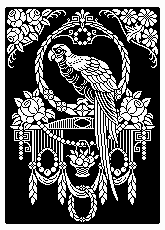
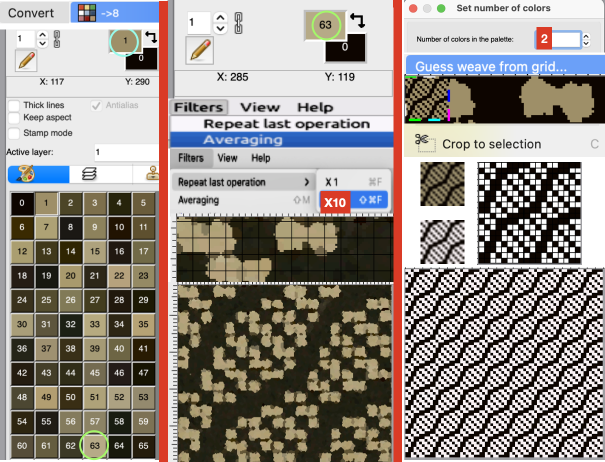
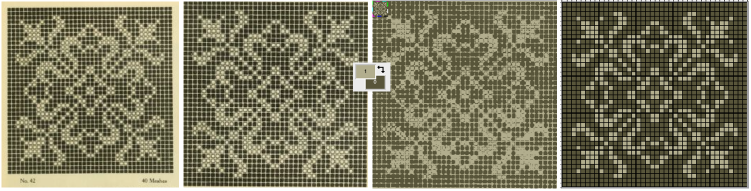
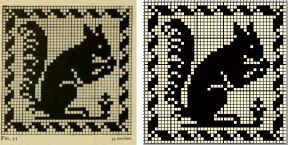
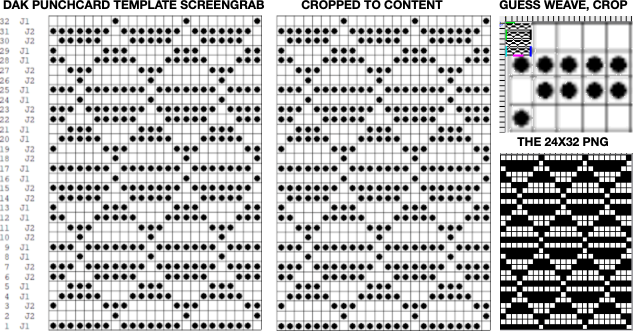
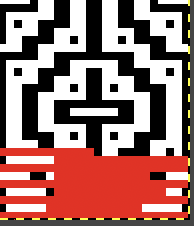
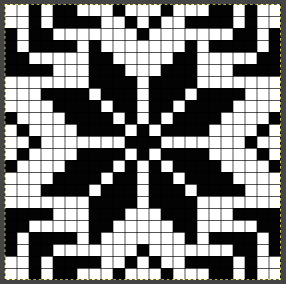
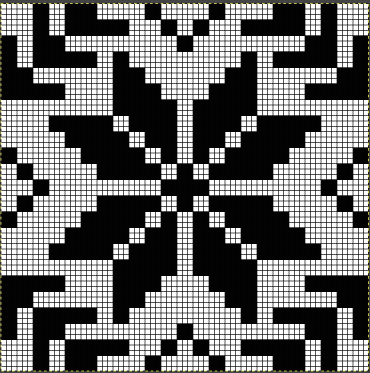
tiled to 141X144 ![]() Occasionally published sources ie this from one of the punchcard volumes can be converted by using tools ie guess weave from grid and knit as provided or serve as germs for other DIY designs
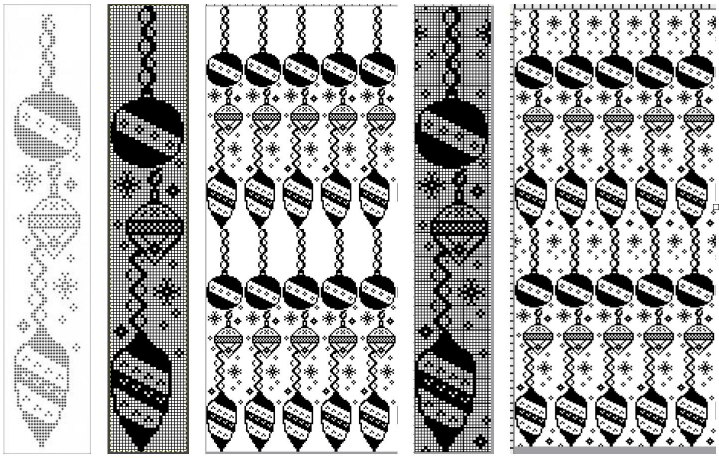
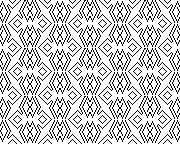
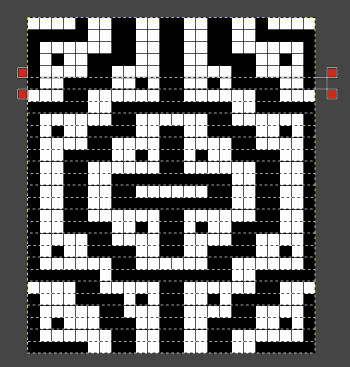
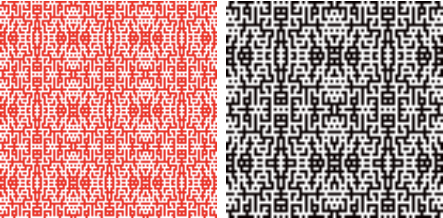
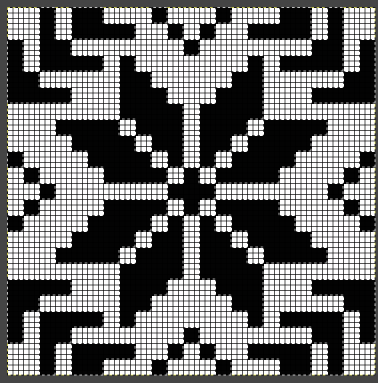
Occasionally published sources ie this from one of the punchcard volumes can be converted by using tools ie guess weave from grid and knit as provided or serve as germs for other DIY designs 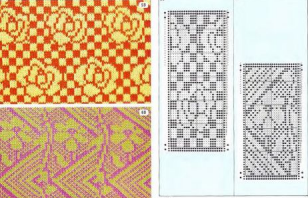 Using added colors only in developing designs: this repeat was shared in the post on Developing tiled repeats suitable for multiple stitch types, including tuck
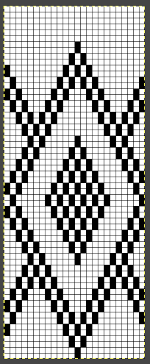
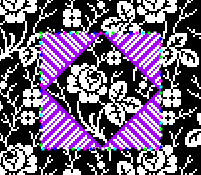
31X31 ![]() now mirrored with double rows eliminated, adjusted to 60X58, with the central diamond black and white pixels selectively replaced by a single color
now mirrored with double rows eliminated, adjusted to 60X58, with the central diamond black and white pixels selectively replaced by a single color  the cyan shape is now filled with a repeat from my stash saved as a brush,
 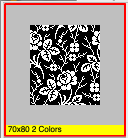 the choice could be made to clean up pixels or use the result as is.
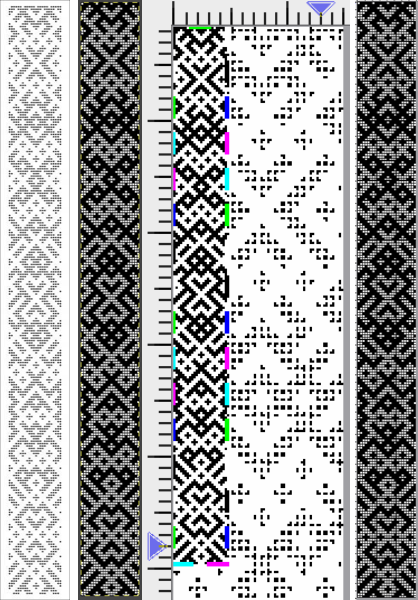
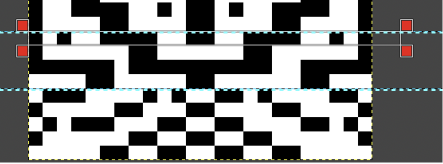
 An alternate method for more flexibility in placement and less cleanup requires working in multiple windows:
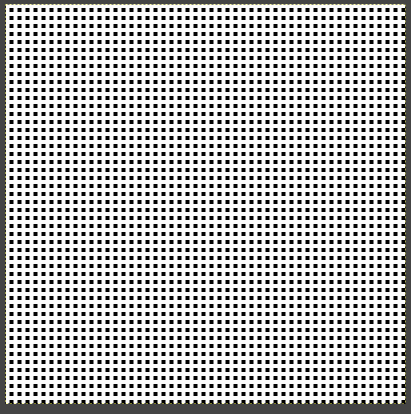
in the first window draw the BW repeat used for the brush in repeat several times
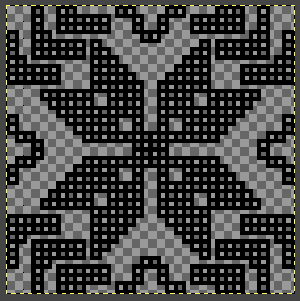
in a second window, the starting 60X58 design is rendered in 2 colors  select all >copy, and return to the first window, the colored image will appear over the larger black one.
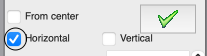
Before moving it in position and pasting it in place, click on the color matching the center diamond in the palette window until the small checkered interior box appears, indicating that the color is now transparent. 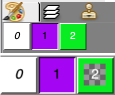 Using the mouse, drag >move the smaller image and paste it in place, undoing and repeating the process until satisfied.
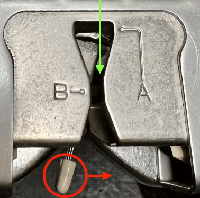
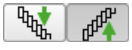
 Select the merge down/drop selection tool by clicking on its icon in the toolbox,
  pressing the Command+d on the Mac Keyboard, or right-clicking outside the selection somewhere in the background image to merge the selection into the image in its current location. The dotted lines, sometimes referred to as walking ants, will disappear.
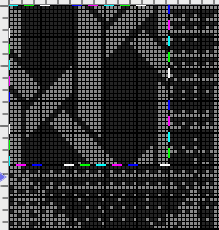
The purple pixels are guides for cropping the design to a new 60X58 repeat.
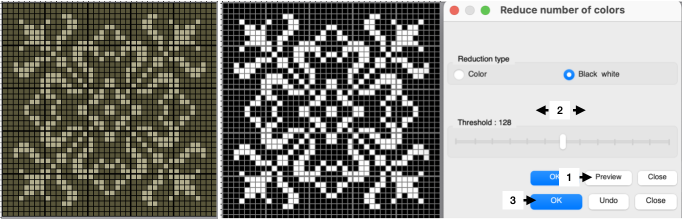
The purple is replaced with black, the color number is verified and set to 2, and the final BW PNG is saved, ready for download 
 Using rendering colors transparent to achieve color separations for specific fabrics will follow in a future post.


 the 60X74 png


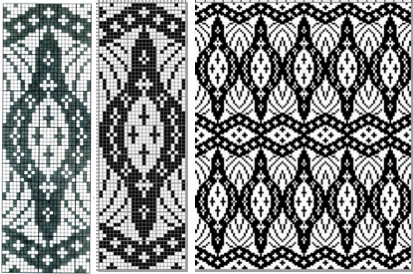


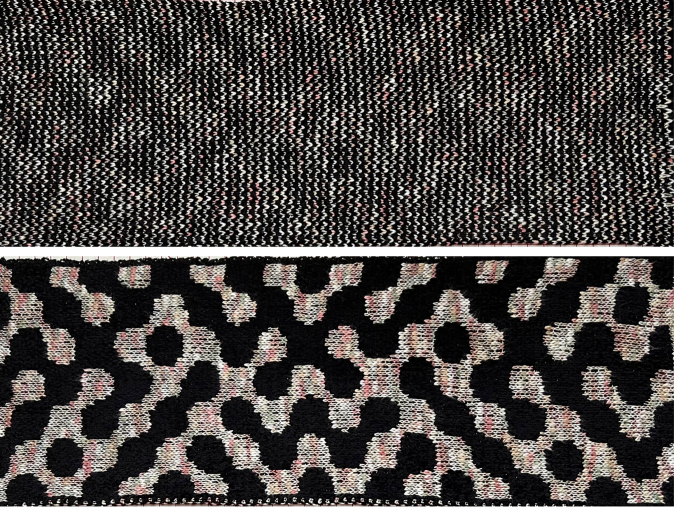


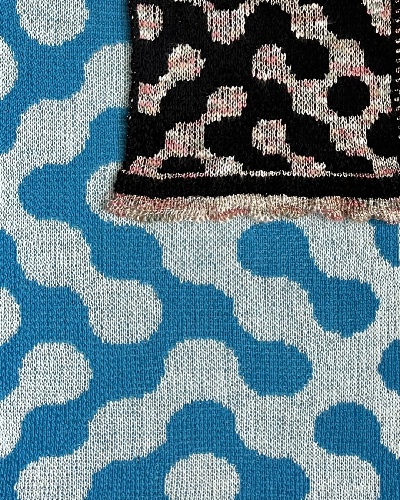
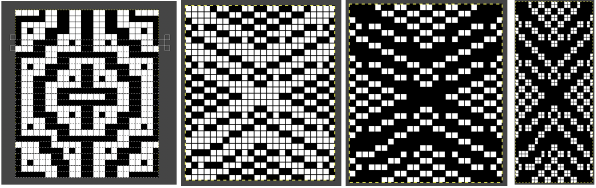


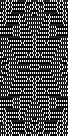


 it is copied and pasted on a new brush-filled ground after the white is rendered transparent


