Reviewing Tools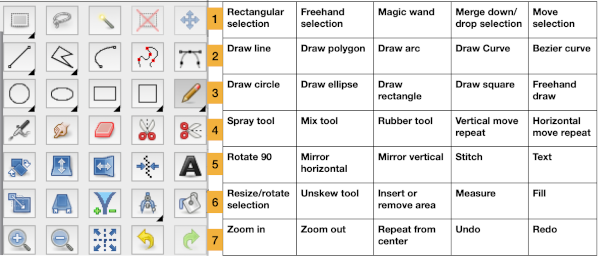 Guess weave from Grid
ArahPaint continues to be user-friendly for multiple applications including knit design.
The developer shares how-to videos that are frequently updated
https://www.arahne.si/public/news/
https://www.youtube.com/@arahpaint4/videos
The same holds for their downloadable manual, and any questions are answered in a timely and informative manner.
I am often driven by knit technique curiosity first, then find myself circling back periodically to program explorations to shorten the process for drafting blog charts and repeats, sharing new information as I notice it in manuals or online.
A recently reviewed https://www.arahne.si/tutorials/how-to-import-old-pattern-drafts/ led to my first experiment.
When using the weave guessing function, it is good to know that the program looks at the center of the grid, and tries to ignore the grid itself. If the center is not a single color and is homogeneous, use averaging to smooth it out before color reduction. If it is not filled properly, use contour operations (thickening) to make it stronger.
When guessing the grid, make sure you use the “preview” function, so you see what the program sees.
The steps, relatively “winging it”:
as in resizing/scaling any design, accurate cell/ anticipated stitch and row counts are needed. They may not be given in the source, where grid properties, cell shapes, and colors may all vary.
For example, the grid in the original may be 6X6 for punchcard designs, 10X10, or even 5X5 for electronic models. Recognizing the blocks used aids in examining and adding up counts when they are not provided.
Load the selected picture, in this case, a random RGB one from a previous post, known to measure 24 stitches by 60 rows: 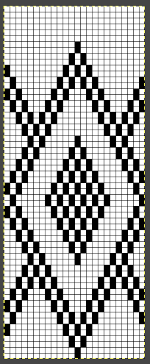 Go to colors, and select convert to 8-bit palette,
 ![]() resulting in these changes in the palette window on bottom right corner
resulting in these changes in the palette window on bottom right corner  Before reducing the number of colors to 2, adjust your background and foreground colors. Without disturbing the 0 value,
 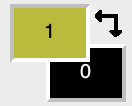 use the shift key and with the mouse select a light color from the 8-bit values, it will replace the #1 value.
 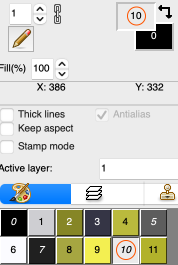 Return to colors, set the number of colors to 2,
 Magnify the image as needed, and use the rectangle select tool to eliminate the dark frame. There will be a dotted color dashed outline that can be adjusted,
 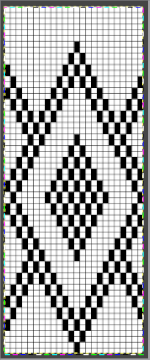 use Image/ Crop to the selection to eliminate the unwanted border.
Select Tools/Guess weave from grid, and a new window will open.
The program automatically defines the size of the original pattern. If the value is not the expected one, enter the desired pixel counts, and click OK. 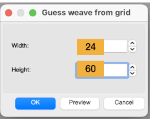 The “weave” will appear on top of the original pattern, surrounded by a bounding dashed line,
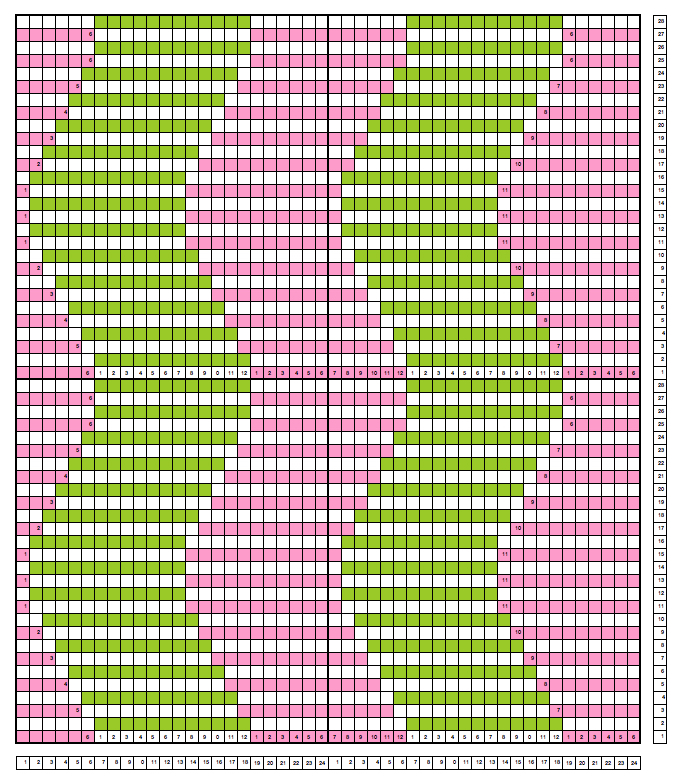
  choose Image, and Crop to the selection, and save the picture as PNG. The result matched that in the previous post, with the Gimp chart on the left, and the Arah on the right. Check that the final PNG is in indexed B/W before any electronic download. Select OK, Close, and save.
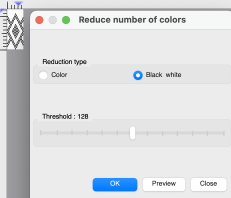
![]() The Threshold adjustment slider is found in the reduce the number of colors window and may be used to alter B/W images at any point in image processing.
The Threshold adjustment slider is found in the reduce the number of colors window and may be used to alter B/W images at any point in image processing.
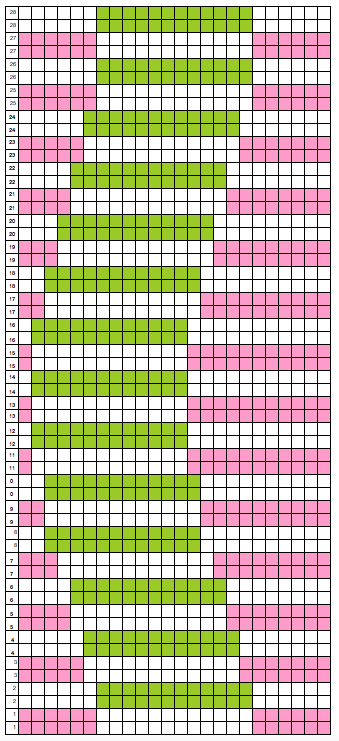
In addition to using Image/draw in repeat to check alignments, the View Repeat option will tile the design an arbitrary number of times automatically, providing a large-scale view, illustrated only in part on the right in the image below. 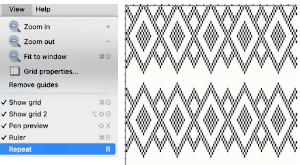 The process is repeated with pattern #42, 46X56, from a Brother electronic pattern book:
the original is on the left, the ArahPaint guess grid result is on the right, colored differently to make it easier to check for matches and any pixel placement differences, 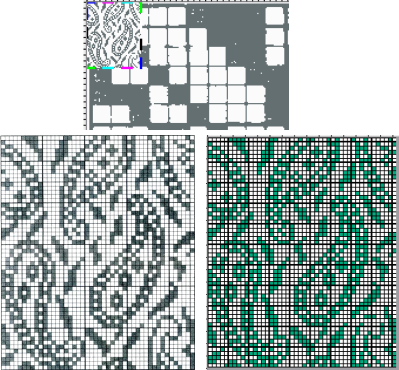 its B/W png.
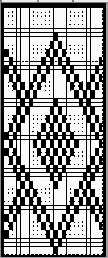
 ![]() The steps again with #3604, 24X240, once again comparing Gimp results to those obtained with ArahPaint
The steps again with #3604, 24X240, once again comparing Gimp results to those obtained with ArahPaint 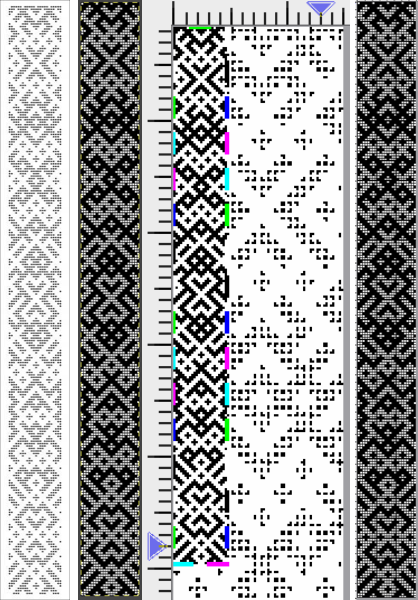
![]() One of the challenges which can appear to varied degrees when converting files is the amount of pixel cleanup required on the resulting images.
One of the challenges which can appear to varied degrees when converting files is the amount of pixel cleanup required on the resulting images.
One contributing factor that may be encountered is that the original to be processed may be askew, as only slightly in this image, #26 from the Brother 270 collection. 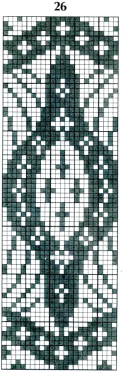 Using the unskew tool is one manner to fix the geometry of a layer distorted by perspective. Rotation may also be used.
Make a rectangular selection around the object which you wish to unskew.
Click on the Unskew tool ![]() Drag the corners of the selection to the distorted part of the image, they are marked by hollow squares at each corner
Drag the corners of the selection to the distorted part of the image, they are marked by hollow squares at each corner ![]() Click OK in the Unskew dialog box
Click OK in the Unskew dialog box 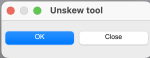 The selection becomes a normal rectangular layer. If uncomfortable working with layers, click on this tool to fix the image and remove the bounding box
 ![]() Repeat the process already described, reducing the number of colors to 2
Repeat the process already described, reducing the number of colors to 2  after cropping to the selection, the dark squares are not a true black. If the png is to be used for download to an electronic machine, change the grey to true black before saving.
The original, followed by the ArahPaint result and a tiled view of it 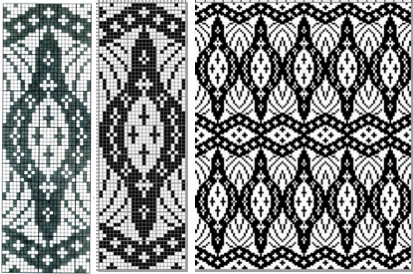
![]() The same approach may be used on large nonrepetitive images.
The same approach may be used on large nonrepetitive images.
Hand-count the number of cells in width and height if they are not provided.
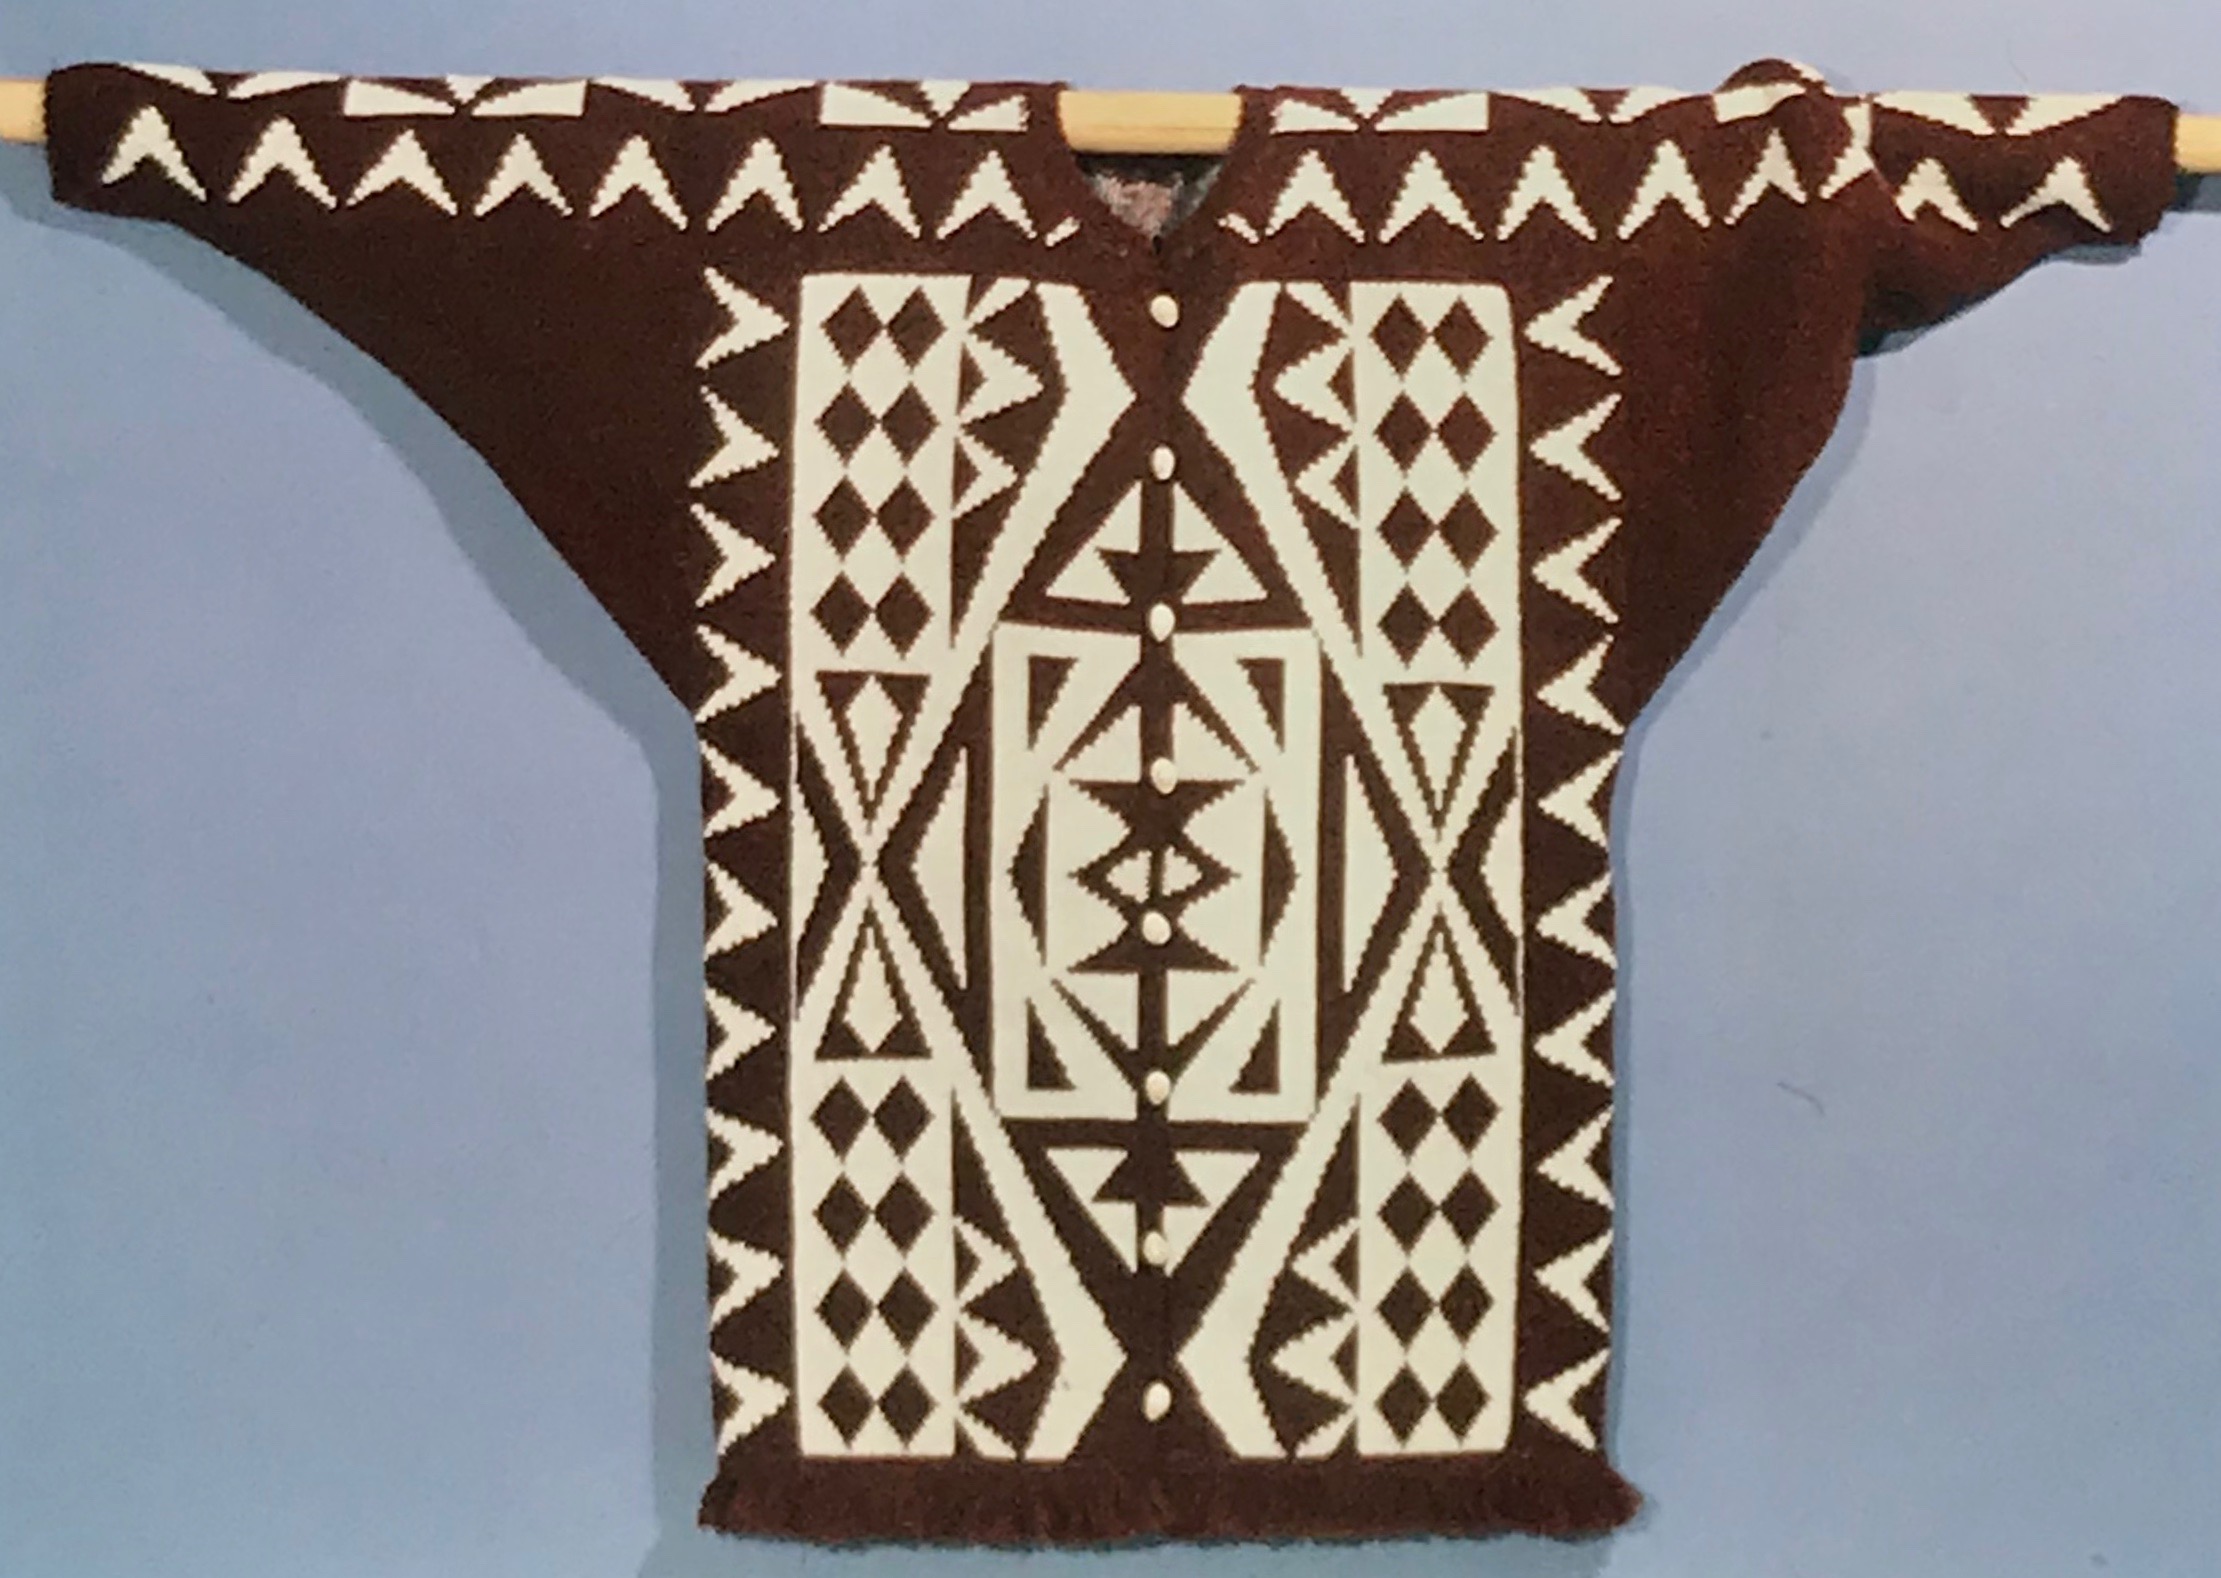
A scan from the Dover publication on Celtic charted designs, converting this 73X54 image proved easy. 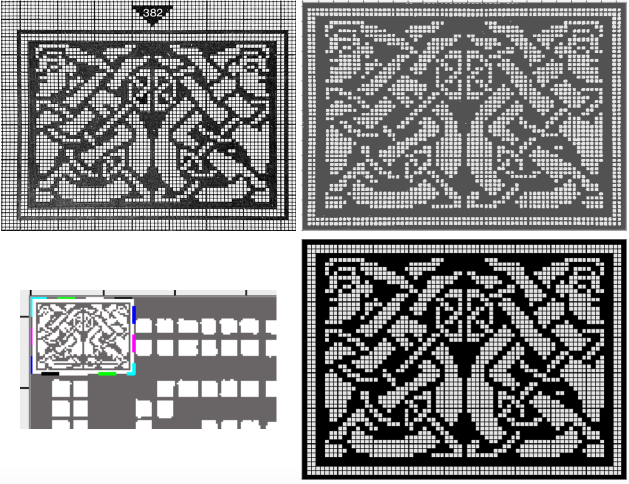
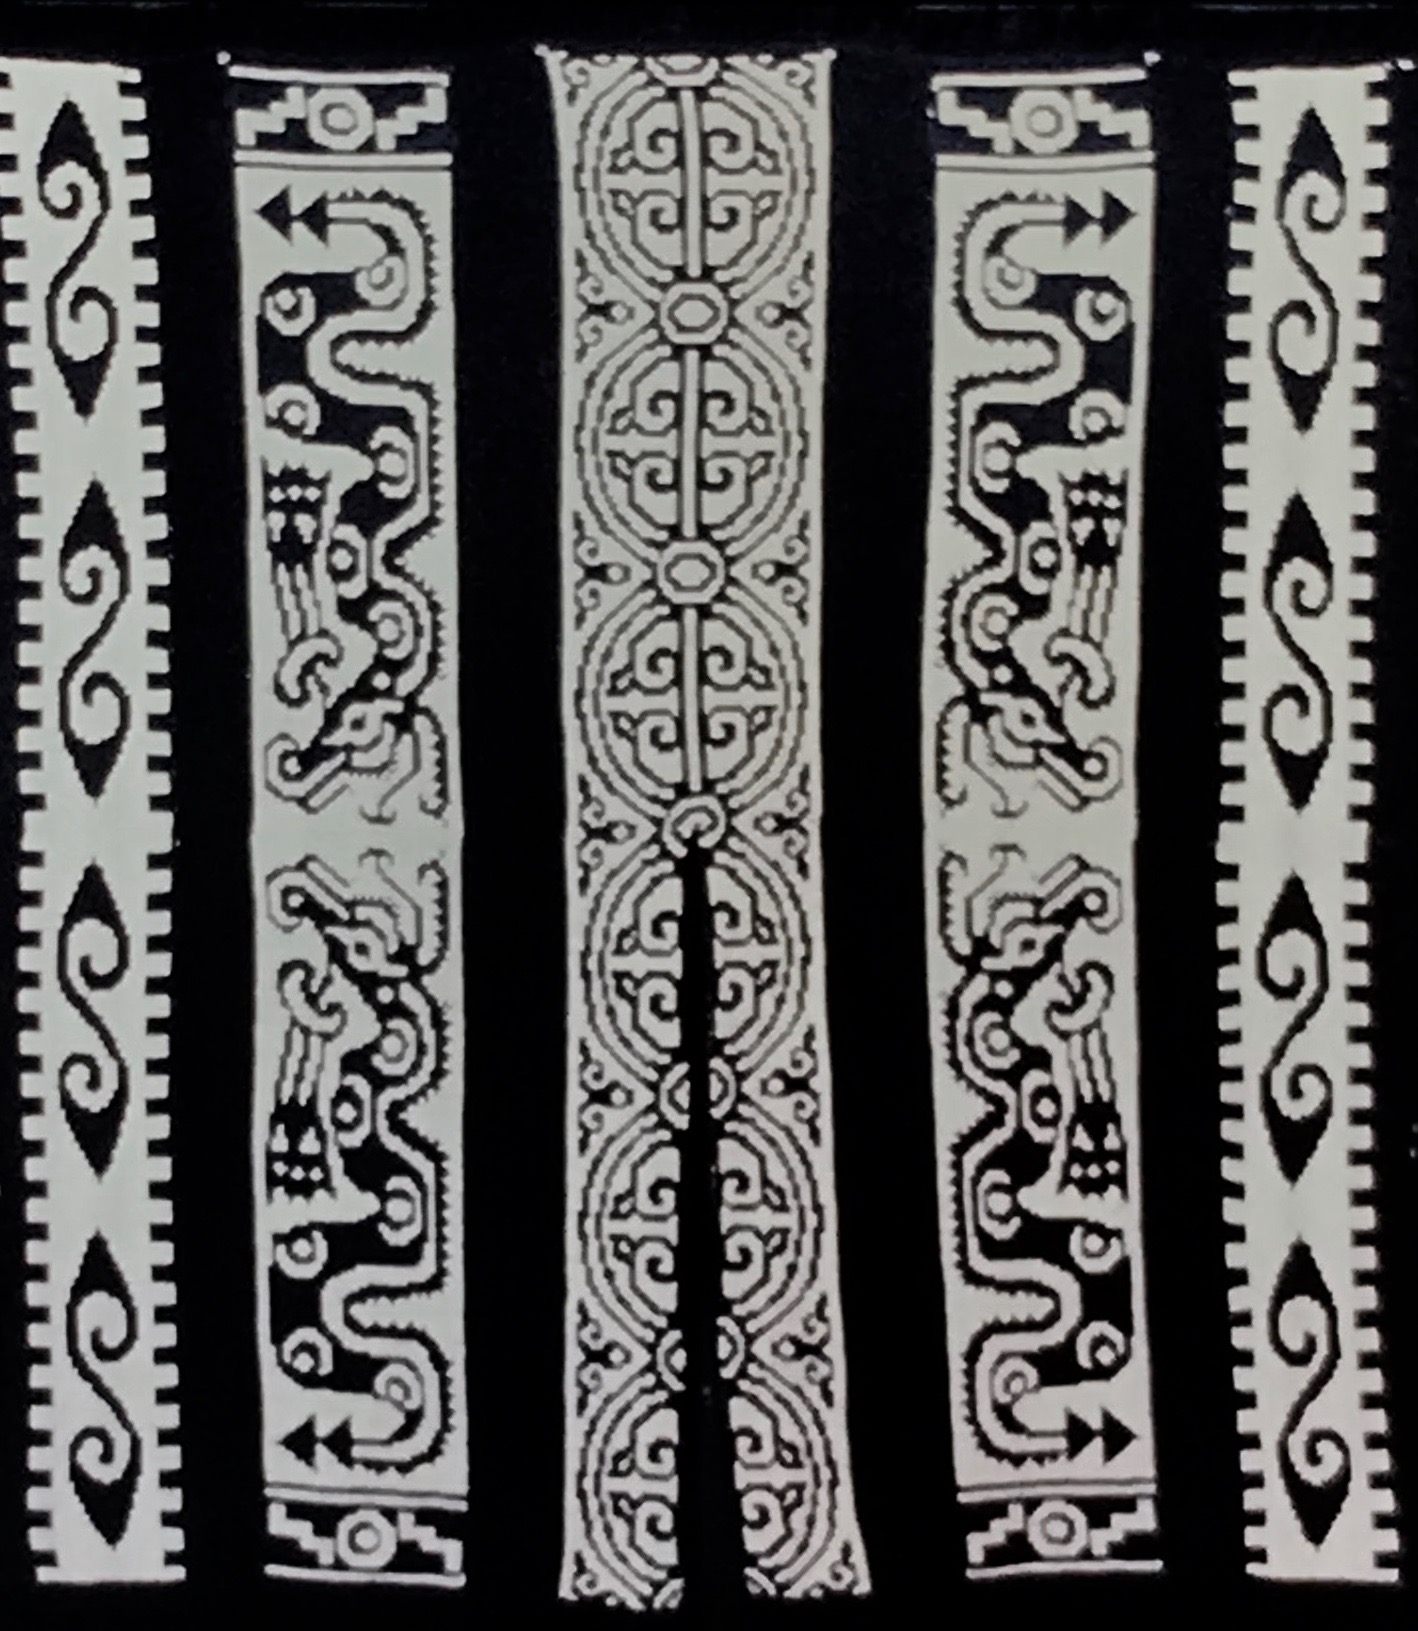
 The scan of a 130X95 stitch/row count chart from Charted Peasant Designs from Saxon Transylvania posed some issues.
The problem, in this case, was not the use of the basic technique, but that multiple areas of the chart were not marked with the black contained within grid cell borders.
Cropping problem areas, processing them separately, and pasting them in place on the previous result where needed appear to greatly reduce final pixel cleanup. 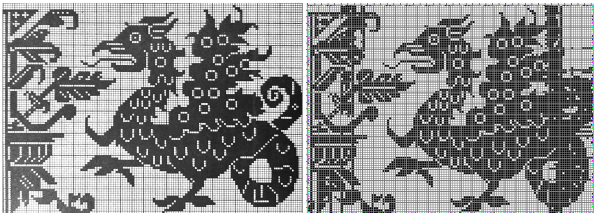
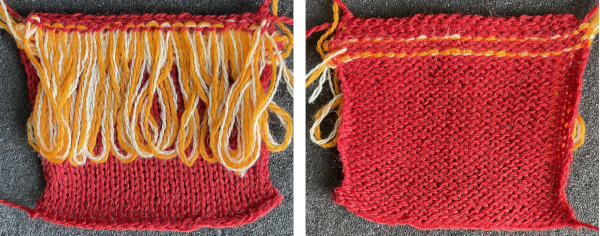
 While weaving and many needlework drafts are often represented on square grids, some knit designs are published to reflect the fact that actual knit stitches with the exception of garter stitch are typically rectangular.
In the early days of electronics, knitting machine models began to have libraries of stitch designs stored in memory, cassettes, or floppies. Often manuals or booklets were printed as companions, visual guides to stored contents. Colors and counts did not matter, since the intent was not to provide reproducible designs.
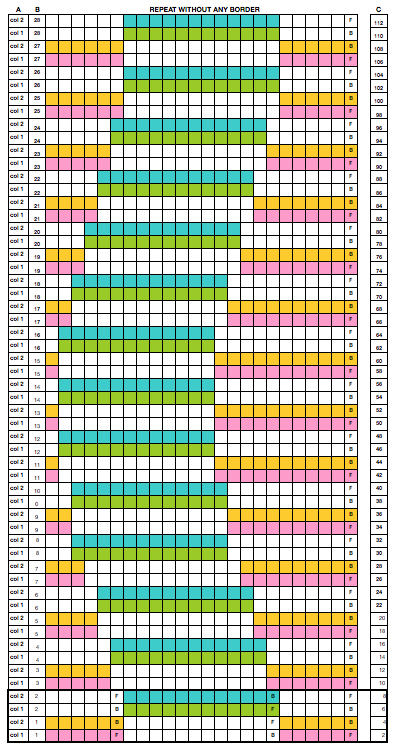
This chart is from Studio, published as a tuck pattern.
My best results were obtained after cropping the original to 74X60 unit counts and scaling the scan’s A: 1733X992 to B:1320X960, a multiple X16 of both values.
C: the result of reducing colors to 2, followed by guess weave-from-grid for a successful match to the original, a final 60X48. The png would need to be color inverted for use with the tuck stitch setting.  The png, after removal of a few wayward pixels, and color inverted for use with the tuck setting
 ![]()
![]()
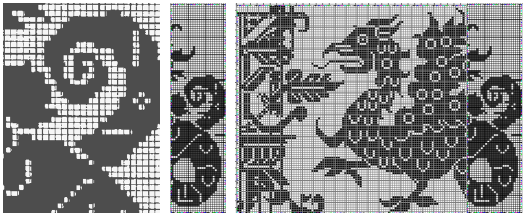
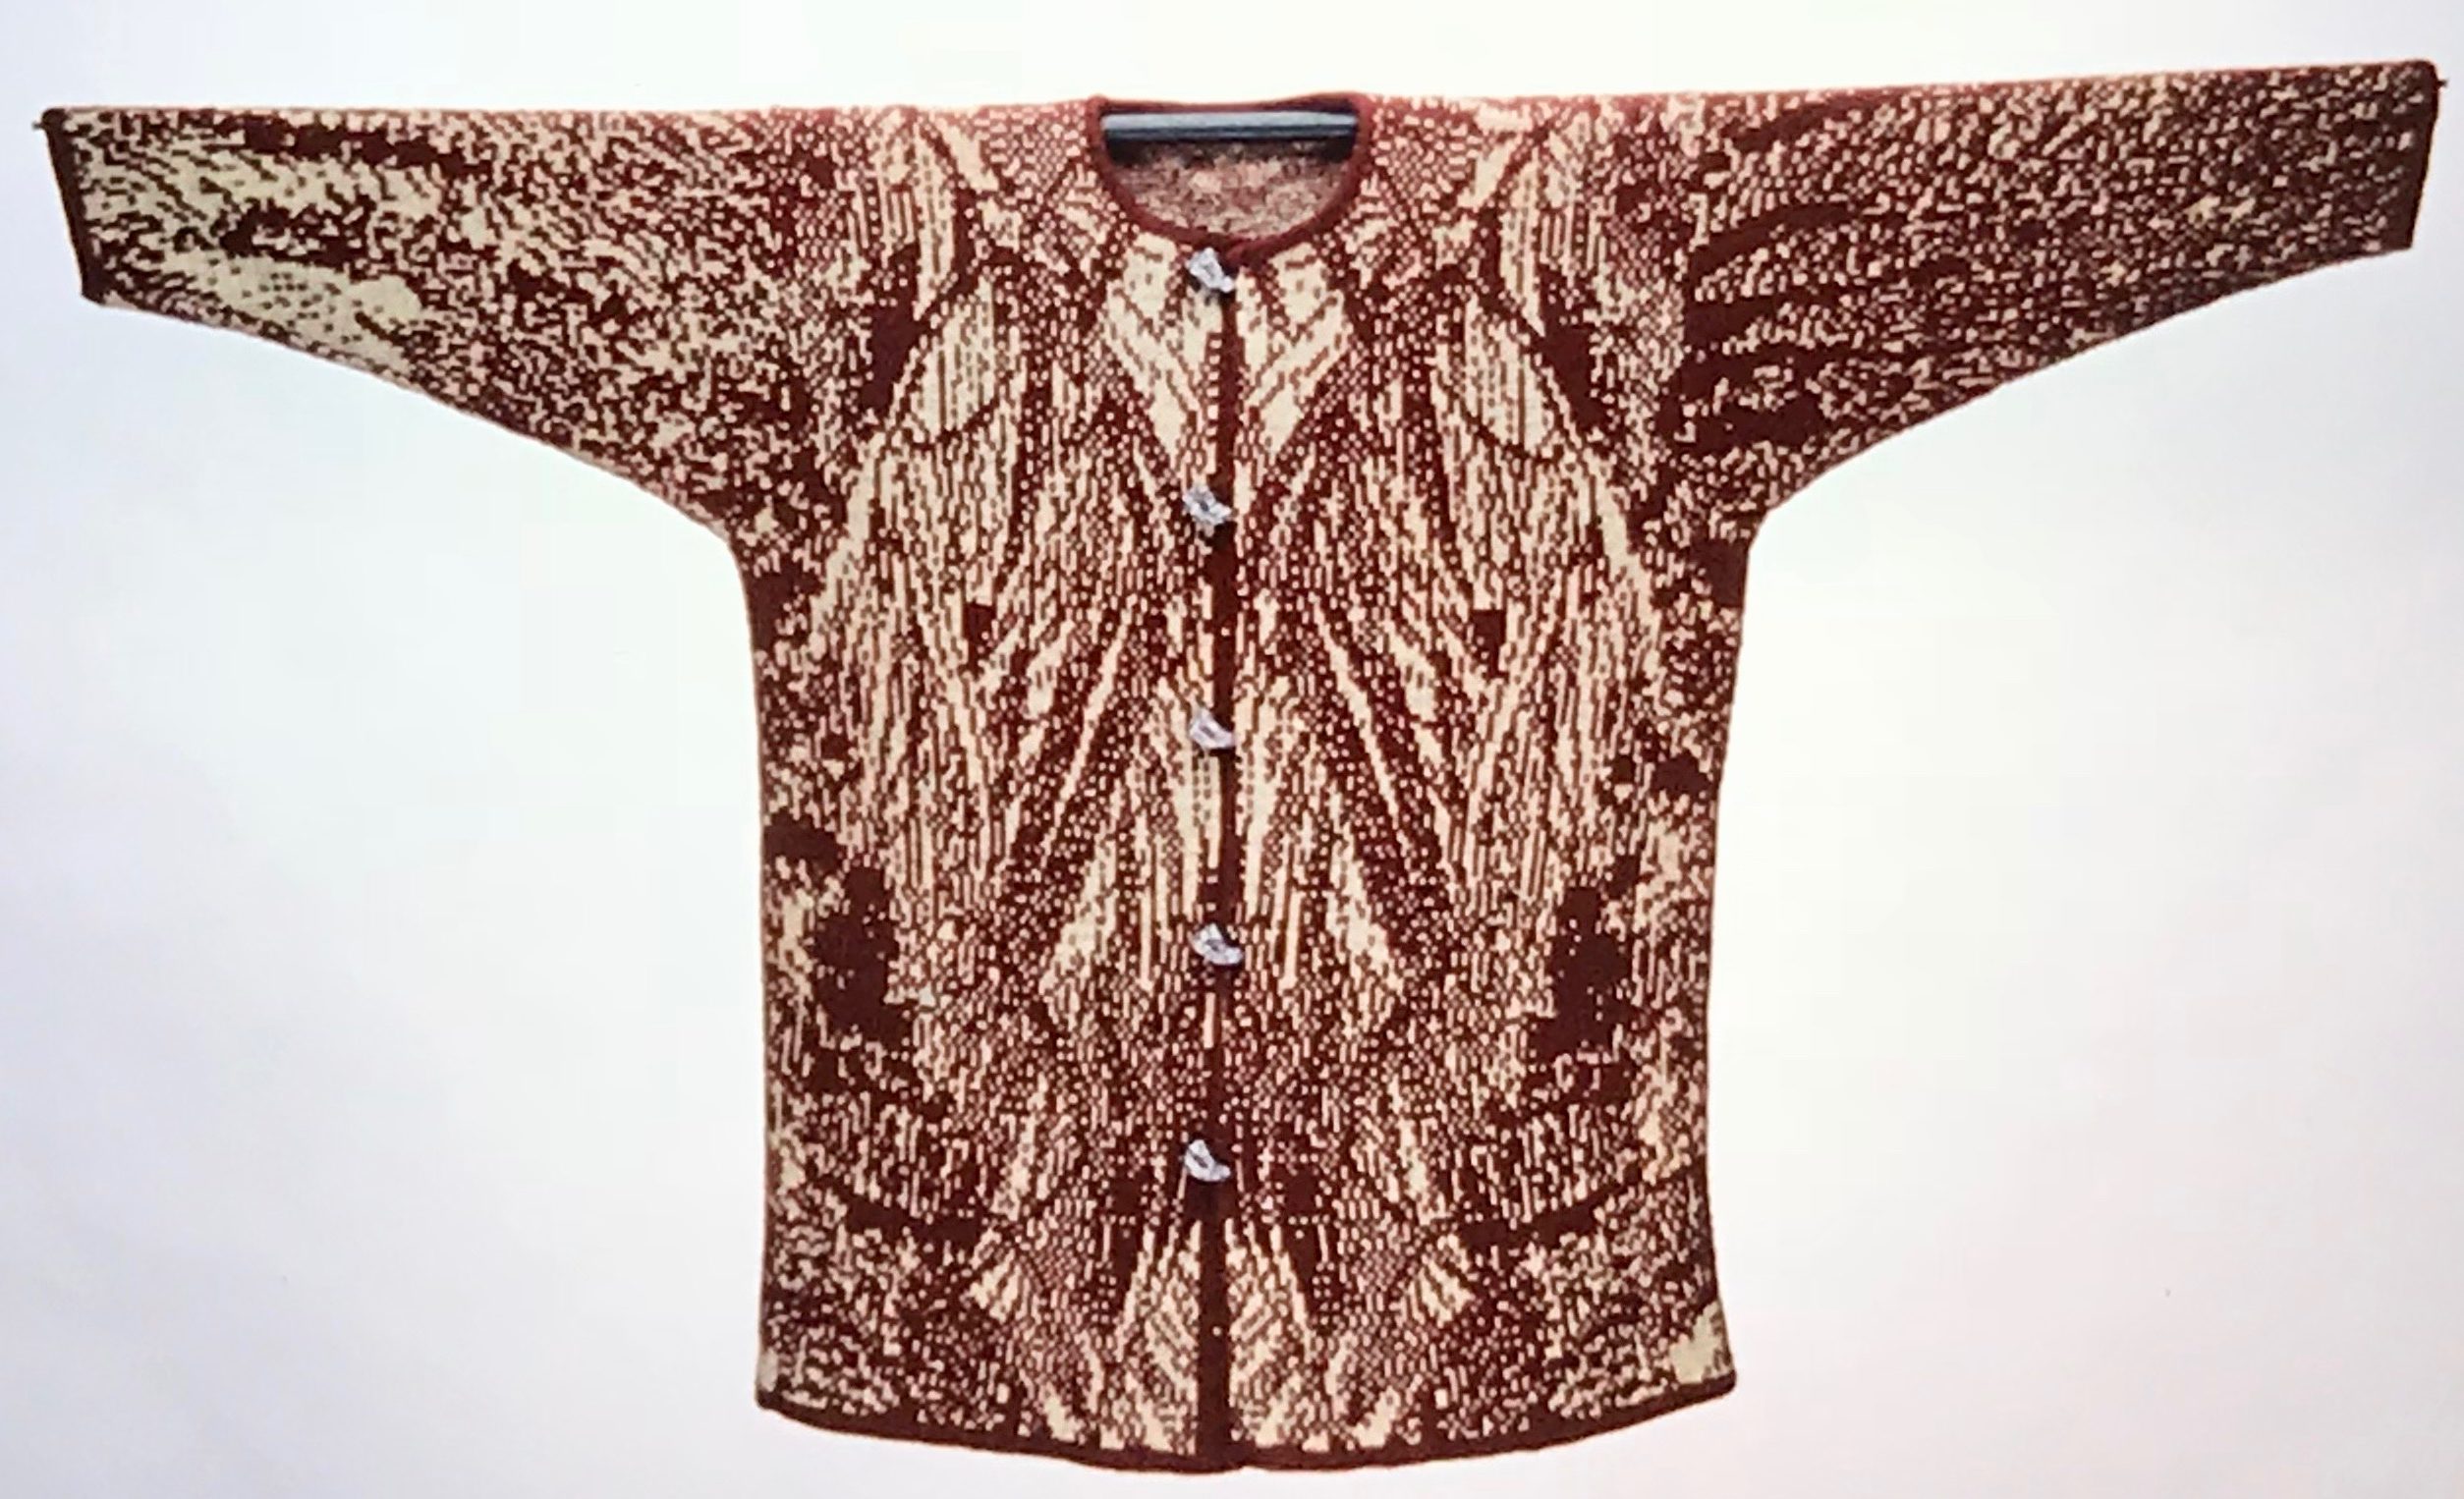
 Returning to that griffin, after resizing/scaling the original to multiples of 11, 1430X1045 pixels, the left portion of the design produced a clean match to the original, while the right segment with the off-grid dark cells still did not. The previously separately reduced segment was added on the far right yielding a far closer match.
  Weaving and cross-stitch libraries offer a huge range of potential design repeats.
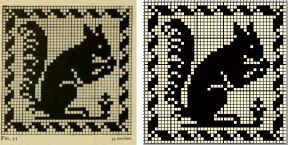
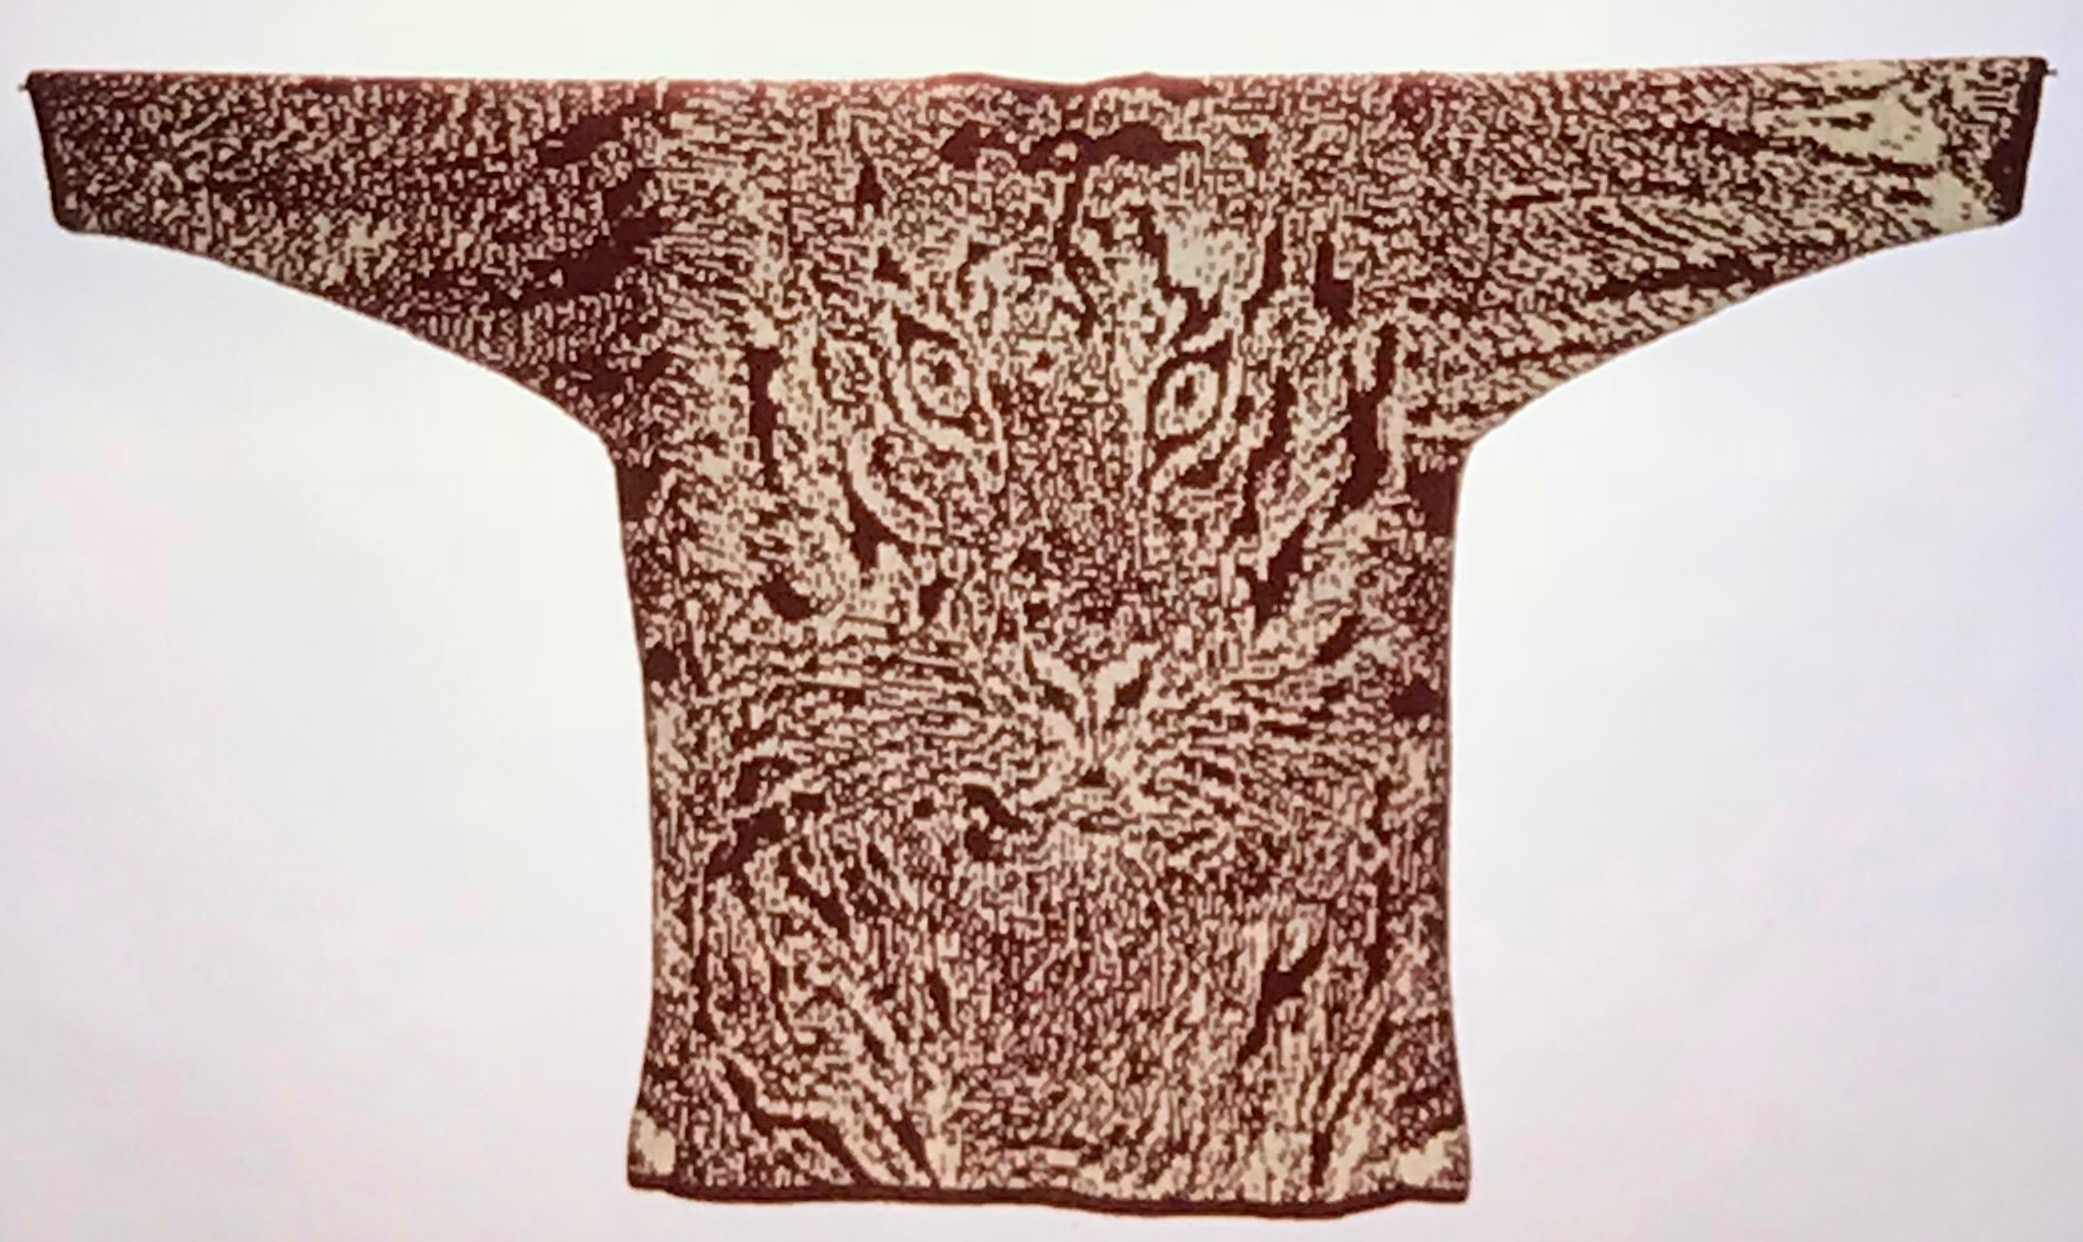
This is from a 1912 cross stitch pub, measures 165X 230 pixels 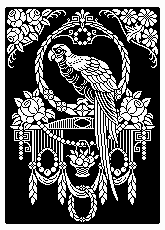 From a similar source: is that a kitty protecting his shawl, and what stitch is that?! 169X142 pixels
  Some resources:
Weaving library: fressinet offers images in black and white
Patternbase: from Dictionary of Weaves
Archive.org: filet crochet
Beginning with a design selected from p.83 in the Dictionary of Weaves 
 Color convert to 24 ->8, an expanded palette will appear. Press the Shift button and click inside the picture to manually select the colors, adding 63 in this case
Filters menu: choose Averaging, and follow with the second choice Repeat the last operation X10
Colors: set the number of colors directly to 2
Guess weave from grid to 18X18
Crop to selection, magnify and check results
Convert to black and white if needed
Check repeat alignment 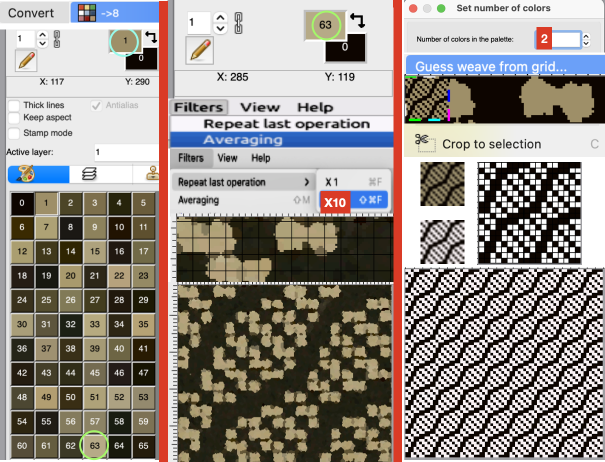 Other ways to handle the same task: another ArahPaint tutorial offers additional tips.
From the Cross stitch book, a 40X40 chart using a straightforward setting of the number of colors to 2. 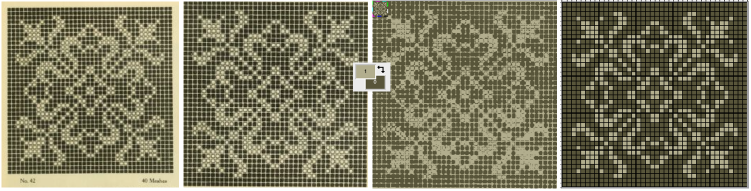 One way to convert the picture on the far right to black and white prior to saving it other than adjusting the palette colors is to use Threshold to reduce the number of colors.
1: select Black white, and Preview in the associated window
2: if an adjustment is required, the slider may be moved to the left or right, Undo if needed, and when satisfied stop
3: click OK and close the window, save the picture as bmp. 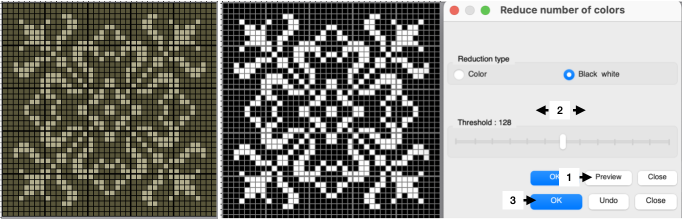 An earlier design intervention for the final B/W png: after setting the palette to 2 colors, reduce the number of colors with the same 3 steps using Threshold for another successful result.
 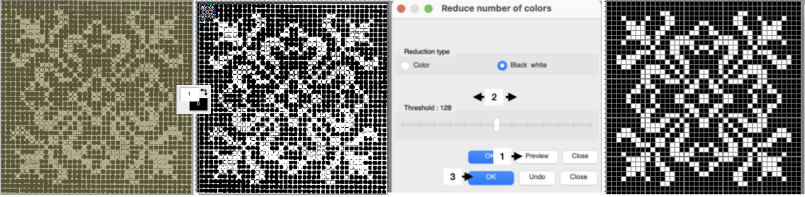 Reducing the number of colors window instead of setting the number of colors to 2:
Color convert to ->8, an expanded palette will appear
Choose Averaging, and follow with the second choice, Repeat the last operation X10
Open the Reduced number of colors window 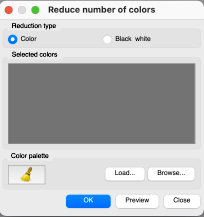 Press the Shift button and click inside the picture to manually select the colors for foreground and background, this did not work for me on my Mac with the latest OS. Selecting colors manually from the expanded palette by clicking on them is an alternative. The higher contrast between the two the cleaner the results.
Select Preview, if satisfied Click on OK, and Close
Select the whole picture
Guess weave from grid
Crop to content
Magnify, evaluate the results, adjust the palette to BW if needed, and save 
![]() Filet crochet pattern books also provide gridded sources that may be used in knit design. This 43X43 pixel file is adapted from Priscilla filet crochet book #1
Filet crochet pattern books also provide gridded sources that may be used in knit design. This 43X43 pixel file is adapted from Priscilla filet crochet book #1
![]() The same process may be used on color separation templates produced in DAK
The same process may be used on color separation templates produced in DAK
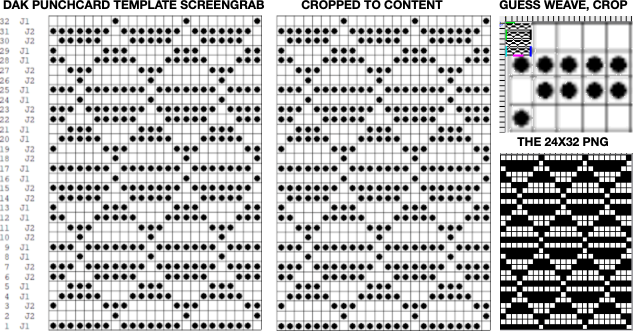
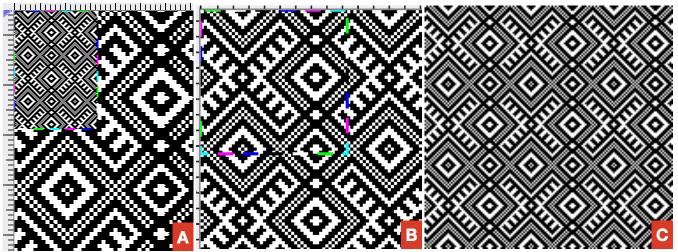
![]() From a random Pinterest find with an original 330X474 RGB chart:
From a random Pinterest find with an original 330X474 RGB chart:
A: guess weave from grid, crop to selection
B: tools, find repeat, crop to selection
C: the final 47X46 png drawn in repeat ![]()
 Adding colors to black and white pngs following the tip by the developer in the post comments:
Choose a black-and-white repeat, in this case, a 36X9 pixel repeat ![]() Double-click on one of the two colors to protect/lock it
Double-click on one of the two colors to protect/lock it  Double-click on it again, and the lock disappears, the color is no longer protected.
In the palette, use + to add a new color, this may be repeated more than once to add more colors or go to colors, set the number of colors to a number, ie. 6, for a random palette group that may, in turn, be edited to other values. 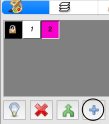 Double-click on the rectangle tool to draw filled rectangles
 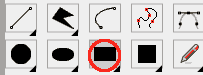 In rectangle options, above the palette icon, there are toggle buttons for Horizontal and Vertical, remember to protect a color
 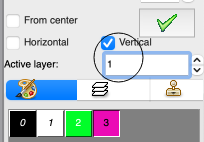 Once your selection is made, draw the filled rectangle across a selected width and height while keeping the protected color intact. Draw the result in repeat to check for alignment
  the protected color may be toggled to white
  If the designs are to be programmed for multiple color slip stitch or DBJ there are rules to be observed, and there may be restrictions on whether each palette color will be recognized as a third or fourth color by the download program ie. when using Ayab, where no two colors may occur in the same range of 8-bit values. For 4 colors, the ranges would be 0-63, 64-127, 128-195, and 196-255.
The img2track partial window with the associated color assignments for the first vertical variation. 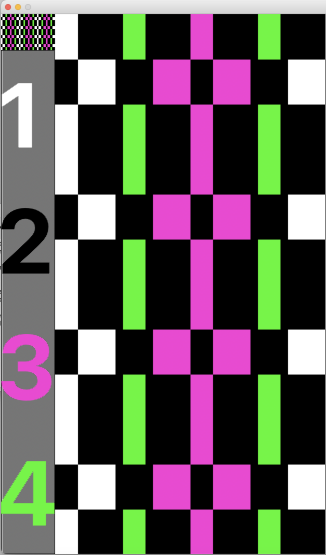 The horizontal choice allows one to play with selections possibly matching yarn colors in fair isle knitting,
 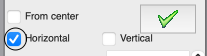 only 2 colors per row may be used, here the A feeder yarn remains fixed
 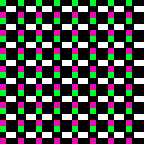 Remember to unlock the previous color choice if protecting new segment selections.
Visualizing possible FI striping results in progress 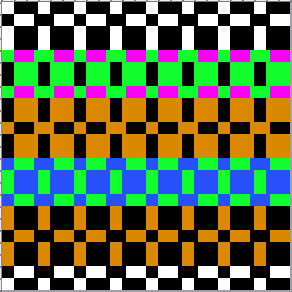 Working with diagonal patterning in machine knitting introduced some approaches.
Following guidelines in Easily generate random weaves it is possible to quickly generate DIY designs for use in multiple techniques.
To begin with, load a new picture 12 pixels wide and one pixel high
Set the number of colors to 2, black and white if the goal is downloadable pngs.
Fill in a repeat, and multiply it by Y multiple times to achieve the final number, 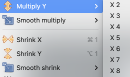 or fill in vertical bands using the pencil tool on the final planned starting canvas.
A single row repeat first multiplied Y X6, then X2 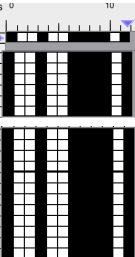 Select the measurement tool:
 ![]() The tilt tool shifts every next line of pixels, the width of the line in the X field for the horizontal tilt,
The tilt tool shifts every next line of pixels, the width of the line in the X field for the horizontal tilt, ![]() or in the Y field for the vertical tilt
or in the Y field for the vertical tilt 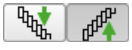 Default values are set to 0
  The selections for this design:
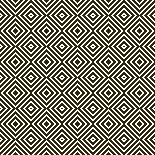
 ![]() The resulting file, also shown drawn in repeat:
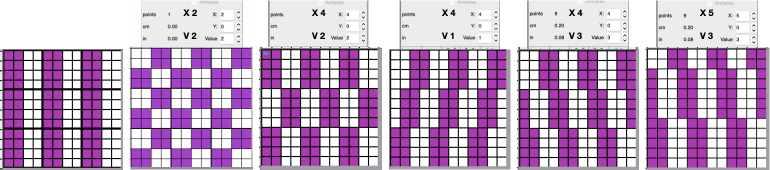
The resulting file, also shown drawn in repeat: 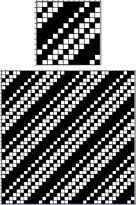 Two more, with a starting picture total height of 24 pixels
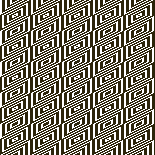
 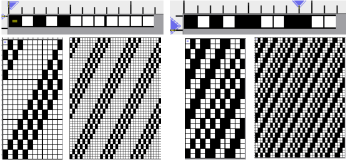 One repeat, multiple width selections
 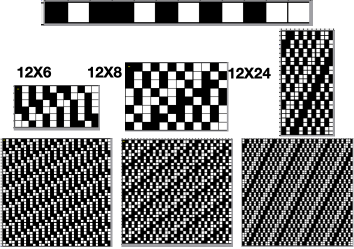 This repeat may be used for tuck or slip stitch, providing the final png is color reversed. The 12X24 initial result was multiplied X2 in height/Y to produce the 12X48 one. The image on the far right checks alignments
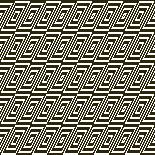
 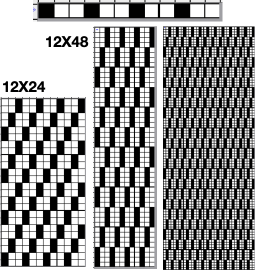 Working in multiple colors using the same approach:
 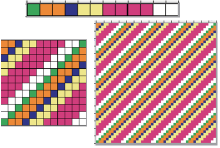 These charts continue to use the selections
 ![]() with reverting back to the original after each variation, though steps may be made sequentially and reversed in a matter of seconds
with reverting back to the original after each variation, though steps may be made sequentially and reversed in a matter of seconds 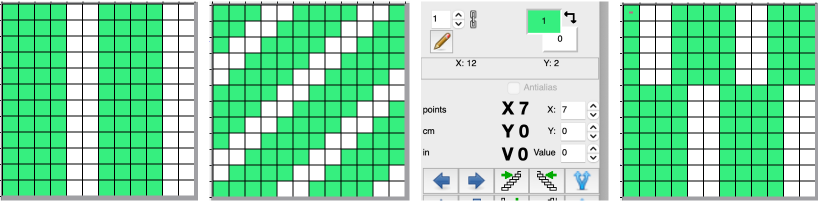
![]() Any results may be modified by adding other program functions to produce drafts of expanded repeats ie. through using drawing in repeat/ random. The results may be suitable for large pieces ie blankets and likely best knit as DBJ.
Any results may be modified by adding other program functions to produce drafts of expanded repeats ie. through using drawing in repeat/ random. The results may be suitable for large pieces ie blankets and likely best knit as DBJ. 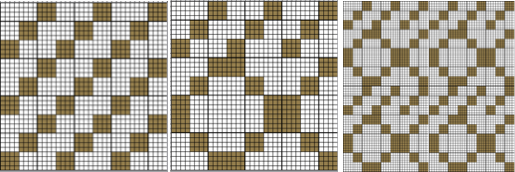 The ease of designing needs to be paired with good notes on charting cause and effect and an understanding of the relationship between pixels/ punched holes and stitch formation using varied cam button settings.
Using Filters is an additional way to develop images that play with the eyes, sometimes with only a few keystrokes.
A description of filters and their use may be found on pp 88-101 of the user manual (thumbnails # 96-108).
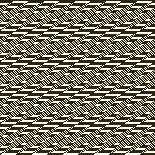
Filter options: 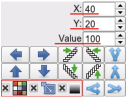 This first series uses only the contour filter
 ![]() and random selection of arrows from this tool
and random selection of arrows from this tool

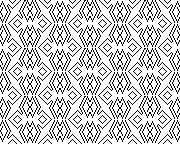
 beginning with a 12X12 pixel design
 ![]() developing it into a 31X31 one, not all doubled pixels eliminated
developing it into a 31X31 one, not all doubled pixels eliminated ![]()
![]()
![]()
![]()
![]()


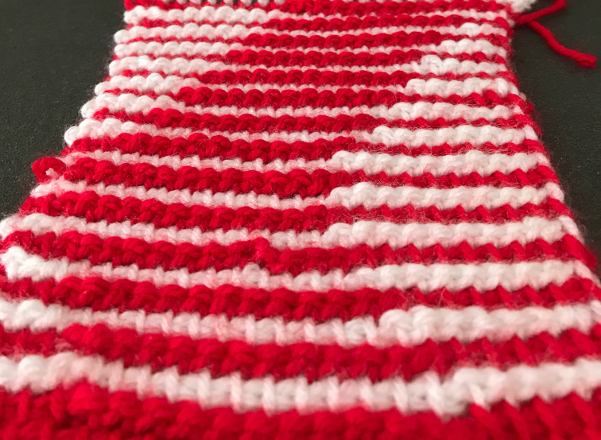
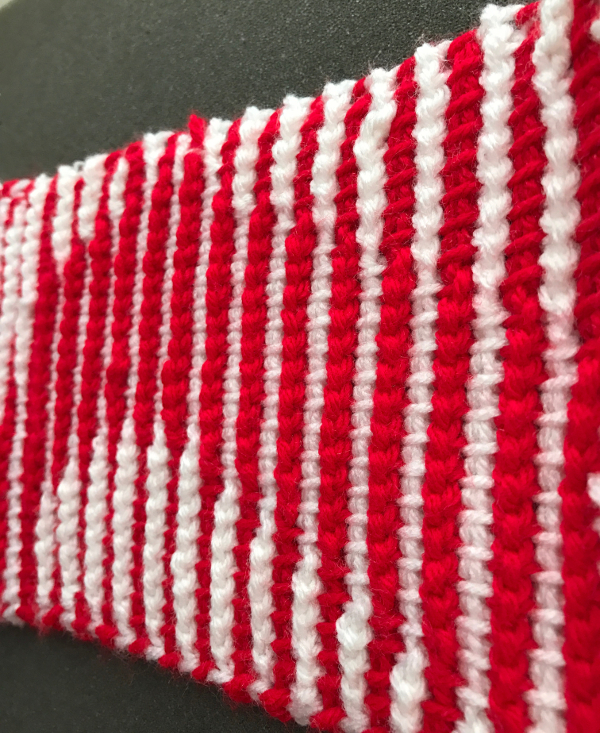
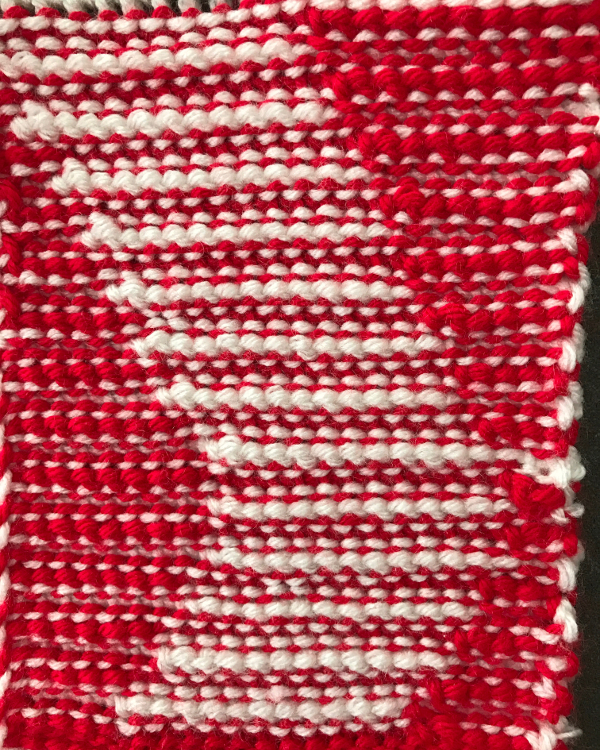
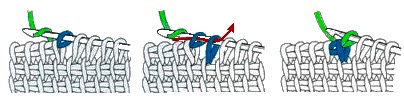
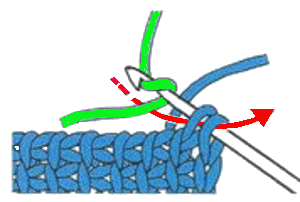
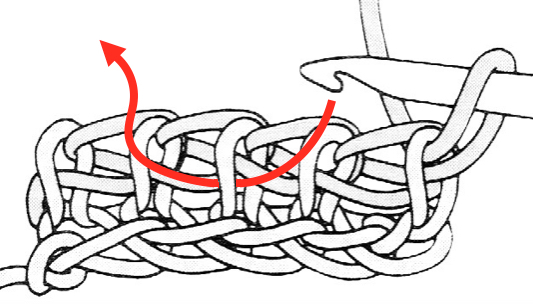
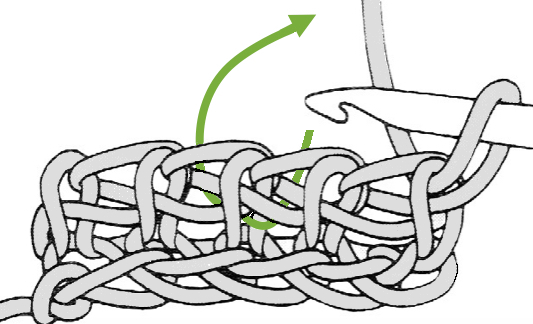
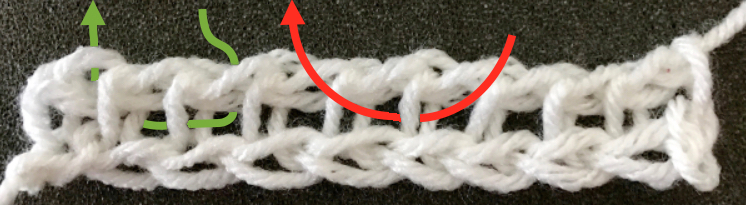
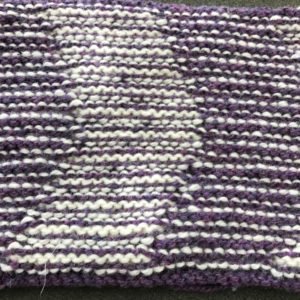 Since I am now involved in a group interested chiefly in crochet, I got curious about executing the fabric in crochet. Part of the problem is that enough texture needs to be created to be able to read the “shadows”. I tried crocheting in different parts of the chain, around the posts in the row below, and ultimately went back to afghan stitch. I had not used the latter since making blankets first for my son, and then for my grandchildren.