Several methods for creating fringes including some that may apply to this fabric as well were explored in the collection of fringes 1 post
Hairpin lace, familiar to many crocheters, is based on a central column with side loops that can be produced in strips, in turn, joined together in different configurations to compose open inserts, shawls, garments, serve as trims and joins.
A double-sided machine knit fringe can serve the same functions. My first swatch is knit using the #1 punchcard. Tension is totally dependent on the yarn used, the fabric may be executed on any machine, but as is often the case I am writing specifically for Brother.
The needle arrangement includes 2 center stitches, an even number of out of work needles to determine the width of the long loops, and one stitch at each end that is knit for the duration, then unraveled to loosen loops for various joining methods or uses as seen in hairpin lace references.
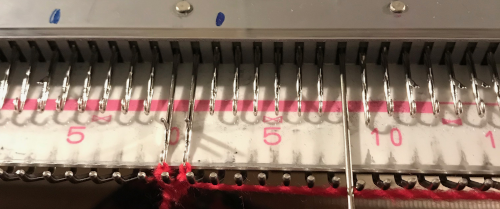
COR: to start with, 2 needles are cast on in the center of the piece, knit one row on them alone. This will produce a small tab that is woven in upon completion of the strip, as are yarn ends, and creates a base so whole loops may be added in equal numbers on each side.
Bring the side stitch on the carriage out to work skipping the chosen number of needles, knit one row to the opposite side, bring the outside needle on that side out to E, set machine for preselection row, knit back to the opposite side. Proceed to knit with both tuck buttons pushed in with end needle selection on.
A separate cone or ball of yarn will be needed in matching or contrasting colors to anchor stitches in the central vertical column. Bring the row counter to 000.
Multiply the number of loops required X2, since it will take 2 passes of the knit carriage to complete each pair, one on each side of the center.
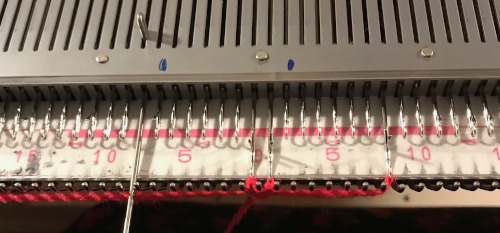
I brought the side stitch on each side prior to knitting the next row out to E, rather than settling for using KCI alone, found that kept the side edges stable and I was not getting dropped loops.
If long strips are to be knitted, control over what is happening on each side matters in their assembly.
As you knit the two center needles will alternate coming forward, a separate strand of yarn is used to e wrap around the needle that comes forward with each pass of the carriage. Even though the illustrations for the technique show equal loop widths, they can actually be created asymmetrically as well, or the central column may be moved on the knitting machine as one advances through the piece for an asymmetrical version.
The dots on the metal bed are from another piece
 the first selection of a needle forward by punchcard
 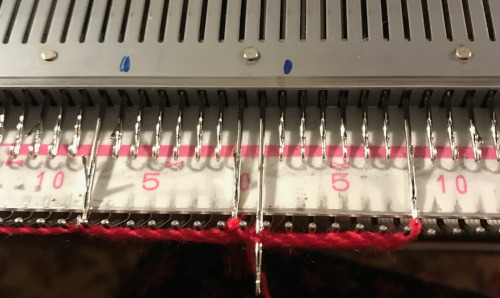 e wrapping with second yarn before moving to left
 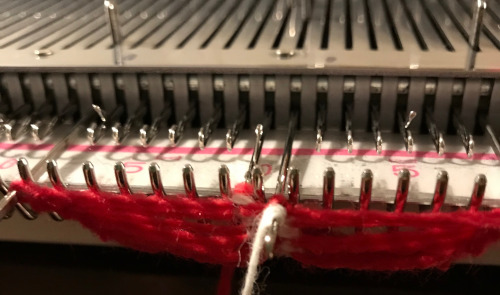 e wrapping with second yarn prior to returning to right, completing a sideways figure 8, end stitches out to E before prior to each carriage pass
 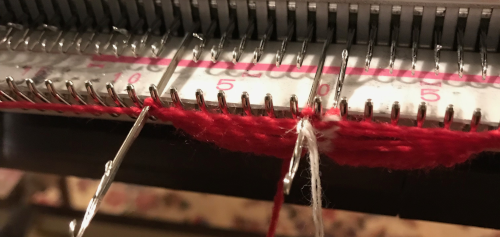 When the required number of rows has been knit, end COR. Unravel the first stitch on the right,
at the center transfer one of the two center stitches onto the other, and secure it with the center yarn.
Drop the strip off the machine, unraveling loops when you are ready to join the strips.
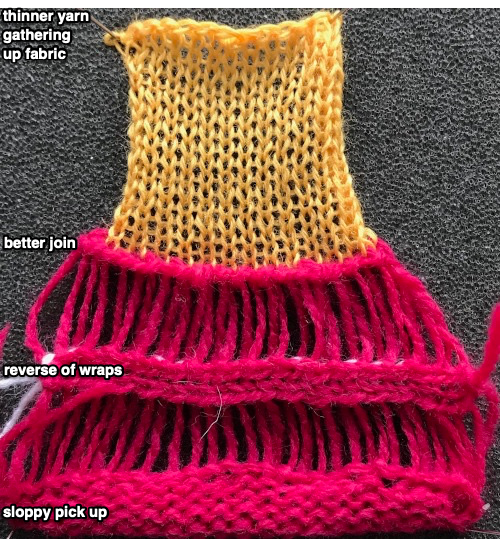
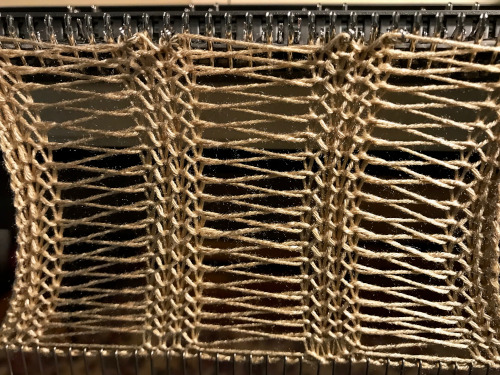
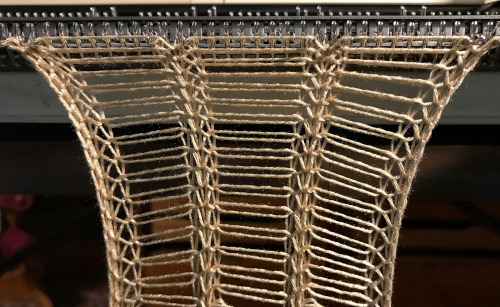
Using the finished sample as an insert brings up the topic of joining knits. Here there is a single stitch on each edge. The unbound off stitch at the top on each side can be hooked on and secured with the first pick-up.
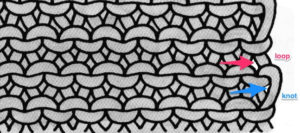
Stitches in the sides of knits form “loops and bumps”. The loops are formed carriage side as the row knits, can be used as possibly the least satisfactory single stitch increase. Opposite the carriage, as that same pass is completed the yarn will twist and create the “knot”, an easy and often acceptable single stitch increase. Which of the two is used to pick up for joining depends on yarn thickness and desired effect. Swatching will serve as a guide. Being consistent gives the best seam/join, without bumps and lags. The single edge stitch side border needs to be stabilized if it is going to serve as the detail at the bottom of the piece.
E wrapping every other needle as shown above with separate strands of yarn for 2 stitches on each side may be used to produce a no-roll edge on the sides of any knit fabric.
Knot vs loop: 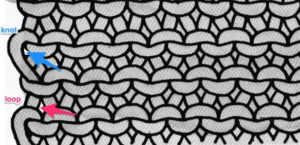
 Using thinner yarn for knitting after the join even if on the same number of stitches, will gather the fabric
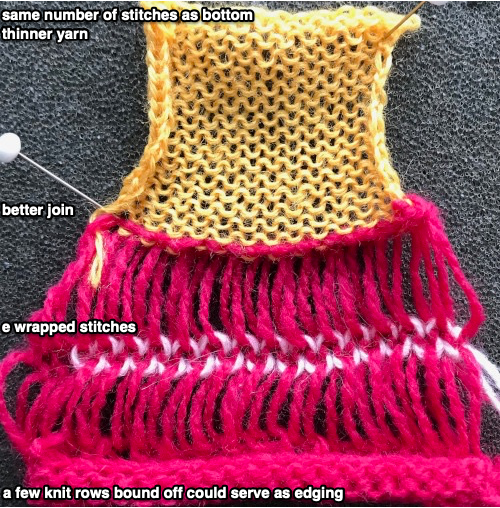
 More on seaming and joining knits 1 and 2. Extensive accumulation of images (crochet) for inspiration and possible technique links may be found on Pinterest
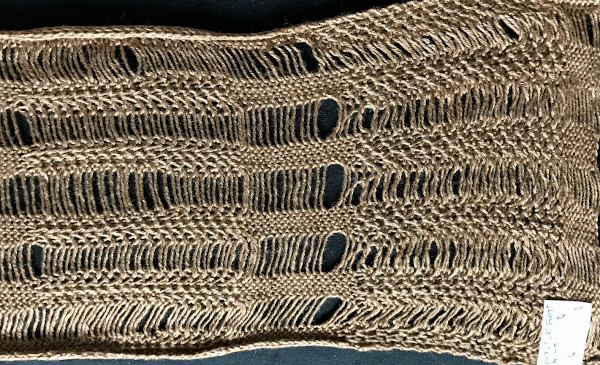
On the left is a sample using an asymmetrical width, latched join method, while on the right loops are twisted broomstick lace fashion, and there is a crochet stitch join  strips of different colors used
  gathering tightly on one side can be the start of circles and shells
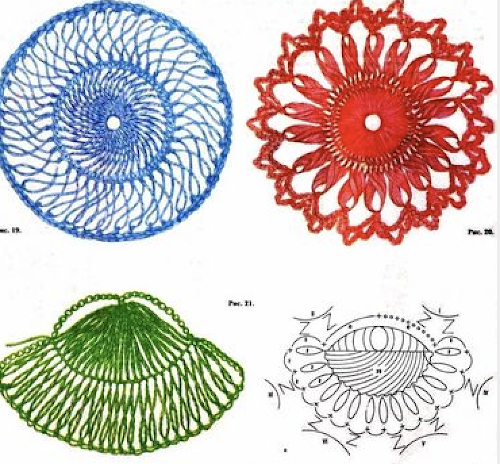
Japanese design books include their own symbols, here is part of a schematic for a shawl. It precludes an understanding of crochet symbols. The latter is simply illustrated and there is more convention as to their meaning than that for knit symbols, particularly as more and more designers are adding homegrown ones to self-published patterns 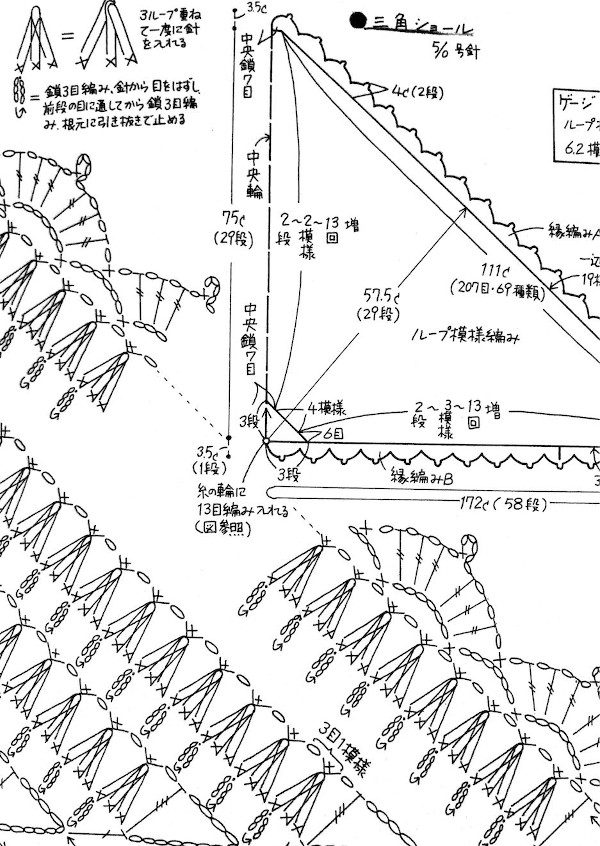 The convention for joining strips of machine knitting by crocheting or latching side loops together suggest having a ladder space (white square, one or more may be used) and a side edge stitch on either side in segments of the final piece ie. afghan strips.
 ![]() When binding off at the top of the piece, the first and last stitch on either side is skipped, leaving them open so that they may, in turn, be unraveled. The easiest method if the goal is to join pairs of strips is to line up two of them side by side, unravel side stitches from the top-down, only enough rows to match the number of loops that will be latched through each other, and proceed for the length of the piece.
When binding off at the top of the piece, the first and last stitch on either side is skipped, leaving them open so that they may, in turn, be unraveled. The easiest method if the goal is to join pairs of strips is to line up two of them side by side, unravel side stitches from the top-down, only enough rows to match the number of loops that will be latched through each other, and proceed for the length of the piece.
Depending on the yarn, work can be rehung on the machine, followed with a latch tool bind off, a segment at a time if needed, while maintaining a continuous piece of yarn.
Steps may be repeated for a crochet pretender edging at both ends if the number of needles on the machine will support that. Another alternative for the horizontal edges when no fringe is planned is to bind off with a crochet hook as follows: knitted edge: slip stitch in each knitted stitch, open section: chain 1, 1 single crochet stitch into first jumbo stitch, chain 1, 1 sc into second jumbo stitch, chain1 repeating across the row. If desired, sc again across all stitches. A row of single crochet may be needed to balance cast on edge as well.
Then there is the option of “winging it” and making a personal decision about other suitable alternatives.
When strips approach traditional hairpin, if you wish to work bottom-up or arrangements of loops are planned to be varied, whether, by crochet sequences or rehanging loops on the knitting machine, unraveling may be done while also threading a length of yarn through the loops akin to a lifeline in other types of knitting, making them more manageable. A hand knitting video by Bernat Yarns illustrates the principle on conventional hairpin lace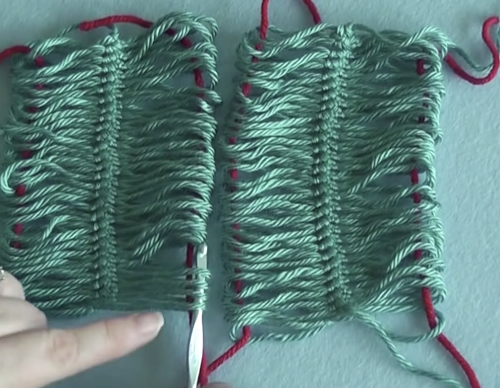 The technique is sometimes referred to as a cable join. The video also provides a reminder that if all the latching through is done in a single, same direction, the fabric will bias. To avoid that, start latching on right for one pair of strips, on left for the next pair. Finishing side edges by latching is shown in the Bernat #4 video along with adding a fringe to finish the top and bottom of the piece. If you enjoy crochet patterns longhand in the “old fashioned” way from out of print sources, here is a reference for inspiration, with hairpin illustrations # 448-456.
A join and side finishing, one side of each strip chaining strands of loops through each other, the outside edge twisting loops akin to broomstick lace: 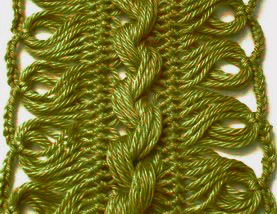 A partial illustration from Pinterest from an unknown source showing how the loops coming together to make shapes might be charted out: the ovals represent chain stitches, the v slip stitches, the different colors the finish of a complete strip’s edge
  Tuck lace is a fabric produced with needles out of work in combination with tuck patterning on the main bed. Patterns for it can serve as the starting point for either the center strips in double-sided loop fabrics or they can be worked in repeats with wider ladder spaces between them for a far quicker “pretend” version. This is one of my ancient swatches for the technique from a classroom demo, using the 1X1 punchcard, shown sideways to save space.
 The card is used at normal rotation. Any time there are needles out of work, end needle selection is canceled to maintain patterning throughout including on end needles of each vertical strip. Tuck <– –> is used resulting in texture as opposed to simple stocking stitch and ladder fabric (center of the swatch). In the right segment, the ladder threads are twisted, in the one on the left they are not. This is what is happening: for twisted ladders on an even total number of needles have an even number in the selected pattern (4), and an even number out of work (6). This is one fabric that definitely benefits from the use of some evenly distributed weight and a good condition sponge bar. End needle selection must be canceled
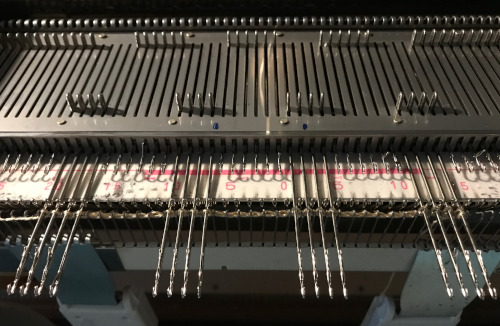
 Here the stitches are arranged with an odd number in work (3), an odd number out of work (7)
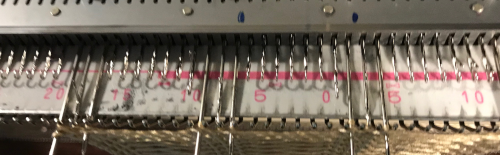
A way of determining needles out of work vs patterning/ in-work ones for both tests: the first is knit on a multiple of 10+4, the second on a multiple of 10+3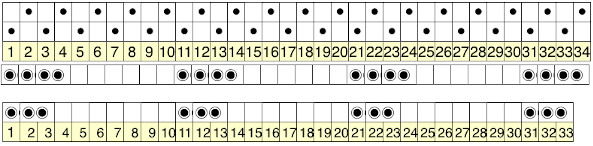
![]() These fabrics will narrow considerably when off the machine, here is an image of the above swatch after a period of “rest”.
These fabrics will narrow considerably when off the machine, here is an image of the above swatch after a period of “rest”.