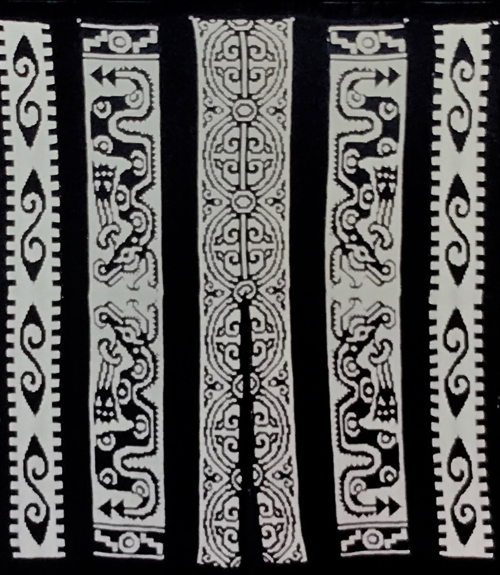
Fringes are not a personal favorite of mine on machine-knit garments in their “simplest” forms. I can recall using them rarely. Here a cut Passap version was applied to a piece made in my student days, a ruana for which I no longer have the measurements. It was composed of wool DBJ, worked in 10 panels, using a mylar sheet on a 910 for patterning, hand pieced, and is still being worn by its owner. 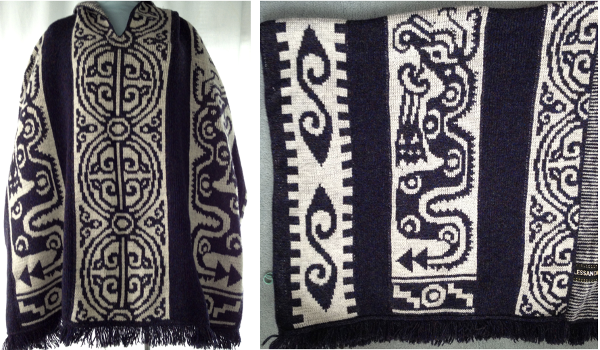
 I made a few items with twisted strands inspired by those seen in wovens produced by my weaving friends. I have no photos of those, failed to document my work for quite a few years. One excuse was the quality of any photos I attempted, and even back in the day, professional photographers charged $180 an hour plus model fees if used. It seemed that adding the cost of such photography to limited edition runs that were planned for sale would make the wholesale price higher than the market would bear. We all make choices based on information we have at that particular time, which was long before the recent easy-to-use photo technology.
There now is a very good video by Diana Sullivan showing a machine knit version of twisted fringe produced on the machine.
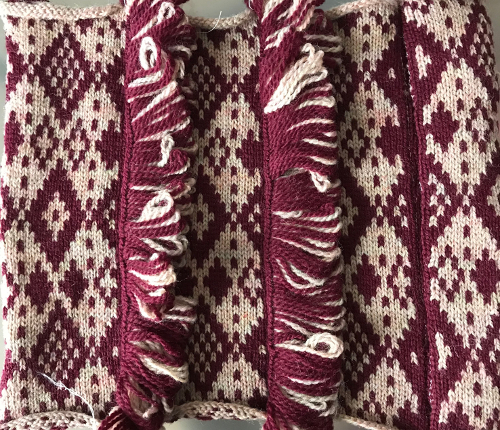
For a while, I was on an i-cord kick. I liked the look, but they were very time-consuming on production items, with lots of ends to weave in, and there was a balance to be sought between far too many to be practical and too few and skimpy to be attractive.  Here a ladder space created by needles out of work is left between vertical fair isle repeats, producing a fringe in 2 colors. The design was not planned, a standard punchcard was used for the purpose of the demo. A planned repeat would have more impact. End needle selection is on, which is usual in FI, not for most patterns with either tuck or slip stitch settings combined with needles out of work, is also true here so that a vertical line on each side of the needles out of work between repeats aids in sewing the strips together. Width is limited since the fabric will be gathered by seaming and become significantly narrower and likely turned sideways. Both sides are shown. Joining could be planned to occur only at the bottom of a piece if desired, stitching lines will be less visible if thread color matches that of the yarn
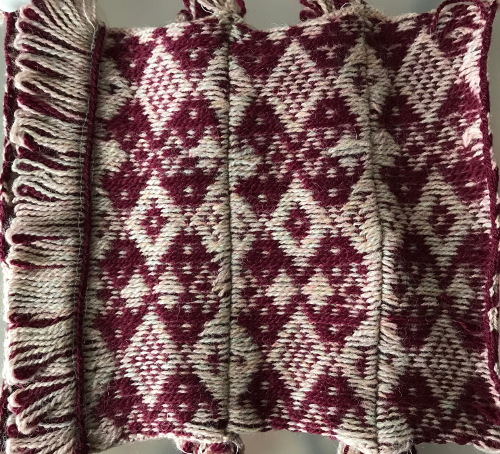
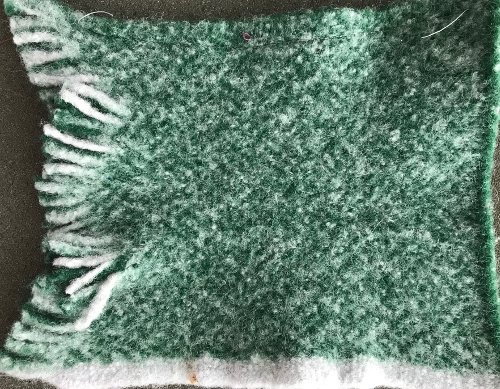
 A needle in work away from the edge produces a side “fringe” followed here by felting partially, cutting the single edge stitch, and finishing the felting process
 Adding thicker or multiple strands of yarns in long loops on edges, isolated areas, or all over
 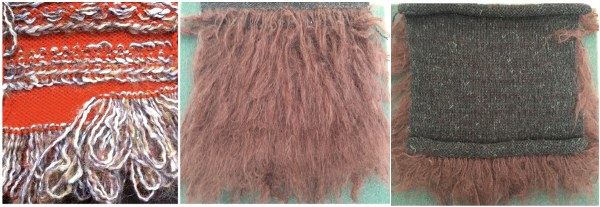 Let us not forget knit weaving with several strands of yarn, adding strips of the result as one knits, or simply hooking on strips of fake fur or thrums (the bits of yarn that litter the floor after you cut your weaving off the loom) at chosen intervals
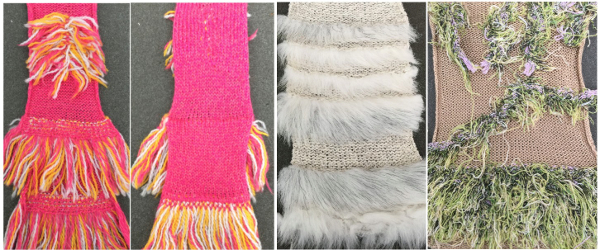
Finished edges on woven or lace trims, strips of fabric, and even roving along with self-made tassels may all be added at any point. Jolie tools, intended to aid in picking up dropped stitches can sometimes be helpful in picking up close to the woven edge (and pricking or piercing body parts on some days). The tool is available for both standard and bulky machines 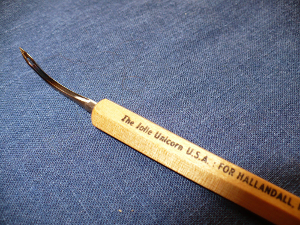 Most often every other needle use is best. Here lace and pom trims are used, purchased fringes of all sorts could be applied the same way anywhere in the piece, joins to knit can be seen.
 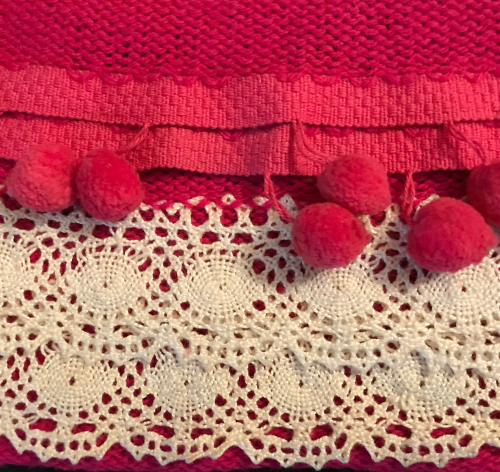 A length of roving may be twisted in its center and applied as you knit. For a while mittens using it as a lining for warmth were popular. A video by Carole Wurst shows a method used in socks https://www.youtube.com/watch?v=4FWmH6XW_FU. Roving will felt together to varying degrees over time, as seen here in another of my ancient swatches. The “sparkle” is there as a result of using an angelica/wool blend.
 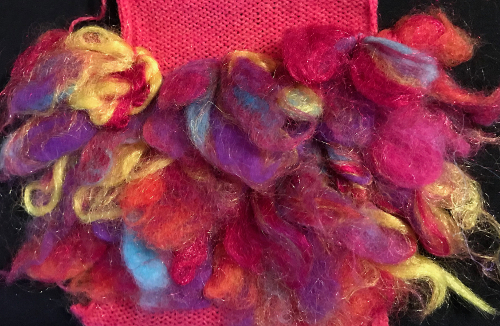 the same twist in the center/ knit through method may be used with torn strips of silk or other thin fabrics, mine here are 1.5 cm. wide. Background yarn may knit fine at standard tension commonly used for it, testing will determine it and the spacing required to meet your goal
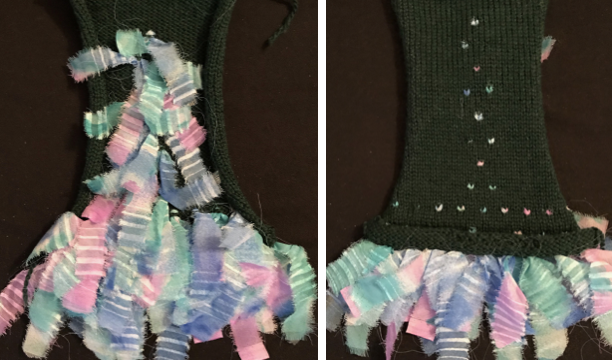
How-tos: to begin with, this is the “passap” version illustrated in the Duo Manual. One may choose wider knit bands between the floats that will be cut or folded over and doubled up
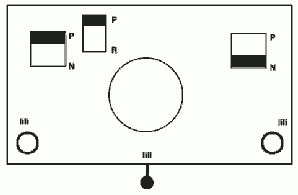
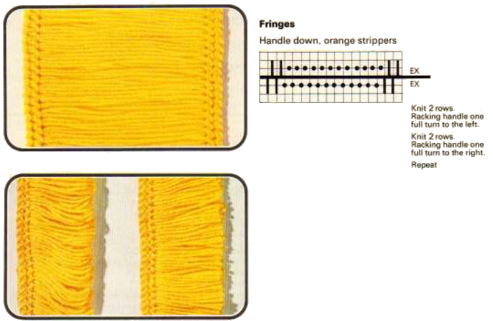 The thickness of the yarn chosen is of critical importance. When I first attempted to knit a version of it on my 930 I encountered problems. To start with, I kept dropping off the stitches on one side or the other. I checked the ribber alignment, proper placement of the cast on comb, switched ribbers, and carriages, and continued to have problems. After all that, the solution turned out to be simply adding another 4 stitches (2 on each bed) toward the center of the piece (I did not count). Here I used a 2/24 which obviously does not have enough body to use as an edging. The Brother equivalent for the Duo setting is half fisherman rib, where one carriage knits in one direction, tucks in the other on every needle for every 2 rows knit, while the other bed’s carriage does the same, but in opposite directions. I used 3 needles on each side rather than 2 as in the Duo repeat, starting with the first needle in work on the left on the ribber, the last needle in work on the right on the top bed. One may begin to knit on either side, but when manually setting the cam buttons lead with settings so that first stitch knits as it moves to the opposite side. Using waste yarn at the start of the piece will produce a better cast on edge for the trim. Operating from the right:
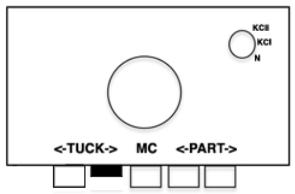
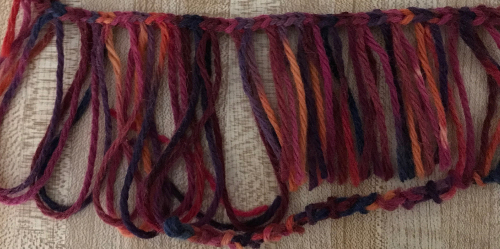
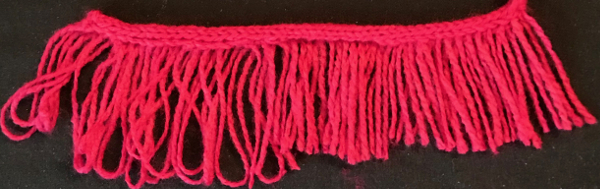
 A 2/11.5 acrylic provided more of a tension adjustment challenge but made for a better fringe.
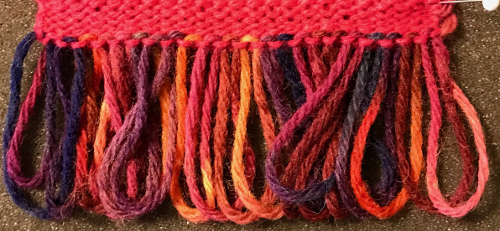
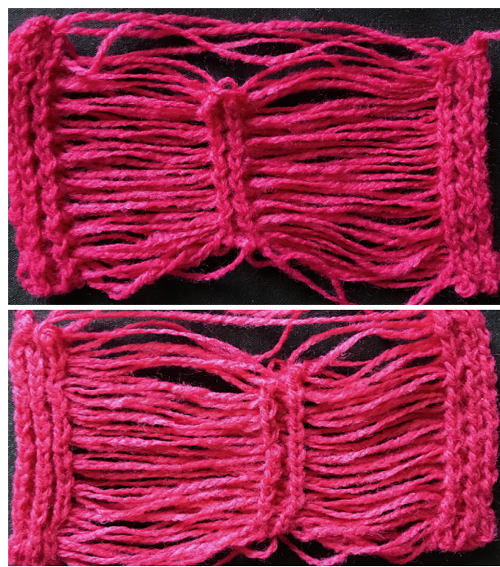 The first and last 3 stitches on either side were transferred to the top bed and bound off, the center stitches were not, allowing them to be unraveled if desired ie in case the fringe is to be folded in half. Those extra center stitches also provide a guide for cutting either down their center (bottom of photo) or on either side of them (toward the top). I found the latter method to produce a cleaner cut line
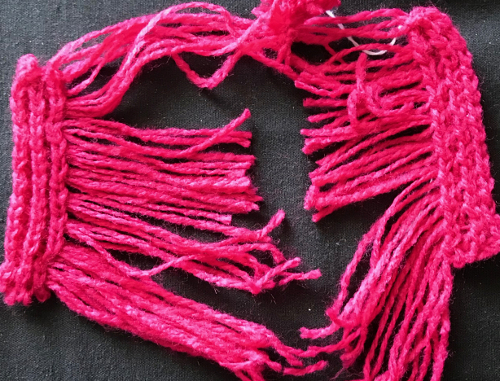 Suggestions for going wider with racked half fisherman rib on Japanese machines: begin with needle arrangement below, out of work needles can be as many as needed, set up and cast on with preferred racking position ie on 5, knit several rows in waste yarn making any adjustments needed so stitches knit are formed properly, weigh appropriately.
 ![]() Add needles on the main bed and remove one on the ribber
Add needles on the main bed and remove one on the ribber![]() Continue the test including in pattern, switch to a couple of rows of plain knitting and end with one knit row using ravel cord in a contrasting color. Cast on for fringe, knit 2 rows. Set for tuck rib, knit 2 rows, rack to position 4, knit 2 rows, rack to position 5, continue racking for the desired length, end with 2 knit rows and bind off or scrap off in case any additional length might be needed. When knitting lengths of trim, ending the piece on open stitches and waste knitting will give one the opportunity to either unravel or add more rows if needed.
Continue the test including in pattern, switch to a couple of rows of plain knitting and end with one knit row using ravel cord in a contrasting color. Cast on for fringe, knit 2 rows. Set for tuck rib, knit 2 rows, rack to position 4, knit 2 rows, rack to position 5, continue racking for the desired length, end with 2 knit rows and bind off or scrap off in case any additional length might be needed. When knitting lengths of trim, ending the piece on open stitches and waste knitting will give one the opportunity to either unravel or add more rows if needed.
Knitting fringes with a center band and cutting side edges will form variations on “feathers”. Pretend “hairpin lace ” produced on the knitting machine also uses related ideas.
An aside tip: if knitting pieces with strips of stocking stitch between ladder spaces often the side edges of the vertical knit columns will not hold and become wider and distorted. Using a single stitch in from each side of the columns on the ribber as well and racking one to left, one to the right from the original position every one or 2 rows will stabilize them. This swatch was knit in a very slippery rayon/cotton blend over 20 years ago using single neighboring stitches on both beds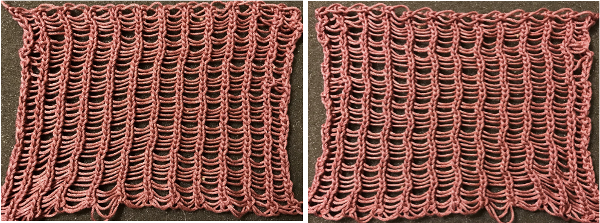 the edge that holds the fringe together is to be very narrow (or even added as one continues to knit) and one wishes to work on the single bed there are several options. With 4-ply and a “matching color” 2 ply I began with the top needle arrangement, and then switched to the one below it, knitting on a 4.5 mm machine.
  A permanent cast-on needs to take place in the preferred method over needles in work knit 2 rows. The stitch on the second needle from the left is going to want to stretch and tends not to be stable. To reduce that happening, there are 2 options involving the second strand of yarn. Here using a 2 ply helps serve that purpose and keeps the fringed strands closer together. The slower method is to remove the second stitch from the left on a tool after every 2 rows knit, then bring the separate yarn strand behind the now empty needle first from the right, then in turn from the left, returning the removed stitch to the machine, knitting 2 rows. I found that too slow for my patience, switched to just laying the second strand over needles before knitting each pair of rows, and decided to eliminate the out of work needle on the left side, moving the second stitch in work to its left.
 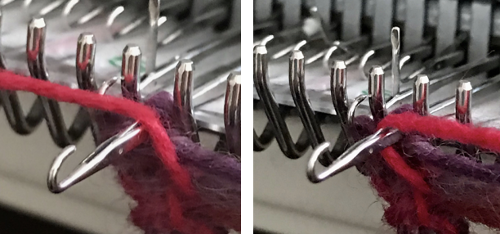 The single stitch on the far right of the chart need not be bound off. There will be 2 options after the work is off the machine. One is to unravel the single stitch column on the far right if loops are the goal, or cut it off, leaving a fairly good trimmed edge here, and what, in this yarn, appeared to me to be an acceptable edging. The 2 edge stitches on the left in my swatch did roll, making a very tight edge. Adjusting the tension used to change that effect would be another choice. Yarn use and personal taste contribute to a range of “successful” results when using any of these techniques.
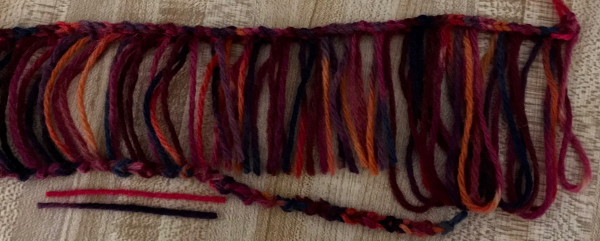
 This version creates a true i-cord edging on one side, and produces a double fringe. Begin cast on with 5 stitches on one side, 1 on the opposite side to accommodate the desired width. As I knit my sample, I added a second stitch on that same side to make for an easier, more stable cutting line. Any changes in tension will affect the width and rigidity of the i-cord, and more markedly any stitches on the opposite side, and the length of the cut loops. As when knitting any slip stitch cords, the tension needs to be tightened by at least 2 numbers from that used in knitting the same yarn in stocking stitch. The carriage is set to slip in one direction, knit in the other, producing a float the width of the knit. Cast on. Beginning with COR knit one row to left, set the carriage to knit in one direction only (I happened to use the right part button, either can work). The process that draws the left side vertical column together into a cord : * transfer the fourth stitch from the left onto the fifth, move both stitches back onto the just emptied fourth needle, leave the fifth needle in work, “knit” 2 rows*. Technically, the 2 passes of the knit carriage to and from the left will produce only one knit row. I used the 2/11.5 acrylic, on the skimpy side. Thin yarns may be plied for the best effect. Here that second stitch has been added on the right, a few rows have been plain-knit.
 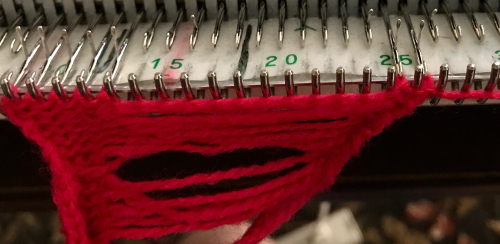 This shows the length of the slipped row, and that a loop is formed on the return to the other side on the empty but in work needle # 5.
 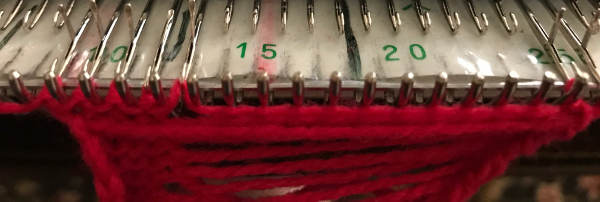 The transfers from needle 4 to 5 and back have been made, leaving the empty needle 5 in work.
  At the top of the piece, I transferred and doubled up the stitches on left, bound them off, and the yarn end(s) can be woven back into the cord.
 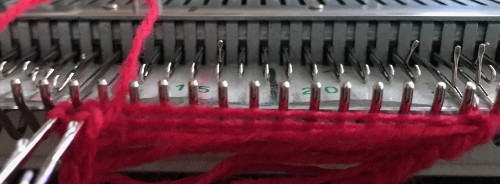 The side with the transfers is the “public” one, the finished fringe is usually hand sewn on, but it may also be used to cast on or be applied to several places in the knit both close together or at various intervals. Tension changes may be observed viewing from left to right, as well as the difference in length of loops as opposed to after the cutaway edge. The third stitch in work on the right may make for a more stable cutting line if looser tensions are preferred. Because the sinker plate used on the single bed has brushes and wheels in use, the width of the fringe can be considerable, without having to be concerned about stabilizing the center as it is when working on the double bed.
Introducing patterning single bed: knit weaving is perhaps the best way to control the number of plies, color mixing, designs in vertical bands, and knitting 2 fringe lengths at the same time. The 1/1 brother card is the most basic, but small repeats can be isolated for more interest or syncing with designs in garment pieces. To start: cast on and knit at least 2 rows on the chosen needle arrangement. Hang claw weights (or smaller) on each block of stitches. Combining strands for weaving adds fullness to the fringe. When any fringe is removed from the machine it should be stretched lengthwise and steamed to set the stitches (which I did not do in any of my swatches). As with other samples, the odd small number of stitches in the center or on the side are cut off to release the fringe. A sample arrangement: odd number of needles on either side and center, even number of needles out of work in-between. ![]() Visualizing the punchcard or electronic needle selection on the same number of needles in work as above helps. Here the first and last needle on each side knits at the start. End needle selection is off; if it is not the outside automatic needle selection will give that edge a different look. Using both settings will help determine if one is more preferred than the other.
Visualizing the punchcard or electronic needle selection on the same number of needles in work as above helps. Here the first and last needle on each side knits at the start. End needle selection is off; if it is not the outside automatic needle selection will give that edge a different look. Using both settings will help determine if one is more preferred than the other. ![]() A closer look at both sides of my ancient swatch knit in 2/8 wool
A closer look at both sides of my ancient swatch knit in 2/8 wool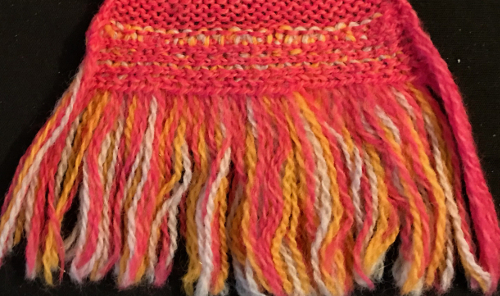
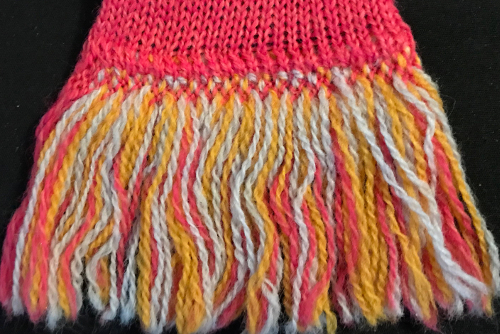 Long loops are best in a thicker yarn, here they are shown in an every other needle arrangement using mohair on 2/8 wool ground
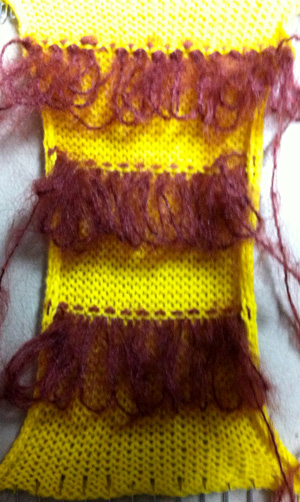 related post reviews some of the methods for creating the loops, there is at least one other. Published directions have taken it for granted that thinner yarn is in use: if working on a machine with a ribber use the gate pegs on the ribber as your gauge. Wind the yarn around the needle, then down to the sinker plate below it with ribber down one position, then around the same needle, down to the same gate peg, then up and around the next needle, continuing across. When the row of loops is completed, knit several rows, and lift the ribber up to release loops.
My test is with yarns of 2 thicknesses, one half the number of plies in the other. Cast on with background yarn, knit at least 2 rows. I wrapped the 4-ply on every needle on the main bed counterclockwise when moving from left to right (think e wrapping in either direction), clockwise when moving from right to left, bringing it down and around the corresponding gate peg. I found it easier to work with needles that were to be wrapped and moved forward from the B position.  The loops prior to being lifted off sinker plates
 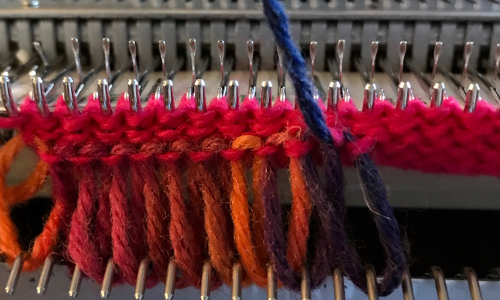 The first ribber height drop produced short loops (2.5 cm)
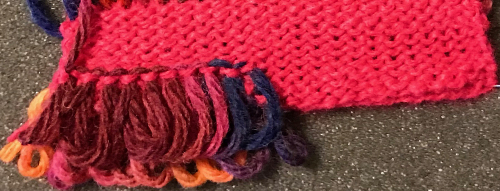 With ribber in the down most position (4.5 cm loops)
 I found that just by knitting 3 more rows in this yarn I could lift the loops off the ribber gate pegs easily, dropping them between the beds and repeating the process. No need to raise the ribber back up. Whether these loops will bear being cut or be too slippery to stay in the ground will be determined by yarn choices.
There are times when a fringe is desired on one or both sides of the piece. Simply leaving needles out of work and an additional one in use to determine the width of the fringe can have skimpy results and an unstable edge stitch on the knit body. This is my solution for solving both: I began by knitting a couple of rows in the background yarn, then added a strand of yellow, and eventually the third strand in light blue, e wrapping the extra strand(s) in the direction away from the carriage. 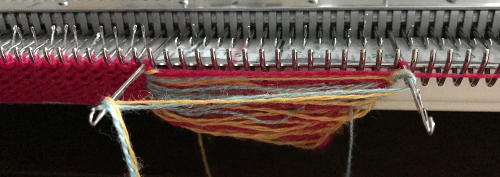
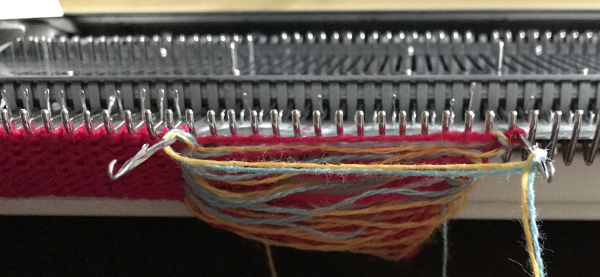 In this case, knitting ended opposite the fringe, only these stitches were bound off, not the single one on the far right
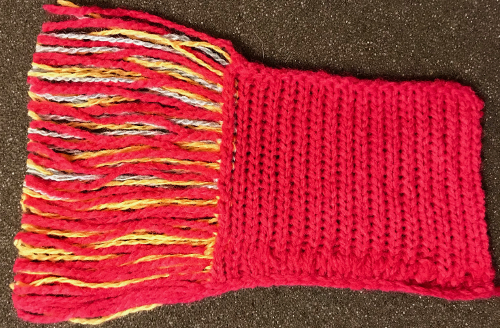
  The single stitch column was trimmed off, leaving a fairly full, stable fringe.
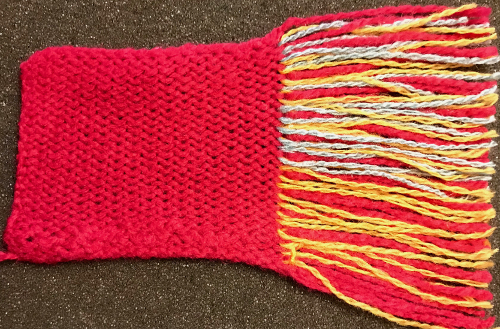
 Cut lengths of yarn may be added to edge or in the body of the knit, eyelets could be used as markers or for an all-over fabric, guiding placement. This illustration is from Annie’s catalog
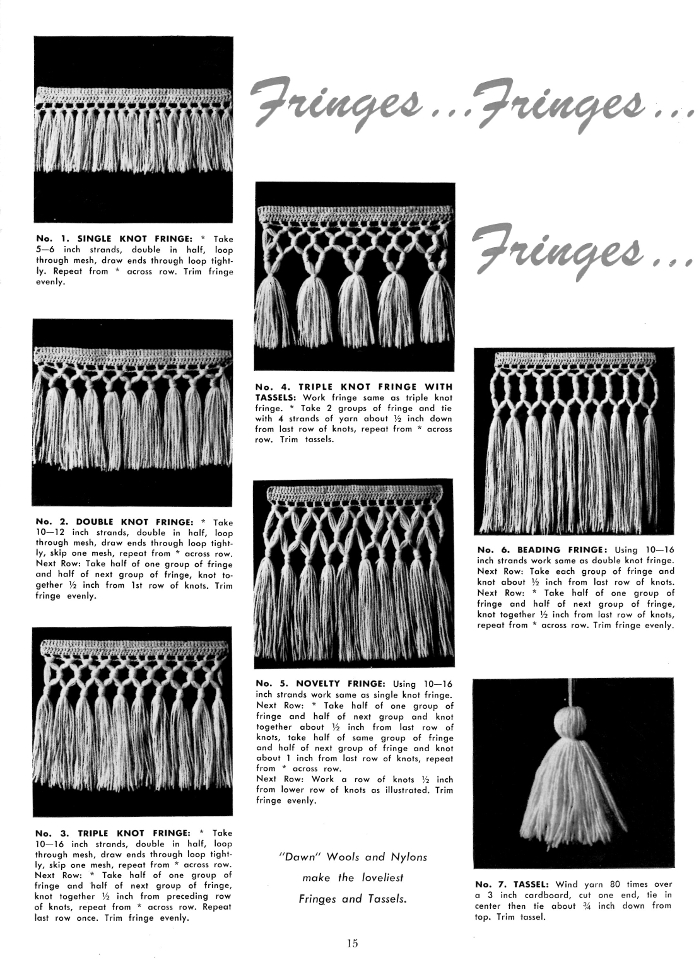
 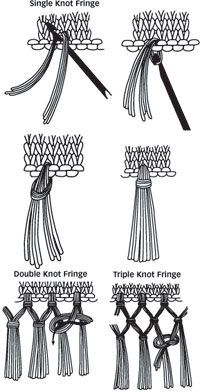 Fringes could also be crocheted or hand-knit, used to cast on the piece or be stitched in place upon its completion. I do not have the source for this, will credit it if I can find one