I enjoy the technical aspects and structures of knit fabric, learned to do simple, common minor repairs in a studio where there were not technicians during lab hours or even studio hours. That said, I had a broken knit carriage that was going to be my source for learning to work with its inner guts that never made it to any useful reassembly in spite of the passage of a couple of decades. I have a lot of hesitation in taking equipment apart, though out of necessity and with the help of online videos and information I have been able to go increasingly further with more confidence. Still saving carriages full of springs and “things” for someone else 😉
Over the years I have not used my KR850 ribber frequently. Last year at some point I produced a collection of racked, ribbed 3D effect scarves, giving it a major work out. I traditionally kept my ribber off my Brother machines, used my Passap for double bed and DBJ, and my line of accessories for sale was often knit single bed on my standard or bulky machines. As a result, I rarely needed to adjust the ribber bed position relative to pitch. I had purchased the ribber used.
As I have returned to knitting more frequently of late and wanted to expand posts that included racking I found suddenly the first movement upon reversing racking direction failed, requiring 2 full turns of the handle before advancing to the next position. Not too long after the pitch lever was not moving properly as well. The operation and service manuals for the ribber had not provided much advice, nor could I find any helpful information online. I highlighted pertinent areas with color in the images below. From the service manual: 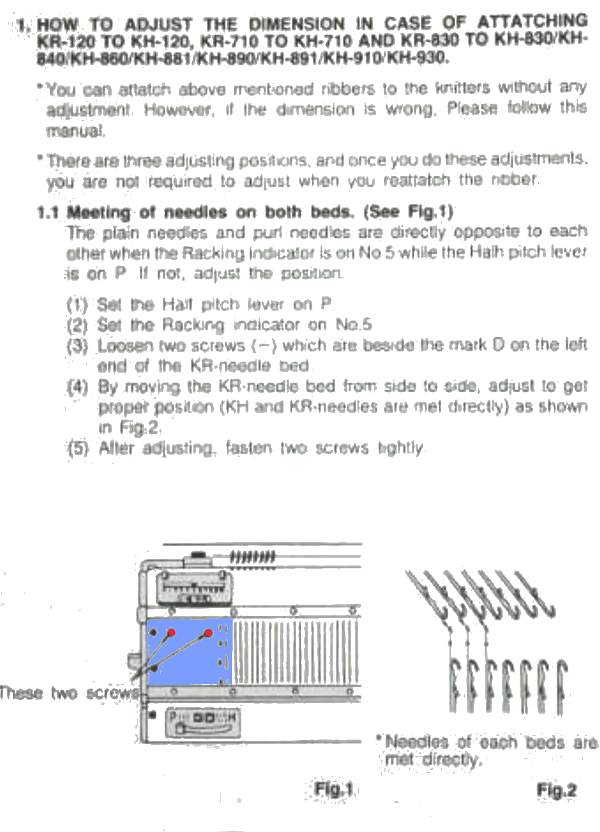 I asked on Ravelry for advice or shared experiences. A possible culprit was suggested to me, and I was pointed toward the parts manual, where I was faced with this, which at first seemed pretty daunting
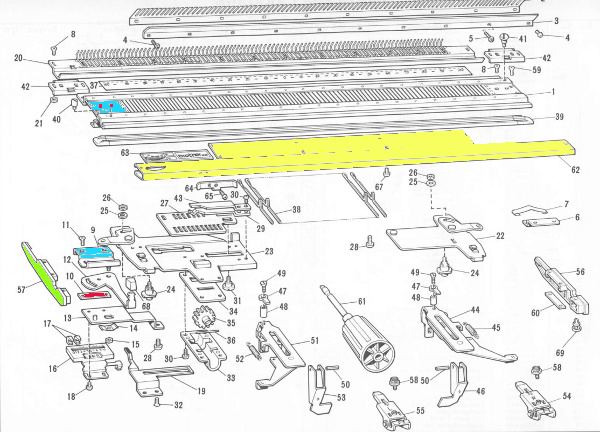
 When I tried to turn the screws marked in red I found they were loose. After I took apart the racking handle, braving far more disassembly than turned out to be needed, housing little screws and washers in separate small plastic containers along with their comrade larger parts, I found perhaps I could have reduced the effort considerably. I did not take photos during the process, as I was not brimming with confidence in the result. Enlarging a portion of the above helped me understand how parts related to each other a bit better.
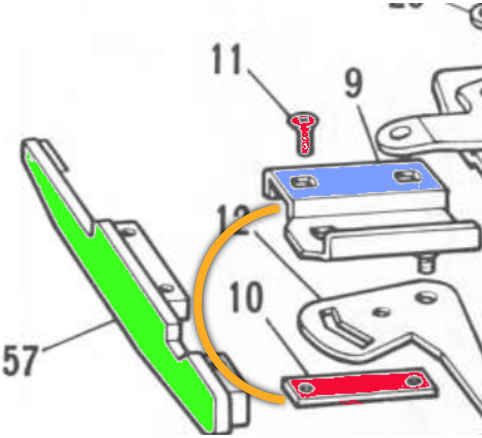
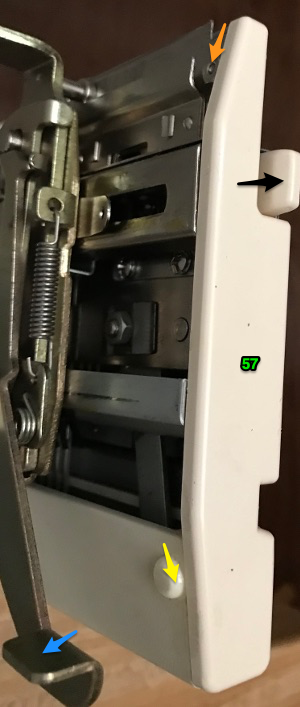
The rectangular piece (red) was loose inside the machine. Removing # 57 is a necessity in order to get at the location for reinsertion of #10 in the slot under #9, to be held in turn by the screws #11. I marked critical areas with colored arrows in sequential photos 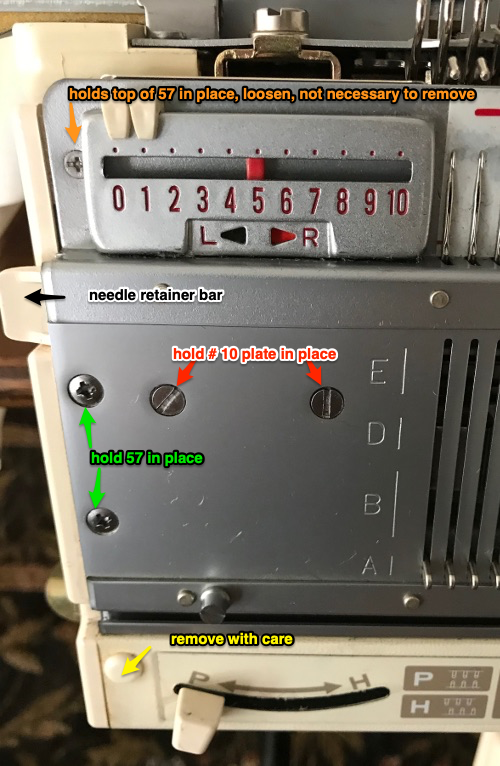

 It really may not have been necessary to even remove the bracket lever. The #10 piece of metal was loose inside the machine, might simply have fallen out if I had turned the bed on its side and given it a mild shake after removing #57. This is with the piece in question in its housing where it belongs (white arrow), shown in relation to the needle retainer bar (black arrow) and screws marked with red arrows that hold it in place.
 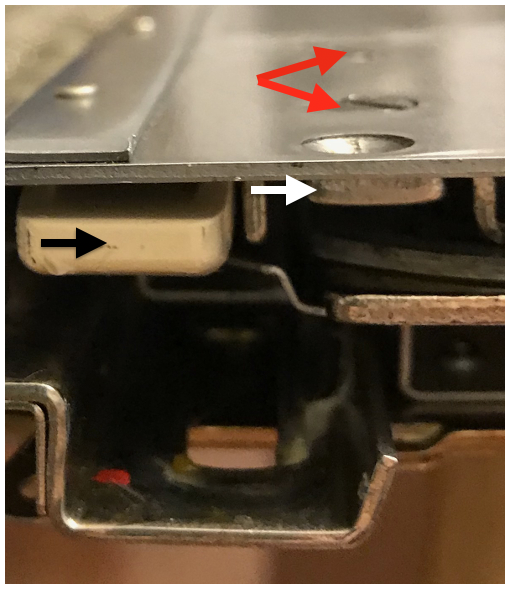 The piece is obviously thinner than the space it lives in, so for screws to anchor it properly, a flathead screwdriver or other improvised tool needs to be inserted under it, lifting it into position and holding it in place with its holes lined up with outside of bed so screws can grip it and be tightened properly.
  My racking handle and pitch lever seem to be working properly once more. I had hours of intimacy with my ribber, it has now been thoroughly cleaned and oiled and has all its screws no longer off or loose, we are far better acquainted. No regrets, but the “repair” as illustrated above would have taken a matter of minutes.