I have an extensive library of both hand and machine knitting publications. I am not the originator of the base drawings for these illustrations. However, they have been accumulated from various decades-old sources, edited by me for content, color, size, etc. My editing program is Gimp. I will review, alter, or add to this library over time.
Sewn bind-offs on the machine

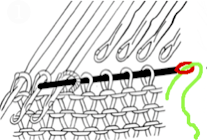
 knitting taken off on waste yarn joining a hem
 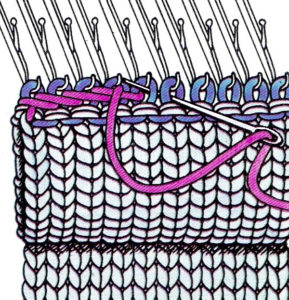 open stitches to finished hem
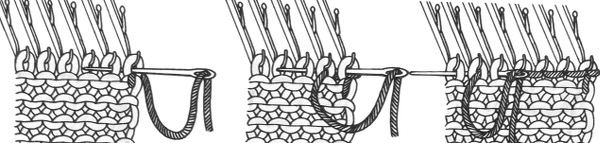
  crochet bind-off through the top or bottom of stitches in the last row respectively
 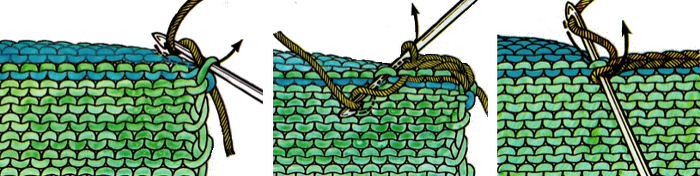 weaving in yarn ends across a row on the purl side
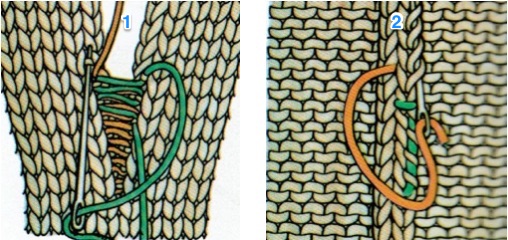
 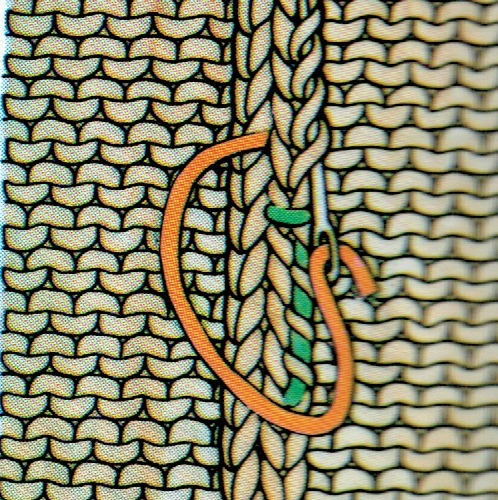 Mattress stitch: work a few rows with loose stitches so entry and exit points are visible, then pull on yarn and tug on finished segments as you go to adjust stitch size
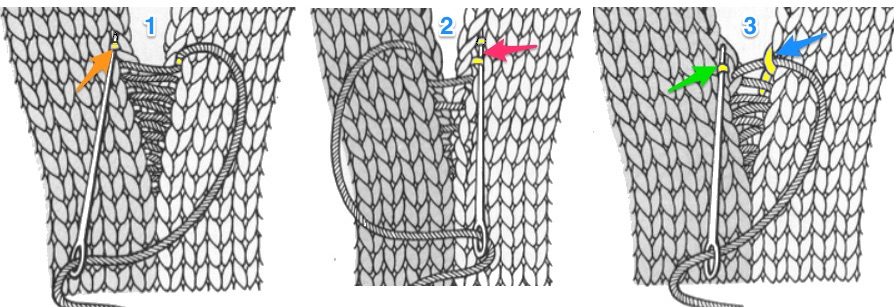
1. under the single bar between a full knit stitch on either edge of knitting, best for bulkier knits
2. under double bars between a full knit stitch on either edge of knitting, faster on smaller gauge knit
3. worked half a stitch away from the edge, every row, under the bar on left, loop on the right
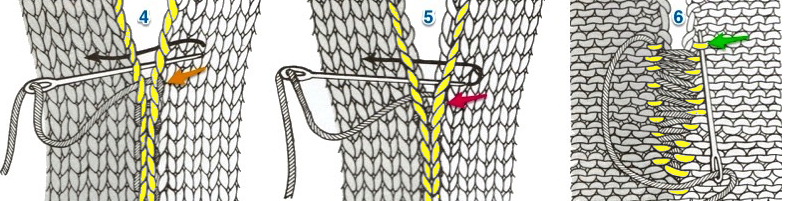
 4. running stitch along and through the center of edge stitches, alternating sides every row
5. running stitch one full stitch away from the edge, alternating sides every row
6. joining purl stitches in every row
 garter stitch
 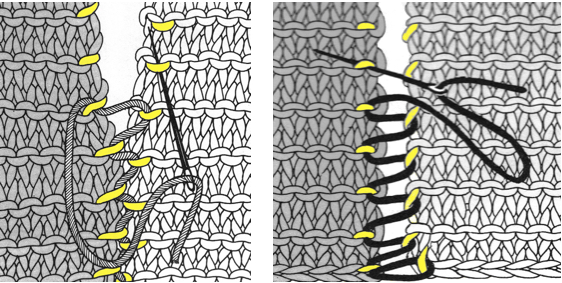 1. mattress stitch, knit side out, one full stitch away from the edge, adding a second strand of yarn to finish the join
2. weaving in joined yarns along the inseam, traveling in opposite directions
 2 X 2 rib ending with one knit stitch
 ![]() 2 X 2 rib ending with 2 knit stitches
2 X 2 rib ending with 2 knit stitches![]() rib join through “edge loops” of knit stitches
rib join through “edge loops” of knit stitches ![]() 2 X 2 rib join ending with 2 knit stitches, 1 full stitch from edge
2 X 2 rib join ending with 2 knit stitches, 1 full stitch from edge 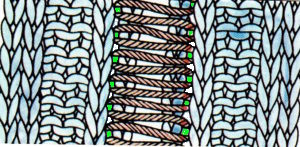 2 X 2 rib join ending with 2 purl stitches, 1 full stitch from edge
 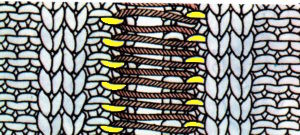 For more illustrations in addition to the above for joining ribbed stitches see the later 2022 post
Picking up stitches to continue knitting or joining on the machine: straight edges, 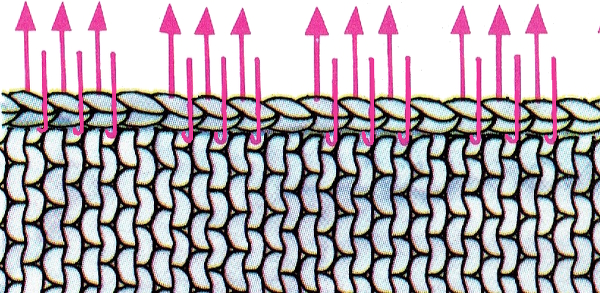 curved edges
  open sts to bound off; bound off sts to bound off (steps 1 and 2)
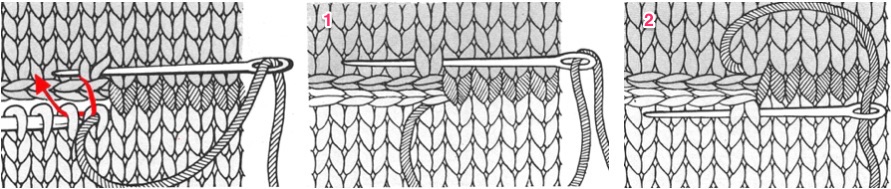 knit to purl; knit to rib
 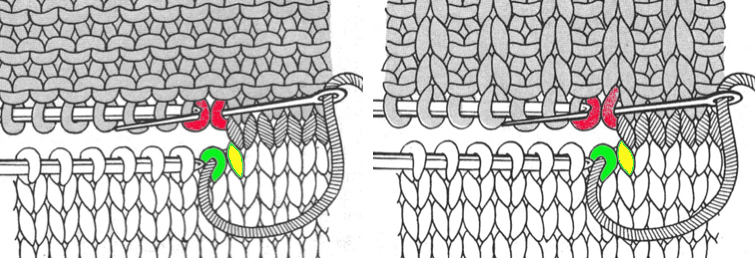 garter-stitch
 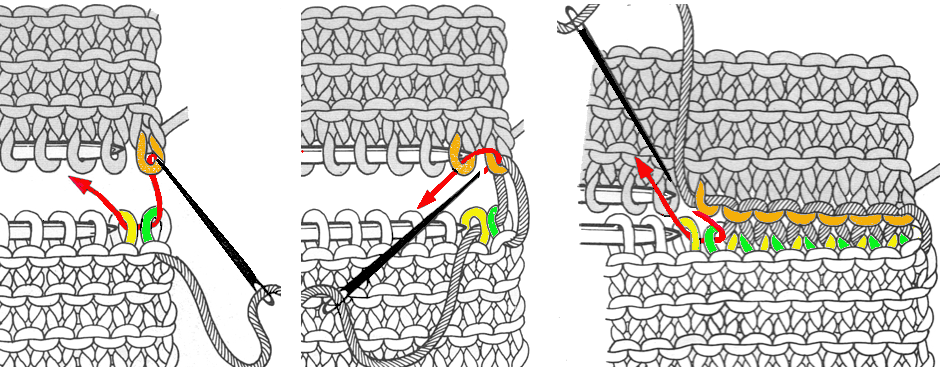 decreasing evenly at intervals across a row
 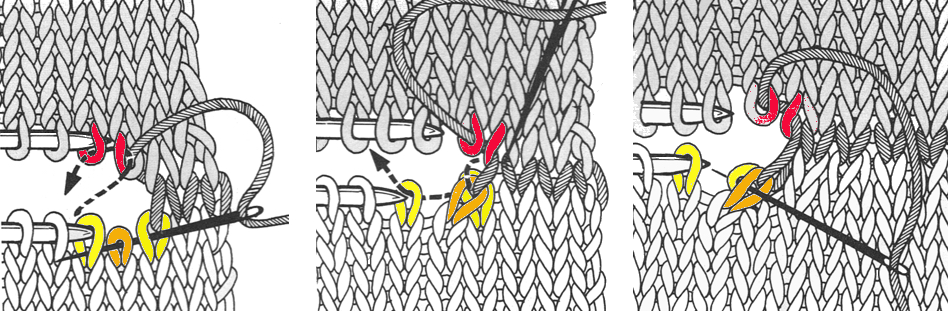 grafting with purl side facing
  if you are left-handed or the yarn end is on the alternate piece, rotating the image or flipping it horizontally or vertically will provide guidelines.
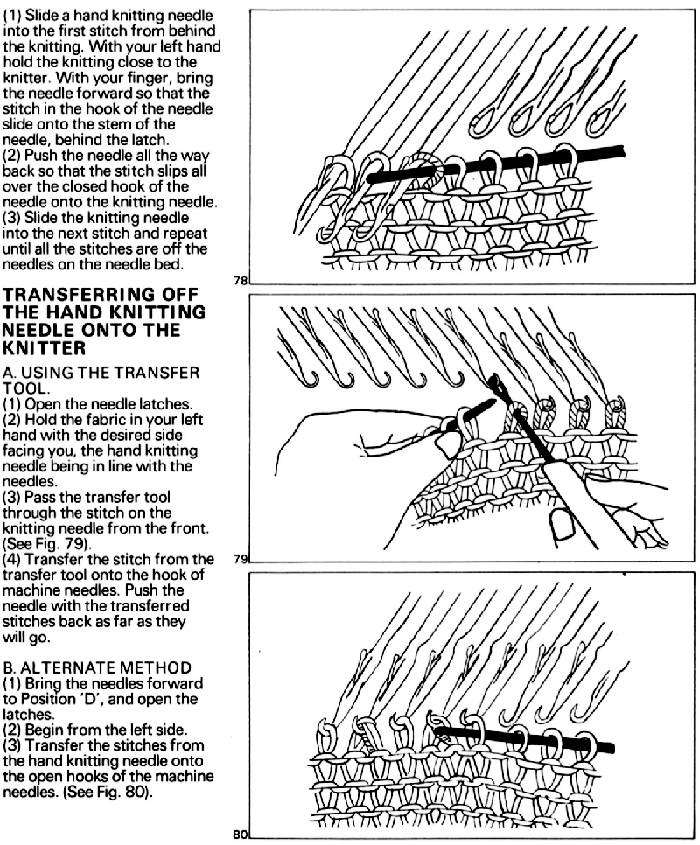
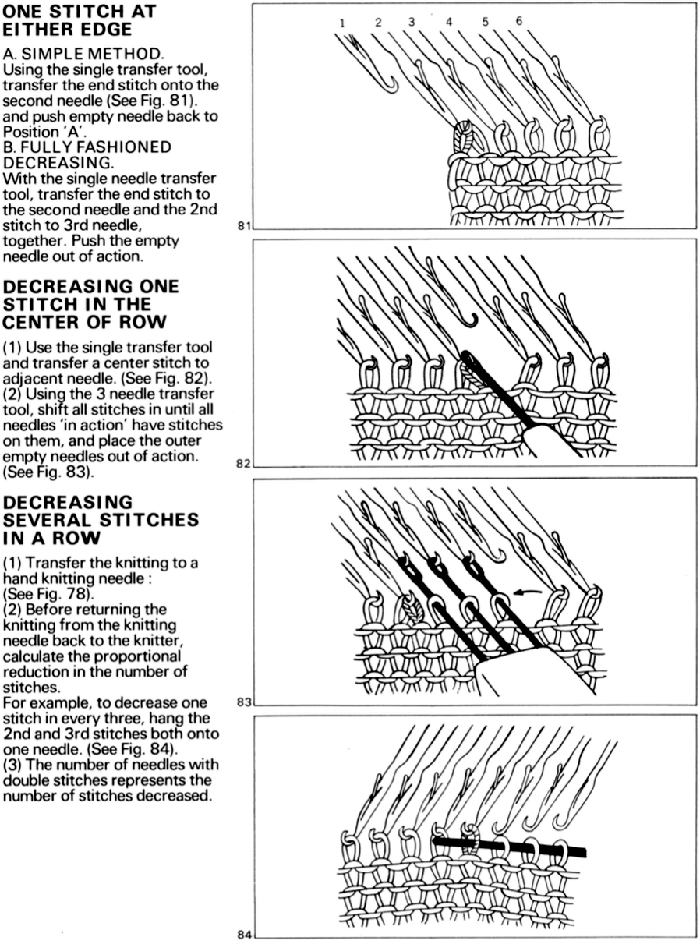
 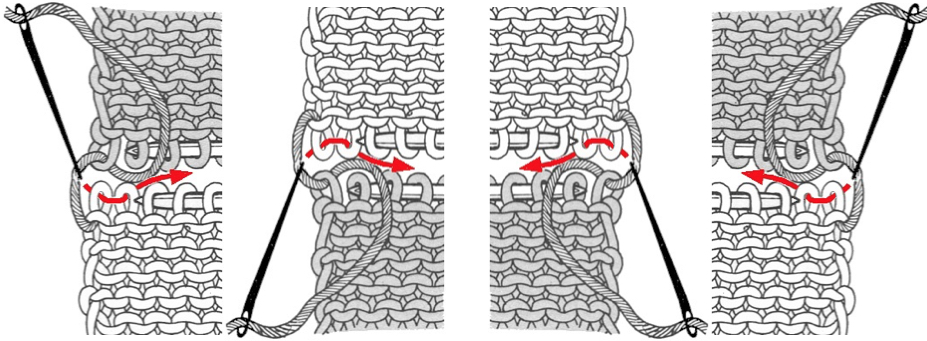 There are many alternatives for increasing and decreasing stitches. These pages are from the KH 800, a Brother model made in 1970-71, and cover the basics and the often underused technique of using a knitting needle to remove stitches from the machine for any reason, here intended for decreasing evenly across a row as an alternative to scrapping off on waste yarn or using a garter bar.
Long and thin double-pointed needles are best on the standard, and sizing is more flexible when working on the bulky. If a double-pointed one is used, have a needle stopper on one end, and swap it out to the opposite side when shifting stitch positions. The work could be turned over with this technique as well.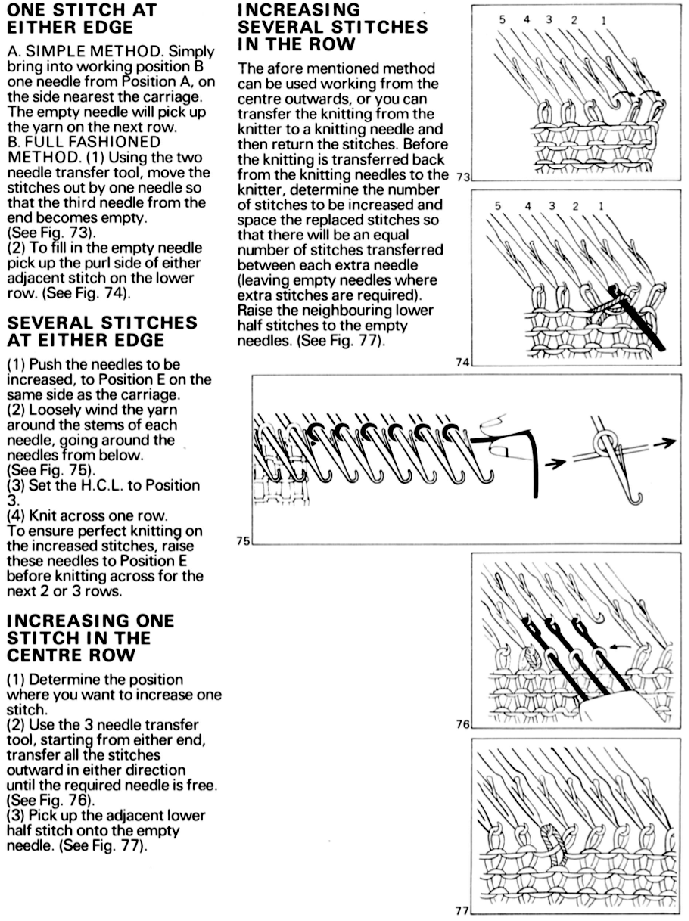
 There are wide varieties of stitch holders that may be used to store or move stitches around when tools with enough prongs to serve the purpose are not available, as well as safety-pin-like plastic ones that can hold single open stitches or serve as markers at the edges of the knit.
 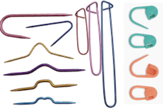 Sometimes appropriate lengths of ravel cord and a yarn needle can serve the purpose as well.