These illustrations are not my own work, they were taken from various out-of-print Japanese published resources including manuals for different machine brands, or handouts received decades ago, in the days of international machine seminars, and altered and resized.
For more information on seaming and joining also see the previous posts: Seaming, joining and picking up stitches on knits 2, which includes some illustrations on joining ribs as well
Seaming, joining, picking up stitches on knits 1
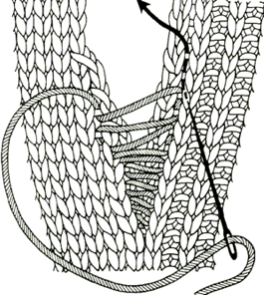
The plan here is to provide additional illustrations for joining ribbed stitches in various configurations so as to maintain the stitch arrangement 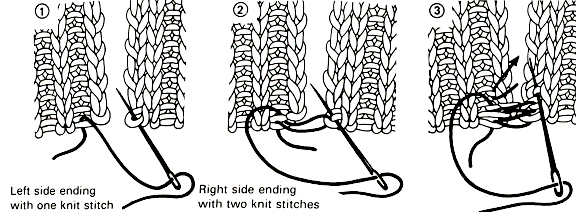

 rib join through the edge loops of knit stitches
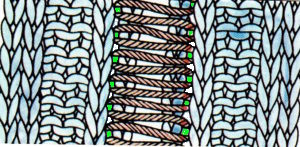
 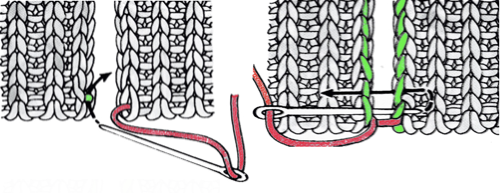 2X2 rib ending with one stitch
 ![]() 2X2 rib join ending with 2 stitches
2X2 rib join ending with 2 stitches ![]()
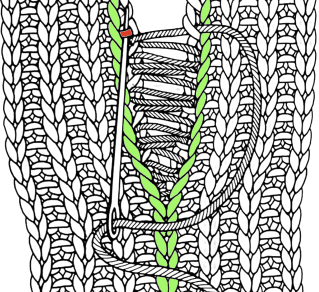
 2 X 2 rib join ending with 2 purl stitches, 1 full stitch from the edge
 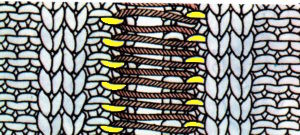 Attaching ribs to garments: it often is best to weave under and out of single bars at a time, particularly in bulkier knits and in short ribbed edgings. If the stitches are small, it is possible to weave under bars 2 at a time, always test on swatches before committing any technique to a garment.
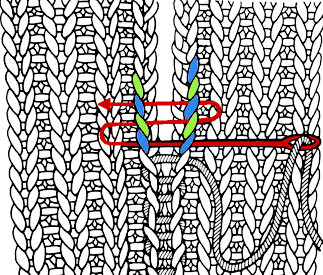
In A there is a fully formed knit stitch on each edge while in B, some shaping may be seen. The gauge for the ribbed fabric vs stocking or other techniques may be quite different, so in joining, it may be necessary to adjust sequences of pick-ups on either side in order to ease any differences in fabric lengths and maintain a smooth, flat join. 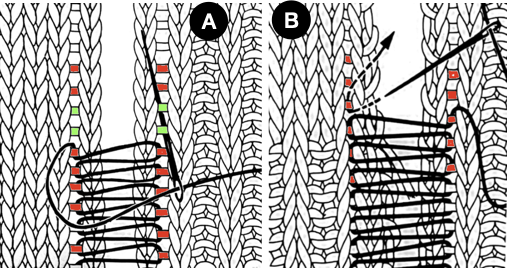 Attaching to a V-neck, adjusting for shaping