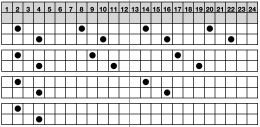
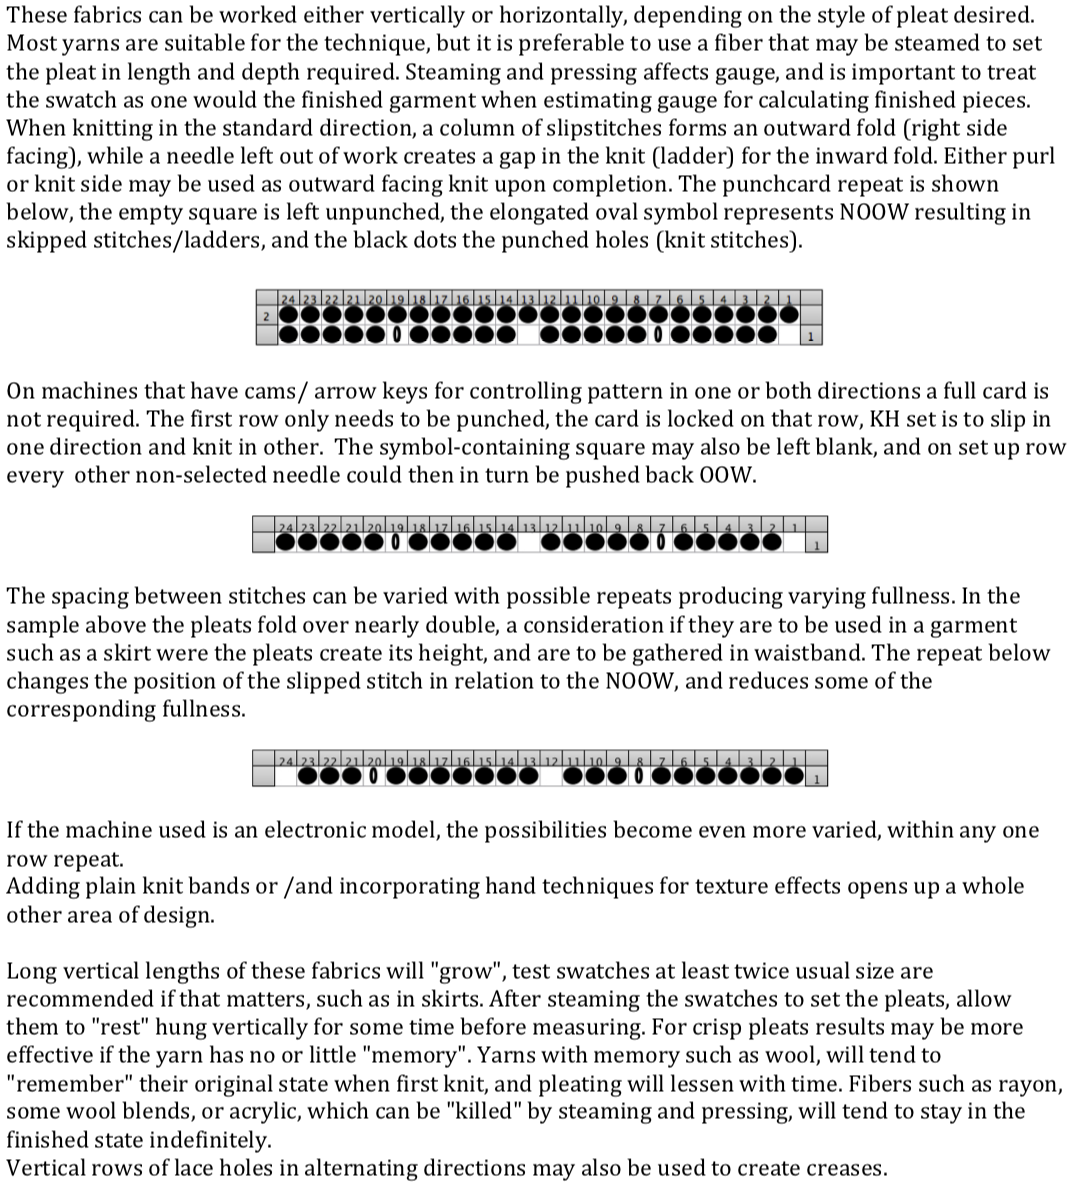
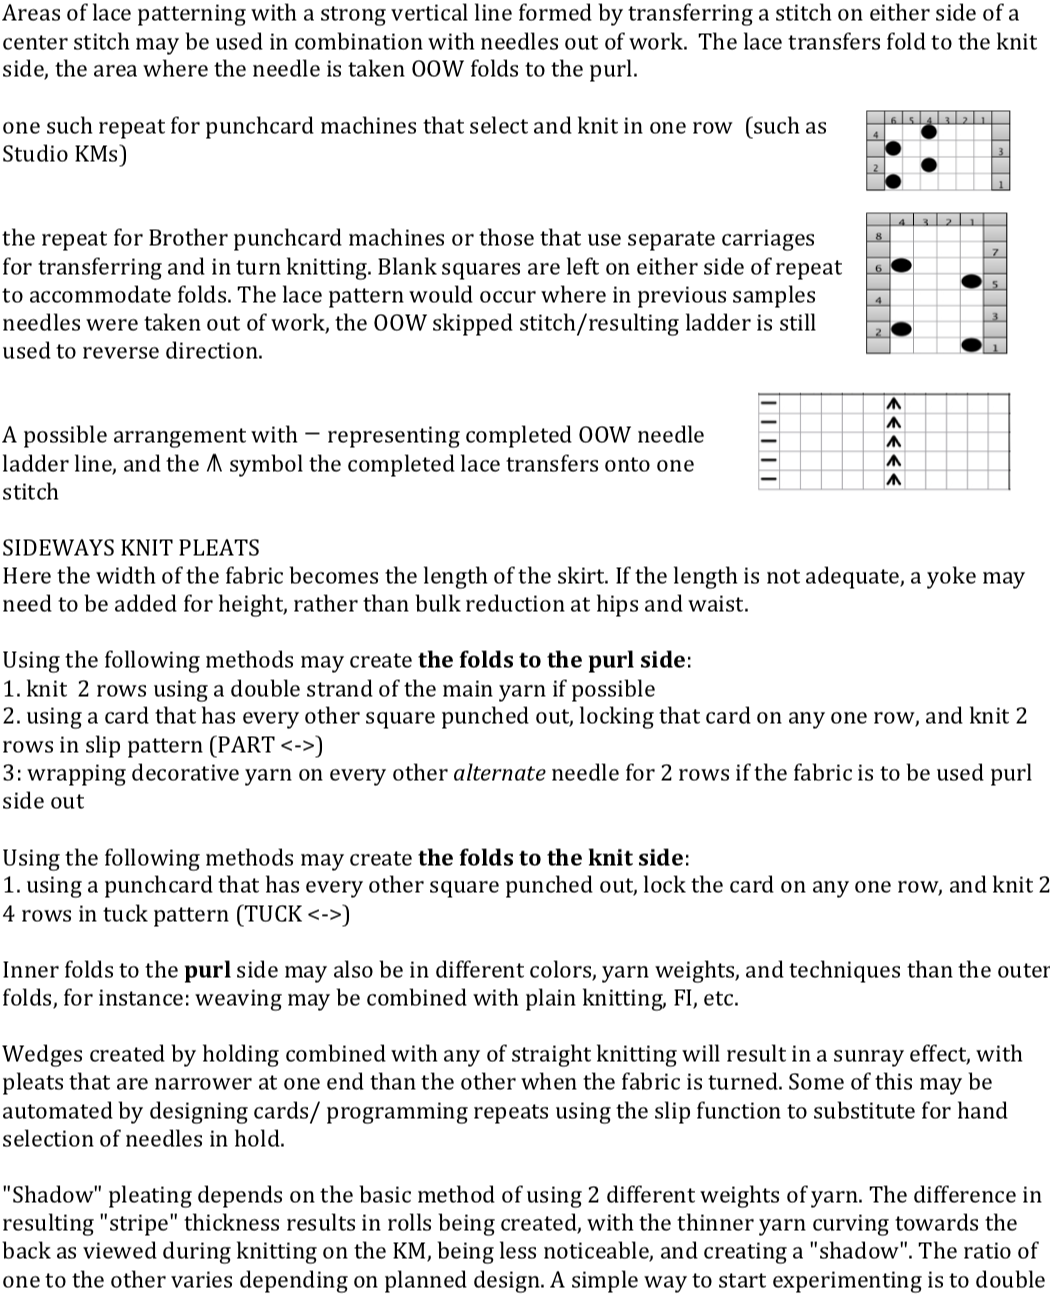
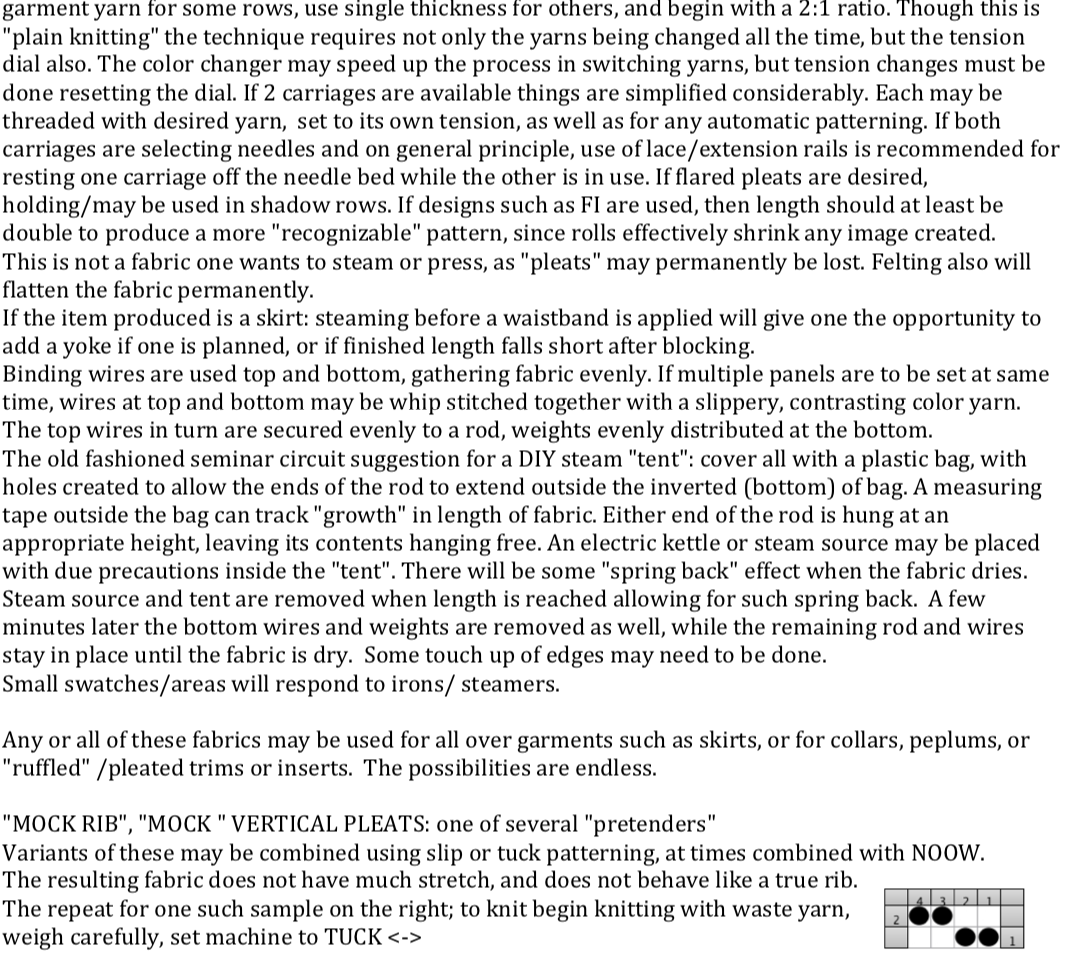
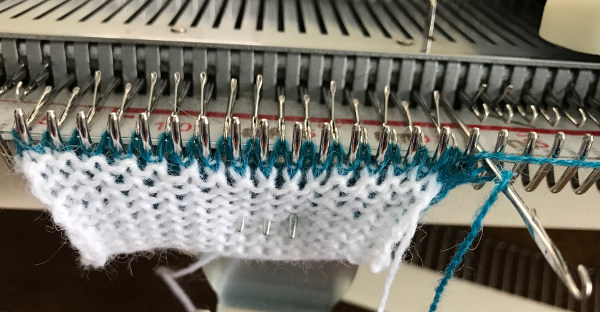
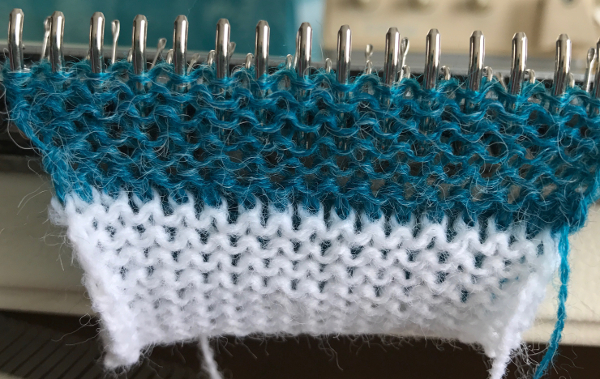
IN PROGRESS
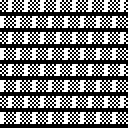
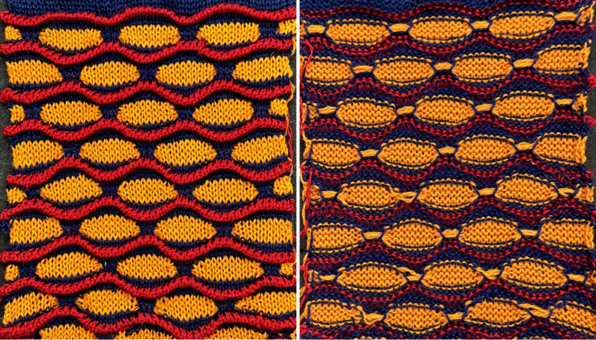
Single bed slip stitch vs ruching included a highly textured sample with a 64X96 repeat that could serve as the start of subsequent explorations. The plan was to introduce FI or FI-like patterning to the fold areas of the design. However, those areas must be knit in slip stitch as well, otherwise the fair isle setting will knit the white pixel areas with the color in the A feeder as opposed to slipping those same needles.
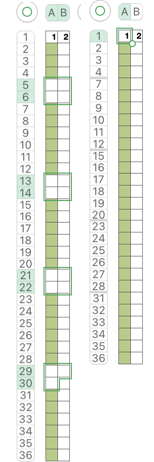
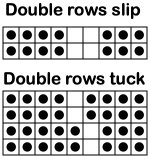
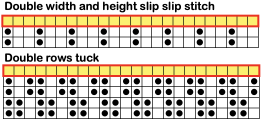
The EON pattern selection in the related swatch is familiar to users of the birdseye backing in DBJ, which the ribber executes when the lili buttons are used, where two passes in a single color complete a one-row horizontal stripe. 
 Textured knits involve large numbers of rows and carriage passes. To reduce them, use the option of placing them as borders or striped segments interspersed with all knit rows in the same colorway or in added colors.
Working in ArahPaint, how tos for its use in DIY knit design are available in several former posts.
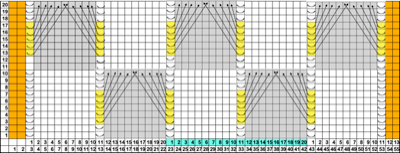
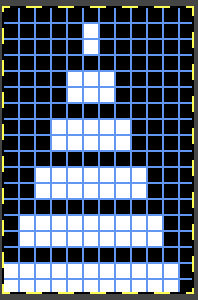
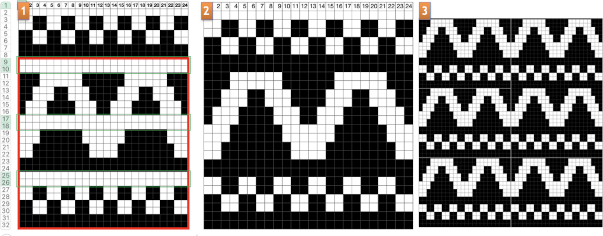
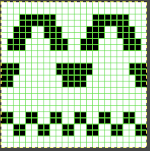
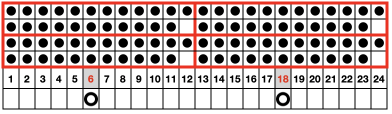
Simplifying the inspiration repeat while returning to other previously explored shapes offers the opportunity of observing and understanding how the programmed pixels relate to stitch formation on the knit bed:
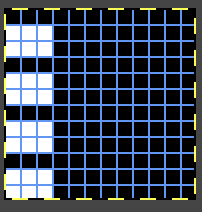
work with a consistent color pattern, i.e., ![]() colors can be protected temporarily while selecting other colors for pattern fill,
colors can be protected temporarily while selecting other colors for pattern fill, ![]() committing to working with multiples of 4 for repeat height, and a 4X4 BW pattern fill, 4X4, 2colors.
committing to working with multiples of 4 for repeat height, and a 4X4 BW pattern fill, 4X4, 2colors.  The steps, in brief, from left to right, include visualizing repeats, with a final selection resulting from filling colored rectangles with black, setting the number of colors to 2, for a BW knittable image.
 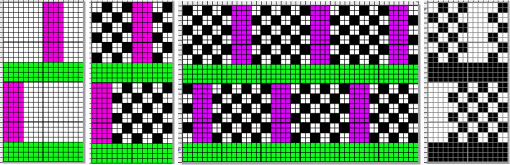 The 16X32 file.
 ![]()
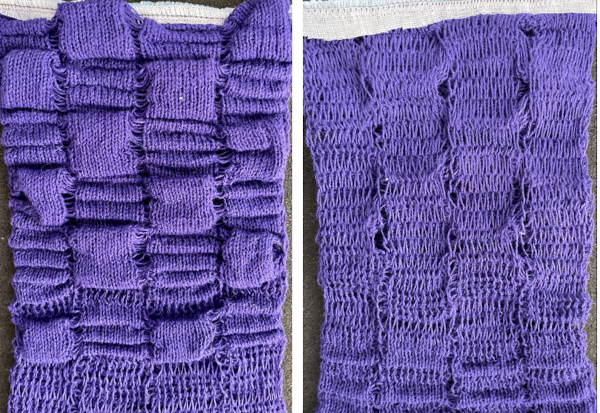
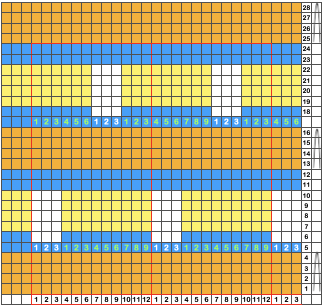
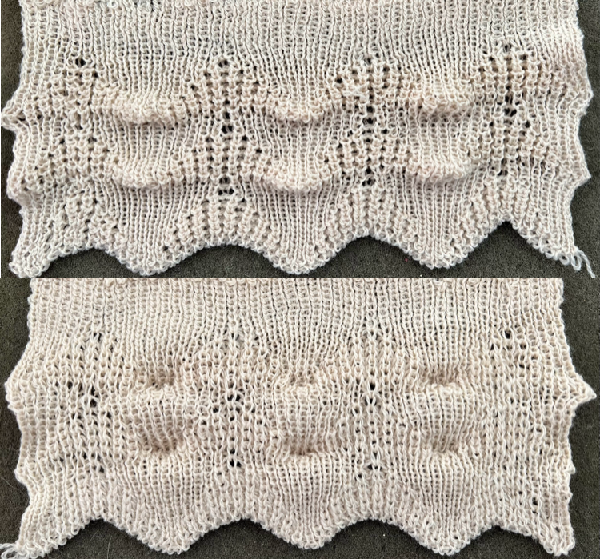
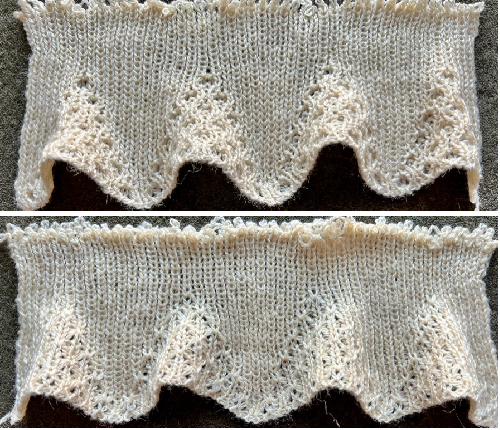
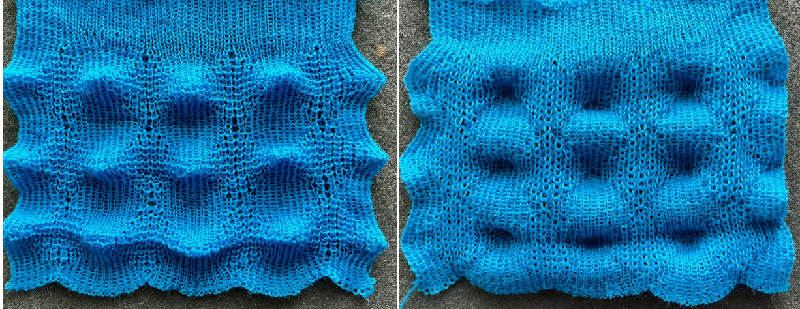
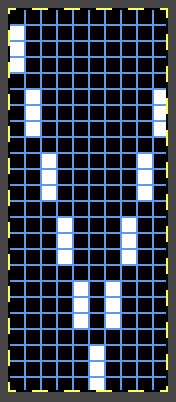
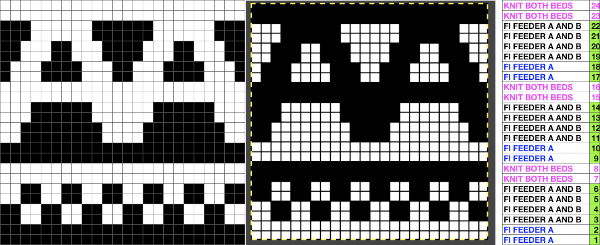
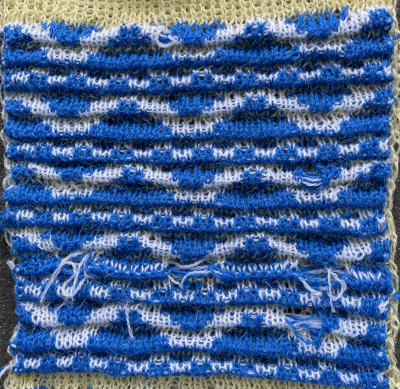
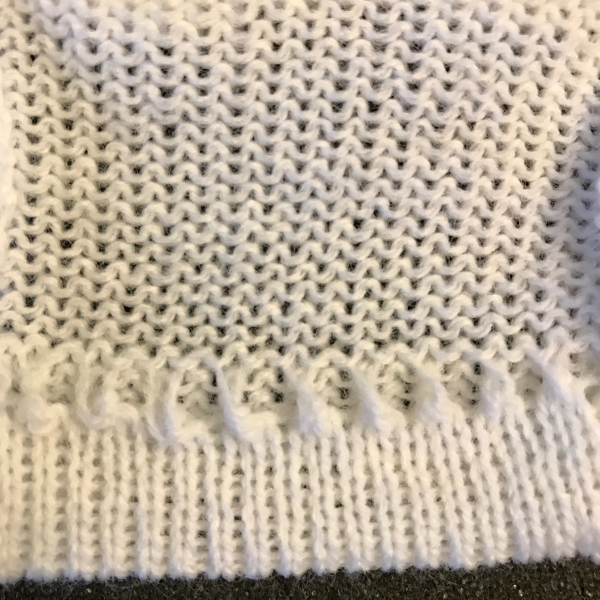
 The design, drawn in repeat, was cropped so the edges of the slipped areas would include some knit stitches as well, and sampled on 48 stitches.
 ![]() Because the slip stitch setting is used throughout, those block areas recur in the same needle locations and form vertical lines as colors 2 and 3 in those gathered segments are changed every 2 rows.
Because the slip stitch setting is used throughout, those block areas recur in the same needle locations and form vertical lines as colors 2 and 3 in those gathered segments are changed every 2 rows.  Color 1, the dark color, knits for 4 rows, is easy to identify since every needle in work is preselected before the related color change.
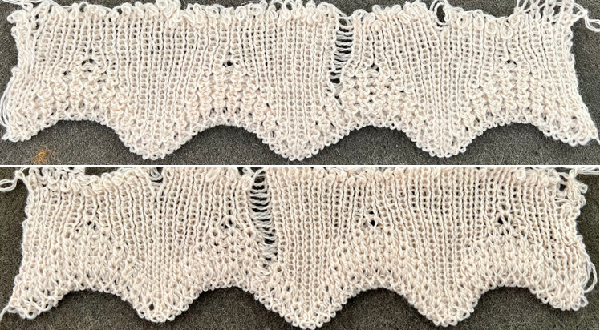
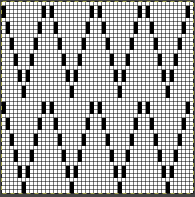
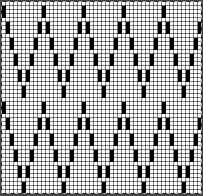
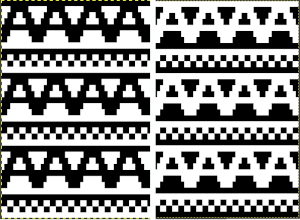
The swatch shows a part of the initial exploration, starting with the dark color knitting for only two rows, and toying with blocks vs stripes in the patterned folds. 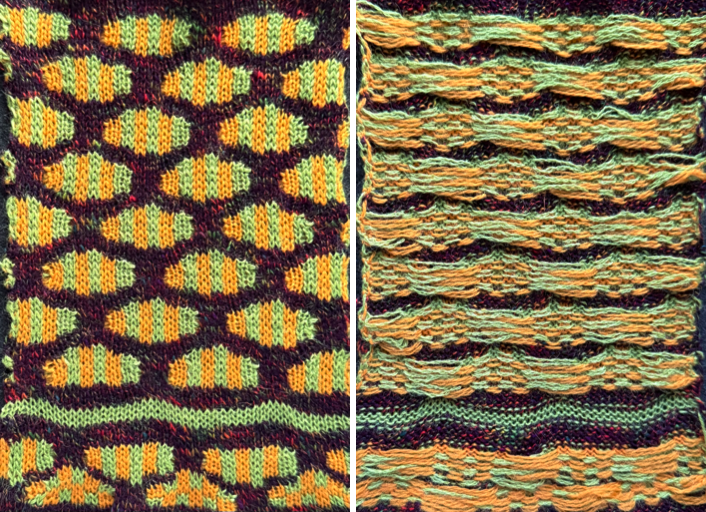 Moving toward distortion of the shapes in the slip stitch areas, returning to 2 rows of all knit stitches in the dark and patterning to produce horizontal stripes in colors 2 and 3. The new brush fill, also 4X4, 2 colors.
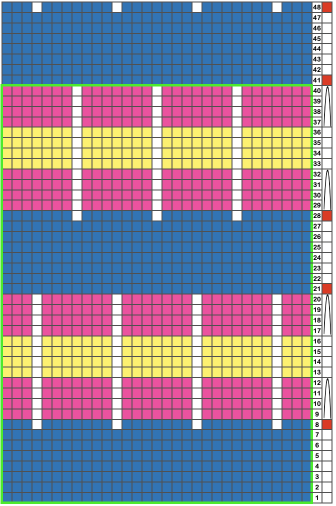
  The new repeat, 16X28, with all color changes planned every 2 rows,
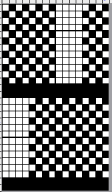
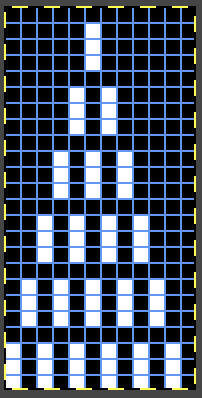
![]() and modified, removing black pixels in the knit rows, resulting in the center distortion.
and modified, removing black pixels in the knit rows, resulting in the center distortion.  The adjusted 16X28 repeat
 ![]() was tested programming 48X28.
was tested programming 48X28. ![]()
 Adding to the slip stitch/hem family:
  The staggered design repeat is 32 rows in height.
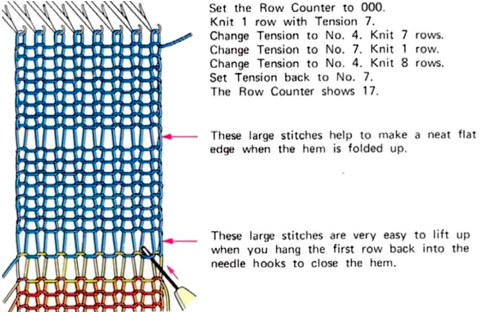
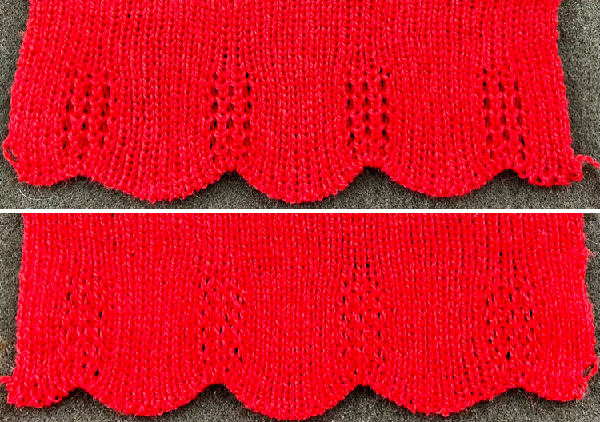
The hems are composed of 5 rows, followed by lifting stitches on the 6th row, an all-knit row to seal the hem, 10 rows of contrast, and repeating the steps.
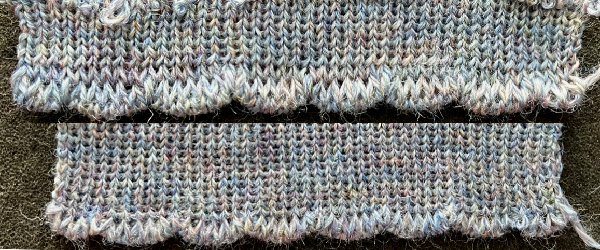
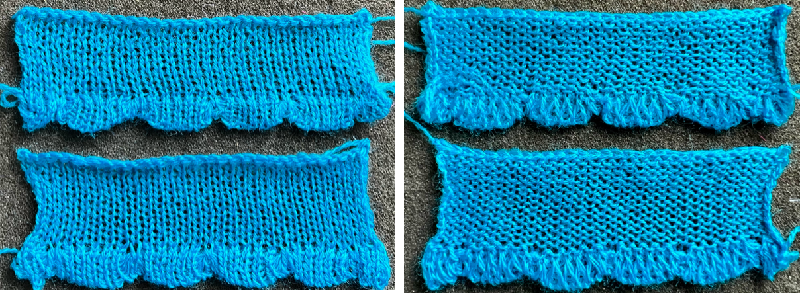
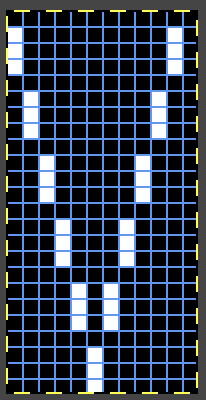
The 16X32 single repeat. ![]() The design was tested on 50 stitches.
The design was tested on 50 stitches. ![]() I preferred the appearance of the slipped stitches meeting the subsequent hems on the right.
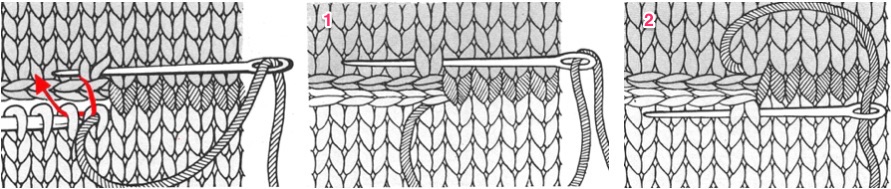
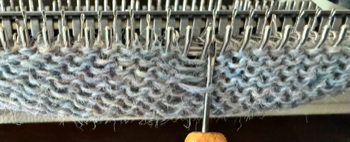
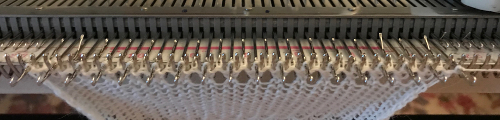
I preferred the appearance of the slipped stitches meeting the subsequent hems on the right.  The work in progress: when no pattern needles are preselected, the hems are formed, and sometimes multiple stitches can be lifted at a time. When that is completed across the row, move all stitches out to E for sealing the fold.
As knitting resumes, the other color(s) skip needles and form floats behind the skipped stitches.  The floats themselves can be manipulated.
  Before knitting the first row of the next hem, pick up stitches from the skipped groups of 4. Doing so on the row above the join produces the added space between the folds.
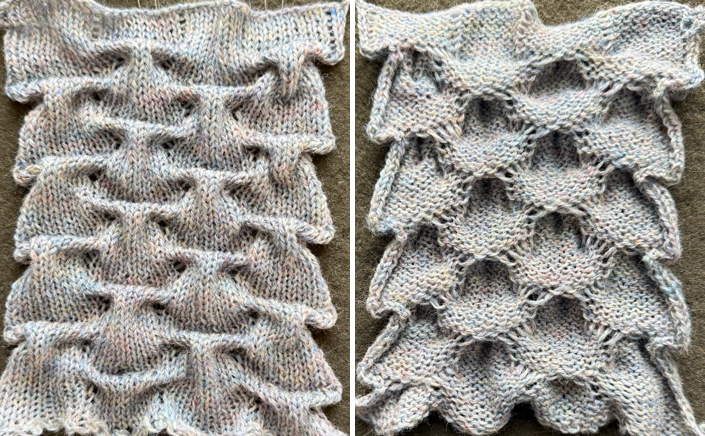
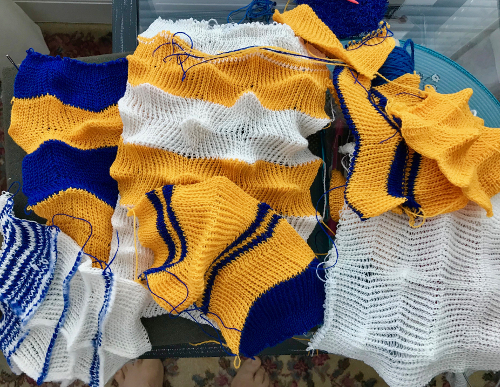
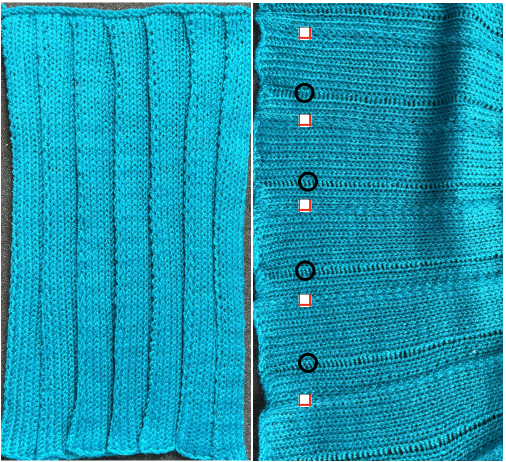
 This swatch, from Adding hems to varied knits was knit using held stitch groups; the concept could be used without the third color for a quicker knit, but the height of the shapes between the folds may be limited.
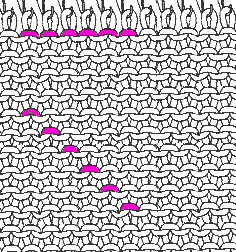
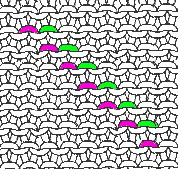
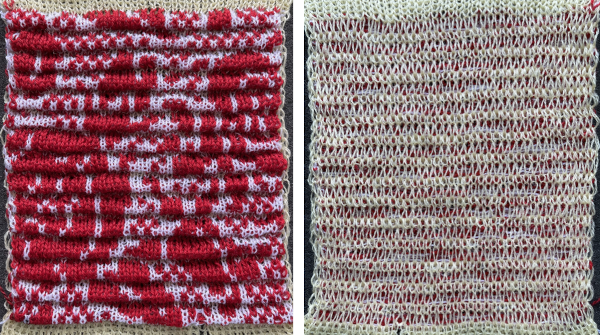
 Another adaptation retaining some of the above qualities: the spreadsheet start,
  the ultimate single repeat, the magenta dots mark a possible addition of a white pixel to mark spots for hooking up floats 14X28,
  tested on 38 needles.
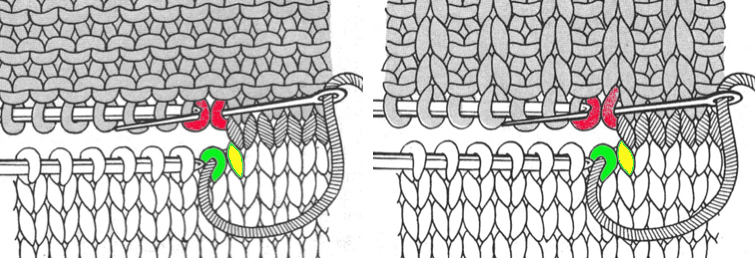
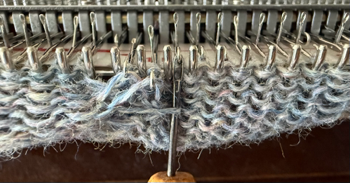
 ![]() When the row with no needle preselection is reached, a hem can be hung. To save time, the first attempt was to lift every other stitch, as seen at the bottom of the swatch; a return to lifting every stitch was made on subsequent folds.
When the row with no needle preselection is reached, a hem can be hung. To save time, the first attempt was to lift every other stitch, as seen at the bottom of the swatch; a return to lifting every stitch was made on subsequent folds.  After the process is completed, all needles are brought to E to knit the sealing row of the hem.
  The color is then changed to the one chosen to form the enclosed shapes.
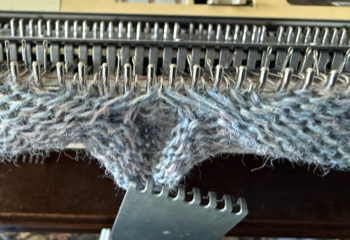
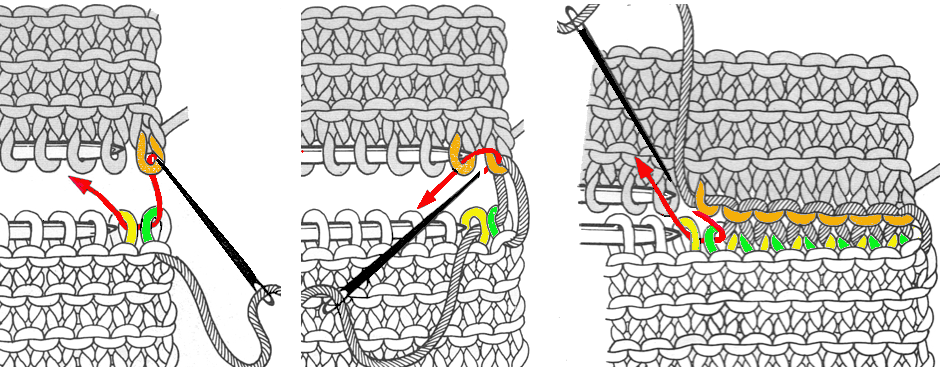
The slip stitch sections formed floats, and these were manipulated as well in the center position, at first after closure of the hem, seen at the bottom, and then after the all-needle preselection row on the same color yarn before returning to changing color for knitting the hem stitches. 

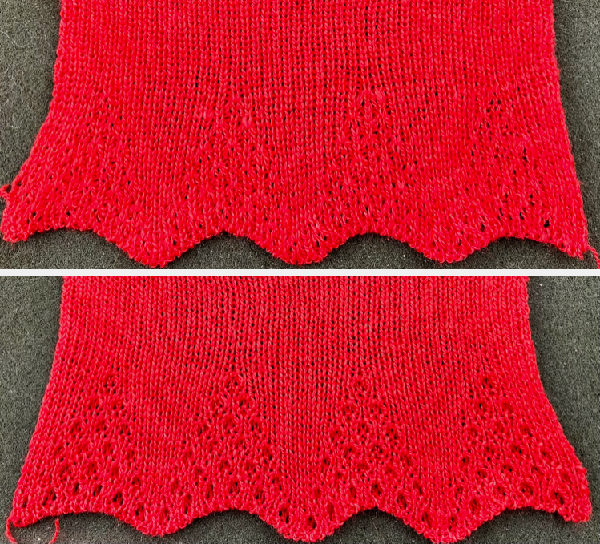
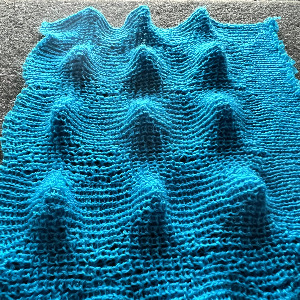
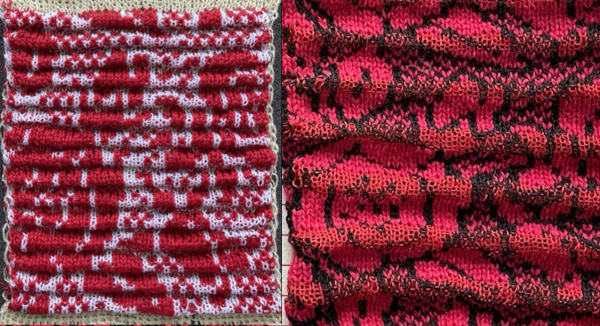
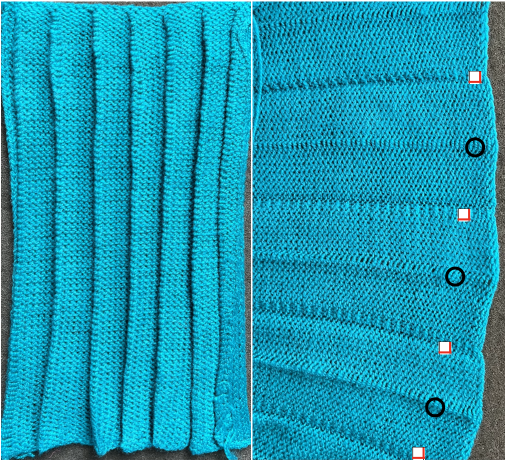
 Expanding patterning in the folds, increasing their depth, and still planning vertical stripes in consistent locations.
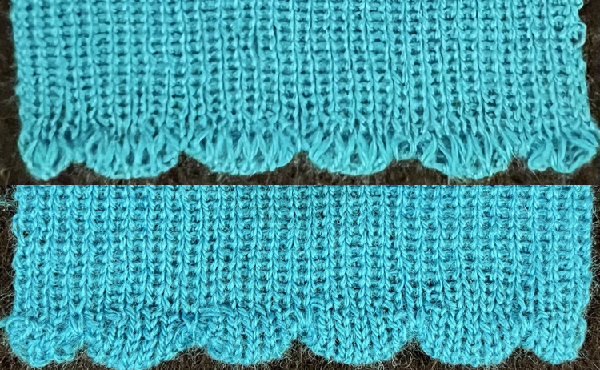
 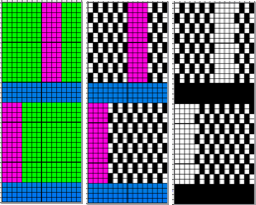 The 16X40 repeat
![]() was test-knit on 52 stitches.
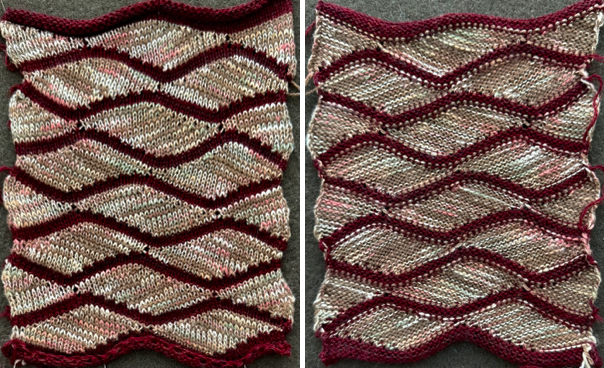
was test-knit on 52 stitches. ![]() When the resulting swatch was lightly steamed and pressed, it retained bubbled textures.
When the resulting swatch was lightly steamed and pressed, it retained bubbled textures. 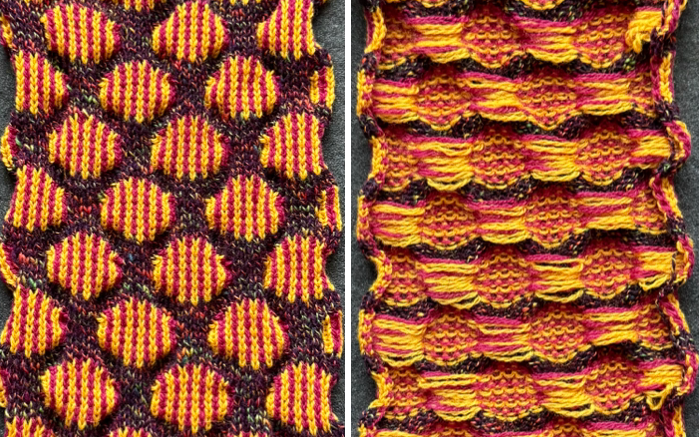 Visualizing the potential landing spots for 2X2 block patterning when using slip stitch with color changes every 2 rows.
  Missoni inspiration.
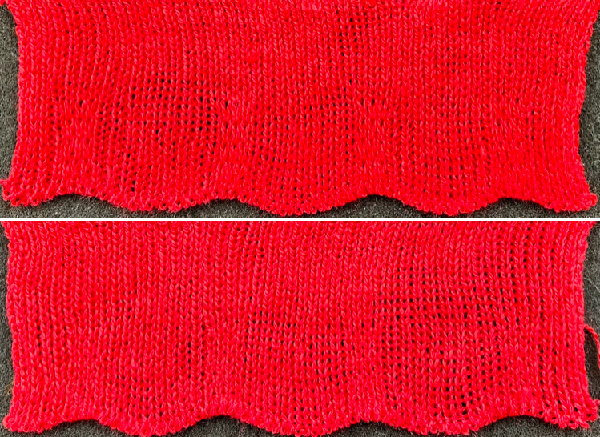
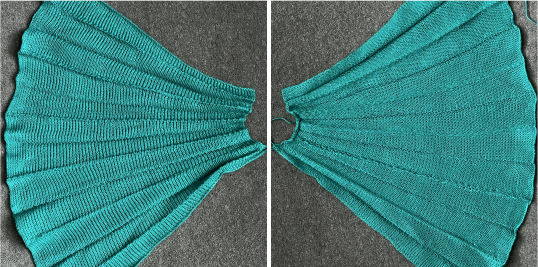
 Ruching involves selectively rehanging stitches to form hems, with folds usually forming on the knit side.
Reviewing single bed ruching offers samples and previous links exploring the technique.
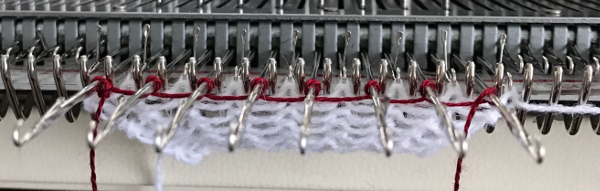
This swatch was executed as a hand technique, with markings on a custom needle tape serving as guides.
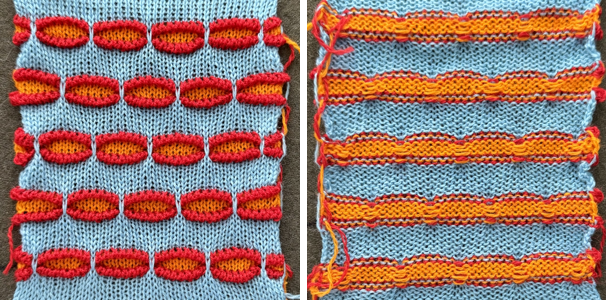
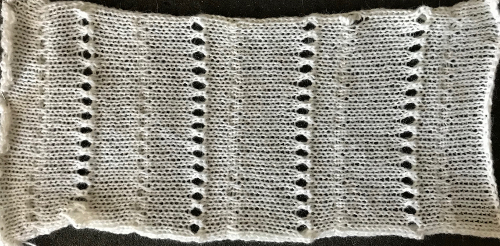
The starting concept in a spreadsheet: 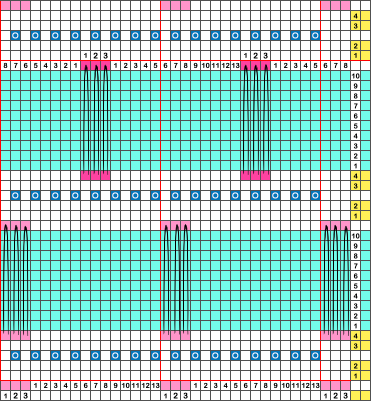 For the white eyelet stripes, knit 2 rows, transfer every other needle to the left. In a long piece, consider alternating the direction of the eyelets to avoid the stripes favoring a lean to one side. Mine were all to the left.
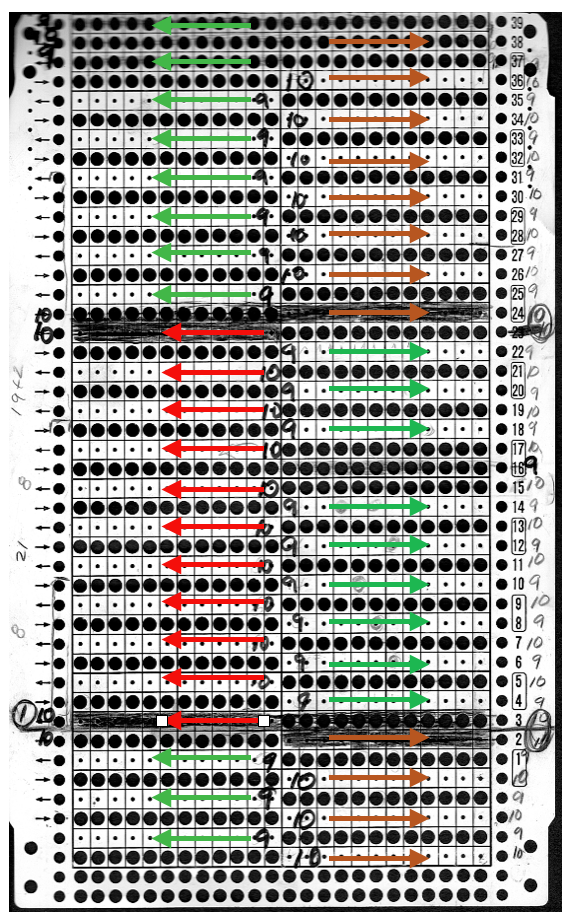
The rows requiring actions before the next carriage passes are unmarked in the chart.
Knit two more rows
Change color, knit 10 + or – rows.
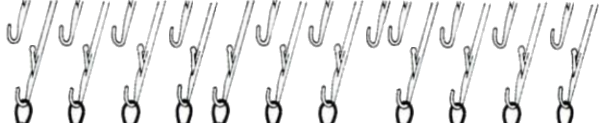
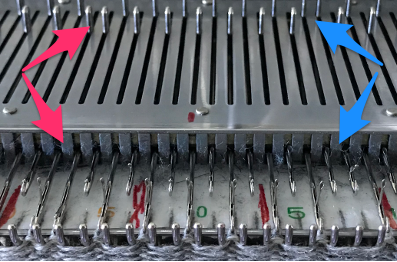
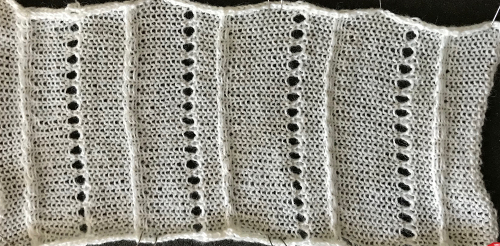
Before knitting the first row of the next eyelet stripe, lift 3 stitches from the top of the previous one onto the hooks of the needles as shown.
Knit 2 rows, transfer stitches, knit two more rows, change color, knit 10 rows, lift stitches in the alternate locations, repeat the process. Groups of 3 stitches were selected from the previous white eyelet stripes, and then from every other color stitch.
The dominant, dark color is knit for 10 rows. 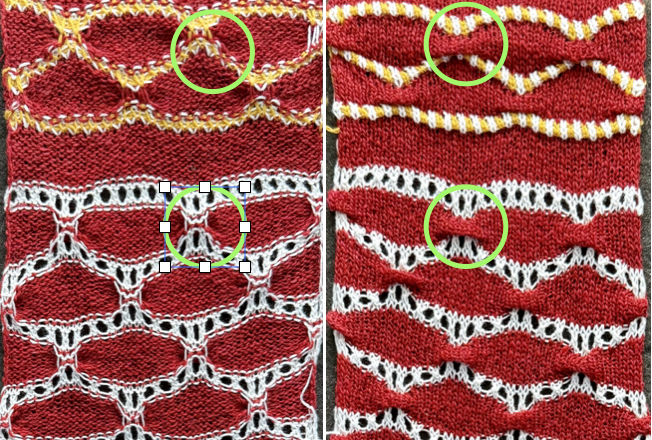
 Randomly selected samples from former posts:
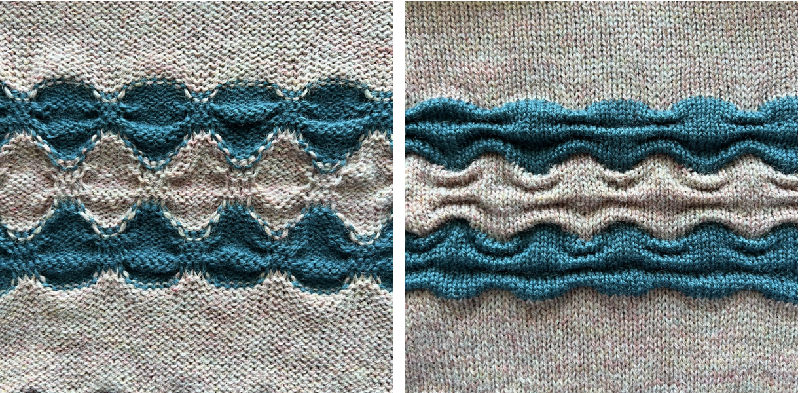


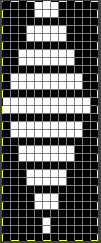
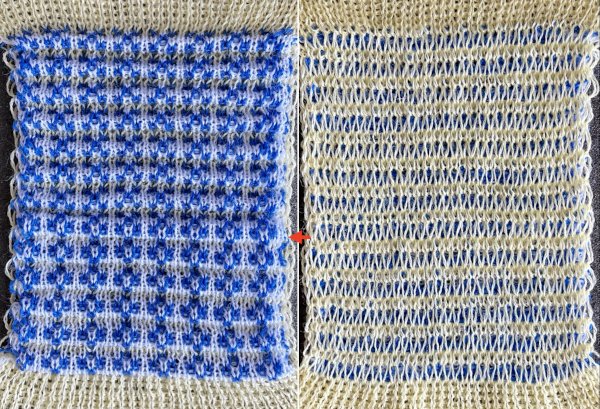
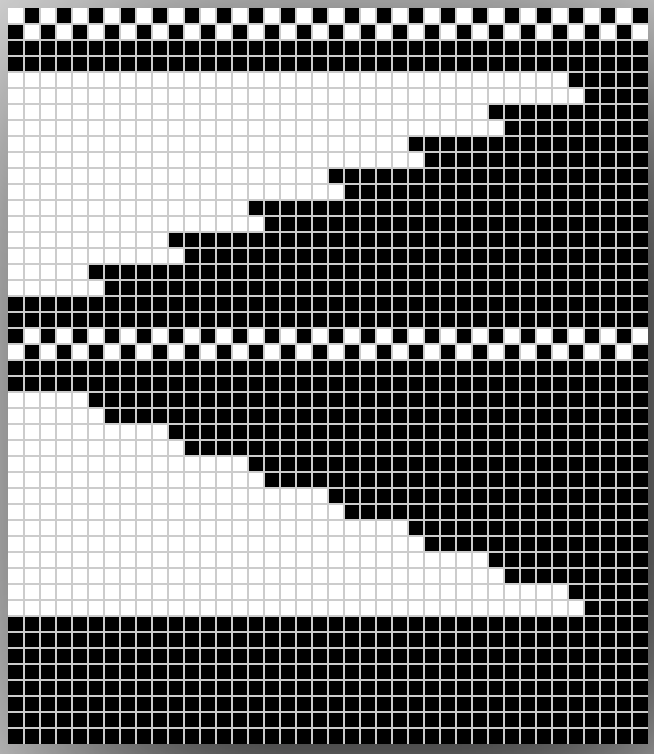
 All-knit rows can be added in each half repeat block, cells representing them are colored in darker grey. The single design repeat is 12X28, 14 rows are knit before ruching, and pick up starts with the 6th sinker loop down.

 This repeat is 16X42 pixels and may be used color-reversed for a slip stitch variation.
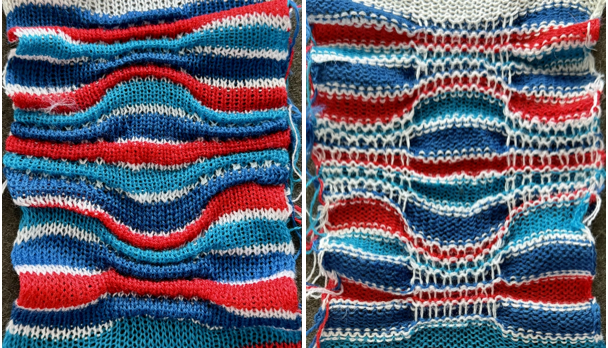
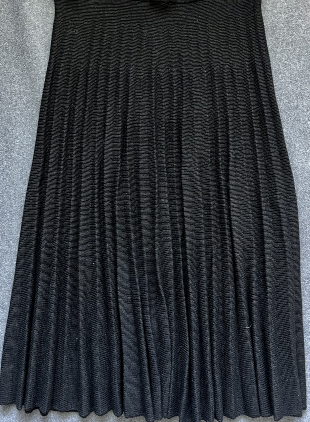
 The yarns used in the test swatch were a 3/9 wool and a sock yarn remnant, knit at tension 10, resulting in a rather stiff knit. Individual stitches were lifted on each edge aside the large all-knit segments to avoid ruffling and attempt at a balanced length.


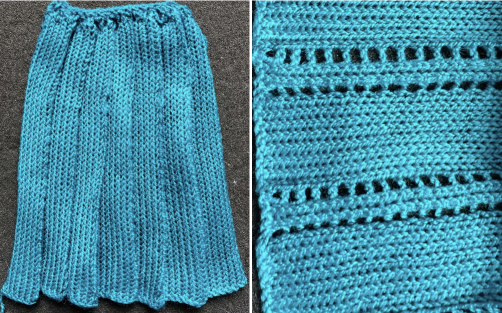
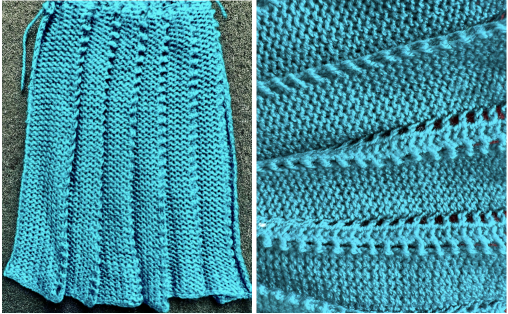


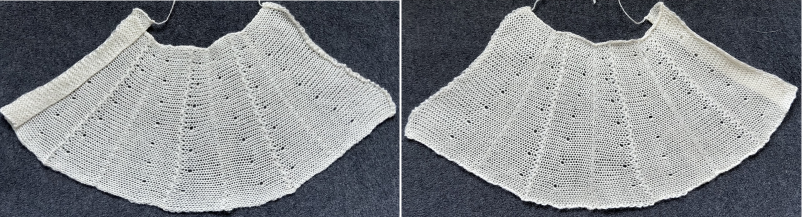
 The fabric narrows considerably as it is stretched lengthwise to set the stitches. Several panels would be required for a garment such as a skirt. Such an item would need to be pulled into shape, pinned, and hot pressed. Fiber content will determine the crispness of the pleats after blocking, and their retention after cleaning. The swatch below is turned sideways for the sake of space.
 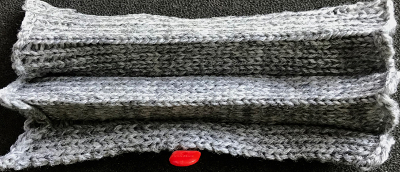 More variations with folds can be made by varying the “rules” commonly recognized for creases. Working sideways once more: on a punchcard machine, using card # 1 locked, cast on making certain every other needle as well as the first and last are selected.
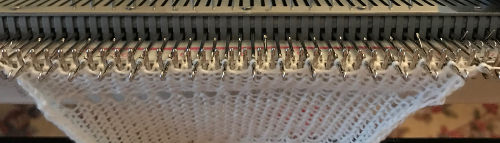 Cancel the slip setting, complete the next knit section, and transfer every other needle to the adjacent one on either the right or left.
 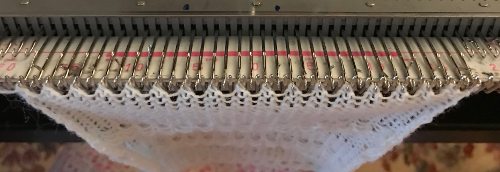 The needles holding 2 stitches may be brought out to the hold position as each transfer is made, or pushed out to hold after the fact to insure the stitches have been transferred and will knit off properly. The number of needles in work remains constant.
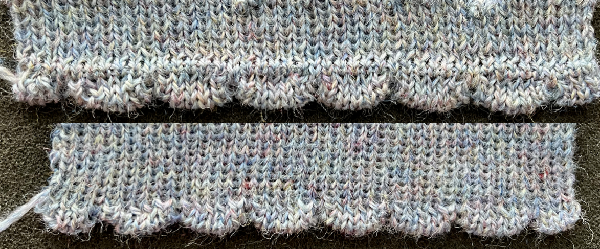
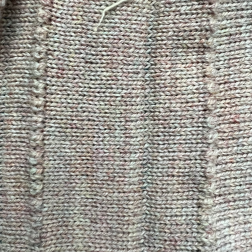
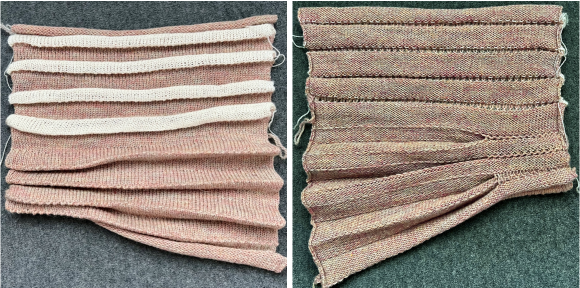
 The slipped stitches form the inside folds in the pressed swatch, while eyelets and tuck stitches fold a picot edge to the outside.
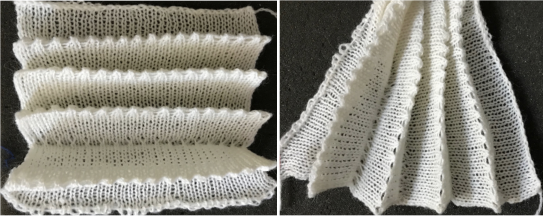
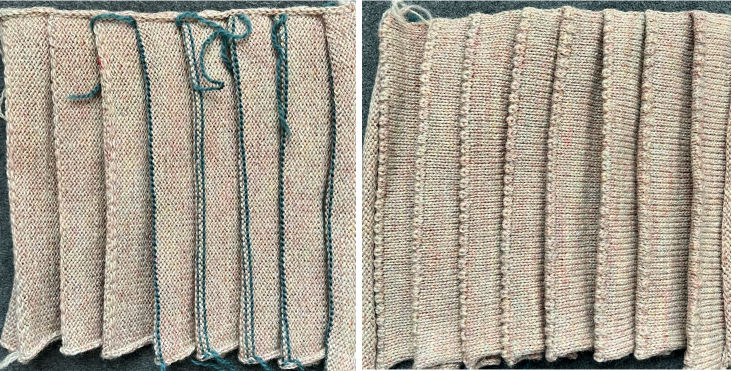
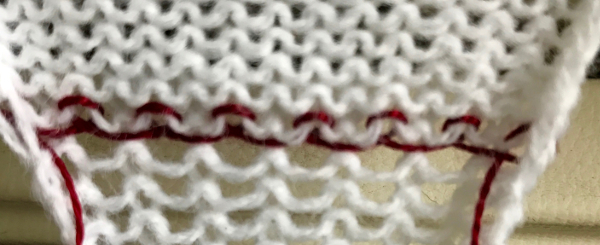

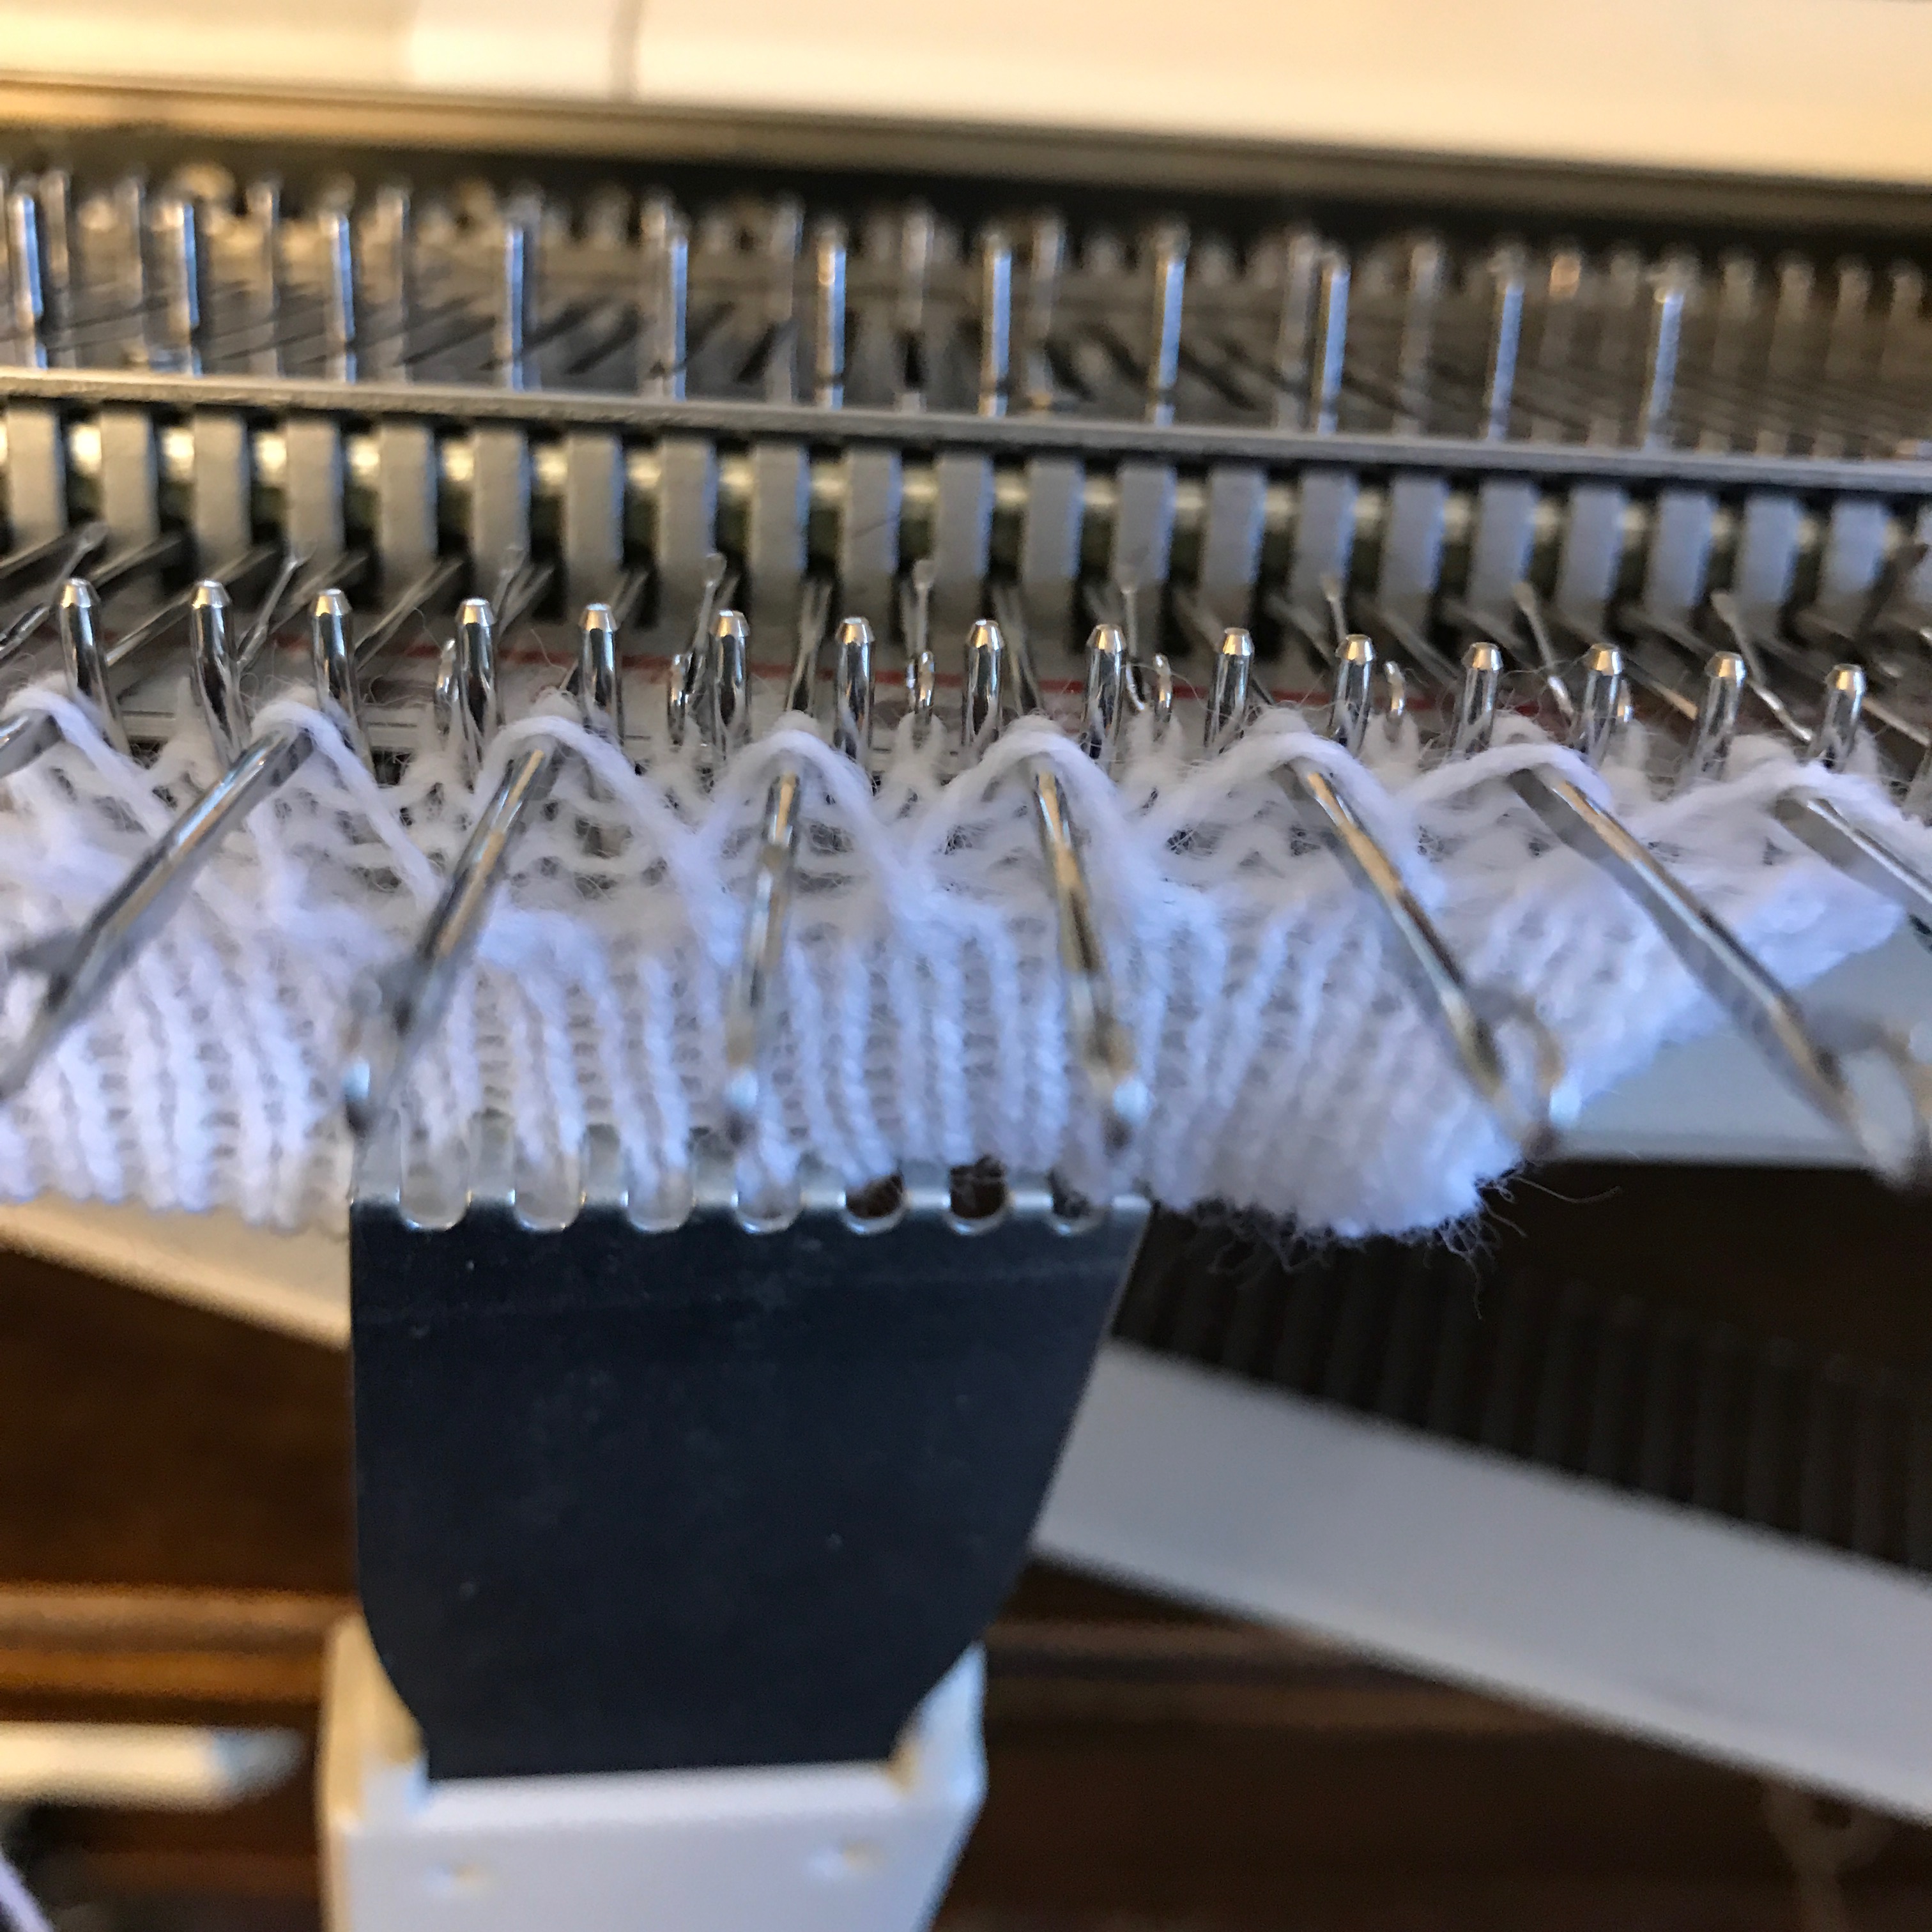


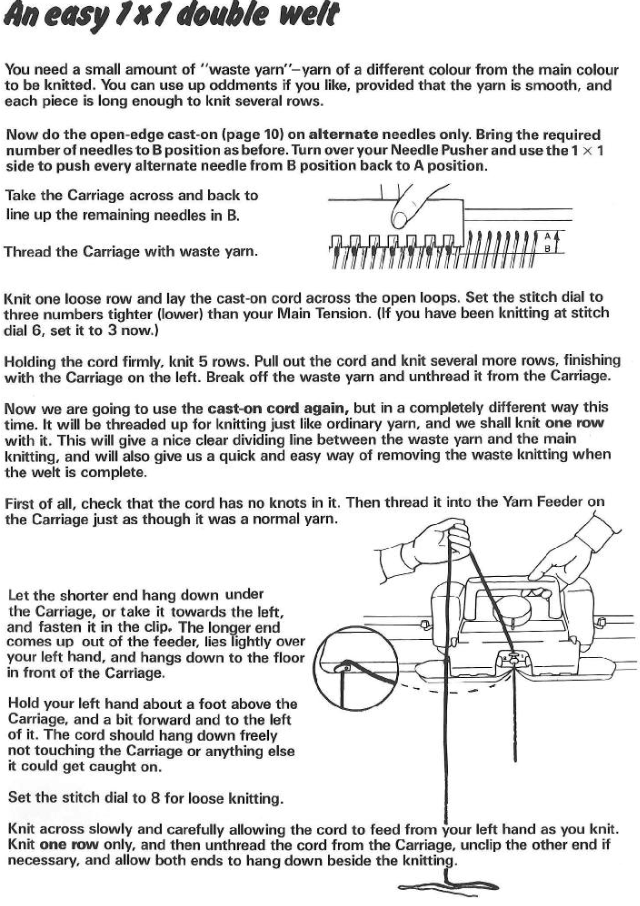


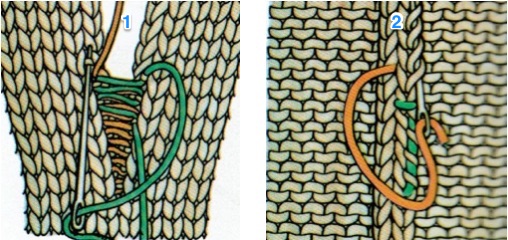
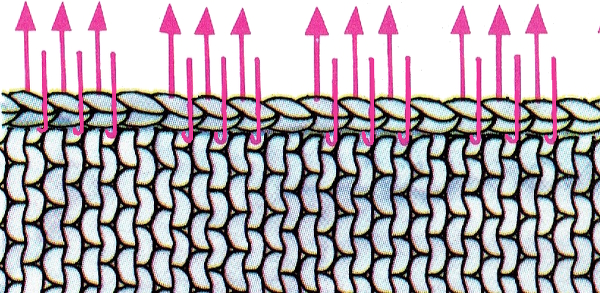
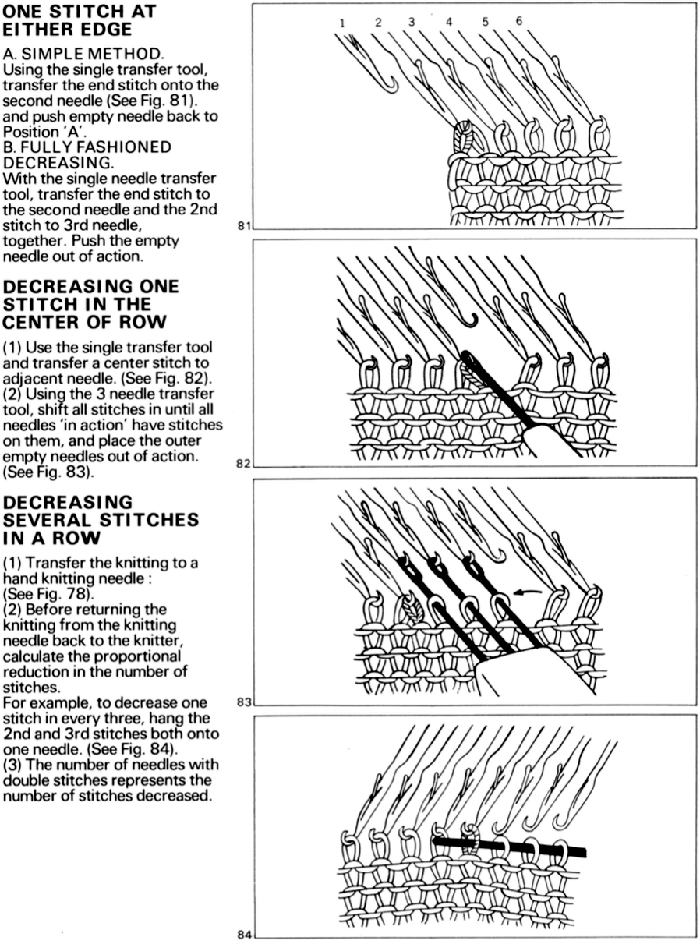
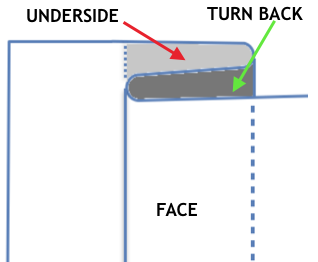
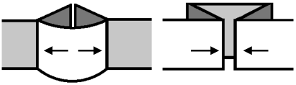
 open stitches to finished hem
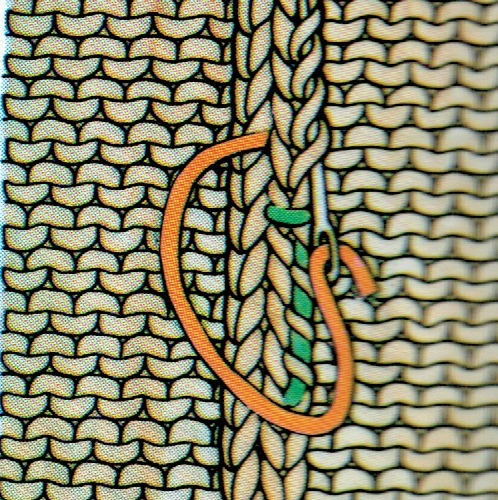
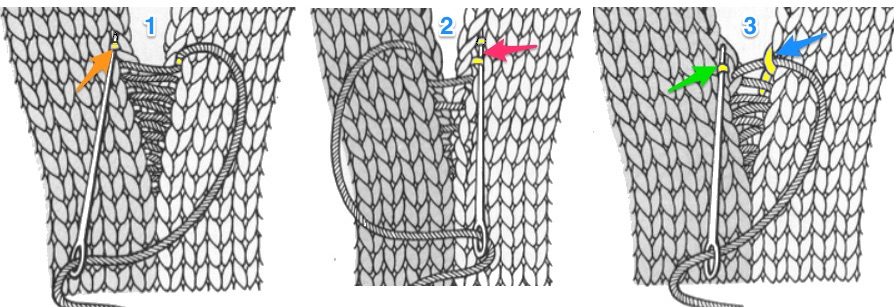
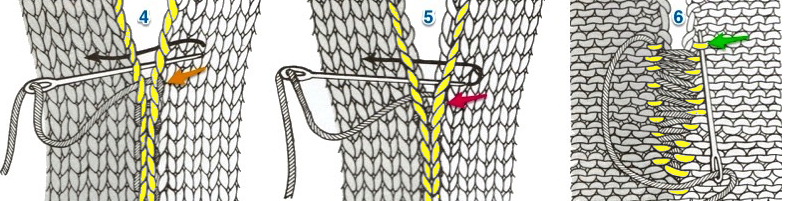
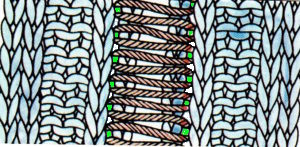
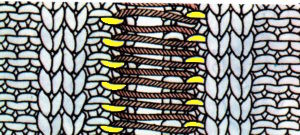
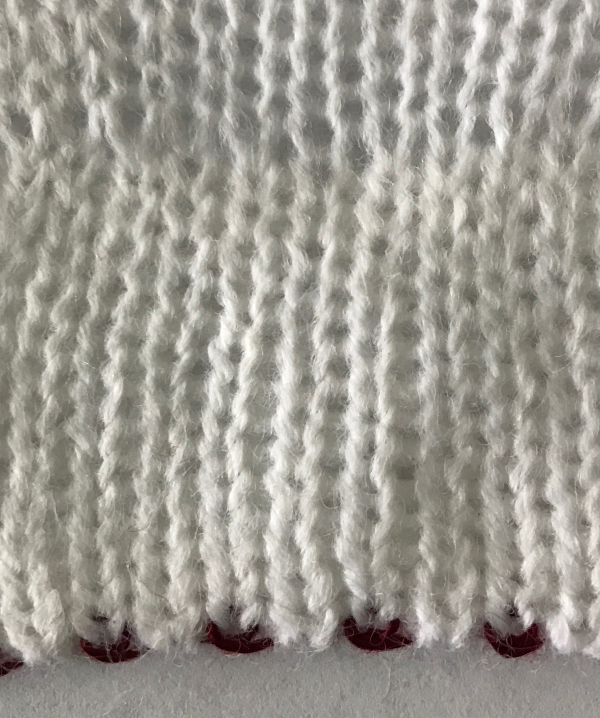
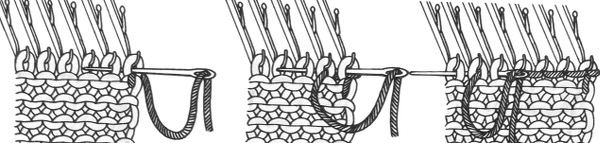
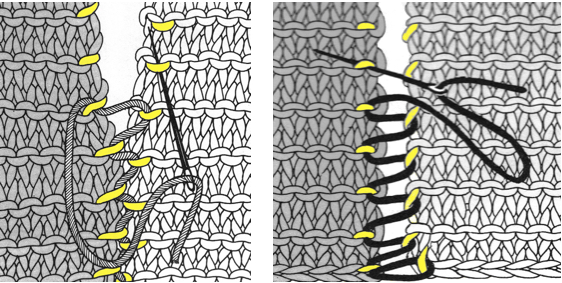 1. mattress stitch, knit side out, one full stitch away from the edge, adding a second strand of yarn to finish the join