A cumulative collection of links to pleat-related blog posts
Single bed
Origami folds inspired pleats 1
Shadow pleats with added FI patterning
Shadow pleats knitting
Revisiting pleats on the knitting machine: single bed
Pleats created with lace transfers
Ruching 2: more working with stitch groups
Ruching 1: fern “pretender” and more
Pleats: automating “pleating”, single bed
Double bed
Pintucks 2, ripples in knits using the ribber
Pintucks 1 vs shadow pleats, Fair Isle pintucks
Origami-inspired 2: more pleats and fold using ribber
Slip stitch patterns with hand-transferred stitches, double bed
Knit and purl blocks to create folding fabric_ “pleats”
Pleats: ribbed, folding fabrics
On two needles hand-knit and purl folds
Some authors and publications include hems in the category of pleats as “horizontal”. To my mind, they merit their own category.
HEMS
Machine knit hems 2
Machine knit hems 1
Ruching/hooked-up stitches
Any techniques may also be used on only parts of finished projects.
Presently, in fashion and knitwear, skirts and clothing with ruffled or folded fabric variations abound.
In 2013 I shared a post on automating single bed pleats including downloadable files of one of my early handouts and working notes.
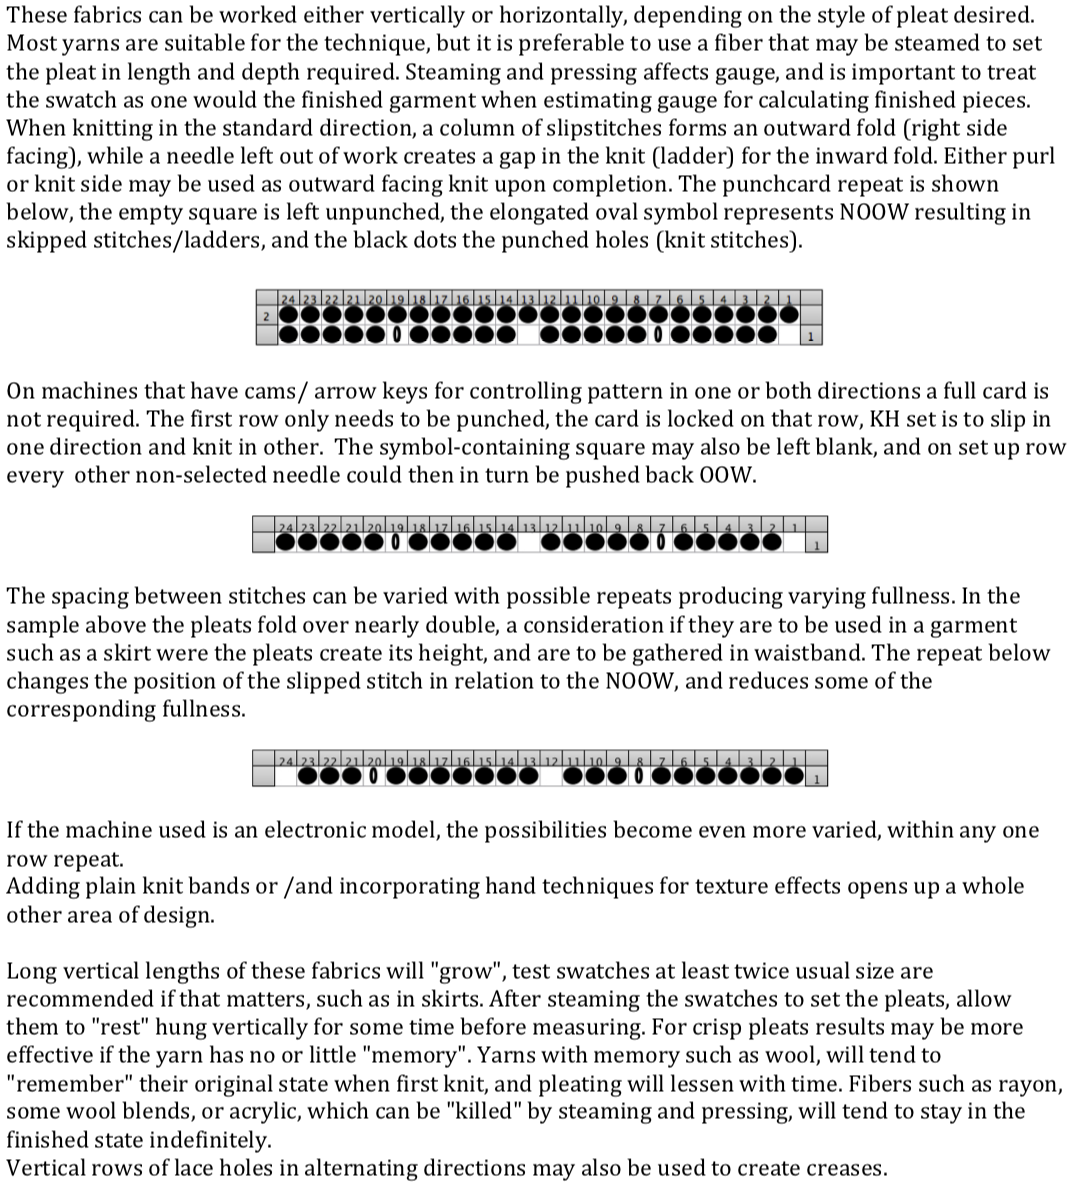
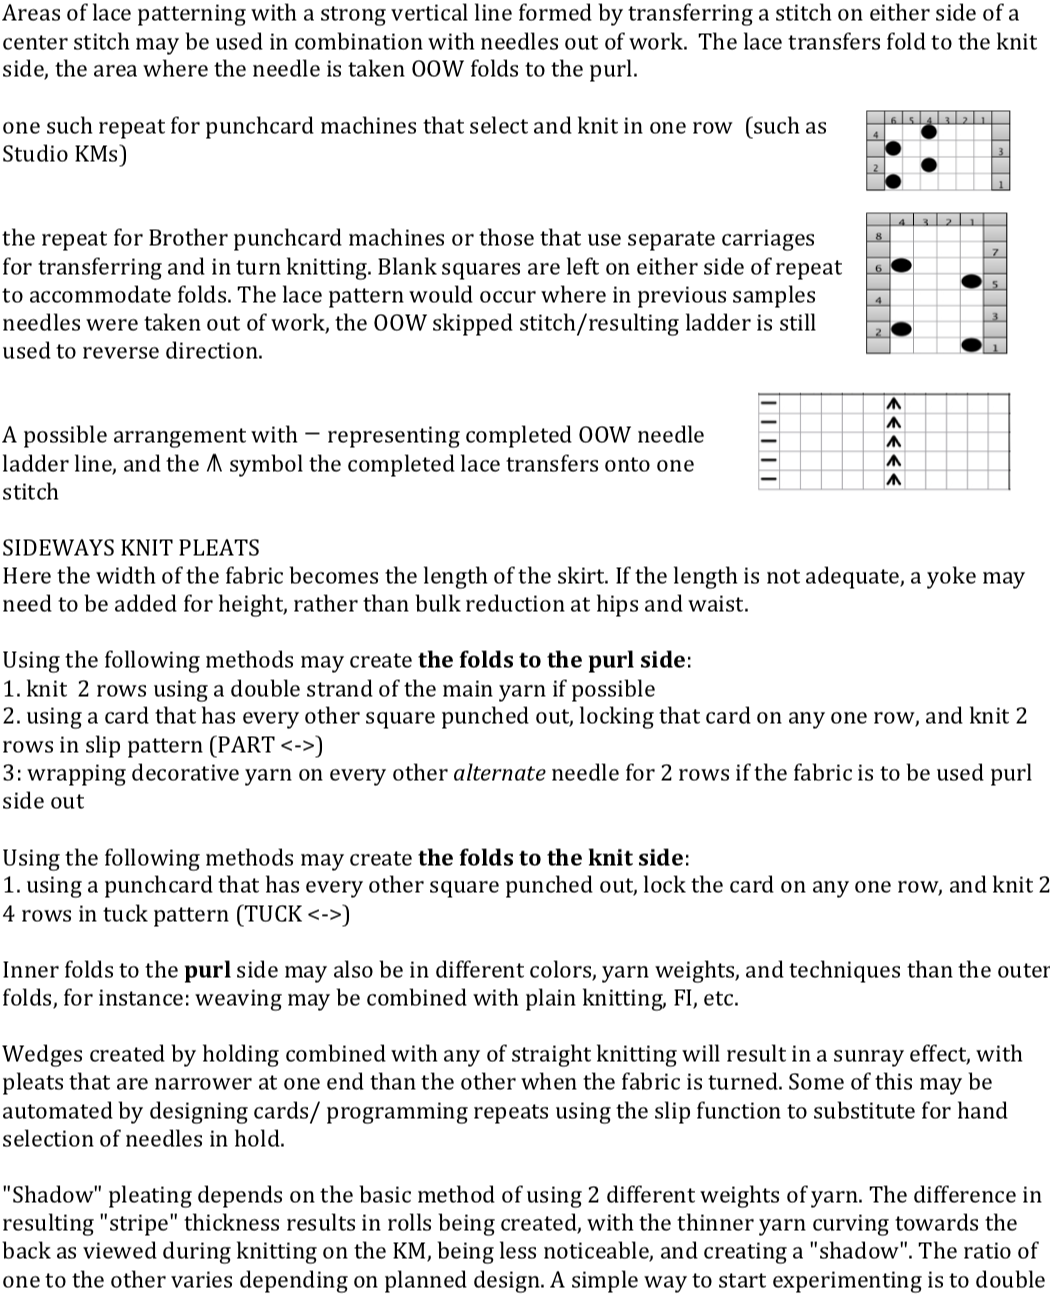
This post contains some of the same information, repeated for convenience, along with additional info and images added in 2023.
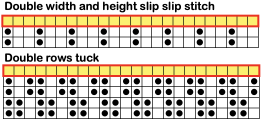
Addition: transfer lace punchcard repeats for Brother machines can vary, from 6 stitch patterns to 8, 12, and 24. Two blank rows (grey cells) would be added above the transfer marks (black dots) below to complete a single transfer repeat. The red line marks the centerline of the 24 stitches. 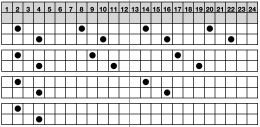
 Proof of concept swatches:
a slip stitch design repeat, punchcard-suitable, is redrawn with black dots representing knit stitches, and blank cells representing slipped/skipped ones. Empty circles along with red numbers mark the locations where stitches are transferred to the right or left, and empty needles are pushed back to A position, out of work/OOW, resulting in ladders. 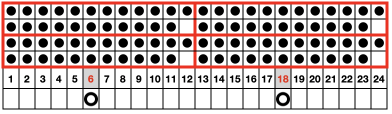 The appearance of the knit side,
 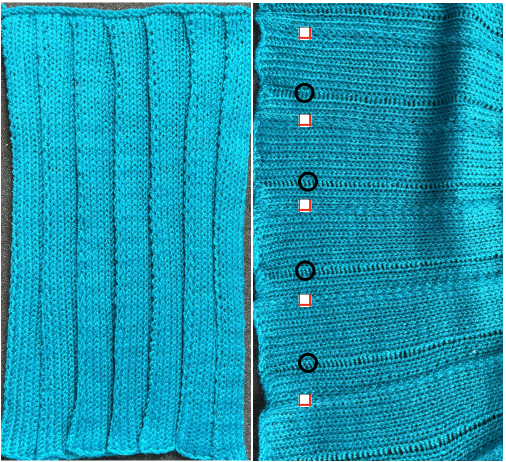 and the purl
 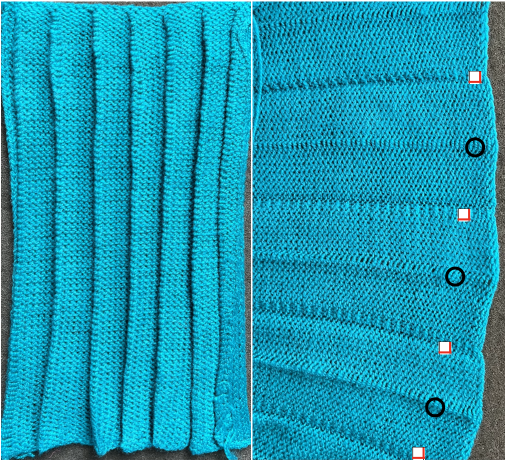 Vertical lace transfers:
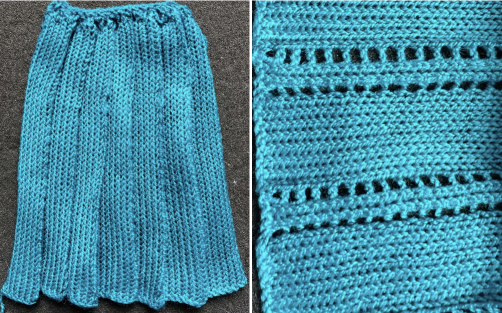
 When working in a stocking stitch, if a soft-looking pleat is desired, the knitted fabric is simply folded to form the pleat and joined to keep the fold. Crisper folds require the added techniques described above. In hand-knitting fold lines are created by slipping stitches on the fold line on the “public side”. Assuming the latter is the knit side of the fabric, this is often indicated by “sl1 with yarn in the back” for the front fold line (and as another slip stitch option, with yarn in front for the back fold line). A purl stitch is more commonly worked on the same side of the knit for the opposing, inner fold. Both the slipped stitch and the purl one are purled on the return purl row pass. It is also possible to work the former purl stitch as a purl, resulting in a garter stitch inner fold.
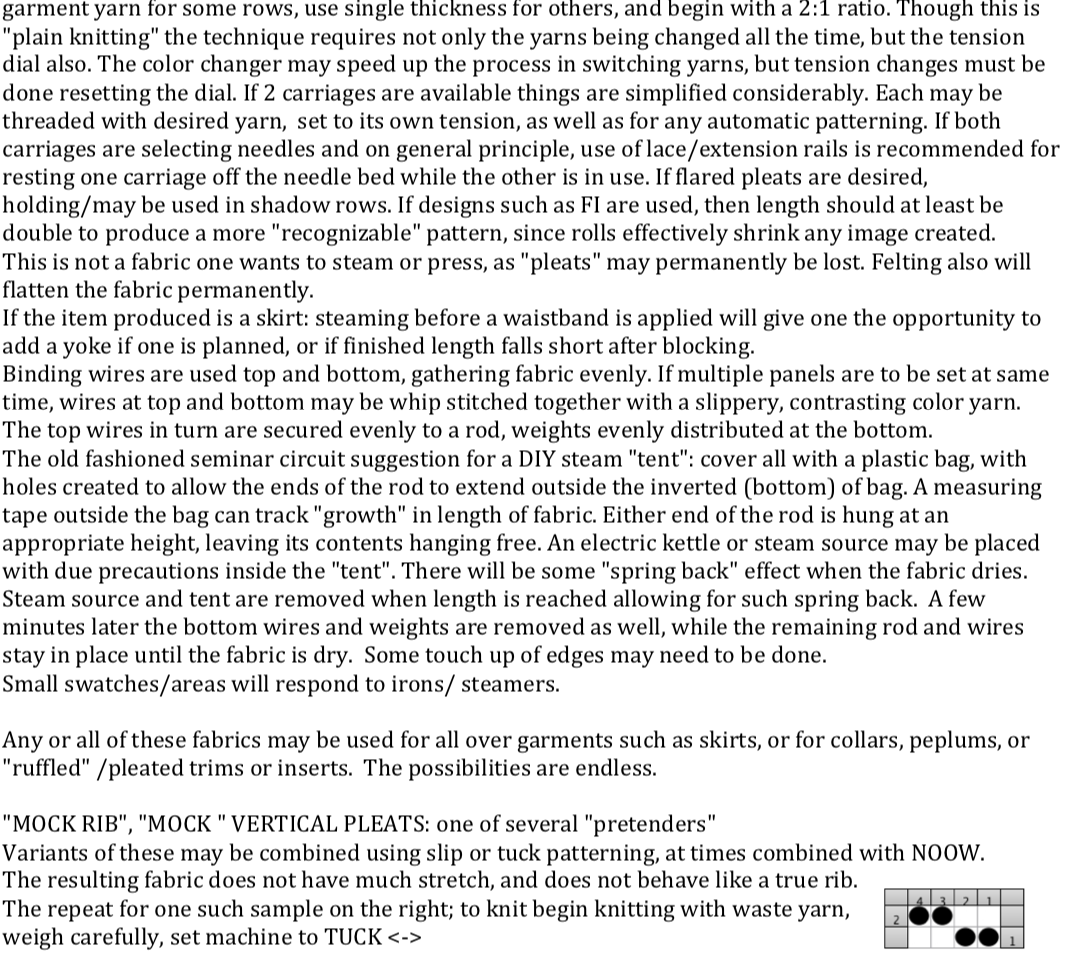
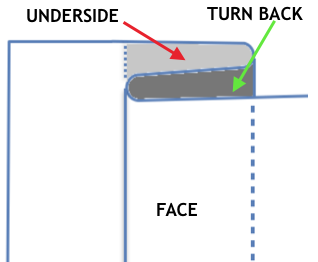
To review, parts of pleats:
knife pleats may be put next to each other and pointing to the right (S) 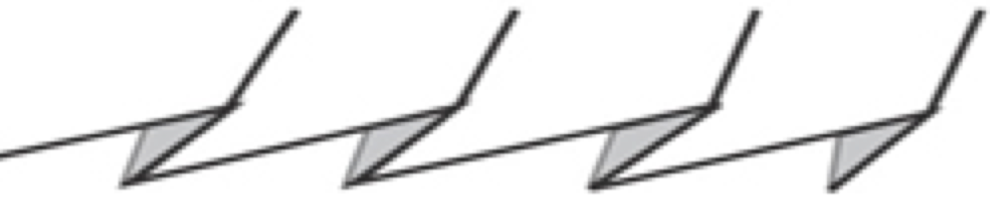 or the left (Z)
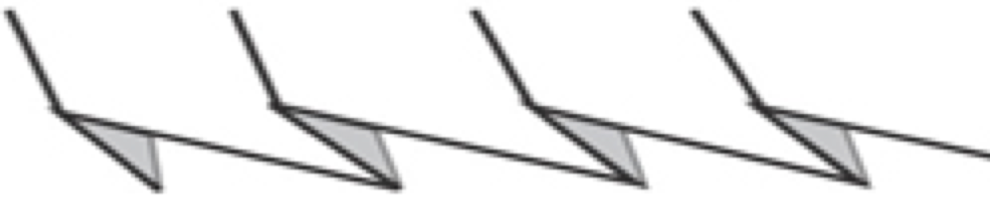
Box pleats are composed of alternating right and left knife pleats, pointing away from each other. Inverted box pleats are composed of one left and one right knife pleat, pointing toward each other.
 Accordion pleas are a series of knife pleats in which the back of one pleat forms the face of the next
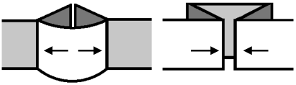
It is possible to knit folding pleats in a knitted stocking stitch with the pleats formed vertically rather than sideways. The two needles (highlighted in red) close together form the top hard outer ridge, and the two empty spaces where needles are out of work (red dots) form the under-fold. The remaining black dots represent out-of-work needles as well  Normally, EON knitting is reserved for tuck lace or heavier yarns on standard machines. For my test swatch, I used a coarse 2/8 wool on tension 4
 The fabric narrows considerably as it is stretched lengthwise to set the stitches. Several panels would be required for a garment such as a skirt. Such an item would need to be pulled into shape, pinned, and hot pressed. Fiber content will determine the crispness of the pleats after blocking, and their retention after cleaning. The swatch below is turned sideways for the sake of space.
 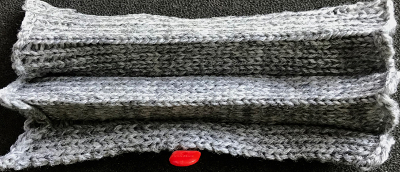 More variations with folds can be made by varying the “rules” commonly recognized for creases. Working sideways once more: on a punchcard machine, using card # 1 locked, cast on making certain every other needle as well as the first and last are selected.
In the swatch varies the number of all knit rows between creasing methods. Overlapping at fixed width at the top of the piece once the fabric is rotated lengthwise, creates a fair amount of bulk as pleats are fixed.
The all-knit sections could be combined with holding techniques to vary the width of pleats from one end to a different width than at the other.
The change knob remains set to KC throughout.
With no cam buttons selected, all stitches will knit.
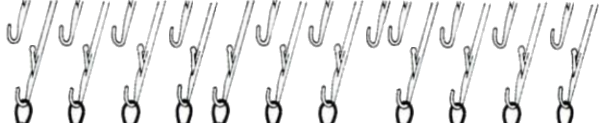
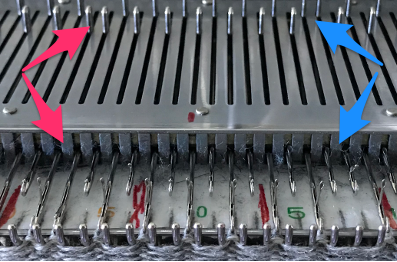
After the desired number of rows, cam buttons are set to slip in both directions for at least 4 rows (commonly this is done for 2).  Cancel the slip setting, complete the next knit section, and transfer every other needle to the adjacent one on either the right or left.
  The needles holding 2 stitches may be brought out to the hold position as each transfer is made, or pushed out to hold after the fact to insure the stitches have been transferred and will knit off properly. The number of needles in work remains constant.
  Change the cam buttons to tuck in both directions. On the first carriage pass, the empty needles will pick up a loop, on the second pass a second loop will be formed on those same needles.
  Cancel the tuck setting, and leave the needle selection on to form knit stitches once again, continue with the determined number of rows.
Repeat the process beginning with the slip stitch setting once more.
The yarn used is a 2/24 acrylic, seen here stretched flat. 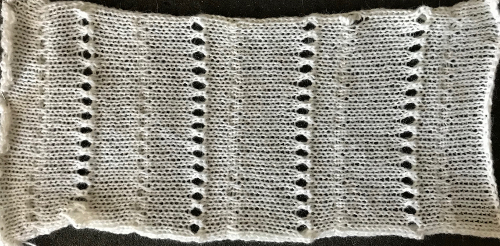
 The slipped stitches form the inside folds in the pressed swatch, while eyelets and tuck stitches fold a picot edge to the outside.
 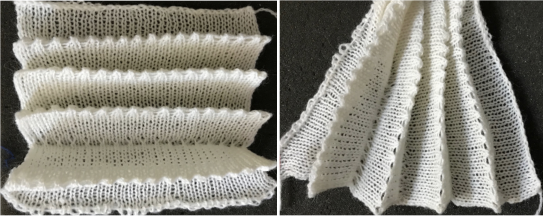 The placement of the holding sequences may be varied, with the eyelets allowed to form and considered a potential design feature.
 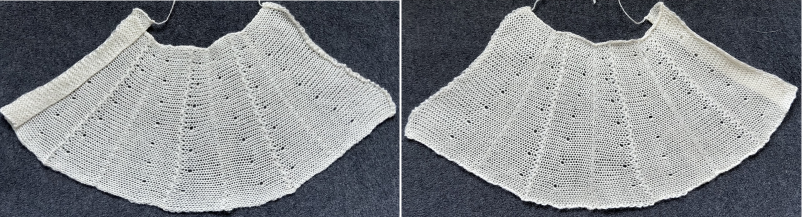 The number of slip floats or tucked stitches may also be altered by widening the slip repeat or lengthening it, and tucking on alternate pairs of stitches for usually no more than two rows.
 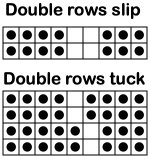 Extending the repeat to a punch card with slipped or tucked stitches flanked by a single knit stitch on either side. The outlined blocks of colored cells represent subsequent knit rows.
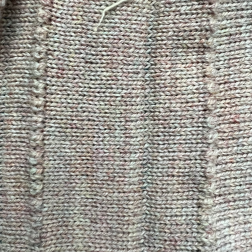
 The folds to the purl side may also be created by simply doubling up the yarn for a single row. Both yarns in this case are 2/8 wool. The second color is used for illustration purposes but might be a design feature in some pieces, and is not clearly visible on the knit side.
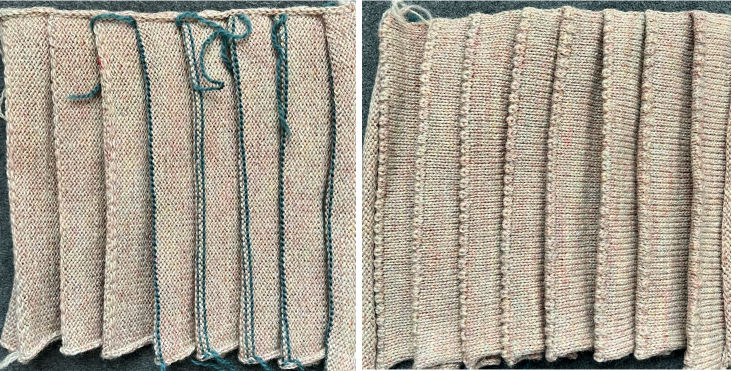
 Hand selection aided by some of the standard multiple-selection tools is easy enough to use for tests on small swatches to determine resulting effects and preferences prior to any programming.
In this swatch, such increases are combined with holding techniques for what might become anything from an extended ruffle to a full skirt.
The issue with sideways knits is that the number of needles available and the knit gauge may limit the possible length of any garment produced in a single piece. 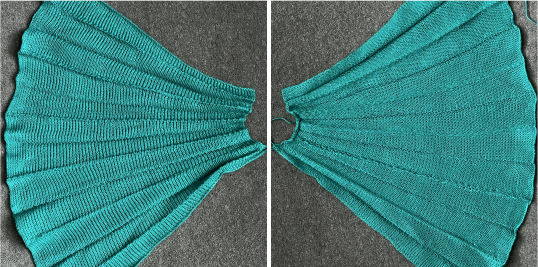 Single bed pintucks may be made by knitting any number of rows on the top bed, followed by the use of every other needle selection to create slip-stitch floats on the machine to serve as markers. The short floats are picked up and hooked onto the corresponding needles in work after more knit rows.
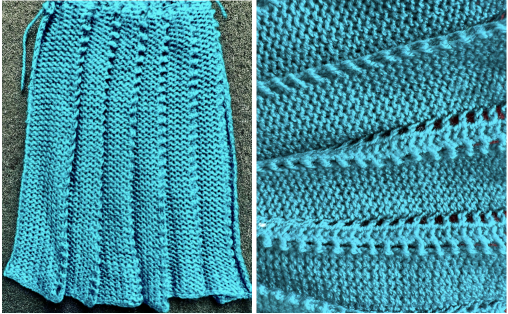
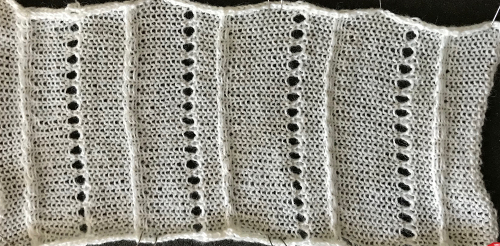
Short-row shaping may be automated to include needle wrapping to diminish the size of the resulting eyelets. 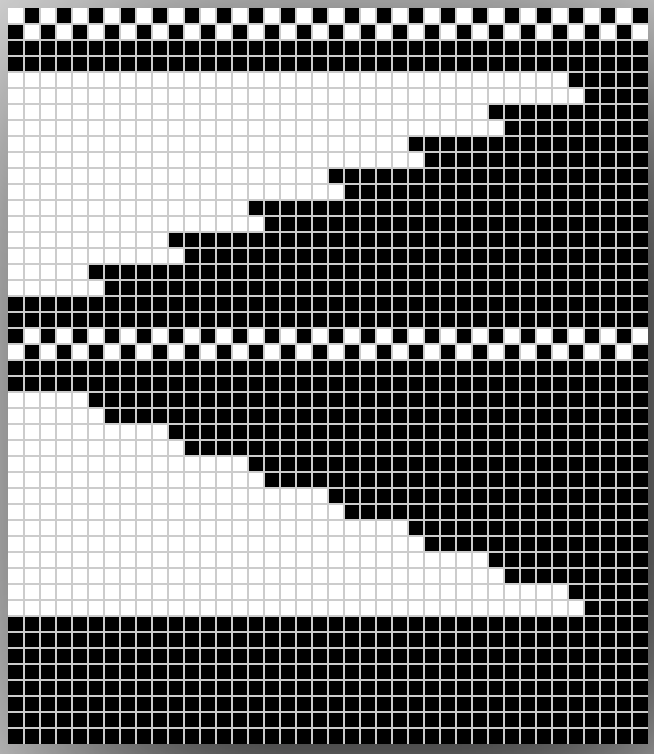 This photo is of a multiple-decades-old skirt that has been stored folded for years, as taken out of the storage box. It measures 26 inches in length, with a 97.5-inch bottom circumference. Single tuck and slipped stitches were used along with short rows to create intentionally soft folds.
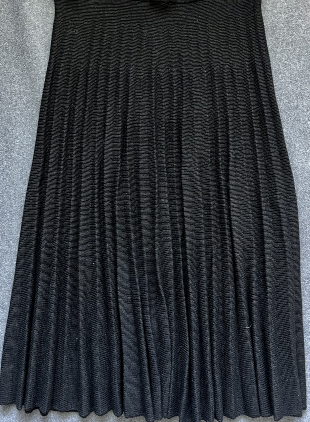
Useful math calculators for planning wedges
A look at miters, spirals, and angles to create shapes
Some notes on circular shawls
Round yokes and more
Hems created using this technique are faster than those where every needle is rehung and may be stuffed or threaded with other materials ie suitable size plastic tubing, or upholstery cords for sculptural effects. 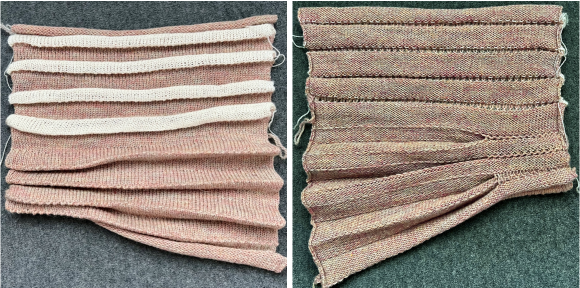
Planning is required for the best method as to how to join panels in items such as skirts.
Markers at regular counts added while the work is on the machine in areas that are to be folded or gathered into a waistband, yoke, or to other shaped pieces are useful.