Reviewed and in the process of being edited with added charts and photos 12/2022. My working and presentation methods have evolved, resulting from evolving working methods and skill in using the new generations of available hardware and software including new generation iPhones with their built-in cameras. This post will continue as a hybrid of sorts.
The previous share on this topic: Ruching 1, a fern pretender,  and more.
An illustration of what part of the stitches to pick up  Going straight up: in the 2014 chart color blocks illustrate needle groups that get picked up and transferred onto the same color row on the machine, with no specific references to needle tape or any other markings.
 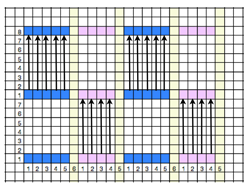 When repeating the operation in the same needle locations, having NOOW (needles out of work), thus creating ladders, makes it easier to keep track of groups in configurations.
The yellow lines represent needles taken completely OOW at the start of knitting.
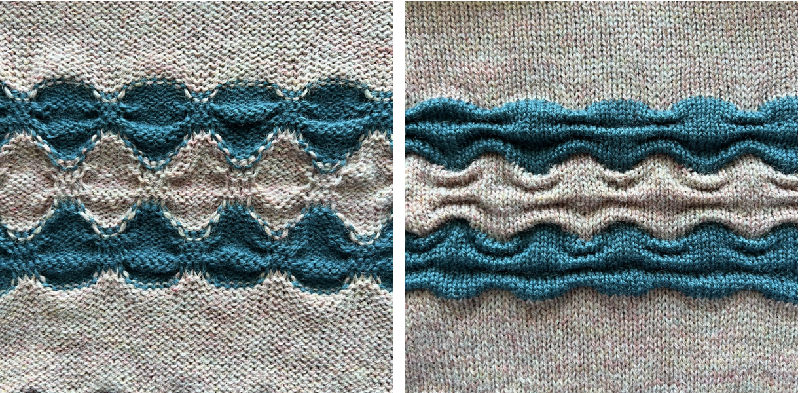
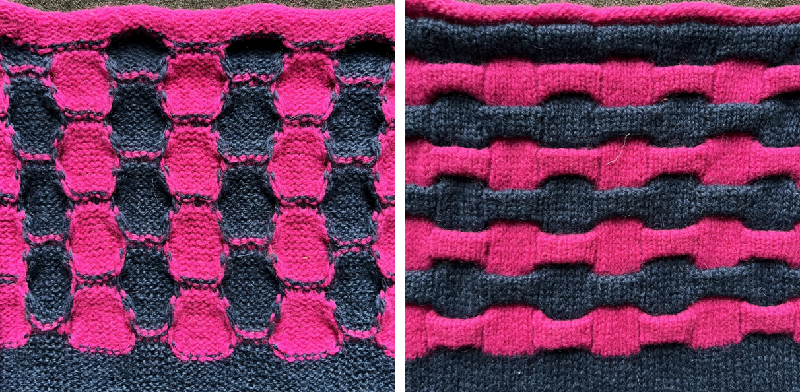
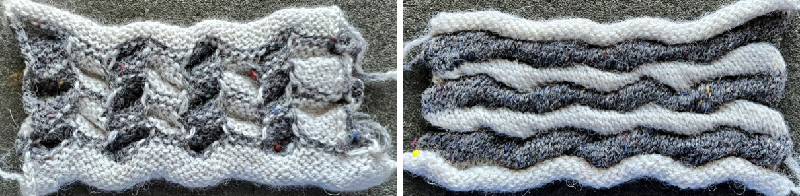
Any of these fabrics may be executed in a single color or varied color sequences. Sometimes changing the color in swatches and using sharply contrasting ones helps one understand the structure of the resulting fabric a bit more easily.
The number of rows knit between picking up stitches can be varied to suit, and not all horizontal stripes need to match in height.
Stripes in plain knit rows in the same color or an alternate one can add interest and decrease the total number of carriage passes in the overall piece.
In a different approach at the same visualization, all blank vertical rows represent locations where needles are in the A position, out of work, and remaining that way throughout.
To maintain equal edges in the piece, this setup is on a multiple of 6+5 needles: 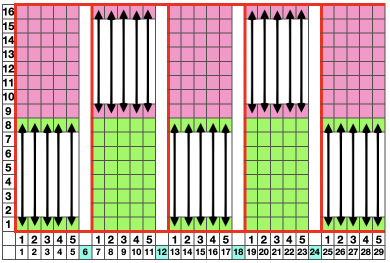 The block layout can be varied,
  along with adding all knit stripes in any chosen color.
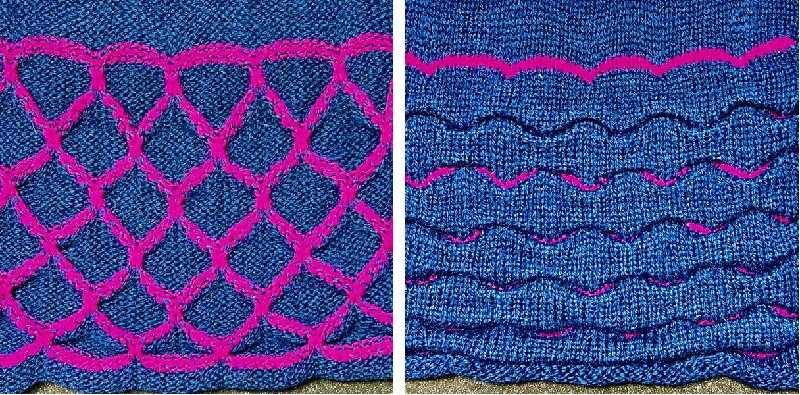
 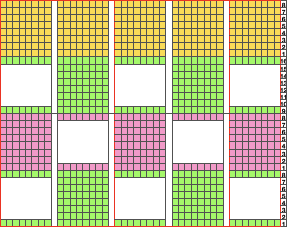 Variations in picking up sequences may be seen here creating different secondary patterns.
  The red dots in the first photo indicate a row of additional ruching in the center of solid striping.
Cast on a multiple of 12+4 stitches: 

 In response to the comment on this post, here is a proposed variant of the technique to try on a 40-stitch (36+4) sample.
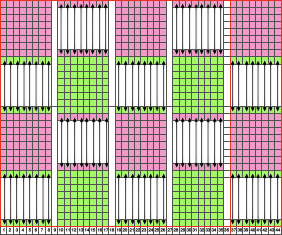
Visualizing the brick layout single stripe segments: 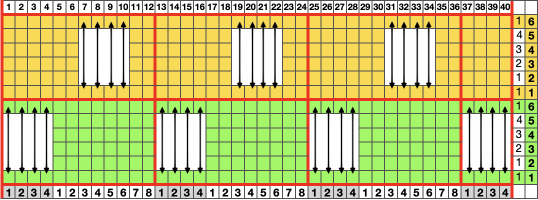 Maintaining the brick layout, each segment may be repeated the desired number of times, creating stripes in extended textures.
 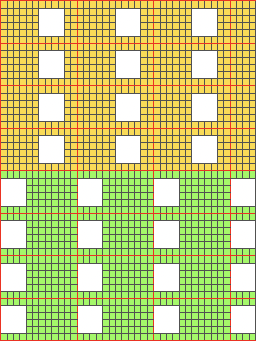 Varying spacings and rows, the setup is on a multiple of 9+8 needles.
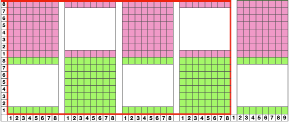
 Far less dense, a proposed spacing, the bubbles will be more prominent if 2 stitches rather than one are hooked up,
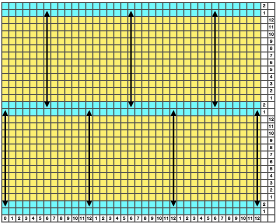
 with the concept used to form intermittent design bands,
 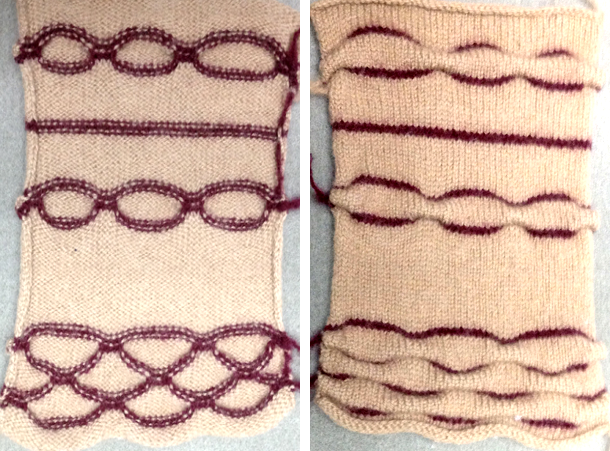 ruching partway, gathering one side, using thick and thin yarns
 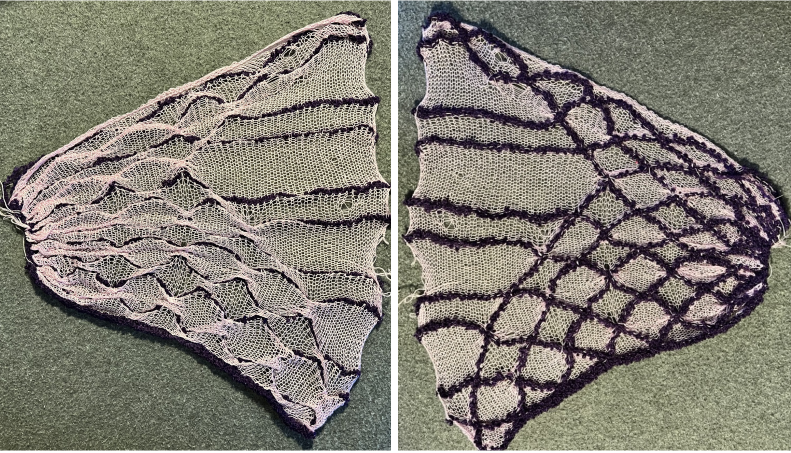 working in narrow stripes and very small repeats.
 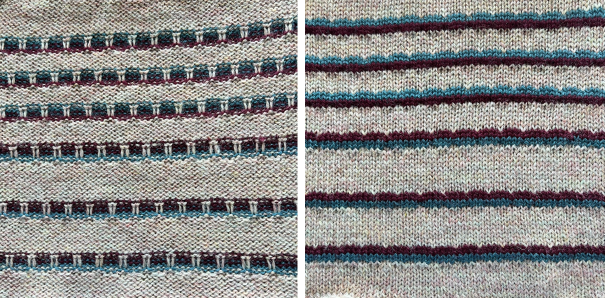 Returning to the diagonals previously depicted this way,
  now with some changes.
 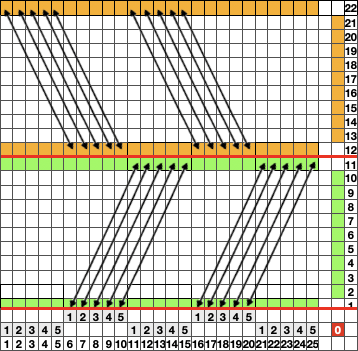 Repeating the pattern on a wider knit, considering shaping for even side edges
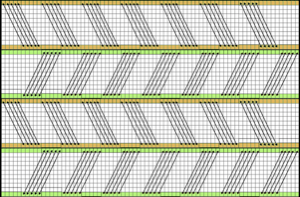
 Applying the same technique in bands rather than all over
 Adding wide ladders: both the number of stitches lifted and hooked up and the number of needles left out of work can be varied to suit, even in the same piece. In this illustration, the colored columns represent knit stitches, the white ones needles left out of work. Repeats are 10 rows in height, with stitches hooked up every 5 rows in alternate columns
 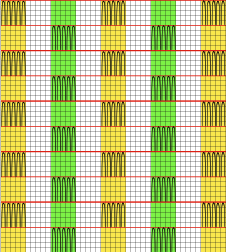 A swatch utilizing the concept:
 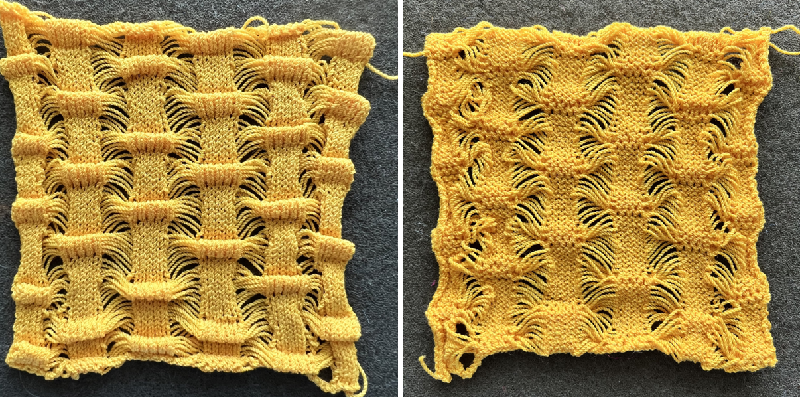 Ruched Fair Isle: when using Brother machines, to keep the pattern uninterrupted, prior to knitting the row with the completed hooked-up selections, the correct needle preselection for each pattern group needs to be hand selected.
 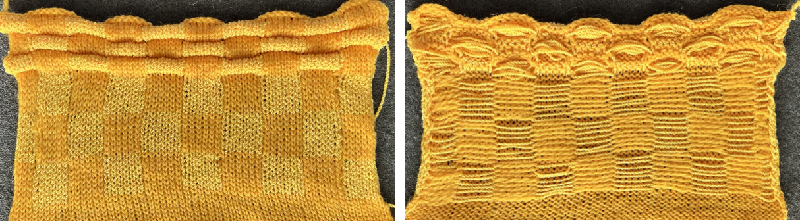 Some tips on ruched FI knitting: the fabric will shrink considerably in length, so most motifs will need to be elongated to accommodate that.
Having a pattern that may be tracked easily by watching the floats on its reverse is helpful as may working in bands where the colors swap spaces (changing yarn feeder positions).
In very textured knits, 2 all knit rows could be added at the point of ruching, pushing end needles in if selected by the machine so as not to form floats from one side to the other. One row could serve as well, but then there are decisions about what to do with added yarn ends. The added rows can be left unpunched, will knit color in A feeder, and may not be visible in the finished knit. As always, test before committing to large pieces.
If small groups of stitches are to be picked up and rehung, markers with segments of nylon thread or yarn may be placed on the corresponding needles and be temporarily knit in. In addition, the needle tape or needle bed may be marked with a water-soluble pen to indicate locations for rehanging, or a custom needle tape may be printed.
Varying striping, and segment sizes. 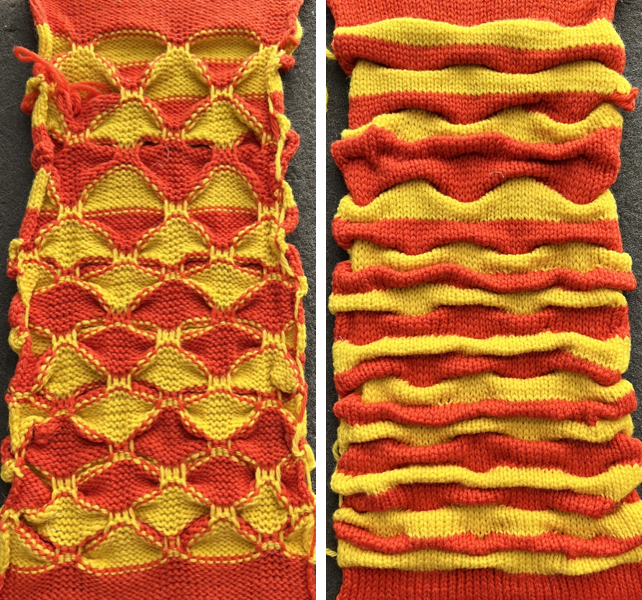 Working in a single color, with ruching forming hems in the center of the piece, followed by light felting.
 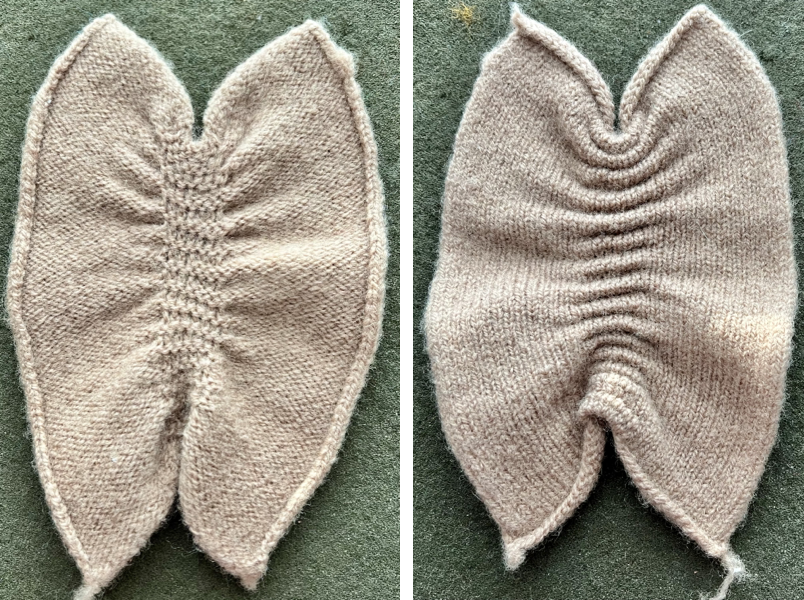 Here the hems are 2 in different heights and all on the same edge, also felted.
 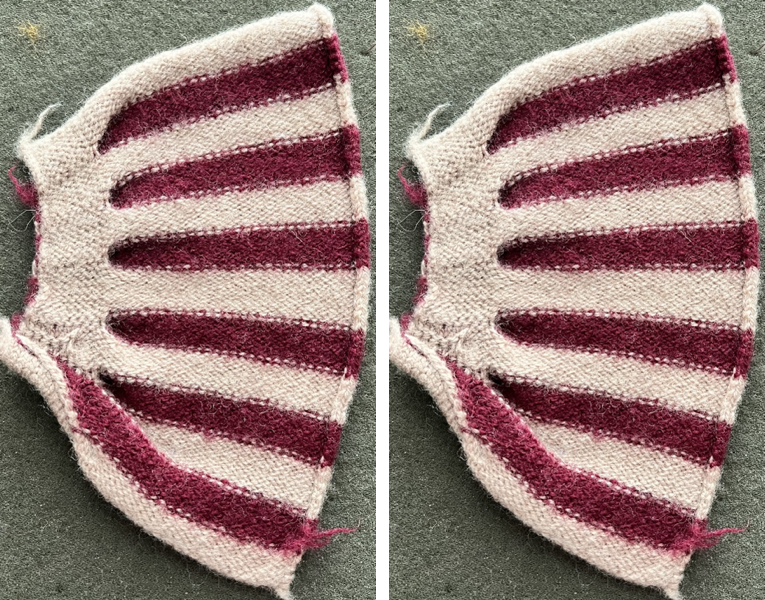 Using unconventional materials: wool and raffia, followed by felting
 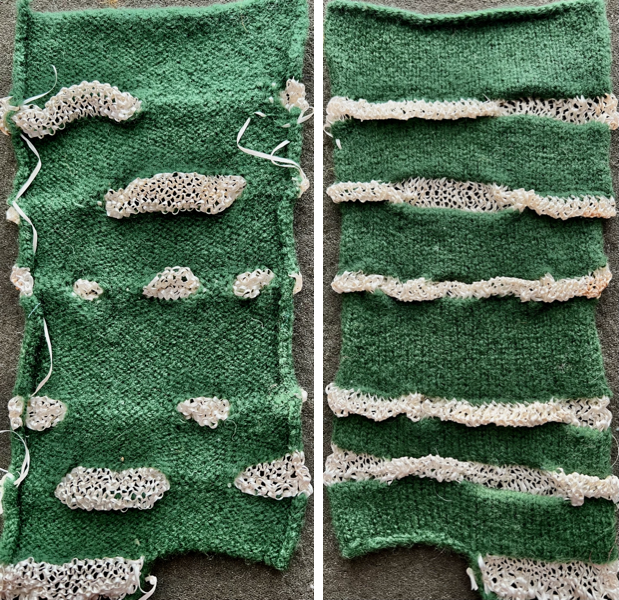 If every stitch is hooked up across a row, the result on the reverse side will form from a roll to a hem depending on the number of knit rows completed at the time
in response to your query, I am now adding charts including guidelines for similar effects. It is interesting for me to observe how much easier it is for me to generate them now that I have used the associated programs for so much longer.
I just found this post. This is the perfect effect of something in trying to create. Can you at all recall on the tan and blue piece how many rows you did between picking up? Thanks!
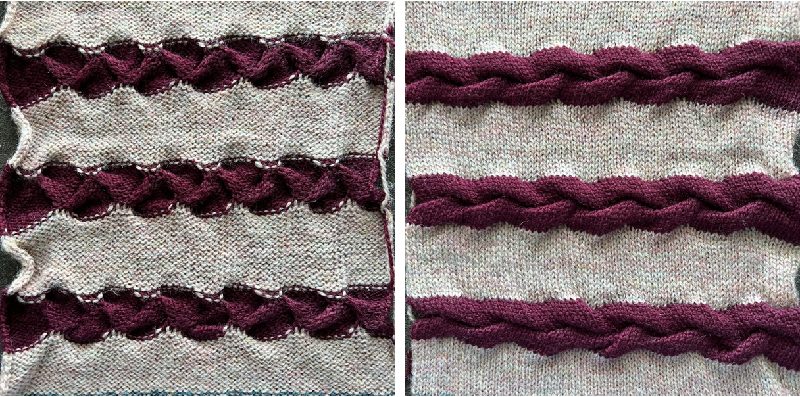
they are the same size, yarn weights are a tad different, and the colors play against each other. I will add a post on history of some of my swatches.
Love these, Sandy! On the pink/black example, is there any difference in stitches from the ruched segment of one color to the non-ruched? They look bigger when they’re ruched, but perhaps that’s just because they’re pulled and stretched a bit?
Thanks for these lovely examples.