This content, on a topic I intended to expand on further, had been “tucked” away as a draft last March.
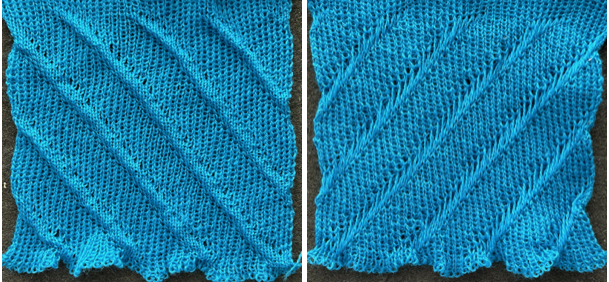
Ripples in knits are created by knitting an unbalanced fabric, with one of the beds knitting more rows than the opposite bed.
Depending on the design, the fabrics may share similarities with blistered stitches DBJ.
Pintucks vs shadow pleats introduces fair isle patterning possibilities on the top bed.
Pintucks are created by knitting on one bed and slipping on the other for often as many as 6-10 rows followed by plain knitting on both beds to seal the fabric together.
Nopps are made in a similar fashion, but using the tuck setting and for fewer rows. Before moving on to exploring added textures, this shares a few of the many options.
Both fabrics may be knit with or without added automatic patterning.
Pintucks tend to be firmer and with less stretch than fabrics using tuck settings.
Some published sources for single-color versions, though intersections could be isolated and horizontal colored stripes continuing on both beds may be introduced:
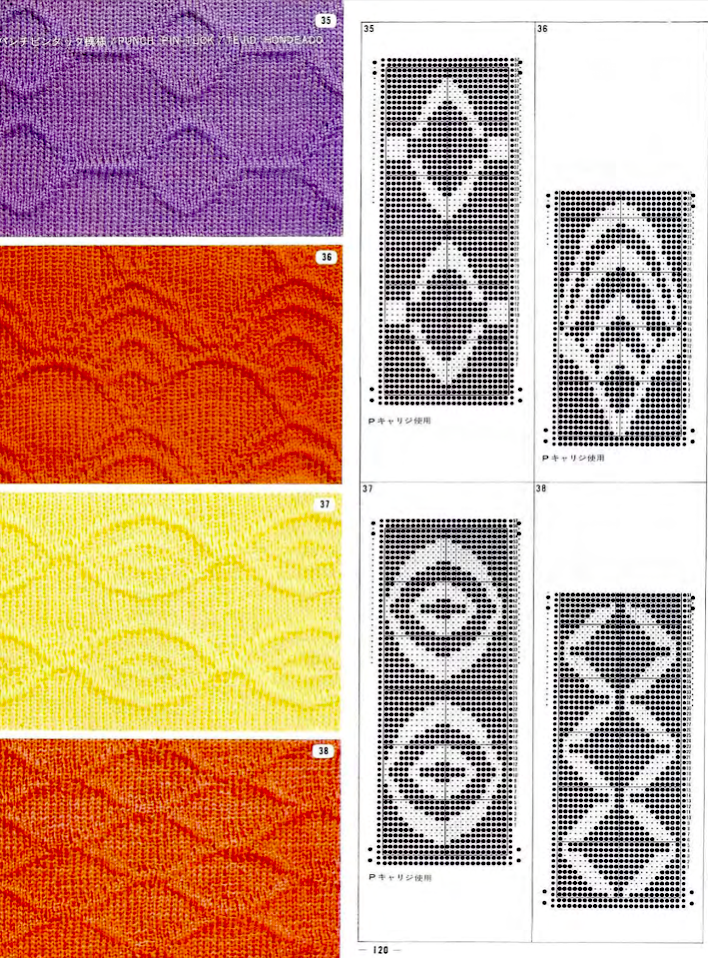
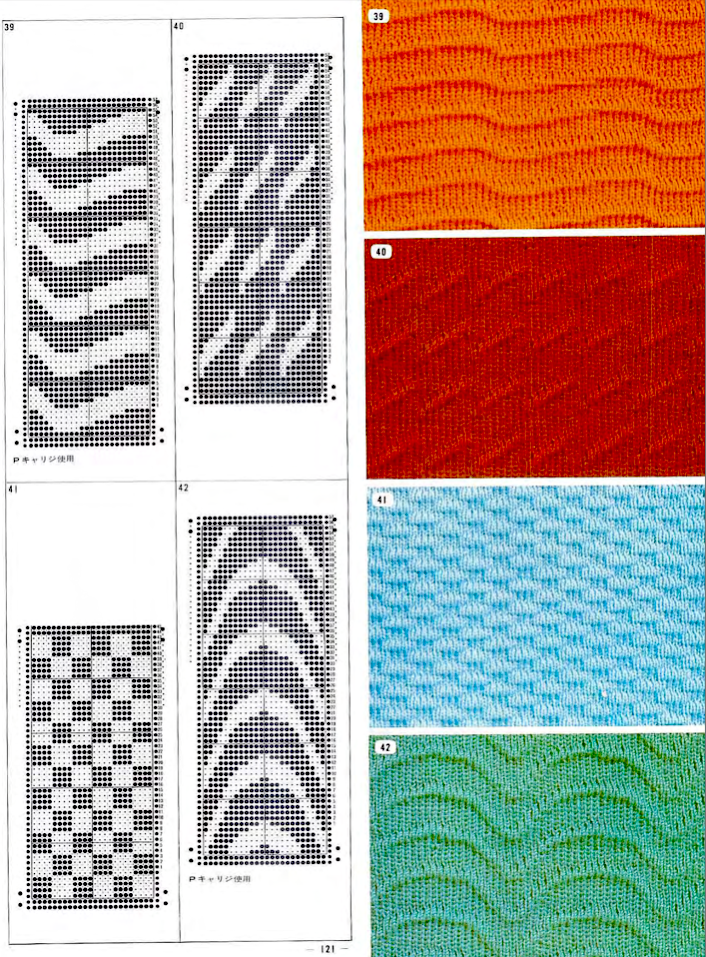
fromStudio punchcard volumes included samples, calling the fabric punch pin tuck
 Brother introduced the idea in their Ribber Techniques Book:
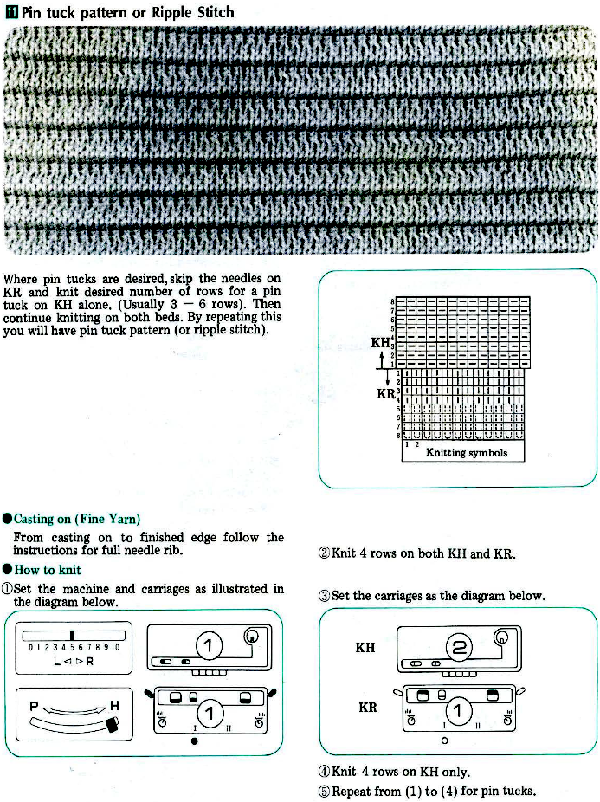
 My experience in knitting these fabrics has been using Brother and Passap. In my blog posts, I discuss fabrics and settings I am able to test and reproduce, so specific ones for other machine brands are not usually included for specific techniques.
In creating DIY textures, an extra needle is generally used on the bed used to knit the sealing rows.
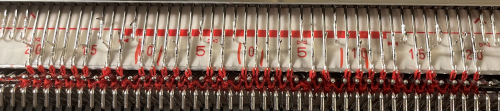
Nonautomated patterning may be created by leaving needles out of work on either bed. Adding racking changes the fabric even further.
If automatic patterning is used along with tuck or slip settings, the end needle selection on the patterning bed is canceled or the needles on either side of the ones out of work will knit the stitches rather than tucking or slipping them.
Many decisions are made in the process, beginning with a simple variation, A, followed by B with a small number of needles out of work on the top bed,
 which will create ladders between knit spaces as would happen in any single-bed knitting.
Switching to needles out of work on the ribber renders the main bed knitting with blocks of pattern and no floats, C.
The remaining pintucks are created with 6 rows of knitting on the top bed. C: racking sequence is by one position in either direction, followed by another pintuck with no racking before every sealing row
D: racking is by one position in each direction, before every sealing row
E: racking by one position X4 before each sealing row, then reversing the sequence in the opposite direction. The effect on the knit side is subtle. 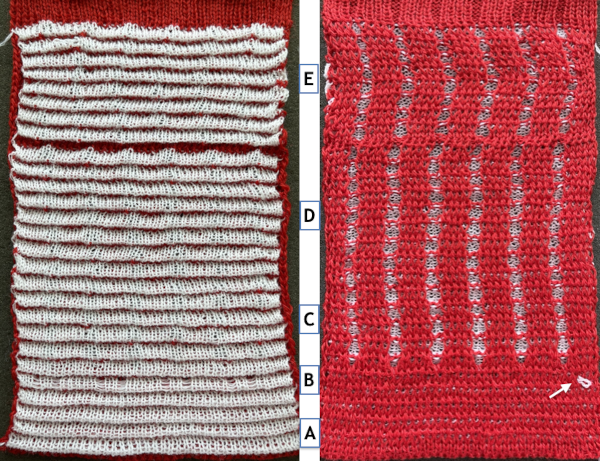 Additional swatch photos in each post
Ribber fabrics produced with 2 knit carriages selecting needles
racking 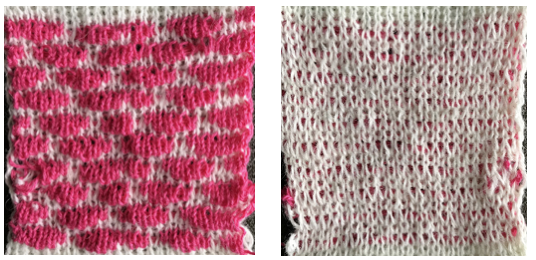 Adding lots of texture: Combining knit carriage needle selection with racking and needles out of work. The surface here is more dramatic, it is best to use yarns with memory such as wool, and to have a memo provided by the machine if possible or some other way to help track the racking sequence without errors in long projects.
 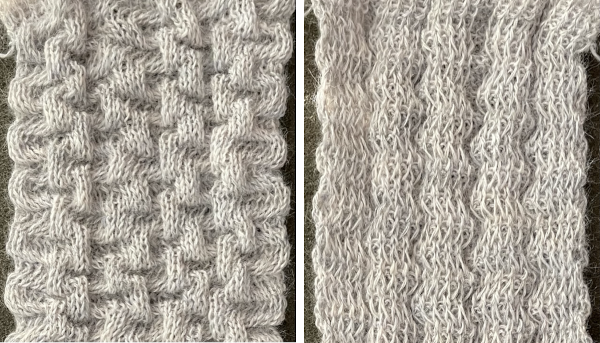 Racking by more positions as well as more knit rows on the top bed.
 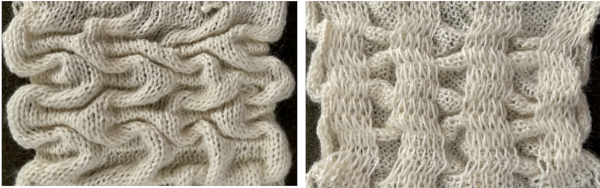 Racking: Passap/Brother 3 Combining knit carriage needle selection with racking
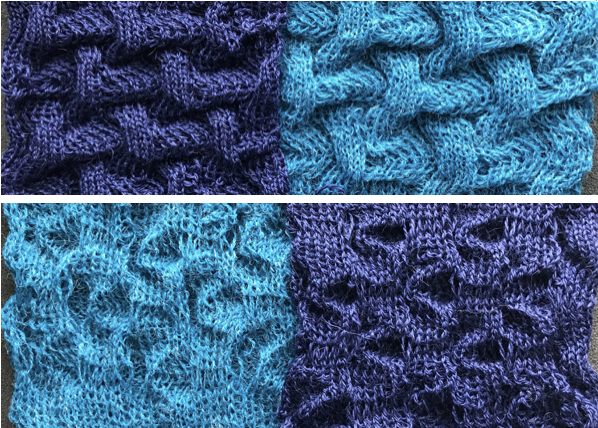 Adding complexity with transfers from one bed to the other to racking
 ![]() A Passap special begins with deciding on which bed to produce patterning, at first with manual selection on the back bed, then with a programmed repeat on the front bed, no racking
A Passap special begins with deciding on which bed to produce patterning, at first with manual selection on the back bed, then with a programmed repeat on the front bed, no racking 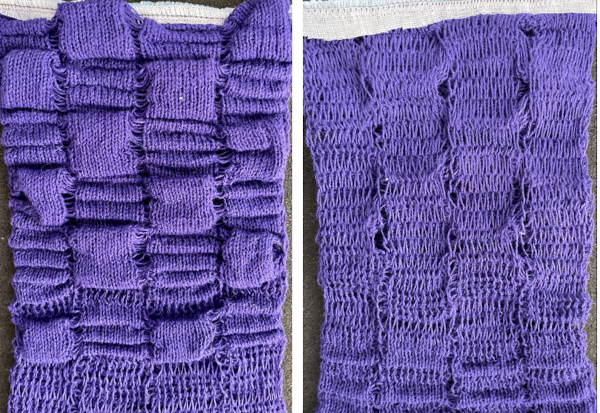 At the top of the swatch, to secure stitches, a strip of woven interfacing was ironed on, and a zig-zag stitch was added with a sewing machine before further trimming.
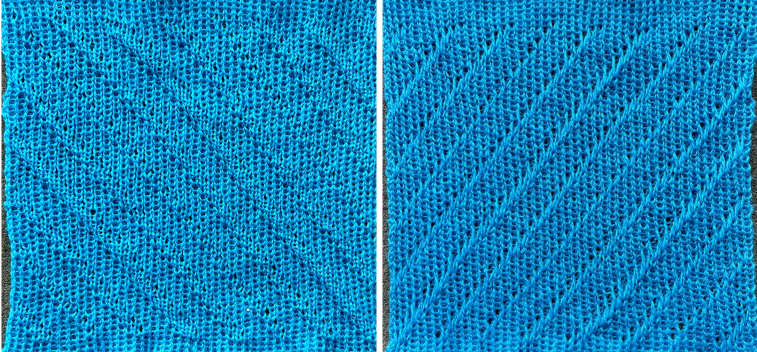
A subtle effect with diagonal pattern movement. More details in the post on diagonal patterning in machine knits. ![]()
 and one with evenly distributed, more pronounced folds
 ![]()