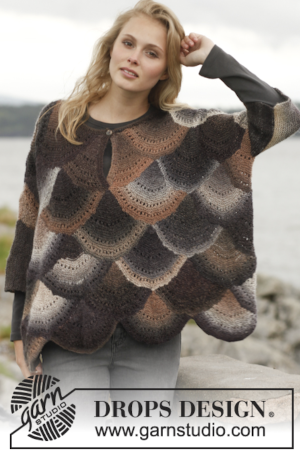
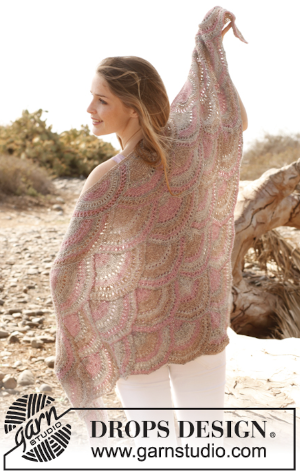
After a slow down in my blog posts for a variety of reasons I find myself playing catch up with the eternal list of knit fabrics that I wish to explore out of my own curiosity and the attempt to answer questions from knitters who contacted me directly via the blog or have asked them in the online forums in which I am a member.
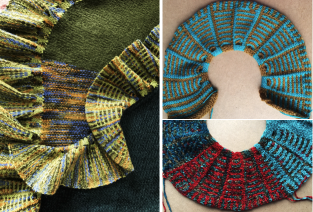
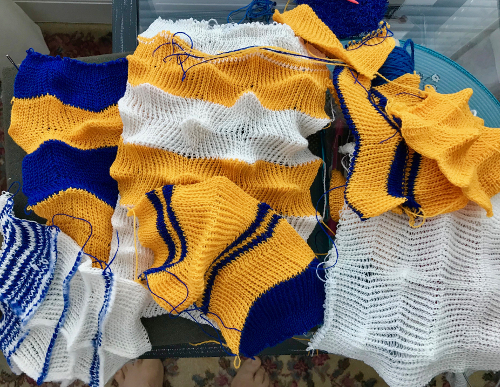
Stephen West is a prolific designer of colorful hand knits in a variety of techniques and complexity. This honey-striped scarf is an example. 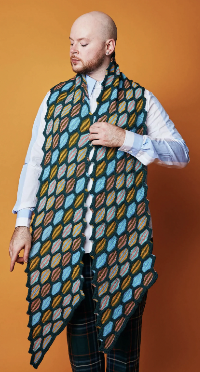 Slip-stitch patterning is a likely way of knitting a similar effect combined with
the use of the concept familiar to many when making bias cast-on rags.
A fixed number of stitches is cast on and positioned as far to one side of the machine as possible. They are then decreased on a fixed side and increased on the opposite one.
The strip moves across the needle bed, when far enough on the side opposite to the starting one, it is returned to the original needle bed position and the process is repeated until the desired length is reached.
If the moves to and from are performed on solid color rows matching needle selections may not be an issue. If the repeats in other cam settings are to match, then proper needle placement can be assisted by marking the metal bed, the factory-supplied needle tape, or a custom-printed one, and hand-selection for the first design row may be required and planned.
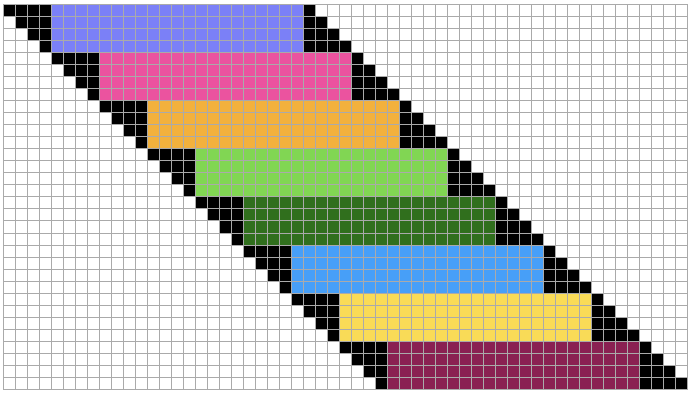
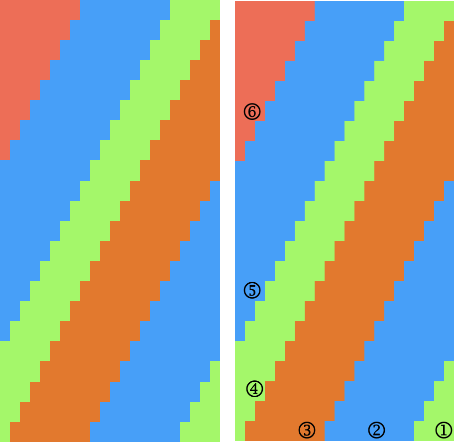
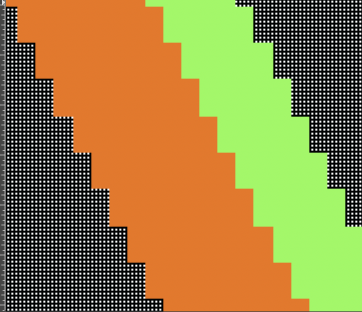
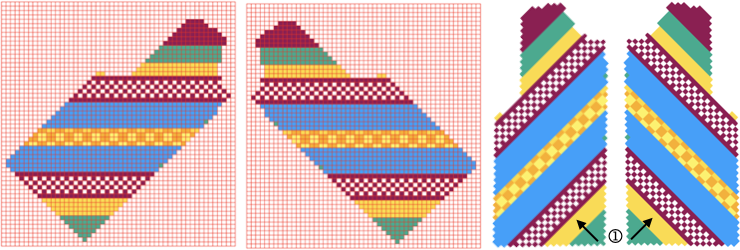
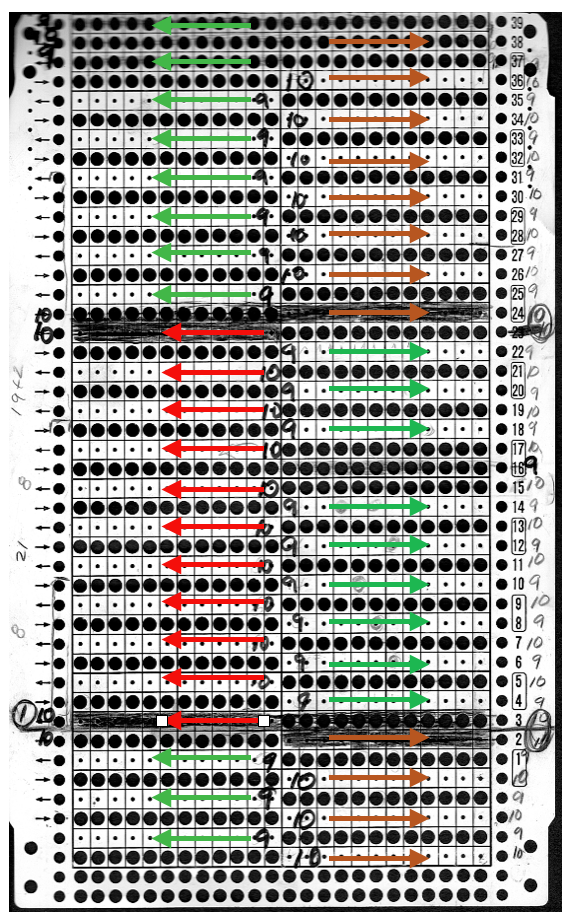
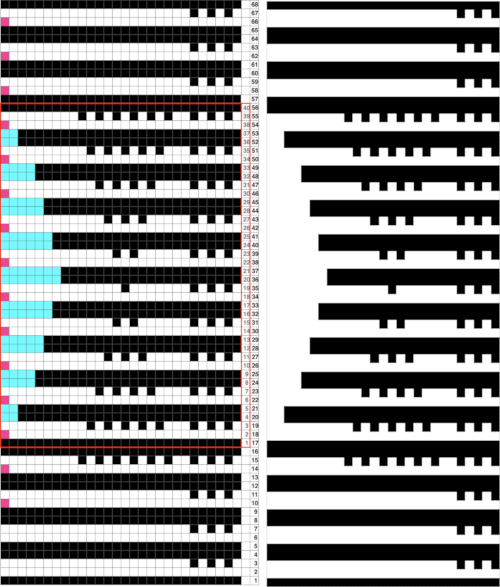
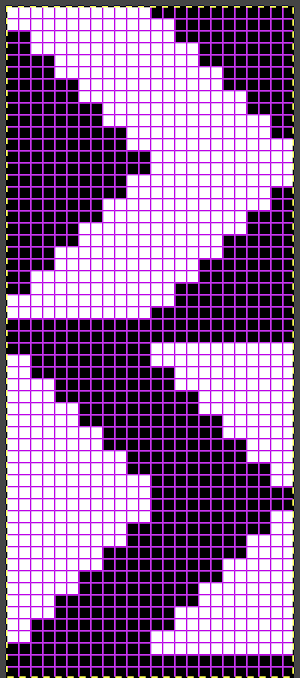
This chart attempts to visualize the proposed movement using colored stripes. Stitches are bound off on one side and cast-on on the other to maintain a fixed width with shaped edges. 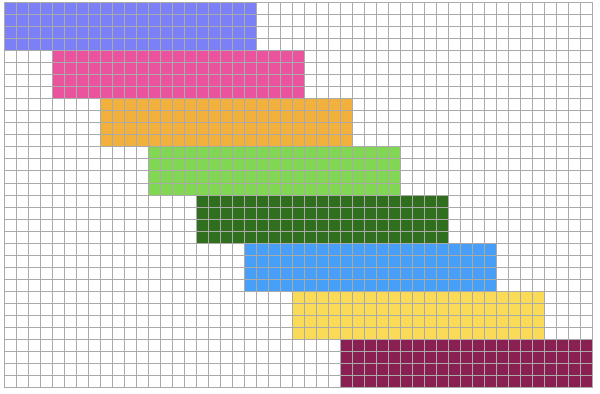 If the goal is to maintain straight bias edges, the design repeat would need to be rendered wider in order to compensate for the shifts on the needle bed in turn modifying increases and decreases at a different rate The black cells represent the adjusted stitch counts needed for each pattern band.
  When an item such as a scarf is worn, both options will appear as diagonals.
 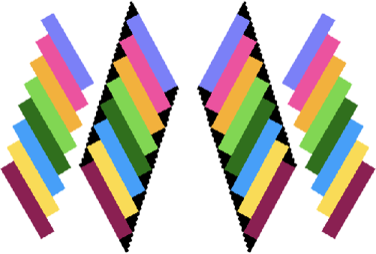 If any picture knitting is included and the direction of it matters when the piece is worn, appreciated particularly in representational fair isle, such accessories are best knit as 2 pieces knit from the bottom up, and grafted together at their center after the fact.
Increases and decreases are calculated based on the knit gauge carefully for garments. The approach to accessories may be more casual.
Stripes heights are varied to accommodate any specific design motifs or cam settings and in turn, are added to the base visualization charts.
Here an attempt at 45-degree striping is made by beginning on a 3-stitch tab. Increasing on the carriage side creates loops, while those opposite the carriage form knots.
Increases and decreases are indicated by arrows.
Increases are made on alternating sides, opposite the carriage, to produce matching edges.
The red cells in the chart represent the carriage side prior to each pass.
Table cells have been rendered rectangular in a 4 to 3 ratio, estimating the difference in gauge between stitches and rows.
Striping for an even number of rows matters if color changes are made on a fixed side ie if a color changer is in use. 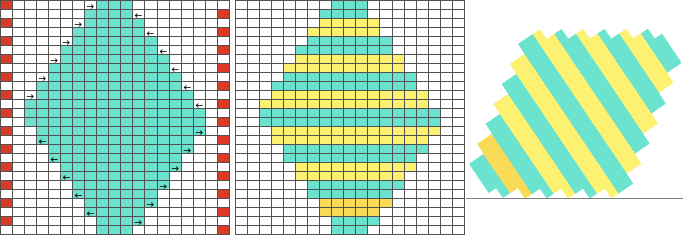 Yarn ends at color changes may be cut or the yarn can be carried up the side depending on preference and the number of rows involved. If carried up for long stretches, the alternate color yarn not in use may be secured by e wrapping it on the end needle periodically. Care needs to be taken that the float up the side is not so short as to have an effect on the swatch length and having an effort to remedy that will leave yarn ends too short to be secured.
The result is not going to produce a proper square, garter stitch is the only knit stitch that results in approximately true square shapes.
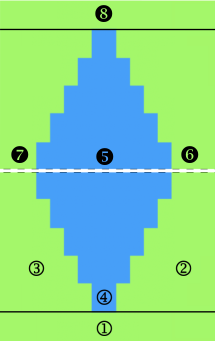
If the center of the machine is always used for swatches, keep an eye on the stitch formation. If loops are formed repeatedly on specific needles akin to tuck stitches or problem areas such as those in the center of this swatch are encountered, they can be caused by damaged needles or sticky latches that may result from frequent use. 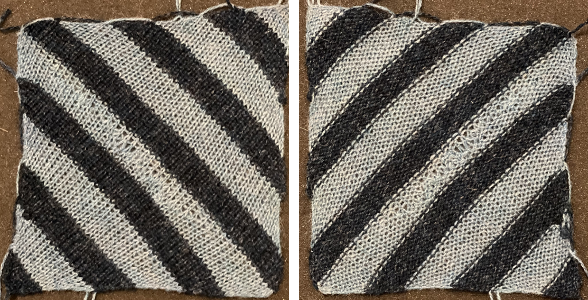 Diagonal lines in knits that maintain straight sides are also achieved using short row/holding intarsia techniques. Segments are planned in specific orders
  which can be varied to form added shapes.
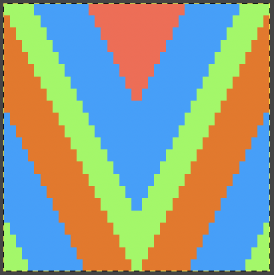
  Chevrons would be more easily created by knitting separate strips and seaming as you knit or after the fact.
  The addition of small-repeat fair isle patterns is also possible. Keep in mind when bringing needles back into work to reverse shaping, needle preselection for accurate patterning in Brother machines needs to be maintained by hand selection.
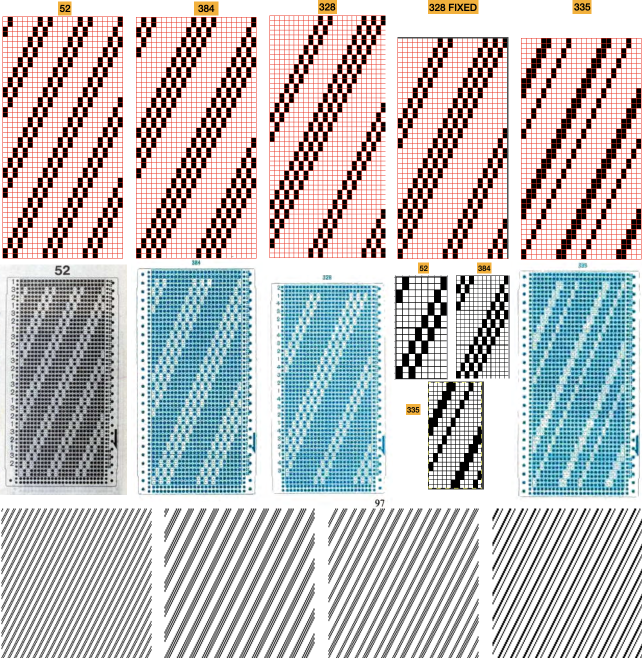
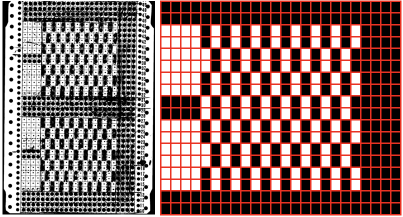
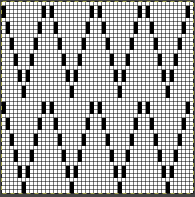
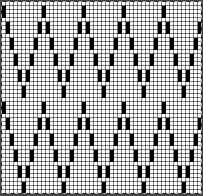
  Some of the published punchcard patterns can serve as a source for diagonal lines that may be tiled and programmed for the full design in addition to being used for their original intent. Numbers 52, 384, and 328 (published with error), are suitable for tuck, slip, and FI with moderately wide floats, while 335 would fail as a tuck stitch.
Tiling as in any patterning will reveal errors, such as here for 328. 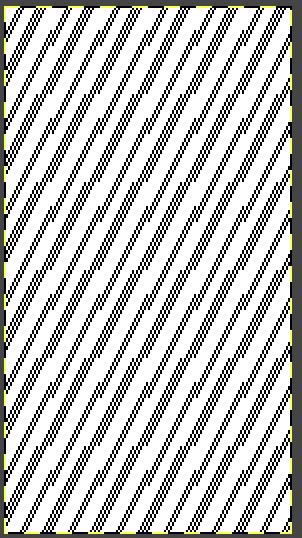 The latter was edited to a 22-stitch wide repeat, becoming suitable for only electronic machine models.
The charts with the red grid on the top row were rendered as tables in Numbers. Since their end use is different, they are the color-reversed version of the cards, whose screengrabs were in turn processed in Gimp to create knittable pngs.
The smallest repeats suitable for electronics are given in the center row of images, the amended 328 cannot be reduced in size. The last row illustrates tiling for all files as BW images that may be opened and amended to suit the size of the pieces planned.
 Files in png formats for the group: if pngs generated by me in BW indexed mode are downloaded and opened in editors such as Gimp, they will open in RGB mode. To make them suitable for download programs, convert them to indexed BW mode again and save the result. There should be no loss of data.
384, 12X24 12X48
12X48  144X144
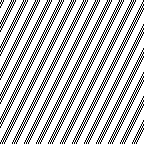 328, 22X44
176X176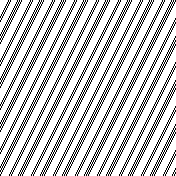
335, 12X24
24X48  144X144
 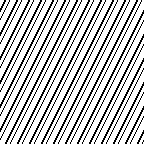 52, 8X16
24X48  192X192
 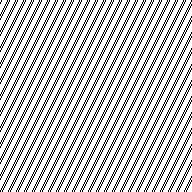 The black lines formed by units 2 rows in height can be followed or erased to establish short rows shaping a stitch at a time every two rows, in a view of at least 2X2 full repeats to check color placement as seen here.
 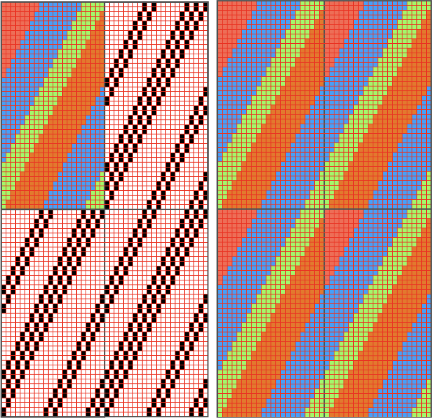 The method was used to isolate the previous ungridded color illustrations. Another instance of a published Toyota 901#11diagonal tuck card, in this case, incorporates a combination of 2 and 4-row tuck patterning. The repeat is 24X48
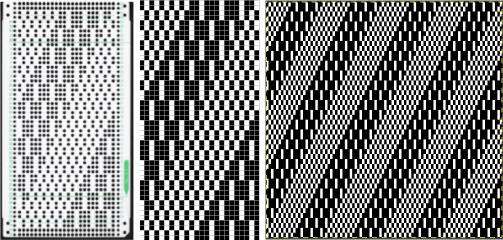 The previews may be used to replace color selections with those matching yarn colors used in the project to develop some idea as to how color shifts might affect the final piece.
EON diagonal patterning surrounding blocks containing other shapes may be maintained with slight variations in the size of the shapes used to fill those blocks 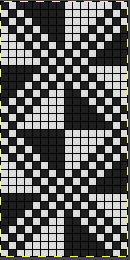

 References published for weaving can be a source of charts usable for this type of design.
The repeats are given in terms of width (shafts) and height (picks). For proper alignments, the provided charts need to be reproduced in full, or in DIY adaptations careful editing with erasures or additions can still maintain the proper tiling.
A page from an 1898 pub 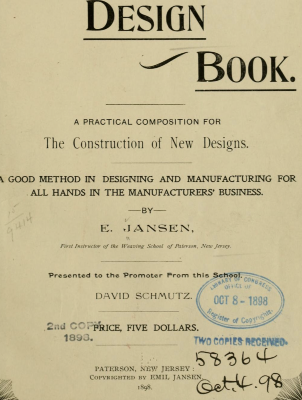
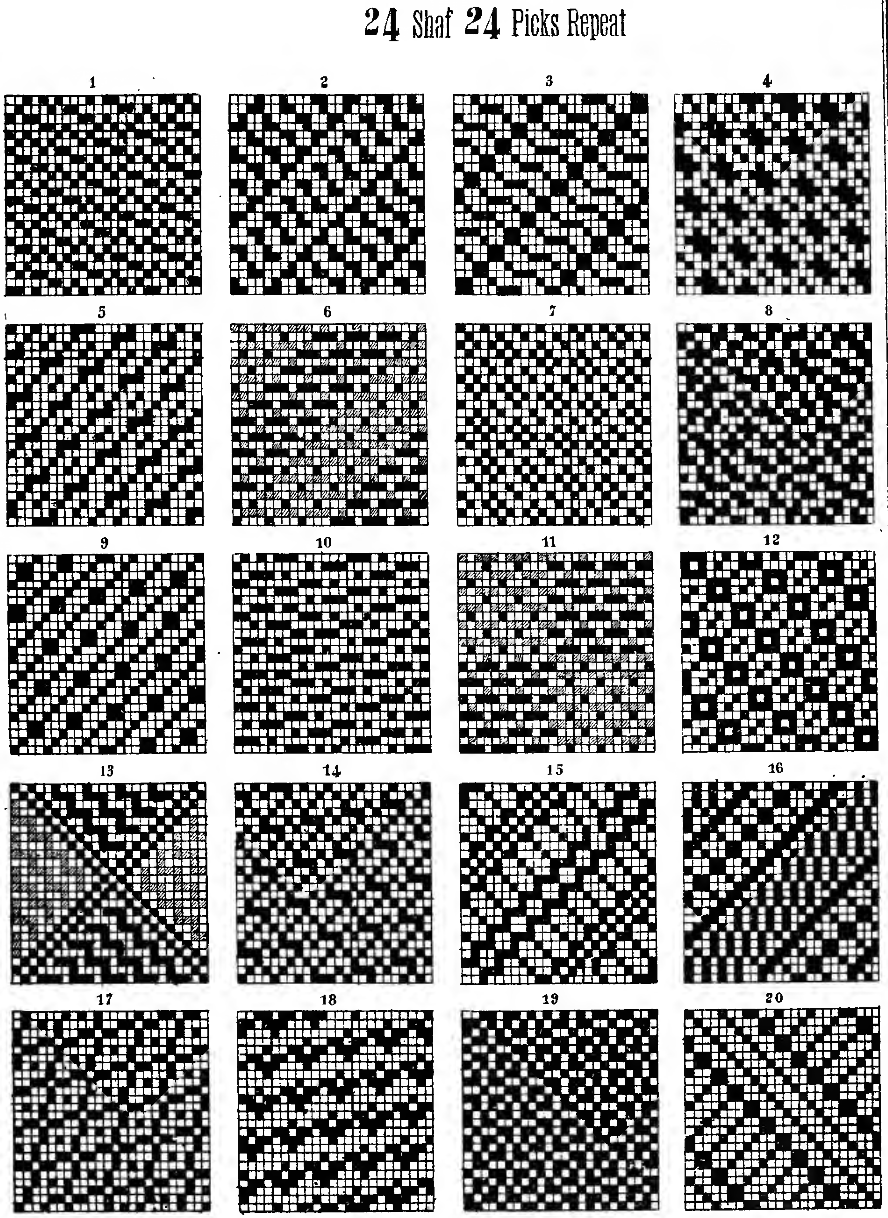 Playing with using #20 and #16 mirrored, isolating, erasing, or combining elements of each while keeping fixed some of the details that move diagonally to touch sides of the repeats, with the process illustrated in color.
Consider the width of the floats if planning for fair isle patterning.
Check the original for any errors, marked in the color chart in black. They are often not noticeable until the design is drawn in repeat. 
 The editable png for the center 24X24 design is tiled on the far right above. It is also suitable for punchcards
Handweaving drafts such as those found at handweaving. net provide endless inspiration for designs, including diagonals.
8X8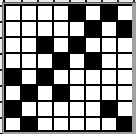

 12X12
12X12
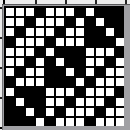
 drawn in repeat X7
 12X12
12X12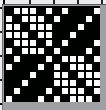
 drawn in repeat X7
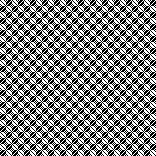 15X15
15X15

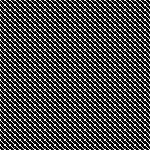 color reversed
 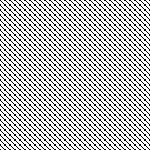 using color invert and quarter rotations to 30X30
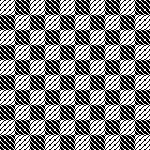 16X16
16X16

 16X16
16X16
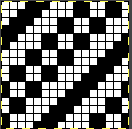

 16X24
16X24
 drawn in repeat to 160X168
  20X20
20X20
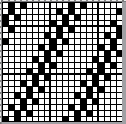

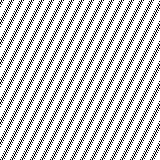 32X32 with rotated segments
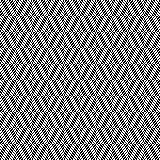 playing with rectangles, squares, and fill-ins24X24

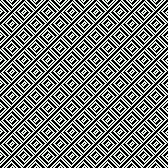 Chevrons can be developed from partial repeats. This is from Toyota 950#12, 24X20
 drawn in repeat to 144X140
  Whether in use for a punchcard model or an electronic one, the convention if the end goal is a tuck stitch fabric, is to color reverse the design
 It is possible to generate DIY designs easily using ArahPaint.
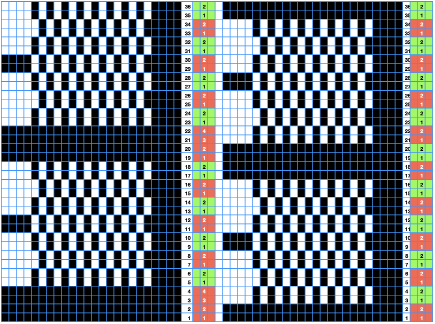
Taking diagonal patterning to the double bed for creating pintuck effects using the slip-stitch setting, this 24X48 repeat explores some of the potential spacings and the resulting ridges. 
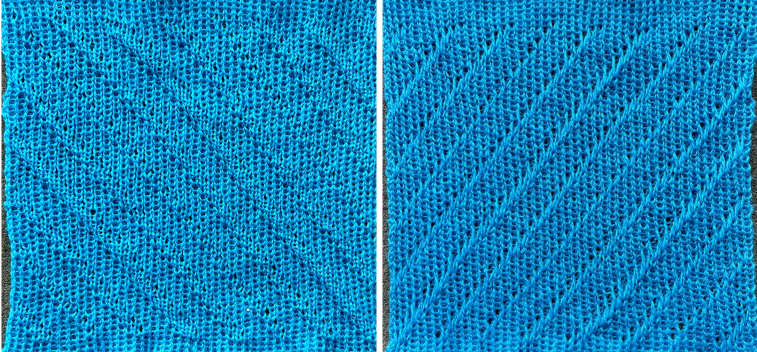 The next 2 repeats tested, both 24 stitches X 48 rows:
 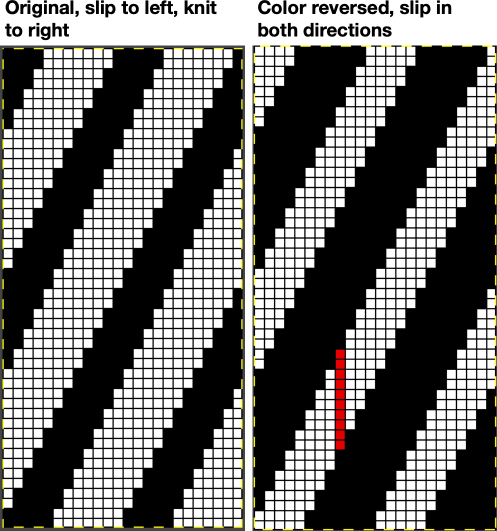 The red line is a reminder that the slipped stitches are being held for as many as 8 rows. It is best to use thin yarn that does not break easily and to watch for the knit stitches riding up.
Slipping in one direction produces a very subtle texture, 
 while the color-reversed design produces even-sized identifiable folds
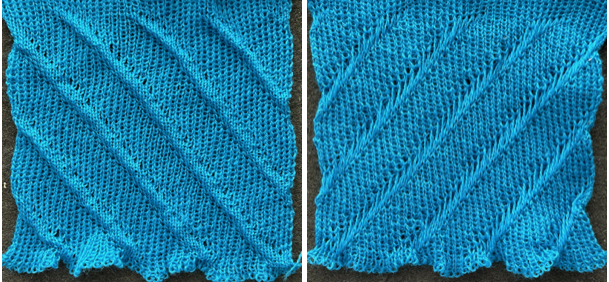 Adding lettering or small shapes and maintaining the diagonal can result in distortion of the motifs.
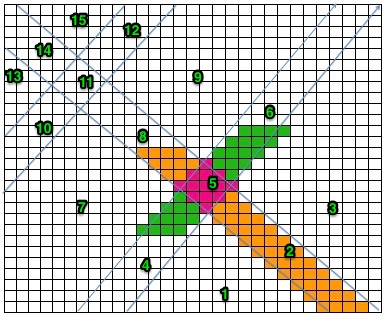
One option to add such motifs is to form the knit by beginning on 3 stitches as in this shared swatch and planning the stripes to heights and widths that accommodate adding designs or fonts. 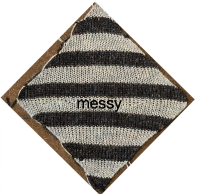 Short-row intarsia will also produce diagonal striping, from simple to complex as seen in this chart, with knitting sequence numbered for each segment.
  A limited number of rows may be knit in stocking stitch in areas following shapes not simply to travel to the opposite side and reverse shaping, but also to add small rolls or hems.
Another use might be to add small vertical motif details or patterning in their usual orientation.
The limit appears to be a maximum of 8 rows of alternative patterns, in order to keep the short-rowed areas from developing into distorted edges, which may be variable depending on the yarn and pattern used.
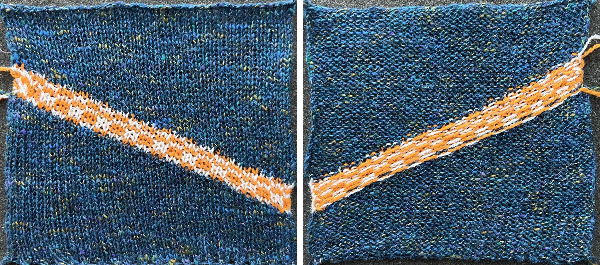
This first swatch was knit using progressively thinner yarns, wool, wool rayon, and a 2/24 acrylic in the FI segment. FI is a slip stitch that narrows the knit. The dark acrylic color stitch definition here gets lost. The band is seen pulling in the short-row segments on both sides. The shaping in both the top and bottom segments is by 2 stitches at a time. 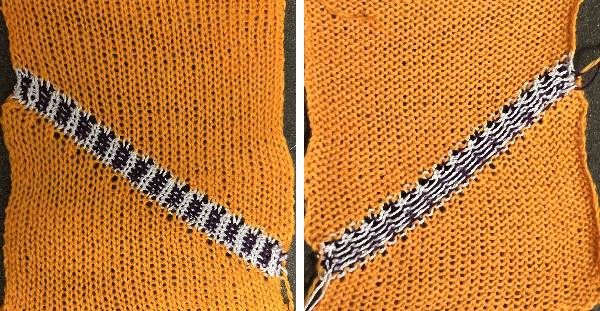 The result in different yarns of equal thickness, with the FI band knit at a tension one full number looser than the stocking stitch areas, with the top and bottom solid color segments now shaped 3 stitches at a time.
  There is a trick when making A-line skirts to change the triangles that would poke out normally at the bottom if shaping were to begin immediately used as a design feature in many runway knits recently. If between an inch or 2 are actually knit up straight before shaping starts, the problem is eliminated. Depending on the design this may be a solution or it may read as a patterning error.
There are some conventions and “rules” for short-row techniques, but they do not always apply.
Keeping good notes helps to make successful experiments reproducible.
Two more tries began to experiment with working on the first and last groups in the holding techniques on a different number of stitches than the remaining shapes, noting differences. In the first an all-knit row is made across the short-row eyelets, reducing the planned FI band from 6 rows to 5. A rough spot in maintaining even stitches on one side is noticeable. 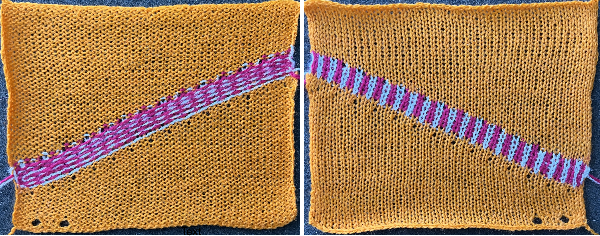 Progress: holding happened at the start of the bottom wedge, the FI was knit at 2 tension numbers looser than the stocking stitch, for 6 rows.
 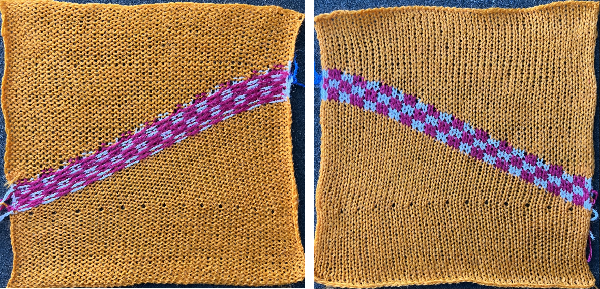 The goal in the short row shaping for the triangles is to maintain vertical edges that appear as straight as possible to the eye. One need not work on large swatches, small ones can provide clues as to differences resulting from variations in the starting side of the short-row shapings.
 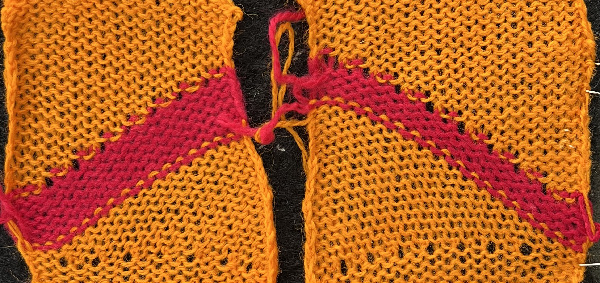 Studying the results can lead to many variations. There are student theses and careers based on exploring limited techniques to the max.
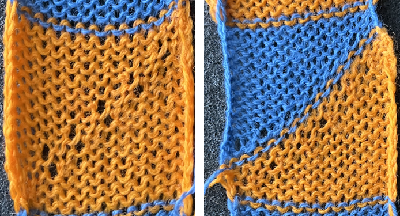
Building a theoretical true square or other predictable shapes is subject to the yarn and tension used. Beginning with a small sample, this shows the order of knitting 2 triangular shapes with the carriage beginning to knit each shape from alternate sides. In this case, 2 stitches are to be brought in and out of holding at a time. 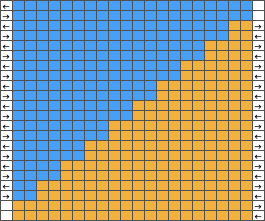 Because each color knits for 2 rows, small slits happen in the fabric resulting in eyelets. They may be used as design features, or attempts can be made to reduce their size. One way to do so is to have plain knit rows between holding selections to keep the small slits from intersecting and becoming double height. On the left swatch, one yellow row was knit to the left before reverse shaping in the same color. In the swatch on the right, in addition, 2 rows were knit in the blue prior to reverse shaping.
  Reviewing the concept and developing a chart for larger swatches: the cyan color cells represent stitches in the hold position and the white cells stitches that will be knit.
At the top of the first wedge, most needles will be in the hold position, return them all to the B position manually before knitting the next row.
With the carriage on either side, set it for KCI with the cam buttons to slip for a free pass to the opposite side, the first FI pattern row will pre-select. Holding need not be canceled, since no needles are brought far enough out for the technique.
Cancel the slip setting, change the cam setting for FI knitting, place the pairs of colors in their corresponding feeders, and knit 6-8 rows of pattern.
Bring all needles out to hold except for the first desired group, if the holding lever has been canceled, reset it and commence reverse shaping. 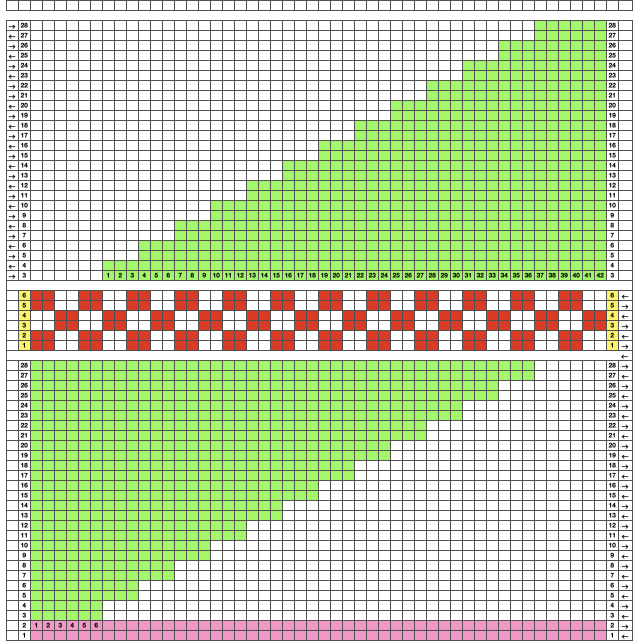 Merrily knitting along and you forget to loosen the tension for the fair isle stripe:
 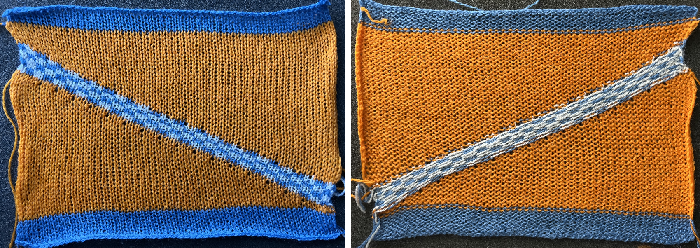 And what if the FI were to actually follow diagonal colored stripes? The approach is the same. I am right-handed, my default is often to begin on the right. Left-handed knitters can mirror charts as needed to make them easier to follow.
The first triangle is shaped from right toward left, subsequent ones begin on the left, then to wrap or not wrap becomes the question. 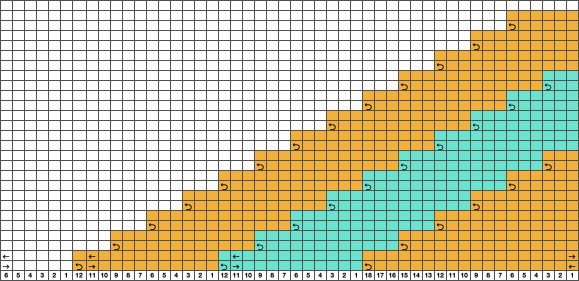 Review of wrapping, which does not disturb the stitch on or the position of the wrapped needle:
  I obstinately use random yarns at hand, sometimes too thin for the task at hand, true here. Any type of intarsia, of which holding is one, will be accompanied by lots of yarn ends that will require weaving in. Some of the stitches were wrapped here, some not, and maybe the eyelets could be considered a pleasing design feature. The 8 rows of FI, knit at 2 full tension numbers higher than that used for stocking stitch, minimizes the size of the eyelets all on their own on both sides of its stripe. Errors in bringing an added group or not into work may not always be immediately visible, frogging this type of knitting can be painful.
I would not use the last 6 stitch modification in any future swatches. 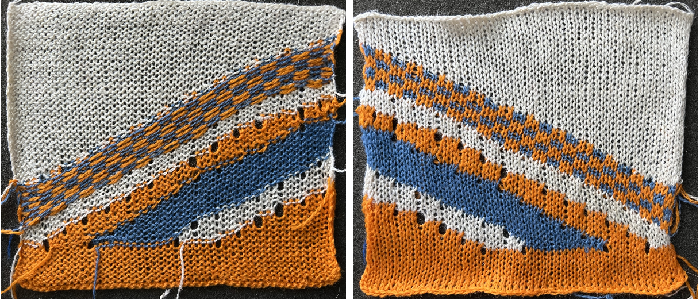 Elizabeth Zimmermann published many patterns for hand knitting utilizing garter stitch and striped diagonal wedges for garment shaping.
Multiple colors per row patterning may be maintained by beginning planning with diagonal straight lines, seen here in a 32X32 repeat.  Opened in img2track
  The design will be elongated, and 256 passes are required to finish a single repeat
  Each color may be edited to suit. Quick visualizations of a few of the possible repeat arrangements using the file as is
  Avoiding lots of extra knit rows by eliminating one of the colors.

 The larger designs may need to be knit in sections depending on the available memory in the knitting machine model being used.
Machine-knit stitches do not form as close to square ones found in garter stitches. Rendering the full-scale garment on a knit leader would make knitting to gauge while avoiding tons of math calculations possible.
DIY is a bit like assembling paper cut-outs that are required to fit together, first attempts at planning do not always succeed. One may begin at different parts of the piece and seam two halves together if necessary in order to keep matching stitch formations in both directions. Stripes may be added to form secondary intersecting shapes. 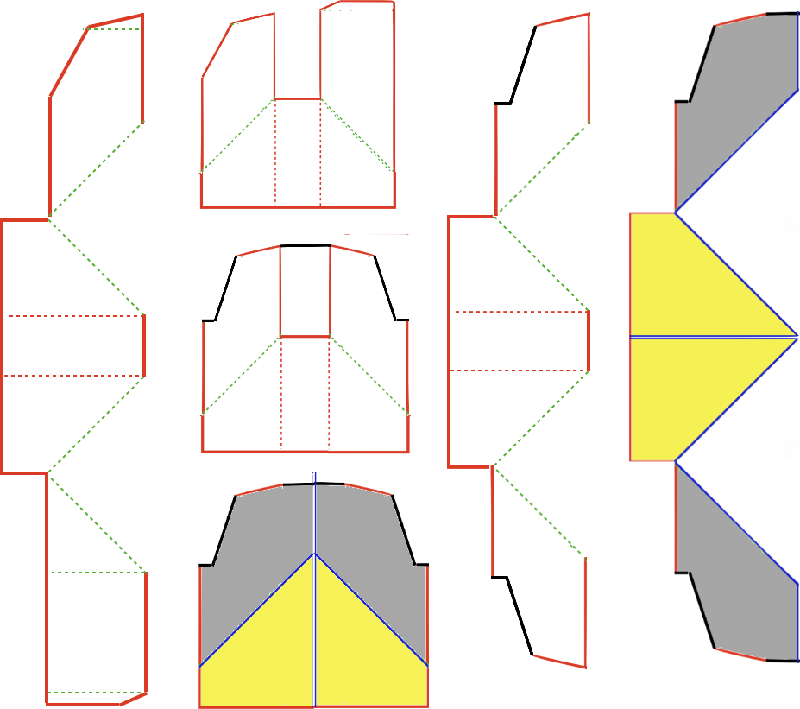 On the left is a simple one-piece vest concept with no miters in the back panel, which may be knit from the bottom up or as two pieces with a center seam.
The bolero style is repeated in 2 separate pieces with mirror shaping in the second and would be joined at the center back.
The knit gauge is easier to maintain in short or small wearables. 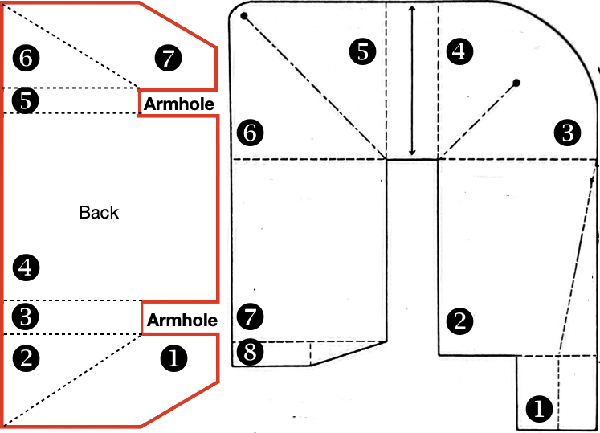 Many garments may be made following the concepts for creating “pies”.
Decades ago batwing sweaters based on a sideways circular knit concept were standard presentations at knit seminars. Short-row diagonal graduated wedges were followed by varying amounts of all knit rows.
This idea for a short sleeve garment is from a Japanese magazine. In creating such illustrations because of the scale of the publication, the aspect ratio is distorted. In the final garment, the bottom circumference can in fact be far narrower than it might appear to the eye in the sketch and may be gathered or left released depending on design goals. The neckline diameter at the end of the project, after joining one shoulder, is gathered with evenly distributed decreases to the desired measurement prior to knitting the collar. 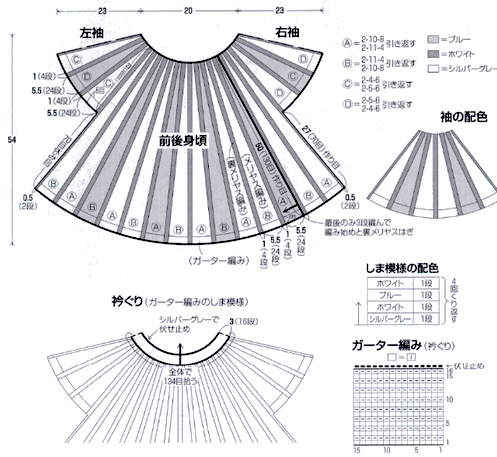 A way to form a long sleeve item, using binding off and casting on stitches in addition to shaped wedges followed by all knit rows.
  Knitting a garment on the bias at 45 degrees will produce a knit fabric that drapes differently.
Horizontal patterning can turn into diagonals and chevrons, and fancy decreases may be used in the center shaping of the garment.
Pre-computer programs and knitleaders, an easy way to sort out shaping for garments, was to begin by drawing on large sheets of graph paper. An all-square grid is fine.
Calculate a 10 cm/4 inch knitting gauge to the second decimal point before any rounding off. For example, if the gauge works out to be 5.728, and the measurement needed is 19.5 inches, the multiplied value result is 111.696, which can be rounded off to a 112-row line on the graph paper.
Working in cm can actually lead to easier calculations and is required when using a charting device.
Each cell in the graph paper grid equals one stitch and one row.
For knitting on the straight grain, based on gauge, draw series dots placing them on the beginning and the ending pots for each measurement, and connect them with straight lines.
Curves such as those necessary for necklines may be composed of short straight-line segments.
When knitting from the bottom up, continue with a colored pencil, filling in squares as they jog in or out, maintaining the new outline as close to the first as possible.
For the bias knit, whether on graph paper, the computer, or a charting device, begin by drawing a 45-degree line.
Rotate and trace the unmodified original straight-line image in place, follow the lines, and mark in and out jogs once more in color for contrast.
This is a very small chart so outline jogs in far larger pieces cannot be reflected. They would produce edges not as straight as in standard knitting, which will need to be considered when joining finished pieces.
As the piece is rotated, a wider grid base is required. Consider that the motif images as they are worked on the purl side will be mirrored horizontally on the knit side, a particular consideration if any text is introduced. 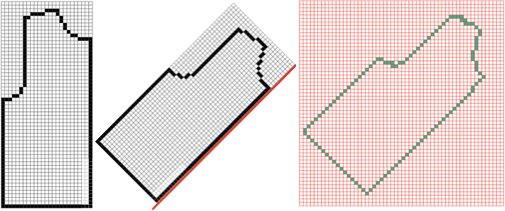
 Comparing theoretical purl as opposed to knit views on the left, two purl views on the right.
 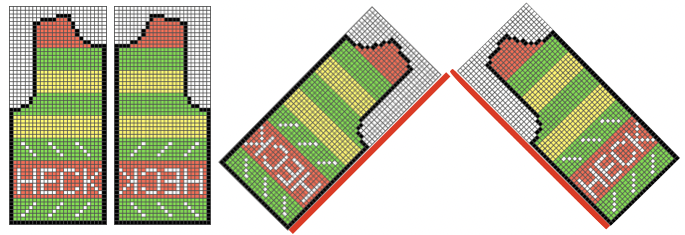 Fonts in various stitch and row counts are useful when planning knit text.
The point at which the text or pattern is introduced needs to have enough stitches in work on the machine to contain the intended words, ie for the above, a minimum ground, independent of shaping, would need to contain more than 9 rows if solid color stripes are to be added above and below it, and 26 stitches in width in this case.
A proof of concept swatch with arbitrary shaping on every other row illustrates the need for shaping based on a calculated gauge if a square is indeed the aim.
I knit on a 930 where mirroring is automated for programmed designs, so the text was programmed as drawn.
Sometimes less information is more. It became evident very soon that the placement of the text on the left was wrong if the aim was to have it centered in the final shape, and that more rows were needed at the top of the design.
On the right, the purl side as it faces the knitter is shown, with black pixels used to represent increases and decreases. The center red line separates the needle placements on either side of 0, and the text is shown in the default mirroring. 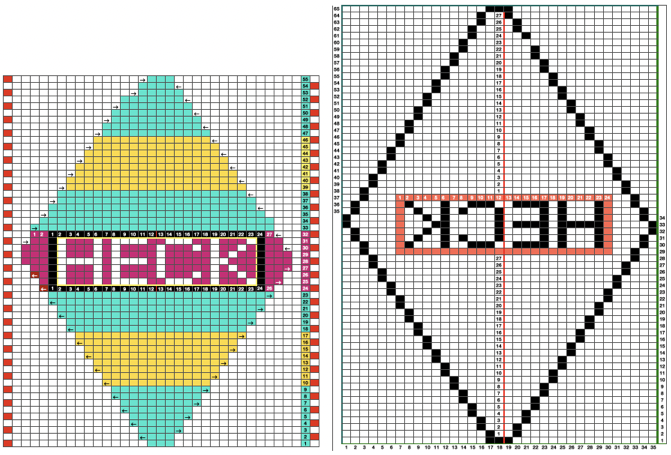 The respective swatches after their rotation preview one of the potential results
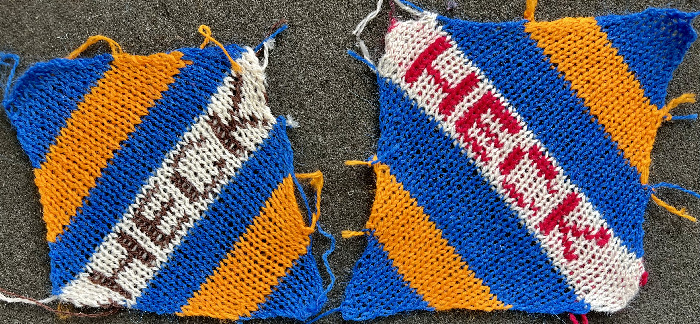
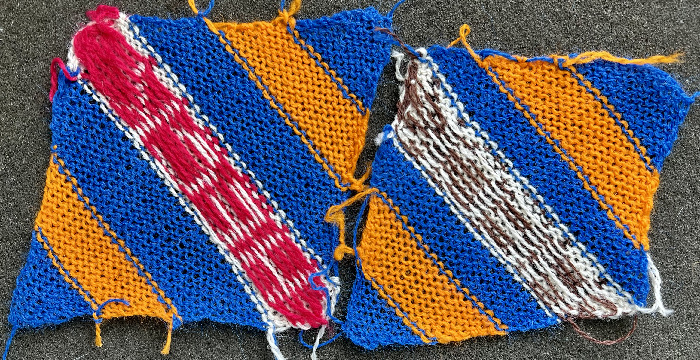 A true diagonal repeat may be planned for motif patterning knit from the bottom up. The drawback is that for executing a fair isle using more than 2 colors or with multiple color changes, partially illustrated on the far right, the 32X32 repeat would need to be rotated and knit as above.

From the Brother machine knitting techniques book, a suggestion for dividing a sweater front into diagonal halves created by using the holding technique 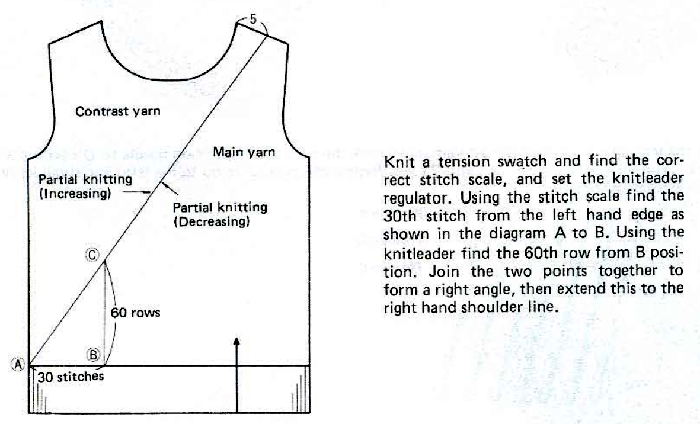
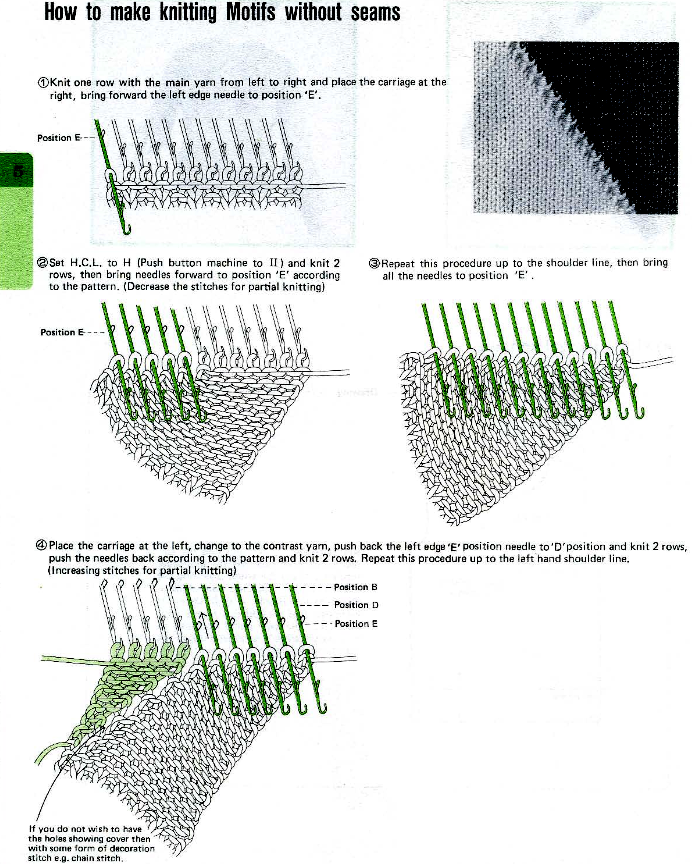
The idea of chaining the eyelet areas to reduce the size of the slits is an interesting one that up to now I have not tested.
Diagonal pleats
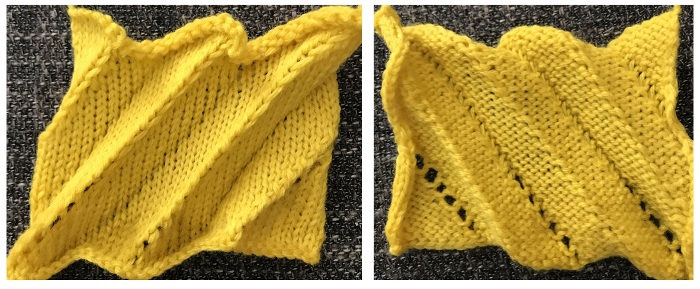
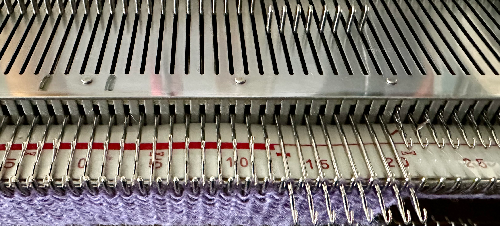 The direction of movement for the knit carriage is illustrated by arrows in the charts, which serve as guides in planning sequences.

 The second repeat, 40X 226 pixels.
  A PDF for larger views of both files pdf
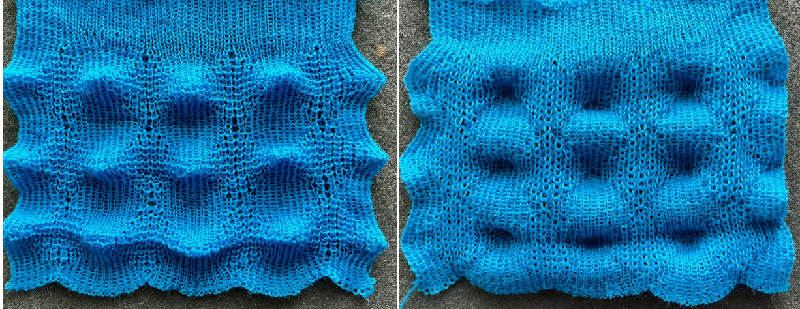
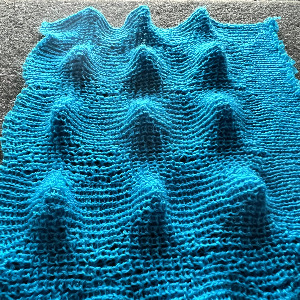
 The same swatch was photographed 48 hours later, in a relaxed state.
 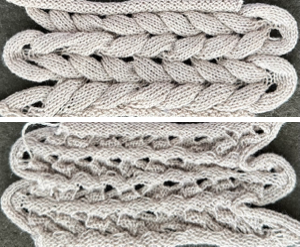 A 2/10 wool knit on the same number of stitches produced a firmer and more clearly 3D effect which remains unaltered with time.
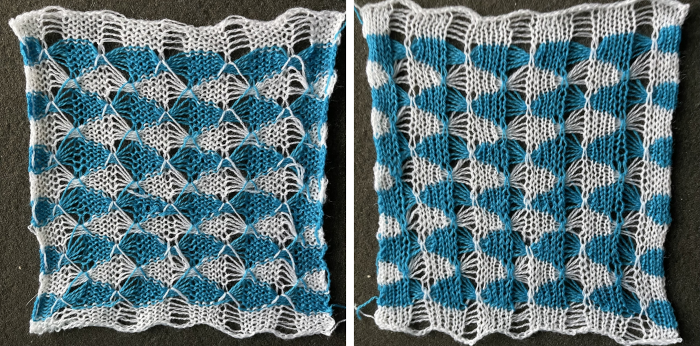
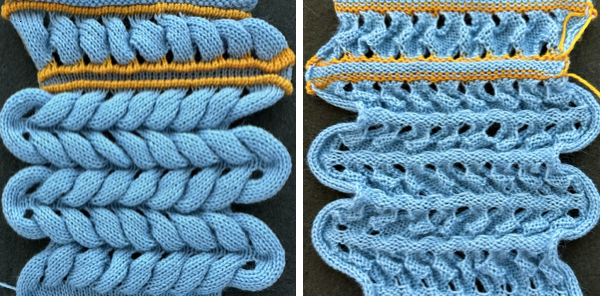 Possibilities with hand selection of needles: some samples from Adding fair isle patterning to short row patterns creating eyelets.
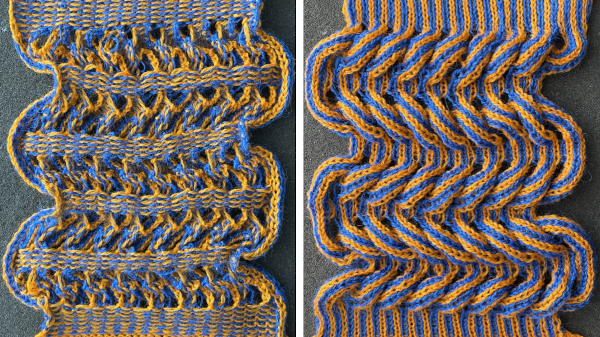
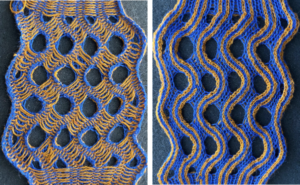
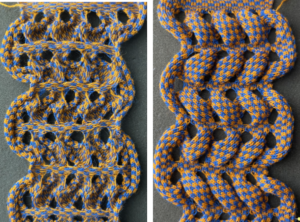
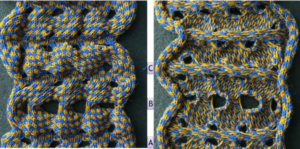 “Wisteria” meets hems
 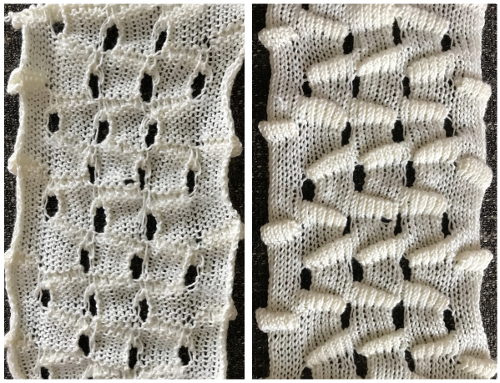 “Wisteria” cousin 2, also called fern leaf, hand technique
 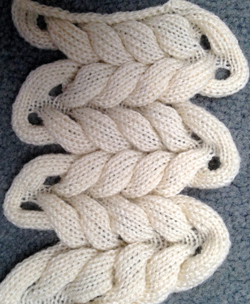 “Wisteria” cousin revisited (“holding” using slip stitch), the first programmed repeat, drawn on mylar. The 910 knit the image as drawn on the purl side, with no mirroring necessary

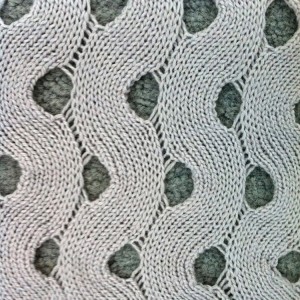 Horizontal “cable”
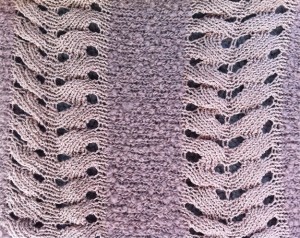


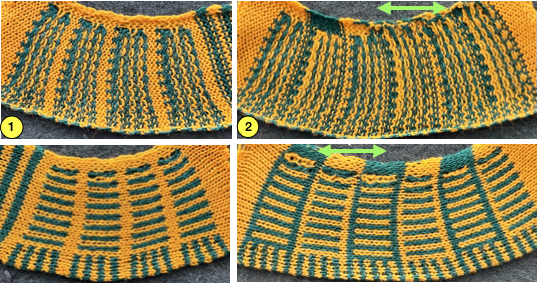
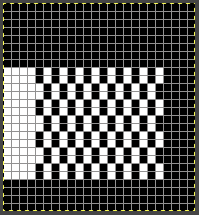
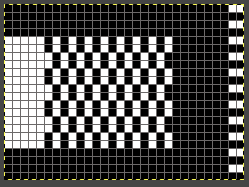
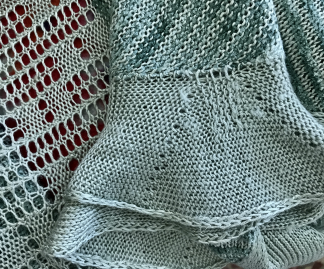
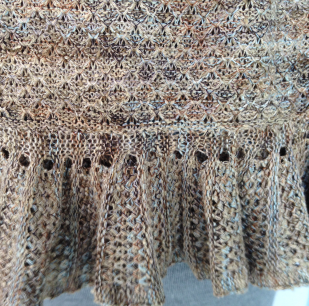


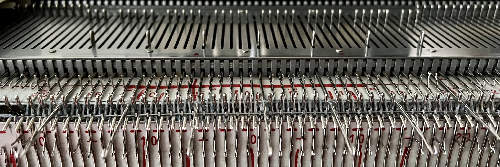
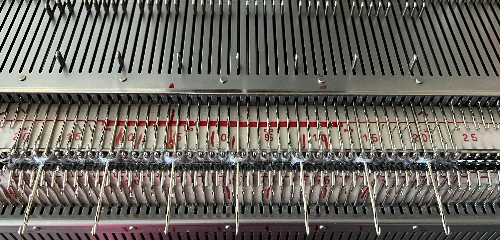
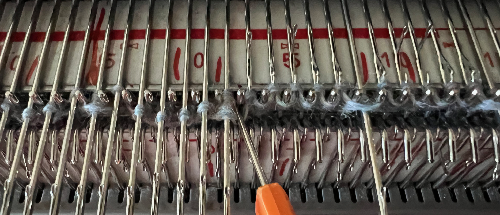
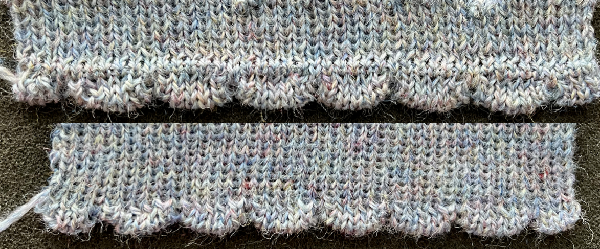
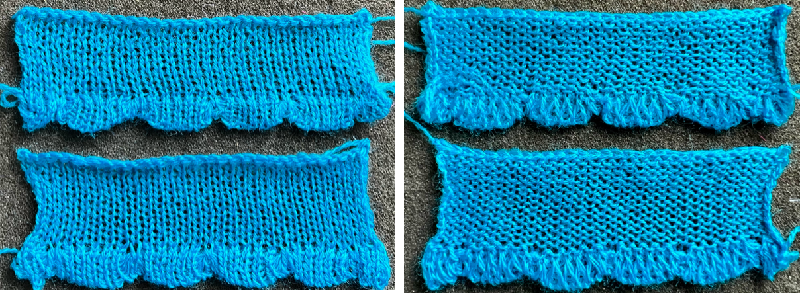
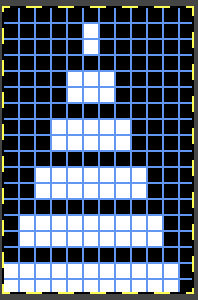
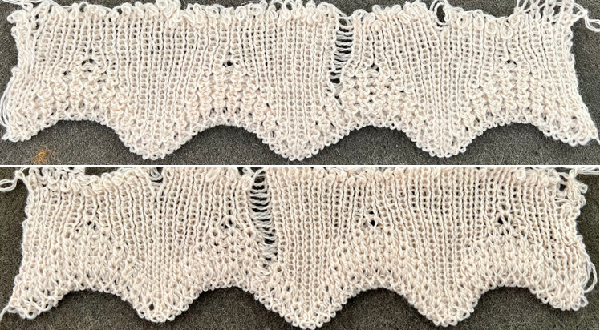
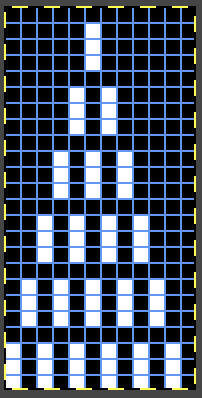
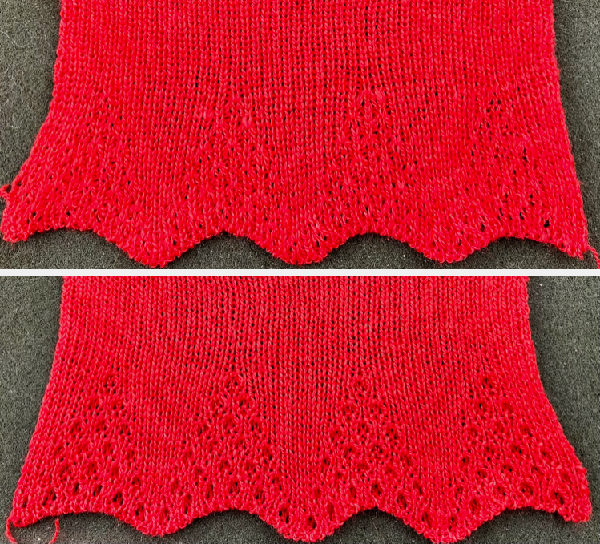
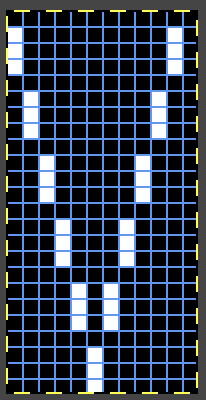
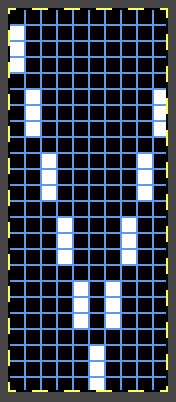
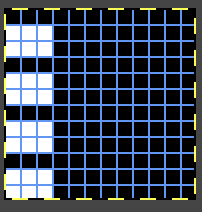
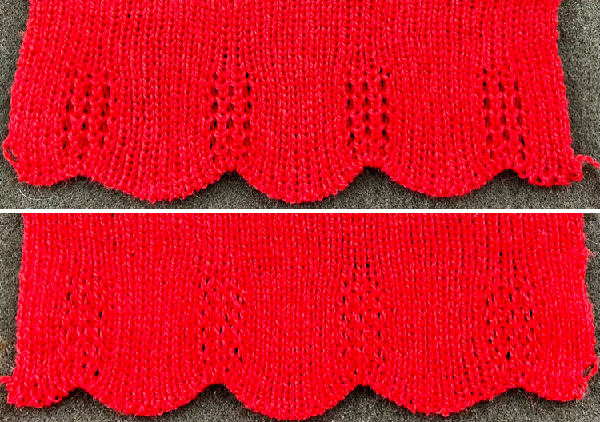
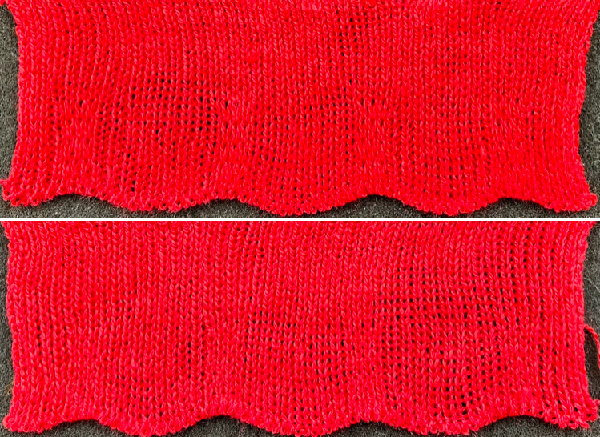


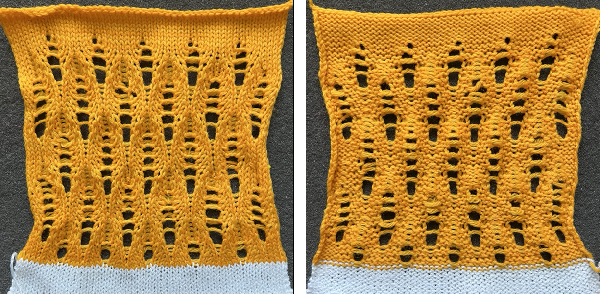
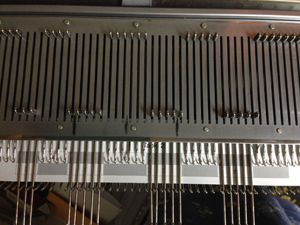
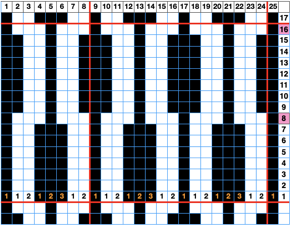
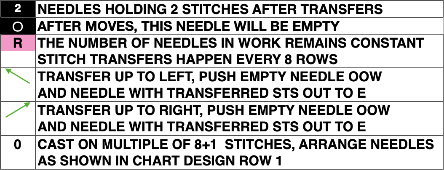
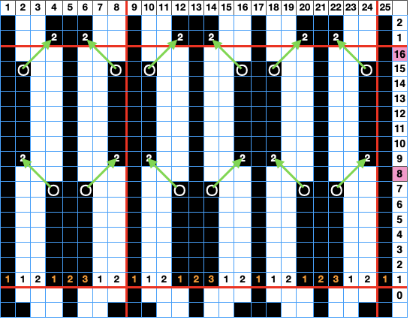
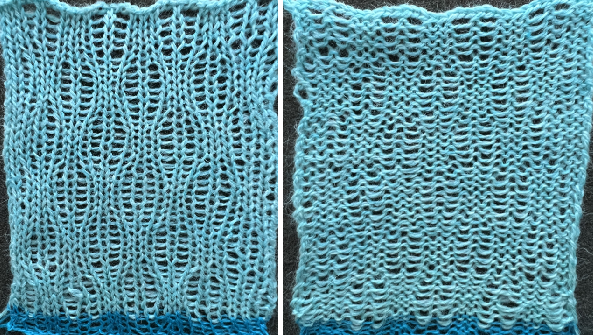
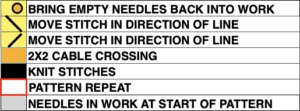
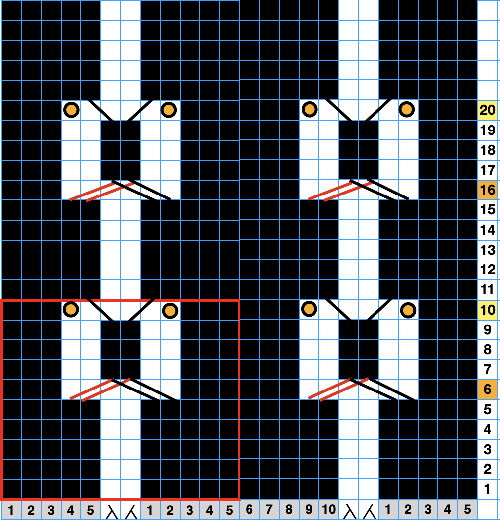
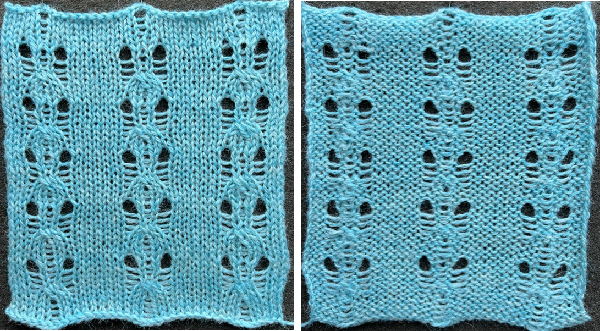
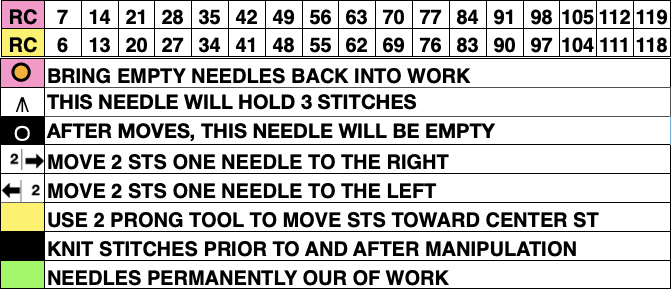
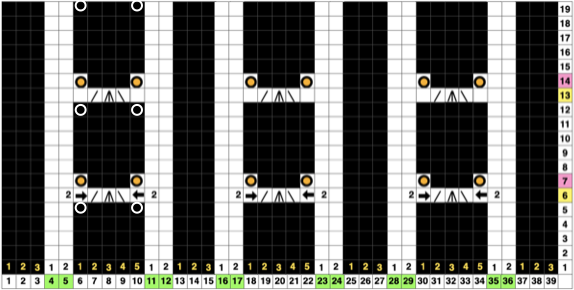
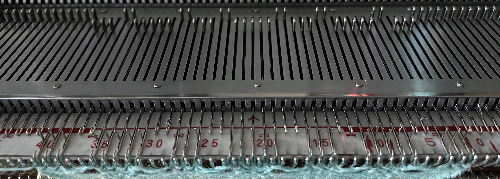
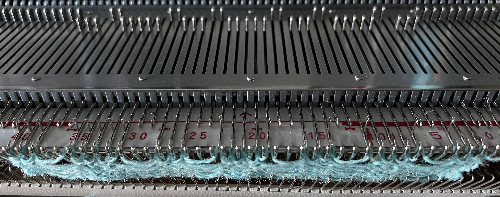

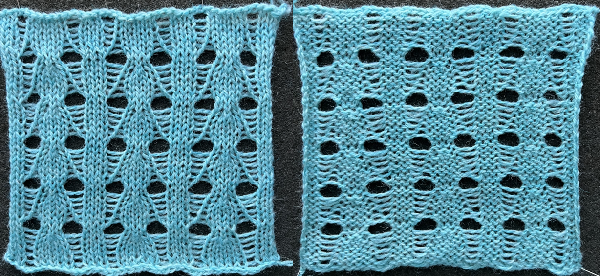
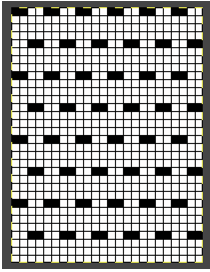
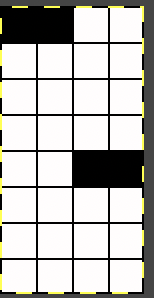

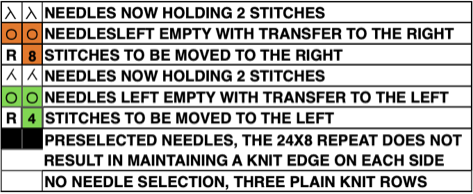
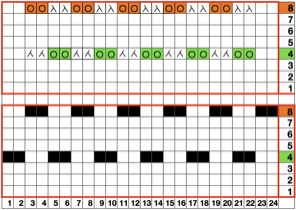


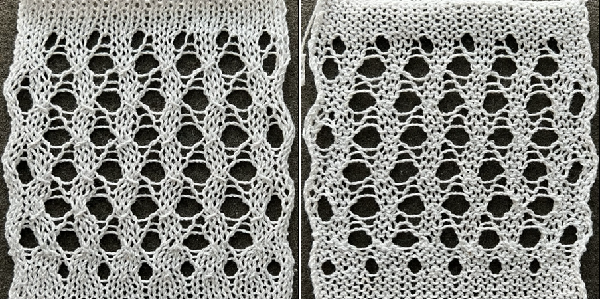

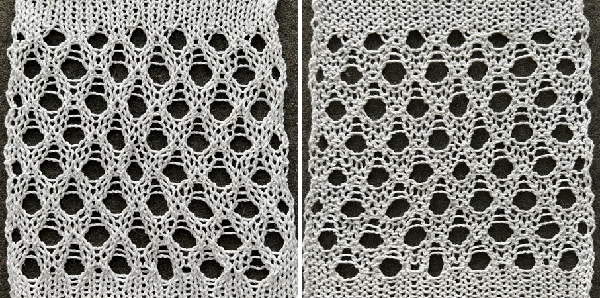

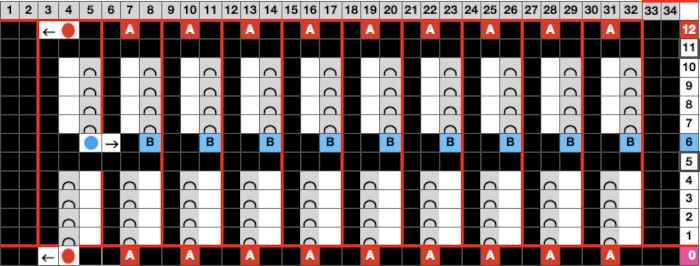
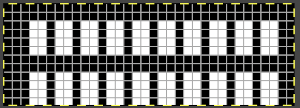
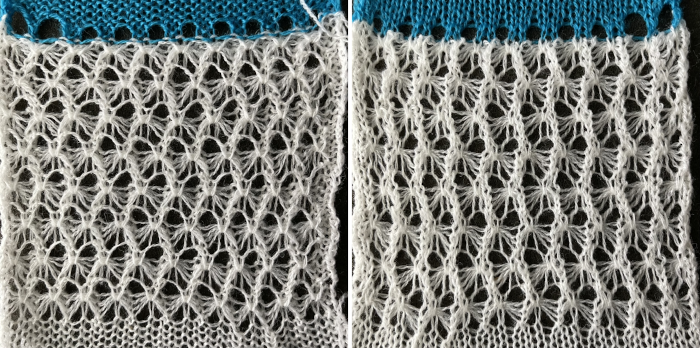

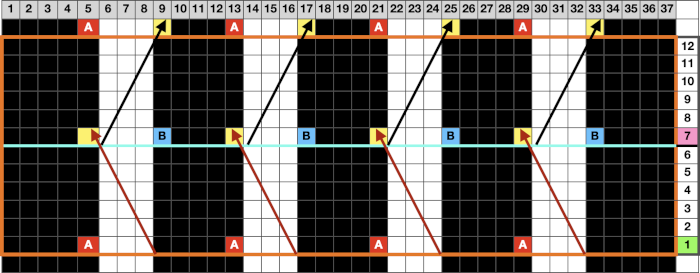
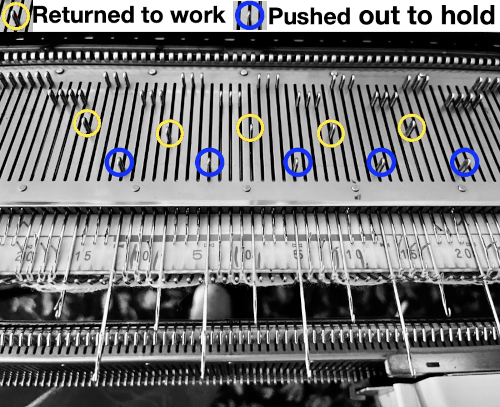
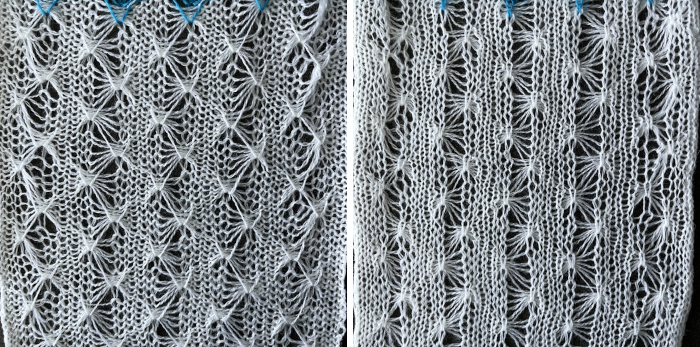

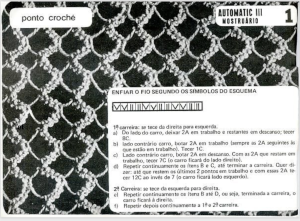
 Chain cast on 2 in work, 2 out of work, end with 2 needles in work
 Number 11 is a close relative but worked on every other needle
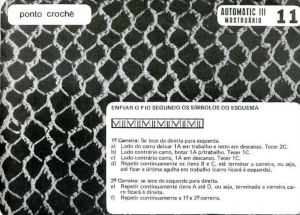
 The rayon used in the previous sample, and a 2/8 wool, were less successful than a 2/11 acrylic in knitting the swatch. The stitches need to be as tight as possible while also needing to be able to knit off properly
 The same directions apply in this instance, the first sample worked with no needles out of work

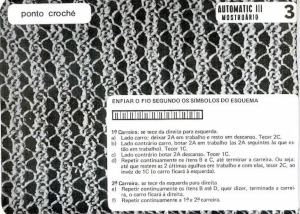
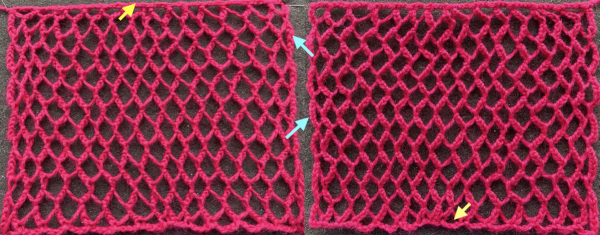 This knit begins on every needle
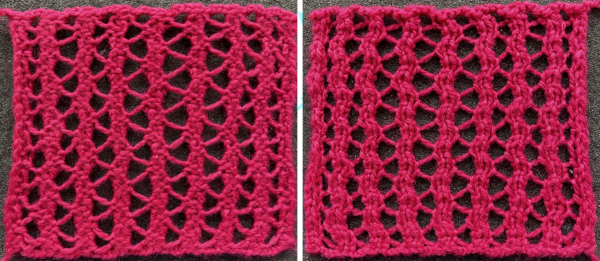 Eliminating those ladders or floats, here eyelets are created where stitches are held for two rows.
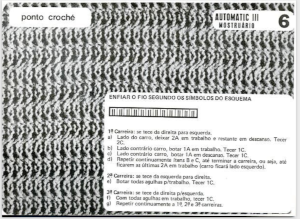
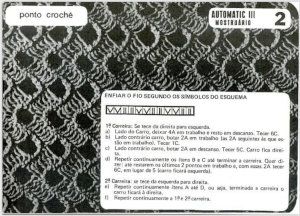
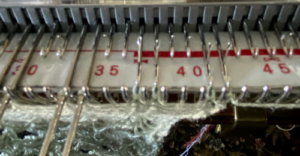
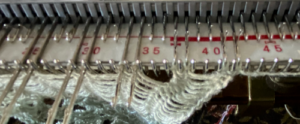
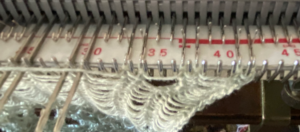 push first 2 of needles out to hold


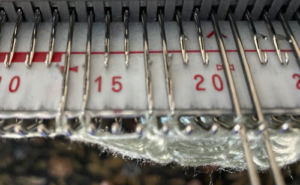 COL knit 10 rows, bring the third pair of needles into work, knit one row
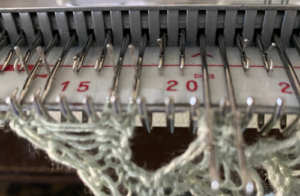
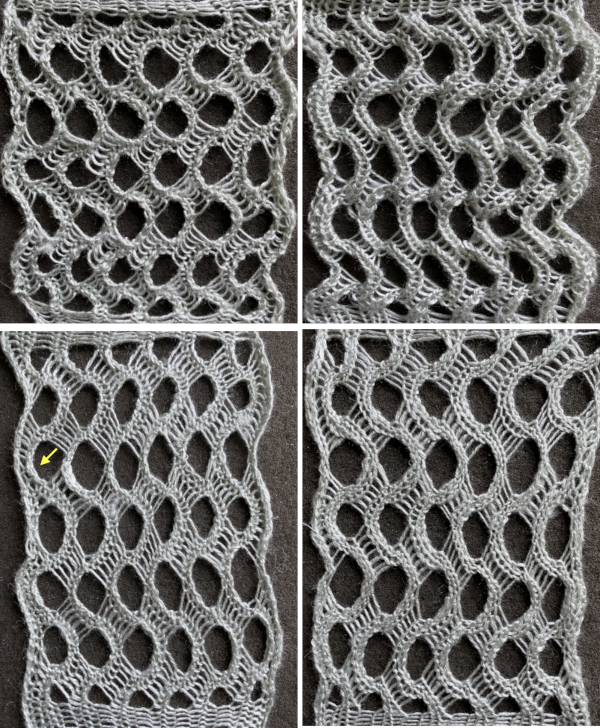
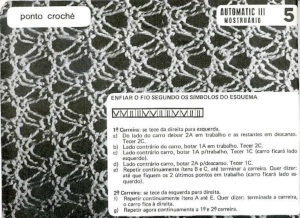
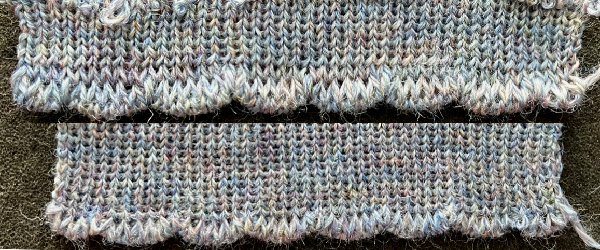
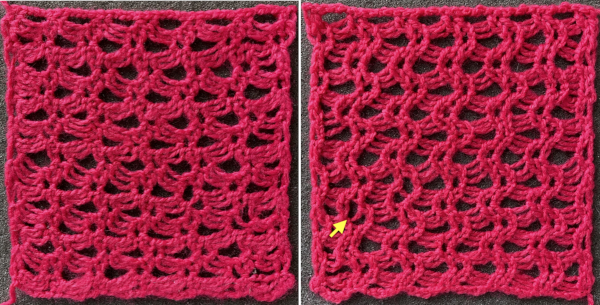 Shell shapes: #4 and # 20 directions are given in the 2017 blog post
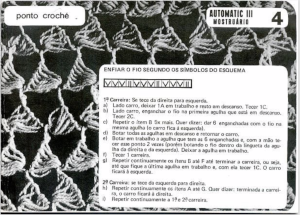


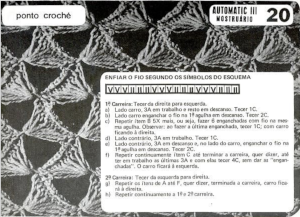
 Some of the trims in this pub may be far more easily and quickly executed using tuck stitches.
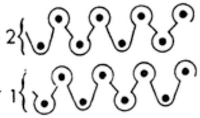 translated for knitting, patterning may be used on either bed, with the opposite bed set to knit every stitch. If patterning is on the ribber, have the first and last needles in work on the main bed.
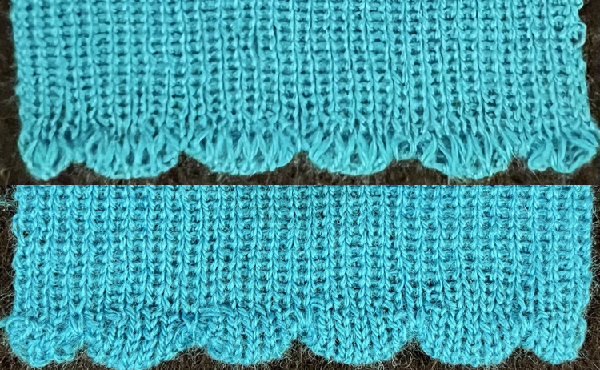
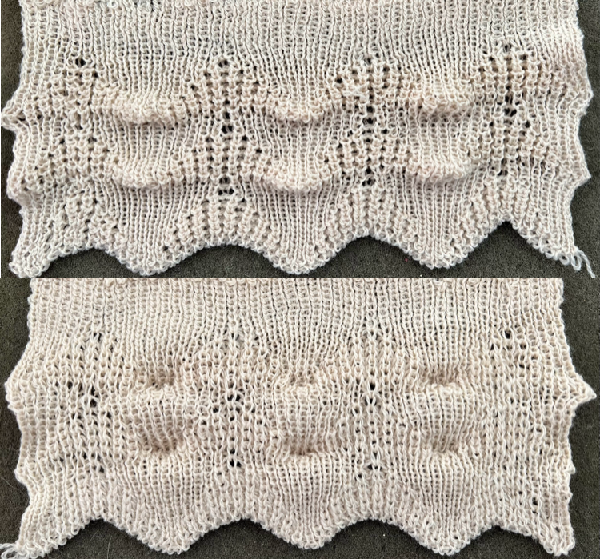
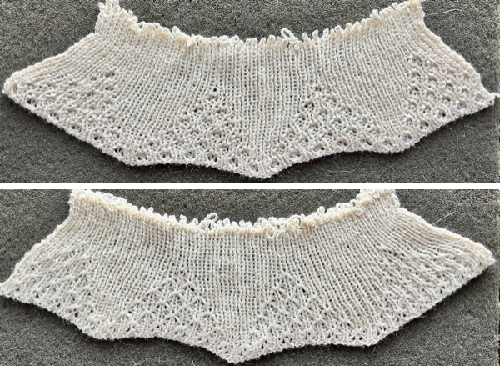
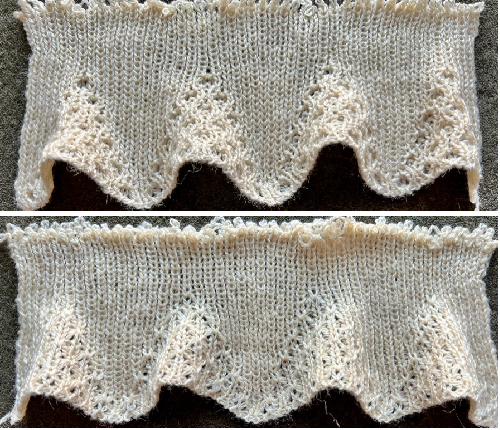
  The top bed is set to tuck in both directions, the fabric is shown lightly stretched
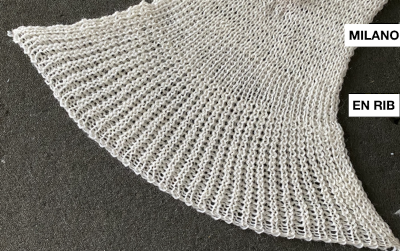
 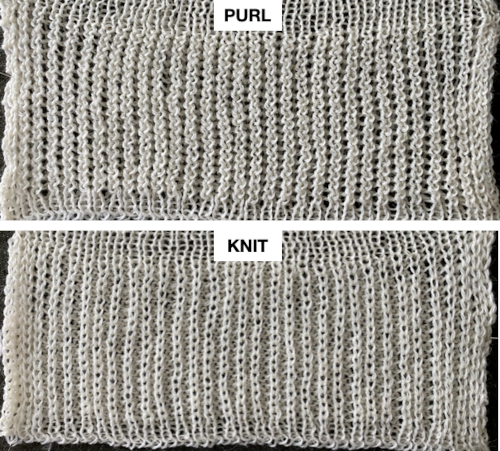 and could conceivably be used to create a ruffled edge when followed by narrower stitch types ie. every needle rib or Milano variants
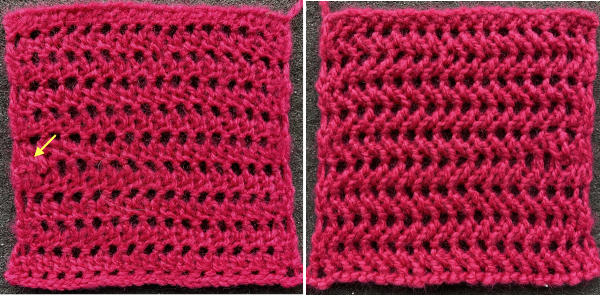
  Changing settings: with the knit carriage set to slip in one direction, knit in the other, the ribber knitting every row
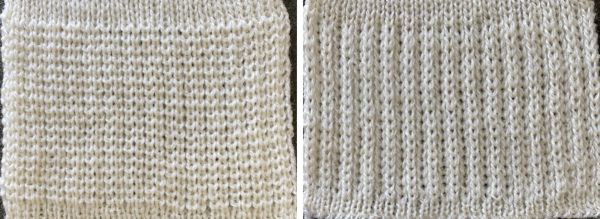 Needles may be taken out of work to create pleats in every needle ribs, alternating their placement between the 2 beds. Knit stitches stabilize tuck ones. Here every other needle is taken out of work on only one bed. The tuck loops are more visible in any open spaces between the vertical rows of ribbed stitches. The ribber will knit every row on the same needles aligning directly above each other, thus ruling out full pitch.
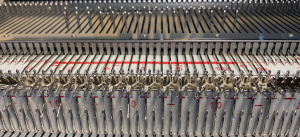
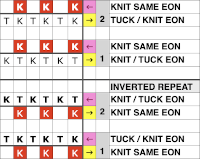 The needles are set up so that the first and last are in use on the ribber, ensuring that a knit stitch will be on the side of any tuck stitch selected on the top bed,
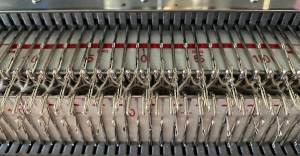
  on the top bed the every other needle tuck selection reverses as the direction of the knit carriage does, needles brought forward knit, the ones skipped hold tuck loops in their needle hooks,
  the resulting fabric
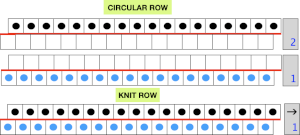 Choosing spacing between needles in work on the main bed
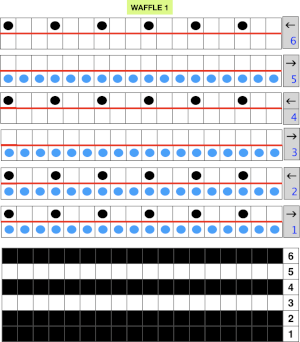
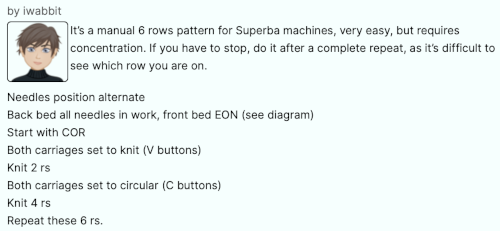
  A working repeat with 4 circular rows, 6 full rows knit
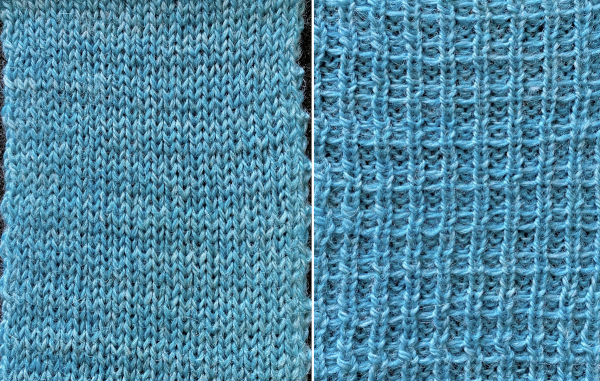
  My first swatch in the technique was in response to a Ravelry member share describing the stitch pattern used in a finished garment
 followed by float formation when only the top bed knits
 The resulting grid may be used as a guide for hand techniques off the machine in isolated areas or all over
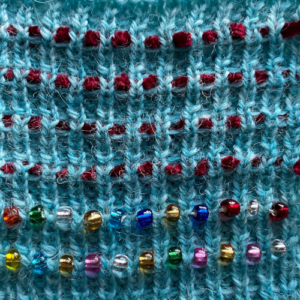
 Needle arrangements may be varied to accommodate thicker yarns, or alter the texture by varying both the number of knit rows and circular ones
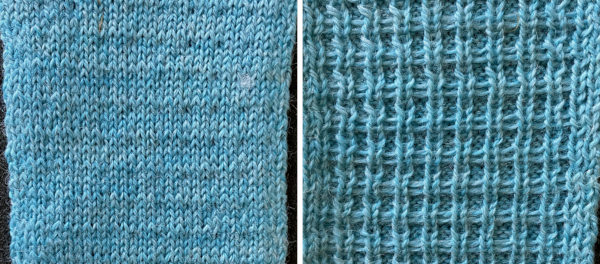
 Because the top bed needles are in pairs, the EON selection remains evident, each of the first 2 passes completes one row of knitting.
 When only the top bed knits, floats are formed between the needles in work

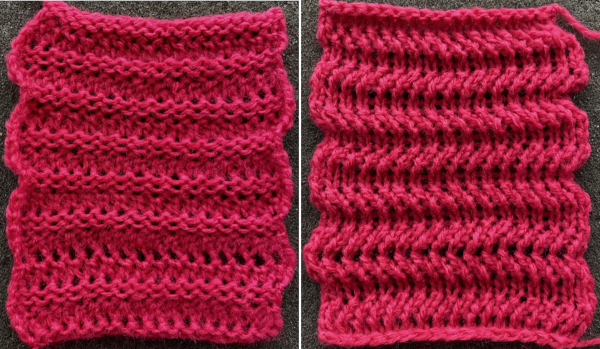
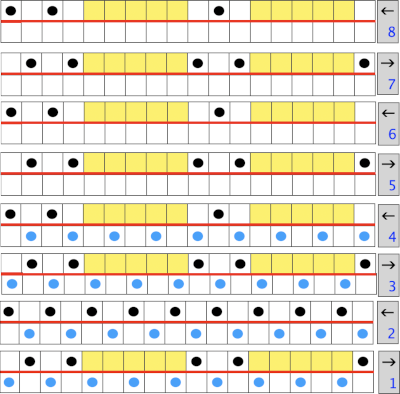
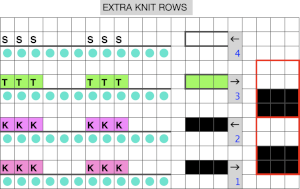
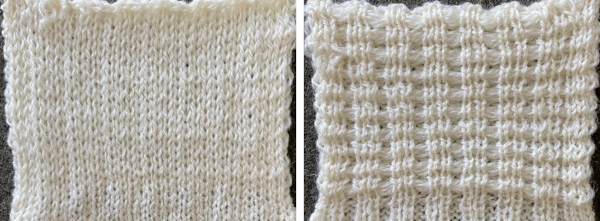 Half Milano with tucked long stitch: the main bed needles will tuck one row, then slip one row. The ribber needles will first knit a row, then slip a row while the second bed knits both rows. Then the ribber needles knit one row then slip a row while the second bed knits two rows.


 the tuck row is formed with the knit pass to the right, no preselection
  the row of stitches is skipped on the way to the left, preselecting for the next first knit row, tuck loops visible on top of the hooks of the selected needles
  the process is repeated. The resulting fabric:
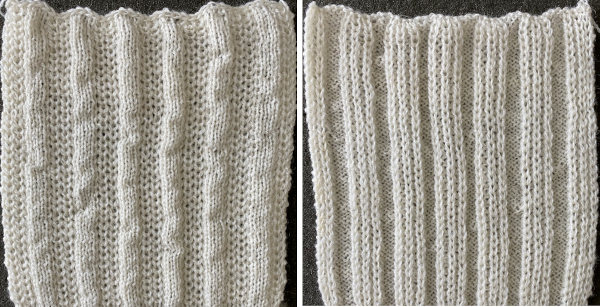
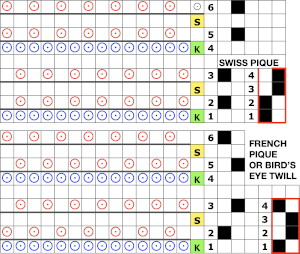
 In DIY the potential for exploration is endless. As always, if needles are out of work on the main bed, end needle selection is canceled. Here slip setting in both directions is used, along with needles out of work on both beds, the 1X1 needle repeat is programmed.
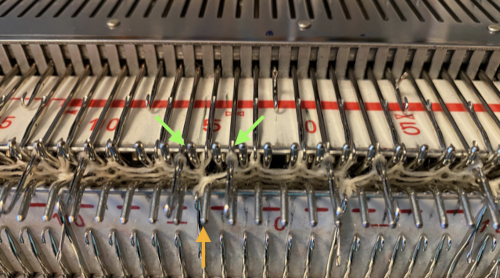
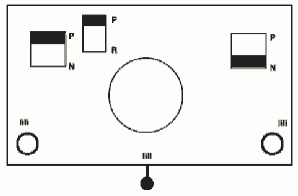 the result has floats on the purl side, a slightly pleated look on the knit side.
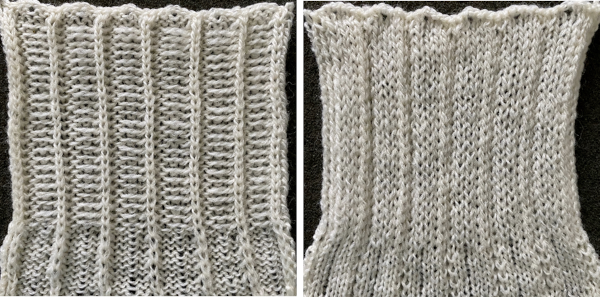
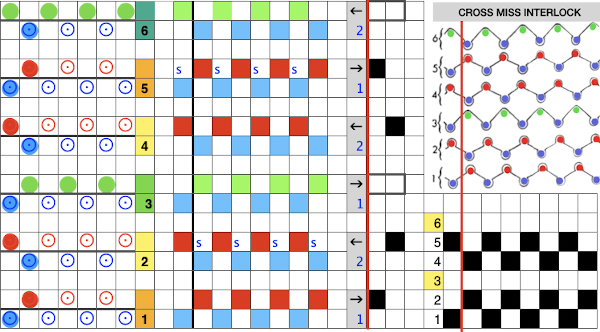
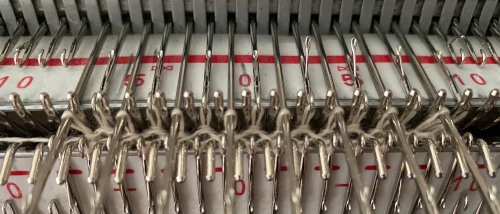 After both no preselection row bring alternate needles out to hold using any EON needle tool. In my case, COL, I began with needle 1 on the left on row 3, alternating beginning with needle 2 on the left on row 6. The number of rows in between hand techs is an odd one, so sides for the hand tech will alter as well. This shows the tuck loops formed EON as the carriages travel to the right.
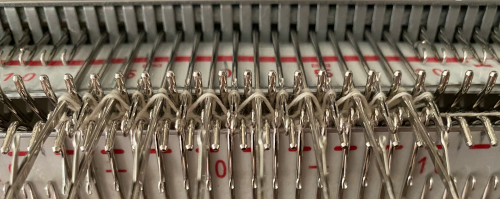 Prior to resuming pattern knitting, needles with loops on them need to be returned to the B position, maintaining the EON needle preselection for the next pass
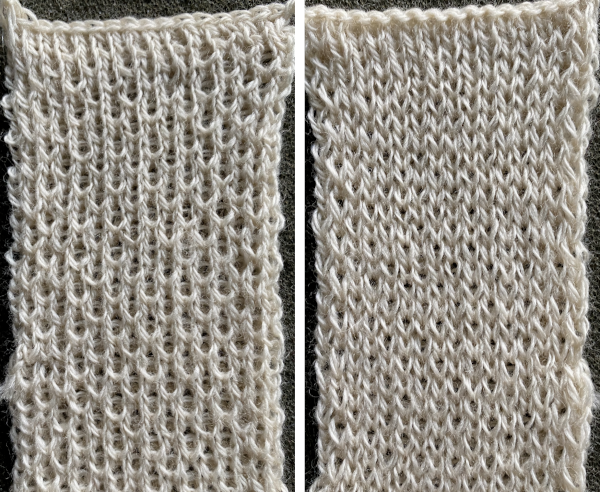
 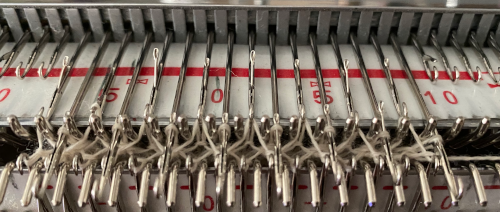 Repeat the process when design row 6 is reached, beginning with needle 2 on the left. The texture appears on the purl side of the piece, shown on the left
 This repeat uses 6 passes as well. The tuck loops on the top bed occur above slipped stitches in the previous pass, which may be replicated, but the real problem is that every third row on the ribber is also having to tuck on specific needles with no knit stitches between them. The tuck loops happen directly above knit stitches formed in the previous row if the tucking lever is changed manually from R to P on those rows. That is a lot to juggle, a no.
 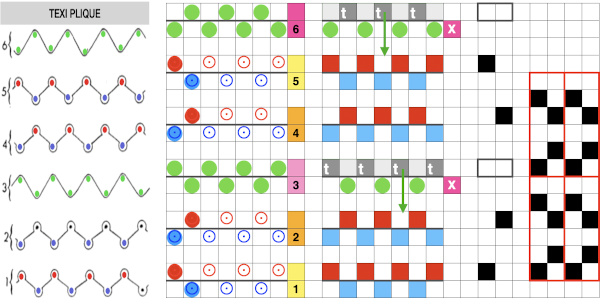 Here the eon tuck would fall on slipped stitches in the previous pass, so that is doable. It is possible to fool the lili selection into believing there are extra needles in work on each side of the ribber, which can “make” the first stitch on either side knit rather than slip or tuck. The method is used in creating a
 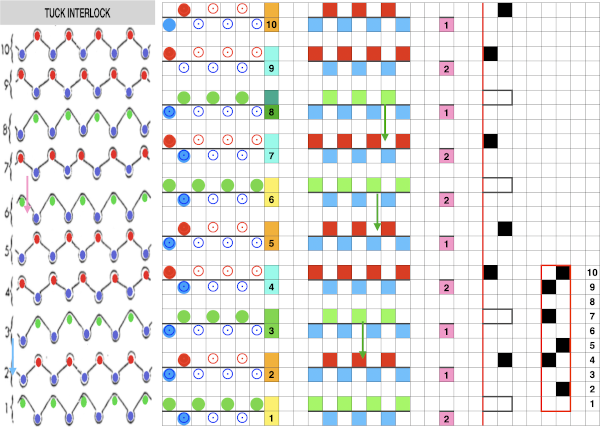 This pattern repeat is a short one, the changes are more regular on the ribber. The hand tech tuck stitches could be formed for 2 rows with all stitches getting worked back to B position in between those preselected for the next pattern row. The lili buttons need to get fooled after alternating pairs of rows, the start of several nos for me.
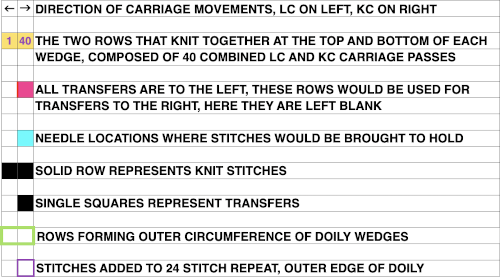
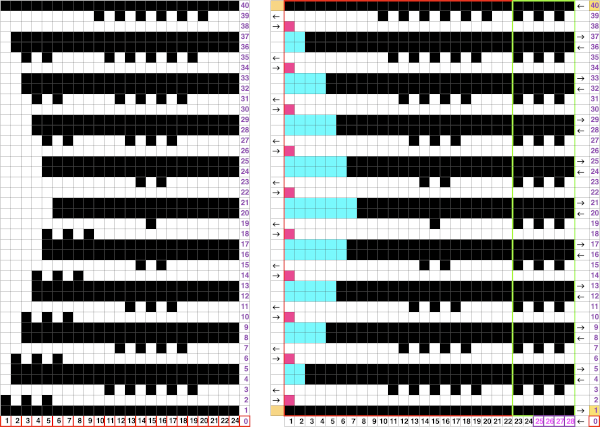
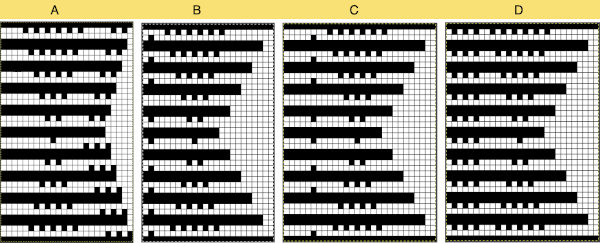 The test swatch in progress
 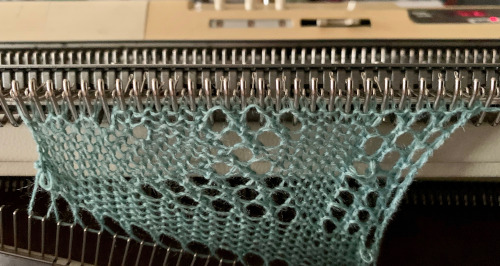 I used a short cast on comb for weight across the piece, moving it up cautiously on a regular basis
 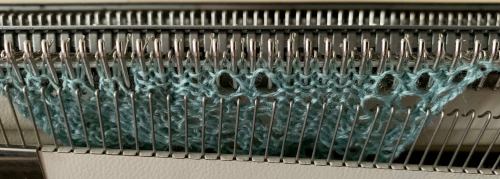 It is helpful when starting in waste yarn or simply using plain knit rows at the bottom of a test swatch to choose a clearly contrasting color. Here I did not do so, the drawn line is to help define the start of the shape formation created by the holding sequences and eyelets. The eyelet on the outermost edge of the circumference “disappears” as that edge gets stretched to the max. Two eyelets in the diamond shapes are not formed properly
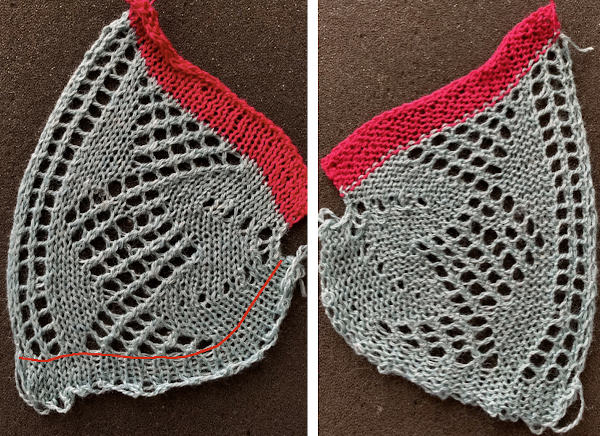
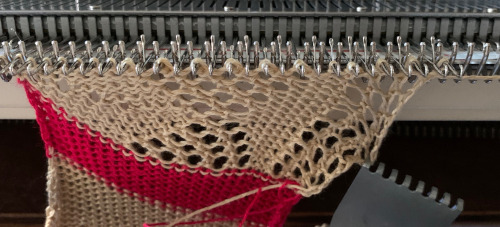 knitting without a knit gauge can be dangerous, here a guess is made as to how many more units might be required to make the final shape go round
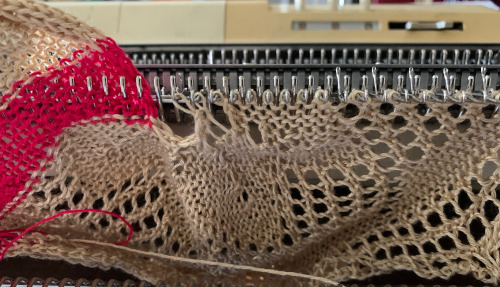 I committed to 8 wedges, another attempt at a check for size prior to seaming the shape.
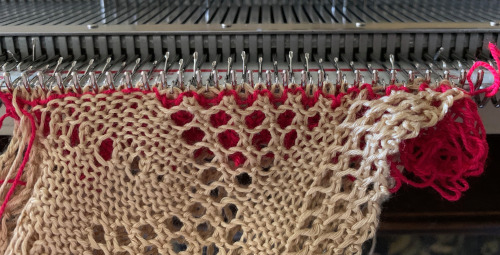
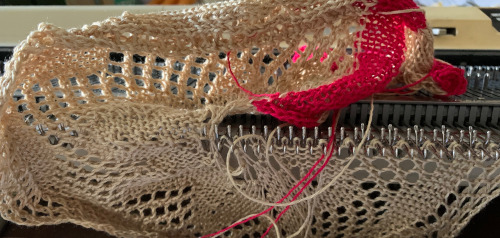 Before joining the stitches permanently, a quick look to see if there was enough knitting to form that pie
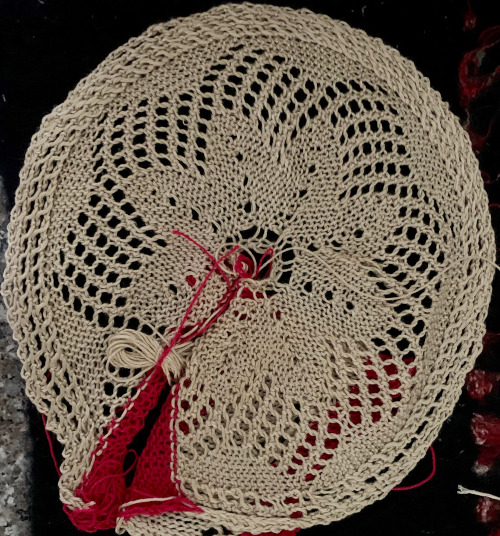
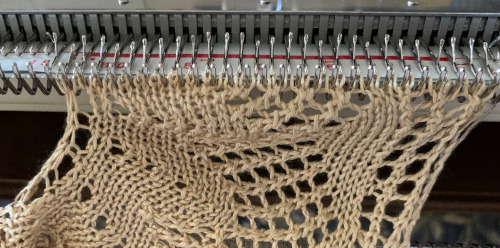
 The least satisfactory and most visible join is the latch tool bind off. Grafting by hand off the machine is the least so. For the sake of ease in identifying open stitches easily, both methods would benefit from a couple more all knit rows between each segment as seen in the repeat in the original doily post in spite of the fact that the shape around the very center opening will change.
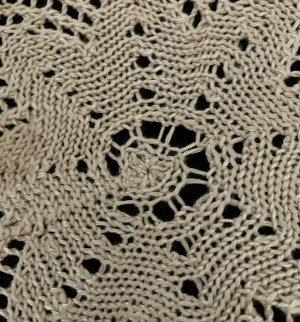
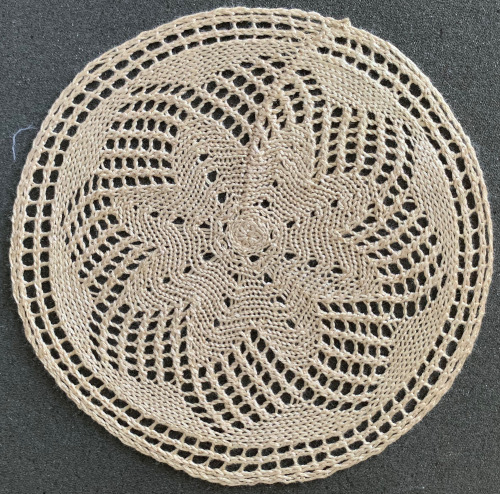
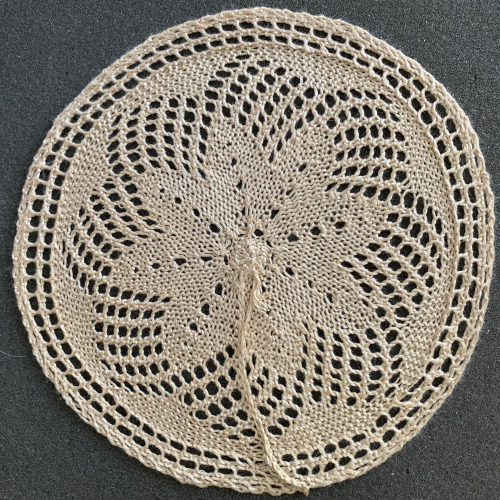
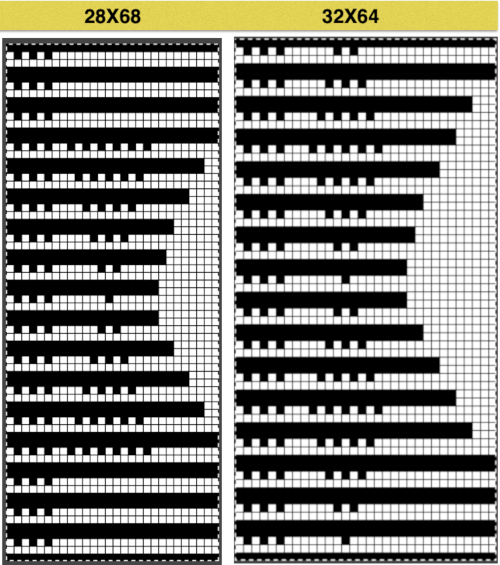
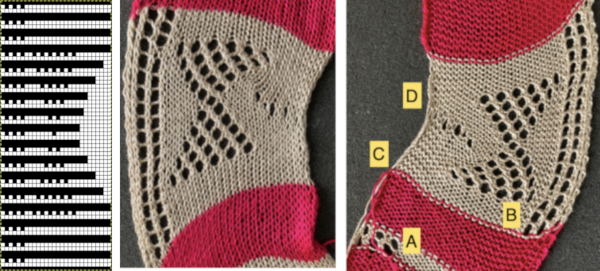 Planning for diamond rather than bow shapes, the repeat was changed from a 28X68 one to a wider, 32 X 64
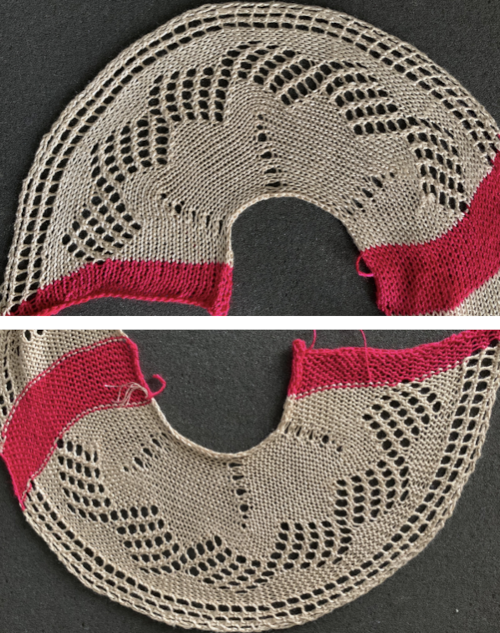
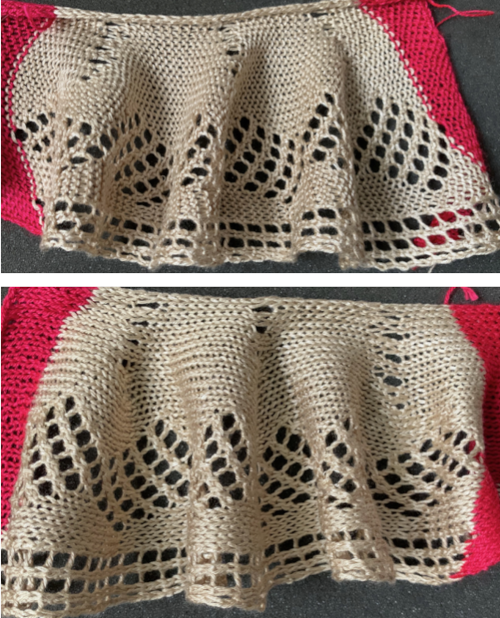

 Adding a second color and reversing directions of shapes brings lots of yarn ends and its “price to pay”
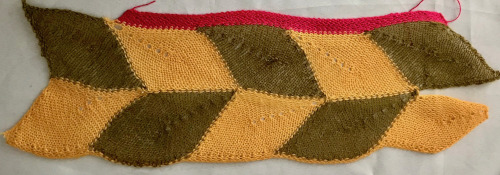
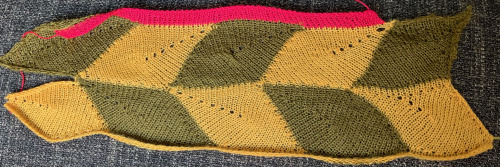 Some handknit large scale inspiration to begin my revisit to MKing them:
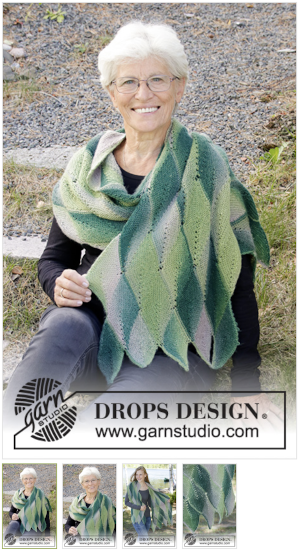
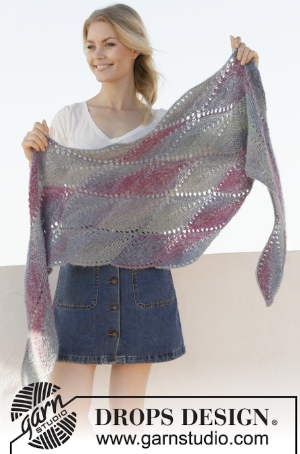
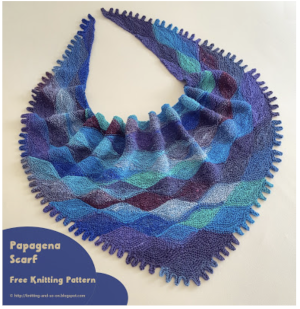
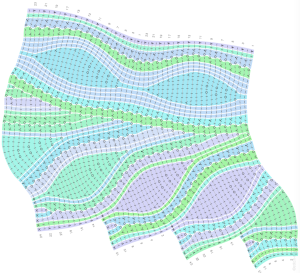 The chart is actually rotated 90 degrees counterclockwise, could serve as inspiration for an electronic pattern.
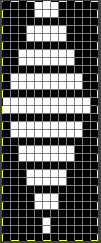
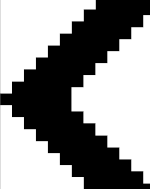 Automated holding sequences may be planned for single or multiple stitches in width, as well as for single and multiple rows in height. For the new initial test, which proved to need editing, this was my repeat
 A tiny test in too thin a yarn
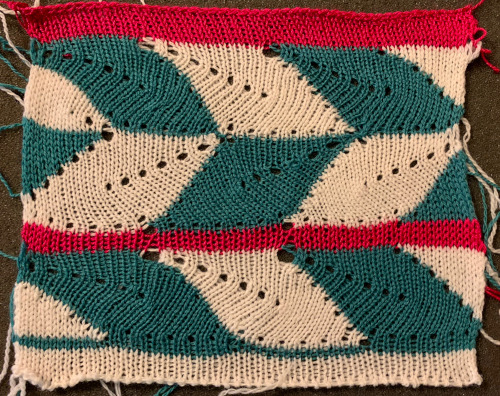
  I am knitting on a 930, the image needs to be mirrored in order for it to appear in the direction I intend on the knit side. The above repeat did not work properly when knitting a whole row of shapes. With some patience, a final, edited, and mirrored repeat was developed that enabled a completed a full row of shapes using the slip setting and holding, and starting with working it from right to left. Sometimes differences are subtle, especially in designing using single-pixel units. The new repeat proved to also work for rows of shapes in the reverse direction after horizontal mirroring and restarting the pattern or design row 1. When working from right to left, the initial preselection row is from left to right, while when working from left to right, the first preselection row is from right to left. After a full row of repeats is completed, the pattern is rolled back to row 1 and mirrored. Punchcard knitters could turn the card over and start again on the proper row. I used contrast color knit rows initially in between rows of shapes to help me note transitions more clearly. The “leaf” is not pointy enough for me, but at times what was not planned may lead to a pleasing result of a different sort.
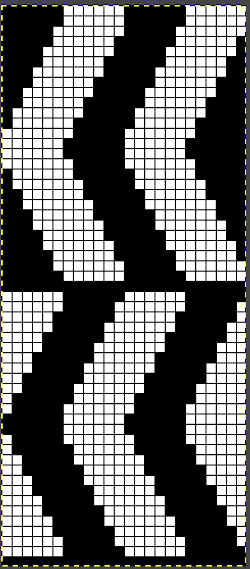
 To knit: cast on with a multiple of 12 stitches on each side of the center 24 on the needle bed
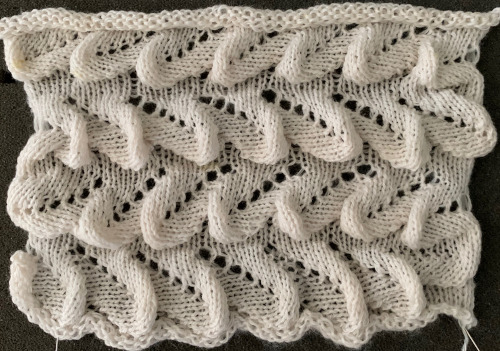
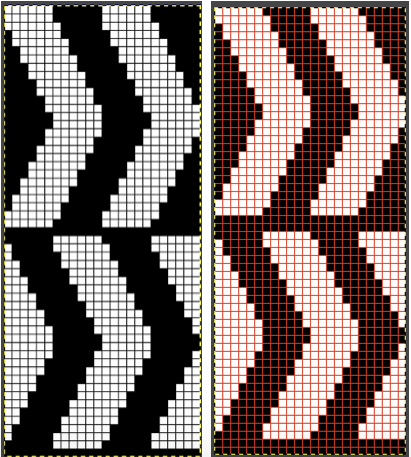
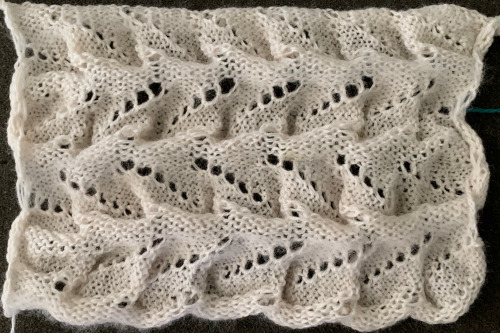 Moving on to a wider version, using 24 stitches in width to allow for using the pattern on a punchcard: this repeats works both as-is and mirrored, the groups of stitches moved in and out of work is now half of the new design repeat = 12.
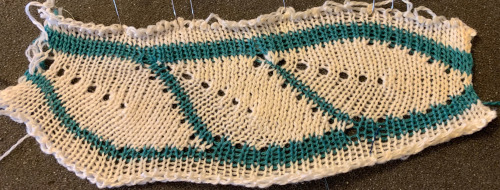
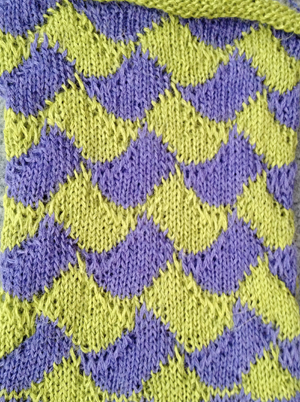
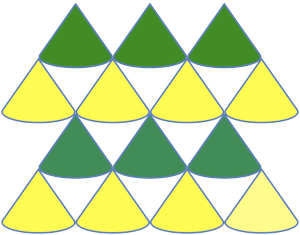
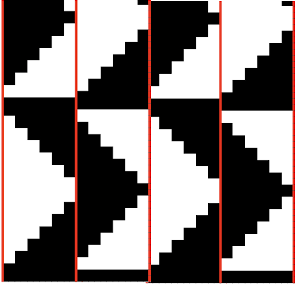 The lovely mess in the swatch happened when I stopped paying attention to everything but what was happening on the needle bed and missed the tangle of yarns in my yarn mast. There is enough knitting, however, to note that the repeat is sound and that the edges on both sides are formed by the narrowest part of the shapes in each direction. One way to solve that is by casting on and binding off along tops and bottoms of shapes as seen in the yellow and green swatch at the top of the post.
 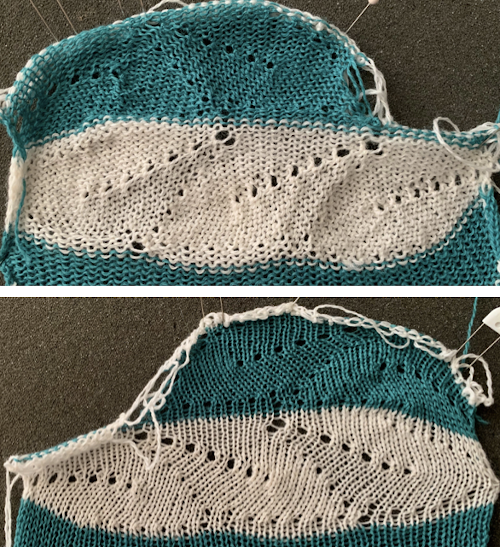 Planning things out to release those edges as seen at the top of the post
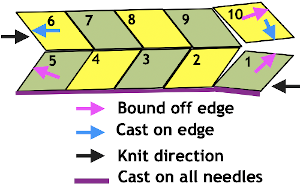

 Problems to solve: maintaining an even number of rows in-between shapes and a straight edge along both sides. The latter could happen with triangles prior to knitting full shapes at either or both ends, the first sample failed on the left side due to both triangles being knit in the same sequence;

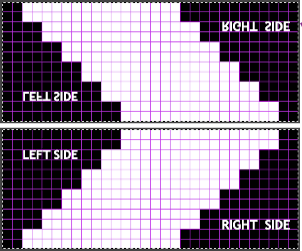

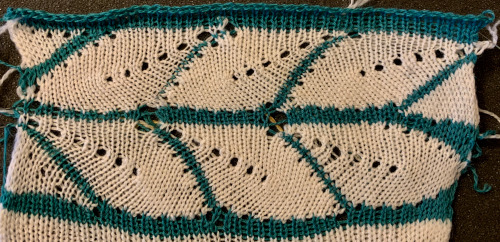
 Begin on waste yarn, decide on the color of the cast on, and any additional knit rows prior to beginning in the pattern. Each of the side triangles is shaped using manual holding techniques over 12 stitches. If starting on the right, the first preselection row needs to be made moving from left to right as above on the first 24 stitches. With knit carriage set to both slip in both directions and holding with COL make certain the first 24 stitches on the right in B position make a free pass to the right.
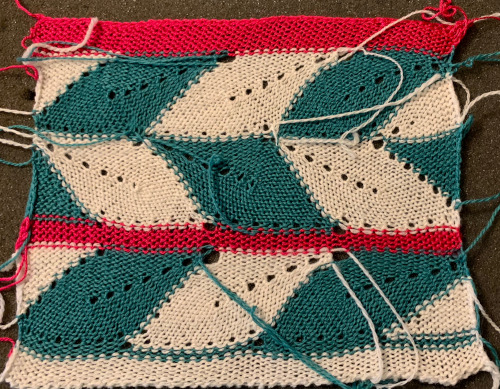


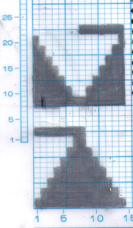 The 910 in my default setting produced the “image’ as drawn on the knit side of the resulting fabric. The post was written prior to my tiling the repeats as a matter of routine to check their alignments. Doing so would have shown a couple of missing pixels, and pointed to any other errors in filling in mylar squares.
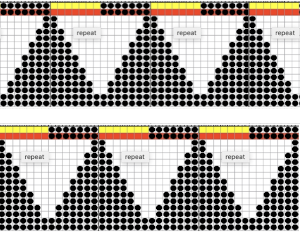
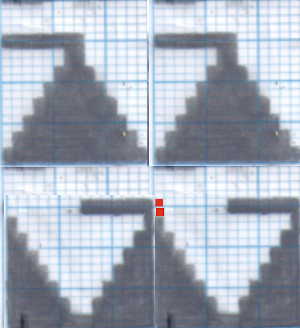 All transfers were made in the same direction.
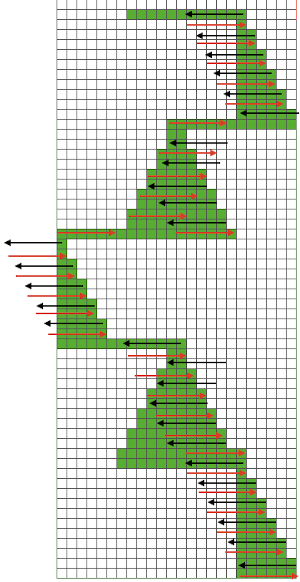 As always, ideas need error-proofing and refining, easier done in a chart if possible prior to any actual knitting.
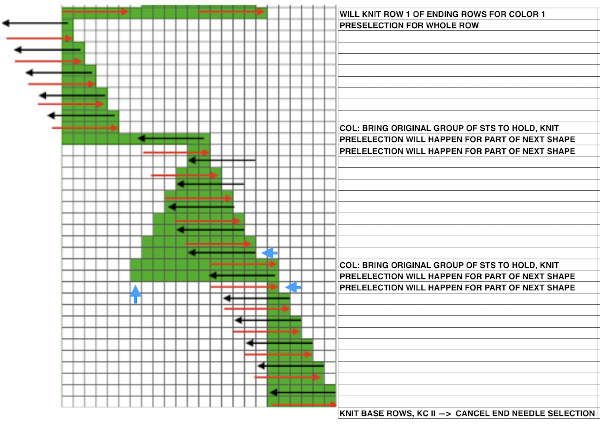 There are a number of changes to make if it is necessary to get the pattern to reverse direction in alternate rows of completed shapes in a brick layout.
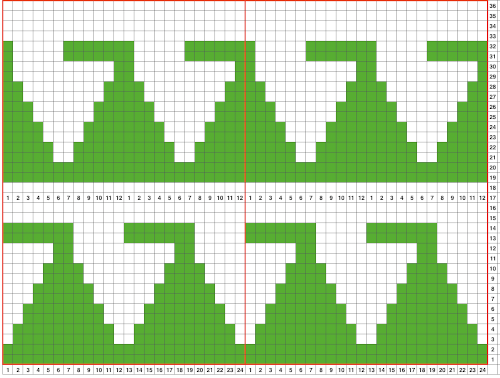 Attempts to visualize holding can happen in spreadsheets, documents, image processing canvases, or even simply on graph paper, moving/ “drawing” back and forth across the cells mimicking carriage movements and marking them accordingly.
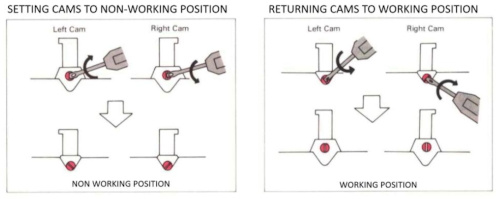
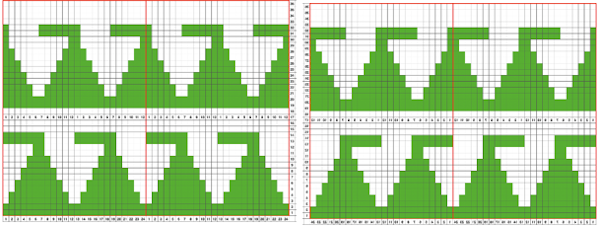 The 930 automatically mirrors downloaded motifs, if direction matters, as in these samples, either mirror the design horizontally prior to saving the png for download to the machine, or use the mirror button selection on the operation panel after the download.
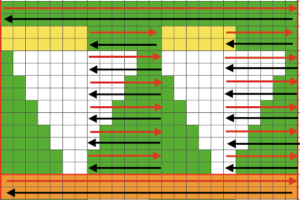
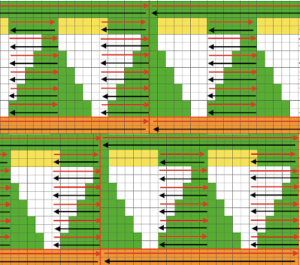
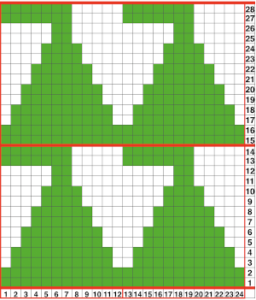
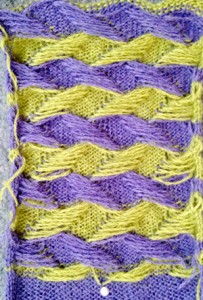
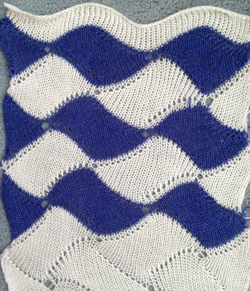

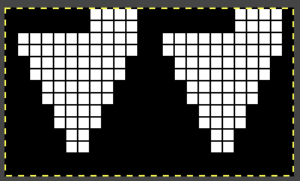 while here the repeat for all full-size shells is planned,
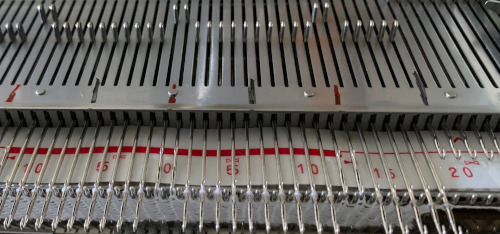
  Marking up the needle bed with water-soluble markers or pencils helps track placements of repeats across the desired number of needles in work: dark lines indicate placement beginning with the mark for half a repeat to maintain straight side edges on the finished piece. Red lines mark the placement of the stitches when they are moved to the left in order to knit the full shells across the bed.
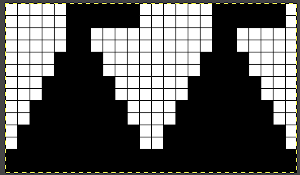

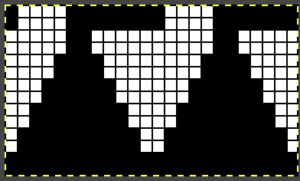
 Scaling the image to render it a bit more legible:
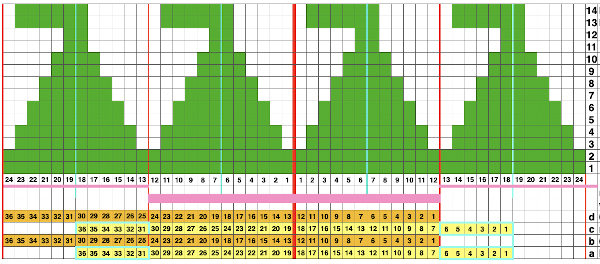
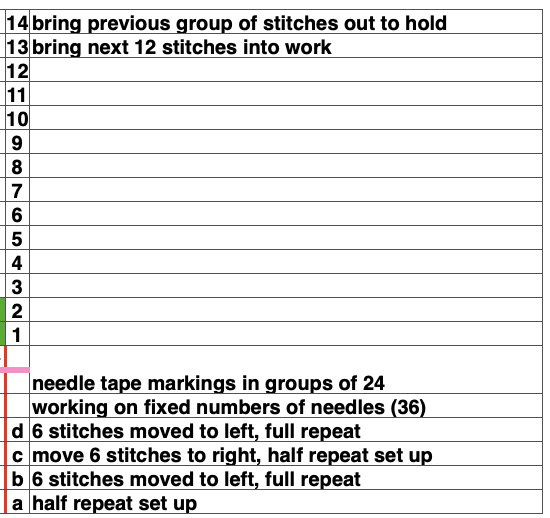 The machine will be set for slip stitch in both directions and holding. End needle selection is canceled.

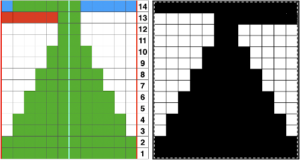
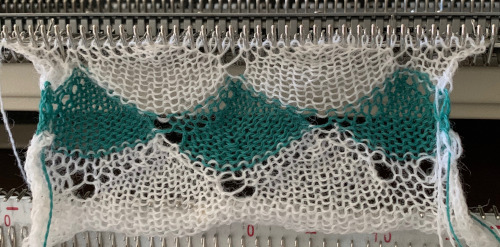 I used two repeats side by side to eliminate having to consider and choose the position option on the 930 needle bed, resulting in having the pattern centered in each 24 stitch fixed segment of needle selection.
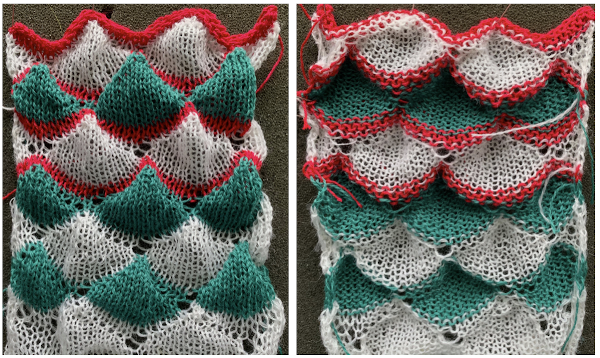 I was too aggressive with clipping yarn ends on the left side, especially while in the process of changing colors, not ever a good idea. Automating the pattern fully on electronic models using only slip stitch patterning is possible. The length of such patterns grows exponentially in proportion to the size of the repeats. Reviewing errors in the beginning concept
 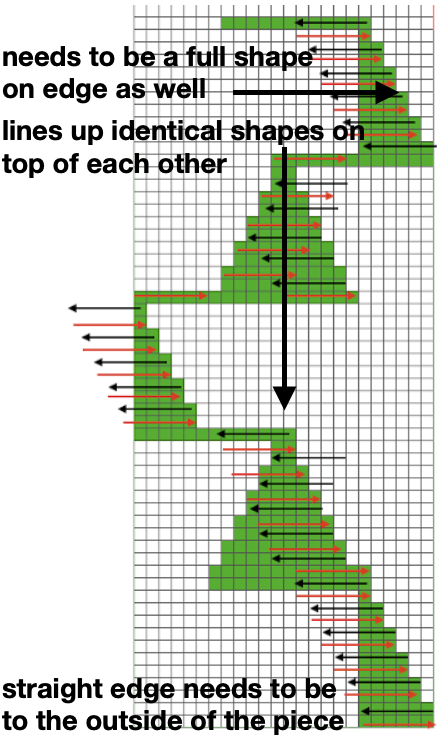 An attempt to visualize the placement of the shape variations in the finished piece using the shell motifs beginning with the shapes created in order to create a straight side edge
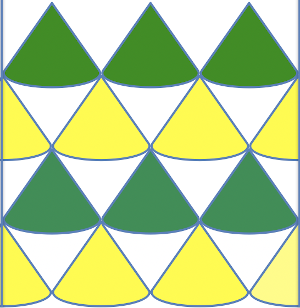
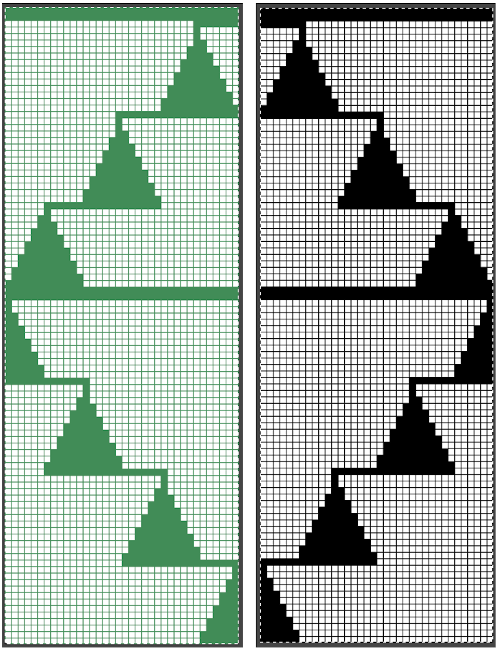 COR: knit a base row in color one from right to left
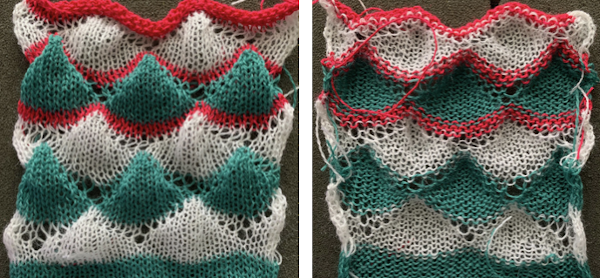 Preserving the 3D texture relies on using yarns with “memory”, ie wool and avoiding aggressive blocking. Using thinner yarns makes the stitch formation more evident. Hard pressing, in this case, knit using acrylic yarns, flattens the fabric considerably, and often, permanently. Both the hold/slip (top) and fully automated swatches (bottom) are shown.
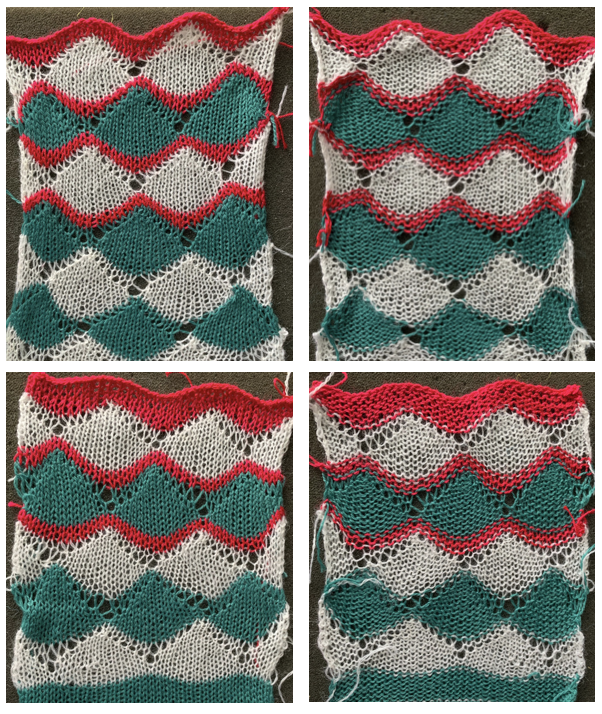 2023: a screen grab from the shell charts was cropped to its outline, opened in ArahPaint, and using the program’s tool “
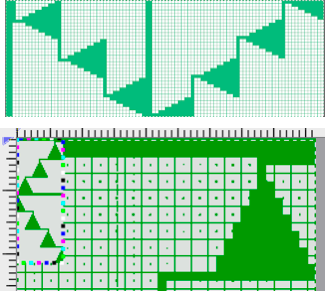

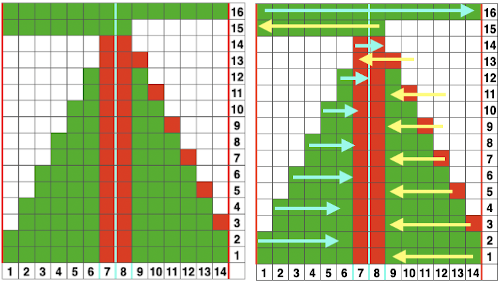
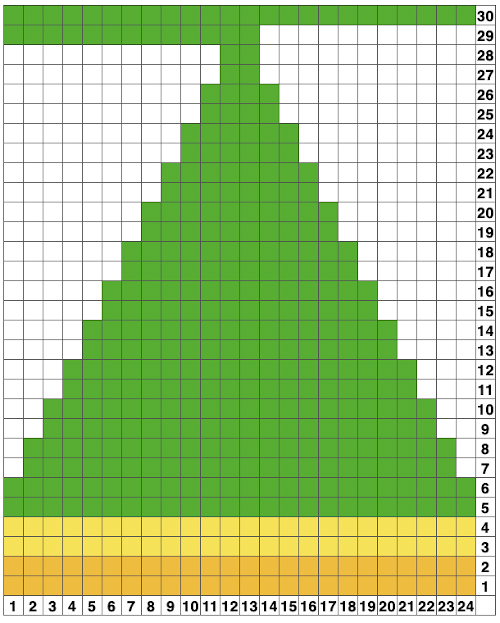 A return to the original 14 stitch repeat, illustrating a way to begin editing for an extra row in width at the bottom of the shape and ending on 2 stitches rather than a single stitch at the top
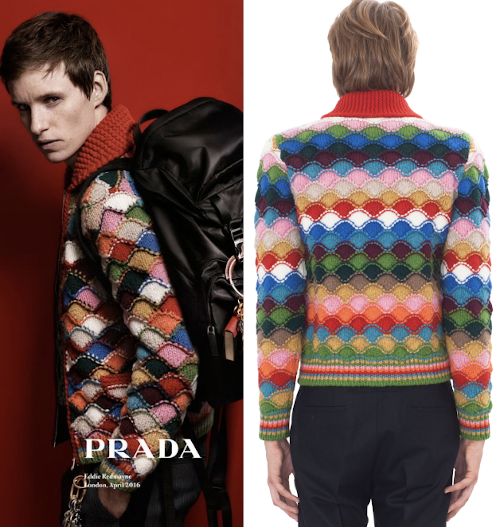
 A Prada sweater using similar shapes
  If you are interested in any large size clamshells, and intarsia appeals to you whether in hand or machine knitting,
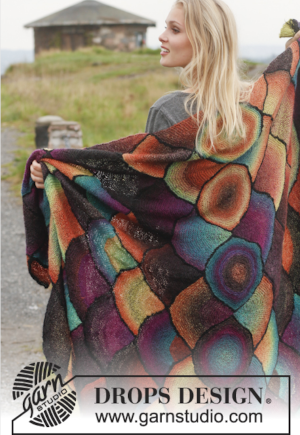 the common illustration for shaping triangular shawls using such motifs
