There are a group of single-bed braids/edgings following horizontal chains produced on the knitting machine that has reminded me of crochet. They are based on frequent latch tool bind-offs that occur with the fabric facing either side as it is regularly removed from the knitting machine. The bind-offs by necessity will move in either or both directions, since a continuous yarn strand may be used unless one chooses to change colors. The bound-off edge is rehung and worked further. It is a great way to get proficient at the technique or to get some use from that linker that has been in storage (providing a loose enough tension producing big enough stitches for it to work smoothly may be used). For the purposes of this discussion, this illustration of a crochet chain shows places where the hook might be inserted and exit before picking up yarn to create the next stitch with a hook. I think of the rear and front loops illustrated as creating a “chain”, and the one in the rear as a “bump”.
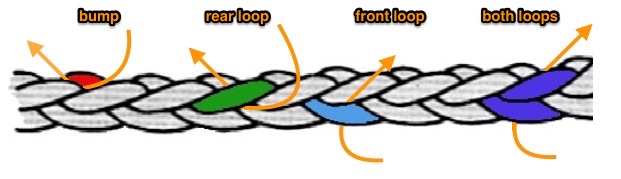
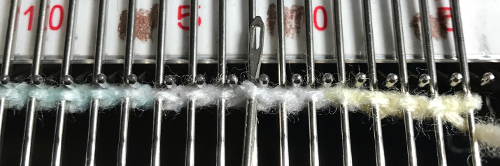
Below I have used an acrylic yarn that tests the 4.5 mm machine’s limit at the loosest possible tension. In crochet cast on, the “bump” is sitting on top of the needles, the “chain” below them
 parts of the cast-on structure taken off the machine: the “bump”
 ![]() “rear loop”
“rear loop” 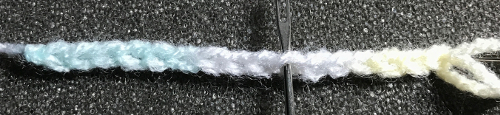 “front loop”
 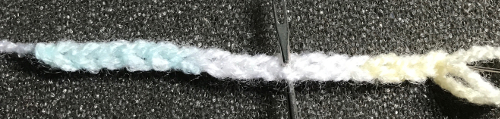 “both loops”
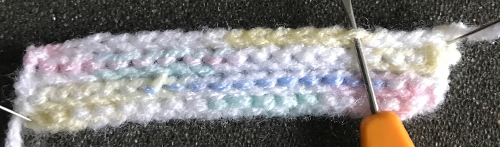
most of these fabrics start with latch tool cast on the required number of stitches for chain +1 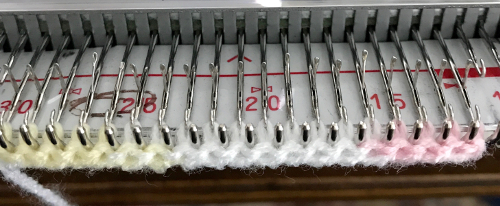 knit one row, bind off
 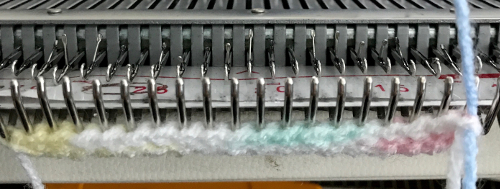 remove work from the machine, do not cut yarn
 ![]()
options for picking up and rehanging stitches: the front loop of “chain”  back loop of “chain”
 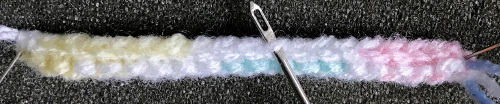 both loops of “chain”
 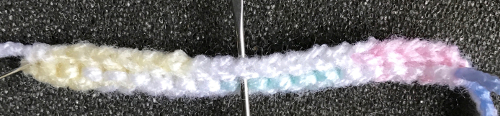 roll work toward you to reach rear “bump”
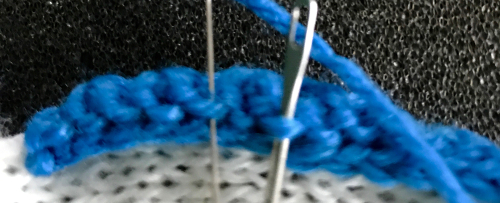
 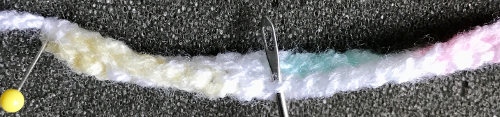 work turned over, rear “bump”
 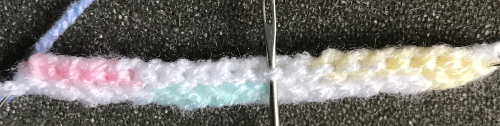 rear loop of “chain” as shown in top
 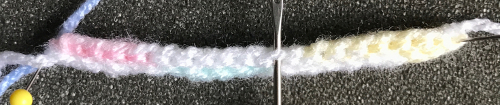 front loop of “chain” with the rear of the fabric facing you
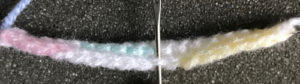
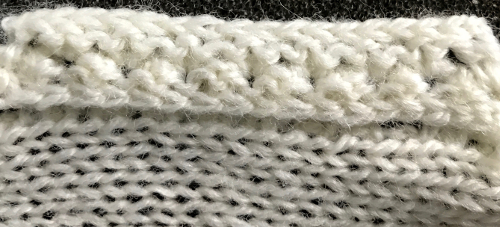
To keep the number of stitches constant for a straight edge on both sides of the piece, the loop at the end gets its own needle. A sample was created picking up the rear loop only, without turning the work over at any time. View of side 1 and loop consistently worked. Note the slight bias in fabric, due to its being worked always in the same direction. Turning the work over would eliminate the problem, in a similar way as transferring eyelets in opposite directions achieves that in lace.
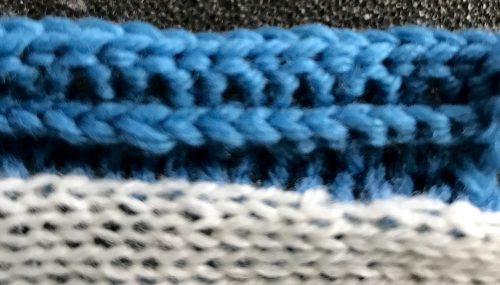
 its reverse side
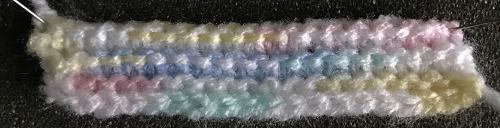
Such trims may be used for no roll edges anywhere on a garment. The number of stitches may be decreased following shaping ie in necklines. Starting with waste yarn, ravel cord, and a chain cast-on row, one can produce stand-alone trims. The look as always varies considerably with the fiber used and its bulk. Other variations and tips:
- knit more than one row between bind-offs (2 or 3) at maximum tension, the chained row will roll slightly, giving a different look; removing the work from the machine and turning it over before binding off, will get the chain to roll to the opposite side
- keep the number of needles in use constant for straight edges, and use math to calculate episodic count adjustments such as decreases if needed
- reverse side is usually the one facing away from the knitter. That is a consideration in planning the look of the trims, depending on whether the body of the piece is to use the purl or knit side as the “public” one.
- in Brother machines holding position is E (they skipped C), and in Studio machines it is D. To ensure stitches’ knitting off properly, work may be brought to this position after each knit row
- textures are further varied by using needles out of work or transfers within knit rows or rehanging concave or concave loops in varied sequences. Looking at stitch formation after 3 knit rows
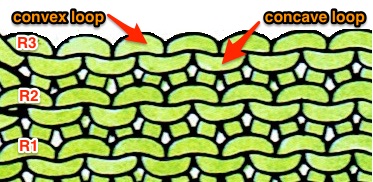
Convex loops are what is picked up when hanging a hem or turning the work over. In sampling, I tend to use any yarn at hand. Quality of material directly relates, however, to the quality of results. The white here is a 2/15 acrylic, and the blue is a 4-ply wool. I knit a long white strip, making a side available for rehanging on the machine, and continuing with a series of trial trims. All samples were made with the purl side facing, but depending on preference and end-use, the fabric could be returned to the machine with the knit side facing as well. It is helpful to have a neat selvage. If the edge includes increases or decreases making them fully fashioned will provide one. Yarns with “memory” ie wool will retain the rolling effect produced by extra knit rows. Stitches are picked up on the finished knit a full stitch away from the edge. I tend to keep my yarn continuous rather than binding-off with separate threads. Pull a long loop out at the carriage side, avoiding tugging and distorting of end stitches when lifting them off the gate pegs in order to rehang them on needles after turning the work over. Adjust loop size prior to knitting the next row. Hang it on the first stitch on that side, or on the adjacent empty needle if you find you are a single stitch short (machine knitting magic)
Trim 1: stitches rehung on the machine  all needles brought out to hold position
 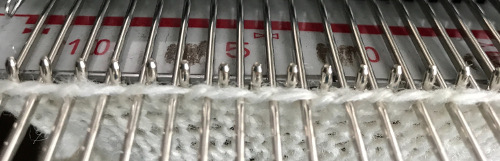 knit 2 rows
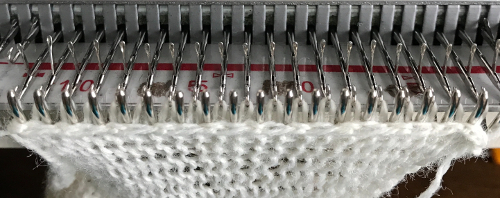
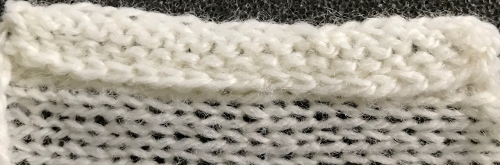
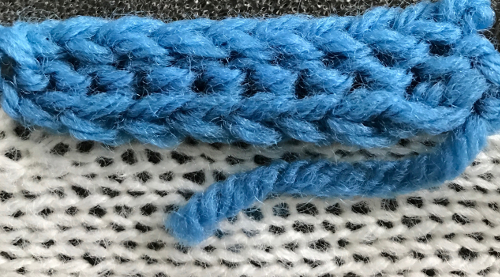
 latch tool bind off (LTBO)
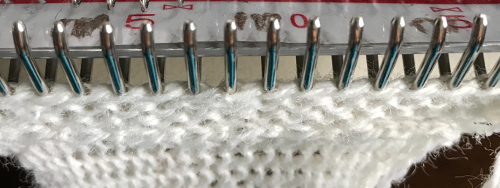
Remove work from the machine, turn the work over (in this case the knit side was now facing me), pick up concave loops and rehang on km, keeping track of stitch count. Bring needles out to hold, making certain each needle has a stitch on it
 knit 2 rows, LTBO
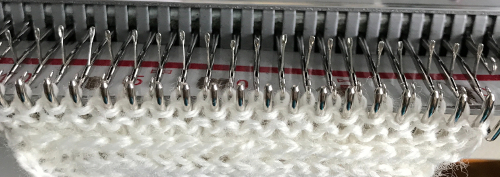 I steamed swatch, some roll lost because of fiber used
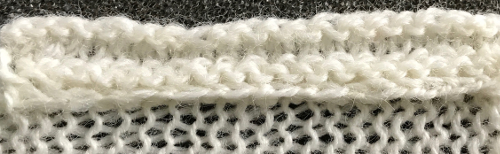
Trim 2: hang stitches on every other needle, knit with thicker yarn
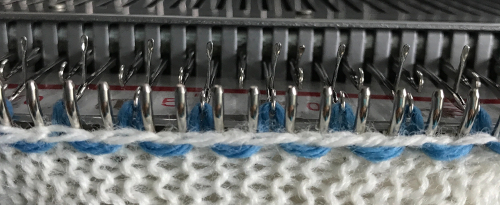 bring needles out to hold, check stitches, knit 2 rows
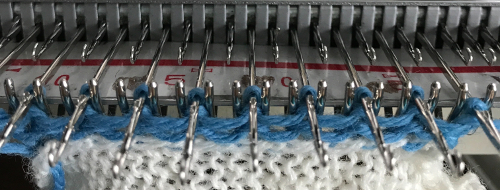 LTBO
LTBO
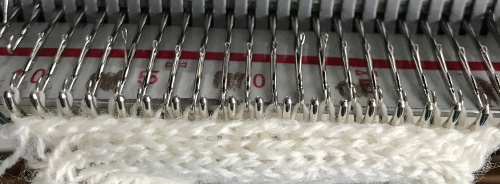
 turn work over, rehang EON (every other needle)
  knit 1 row
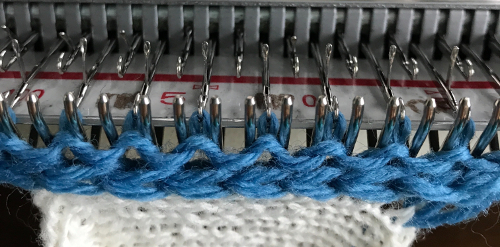 LTBO, lift off
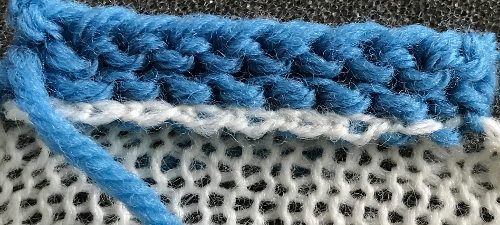
 proceed as above, except after first hanging stitches on EON, bring all the empty needles out to work, check stitches
 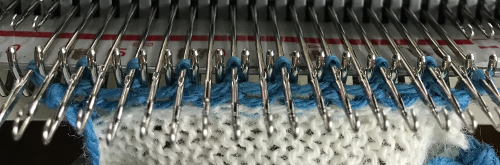 knit 2 rows on every needle
 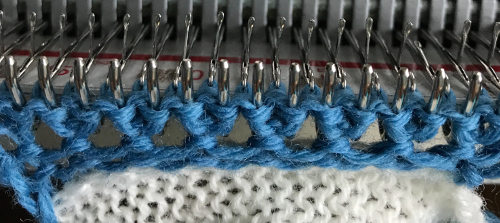 LTBO, lift off
 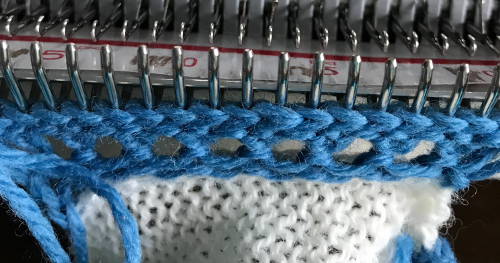 loop that gets picked up and rehung
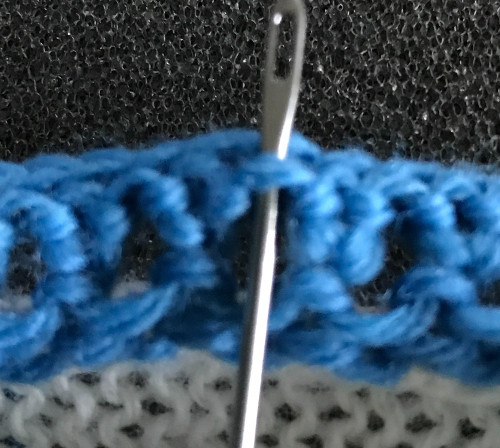
 with work turned over, rehang stitches EON
 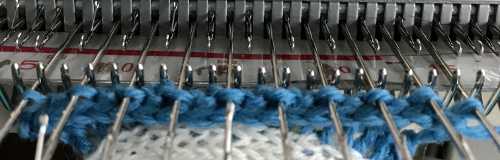 bring all needles out to hold, check stitches, knit 2 rows
 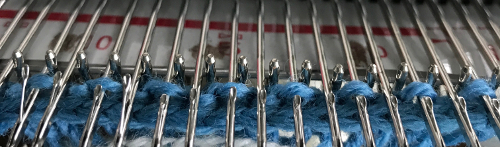 LTBO, lift off
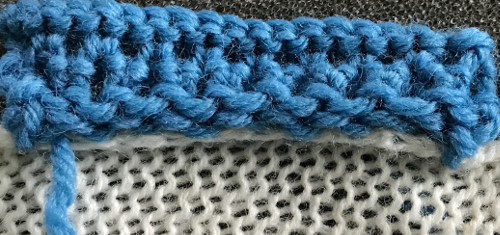
Trim 3: stitches on EON, introducing tuck loops 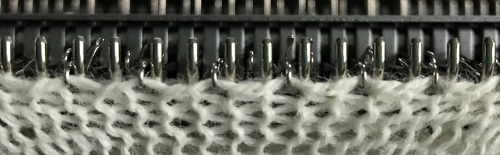 knit multiple rows
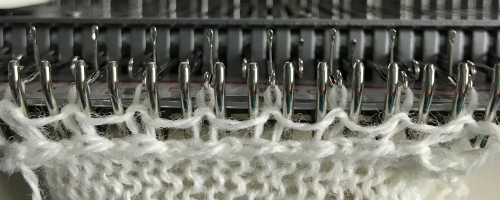
 hook ladders up on empty needles
 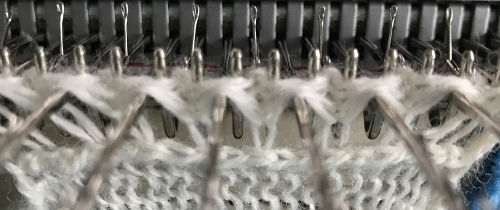 bring all the needles out to hold, checking stitches
 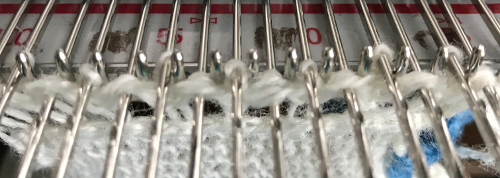 LTBO, lifting the piece off the machine, turning work over picking up grouped loops
 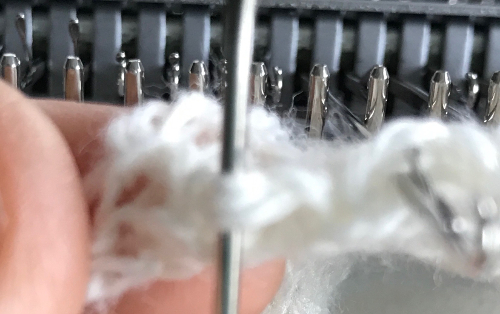 placing them on EON
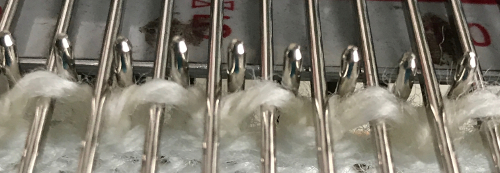 knit 2 rows
 LTBO, lift off
Linker manuals: Studio , Brother