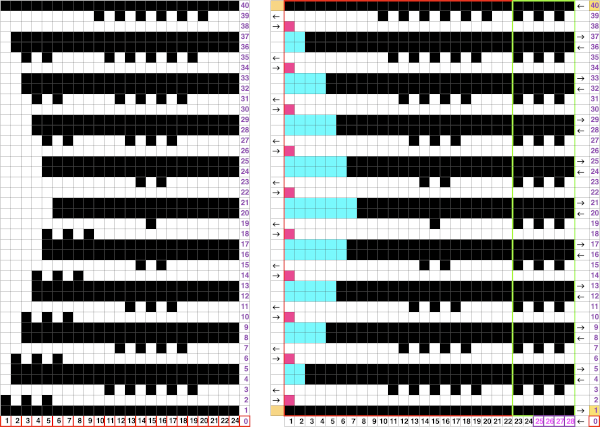
This information follows that provided in lace edgings on Brother machines- automated with slip stitch 2 and lace meets hold and goes round
More on holding techniques: back to that pie,
Revisiting miters, spirals, going square, round, and more, and
Holding/short rows: hand tech to chart to automating with slip stitch 1
These repeats are designed for use on electronic model knitting machines. Because of the mechanical difference in the way that 2 carriage selection works on punchcard machines, though some are presented as 24 stitch repeats, the designs would need to be modified prior to use on punchcard models. For a discussion of the required differences please see the post Doilies: Lace meets hold and goes round
Plotting out changes to a randomly selected previous repeat
The process can also be worked out directly in GIMP, ie in the orientation in which the repeats will be used for download to my 930. The original repeat was mirrored (A), eyelets created by transfers to the right were considered (B), 4 stitches in width were added to the 24 stitch width, transfers to the right began to be eliminated (C). The final repeat D, with all transfers to the left, was used to knit the sample. 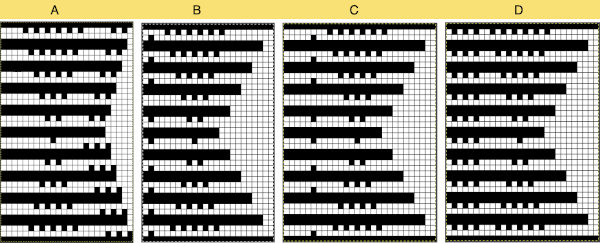 The test swatch in progress
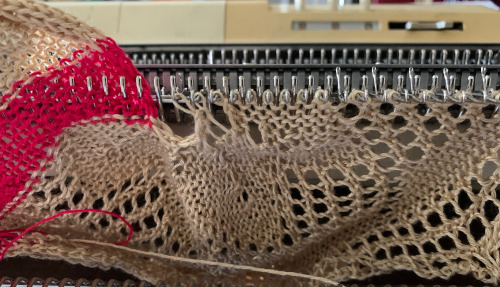
 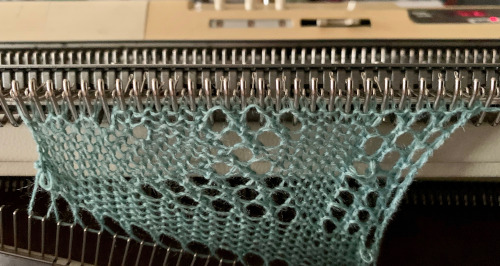 I used a short cast on comb for weight across the piece, moving it up cautiously on a regular basis
 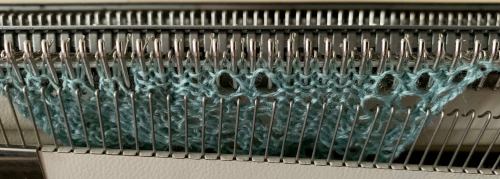 It is helpful when starting in waste yarn or simply using plain knit rows at the bottom of a test swatch to choose a clearly contrasting color. Here I did not do so, the drawn line is to help define the start of the shape formation created by the holding sequences and eyelets. The eyelet on the outermost edge of the circumference “disappears” as that edge gets stretched to the max. Two eyelets in the diamond shapes are not formed properly
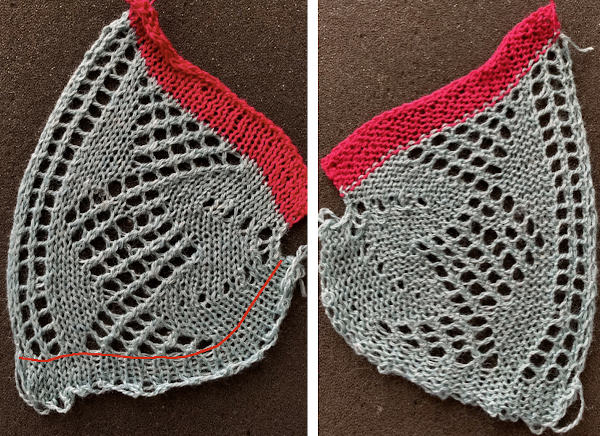
Switching to a rayon yarn for knitting the “doily”, made for easy and quick knitting. The comb used for weight in the wool swatch was not necessary. A single claw from a small weight on the edge stitch a few rows below the knitting and moved up frequently helped insure that the last stitch on that side knit off properly and maintained its length 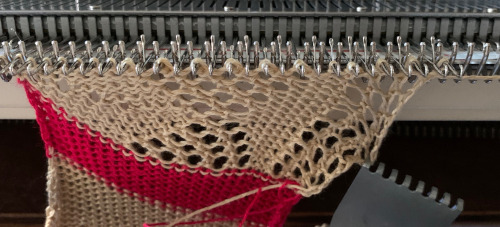 knitting without a knit gauge can be dangerous, here a guess is made as to how many more units might be required to make the final shape go round
 I committed to 8 wedges, another attempt at a check for size prior to seaming the shape.
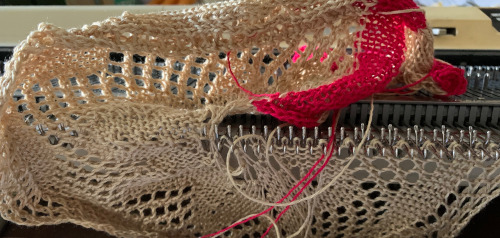 Before joining the stitches permanently, a quick look to see if there was enough knitting to form that pie
 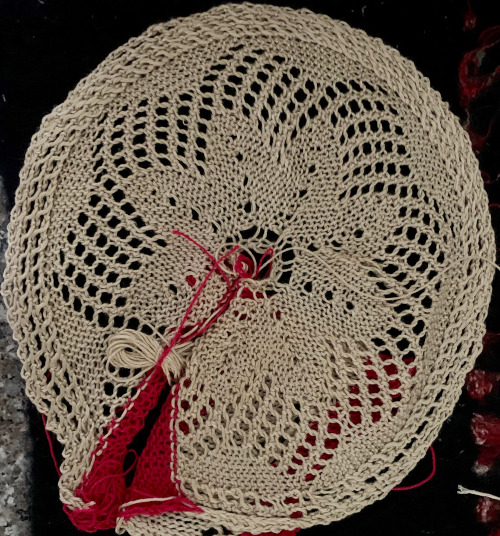 With the knit side as the expected public side of the piece, the work was scrapped off the machine after some wast knitting, one end was rehung with knit side facing and the waste yarn was removed
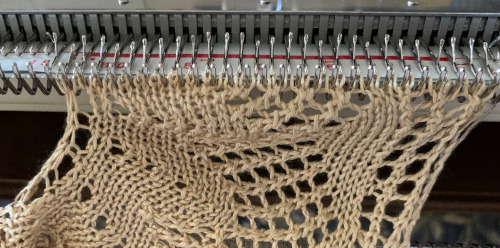 and the process was repeated with the open stitches at the other end of the piece
 The least satisfactory and most visible join is the latch tool bind off. Grafting by hand off the machine is the least so. For the sake of ease in identifying open stitches easily, both methods would benefit from a couple more all knit rows between each segment as seen in the repeat in the original doily post in spite of the fact that the shape around the very center opening will change.
I choose to remove waste yarn before binding off, some prefer to wait. One row was knit across all the stitches. Things were in great shape until the yarn snagged on the far right in my closing knit row, so there is a bit of added bulk there from the rescue attempts to correct the problem.
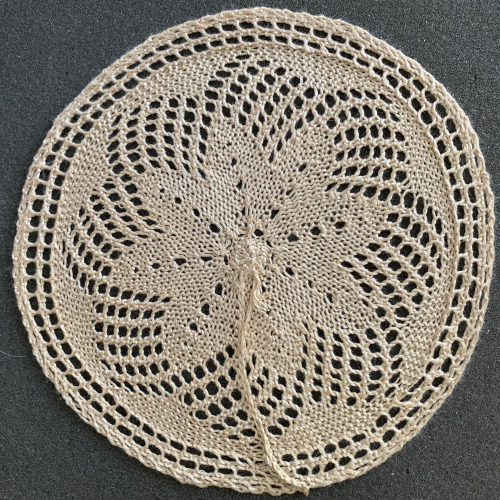
The center opening was gathered. The stitches on its side knit together so infrequently the opening beside them is larger than in any other held areas. 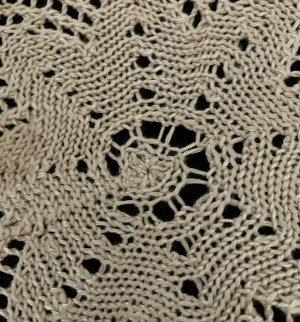 The ladders in those spaces were latched up to get rid of those holes. The doily after a very quick and casual press:
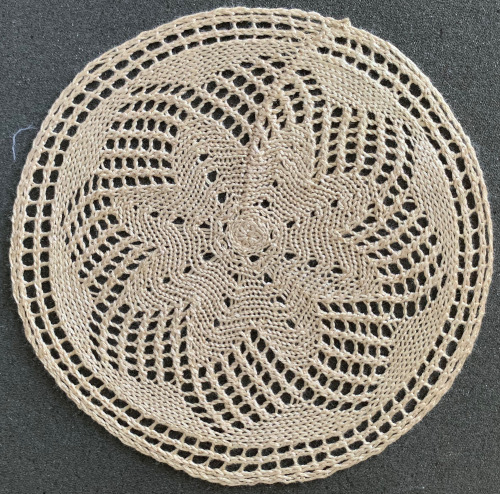
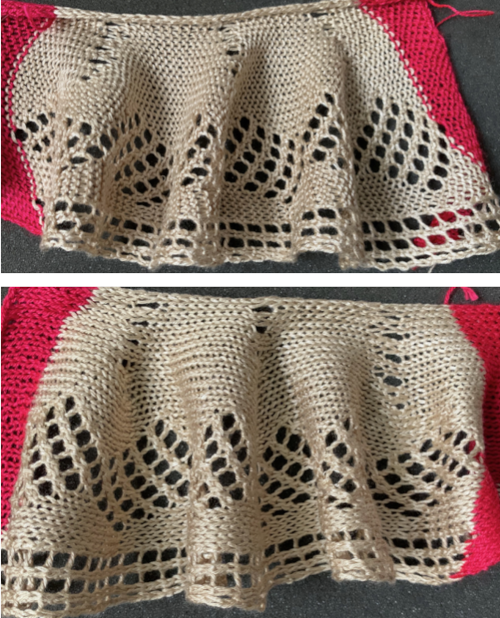
Not a doily person but fond of ruffles? they will be shaped with added all knit rows. The first test for adjustments in a spreadsheet 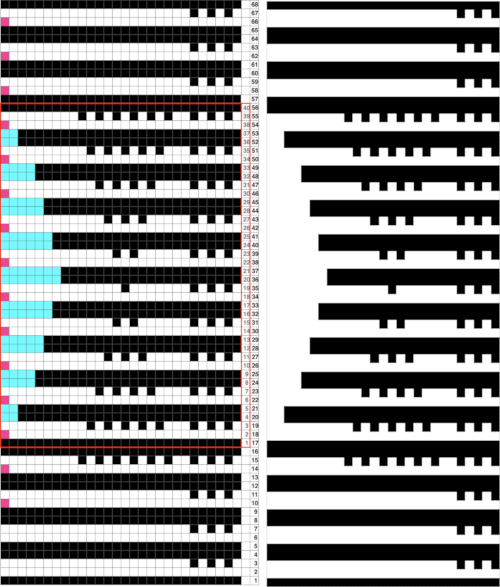 The resulting pattern and reject:
A: if the design is programmed in the wrong direction, the eyelets for the outside circumference should appear on the right of the purl side, not the left
B: the last pass by the knit carriage preselects no needles moving to the right, LC makes its first pass consistently on a row with no needles selected
C: remember to set the knit carriage to slip in both directions, or knitting will continue across the whole row and “holding” is lost
D: keep an eye on the resulting shape and consider if worth pursuing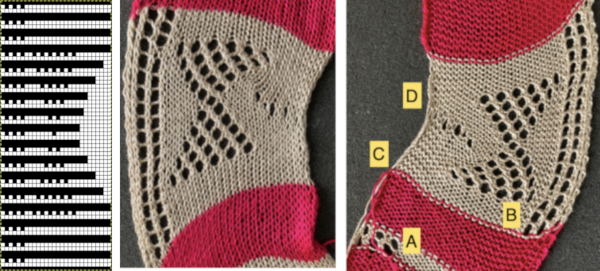 Planning for diamond rather than bow shapes, the repeat was changed from a 28X68 one to a wider, 32 X 64
 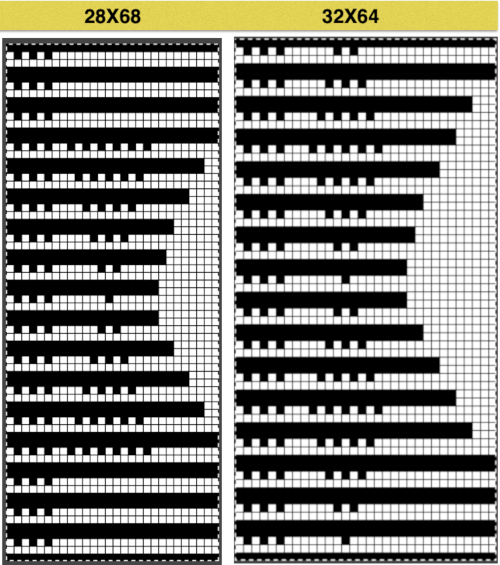 The extra knit stitches on the “held” side make for easier joining of the ruffle to the body of the piece. The “diamond shape” is restored. Its shape has some distortion as the spiral is created. The test swatch was lightly pressed after its removal from the machine, just enough to help it stay flat. In yarns with “no memory” (possibilities other than wool) stitches will be set permanently with pressing and steaming.
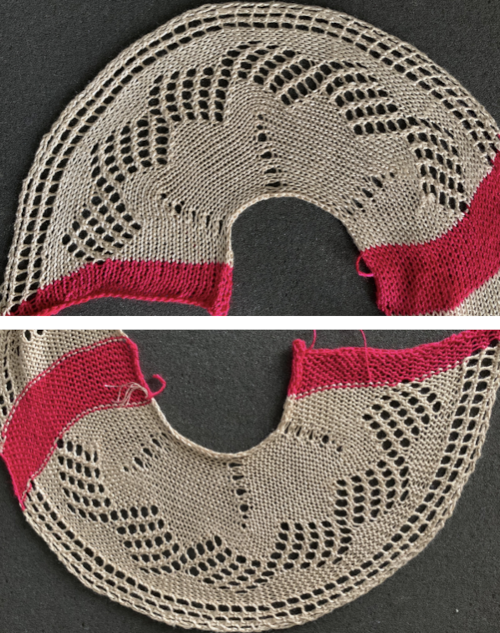
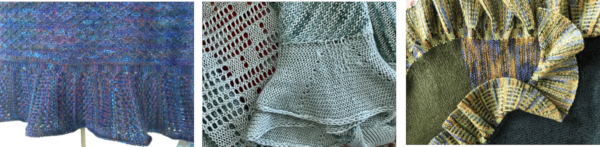
 If the basic principle is understood, other stitch types may be combined with slip stitch rows including tuck stitch, slip stitch, and 2 color patterning, seen here in some seam as you knit ruffles I added to some of my shawls and garments