My recent blog post on adapting lace edgings from published sources containing studio punchcard patterns led me back to reviewing a blog post from 2013, Large eyelet lace, hand transferred (or not) that included a hand technique and an automated mesh pattern.
Since then I have moved beyond mylar sheets on the 910 or using punchcards. The present swatches are knit on a 930 using img2track. The pattern images and corresponding direction of transfers, in this case, occur on the purl side, therefore lace motifs need to be reversed either in the original image processing before download, or after download by remembering to use the mirror button to reverse the image horizontally, which is an episodic forgotten detail on my part. Adjustments in the horizontal repeats as charted here may need to be made depending on the other KM models as well.
Before my using Excel and now Numbers to produce my design charts, images such as this one were created using Intwined, a software program that became quickly unsupported, buggy, and then with no updates for use on Mac. It has long since been abandoned by me.
The first revisited repeat 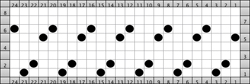 was edited for automation on the 930
 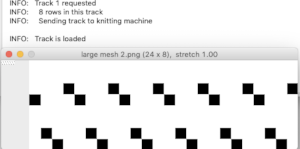 The lace carriage makes 4 passes, followed by 2 rows knit. The arrangement at the end of each transfer sequence will have pairs of double stitches moved onto the adjacent needles, leaving 2 empty needles in between them. Placement on the needle bed should be planned, and added “border” stitches can be moved away and toward the starting number of stitches to keep eyelets forming at the side edges for all-over uniformity
 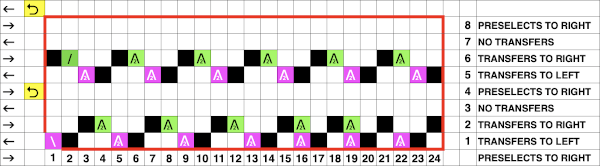 the result will produce 2 pairs of doubled stitches achieved by the repeated transfers with 2 empty needles between each pair where loops and floats will form. Their locations alternate as each sequence is completed
![]() Blank rows between transfer segments are there to make certain the knit rows will happen in the proper locations at the top of each transfer sequence. The first design row transfers are to the left, the transfers to the left begin on design row 8.
Blank rows between transfer segments are there to make certain the knit rows will happen in the proper locations at the top of each transfer sequence. The first design row transfers are to the left, the transfers to the left begin on design row 8.
LCOR is ready for the first row of transfers to the left  LCOL is ready to make transfers to the right
 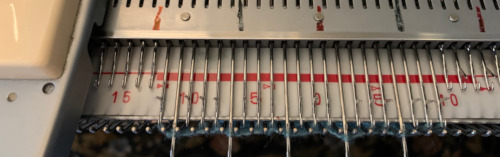 after the transfers single needles are empty, with double stitches in adjacent ones, and transfers to the left are repeated once more, this is the result, with transfer needles pushed out to show doubled up stitches
 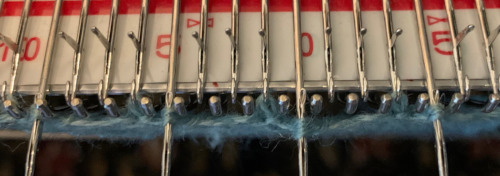 After all the sequence transfers are completed, there will be adjacent pairs of doubled up stitches with 2 empty needles between each pair. As the following 2 rows are knit, the first row creates loops in the empty needles, the second pass skips those needles, forming a “float”. Looking a bit closer after the knit rows
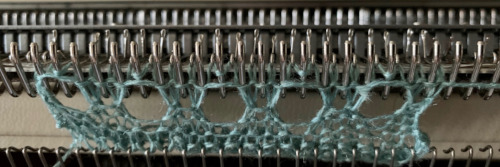 as the process repeats, the first transfer
 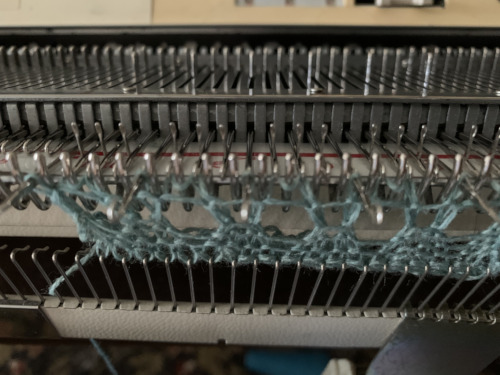 and the second transfer
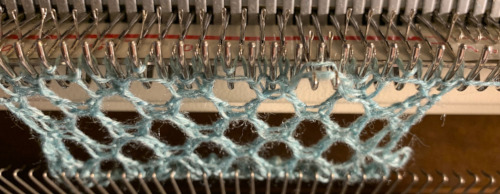
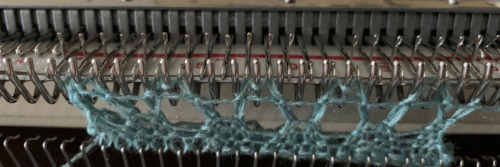 The pairs of stitches that have been moved anchor the 2 side-by-side loops and result in the 3-strand stitch pairs, with every other remaining pair of needles empty between them. The LC returns to the left with no needle selection
 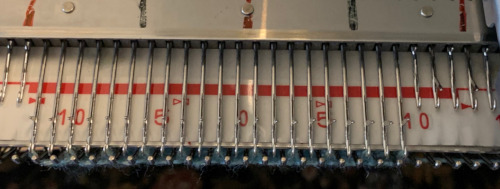 Knit 2 rows, continue in pattern.
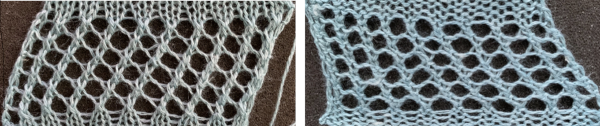
Adjusting the tension will make for a tighter knit, I decreased it by a full number halfway up the swatch below. There is one “operator error” where I attempted to correct a dropped stitch. This fabric is composed of myriad double stitch transfers in both directions and definitely a challenge to produce in any significant size. Making those transfers by hand may wind up being the solution if yarns and automation refuse to work properly. 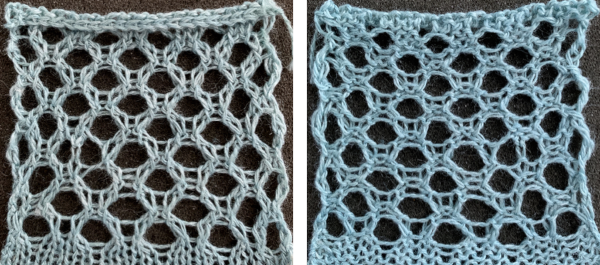 Those short “floats” at the top and bottom of the eyelets can be reduced. This adds a hand technique to every opening, whether results are worth it becomes a personal decision.
 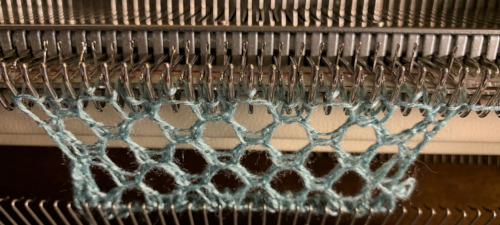 After the 2 knit rows use a tool to lift the float onto the needles holding the side by side loops
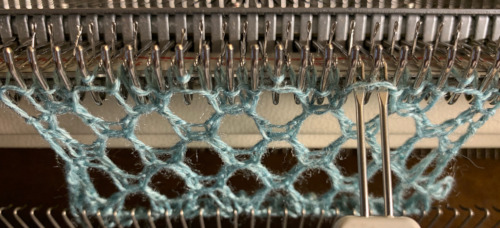
 Before the 2 knit rows, there will be the doubled-up loops in each of those needles, and the 2 doubled-up stitches made from the transfers are added to them as transfers continue. For all those strands to knit off properly, the whole row might best be brought out to the E position before using the knit carriage. The differences between the hooked-up float version of the pattern and the let it be one are shown in areas below the lines in the bottom corners and by arrows in the close-up
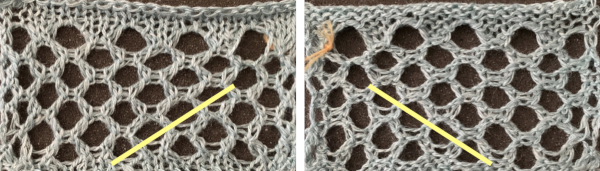
 Much easier and quicker to knit, though quite different, is large mesh combined with tuck stitches
 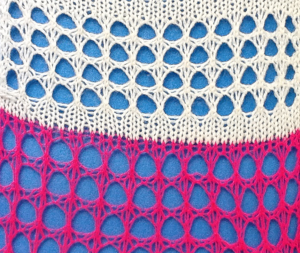 This chart was used in 2013 as a guide for hand technique using a 2/8 wool
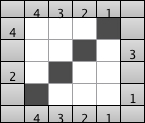
 Knitting lace sequences in a single orientation produces a mesh that is biased. It could be the start for one more chevron shape but was not the intended fabric.
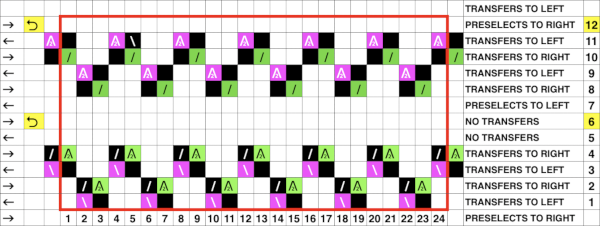
 The adapted repeat: the odd number of passes between each repeating segment ensures that the following selections reverse the direction of the transfers
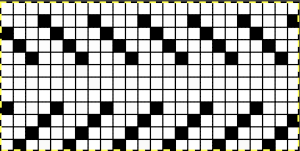 the proper orientation for use on the 930
 Working out the actions in a spreadsheet, border stitches outside the fabric width may be added and subtracted to keep mesh formation along both side edges.
 Needles preselected for transfer to the left
 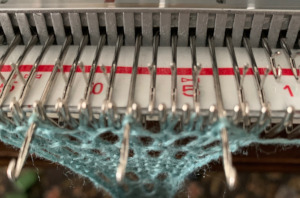 during transfer, needles are preselected for transfer to the right. Doubled up stitches will now be moved
 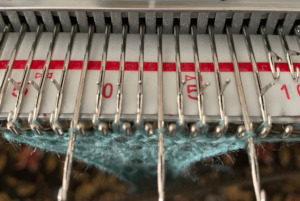 during transfer, needles are preselected for transfer to the left. Doubled up stitches will now be moved
  during transfer, needles are preselected for transfer to the right. Doubled up stitches will now be moved
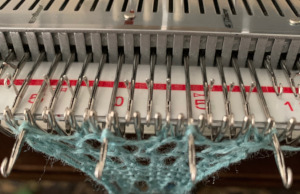 during transfer, no needles are preselected. Doubled up stitches will now be moved, resulting in doubled up stitches on every other needle.
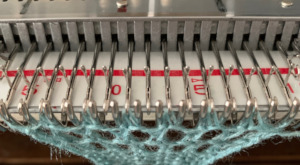
![]() Pairs of knit rows follow each of these sequences.
Pairs of knit rows follow each of these sequences.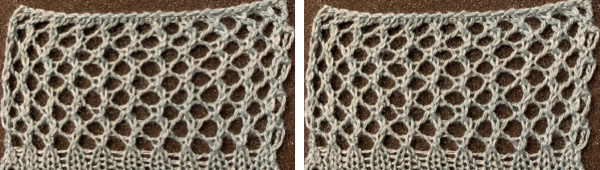 A repeat that produces a smaller mesh with the swing right to left is found in other posts and references. Below part of a published punchcard is shown, with the resulting swatch, and in turn, compared with the large scale version of the same mesh structure knit on the same number of stitches.
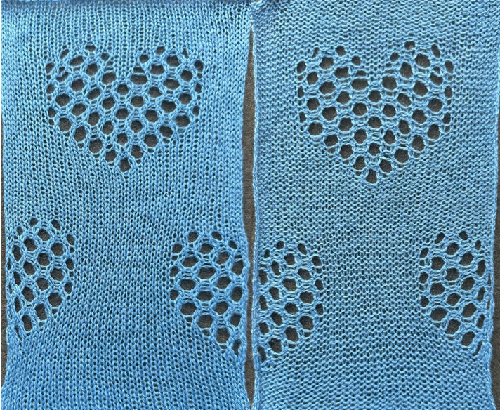
  A large-scale mesh in a heart design