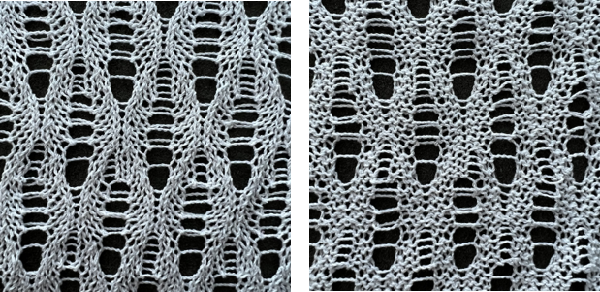
The inspiration: part of a magazine photo  A slightly different approach than in the last post. The tale begins with a hand-knit graph:
 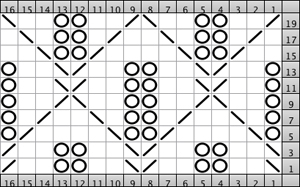 expanded to include alternate rows
 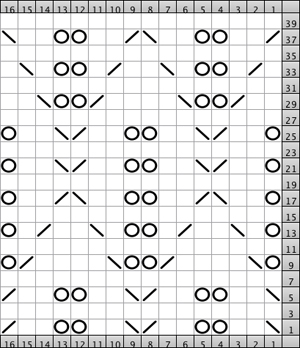 the “graph” paper version
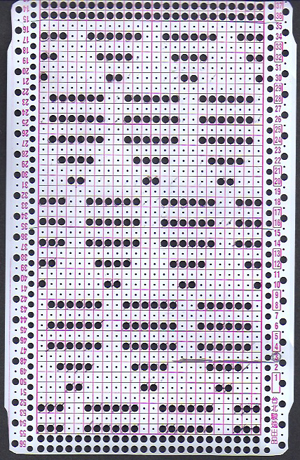
 If a punch card is to be used, all colored squares represent punched holes. I used my 910, Studio mylar for my swatch. The mylar repeat and programmed numbers:
  A png for a single repeat used in the later post:
 ![]() The approach in the execution is a bit different from the previous samples. In this instance, colored squares represent the number of stitches to be moved/the number of prongs on the transfer tool to be used.
The approach in the execution is a bit different from the previous samples. In this instance, colored squares represent the number of stitches to be moved/the number of prongs on the transfer tool to be used.
The pairs of transfers in the chart are made away from each other, orange to the right, and green to the left.
The transfers produce 2 empty needles side by side, they are left in work, as the next row is knit they will produce loops on each needle.
Side-by-side loops do not make stitches, so subsequent rows will continue the ladder.
It is helpful to use yarn that does not split and get caught in hooks, as that may partially knit on the next pass, creating a knit stitch and disrupting the ladder. Also, rows with loops should be checked to make certain they are in the pairs of needle hooks, not off either or both, before the next row of knitting.
Do not release the loops; when the next set of transfers is reached, treat the loop (where circles occur in the graph) as you would a stitch, moving it over on its own prong.
As with transfer lace, it bears taking the time to knit slowly and prevent errors rather than having to attempt “fixing” errors such as runs due to dropped stitches.
The resulting swatch on the standard KM (2/8 wool)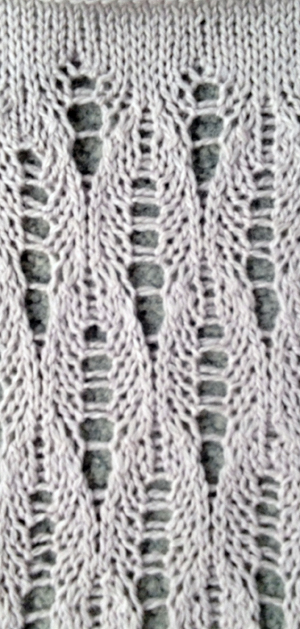 The punchcard:
  The related swatch knit on the 260 bulky KM
 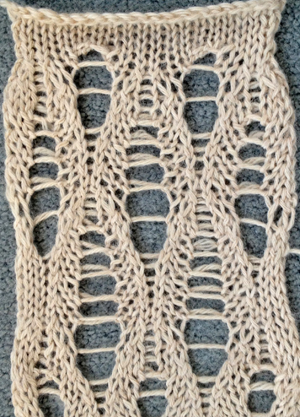 The yarn is an alpaca too thick for the standard. I liked it at tension 1 for stocking stitch, but I had to increase the tension to 3.. to be able to manage the transfers, especially the ones over by 3 stitches X2.
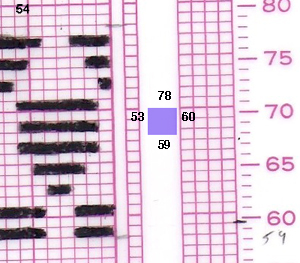
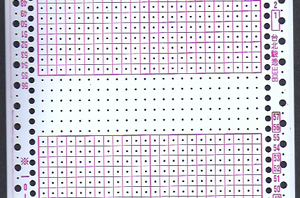
for a sense of the scale difference between the 2 swatches.  The punchcard was made from a roll purchased directly from Hong Kong, advertised specifically for Brother. The roll is continuous, with separations as seen in the image below. Numbering, however, is for Studio KM systems, so adjustments need to be made for using them on Brother KMs (ie. the first selection row will be row 3 as marked in the punchcard used in the swatch above).
  2022: Sometimes what works well on a small swatch does not in a larger one, or may simply require a different yarn, more attention, and slower knitting speed. The first trial at other yarn content included a yarn perhaps too thin for the effect (green), and one requiring maximum tension making the transfers with loops difficult. Once the initial transfers are made, this loop formation will appear in locations indicated in the chart. A visual check should be made as to whether there is a loop on each needle. If one is skipped, simply lift the yarn onto the hook of the empty needle.
  As the fabric progresses, the loops will appear on the top of the shafts of the selected needles and are treated as one would handle stitches in multiple-stitch lace transfers
 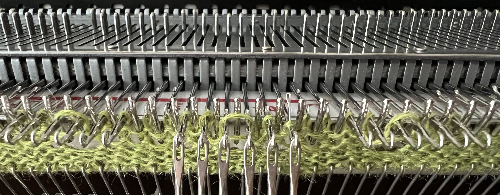 Shown again in the white knit
  After the transfers are made
 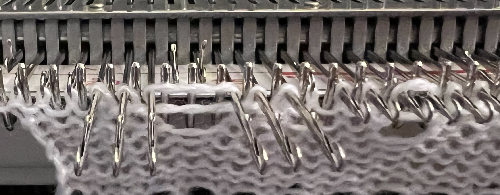 A yarn split on the machine may be seen in the center of this image.
  Yarn splits and dropped loops are quite visible in these tests.
  A return to a different 2/8 wool brought better results, again, splits can be identified in the fuzzy spots even if the ladders are formed correctly
 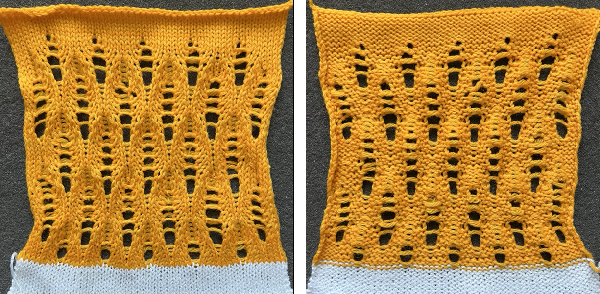 This last swatch was knit in wool rayon. The problem of splitting was eliminated, while dropped stitches were easier to miss