Just about 2 years ago, I had an obsession with leaf shapes in lace and wrote a series of posts on approaches to both designing them and rendering them in knit on more than one machine.
From a ladder and lace early post. 
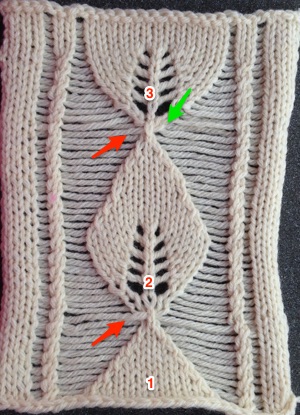
Recent publications reflect the increasing interest in bulkier knits and combining ladder “lace (created by needles remaining out of work) with shapes floating within the resulting open spaces. I thought I would address some issues in such fabrics while returning to a leaf as the focus “shape”. My samples are knit on a Brother 260, using hand techniques that require only the basic set of transfer tools.
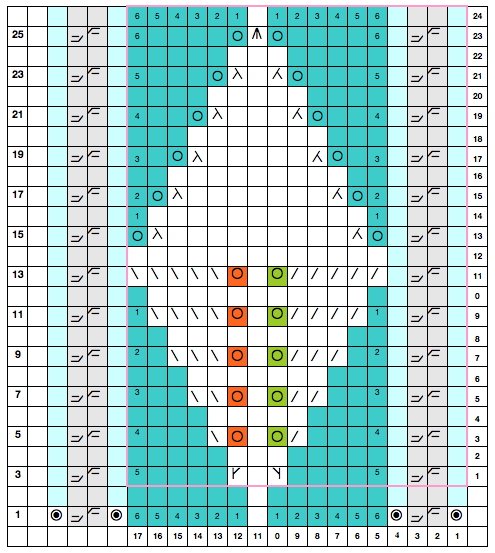
Long verticals in knit may have problems with the edge stitches separating from the rest of the knit, i.e. in FI vertical stripes. In plain knit, the edge stitches may stretch, become distorted, and may encroach on the ladder space. A series of actions taken on the edge stitches of ladders will help prevent that, here I am choosing to use a simple 1 X 1 cable cross every 2 rows to stabilize them. Having the cables coincide with the rows on which transfers are made to create the chosen shape makes tracking them easier.
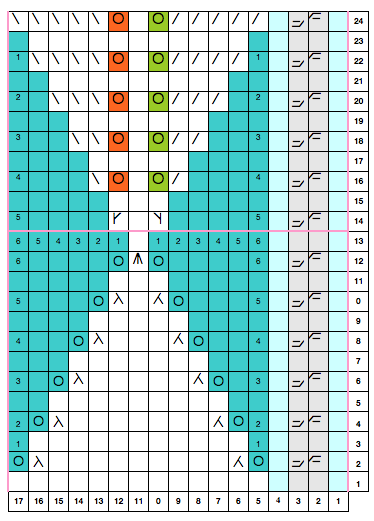
my first schematic (Excel chart)
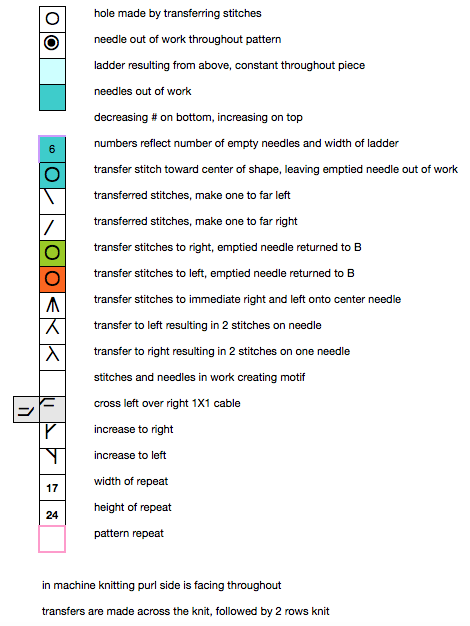
symbols used
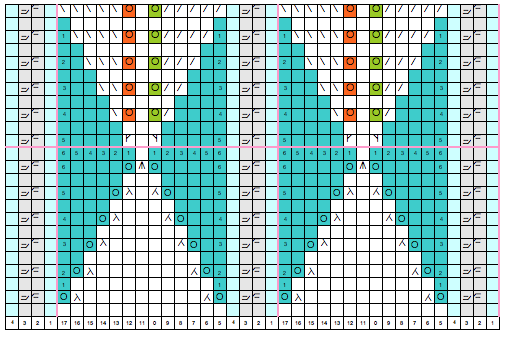
imagining in repeat
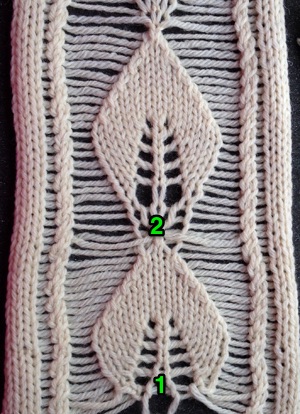
my first swatch
for decreasing stitches in work on the right or left at the top of the chart I used a simple decrease
using the “fully fashioned” option to provide a different look along that edge
For my test swatch I used a crochet cast on across 17 + 4 for single full pattern repeat, + 4 edge stitches on either side = a total of 29 stitches. To create the transition from 1 to 3 stitches in the center of the leaf, I e-wrapped an additional 2 empty needles
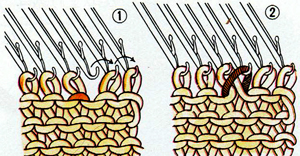
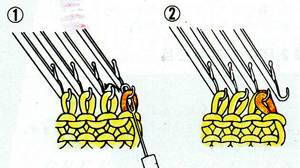
#1 reflects the e-wrapped increase just above the cast-on, and #2 shows the results of the same technique at the top of the established “leaf” pattern
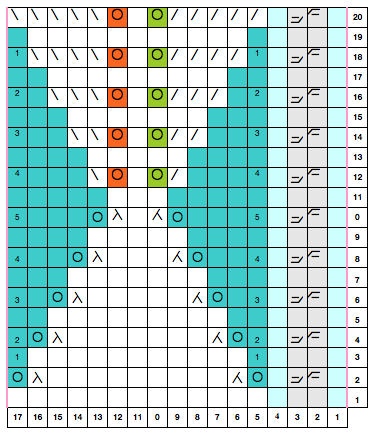
the chart repeat was amended for a different start
 for the second swatch, trying a different way of adding stitches
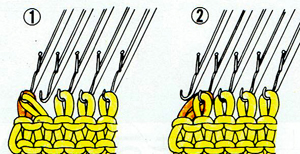
#1 shows a pattern beginning on a group of knit stitches, as opposed to a single center one for leaf
#2 shows a full “leaf” repeat as charted, the red arrow points to e-wrapped yarn traveling in front of the shaping
#3 the red arrow indicates the same is happening with the float, while the green shows my desired twist, with stitch to the front
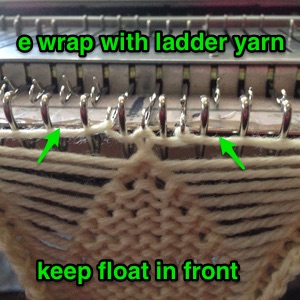
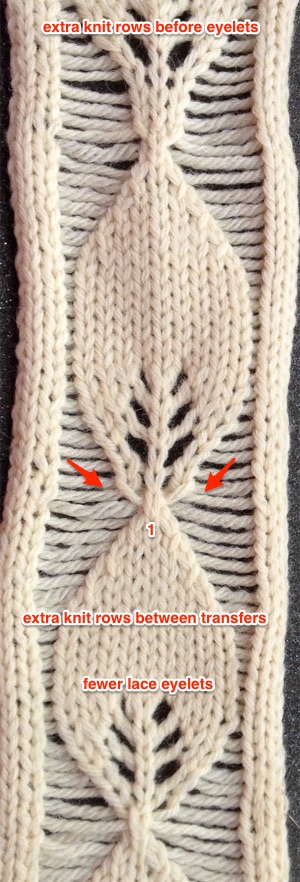
Sorting it out: a third swatch, with an amended way of e-wrapping. To make sampling quicker, I modified the repeat, eliminating cables, and decreasing the number of stitches at the widest part of the leaf, making fewer eyelet transfers. The results show how much the shape of the “leaf” may be varied with just a few changes. Note the twist and location of floats in relationship to stitches just above #1
I will document the 1X3 increase method I liked best out of several trials in my next post.
If having a single pivot stitch for the repeat is not important, the chart below is amended again to accommodate that
if eyelets are eliminated to create a geometric pattern and/or for the sake of speed, increases may be created on both sides beginning on row 12 of the above chart by picking up from the row below